By the Tide Salted Watercolour Background
I am still working out the details on this new blog where I share my love of designing with Stampin’ Up! paper, tools, inks, and stamps. I am excited for all the things I will be able to do with this site!!
Today is Friday!! It’s time for an As You See It Challenge!
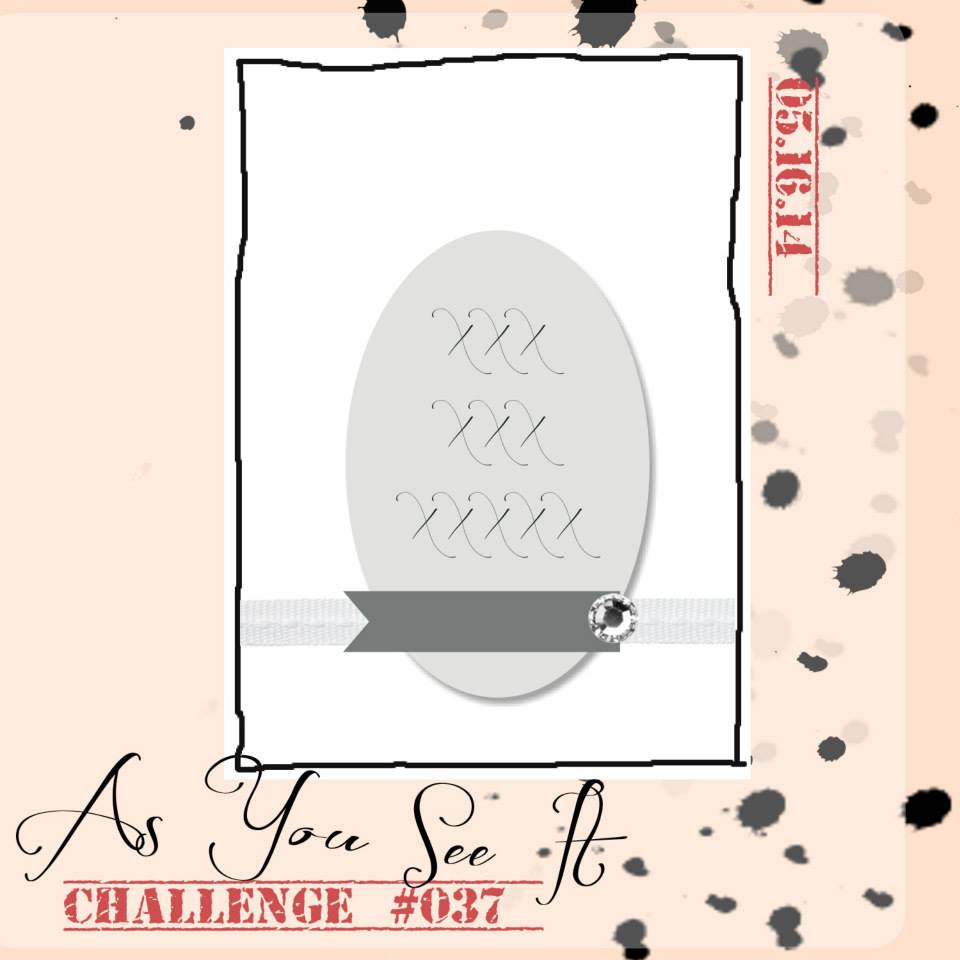
The first thing I thought when I saw this sketch was, “Aw, stink! An oval!” I am not a big fan of ovals for whatever reason. So, I decided to skip the oval and do a circle instead! And that, my friends, is what the As You See It challenges are all about. Yay me! lol!
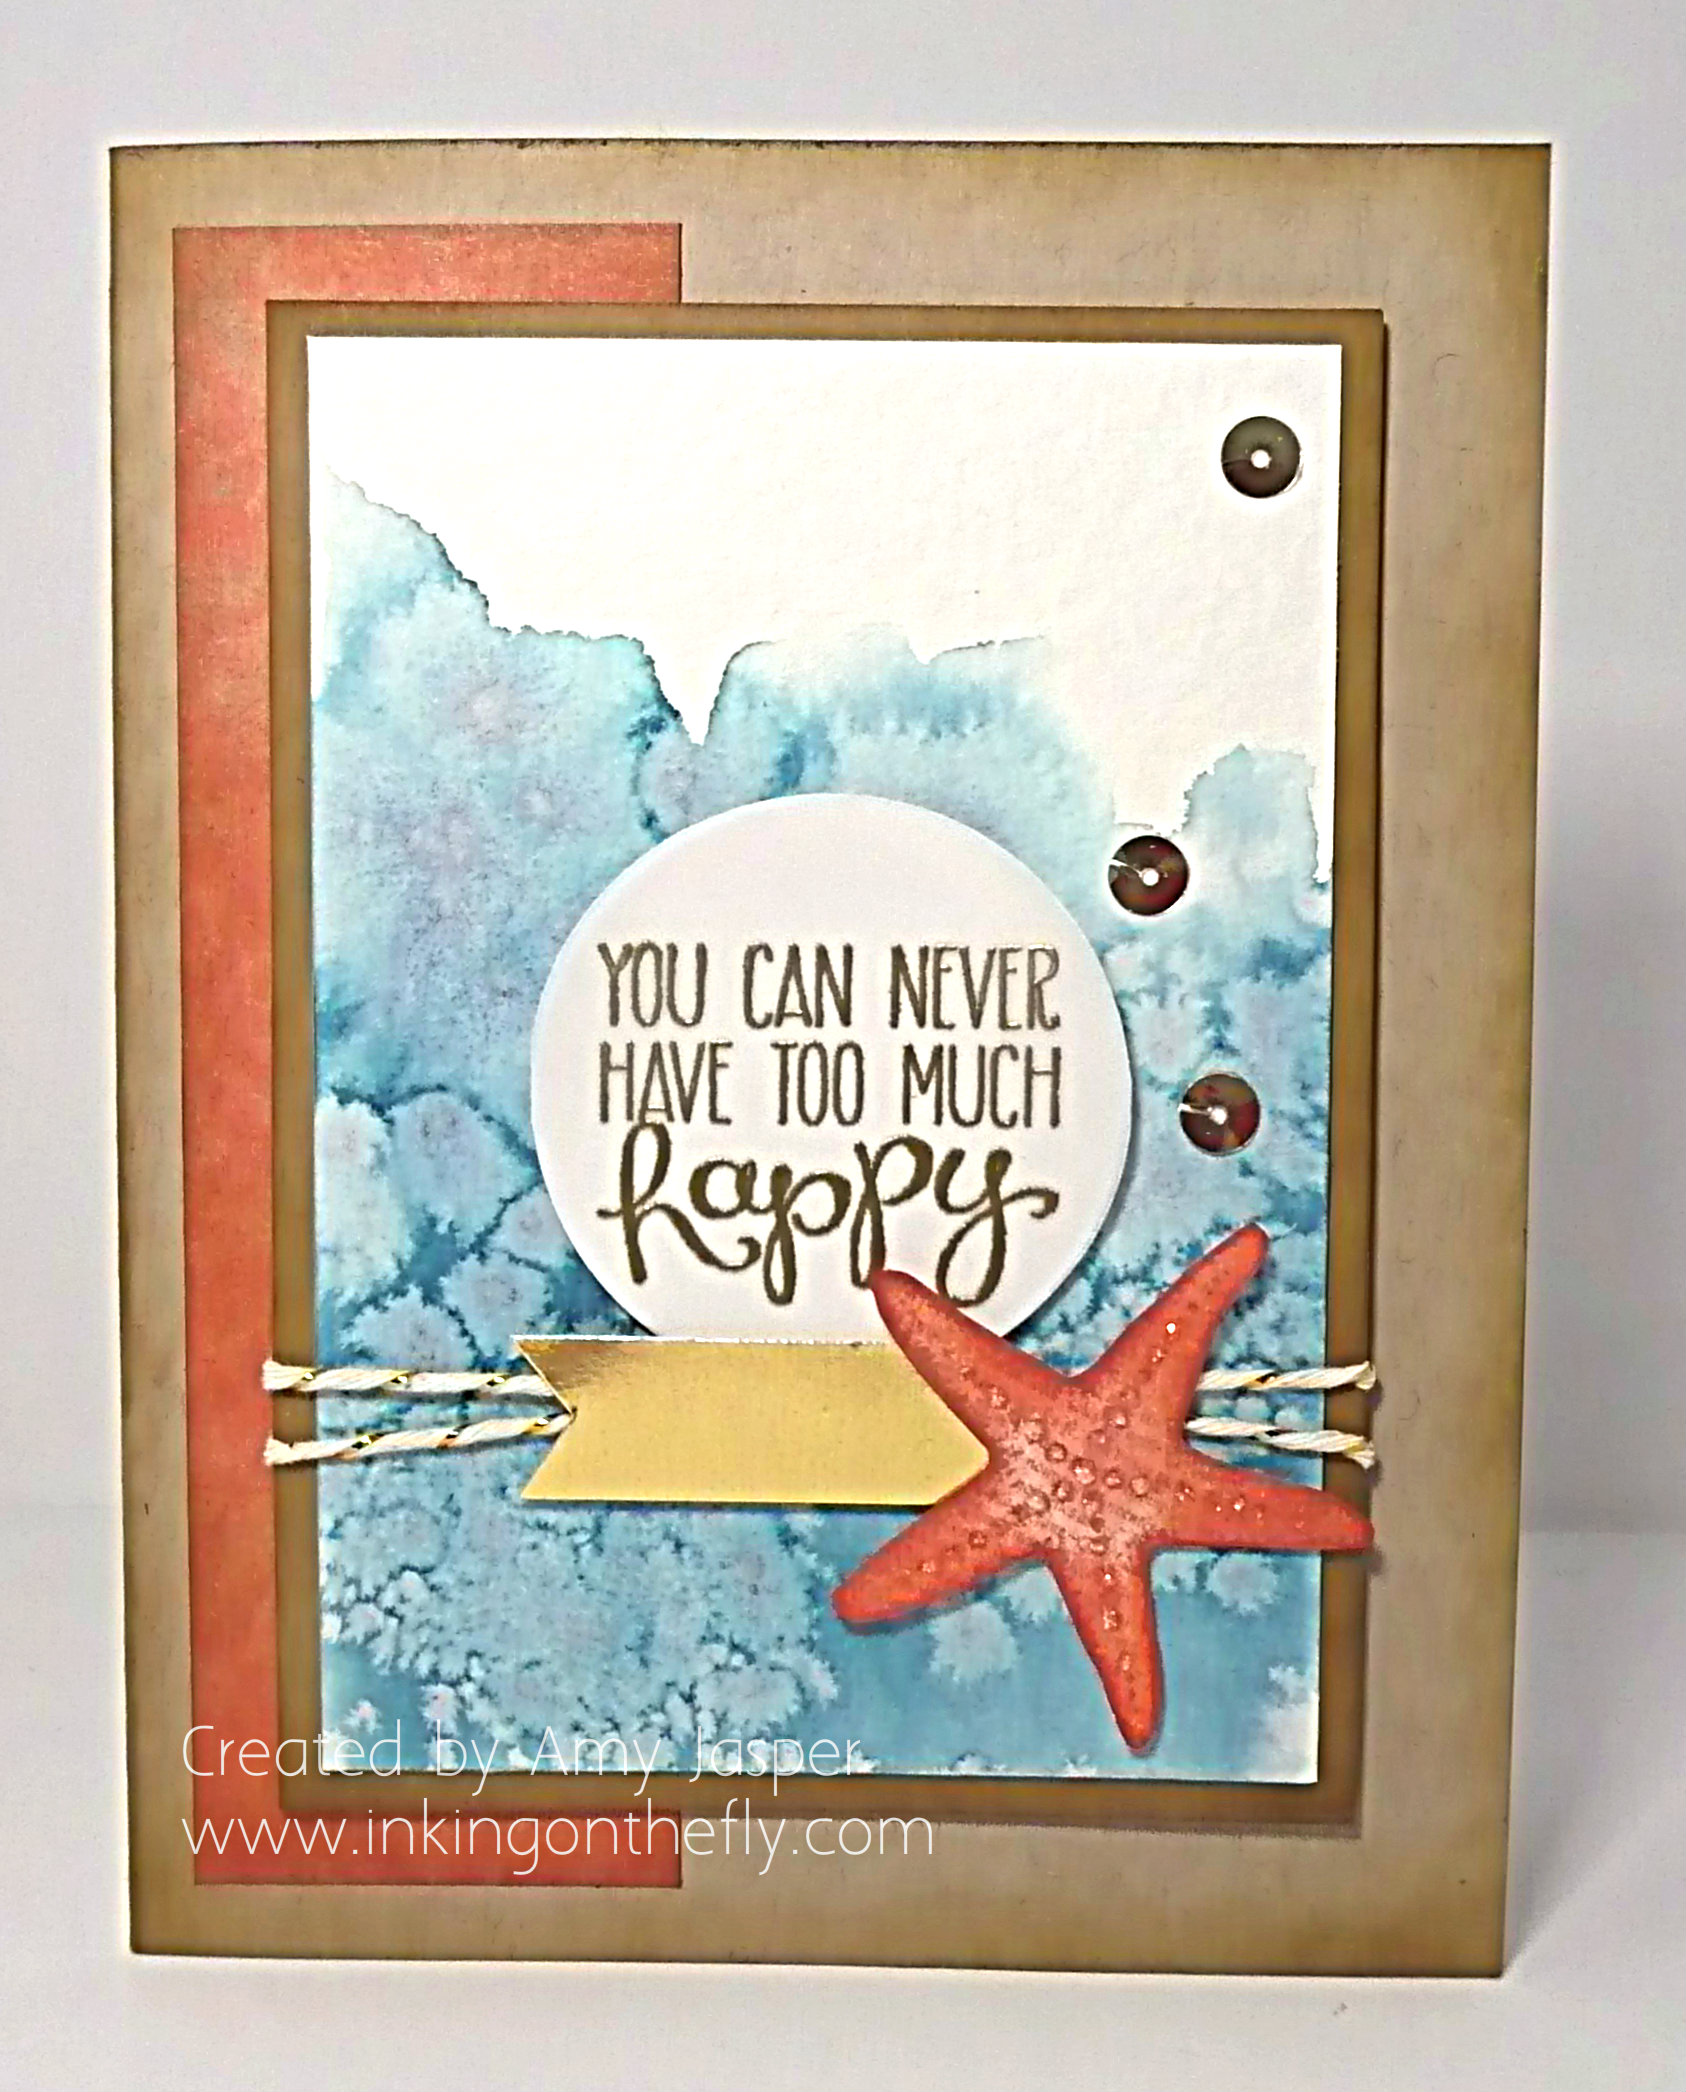
Isn’t the background fabulous!!? It’s so easy, too. I’ve been taking a watercolour painting class these last few weeks (which I’m really enjoying, though it’s harder than it looks). This salted watercolour background was the first technique that I learned. All you need to do is coat your watercolour paper with very watery paint, then sprinkle coarse salt and a bit of finer salt over it, then let it dry! When using Stampin’ Up ink, you can either use the ink like paint with water, or you can cover the watercolour paper with just water (use your aqua painter or spritzer) until it has a puddly layer, then add some drops of ink refill to the paper, spreading it out as you wish with a paintbrush or your aqua painter. Then add your salt. The salt absorbs the colour from the water, leaving a white space around the grains of salt. The coarser salt leaves larger patches, while finer salt leaves smaller patches. If you leave some space that doesn’t have salt, you get a nice random design. If you sprinkle the salt very evenly, you’ll get an all over more even look.
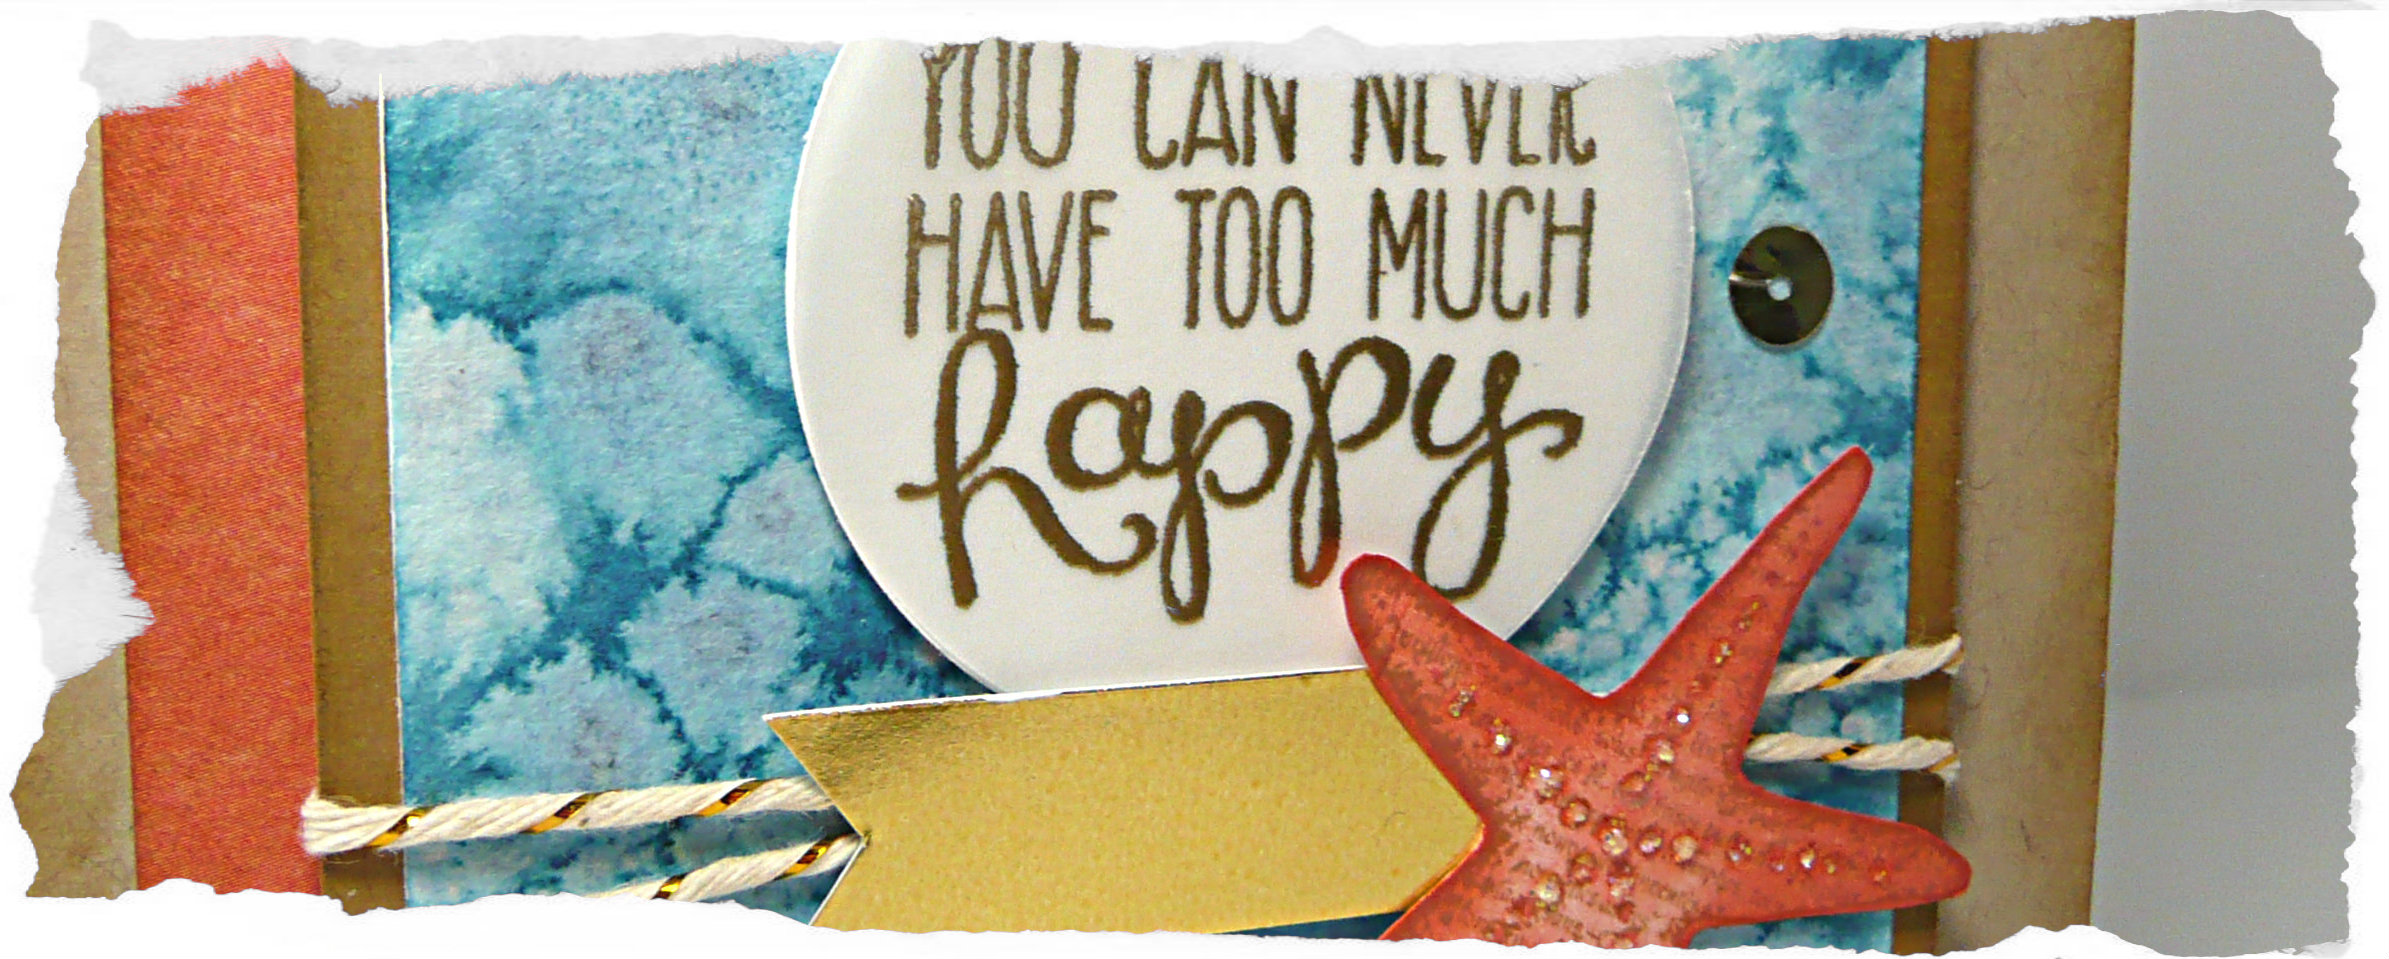
I used salt that I had in the house: pickling salt (hubby made pickled asparagus years ago) and table salt. This background was done with Island Indigo ink refill with an intentional white space on the top of the background, intending to look like the ocean surface.

The Seastar (apparently, it’s not called a Starfish anymore, people) from the By the Tide stamp set is stamped on Very Vanilla cardstock in Baked Brown Sugar and fussy cut before sponged all around the edges with Calypso Coral ink. I also coloured in the dots along the spine of the star with Calypso Coral and added dabs of Dazzling Details.
Other products used include, Baked Brown Sugar cardstock, a strip of the retiring Epic Day Designer Series Paper, Crumb Cake cardstock, sponging with Baked Brown Sugar ink, Gold Baker’s Twine, Gold Foil paper, Gold Sequins, Versamark ink, Gold embossing powder on vellum paper over Whisper White cardstock, 1 3/4″ circle punch, Stampin’ Dimensionals (of course), and Yippee-Skippee stamp set.
I have a couple other cards that I can show you that use this technique, but I’ll share those another day!
Go over to the As You See It Challenge blog, give this great sketch a try, upload your project to your blog, Pinterest, or other site where we can view it and comment on it, then link your project to Challenge #37! If you have any trouble, give me a shout and I’ll help you through the process!

May 20, 2014 @ 7:27 am
I am excited to play around with this technique! You are so creative Amy! Thank you for sharing your creativity with us. 🙂
May 17, 2014 @ 12:13 am
So grateful you posted this technique! I’m excited to try it. Reminds me a bit of my old favourite of cotton-balling drops of ink onto a rubbing-alcohol coated page. Gotta try that one again too. Oh stamping I miss you so much… I promise we shall have quality time together again soon… this thesis thing really isn’t a permanent thing, it’s you my heart belongs to!
(ok clearly I’ve been spending too much time in my own head… and working on my thesis lol).
Thanks again for your awesome posts! Oh and I love this card btw… just another example that has me wanting this stamp set. Glad it’s not retiring!
May 17, 2014 @ 12:44 pm
That old technique was on glossy paper, which SU doesn’t have anymore. I wonder how it might work on other paper … something to play with.
May 25, 2014 @ 1:55 am
Oh i’ve tried it with regular paper before and it works really well- well on the whisper white anyways. 🙂
May 26, 2014 @ 5:09 pm
Ah, good to know!
May 16, 2014 @ 1:30 pm
I love the sea theme!
May 16, 2014 @ 10:25 am
I love the salted watercolor!