Framed Winter Scene
I had the joy of my 14 year old daughter staying home with me on Wednesday for “take your kid to work day”. Basically, she got to stamp with me and I got to talk about what I love about Stampin’ Up! with her! It was a delight to work on this As You See It challenge together. I showed her how to use the Sponge Brayer to create a sunset sky and she thought it was very cool when I splattered water on the ink to create white spots that look like snow!
I was going to have her write part of this blog post, as she is quite the wordsmith, but we ran out of time. I’ll have to convince her to write for you another day.
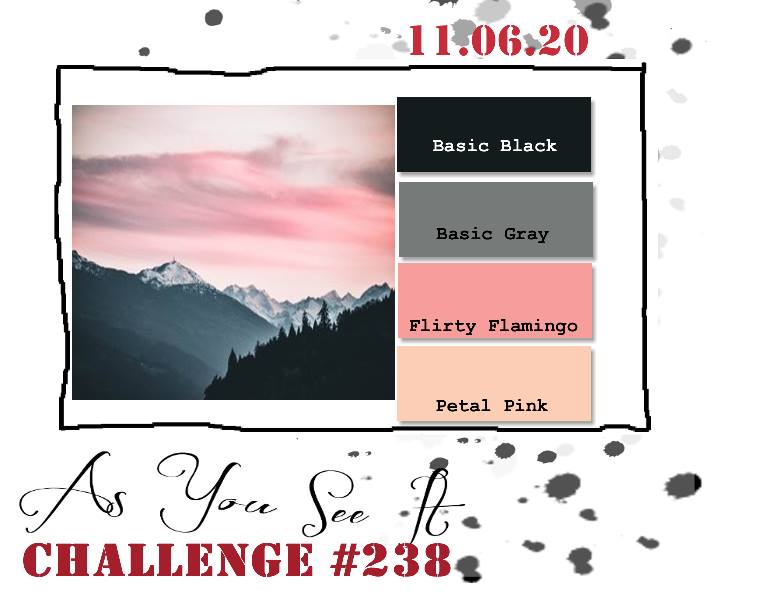
Today’s challenge is a colour combination. I love pinks and greys together, so this was right up my creative alley!
I think these colours are stunning together! So soft and warm. I used the tree stamp from the Campology stamp set. I hadn’t used my new stamp set yet, so I was super excited to have the chance to break it in!
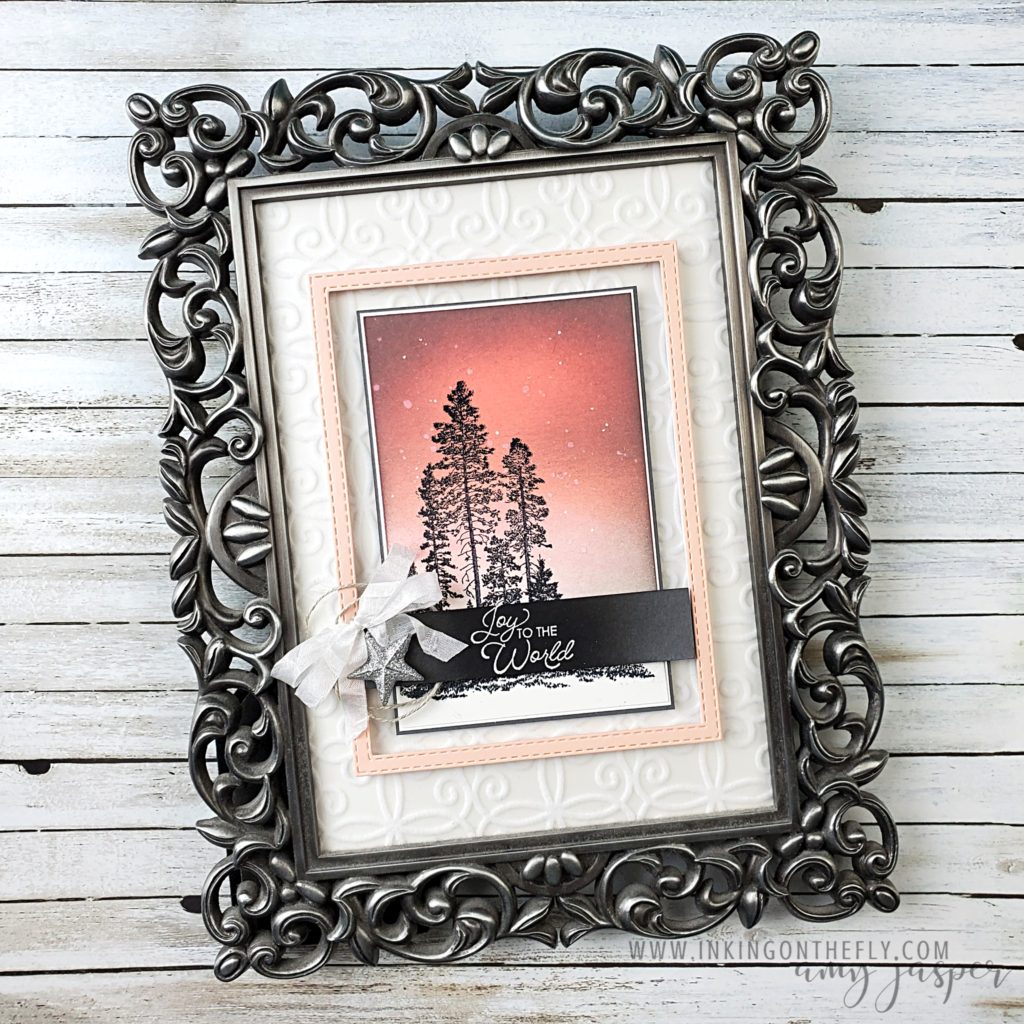
As you probably noticed, I decided that my sunset winter scene would be suitable as a framed piece of artwork. This would still make an amazing card, but I decided to create a 5×7″ art piece that I could display through the winter months.
I used my Sponge Brayer with Petal Pink and Flirty Flamingo ink to create the sunset sky. Then added some wisps of shadowy clouds with a sponge and some Basic Gray ink. I flicked water over this to create the falling snow effect. The trees from my Campology Stamp Set were stamped with Momento Black ink and the trunks were coloured in with a Light Basic Black Blends Marker.
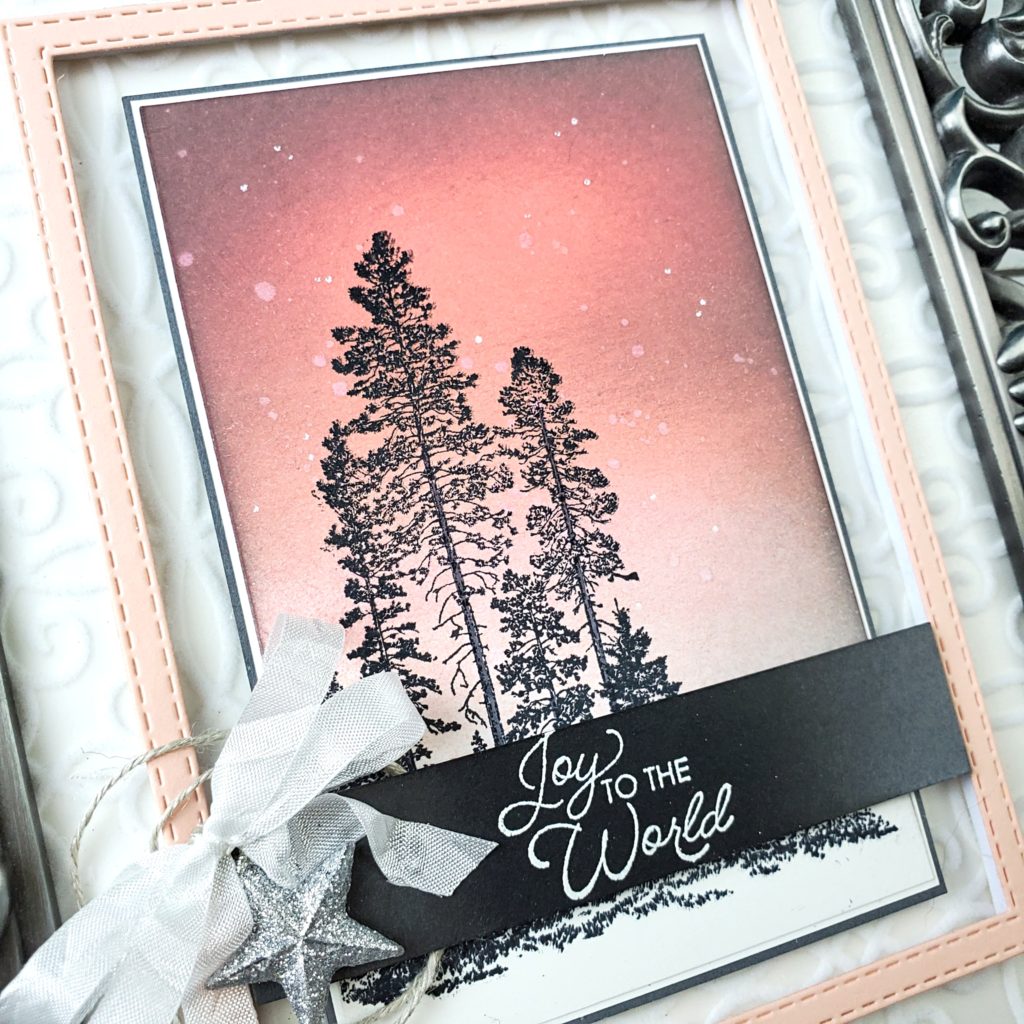
I even added some additional white dots of snow using the Chalk Marker.
This sponged and stamped piece was layered over a thin matte of Whisper White and Basic Gray cardstock and adhered to the Whisper White/Plush Poinsettia Specialty Paper background with Stampin’ Dimensionals.
The Petal Pink frame was cut using the Stitched Rectangle Dies and adhered to the Plush Poinsettia Specialty Paper with Foam Adhesive Strips so it would frame the winter scene.
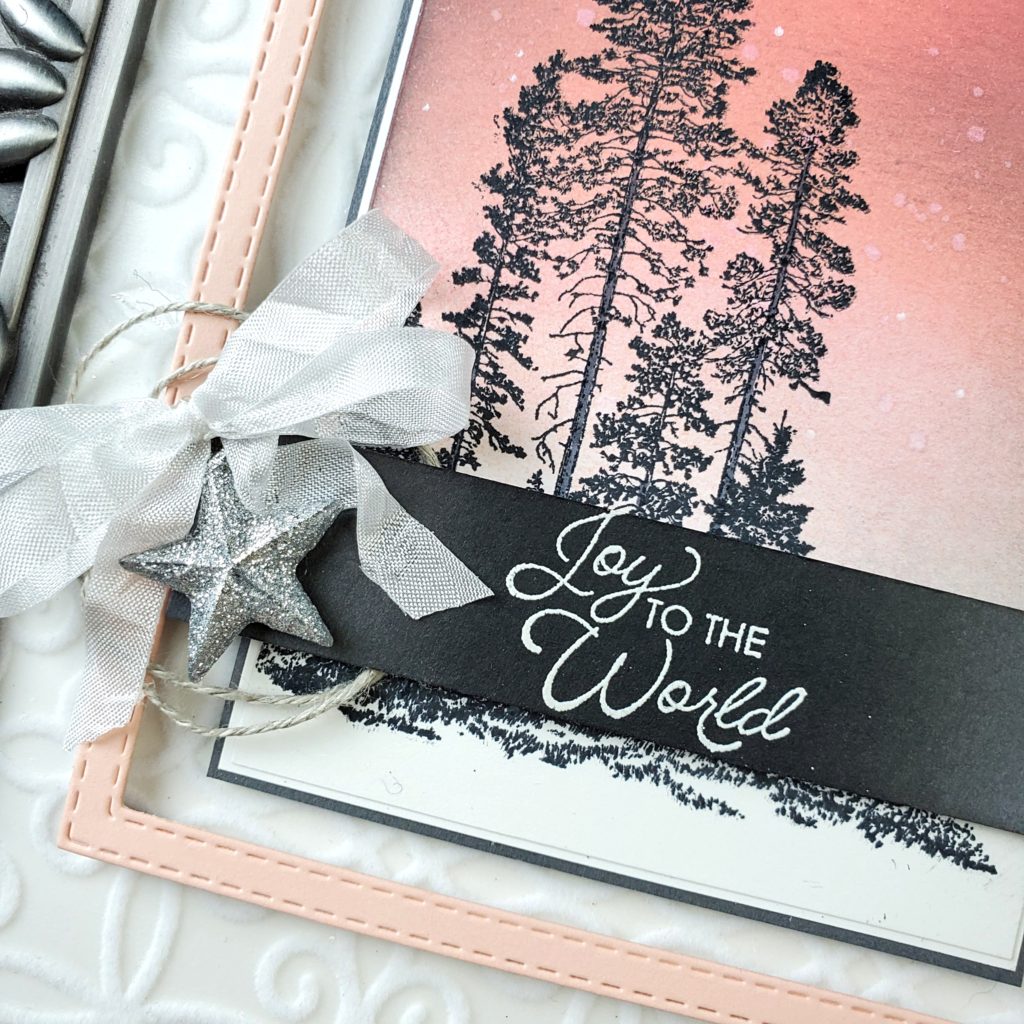
The sentiment from the Itty Bitty Christmas stamp set was stamped on Basic Gray cardstock, then heat embossed with White Embossing Powder and my Heat Tool. I sponged Tuxedo Black Momento Ink over the sentiment to make that white embossing really pop! This was adhere to the front of my artwork with more Stampin’ Dimensionals over a swirl of Linen Thread that I placed on the left side of the sentiment.
The final touch was to tie a double finger bow with the White Crinkle Ribbon and attach it and the Glitter Star Ornament over the swirl of Linen Thread with Glue Dots.
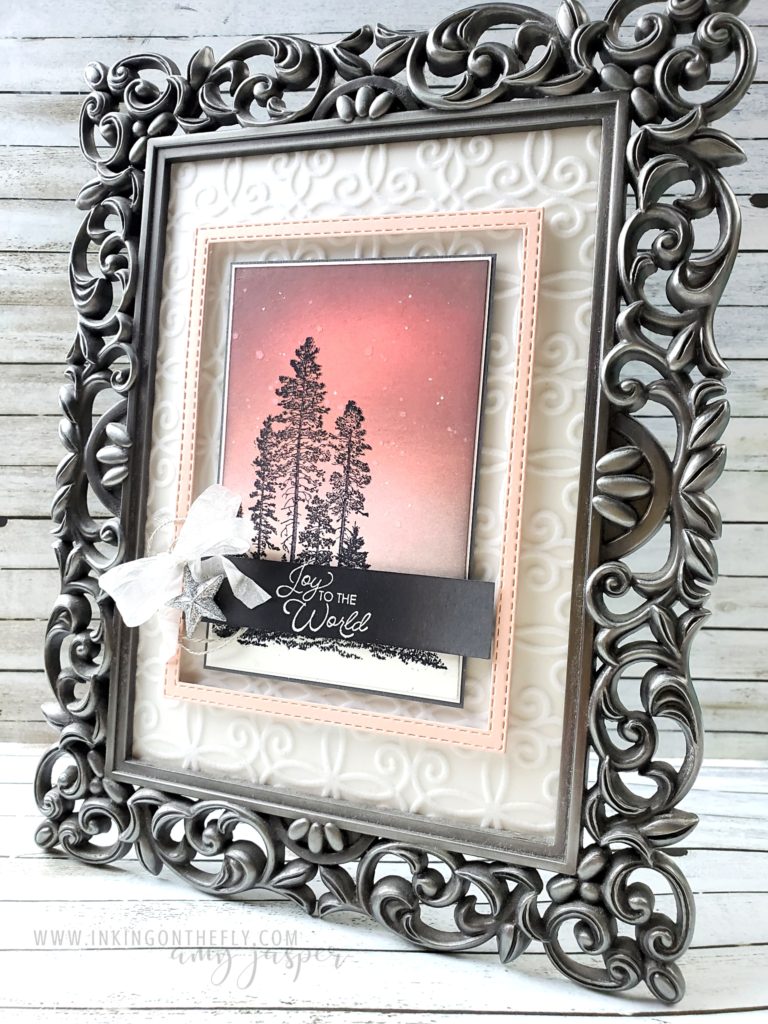
I popped it in a frame over a photo of my son when he was a baby (he was so chubby and smiley!!). When winter is done, I’ll switch the artwork out and put my son’s chubby little grinning face back on display!
I love this colour combination! I think you should try it to and share it with us at the As You See It Challenge Blog! We love seeing your beautiful creations!
As always, you can purchase any of the Stampin’ Up! products that I feature here on my blog. Just click on the SHOP button on my website and see all the gorgeous supplies that Stampin’ Up! has to make your crafting experience the best it can be!
Stay safe and get crafty!!


November 18, 2020 @ 9:41 pm
This is beautiful Amy. A work of art!
November 7, 2020 @ 6:20 pm
Wowza….It really is a work of art! Stunning!
November 6, 2020 @ 12:34 pm
Amy this is stunning – so beautiful! What a lovely way for you to spend ‘take your daughter to work day’!