Little Letters Stenciled T-shirt
This is the year that I turned 42 and I really wanted a shirt with a quote from “Hitchhiker’s Guide to the Galaxy“. When I couldn’t find one, I decided I would make my own.
I wanted to share with you how I did it, using Freezer Paper, Tulip Fabric Paint, Stampin’ Up thinlits and dies and the Big Shot die cutting machine. For the featured project, I used Little Letters thinlits (recently retired) and the long retired Typeset Alphabet Bigz Die.
 First thing to do is to select a t-shirt. This one is a cheap thin shirt that I purchased on sale at Superstore. It is a cotton blend and is nice and smooth to take the paint easily.
I put a large piece of cardboard inside the t-shirt to prevent paint from leaking through the shirt onto the back. What a mess that would be! I did some eyeball measurements in addition to a few actual measurements to do my best to make sure my letters would be straight and centered. Then I began cutting out the letters using my Big Shot and the freezer paper.
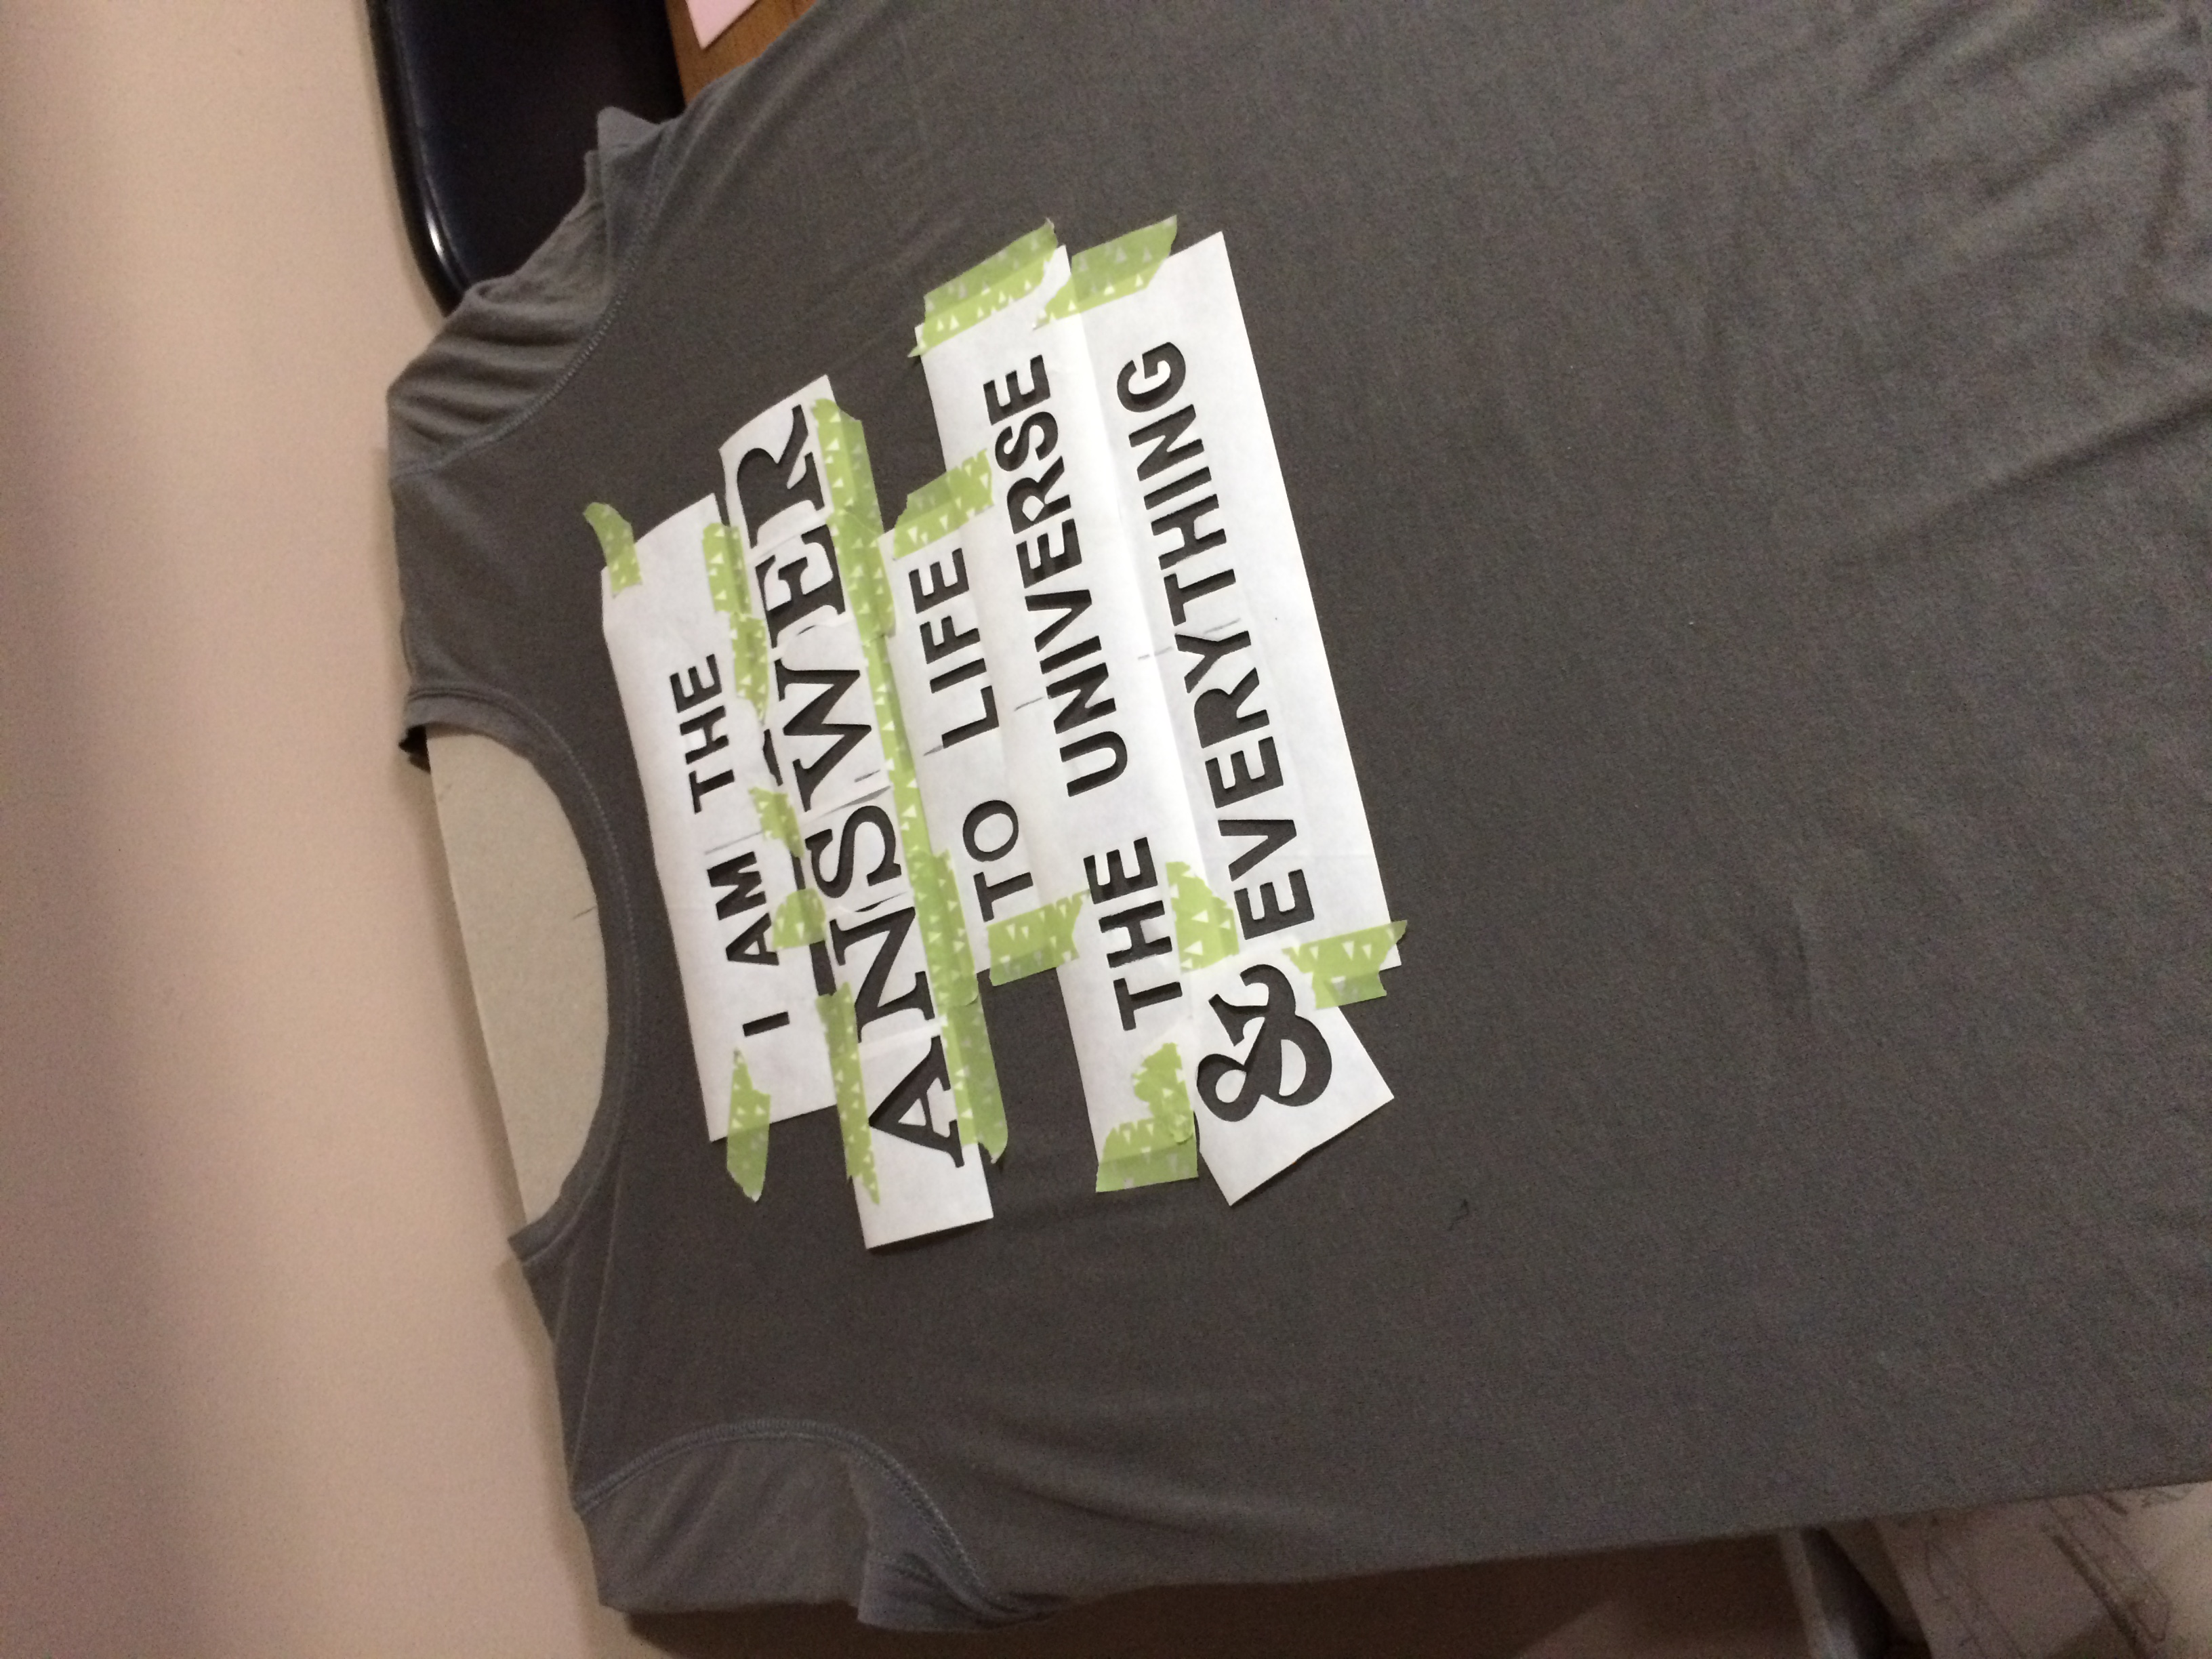
 Washi tape is a gentle way to secure the freezer paper in place as I positioned them on my shirt. Don’t forget to check and double check your spelling!!
 Then I ironed the freezer paper with a medium heat, careful to avoid the washi tape, removing it as the freezer paper began to adhere to the fabric.
(I had to very carefully take the cardboard out of the shirt for this step, so I could slide it onto the ironing board. – when I do this again, I will probably put the shirt on the ironing board during the placement of the letters, then add the protective cardboard just for the painting process.)
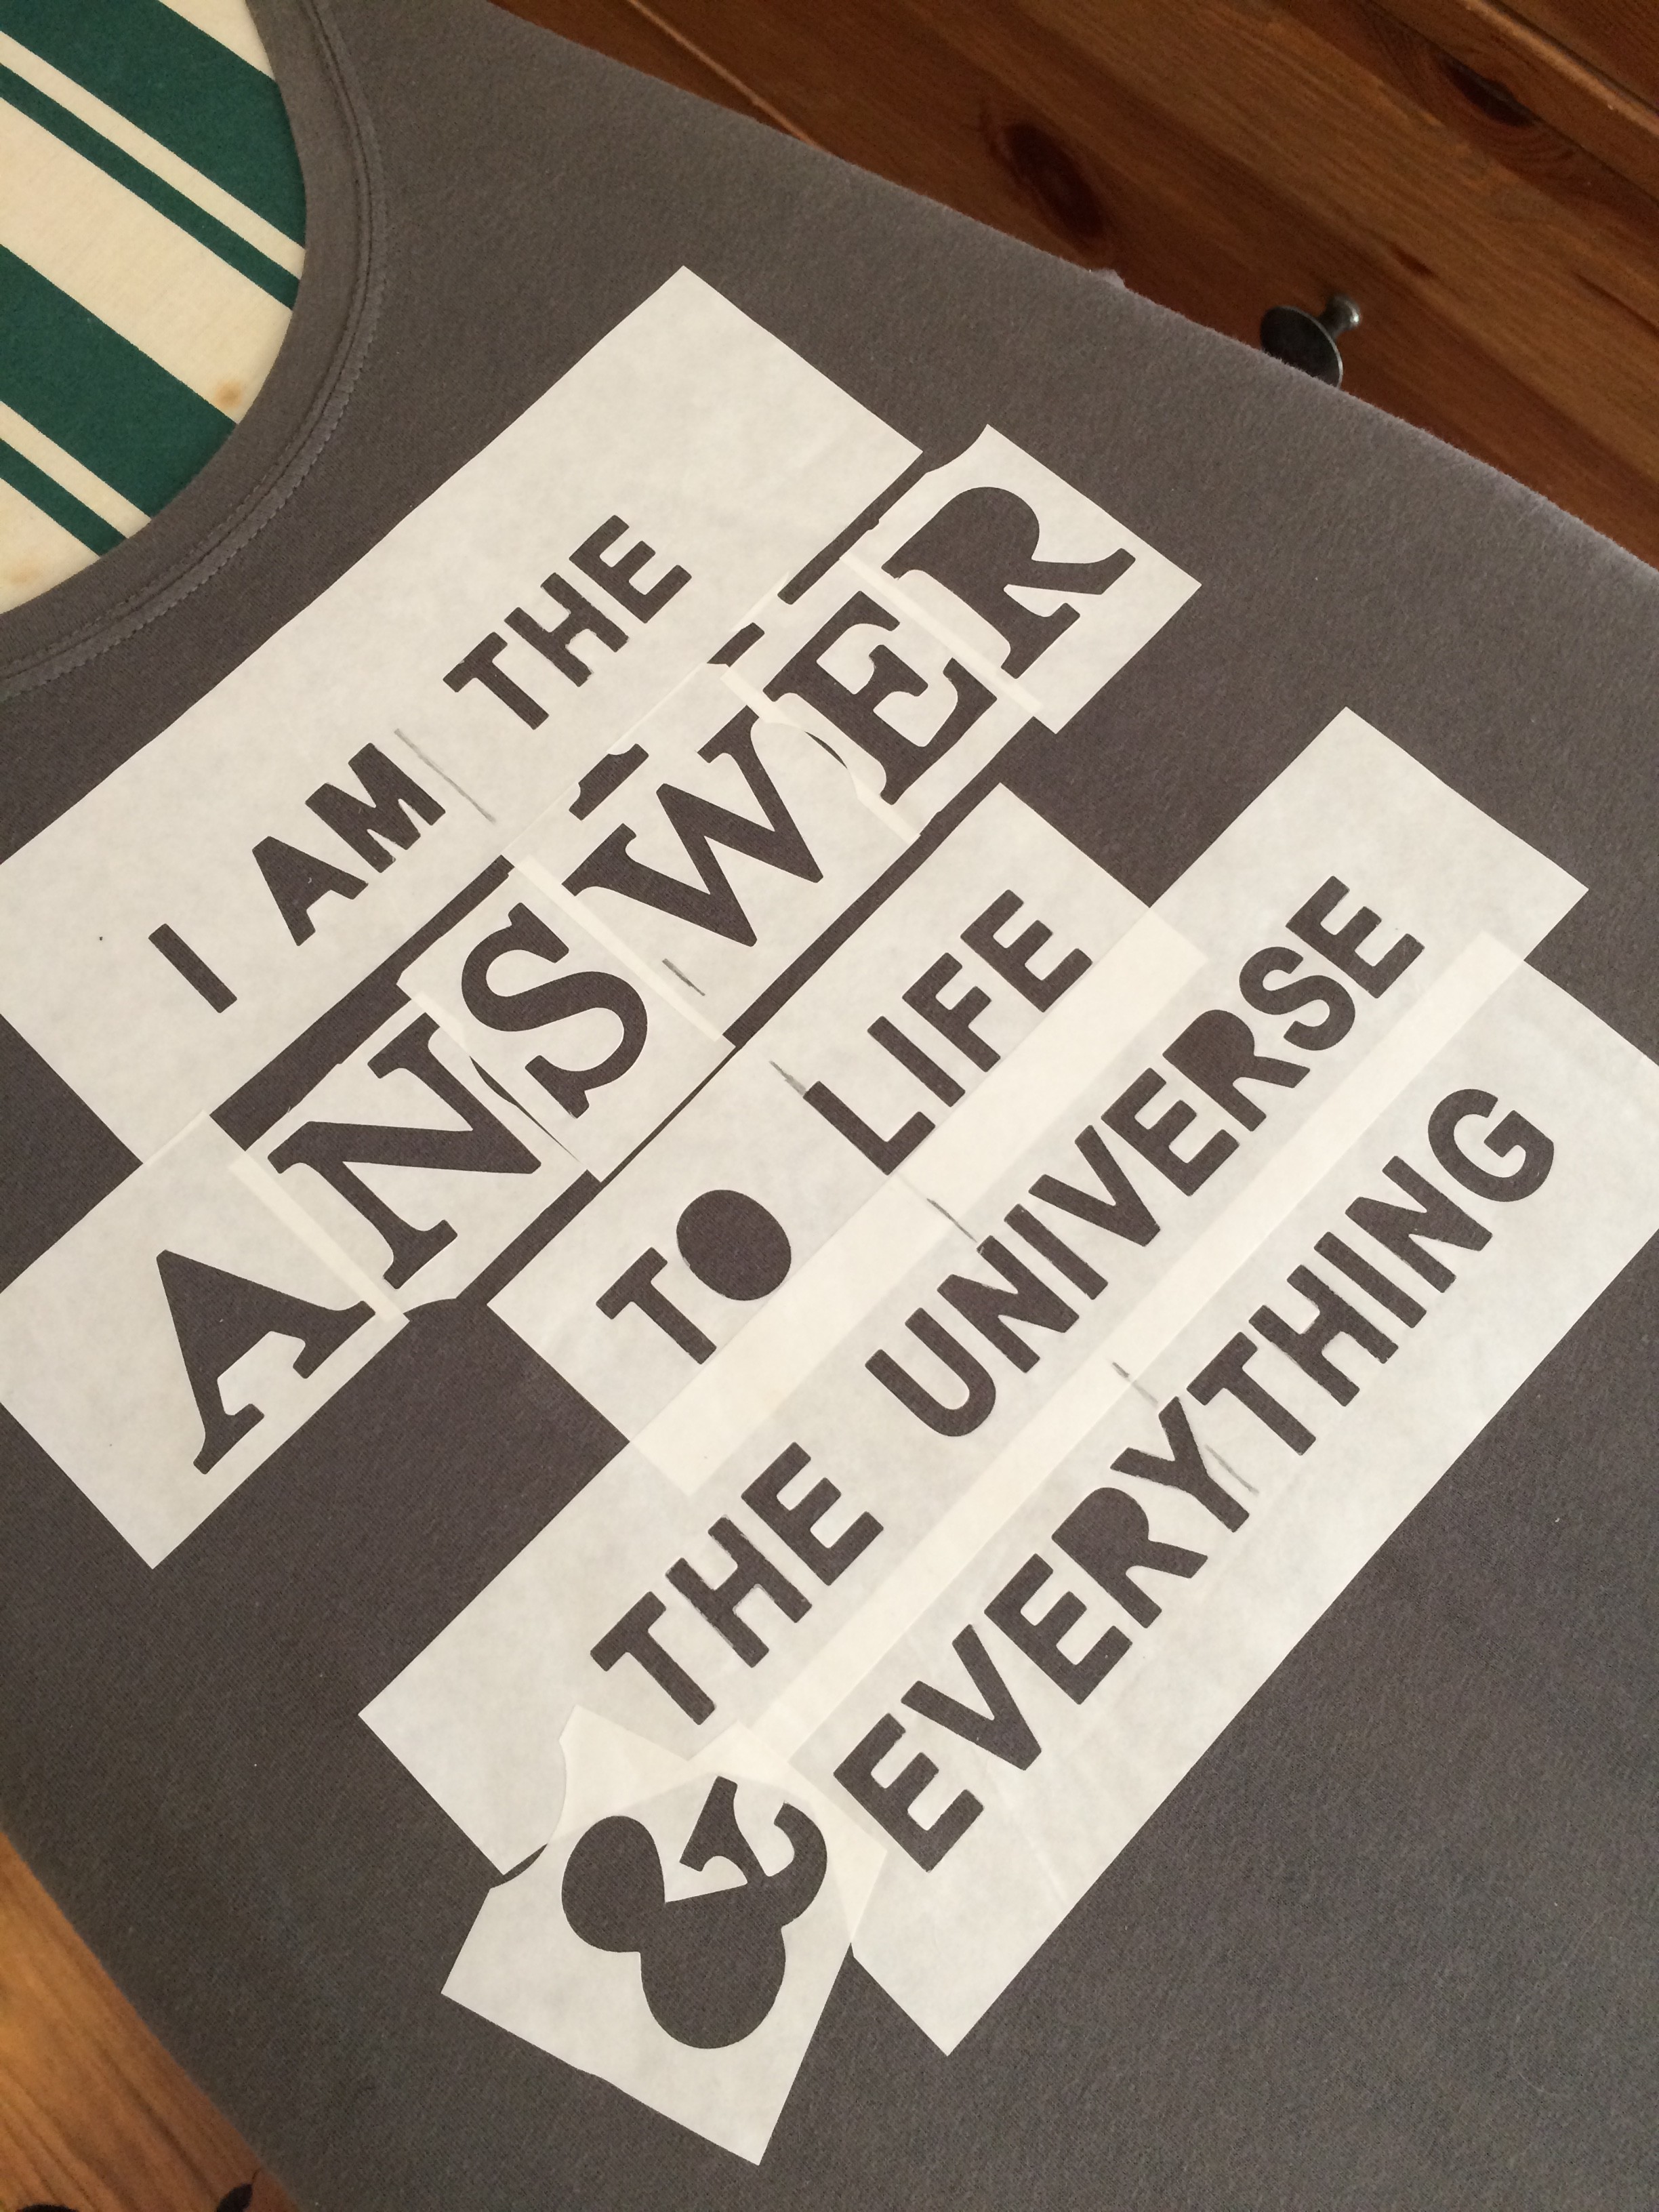 You’ll notice that some of the letters are missing the centers. You could leave it that way or add them in later (don’t forget to save them when you die cut the letters to begin with!)
 It can be a challenge to get those little bits straight in these small letters. I took my time.
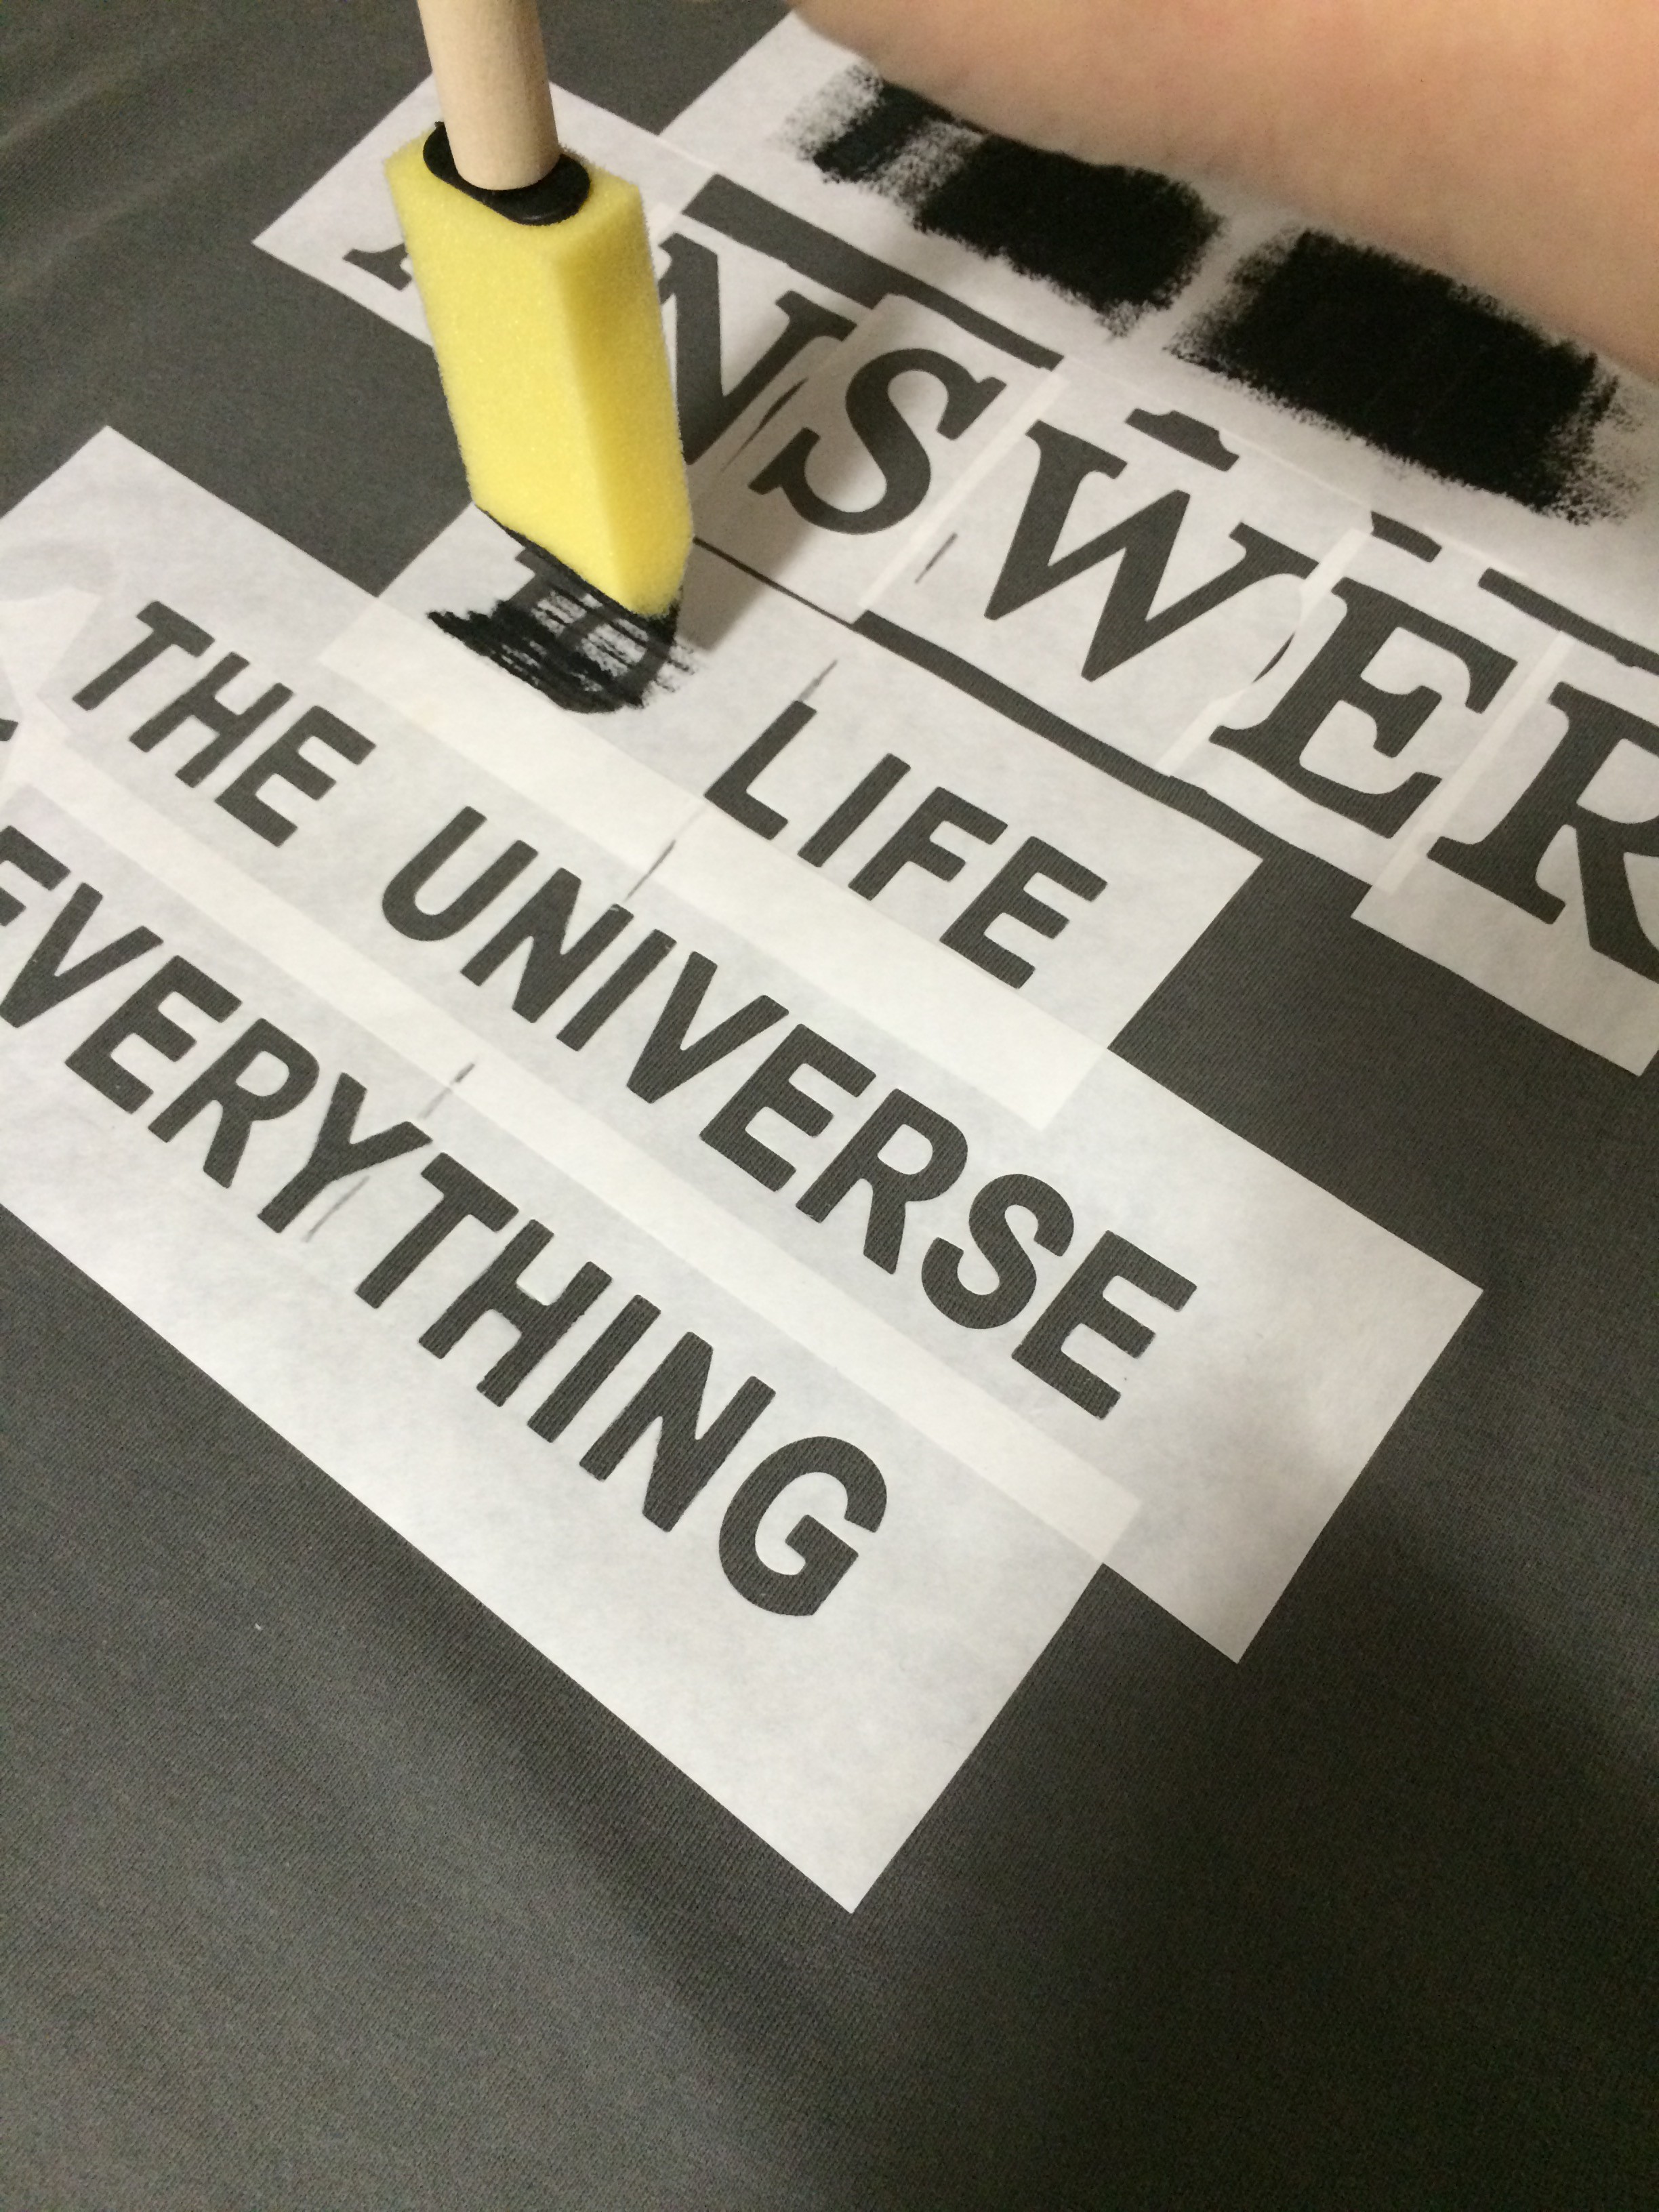 When everything is in place and secured with the iron, you can use the fabric paint and a foam brush to apply paint to your stenciled letters. I used a stippling motion with my brush positioned horizontally, then vertically, on the letters to ensure full coverage.
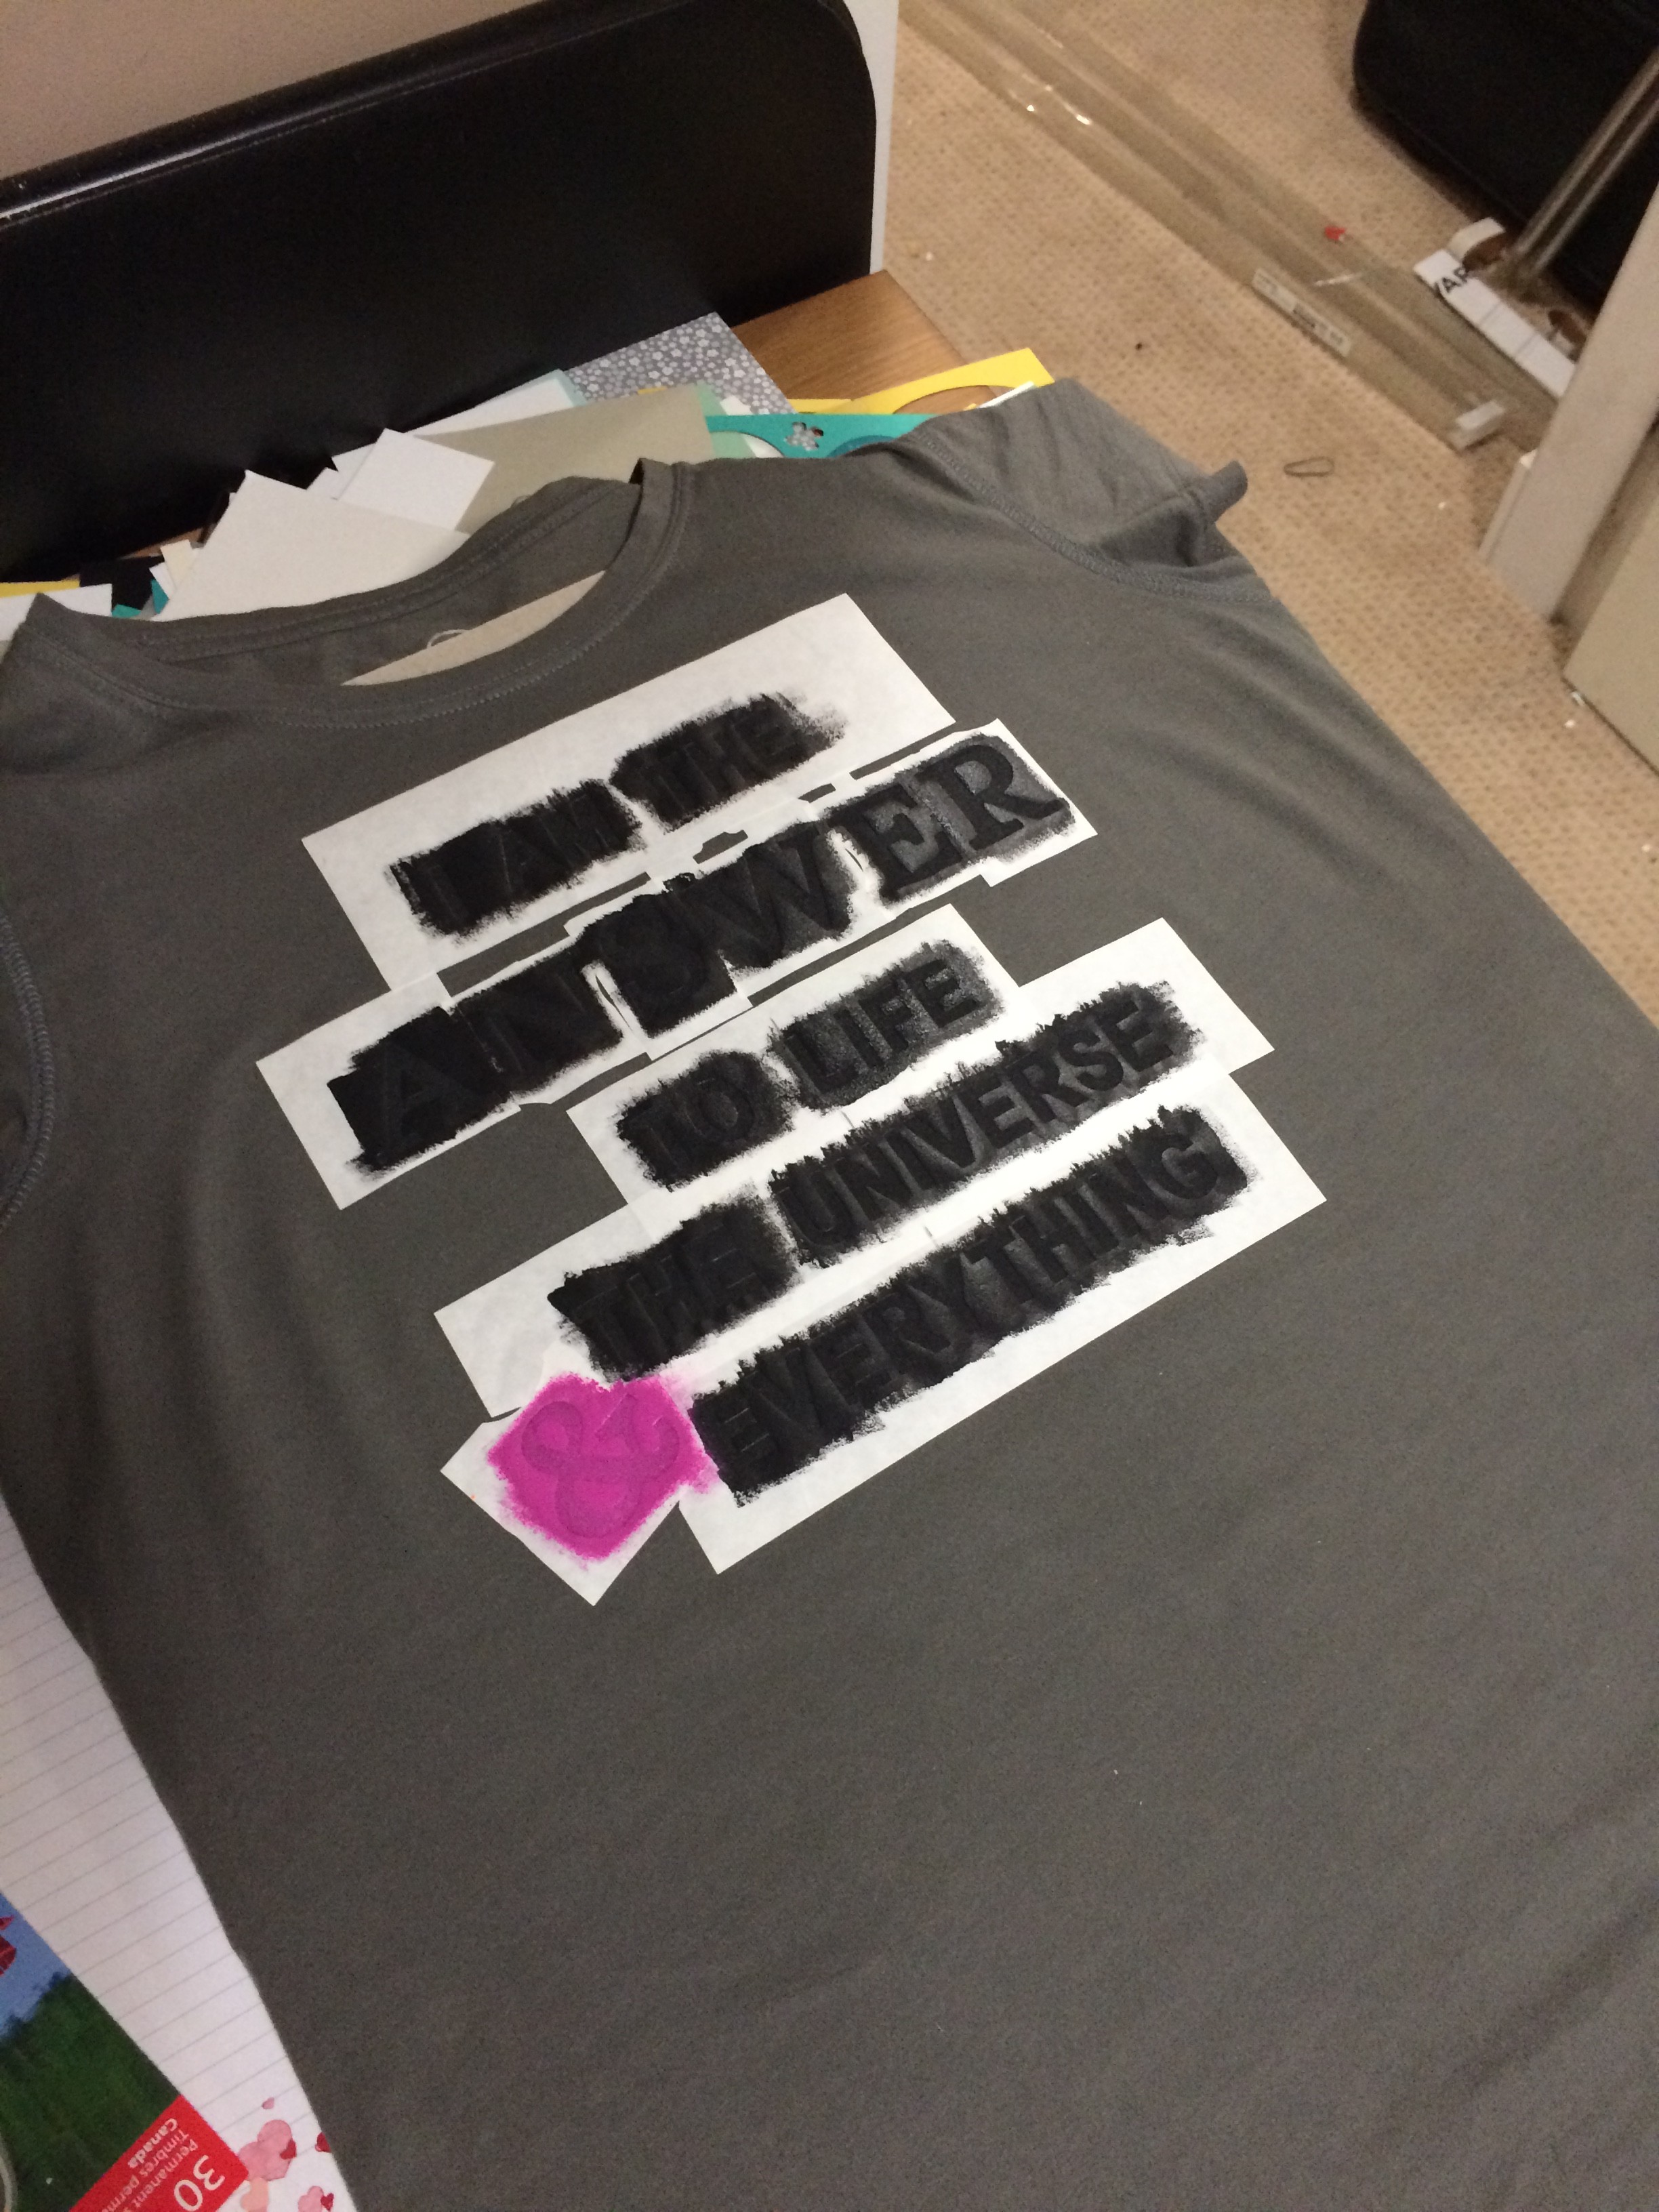 I had to be careful when painting my large letters as there were small spaces in between each letter. This is what it looked like after two coats of fabric paint. (I didn’t even wait between coats)
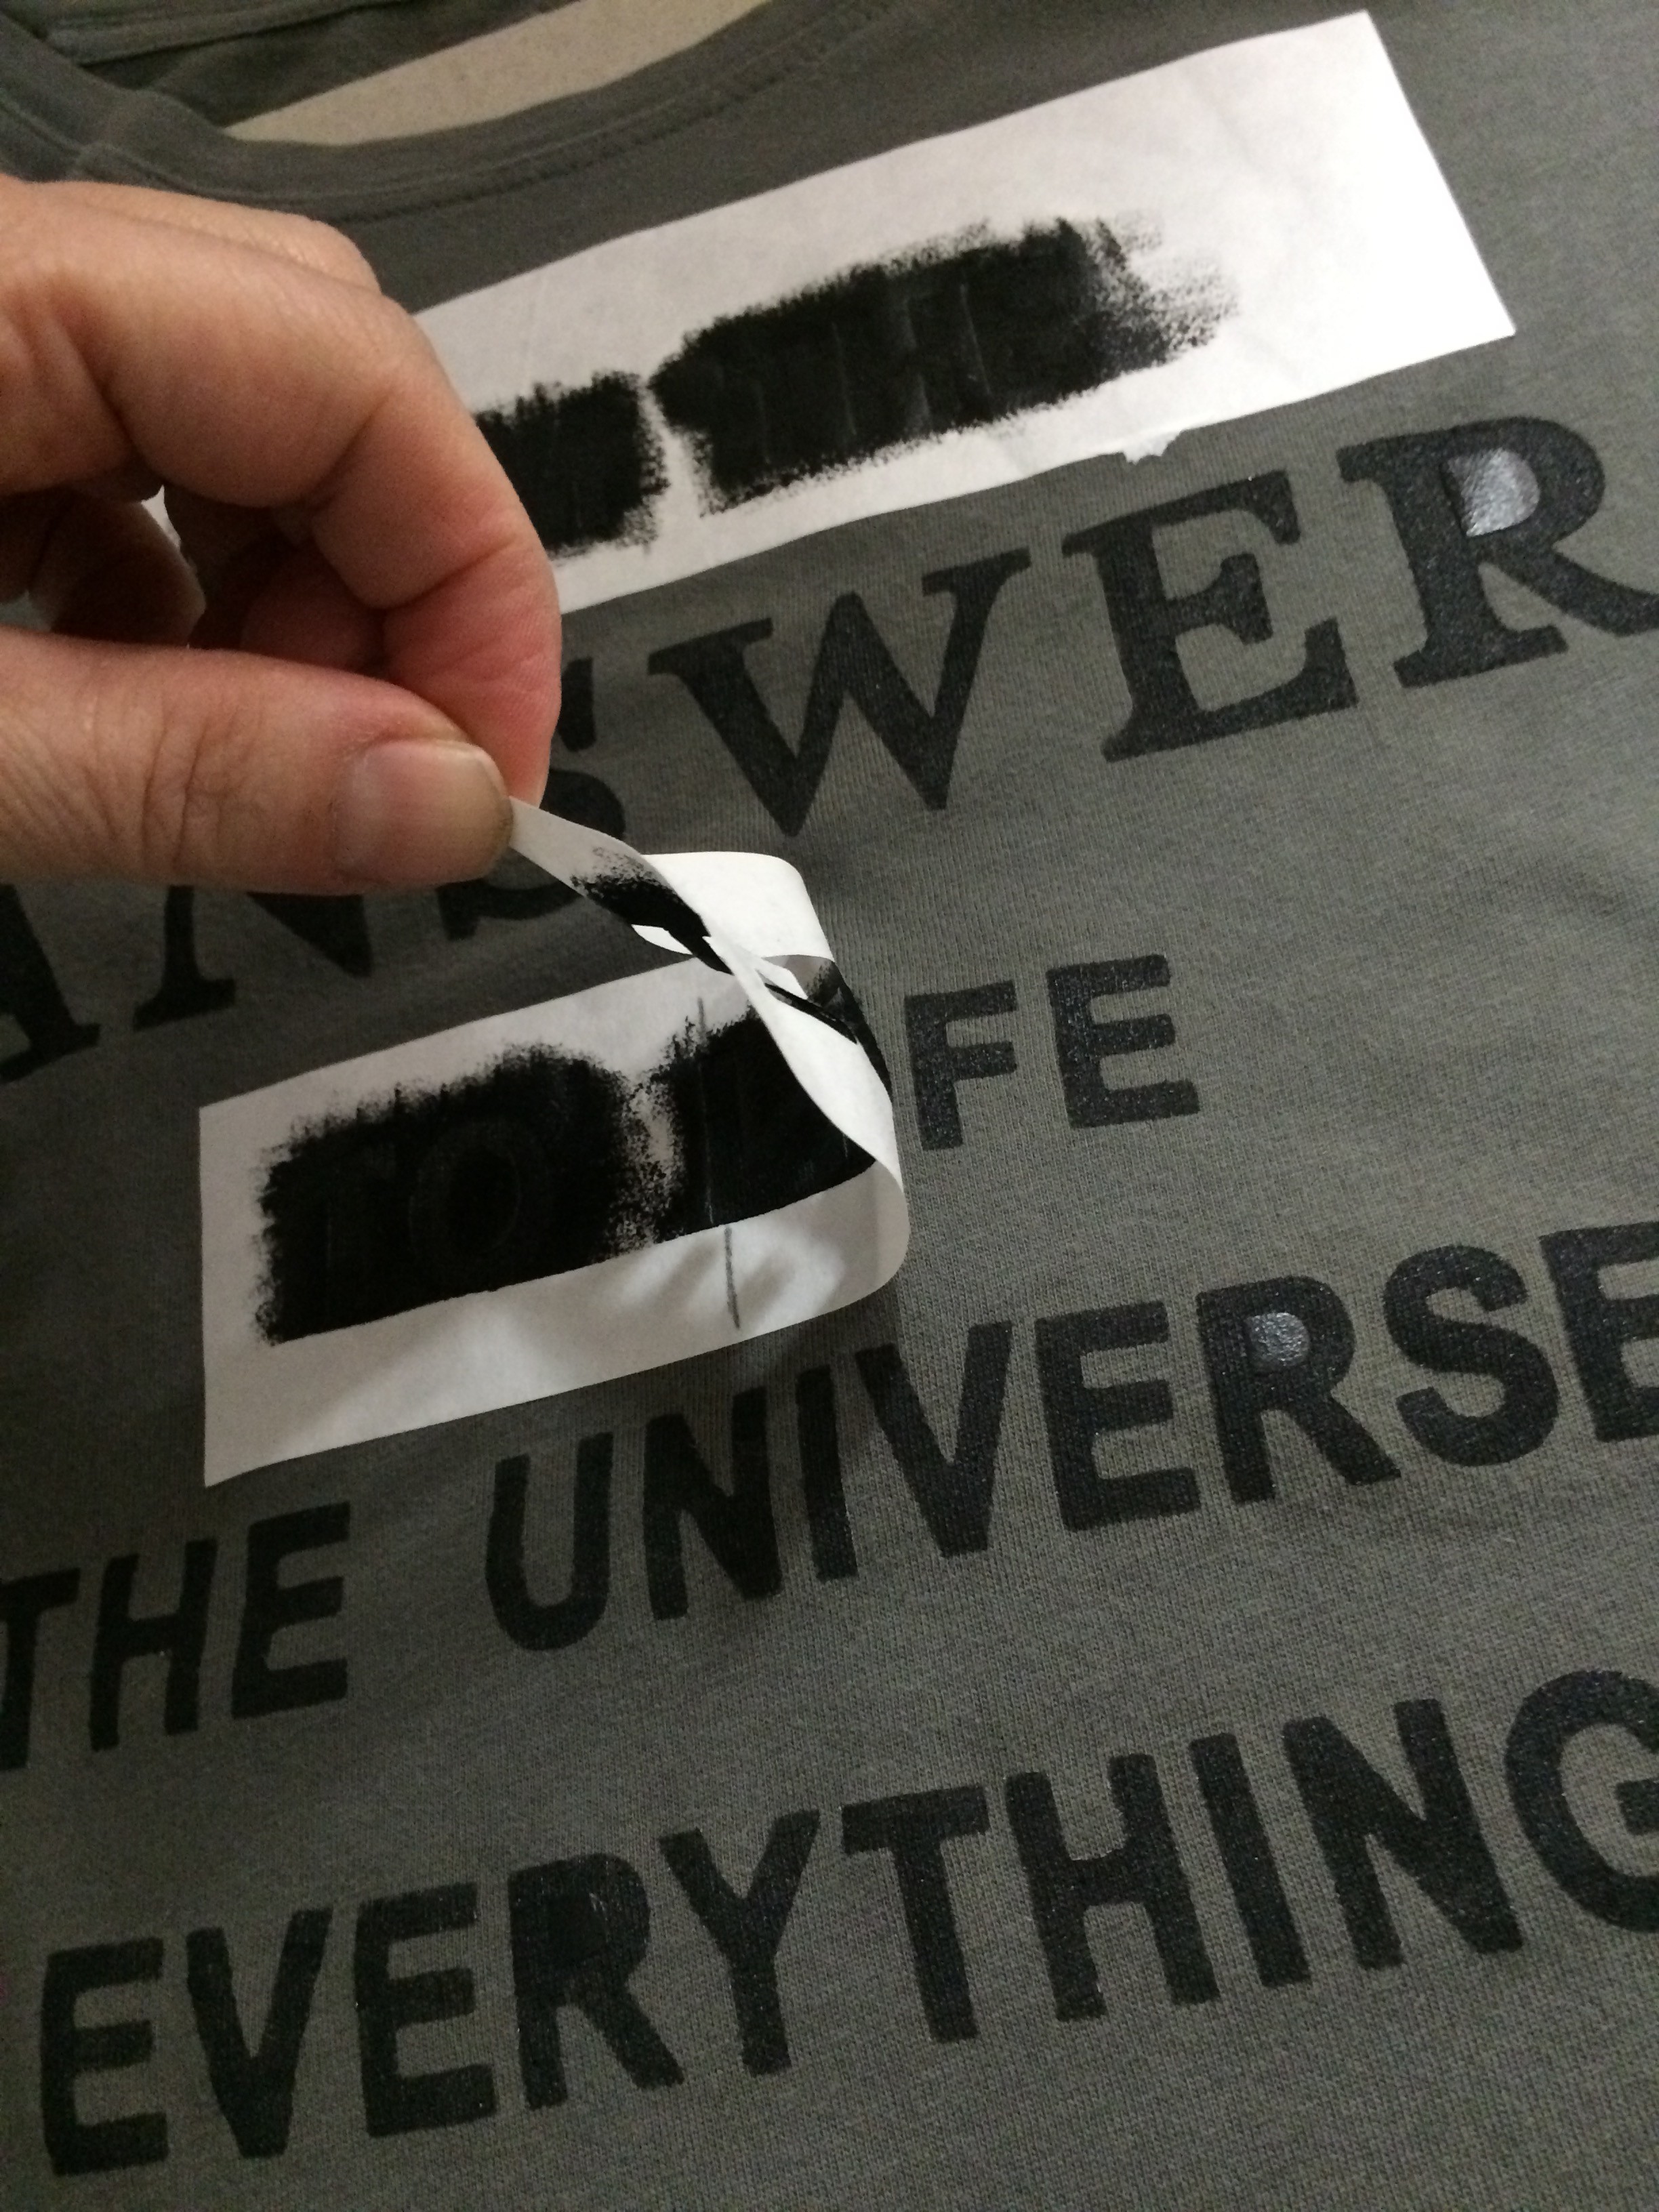 As soon as your fabric paint is pretty well absorbed (make sure there aren’t any pools of paint- you shouldn’t be using that much!), you can start slowly peeling off the freezer paper.
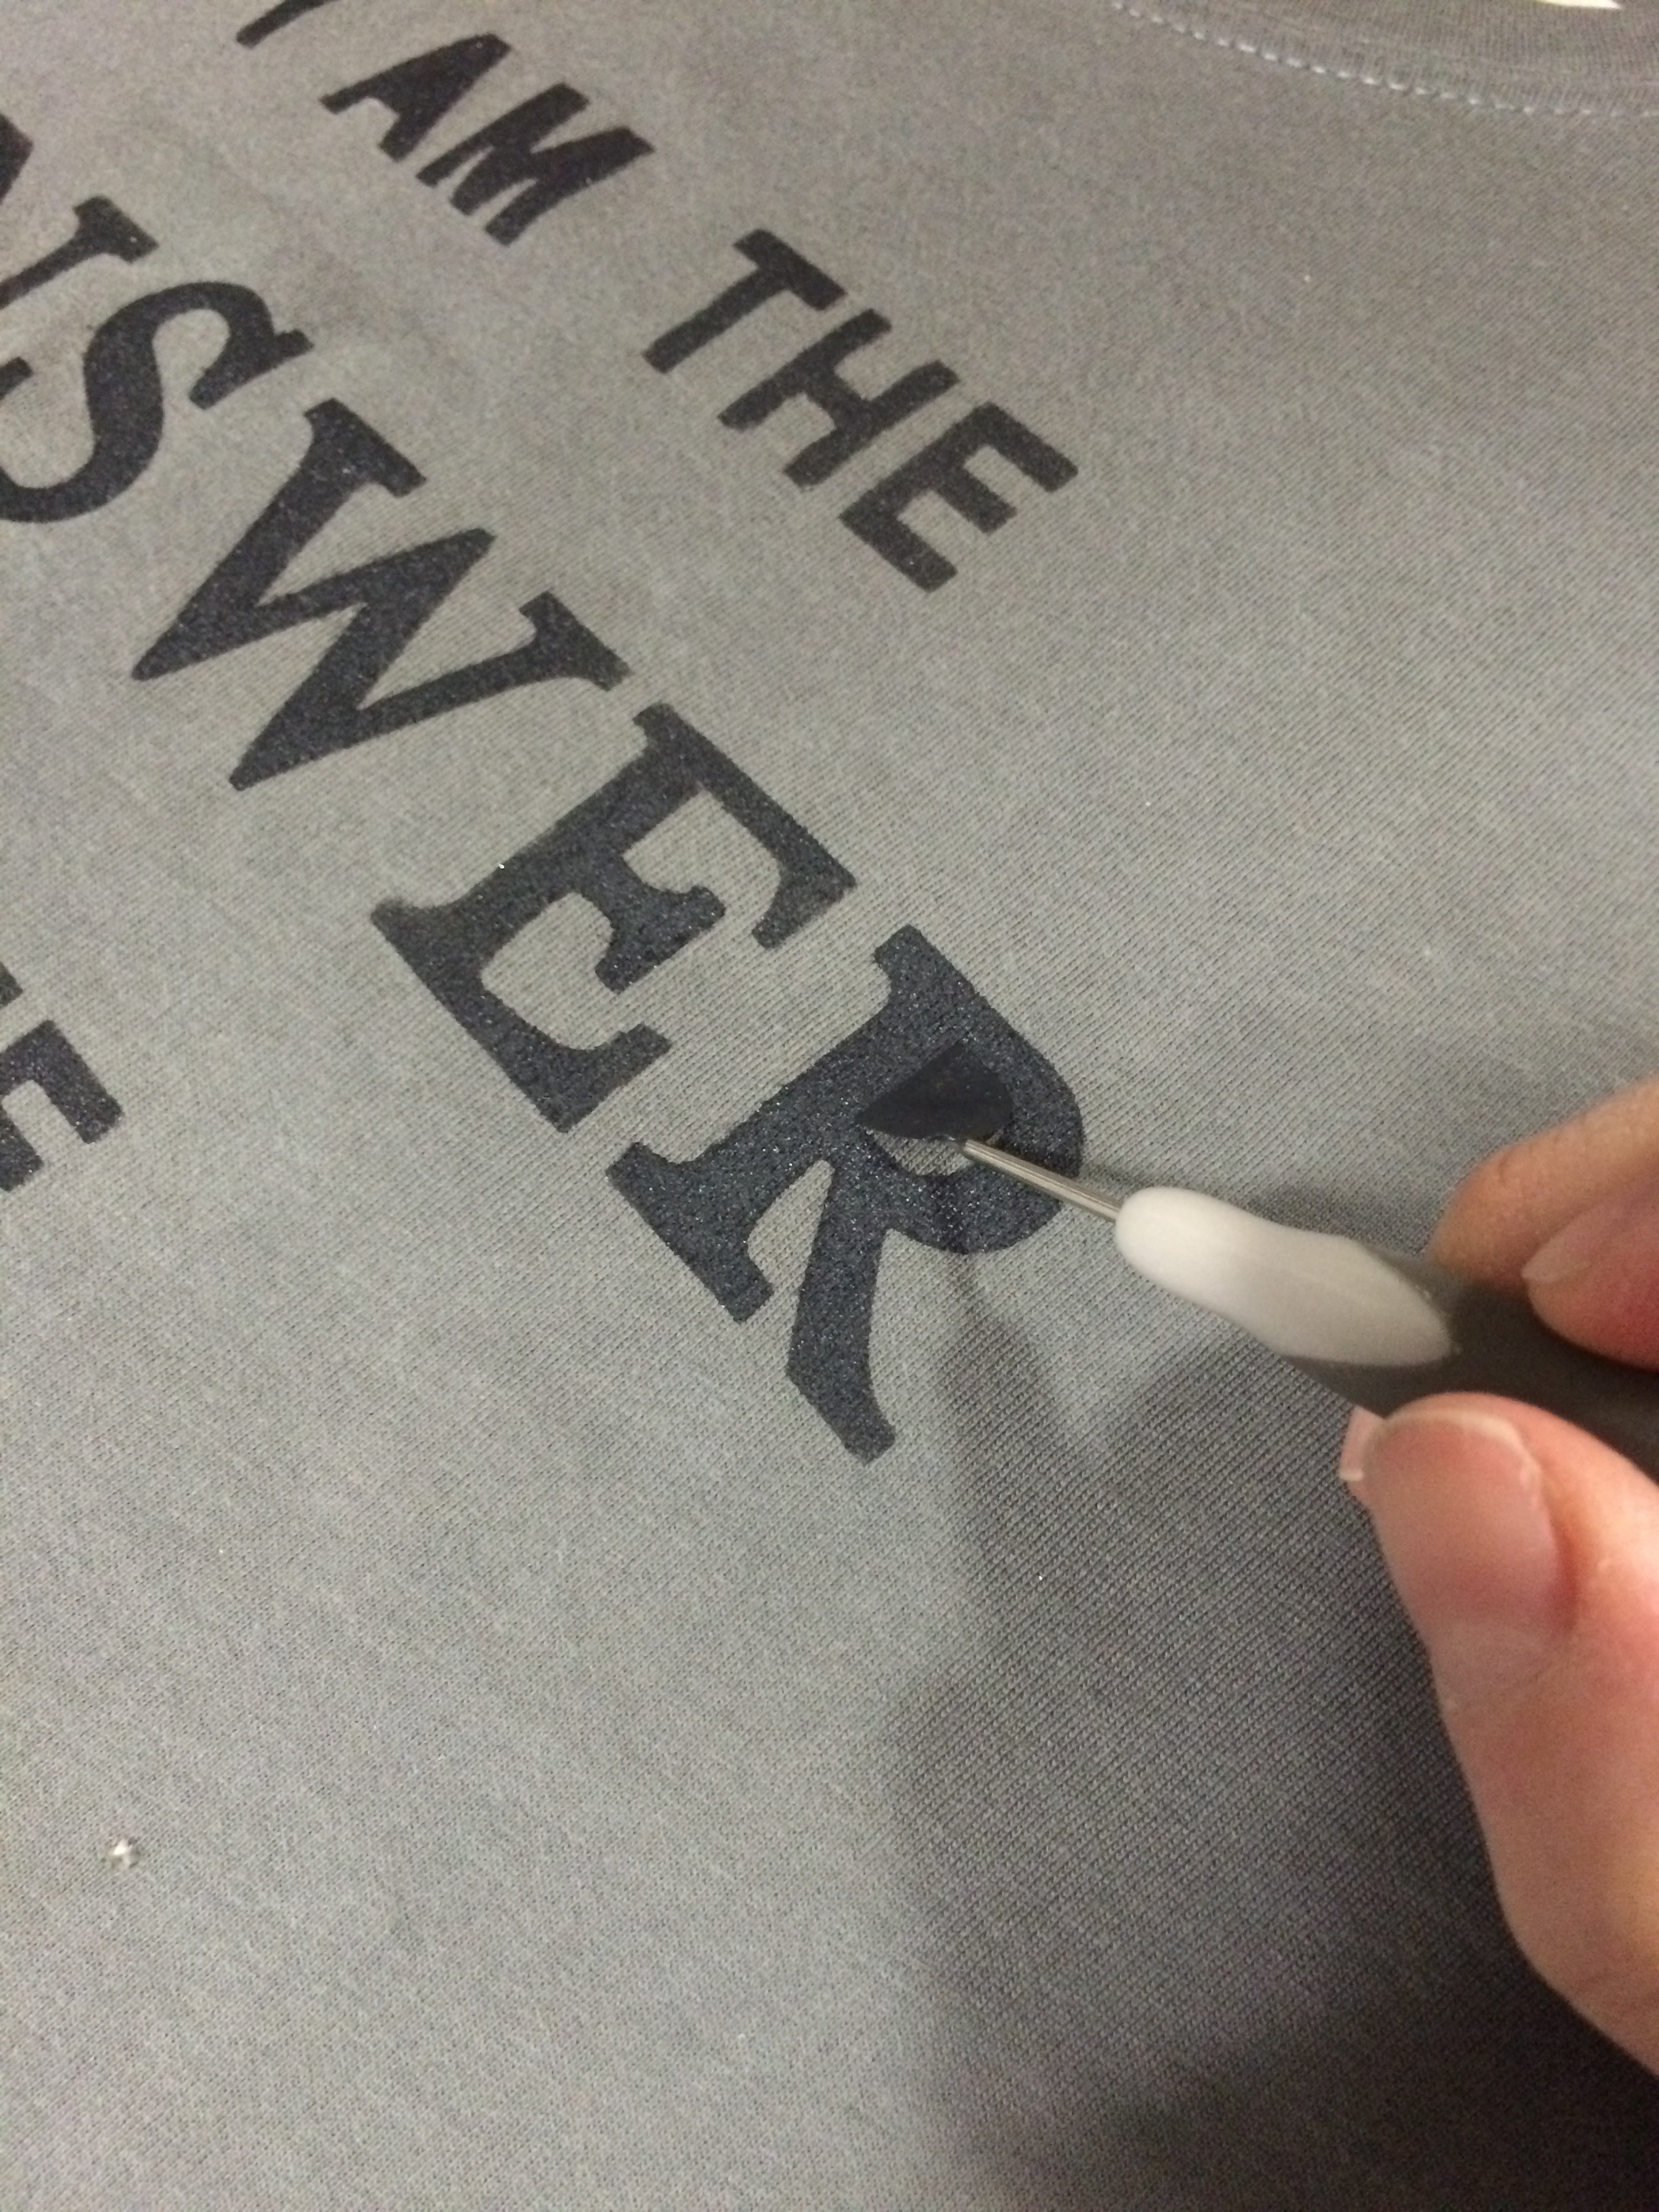 I used my paper-piercing tool to help me lift the smaller pieces of freezer paper for removal. My paint wasn’t completely dry and I didn’t want to get any on my fingers or cause the paint to smudge.
 Finally, I allowed the shirt to dry overnight. The last step was to turn the shirt inside out and heat-set the paint in the dryer.
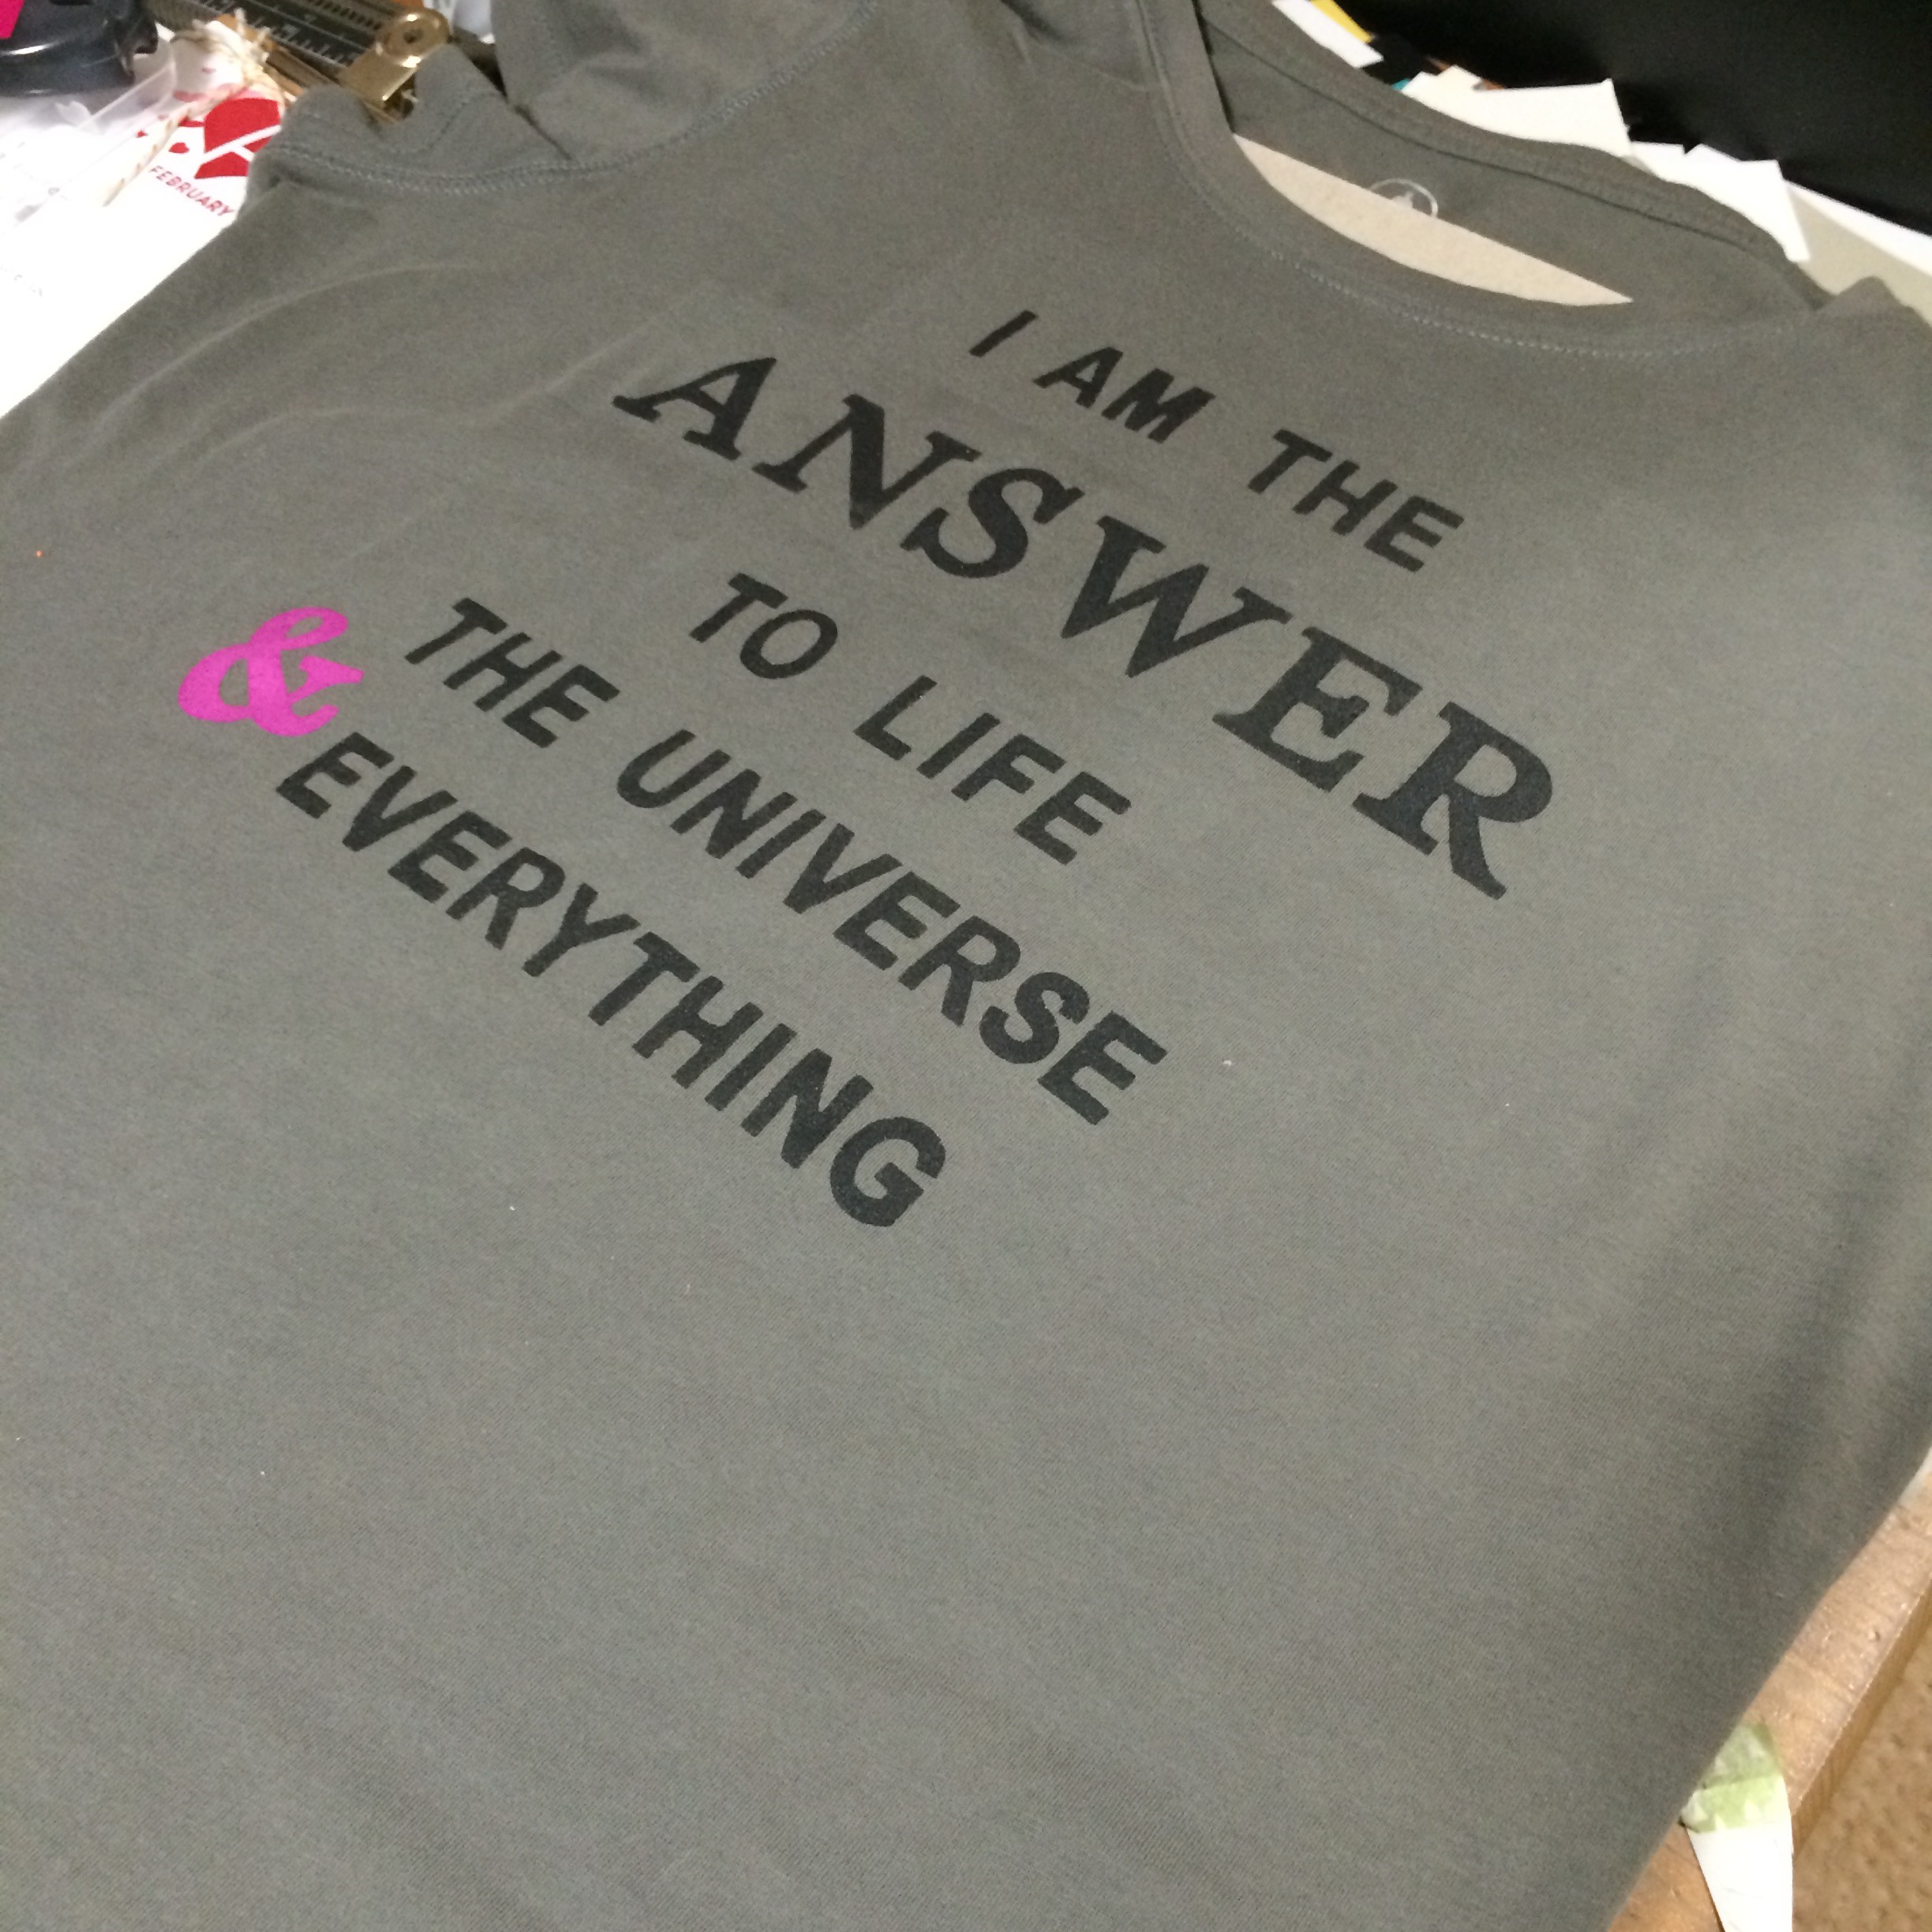
 The result is a cute, custom-made t-shirt! I can’t wait to make more!
I hope you’ll give it a try! Stampin’ Up! has a new set of Large Letter Framelits that would be perfect for this project!

July 16, 2016 @ 10:01 am
Howdy this is somewhat of off topic but I was wanting to know if blogs use WYSIWYG editors or if you
have to manually code with HTML. I’m starting a blog soon but have no coding knowledge so I wanted to get guidance from someone with
experience. Any help would be greatly appreciated!
July 25, 2016 @ 7:51 pm
My blog doesn’t require any code knowledge (thank goodness!). I signed up for a training session to get me started and have been flying from my jump off point! 🙂 Good luck with your blogging!