Wine with Friends
My entire family came down with a nasty bug (probably a type of flu bug, since my husband is the only one who got the flu shot and didn’t get sick!). My son got sick first, then my youngest daughter followed two days later, then my middle child a couple days after that. They were all sick for one whole week each! I kept thinking I was going to go unscathed, but I guess sleeping beside my youngest child through her week of fever and dry cough, I was bound to get it eventually. I only had a fever one day (the kids had it off and on for the whole week!), but after being stuck at home taking care of my kids for 2 weeks, I was laid up for a week as well! That’s a long time to be bound to my house!! When I finally wasn’t glued to the couch, spending most of my time sleeping, I had to force myself out into the real world to catch up on Christmas shopping, decorating and food prep for turkey dinner. As a result, my body has yet to fully recover. It’s been two weeks since I got sick and it’s still lingering. I have that “sexy” raspy voice and I still cough like a smoker in the morning, lol! But I’m grateful that my energy seems to be back to about 90% and I can enjoy some outdoor activities again.
All that to say that I’m happy to get back to my craft room. Even when my kids were sick, I wasn’t able to get away to my room in the basement and stamp. I got a few other things done, like carpet clean my daughter’s new room, while the kids were resting. That felt pretty good. I accomplished something, but was still within ear shot if they needed me.
Now my daughter is fully moved out of the room she shared with her younger sister and is in her new room with the clean carpet! It felt so good to finally do that for her. Having grandma help with the room clean up and purge (the shared room was a junk heap!!), made it a huge success. Next task in the new year is for the girls to pick out their paint colours, so we can make the rooms their own! It’s all very exciting!!
This is a lot of writing already, but let me just add how grateful I am that I was able to quit my job last May and be a stay-at-home-mom first and a Stampin’ Up Demonstrator second. Being at home has made life feel much more under control and less stressful, not to mention more fulfilling. The kids have access to me whenever they’re home and I have been able to begin the process of getting a handle on my home environment. While being sick and while having company visit over the holidays, I have been free to take care of my home and family without having to worry about scheduling around my job or dealing with the stress of finding someone to replace me. Quitting my part-time job to be at home is the best decision I’ve made for me and my family since saying “yes” to getting married to my husband.
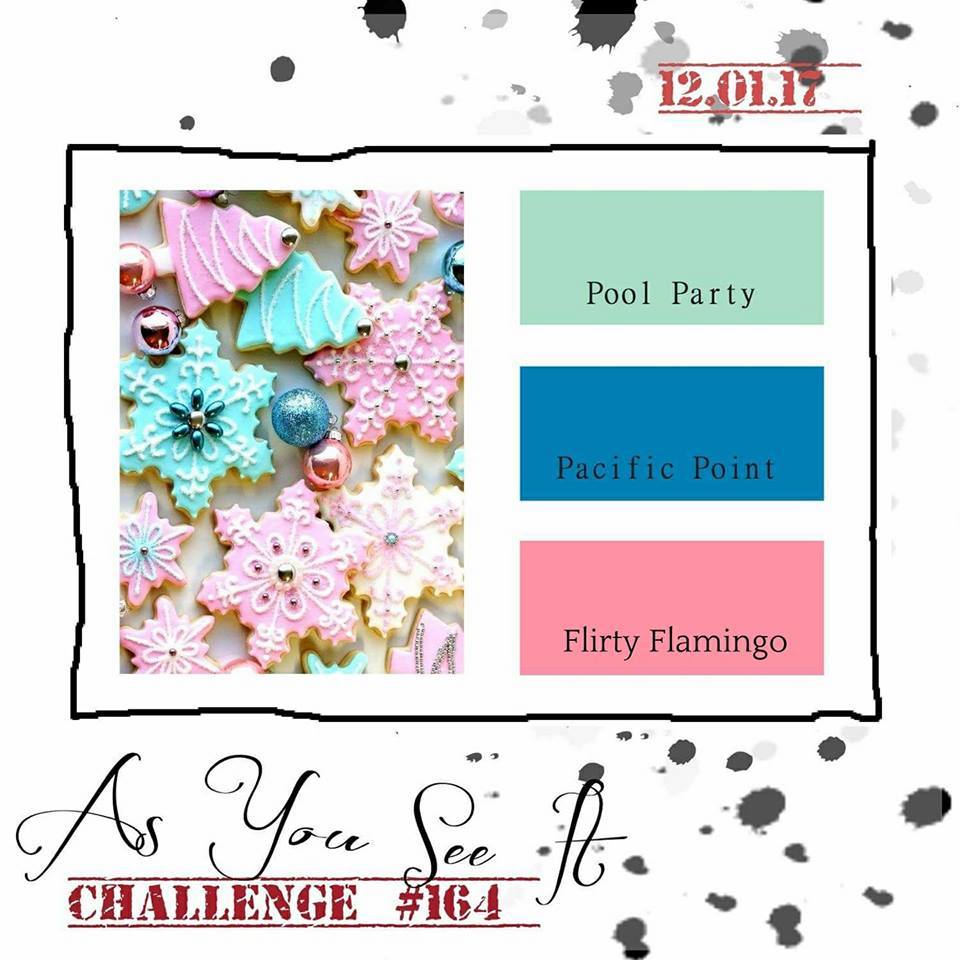
My first assignment in my stamping room after the holidays is, of course, an As You See It Challenge card design!  I thought about using something new from my Occasions or Sale-a-bration pre-order, but in the end, I decided I should get a bit more mileage on one of my favourite Holiday stamp sets. After all, you CAN still purchase this set until the end of the year – so after reading this, go to my SHOP link on my website and get this stamp set while you still can!
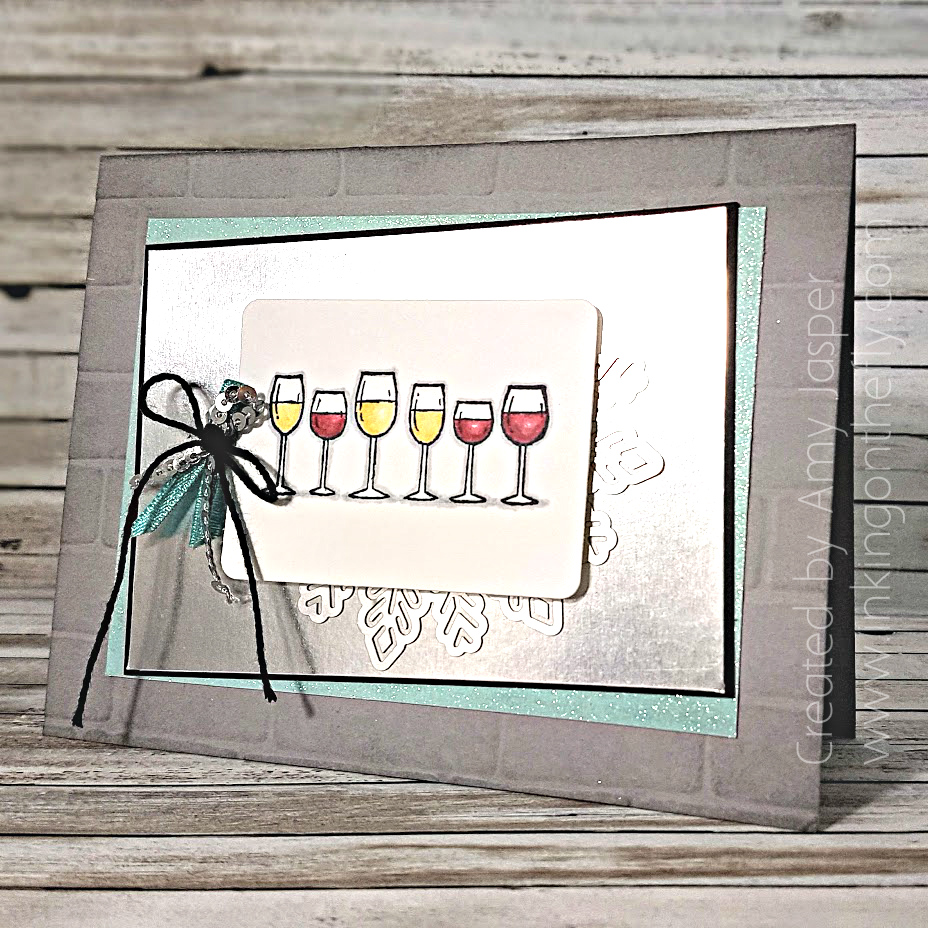 I love this Half Full stamp set. It has a few playful sentiments, but I love wine, so, sentiments aside, this set makes me happy!
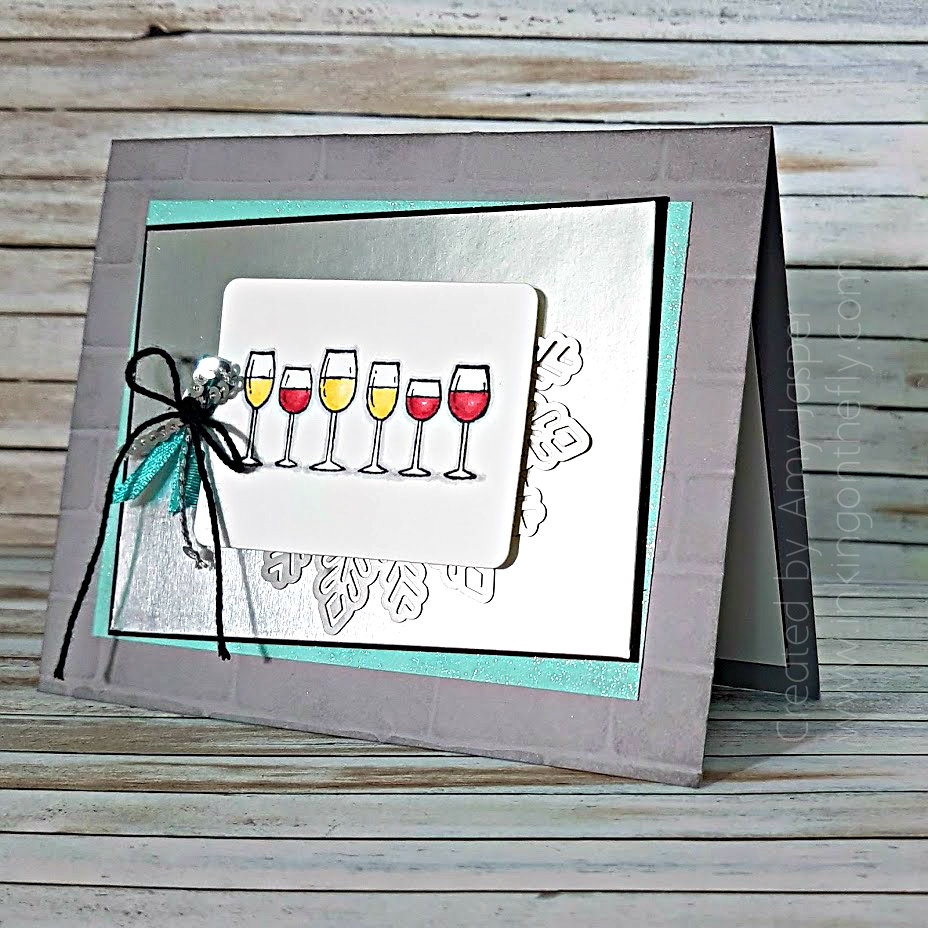
The card base is Smoky Slate card stock that I ran through the Big Shot with the Brick embossing folder and then lightly sponged Smoky Slate ink around the edges to make that embossed pattern pop.
The next layer is Pool Party cardstock. I added sparkle to it by colouring it with my Wink of Stella Glitter Brush. So pretty and sparkly!! I added a thin Basic Black cardstock mat under a layer of Silver Foil paper and attached it over the winky Pool Party layer.
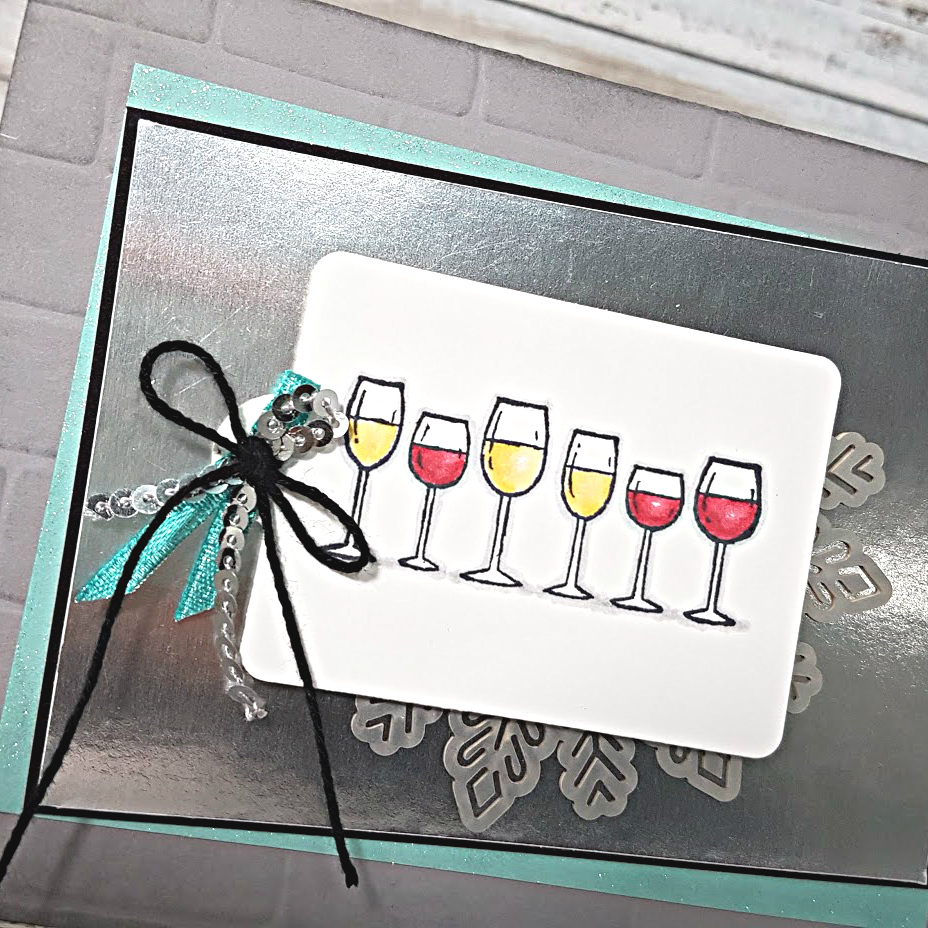 The silver Foil Snowflake (just half of one) was adhered to the Silver Foil layer before attaching the Whisper White die cut on top with Stampin’ Dimensionals. I used a die from the Celebration Thinlits (what a cute set of thinlits, that is!). The wine glasses were stamped on the Whisper White die cut with Tuxedo Black Momento ink, then coloured using Cherry Cobbler, Daffodil Delight, and Smoky Slate Blends Markers.
The final touch on the card front is the ribbon swag – Mini Silver Sequin, Basic Black Solid Baker’s Twine, and a little peep of the Bermuda Bay ribbon from the upcoming Sale-a-bration Shimmer Ribbon pack (so so shimmery!). I didn’t have room for a sentiment on the front, so I chose “the best wines are the ones we drink with friends” (from the Half Full Stamp Set) for the inside of the card. Behind it, I stamped the large wine glass from the same wonderful stamp set in Pool Party ink (stamped off once to reduce the intensity of colour).
I can give this card at any time to ANY of my wine-lovin’ friends. Wine IS best when it’s shared. So who wants to come over for a glass of wine this week!?
 (I’m very grateful to finally have my taste buds returning to normal – wine and coffee just aren’t the same when you can’t taste them!!)