butterflies

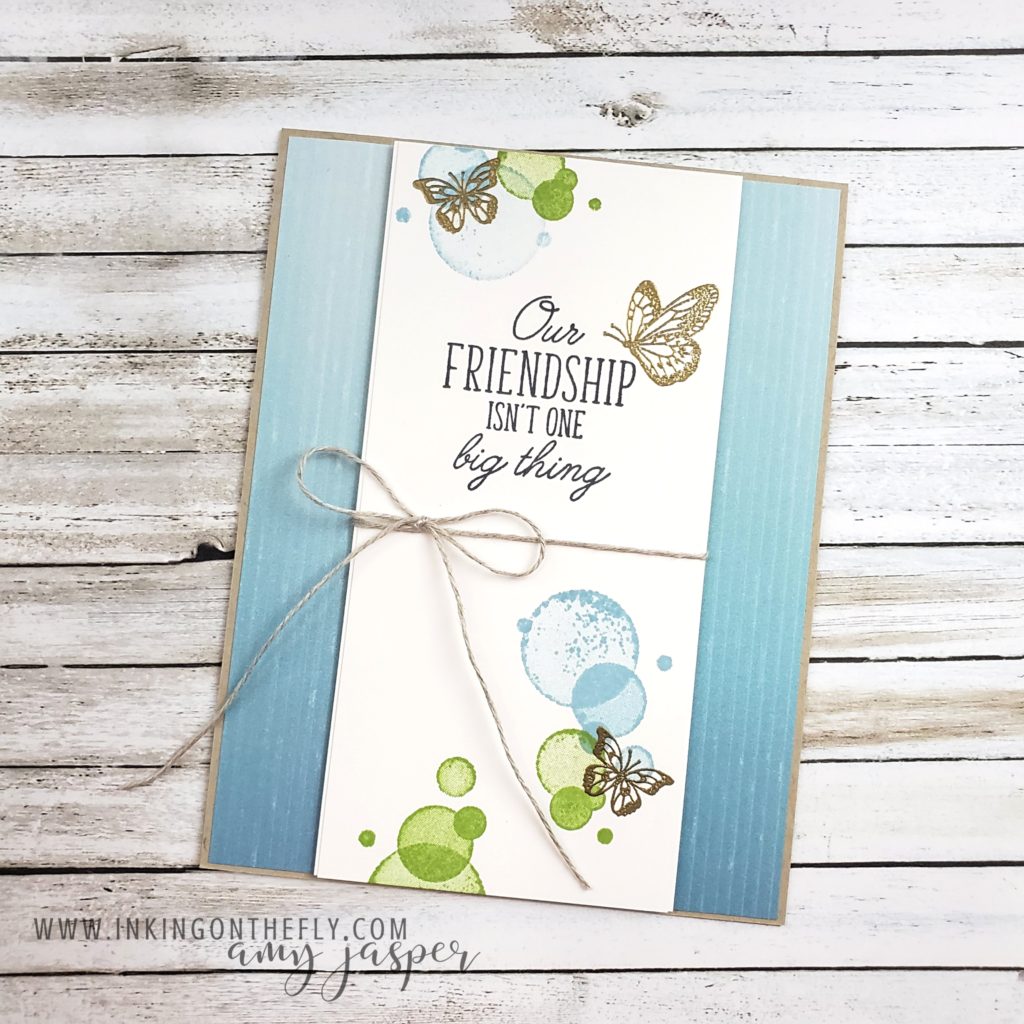
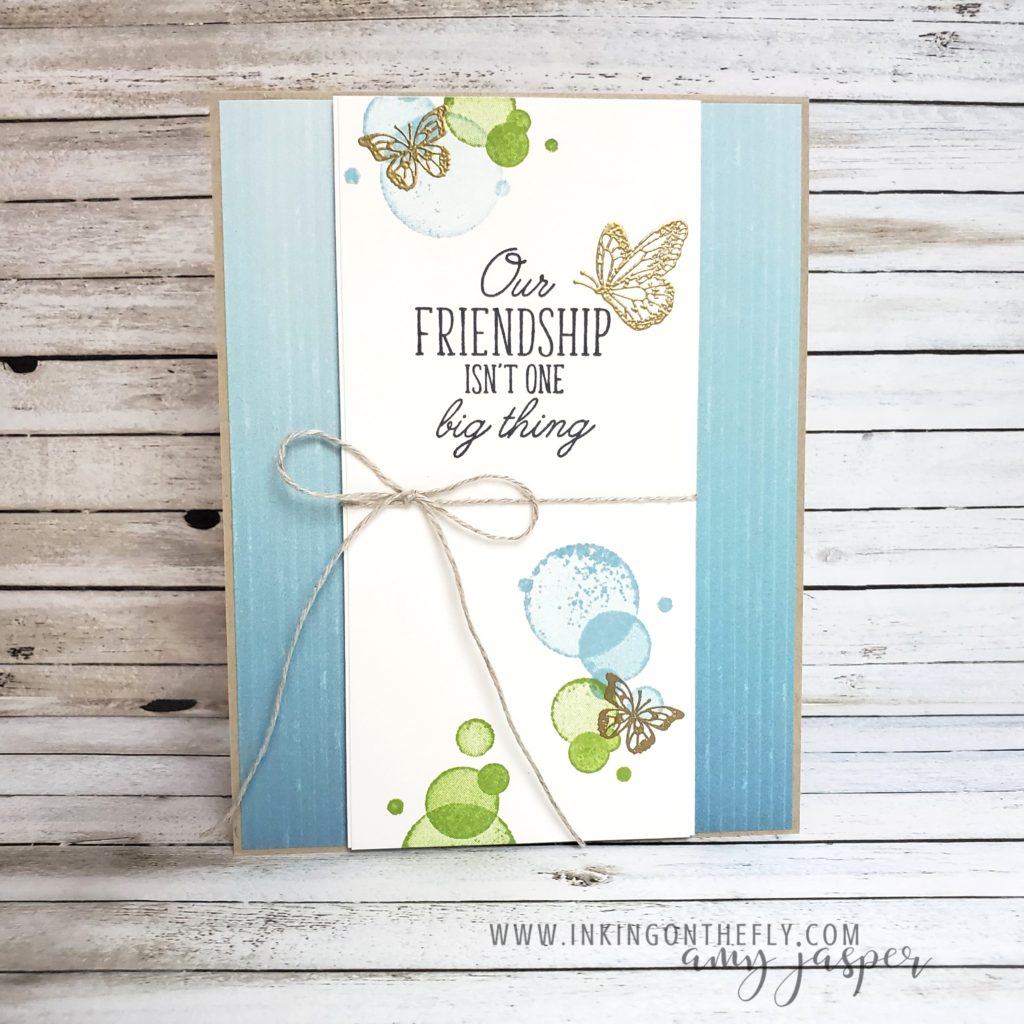
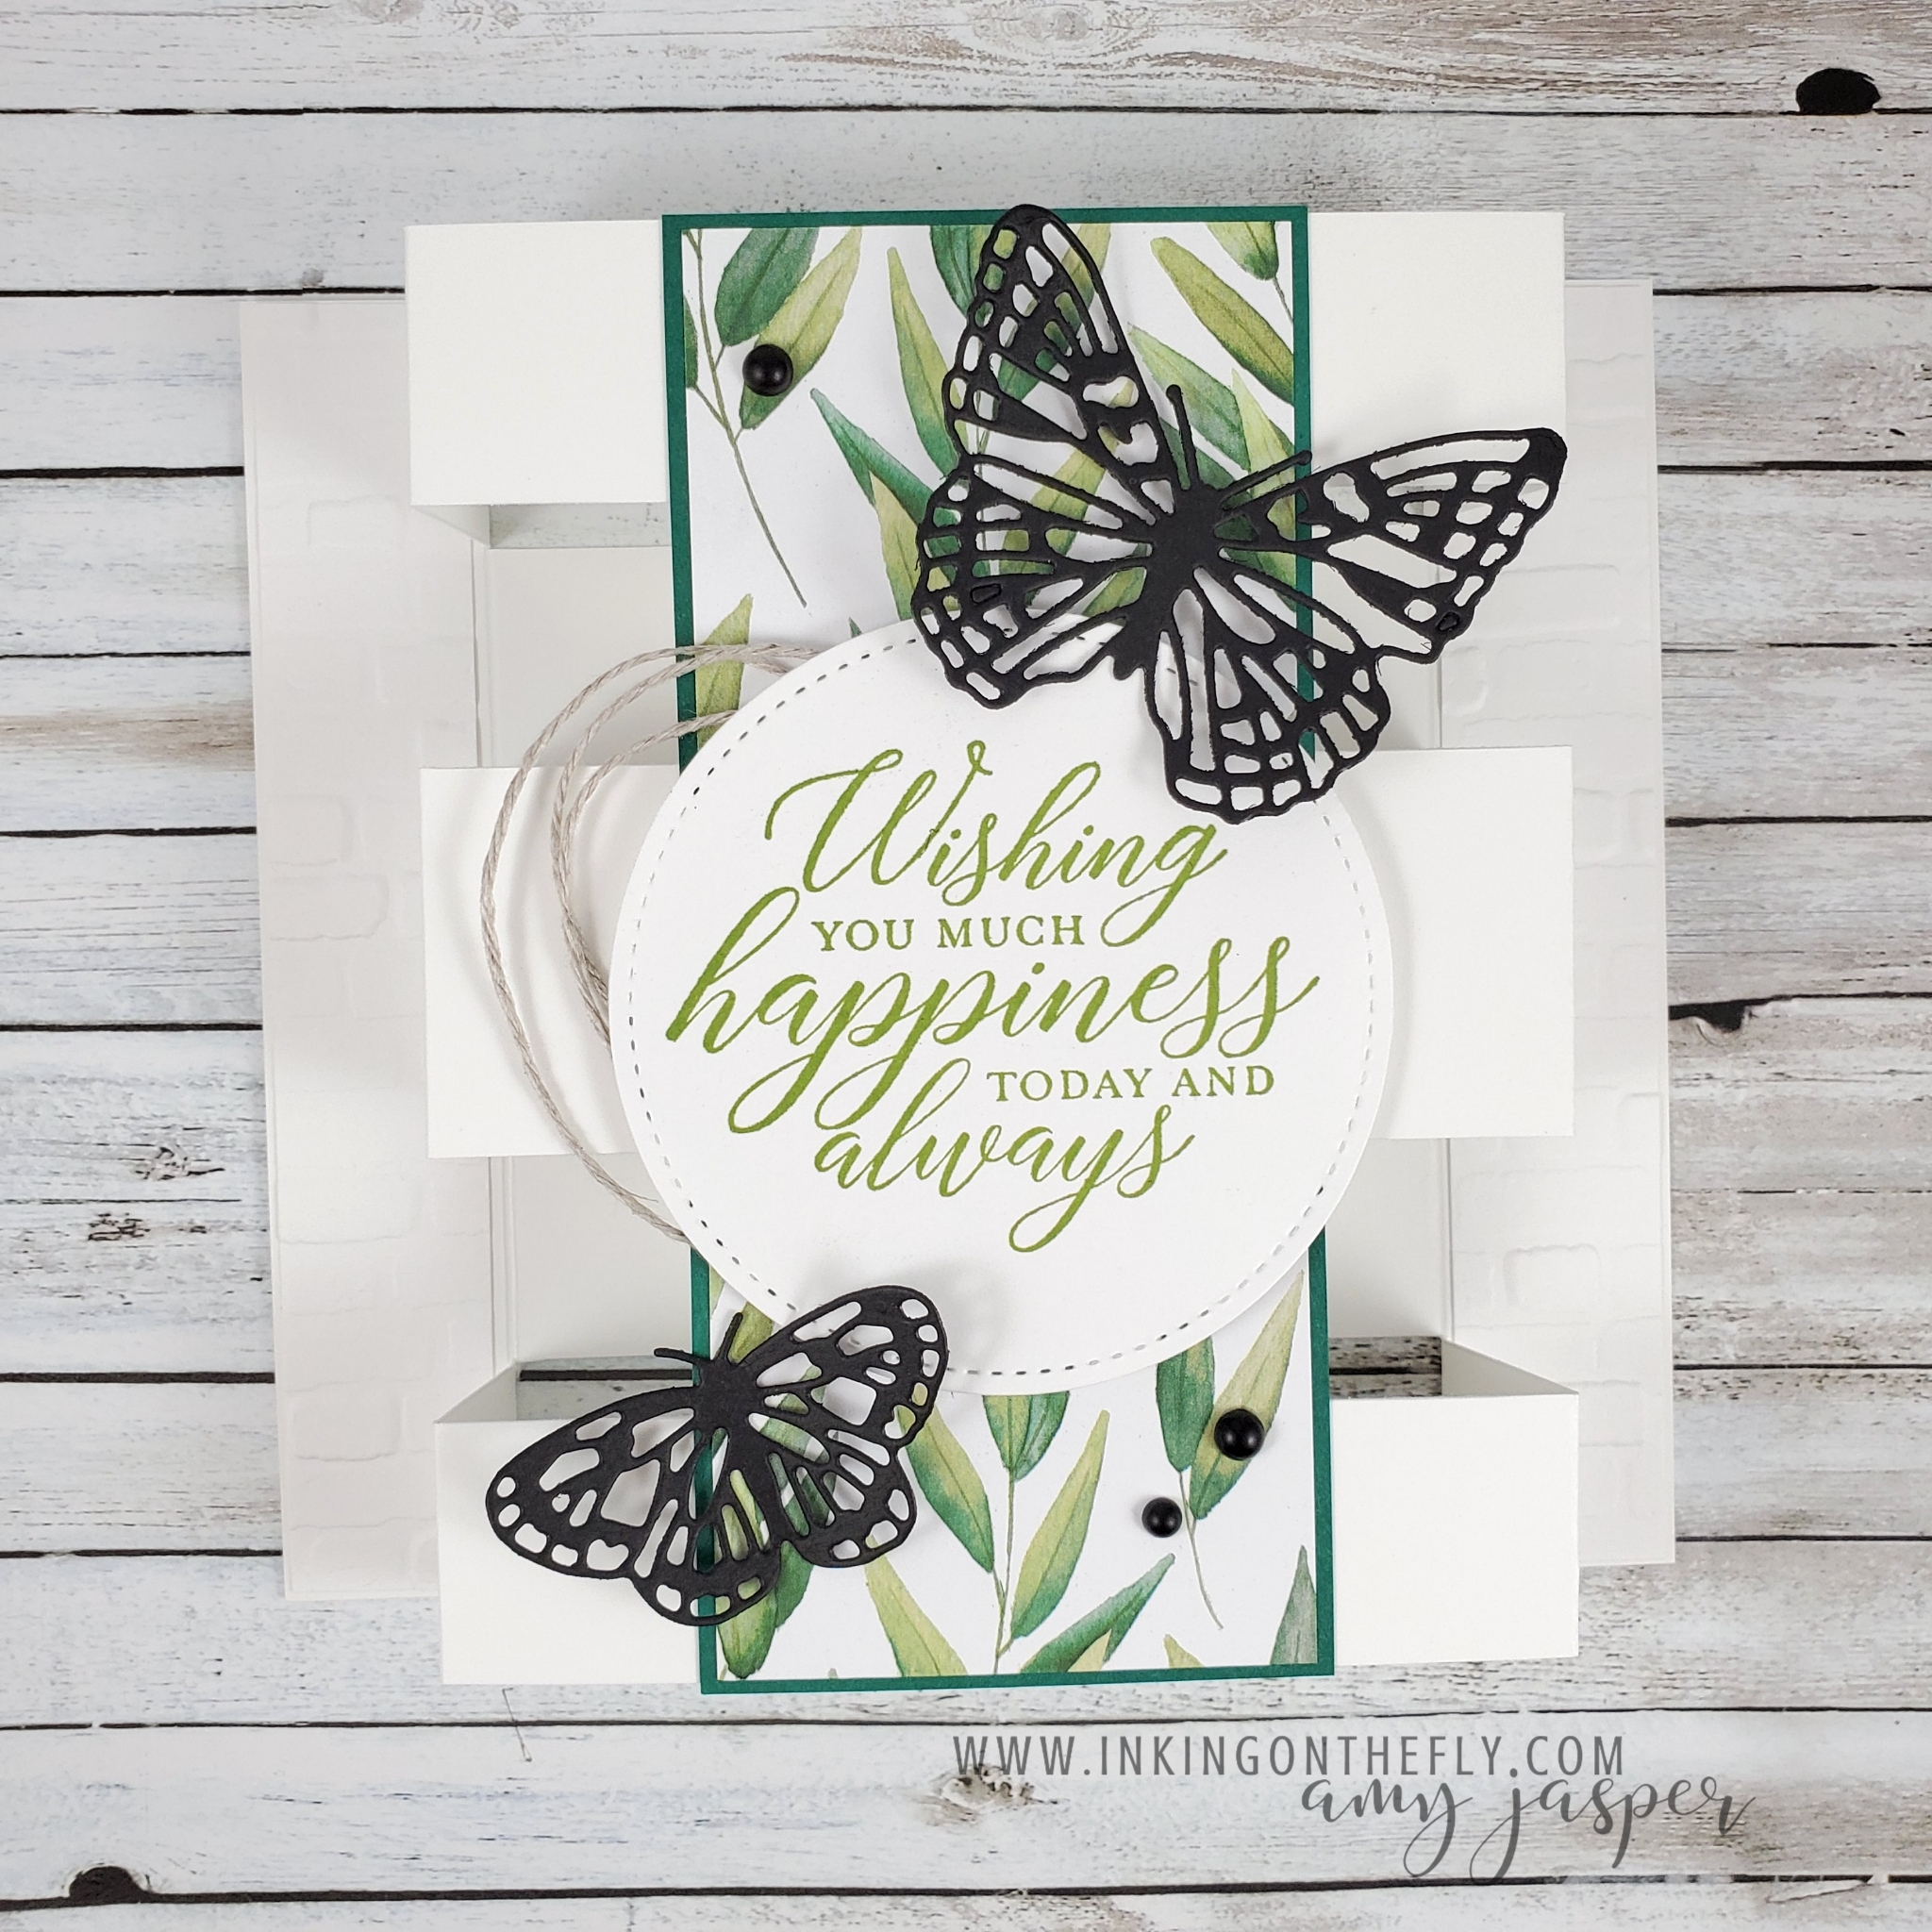
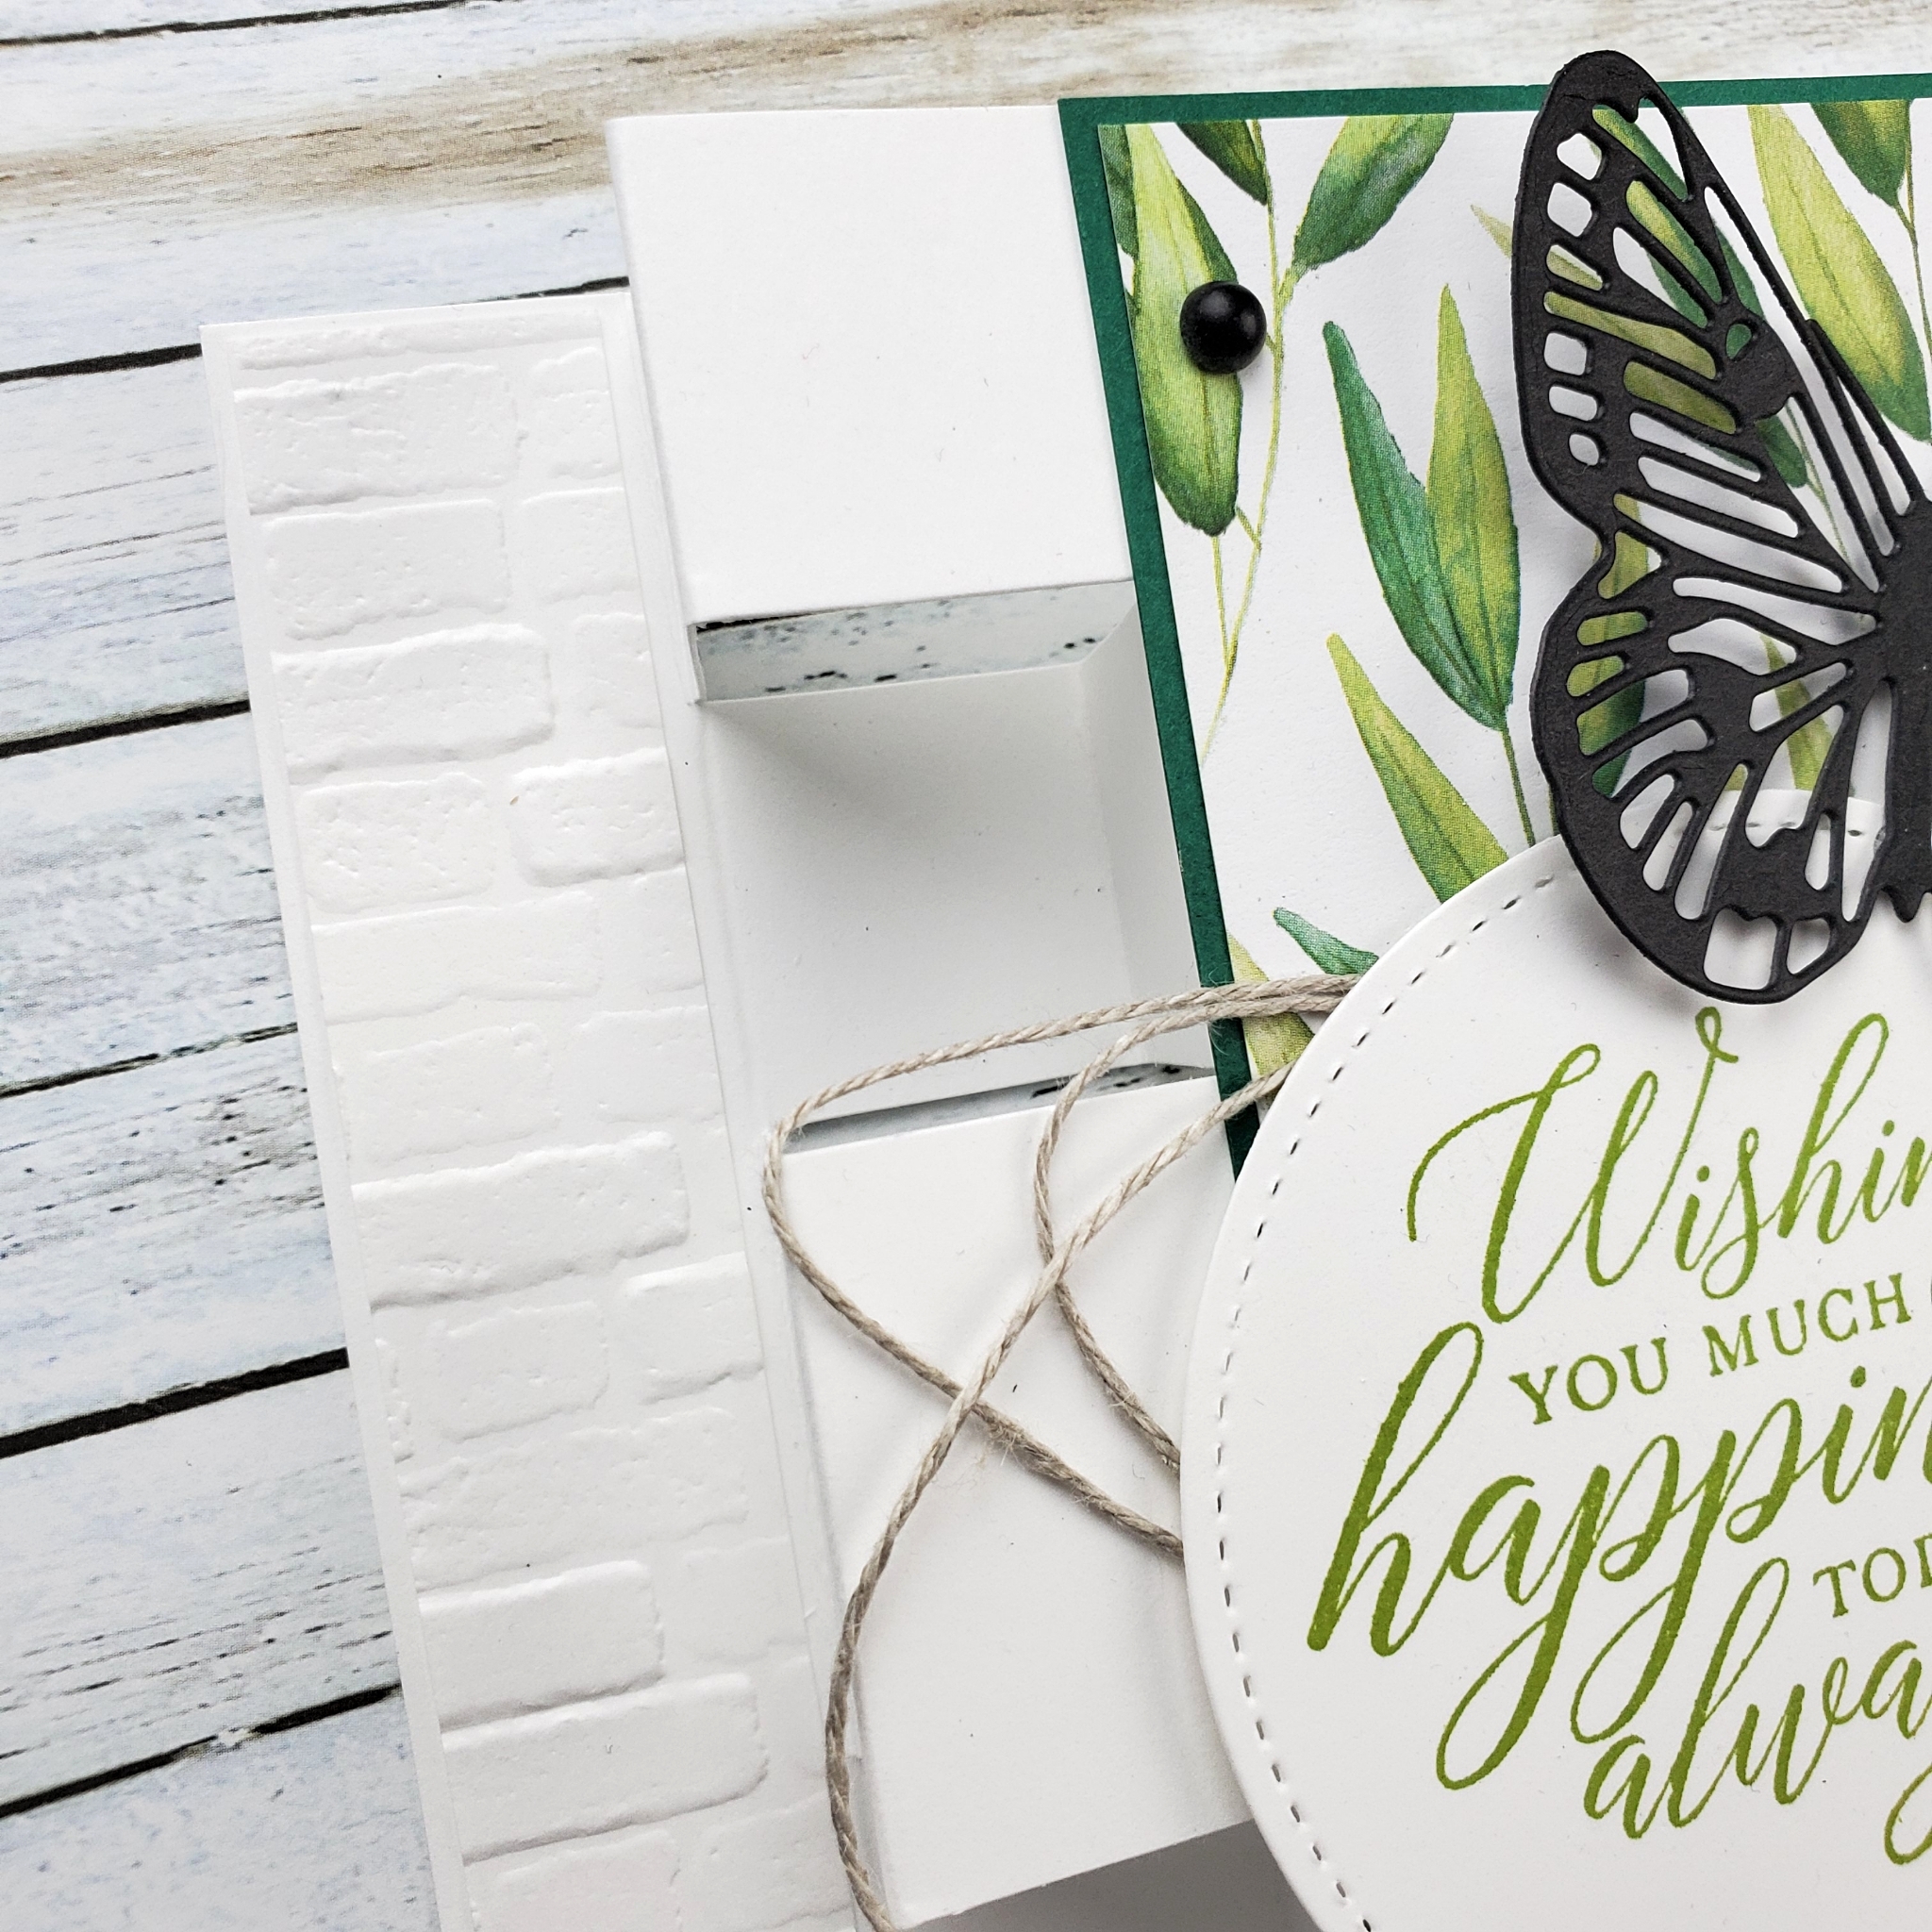
Butterfly Tower Fun Fold

The tower fun fold card design is so unique and is actually very easy to make. You just need to know where to cut and where to fold!

Thankfully, there are amazing and generous people who share their talents online! I first saw the idea shared on one of my demonstrator groups on Facebook, then was directed to the tutorial shared by Julie Davidson, who simplified the concept that she saw from someone else. I think it’s very cool how we get to learn from each other and then make it our own!

My card is one that I offered in my technique class back in March. Those who attend my monthly technique class and those who have VIP Access to the tutorials are given sole viewing privileges for two months. After their private access has come to an end, the tutorial video is available for the general public. Since I designed this project two months ago, some of the supplies used may no longer be available for purchase.

On this particular design, there are three items that are no longer available to purchase from Stampin’ Up!. You can no longer order the stitched circle die, the stamp, or the patterned paper. I recommend using the Layering Circles Dies in place of the stitched circle. The new Expressions in Ink Specialty Designer Series Paper has some beautiful greens that may be a good replacement for the greenery patterned paper that is no longer available. You can use any sentiment that will fit in the circle.

Measurements and supplies used:

  • 8 1/4″ x 5 1/2″ Thick Basic White (cut and scored as explained in the video tutorial)
  • 7/8 x 5 3/8″ Basic White (x2) embossed with the Brick & Mortar 3D Embossing Folder
  • 2 3/8 x 5 1/2″ Shaded Spruce
  • 2 1/4″ x 5 3/8″ Forever Greenery Designer Series Paper (Try it with the new Expressions in Ink paper!)
  • Basic Black die cut butterflies using the Brilliant Wings Dies
  • 3″ Basic White die-cut circle from the Stitched Shapes Dies (Try it with the Layering Circles Dies)
  • 21″ Linen Thread
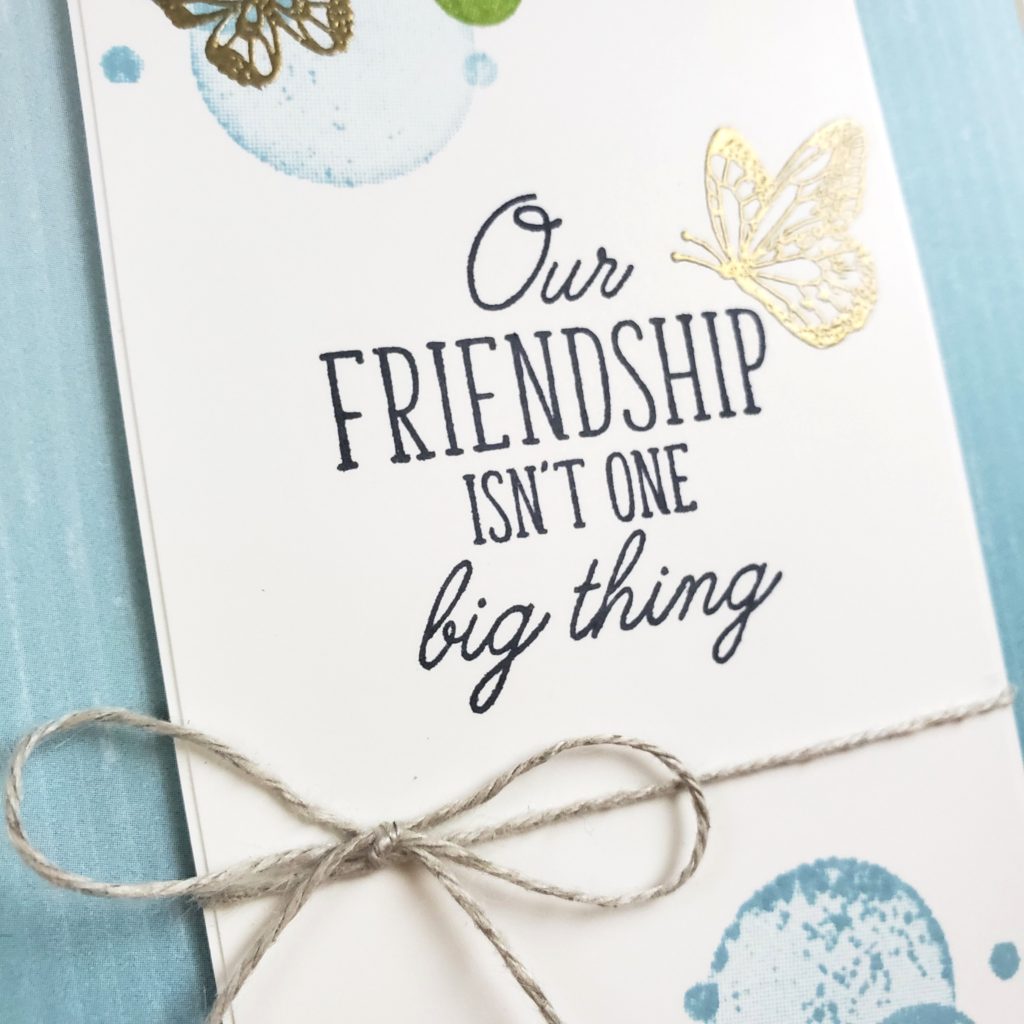
  • Granny Apple Green Ink
  • Black Matt Dots

The Beauty of Friendship

I love speed challenges! They get my creative mojo flowing AND I get a card completed lickety-split!

This card came together in my mind really easily. Let me tell you, these used to be REALLY hard for me! The more I do them, the easier they seem to be. It’s such a great creative exercise. I highly recommend you give a speed challenge a try. If you don’t know how it works, you basically think about the card you want to make. Once you have a plan, you can gather your supplies together, but you CANNOT pre-cut any of your paper or ribbon before you start the clock. When you DO start the clock, you move with confidence until your card is complete. Stop the clock and record your time!

Sometimes, the finished product is a little bit lacking, but you will ALWAYS find that your creative brain has jumped into high gear and something about the card you made has inspired you to try it another way. I love how a speed challenge gets my creative mojo flowing freely!

The As You See It Challenge this time, is a Speed Stamping Challenge with a butterfly theme! You can check out what other people created for this challenge and also share your own design with us over at the As You See It Challenge blog.

I borrowed the Beauty Abounds stamp set from a friend for this challenge because I don’t have ANY butterfly stamps! Can you believe it!!?

I stamped the sentiment on the Whisper White cardstock with Tuxedo Black Momento ink, then stamped the bokeh circles with Balmy Blue ink and Granny Apple Green ink. The butterfly images were stamped with Versamark Ink, Gold Embossing Powder was applied and heat set with my Heat Tool.

I added a second layer of Whisper White behind this piece, partly to create a stiffer layer, but also to give a subtle layered look with the white on white edges.

Linen Thread was wrapped around the white layers and tied in a bow before attaching it to the Artistry Blooms Designer Series Paper and Crumb Cake cardstock card base with Stampin’ Dimensionals.

You can check out the video of this card that only took 9 minutes and 3 seconds to make. In our busy world, even 9 minutes can feel like a long time, so I sped the video up for you! LOL! You’re welcome!


Butterfly Bliss

077header

Oh, speed challenges, how I love thee. Let me count the ways: I love you because you are quick; I love you that you push me; I love you that you’re quick; I love that I have time for you; I love that you are simple; I love that you are quick!!

My card today was designed for the As You See It Challenge Blog. The challenge is to create a card from start to finish in 10 minutes or less!! Can you do it? I’m usually just under the wire and find it very challenging. My design style is very … involved. Making a quick card is NOT my usual style at all! But I love that these challenges stretch me and force me to do something simpler. Sometimes I’m very unhappy with my final results, but today, I quite like how it turned out.

Here’s the speed challenge theme:

AYSIChallenge077-1024x1024

I decided to try working with a cute technique I saw using the Butterflies Thinlits. The card I saw was simple white cardstock, that had the butterfly cut out of it, then put back in place so that a colourful patterned paper showed through the detailing of the wings. I thought I would turn it inside out just a little bit and have the patterned paper on the topmost layer, with the solid colour showing through. Of course, if I HAVE to use purple (not my favourite for cards), I choose to use the gorgeous, rich, Blackberry Bliss!

#inkingonthefly

9:47

Blackberry Bliss is very striking along side the soft neutral tone of Sahara Sand, so I chose one of the patterned papers from the Adventure Bound Designer Series Paper Stack that has a nice tone-on-tone plaid pattern. This I stamped with the leaf image in Sahara Sand, then thoroughly rubbed my Embossing Buddy over the paper before stamping the sentiment in Versamark ink and heating the applied Black Embossing Powder with my Heat Tool.

Once all the stamping was taken care of, I grabbed my butterfly die and headed on over to my Big Shot to cut it out from the stamped patterned paper. The Blackberry Bliss Satin Ribbon is wrapped around this paper and tied in a bow, then applied to the Blackberry Bliss cardstock layer with many Stampin’ Dimensionals (thin paper that has been heated for embossing, tends to get a bit curvy and needs support). Next, half of a Stampin’ Dimensional was used to attach the cut out butterfly back into its place in the patterned paper. And, finally, all that is attached to the Sahara Sand card base.

077butterfly

Love it, love it, love it. Simple, pretty, elegant, and QUICK!! I could easily whip up a bunch of these in different colour combinations and package them up to give away as a gift. Hmm. Maybe I’ll do just that!

I hope you’ll give the speed challenge a try and share your finished result on the As You See It Challenge Blog. I’d love to see what you do with purple!

Amy

Designer-Badge