emboss resist

Emboss Resist with a Twist

What happens when something goes wrong on your card or scrapbook design? Do you start over or see if you can fix it?

My memory of an old technique saved the day and enabled me to fix a problem with gunk getting embedded in my heat-embossed image. And I love it!

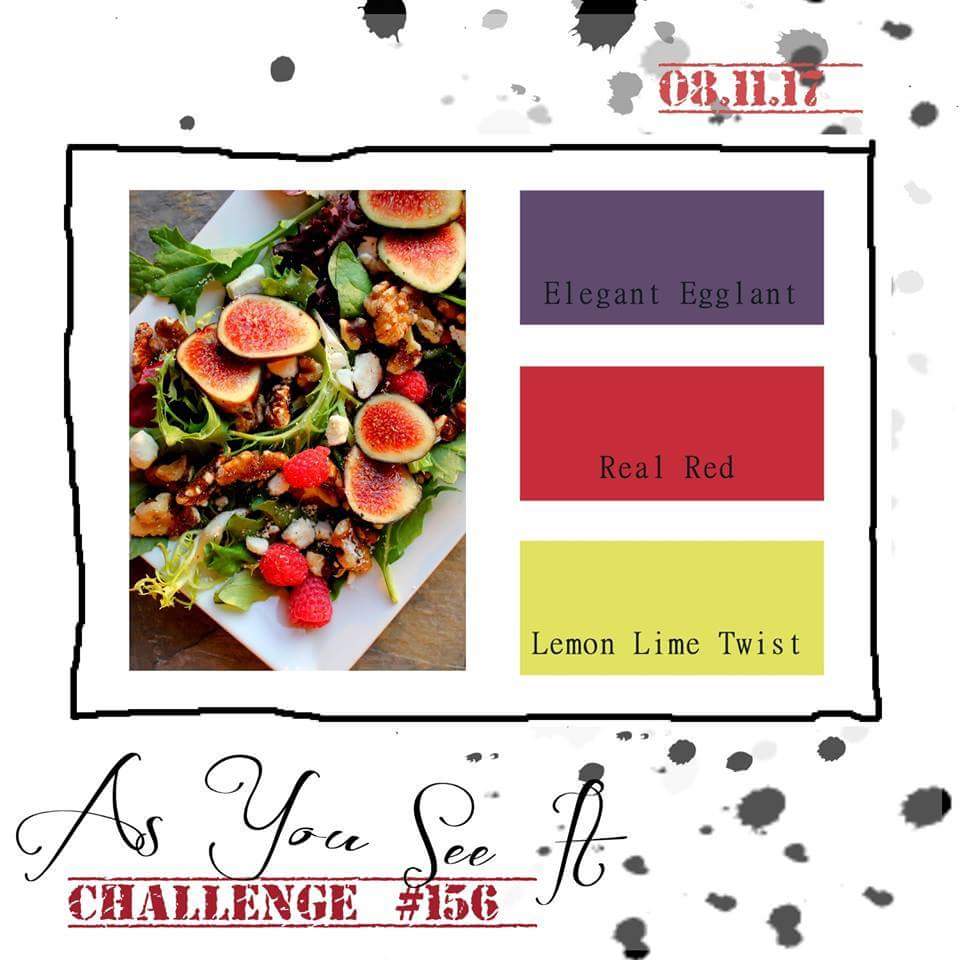
It all began with this colour challenge from the As You See It Challenge blog:

I was a little worried with the intensity of these colours, but by using the coloured ink instead of coloured cardstock, I was able to keep my design from getting too loud.

I wanted to get a jump on my holiday cards, so I went with a Christmas design using the Carols of Christmas stamp set and the Card Front Builder Thinlits.
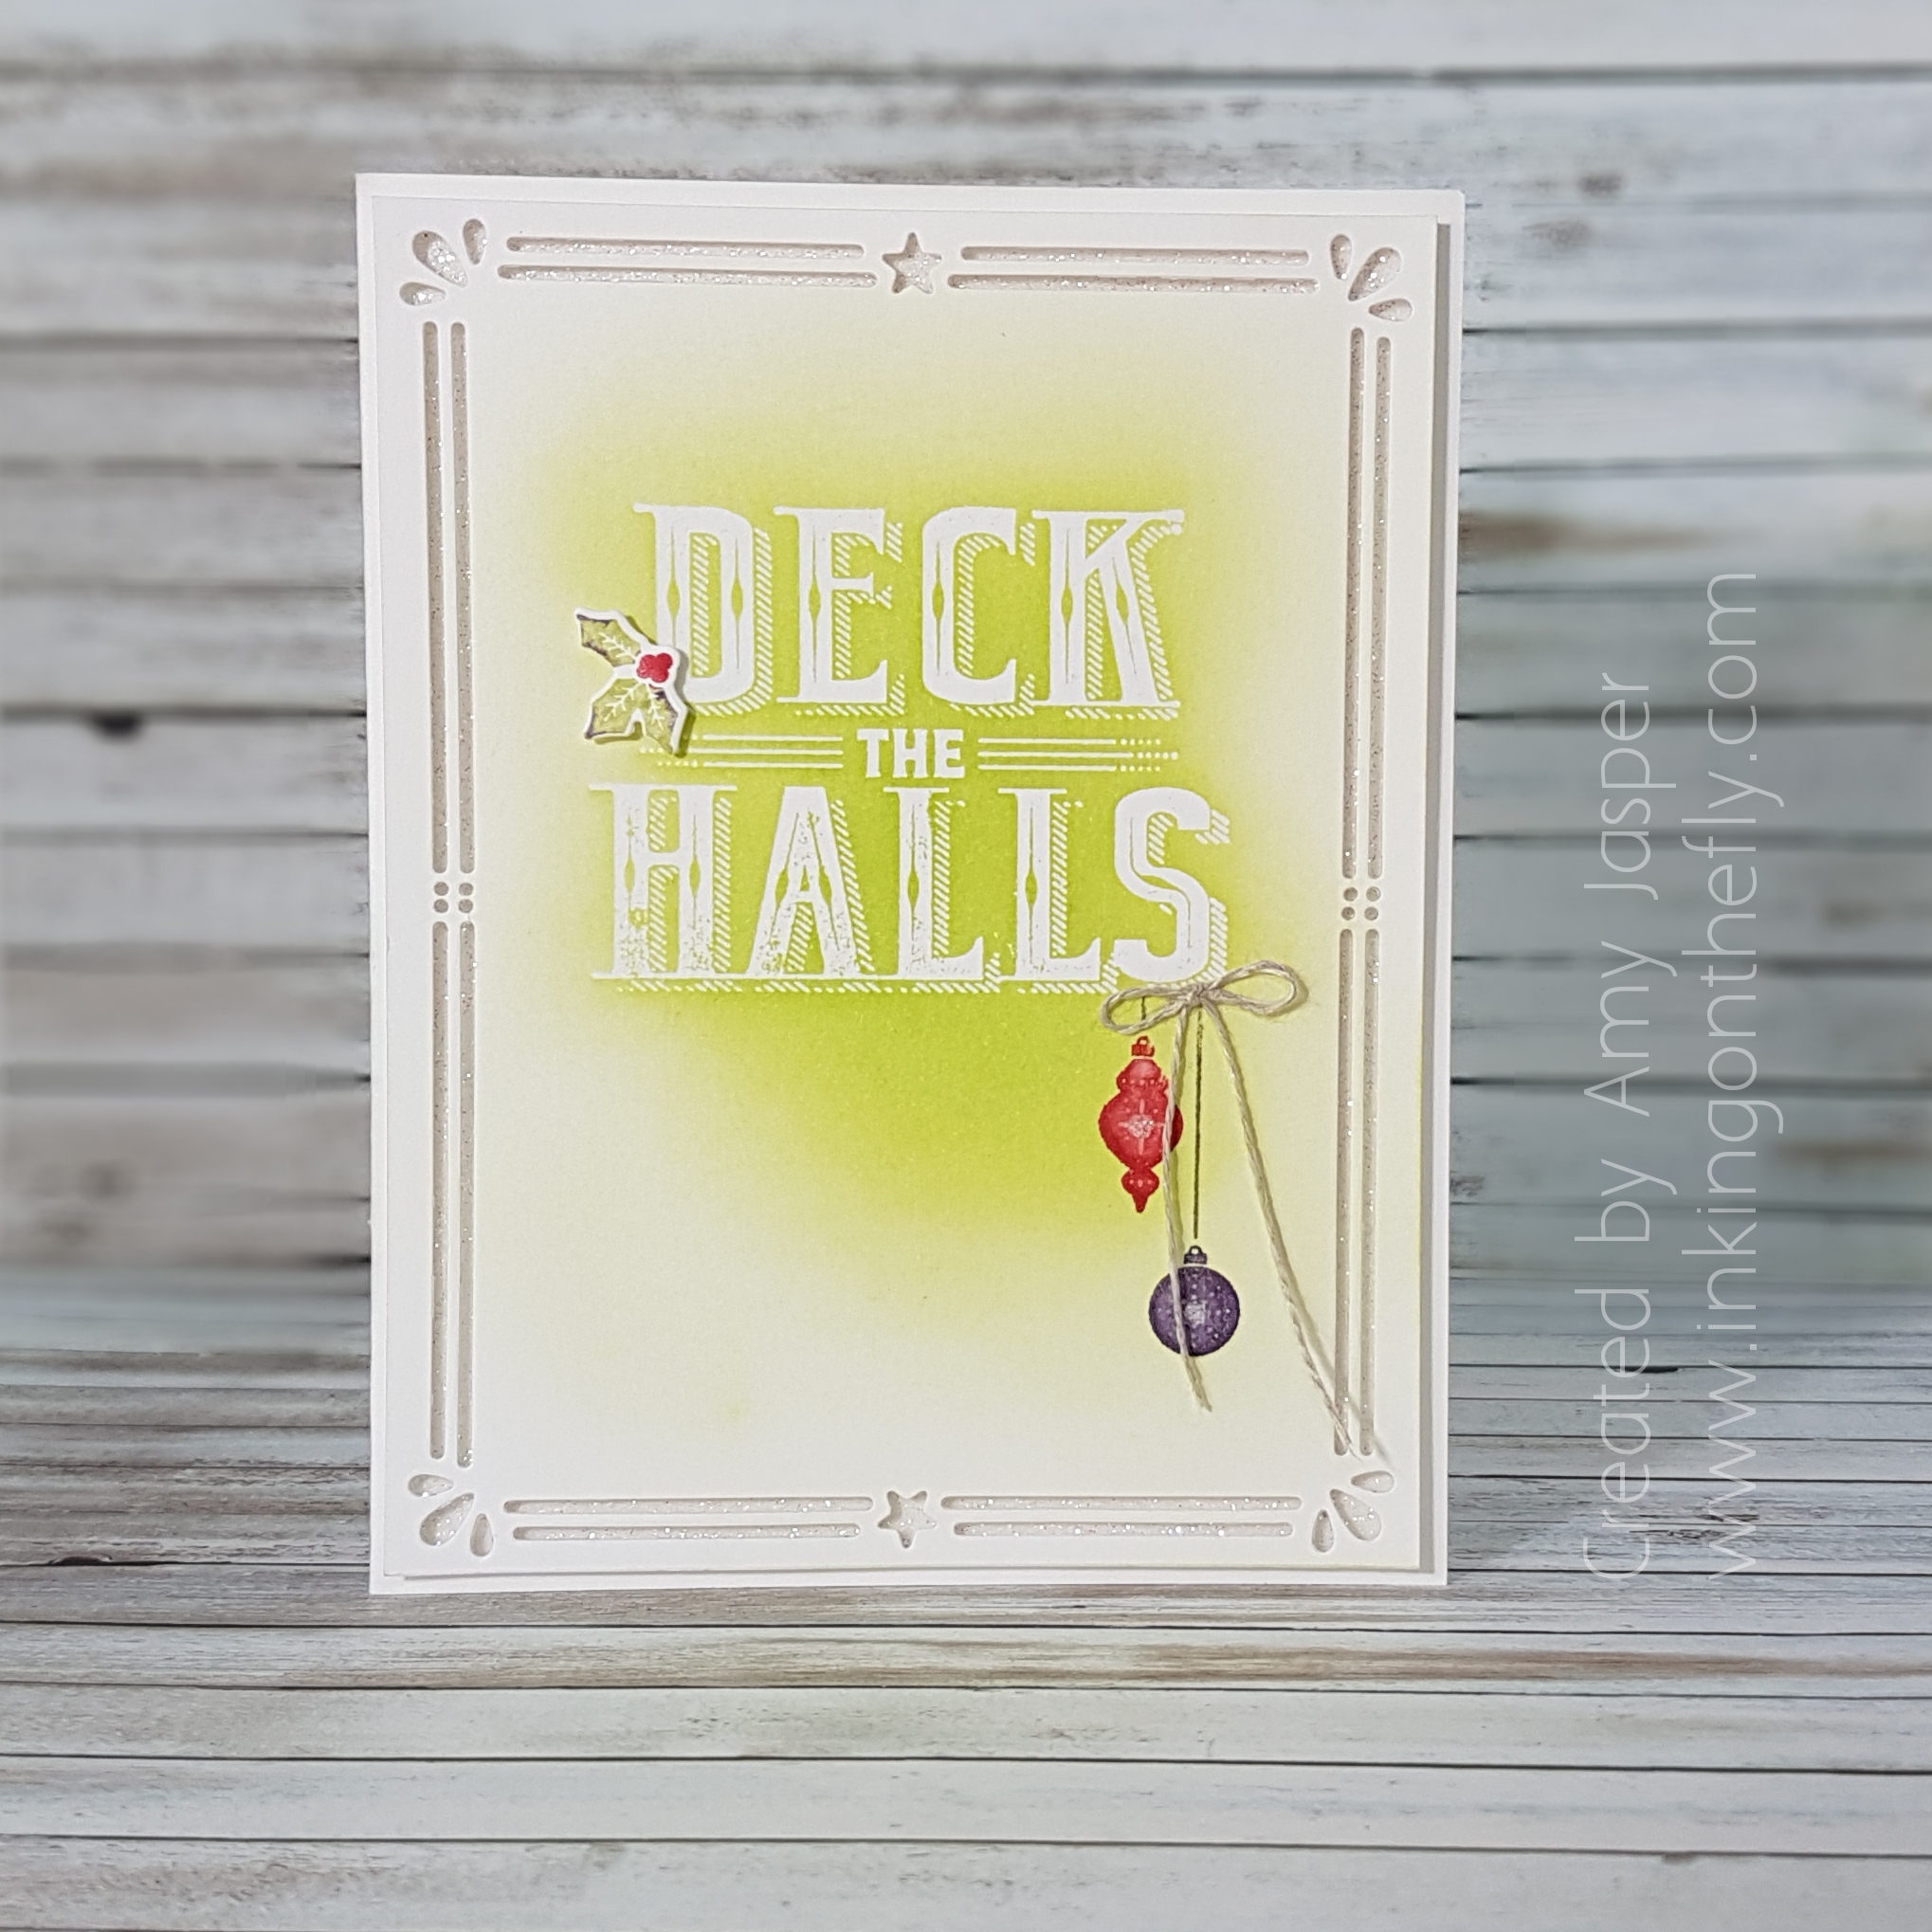
I call this technique, “Emboss Resist with a Twist” or “Emboss Resist and Wipe”. The second name definitely gives you a better understanding of what this technique involves.

The regular emboss resist technique, as you may know, is when you heat emboss an image, usually with clear embossing powder, then sponge or paint with a water-based ink over the image. The embossed area resists the ink and often it is advised to use a paper towel to polish any ink residue off of the embossed image to make it really pop. With the “Emboss Resist with a Twist” technique, you take it another step: Heat the clear embossed image and, while the embossing powder is still warm and soft from being reheated, wipe it with a paper towel to remove it from the surface of your paper!

Wait, WHAT!?

Why would you want to remove it, you ask? Once it’s removed and all the shine has been wiped clean from your cardstock, the image remaining will be more crisp, more white, and will have a beautiful matte finish.
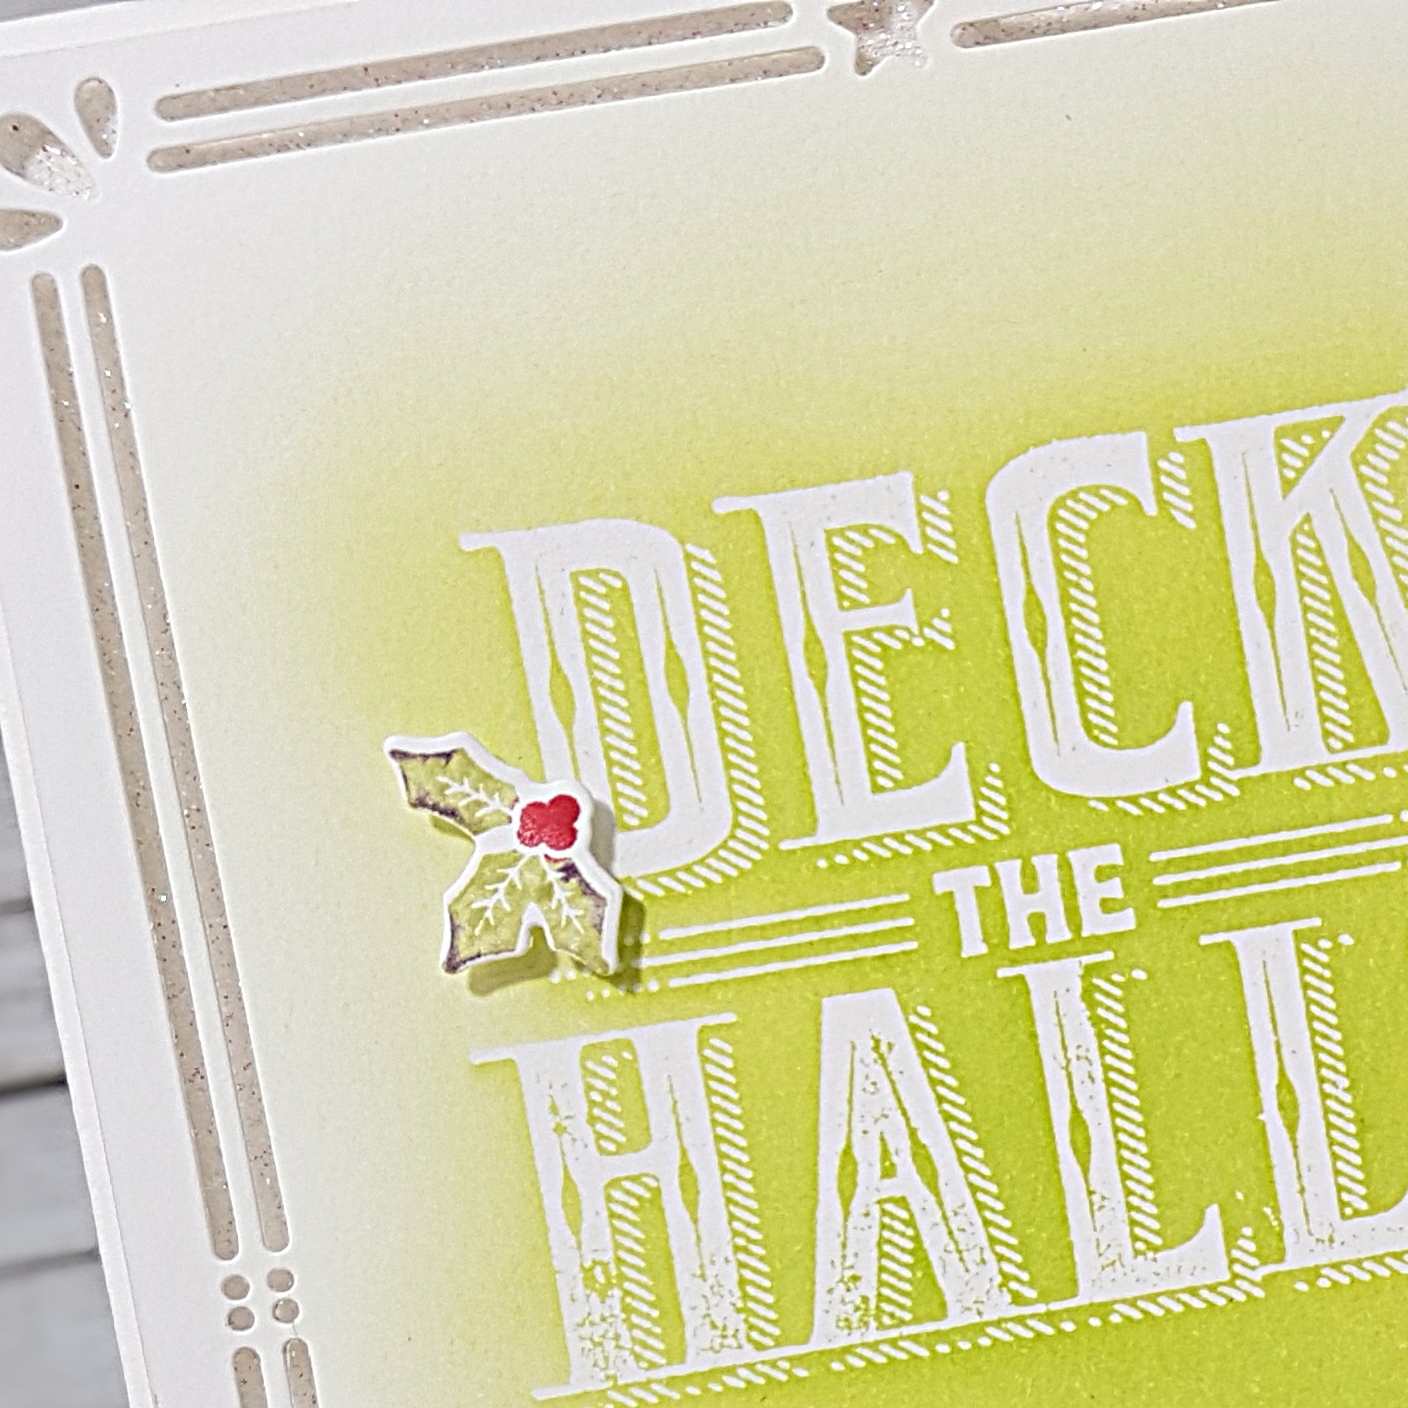
Another reason to remove it is when you make a gunky mistake, like I did! I used the regular emboss resist technique, then ran my piece of cardstock through the Big Shot to cut the beautiful border from the Card Front Builder thinlit dies. To my dismay, I discovered that my dirty embossing plates left a bunch of dark specs of old paper dust and bits embedded into my embossed image!!  EW! Heating and wiping the embossing finish away allowed me to clean up my mess without having to start over again!

I absolutely love how it looks!

The rest of the card came fairly quickly. I used my markers to ink up the rubber on my holly stamp from the Carols of Christmas stamp set so that I could have Lemon Lime Twist leaves with a spackling of Elegant Eggplant around the edges, but still have Real Red berries. After doing the old huffing-with-your-breath-on-the-stamp-to-remoisten-the-ink technique, I stamped the holly image and die cut it with the co-ordinating die from the Card Front Builder Thinlits. This was attached with half of a Mini Dimensional to my card front.
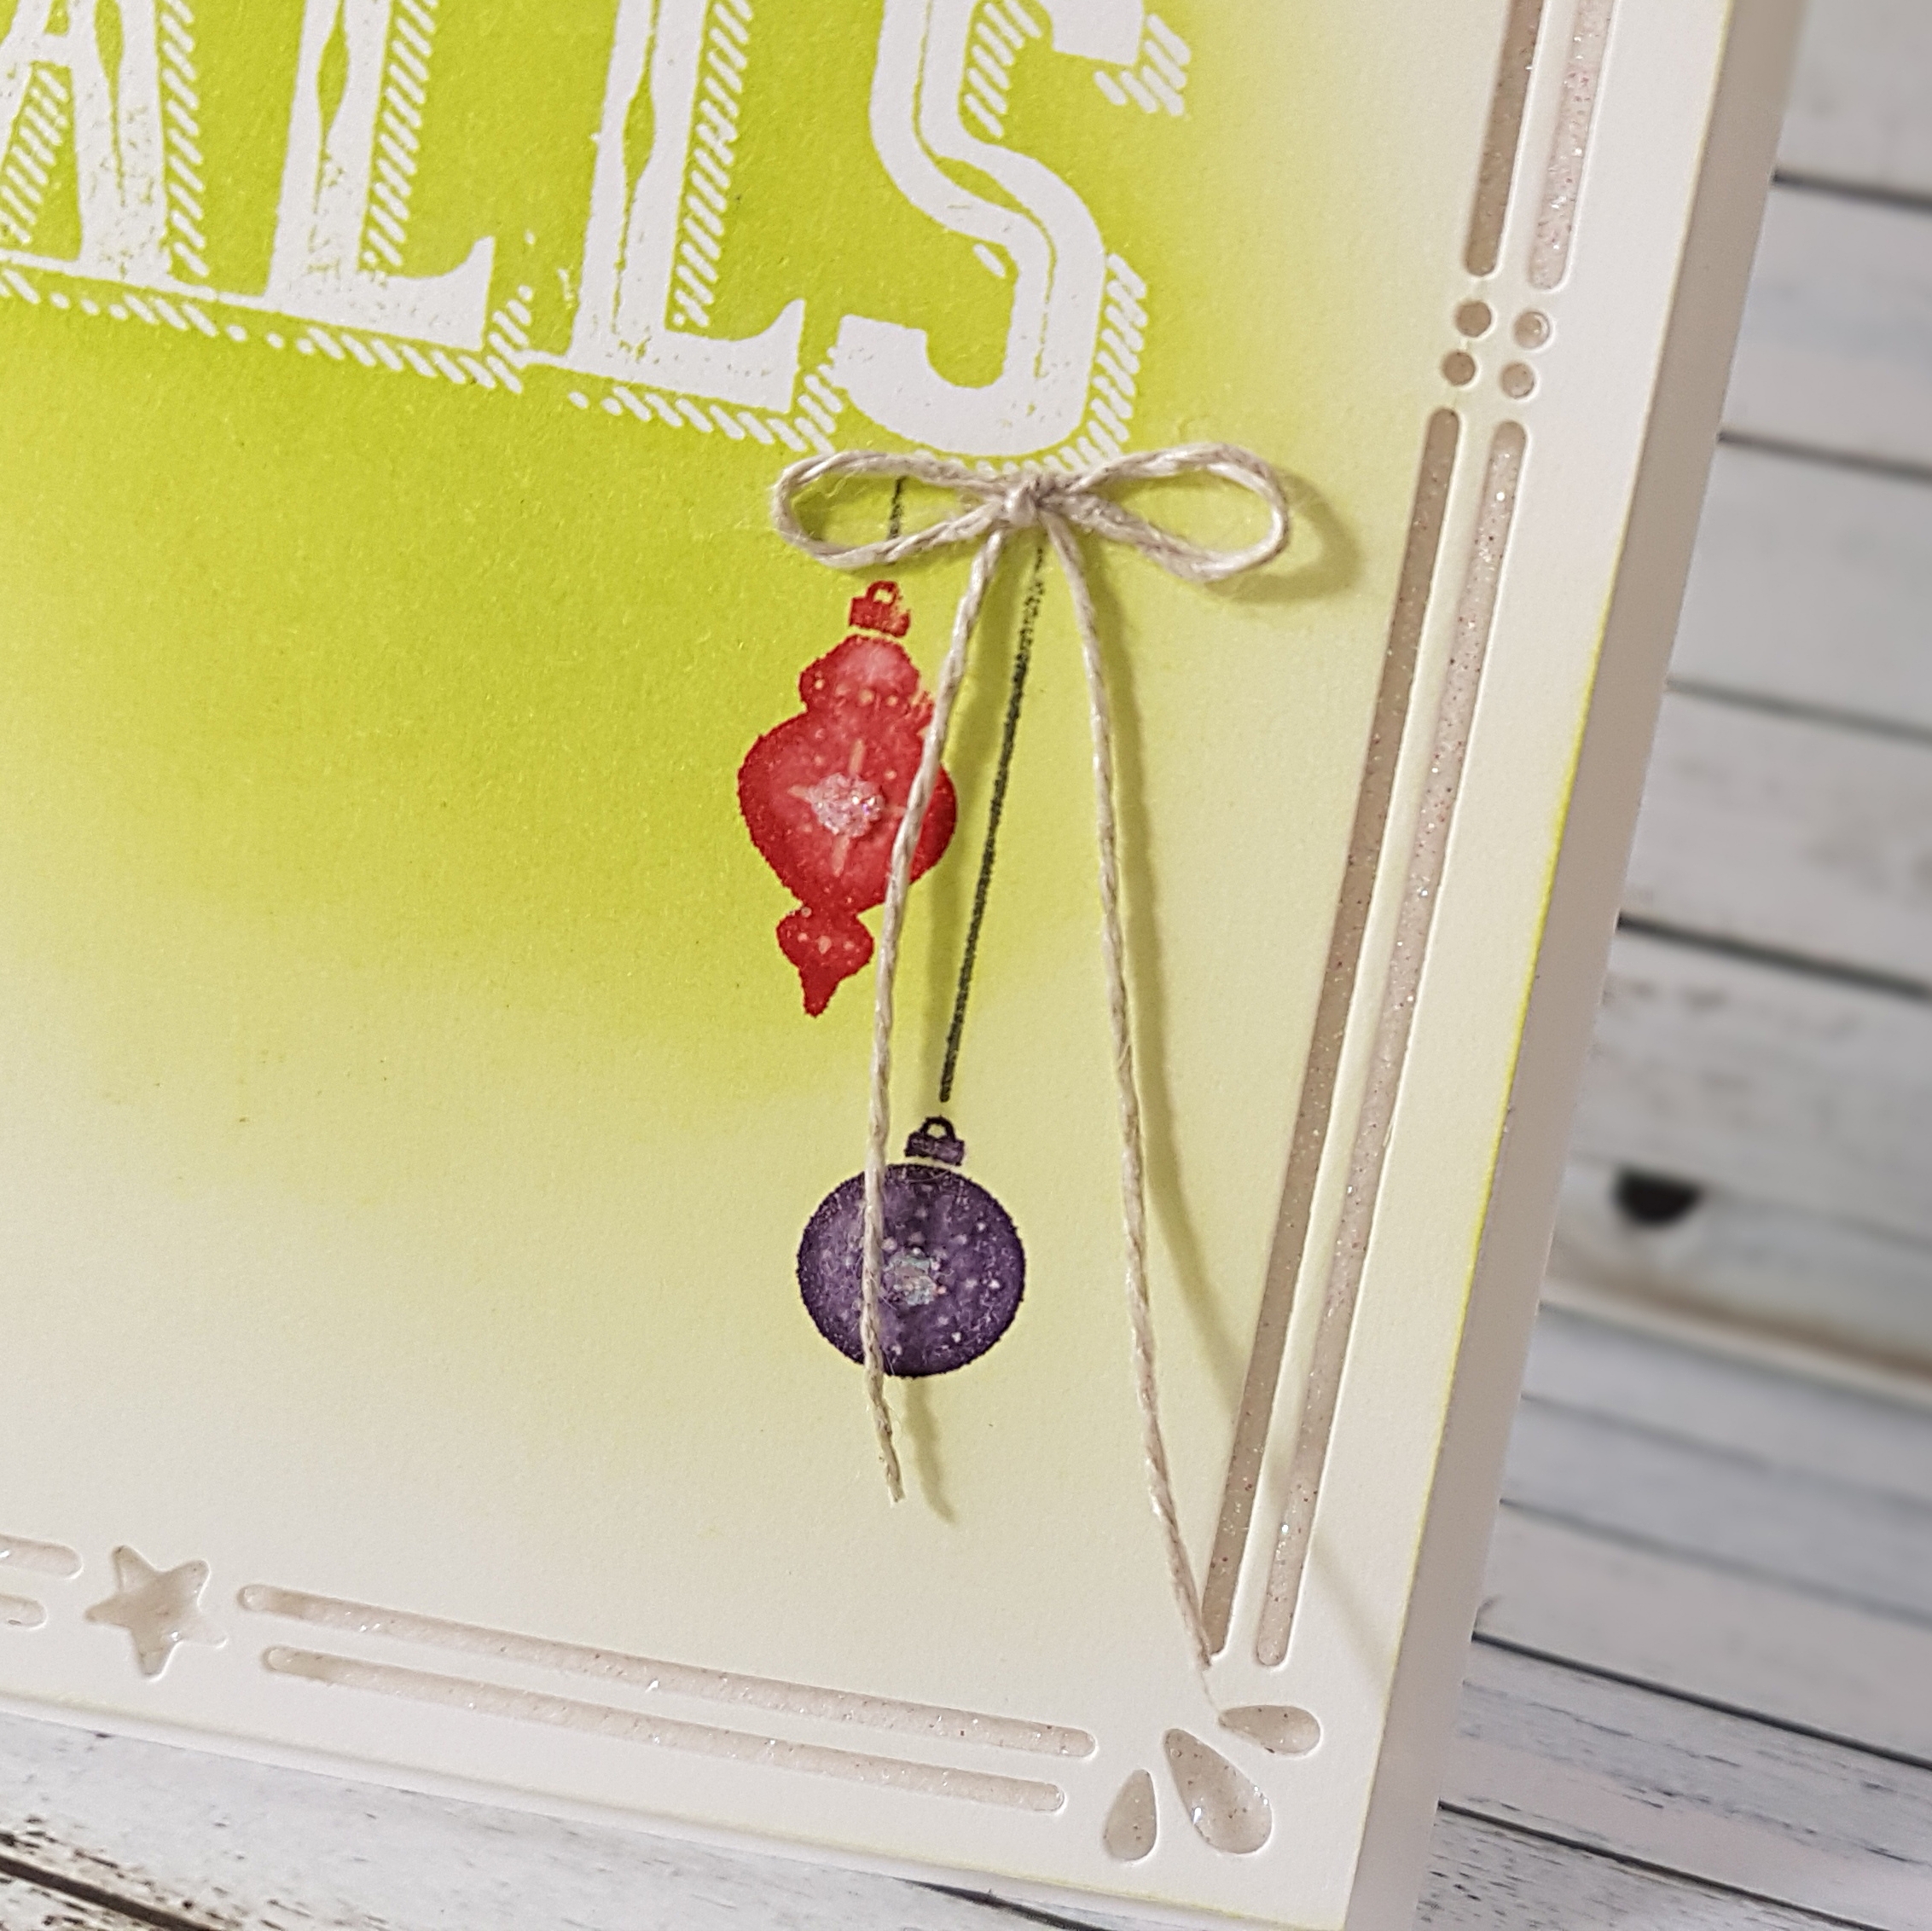
The beautiful little ornament image was also coloured with markers. I used Real Red and Elegant Eggplant to only colour two of the three ornaments, then used Basic Gray for the string of the ornament. I used a sticky note to mask the bottom of the sentiment as my stamp was too tall for where I wanted it, then I huffed once again and stamped the image. I also used a Blender Pen to blend some of the ink in the each ornament on my paper, then added a small bead glue with the Fine Tip Glue Pen to the center of each ornament to I could apply Dazzling Diamonds Glitter. The Linen Thread, tied into a tiny little bow was attached with a carefully rolled Glue Dot.

I wanted a little something-something behind my card front, so I adhered a piece of Dazzling Diamonds Glimmer paper to my card base before attaching my completed card front to it with Stampin’ Up! Dimensionals. Tip: Because of the nature of glitter, even on Glimmer Paper, I was liberal with the Dimensionals and used generous pressure to ensure good contact the the Glimmer paper. If this isn’t done, you might find that your card front detaches without your permission!
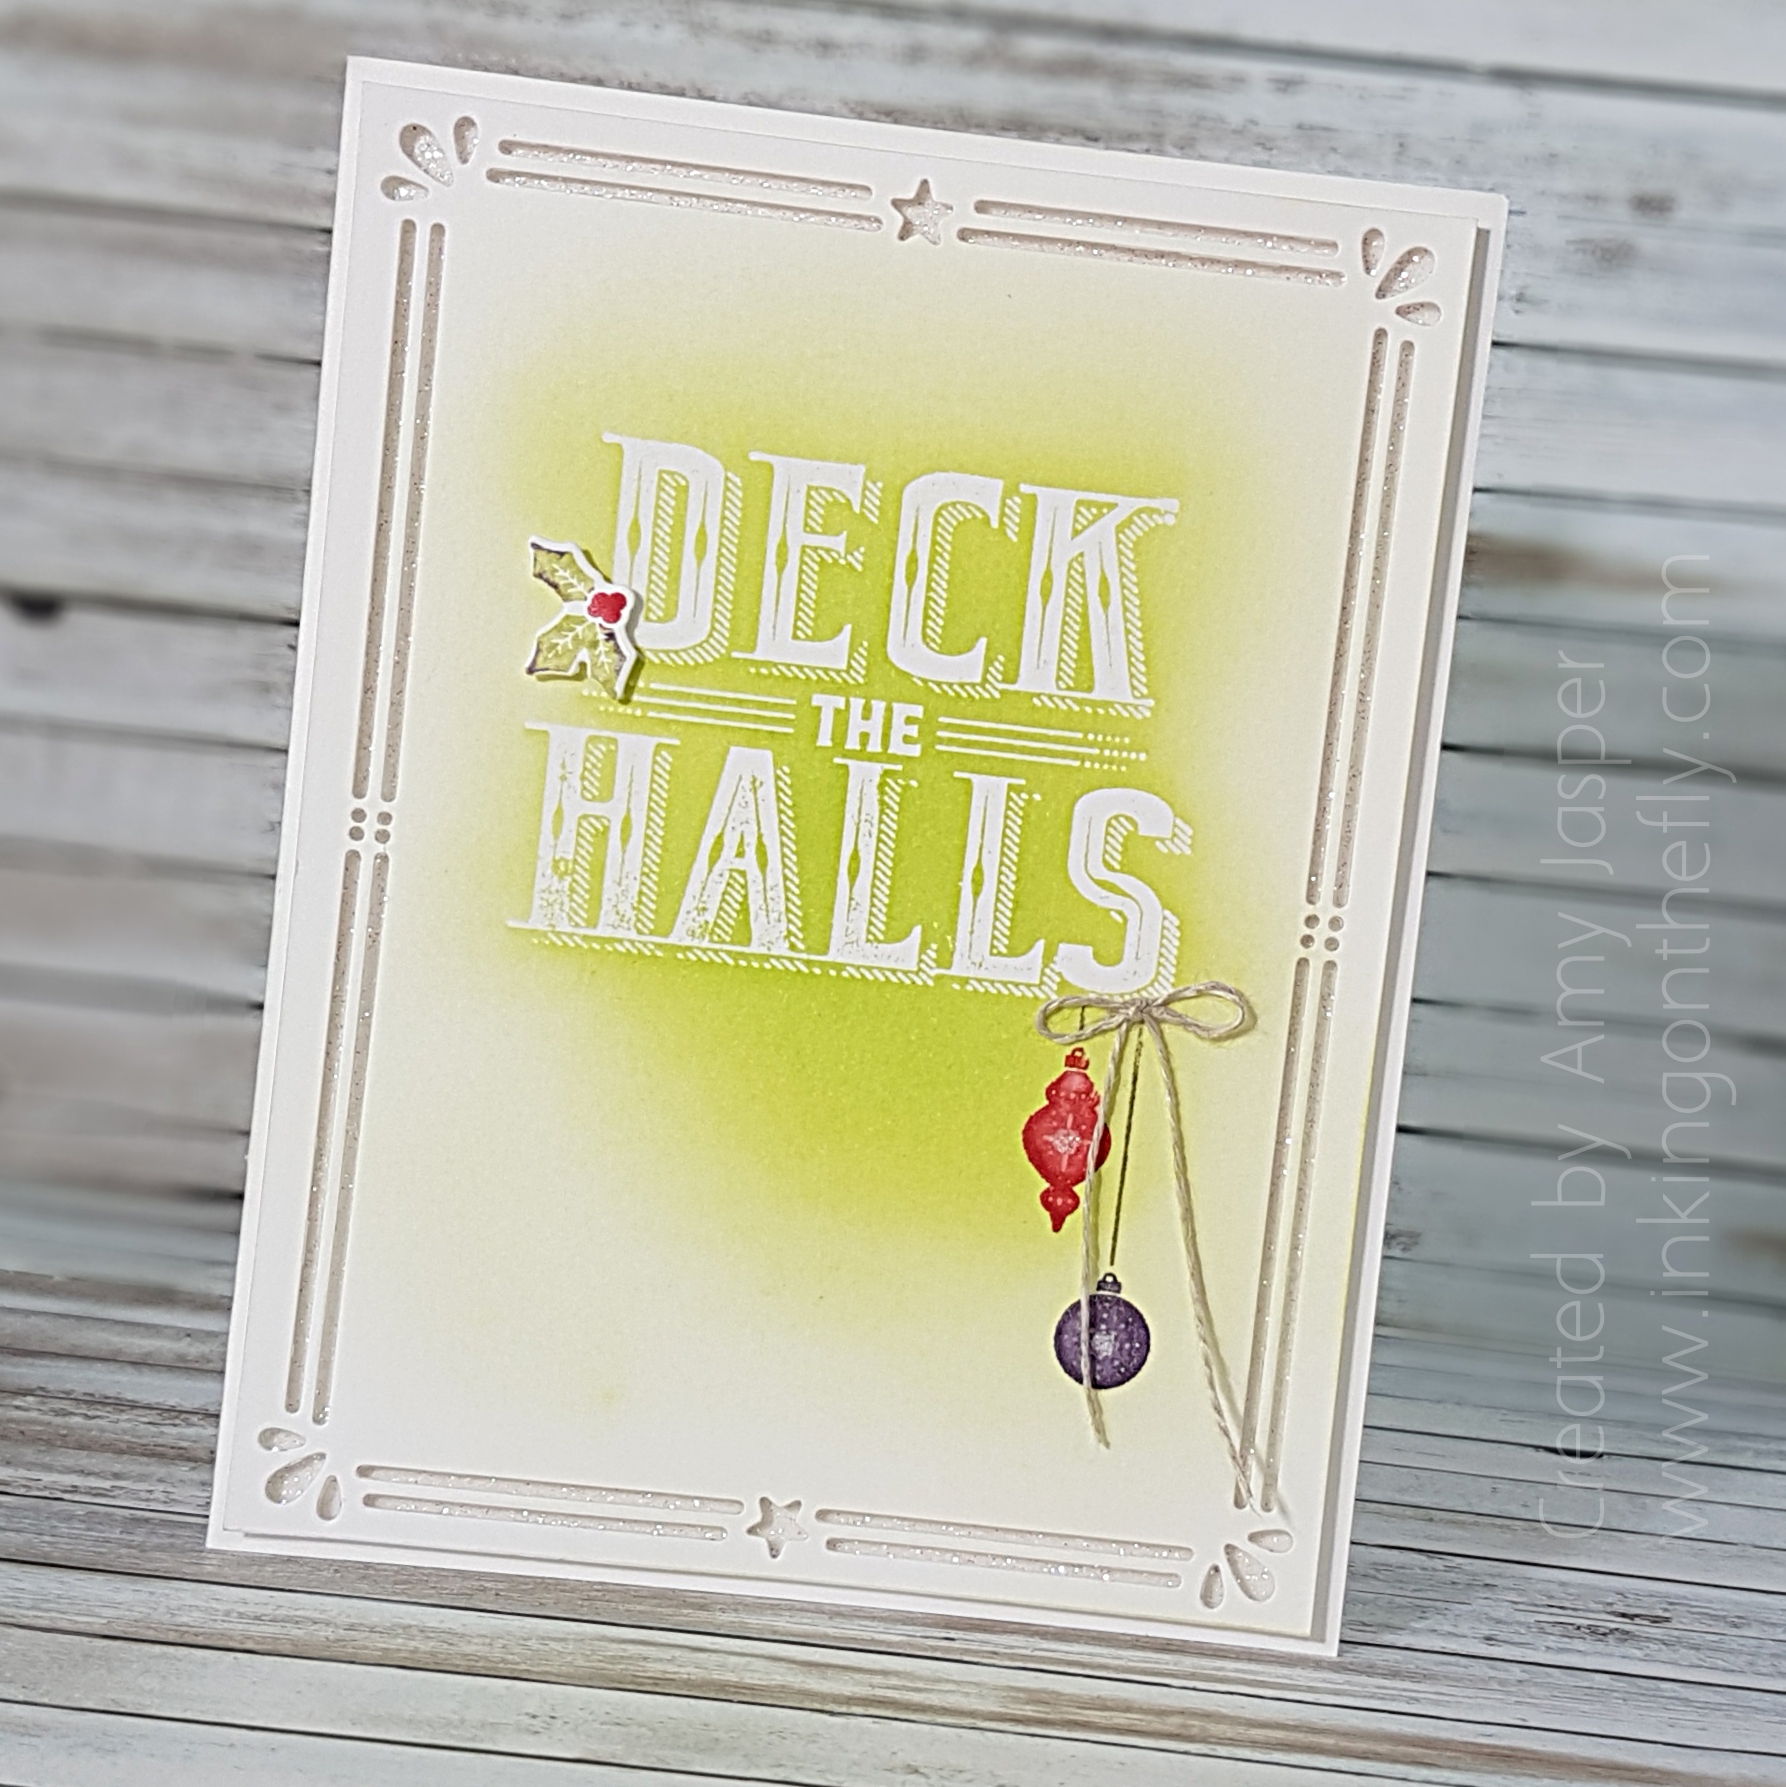
If you’re in my area, this card will be offered at my technique class. Contact me if you’d like to join us!

Be sure to give this colour combination a try and load it up on the As You See It Challenge page so we can see your beautiful creations.
 

Watercolour Carousel

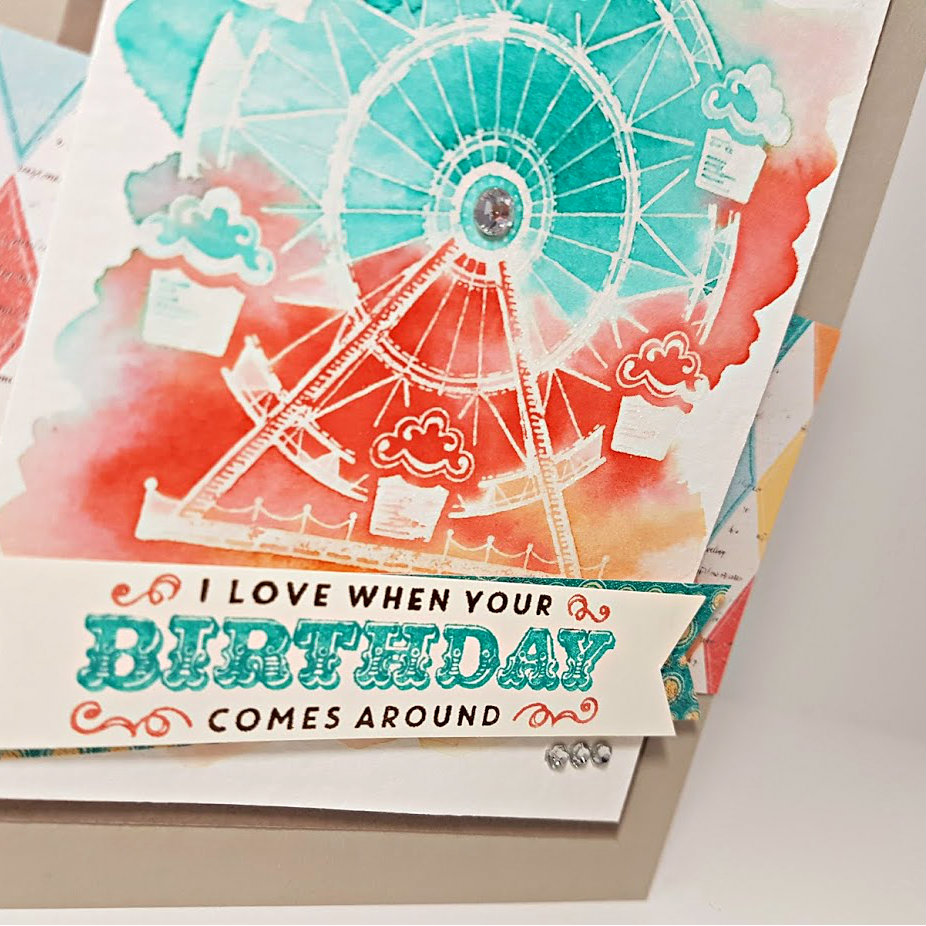
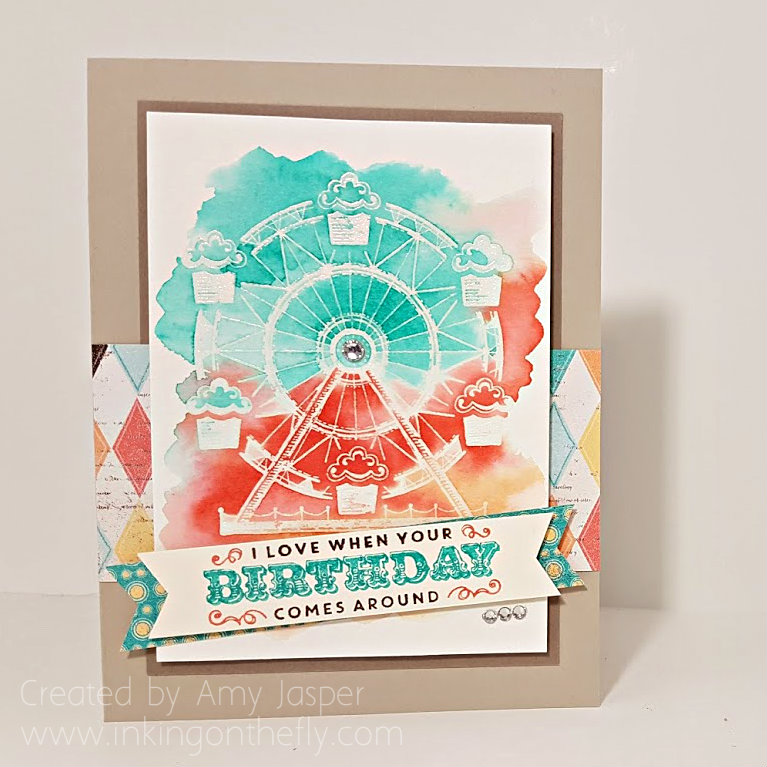
Watercolouring is such a beautiful look and can seem like a difficult venture. But it doesn’t have to be a challenge. This card is created using a simple watercolour technique combined with the emboss resist. Easy peasy!Watercolour Carousel card by Amy Jasper www.inkingonthefly.com

I started by stamping the carousel image from the Carousel Birthday stamp set with Versamark ink on Stampin Up’s Watercolor Cardstock. Then I added some clear embossing powder to the image, tapped off the excess and heat set it with my Heat Tool until the image was clear and shiny.

Next, I applied water over the image. Just clear water using my Aqua Painter for a mess-free experience. I put the water only where I wanted my colour and applied it quite liberally to get the watercolour cardstock good and wet!

The inks came next: First I picked up some Bermuda Bay with my Aqua Painter and applied it to the top most section of my wet cardstock. I didn’t have to move the ink around very much as the water I had applied first did most of the work for me. I cleaned off my brush and picked up some Calypso Coral ink and applied it to the middle section of the area being careful to avoid having it touch the Bermuda Bay too much (that would just get muddy looking and nobody likes a muddy fairground!). Lastly, I cleaned off my brush again and used it to apply some Peek-a-boo Peach ink to the lower portion of my watered cardstock. To get the best colour saturation, I made sure that I used a drop of Ink Refill in the lid of each of these colours. This allowed me to pick up a nicely concentrated amount of ink on my Aqua Painter brush.

watercolour carousel card by Amy Jasper www.inkingonthefly.comWhen I was happy with my colours, I set that aside to dry and continued with the rest of the card. The image doesn’t end up coloured with the rest of the paper because the embossing repells the ink, not allowing it to saturate those areas of the watercolour cardstock.

Sahara Sand cardstock was used for the card base, then a layer of Tip Top Taupe. The patterned paper used is from the Cupcakes and Carousels Designer Series Paper Stack from Stampin’ Up. I used one larger strip across the front of the card and another smaller strip as an accent behind the Very Vanilla banner. The sentiment, also from the Carousel Birthday stamp set, was inked using my Stampin’ Up Markers (Bermuda Bay, Early Espresso, and Calypso Coral), on which I “huffed” with my breath to re-moisten the ink before stamping it on the Very Vanilla cardstock.

When my watercoloured image was dry, I could add it as my next layer using Stampin’ Up Dimensionals. The banner ends were hand cut with my Paper Snips; the patterned paper banner adhered directly, while the Very Vanilla banner with the sentiment was adhered using Stampin’ Up Dimensionals.

Almost done! It just needed some bling, so I added a strip of three Basic Rhinestones just below the right side of the banner and one single larger Basic Rhinestone to the center of the carousel image.

watercolour carousel card by Amy Jasper www.inkingonthefly.comI hope you like it. I sure do! It’s sooo pretty!

Be sure to leave me a hello and let me know if you’ve tried this watercolouring technique before and how it worked out for you.

Save

Save

Save

Soaring Birthday

It’s FRIDAAAAAY!!!

Today, I get to share with you one of the new Sale-a-bration stamp sets that are only available for a short time. This one is particularly great for masculine cards, but is also suitable to congratulate anyone who reached a goal in their lives.

As usual, my Friday blog post starts with a challenge from the As You See It Challenge blog for which I am a designer. I love being part of this design team because of the weekly push to create from a different angle than I’m used to. You’d think it gets easier as I go along (and it does come easily sometimes), but it can be like pulling teeth when I get stuck trying so hard to fit in a particular element required by the challenge.

This week we have a sketch. These are often the hardest for me, I think. However, some of my best cards start with a sketch.

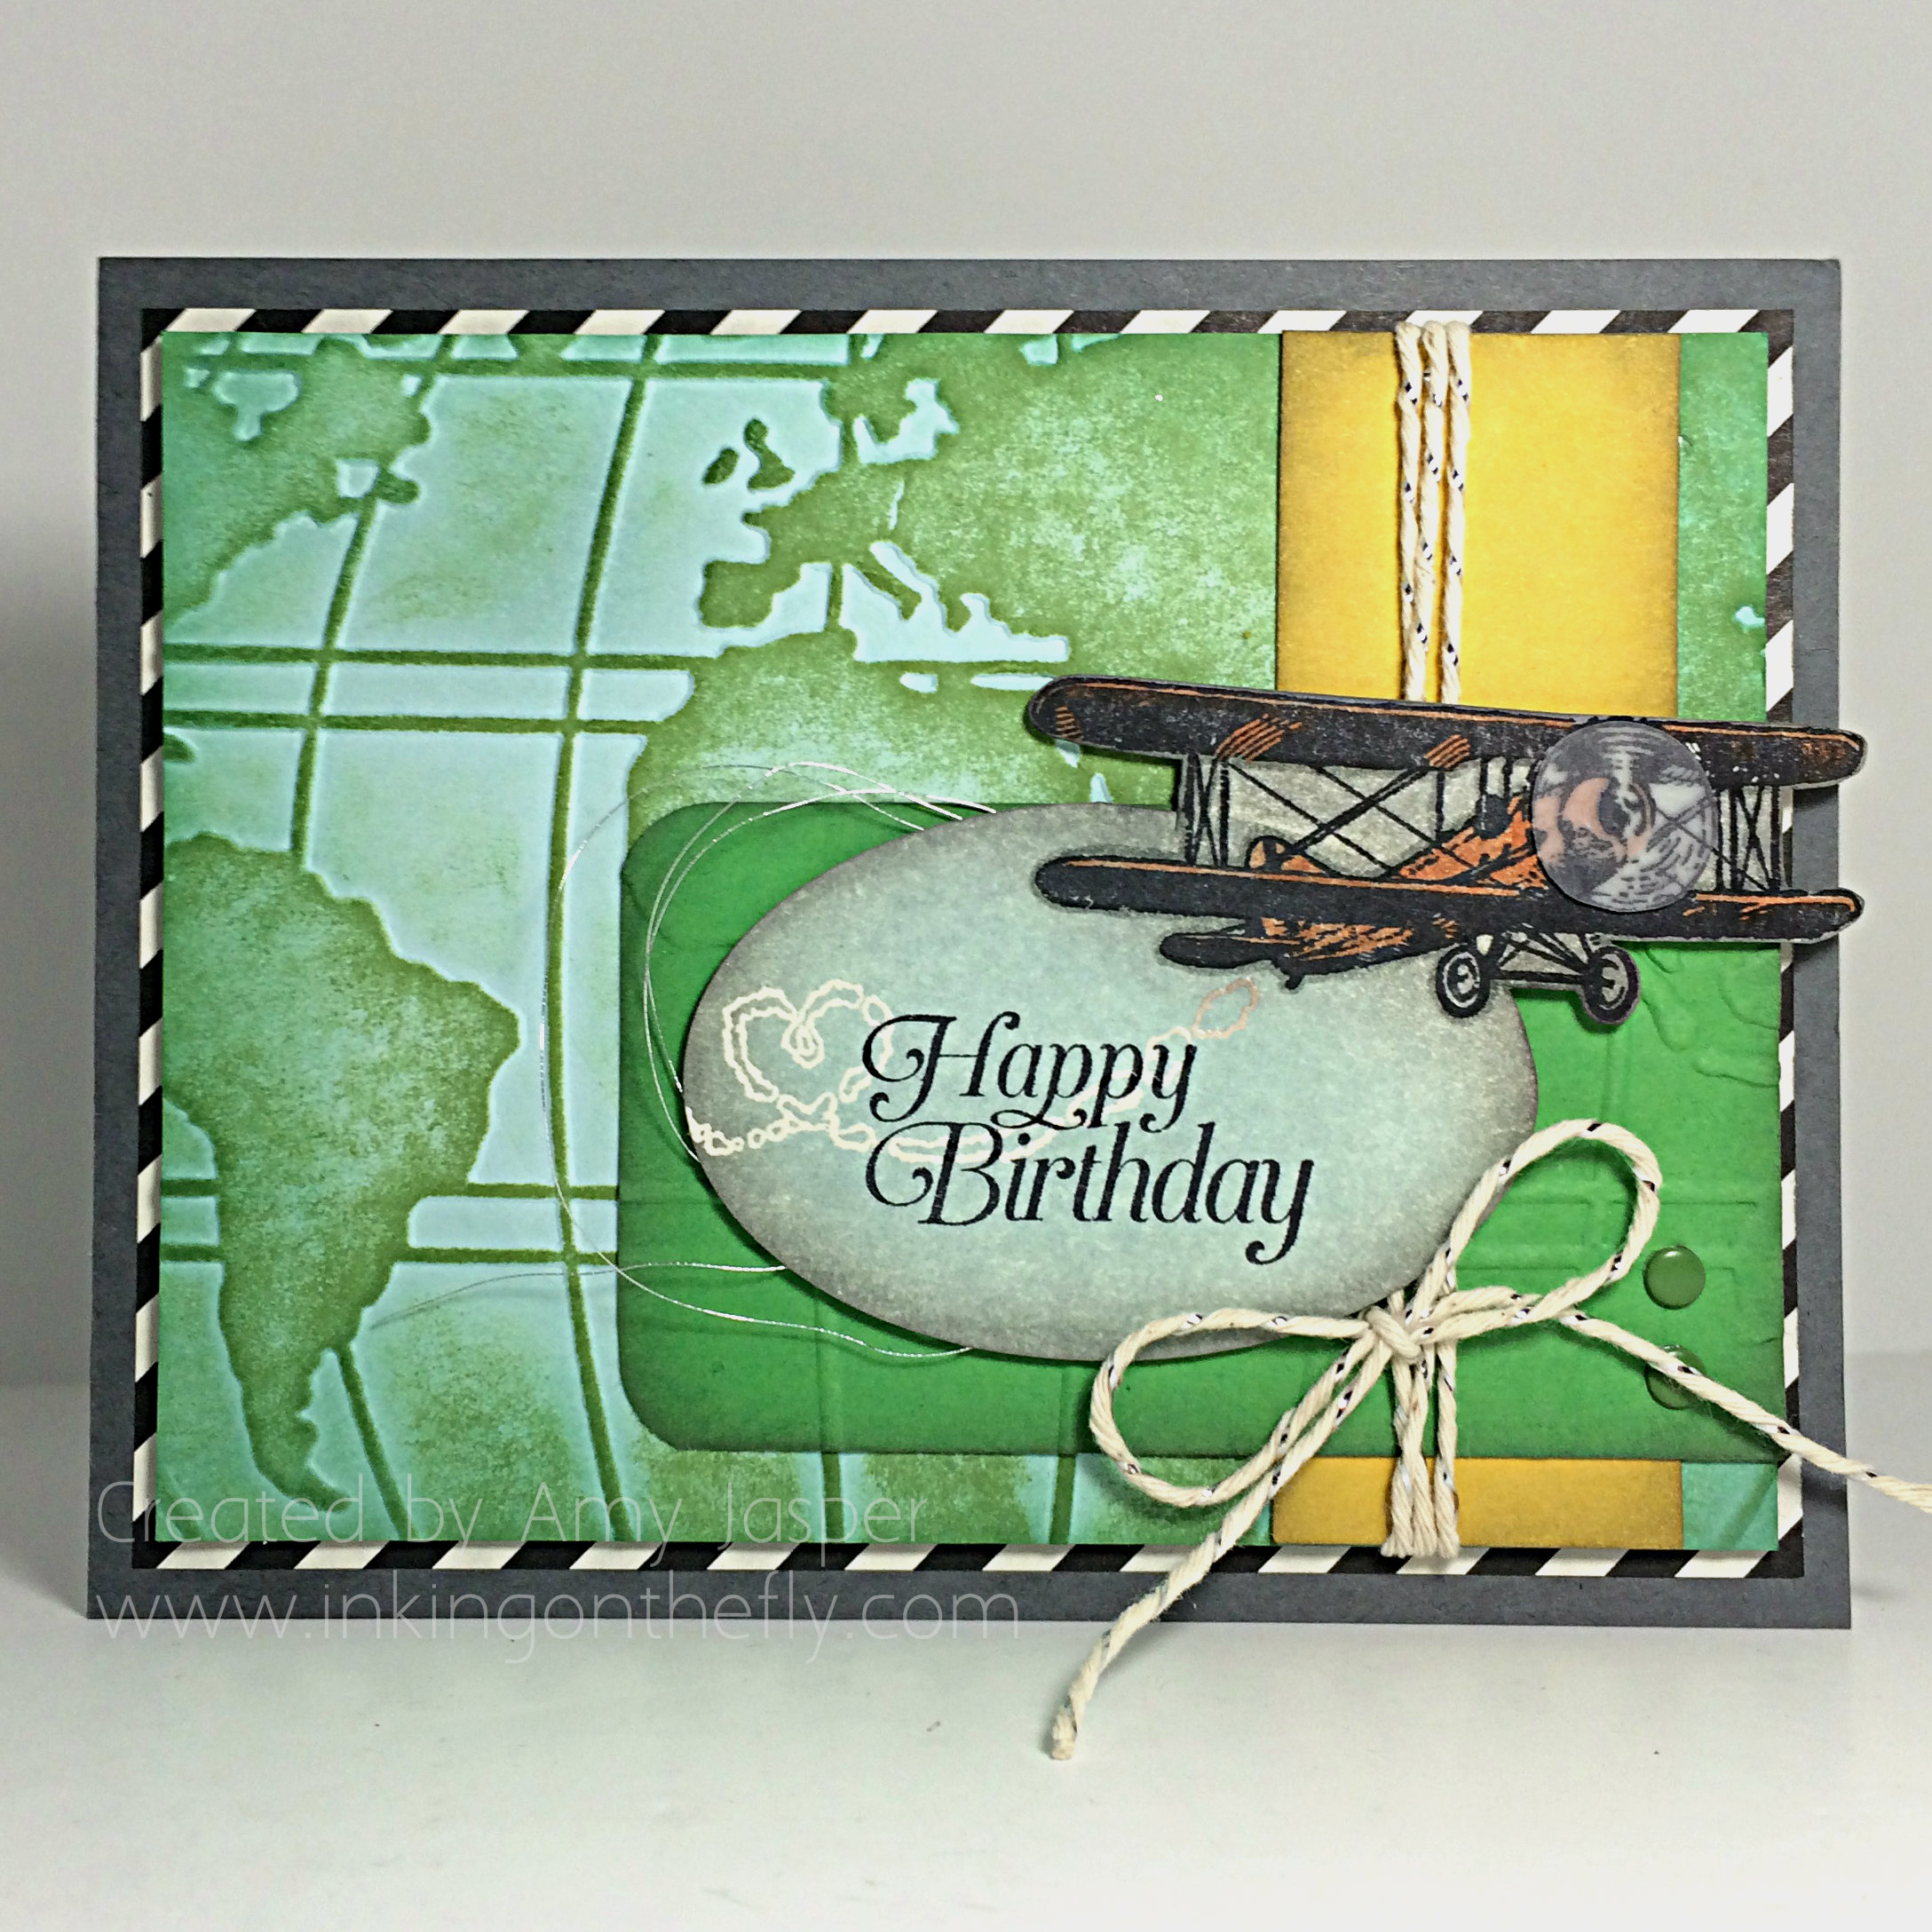
119I wanted to use some of my new items from the Stampin’ Up Occasions catalogue and the Sale-a-bration brochure for this sketch. I chose the Sky is the Limit stamp set and the World Traveler Textured Impressions Folder.

Soaring Birthday by Amy Jasper www.inkingonthefly.com #AYSI119The card base is Basic Grey cardstock. I put a layer of the Typeset Specialty Paper over that to matte the world image created with the embossing folder. Before embossing the cardstock, I inked the folder using my brayer and Wild Wasabi ink. Then, I carefully placed the Soft Sky cardstock in the folder and ran it through my Big Shot to transfer the ink to the cardstock and get the look I wanted.

A strip of Hello Honey cardstock was sponged around the edges with Smoky Slate ink and a Sponge Dauber, then attached to the World Traveler embossed piece. The piece of Cucumber Crush cardstock with two corners rounded using the Project Life Corner Rounder punch was sponged around the edges also and embossed with the World Traveler folder in the Big Shot, being careful to match the pattern of the background (it’s a subtle touch, but I’m all about the fussy details).

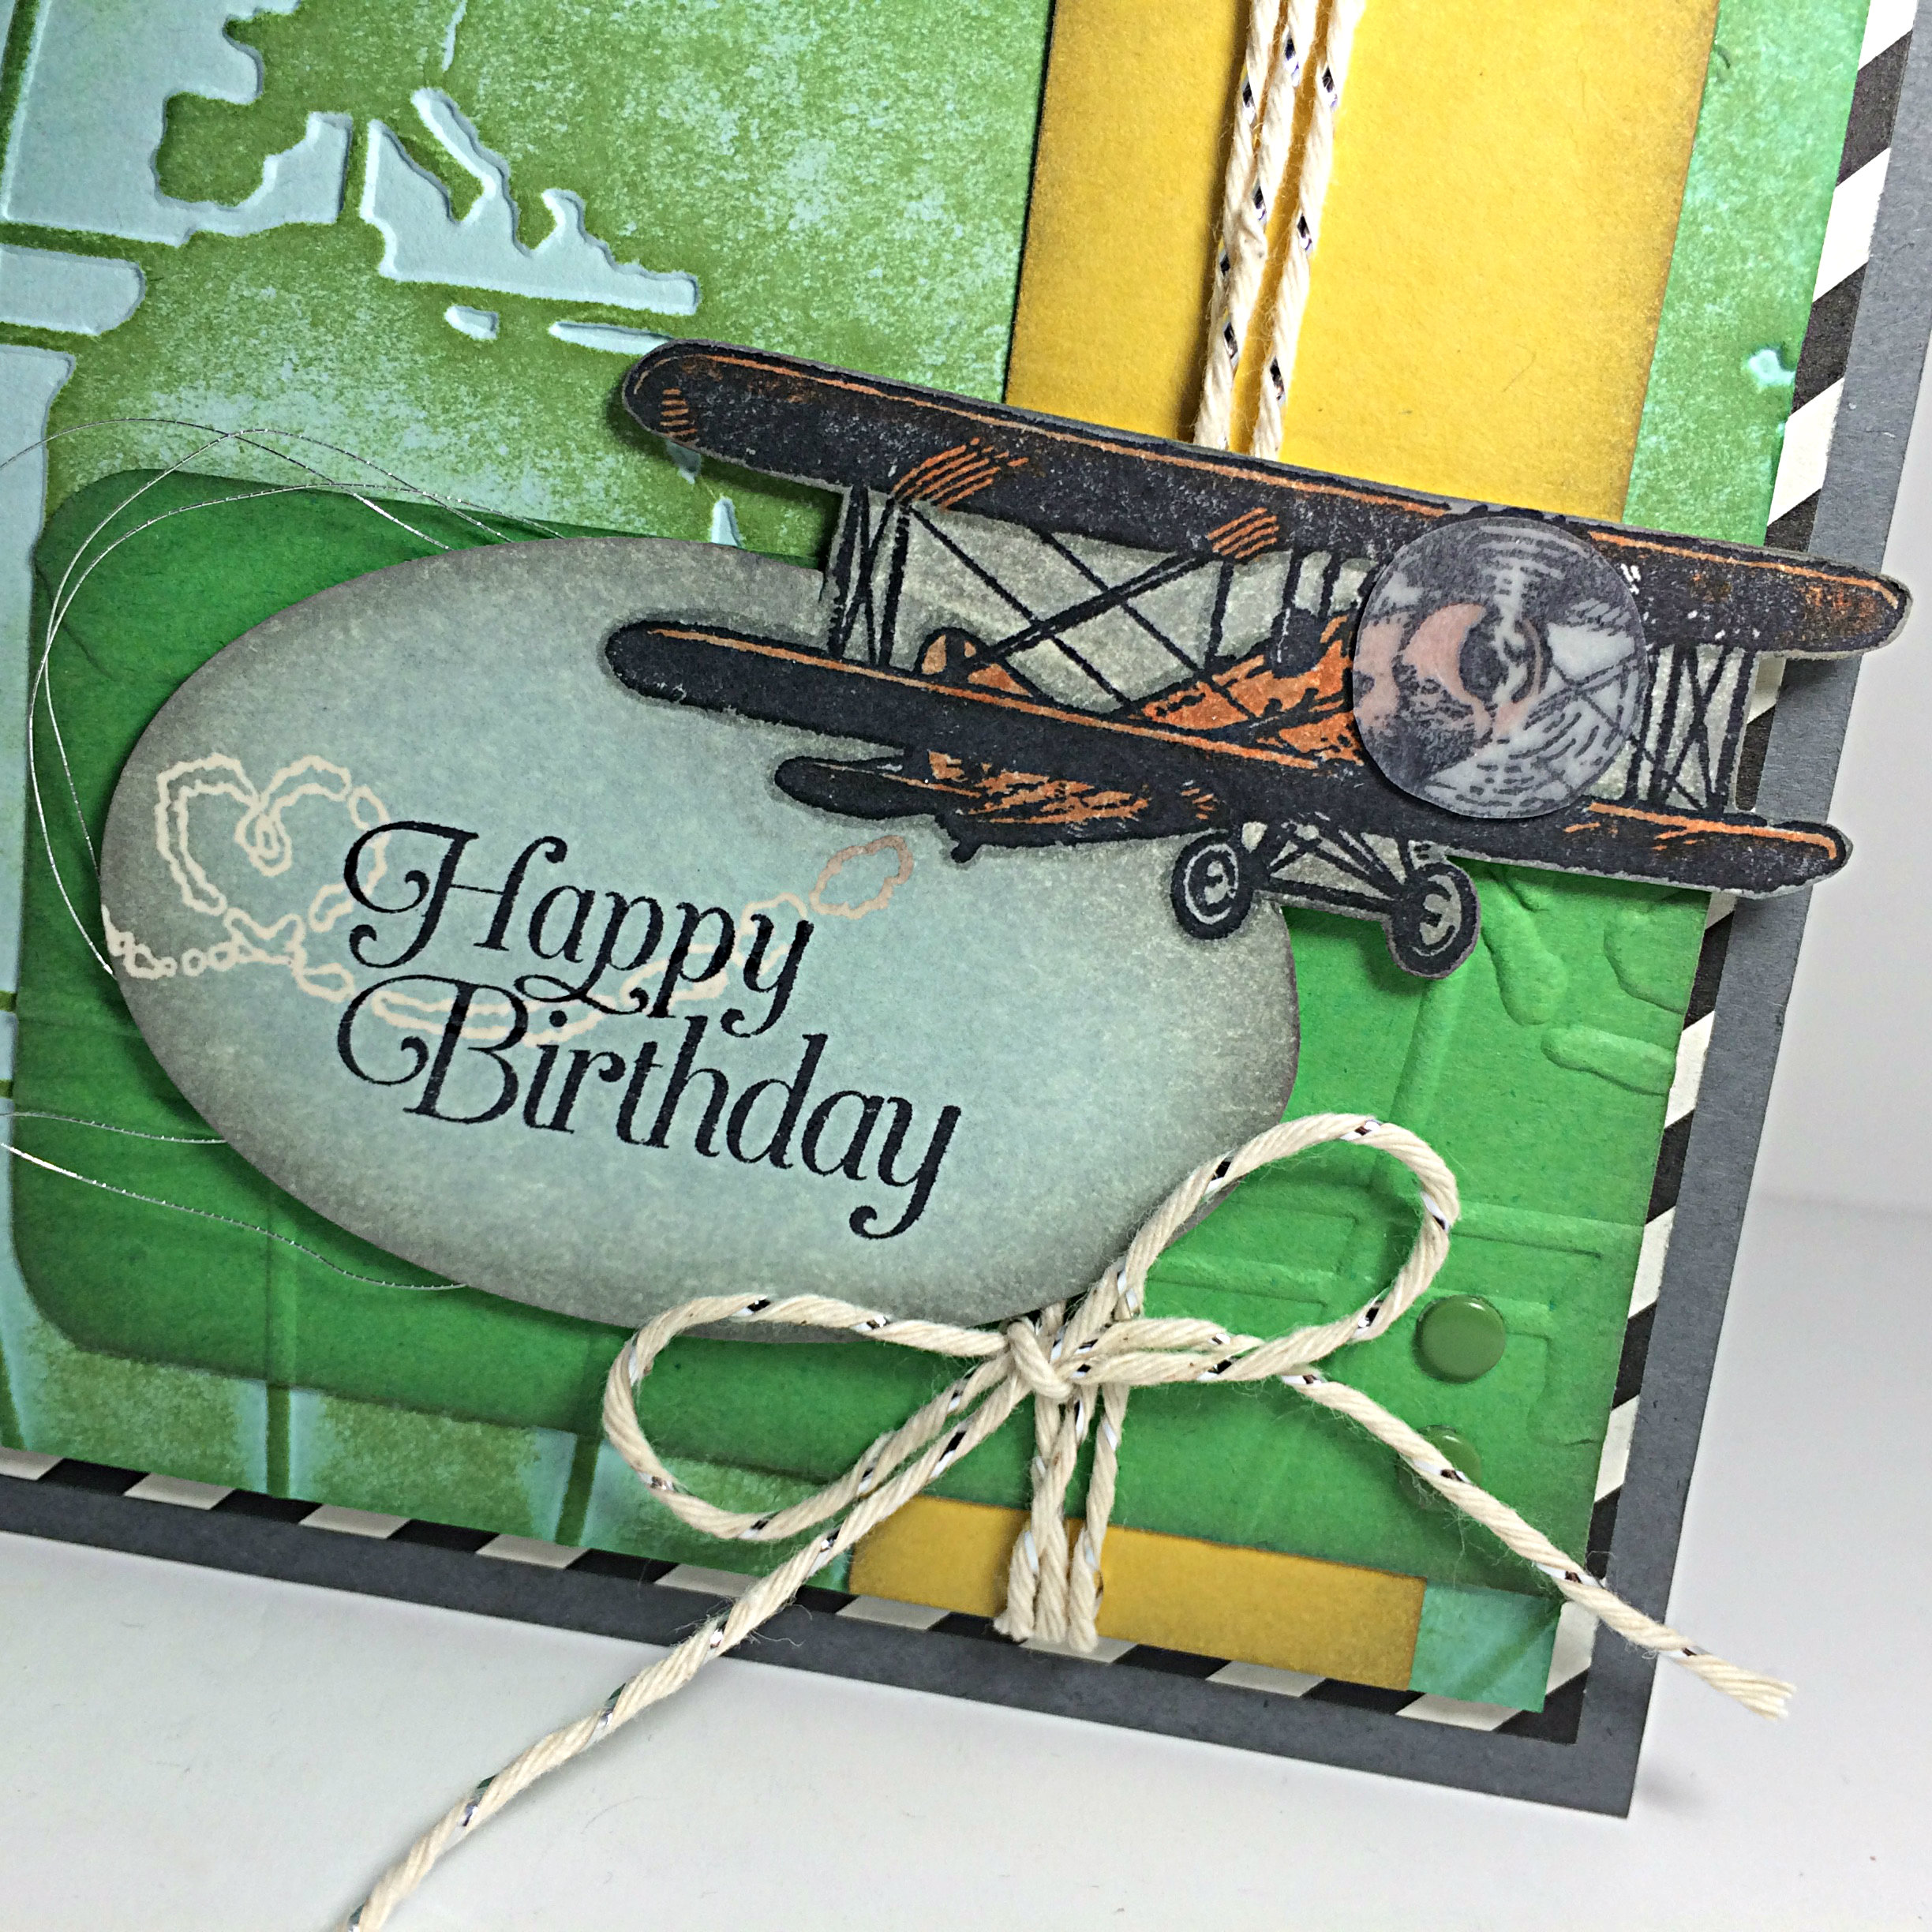
Soaring Birthday by Amy Jasper www.inkingonthefly.com Sky is the Limit from Stampin' Up! #AYSI119I wrapped the Silver Baker’s Twine around these layered pieces three times, finishing it with a bow. You can also see the two Garden Green Candy Dots applied to the bottom right of the piece of Cucumber Crush (in order to be true to the elements in the sketch). The layers over and including the embossed World Traveler cardstock were attached with Stampin’ Up Dimensionals to the Typeset Specialty Designer Series paper layer.

Now comes the accent piece – the focal point of the card. I started with a piece of Very Vanilla cardstock (larger than I needed, just to be sure), and stamped the airplane image in Black Stampin’ Up Archival ink. Then I placed one of the Oval Framelits over the cardstock so that it intersected with the image. I used a pencil to mark where the image would overlap the oval.

(I’m so sorry I don’ t have pictures to help explain this process!)

I fussy cut around the image ONLY to where the oval would be cut, then I placed the oval framelit over the image where I wanted it with the image sticking out OVER the Oval Framelit so that the image wouldn’t be cut off.

Oh my gosh, does this make ANY sense? LOL!

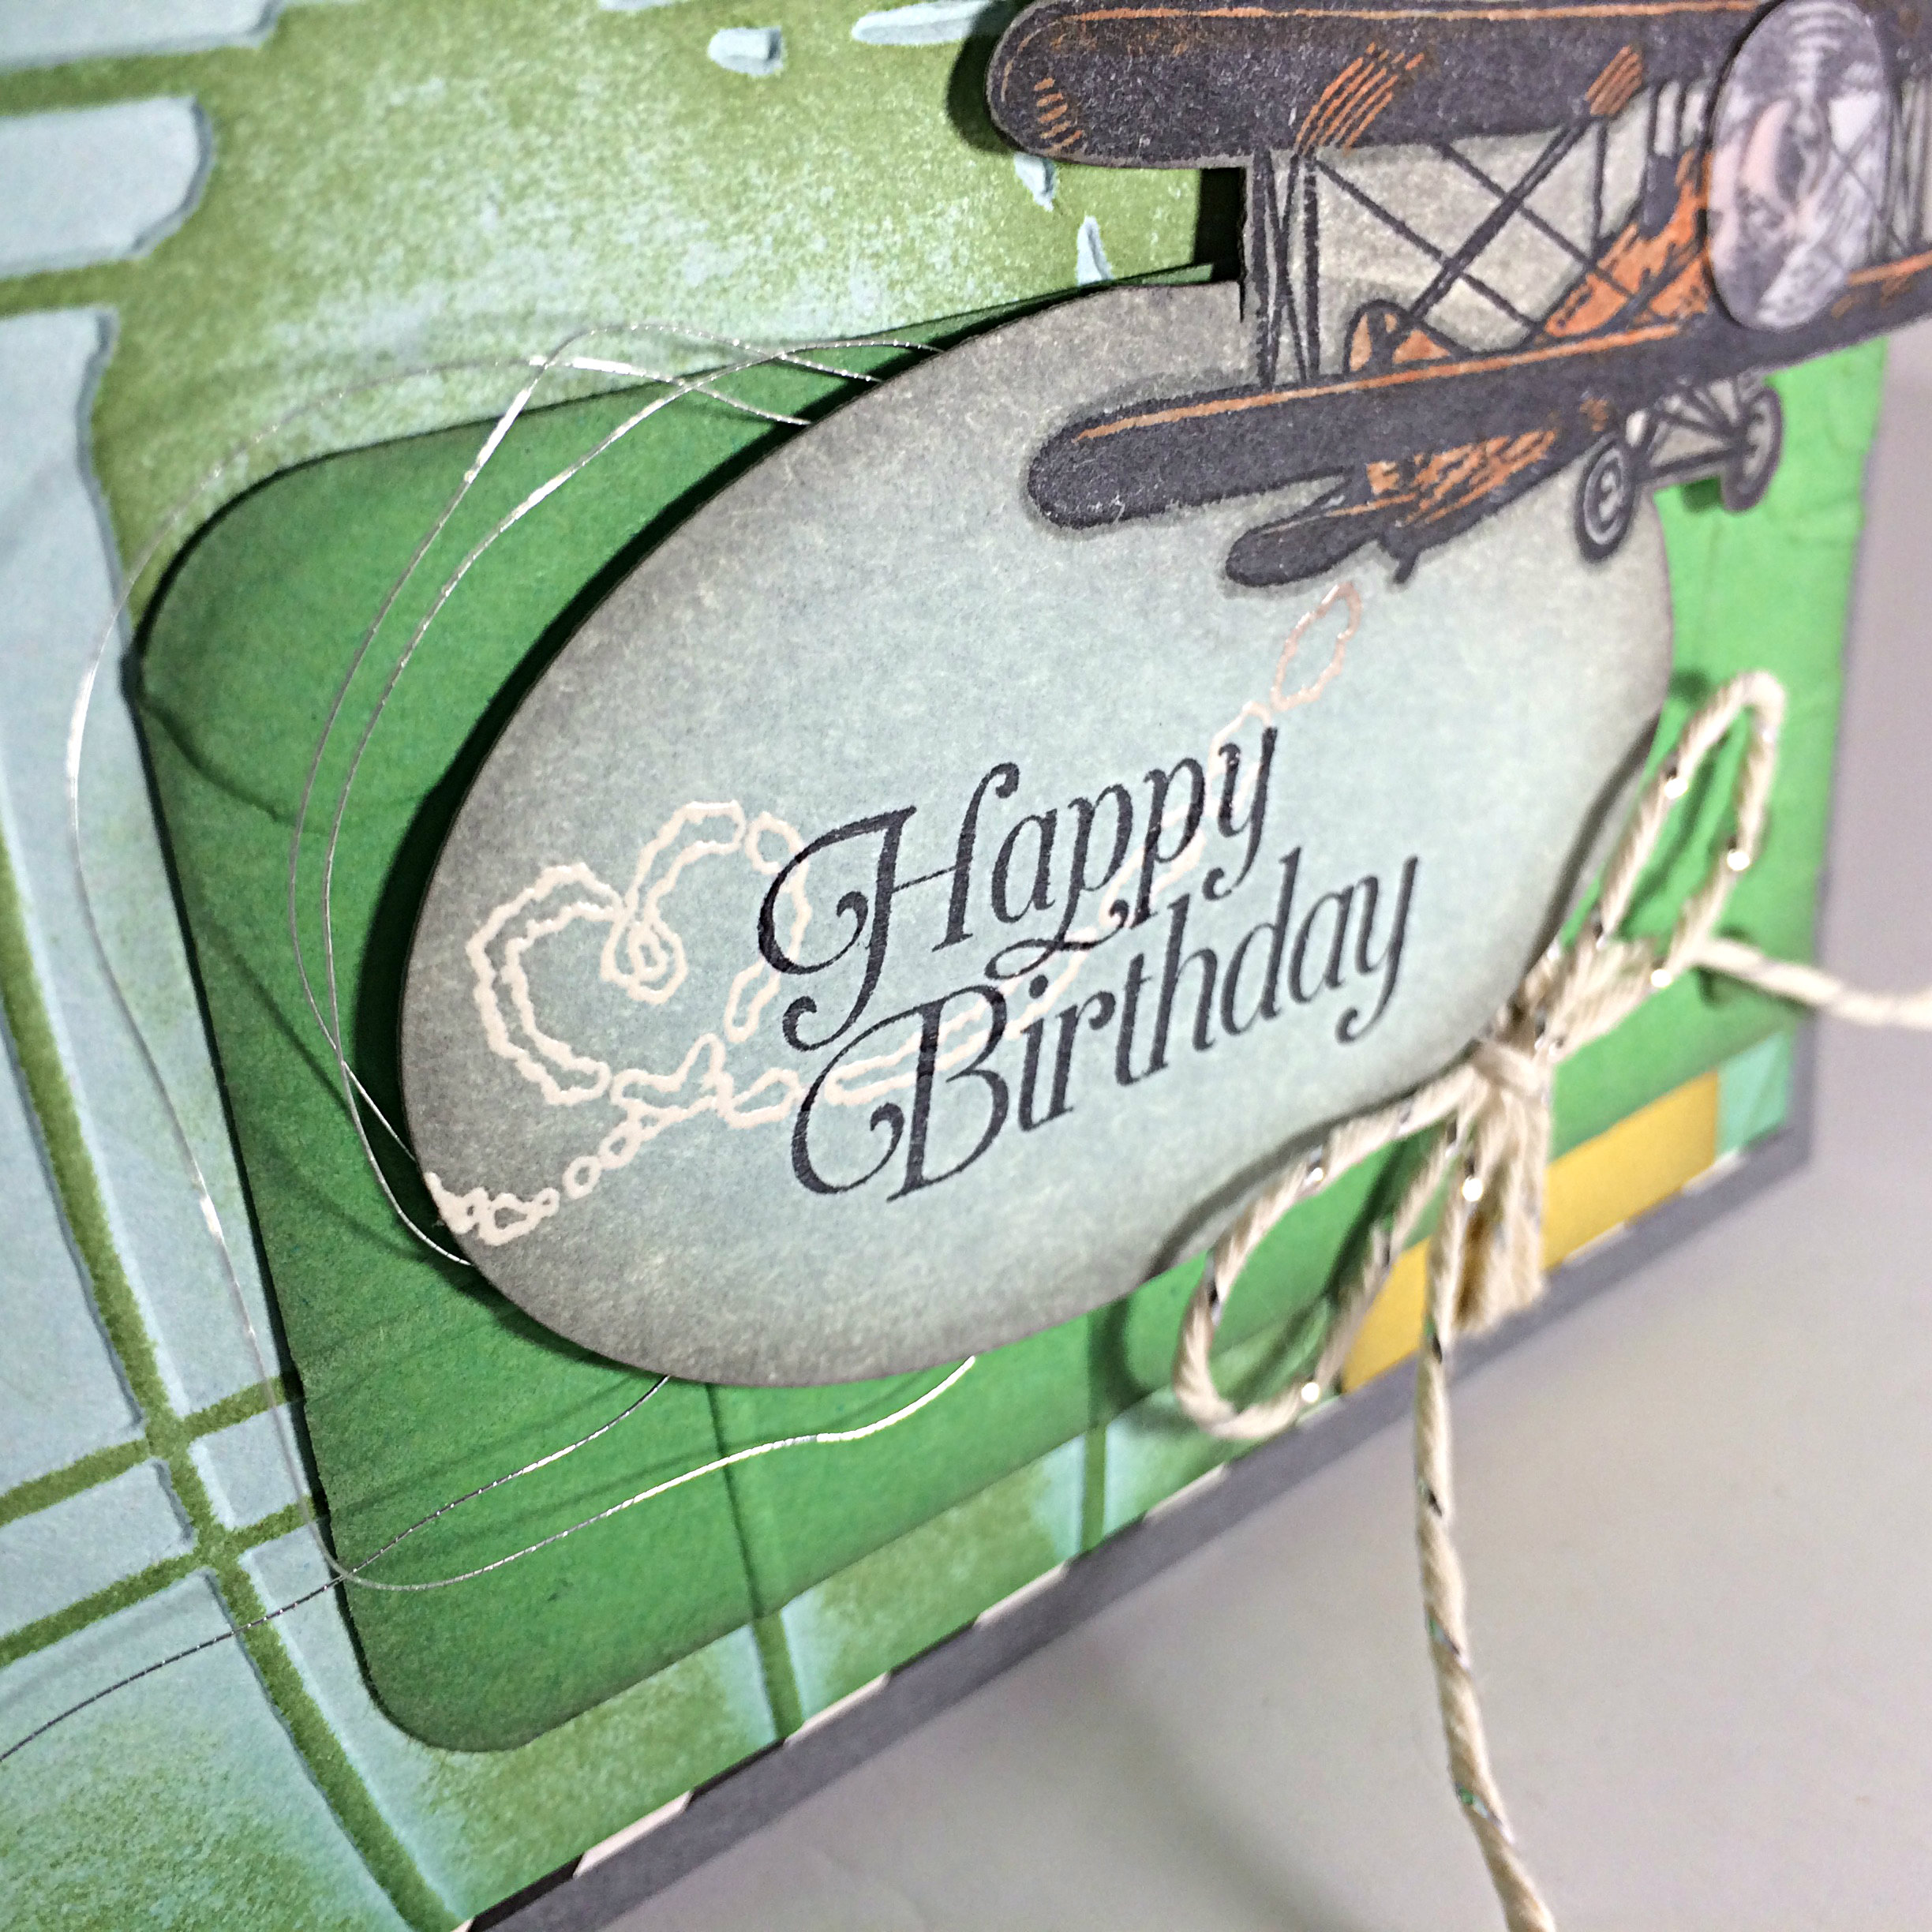
Amy Jasper www.inkingonthefly.com using Sky is the Limit stamp set from Stampin' Up! #AYSI119After I cut it out with my Big Shot, I tidied up the area around the image with my Paper Snips. Next, the Happy Birthday sentiment was stamped with the Stampin’ Up Black Archival ink before running my Embossing Buddy over the entire area in preparation for the heart-shaped smoke image to be stamped with Versamark ink and heat embossed with Clear Embossing powder and the Heat Tool. With that completed, I sponged over the entire area with Soft Sky ink. The ink doesn’t stick to where the clear embossing powder is (Emboss Resist Technique), allowing the smoke image to remain the colour of the Very Vanilla cardstock.

I added some more sponging around the edges of the oval and the airplane with Smoky Slate ink and coloured the airplane with my Stampin’ Up Tangelo Twist marker. I also did an outline around the image with my Stampin’ Up Smoky Slate marker to give the image more pop. The finishing touch on the airplane was to stamp the image again on Stampin’ Up Vellum and fussy cut around the propeller, then to attach the propeller with a Mini Glue Dot.

Soaring Birthday by Amy Jasper www.inkingonthefly.com #AYSI119I tried to throw on a splatter of glitter or something shiny on the upper left of the card, but it didn’t like it, so I took it off and added the Silver Metallic Thread loops under the oval piece before attaching it with Stampin’ Up Dimensionals to the card front.

Who would have thought that it would take this long to explain it all! PHEW! Sorry about that. I won’t be offended if you don’t read it all, lol!

If you like the Sky is the Limit stamp set, you can get it for FREE! All you have to do is order $60 in Stampin’ Up product through my online store and then you can choose that Sale-a-bration stamp set as a FREE item! This particular stamp set is only available until February 15th, so don’t wait too long!

I just love this time of year! Free stuff makes me happy!!

Amy