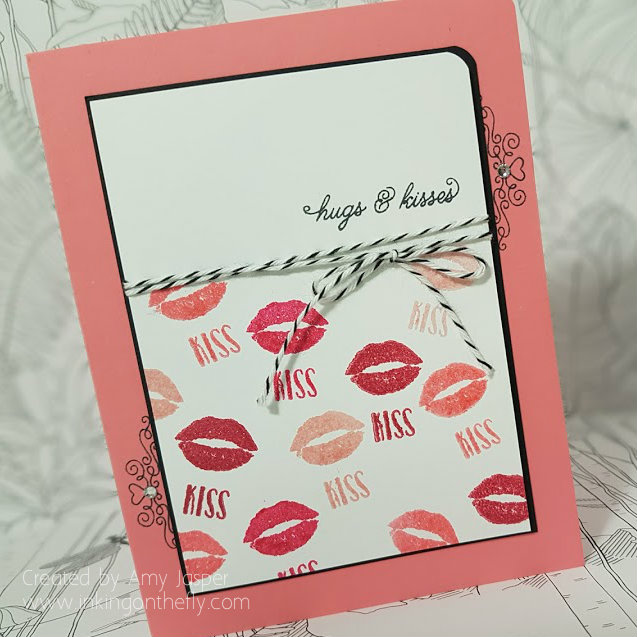
Hugs and Kisses (but mostly kisses!)
Let’s start at the beginning – it’s a very good place to start.
This card design begins with a sketch.
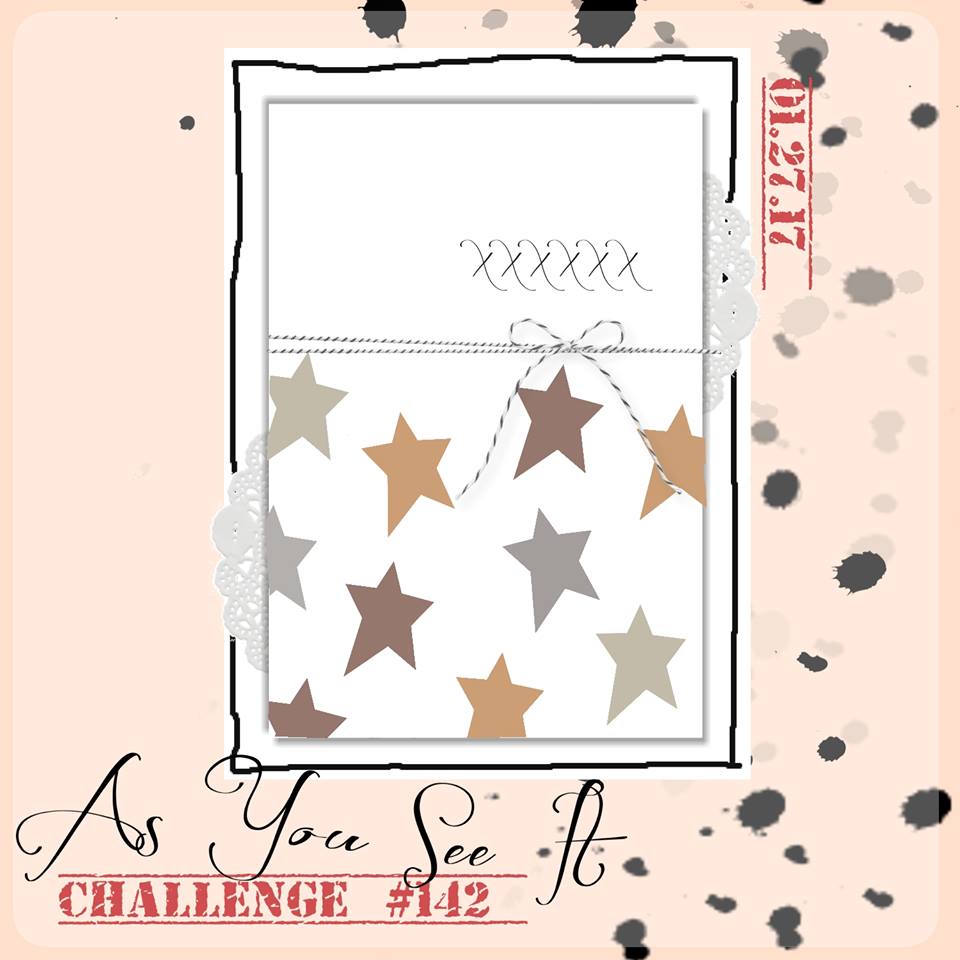 Almost as soon as I saw this sketch, I thought of using lips instead of the stars. I have been obsessing over my lips a little bit lately as I have discovered some new lipstick that stays on all day! (I may or may not have a mild addiction at this point, but I’ll keep you posted). A unique thing about my new lipstick is that you finish the application with a clear and very glossy gloss to “seal” in the colour and to nourish and moisturize your lips. I’m not used to having such glossy lips and, let me tell ya, I had to apply a LOT of that gloss in the beginning as my lips adjusted to the change in my pucker routine. All that to say, I wanted the lips on my card to be GLOSSY!!
 The stamps used on this card are from the Sealed with Love photopolymer stamp set by Stampin’ Up. I attached the image of the lips and the word “kiss” on the same block so I could stamp them together. Because I wanted glossy lips, I used Clear Emboss powder and heat set them. Now, if you have ever added emboss powder to Stampin’ Up Classic inks, you may have noticed that the ink often dries faster than you can apply and heat the powder, resulting in a flat, very un-glossy (let’s call it … “matte”), finish. I wanted glossy, dag-nab-it! So, I first inked my stamp in Versamark, then in the classic ink of my choosing. That way, the Versamark ink would help the area stay moist long enough for my powder to stick to it to be heated to a beautiful glossy gloss finish.
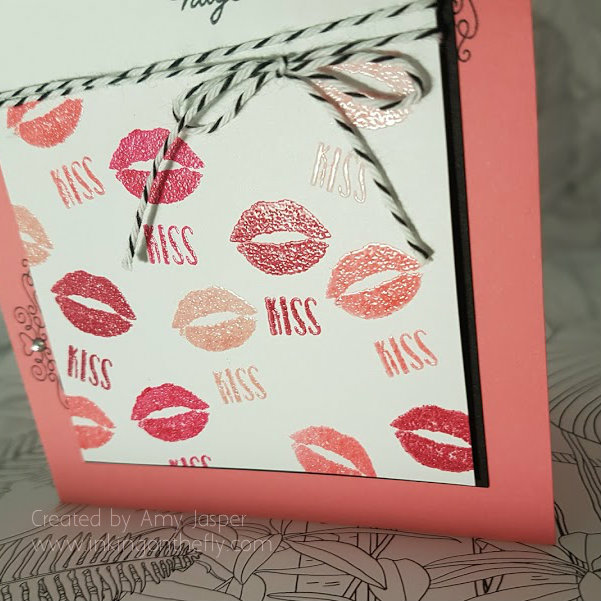
You may be wondering how I stamped the image 12 times and didn’t go just a little bit nutty having to clean off my stamps each time before inking again with Versamark (we all KNOW what happens when you use a dirty stamp on your Versamark ink pad – let’s all try to avoid that, shall we!). So, after inking my stamp with Versamark, I would then ink it into the coloured ink, stamp it, then reapply only the coloured ink, stamp it, then I did it a third time. After that, I quickly cleaned off my stamp and started again with Versamark and the next colour. Until I filled in the area with lips and kisses.
The hugs and kisses sentiment was stamped with Tuxedo Black Momento Ink. I wrapped the Basic Black Baker’s Twine around the Whisper White Cardstock twice before tying a bow.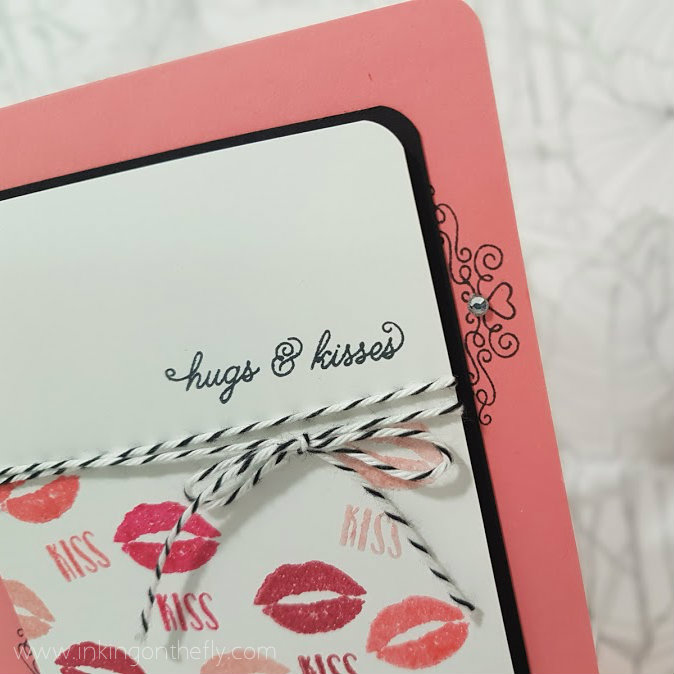
I didn’t feel like using doilies (as the sketch shows), so I used one of the photopolymer stamps from the Sealed with Love Stamp Set and curved it on my block as much as I could (it kept lifting up in the middle because I curved it so sharply, but I persevered!). I stamped it twice on the card base with Tuxedo Black Momento ink.
For added interest, I used the Project Life Corner Rounder Punch on the upper right hand corner of all my paper layers. The Basic Black Cardstock is adhered directly to the Flirty Flamingo card base, then the Whisper White layer is attached with Stampin’ Up Dimensionals.
The final touch was to add the tiny Basic Rhinestones to the heart flourishes on the card.
All in all, this card was pretty easy to make. I would even go as far as to call it quick and simple! You could even skip the embossing and call it easy-peasy!!
How about you try the sketch for yourself now. You might even feel pretty happy with it and upload it the the As You See It Challenge. Hey, you might even be picked as a favourite!