When Skies are Grey
Do you get the February blues? I sure do!! The socked in weather in our valley makes everything feel grey all the time – even me. We’ve actually had a couple beautiful sunny days show up in the last couple weeks and they are GLORIOUS! The brilliant blue sky is such a crisp and stunning contrast to the white snow on the ground. I love how the snow glistens when the sun shines, like someone scattered diamonds all over the ground.
Most of the time, though, we don’t have sun and I crave its warmth and bright happiness in the normally dreary days of February. I guess my card today gives me a little hope for some sunshine because when the weather isn’t taking care of me like I wish it would, I have my family, my husband, my children, my friends, and my dog – they are my sunshine when skies are grey.
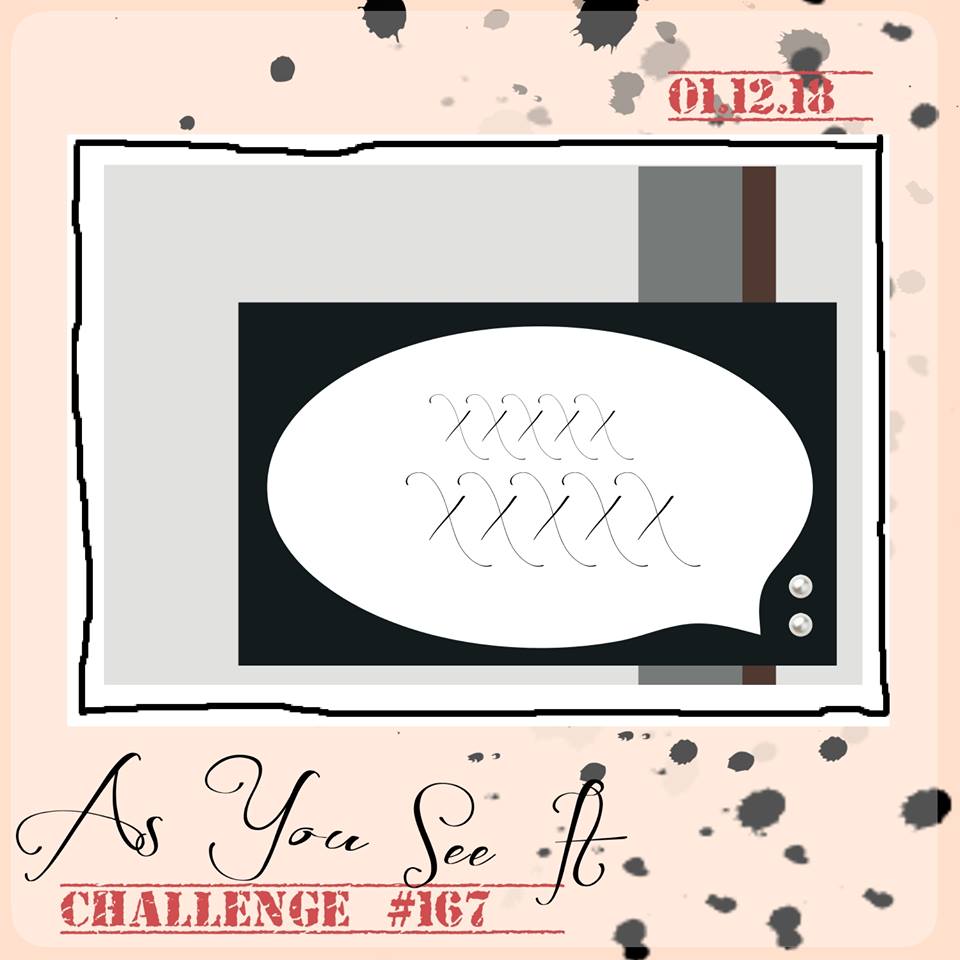
Here’s the As You See It Challenge for today’s design: As soon as I looked at this sketch, my mind immediately saw raindrops falling. I love the Glitter and Clear Epoxy Shapes from Stampin’ Up! and knew they were going to be a part of my card design.
 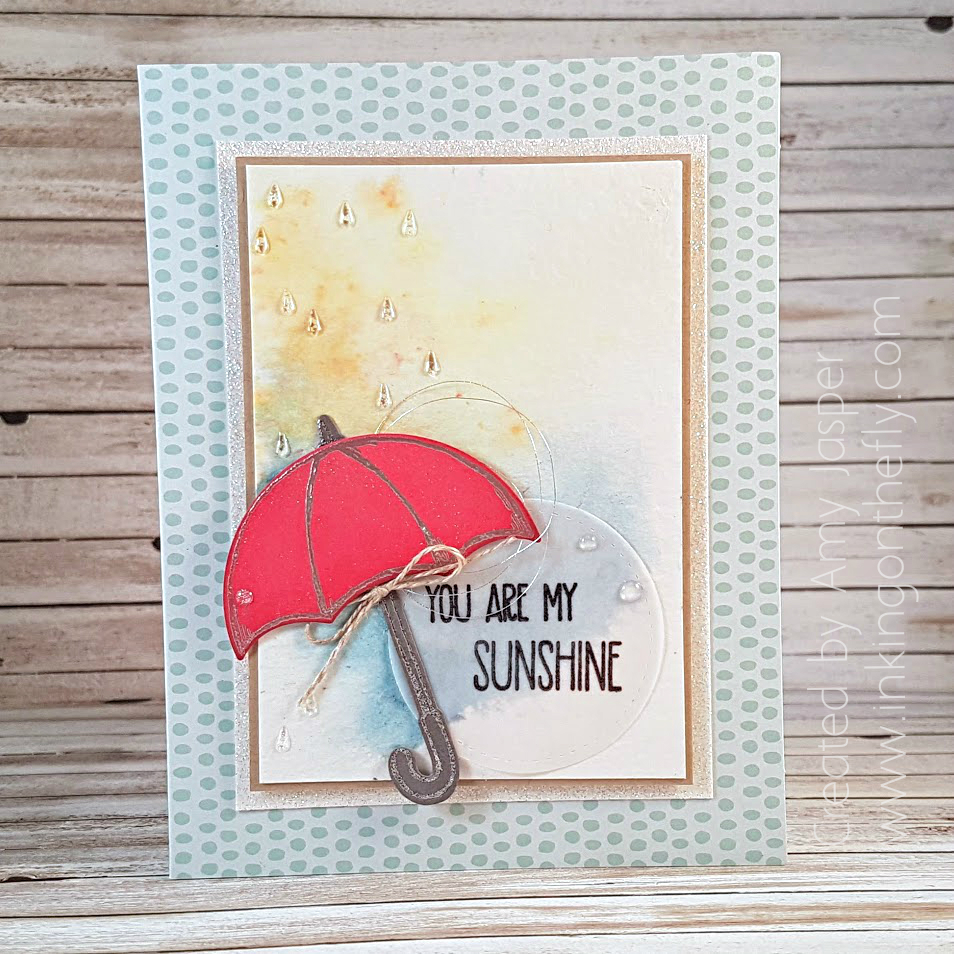 Aren’t the raindrops divine!! I also love the look of the clear and glitter circles – like water droplets or dew drops. Can you imagine them on a flower petal or a leaf image? LOVE!
I enjoyed playing with the Brusho Watercolor Crystals for the background on the Watercolour Paper. I used Prussian Blue, Yellow, and a wee bit of the Gamboge. I wanted it to look splashy and sunshiny at the same time.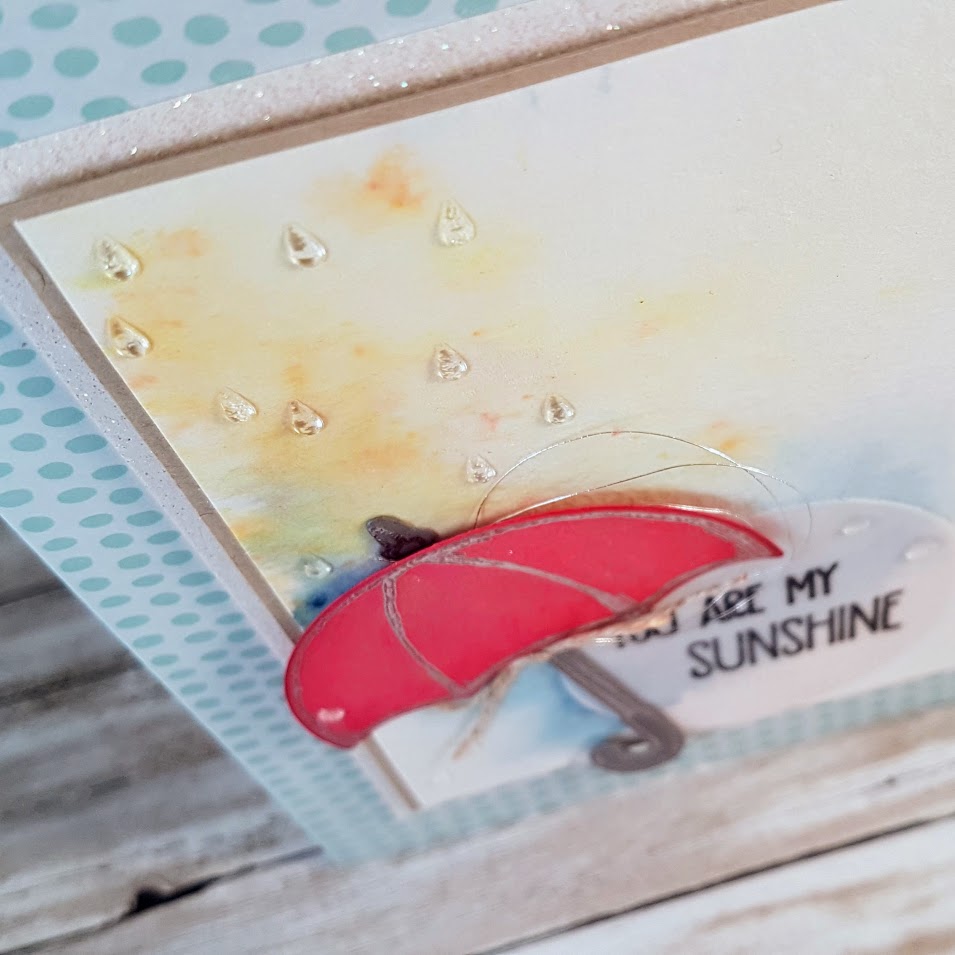 Do you recognize the card base? I really like the versatility of the Tutti-Frutti Cards and Envelopes that you can get for free during Sale-a-bration. They have helped me tremendously in my creations by giving me instant designing superpowers! You can see that I layered some Dazzling Diamonds Glimmer paper and Crumb Cake cardstock underneath the Watercolour Paper,
The umbrella image from the Weather Together stamp set was stamped in Versamark on Melon Mambo cardstock and Basic Gray cardstock, then embossed with the Silver Embossing Powder before getting die cut with the coordinating Umbrella Weather Framelits Dies. I sponged a little bit of Melon Mambo ink around the edges of the umbrella canopy and added Clear Wink of Stella for a greater sense of rain shimmering in the sunshine. 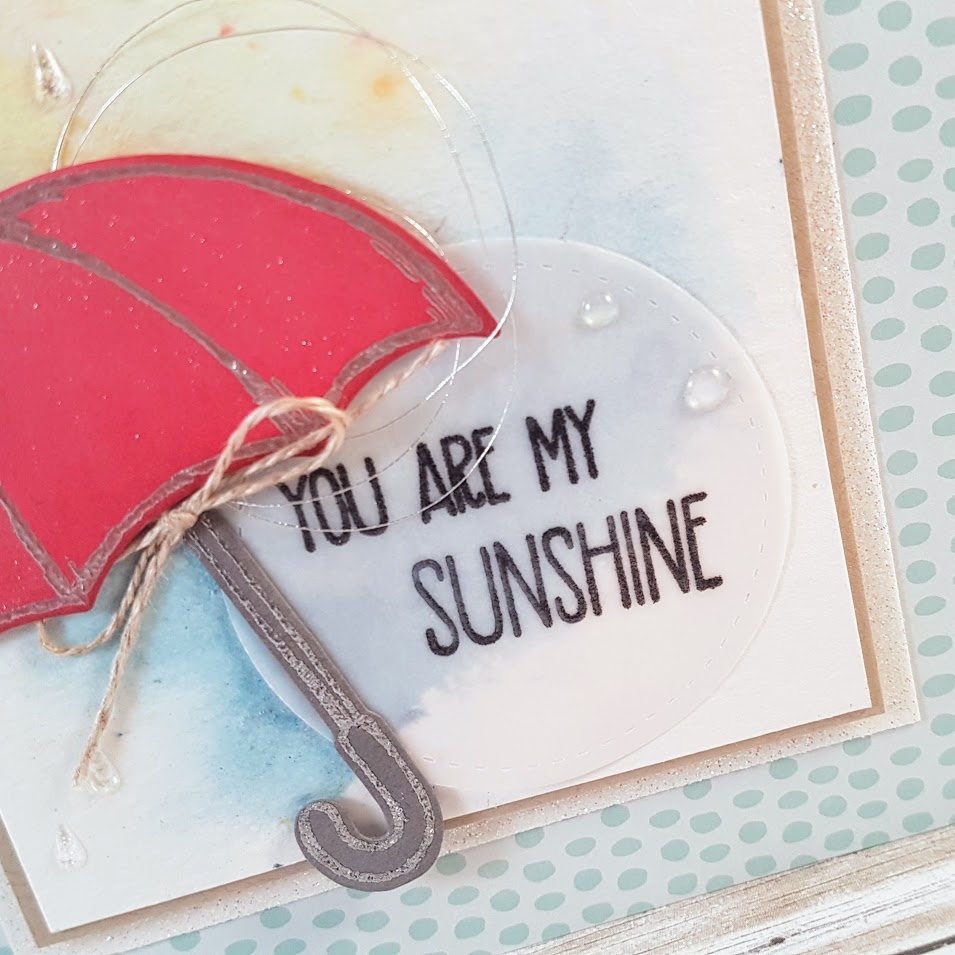 The sentiment from the Sunshine Sayings Stamp Set was stamped on the Vellum cardstock with Archival Black ink, then embossed with Clear Embossing Powder to give it some pop! I used a circle die from the Stitched Shapes Framelits to cut the vellum circle and attached it to the card front with tiny dabs of Multipurpose Liquid Glue under the letters and the epoxy dots.
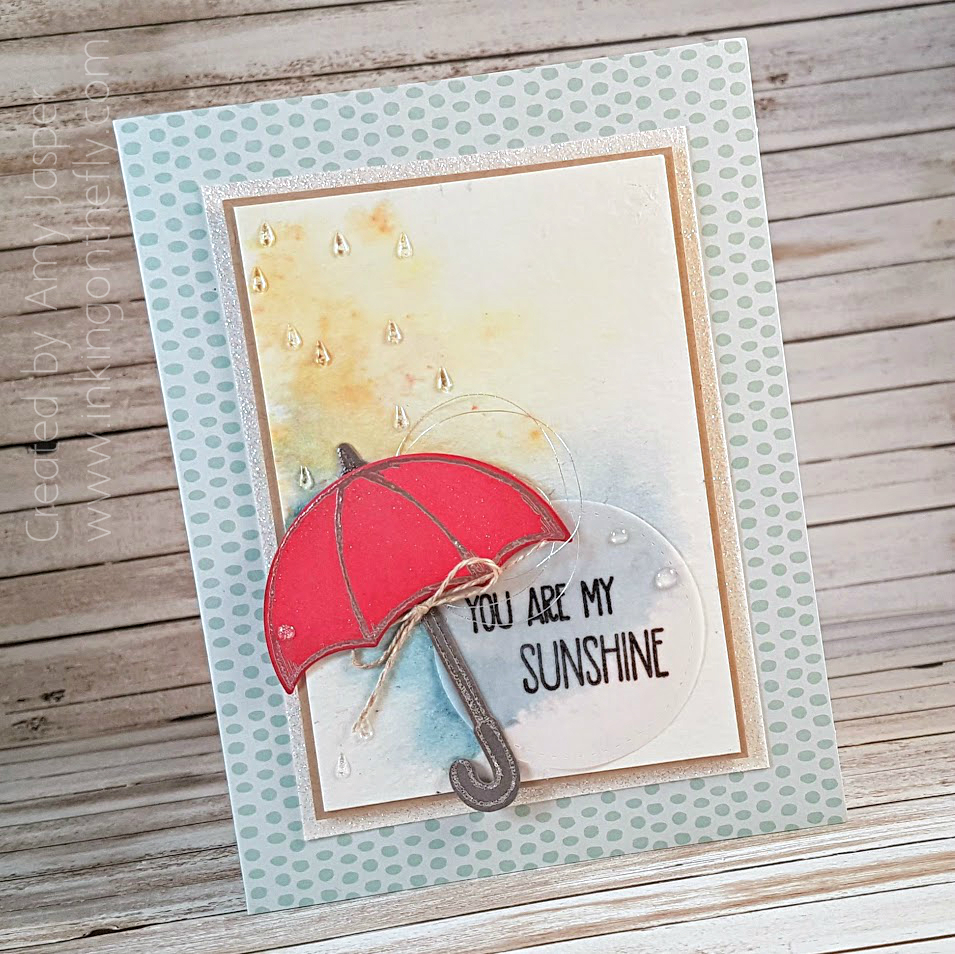 The final touches were the Linen Thread bow, which I attached using a rolled up glue dot, and the subtle loop of Silver Metallic Thread (oh, how I love that thread!!).
What gives you hope when you are surrounded by grey skies?