challenge

Sending Smiles Shadow Box Card

Yay! The As You See It Challenge Blog is up and running again! After tremendous technical issues, it has emerged anew, like the phoenix from the ashes! LOL! It sure feels like that after all that the folks working on it have been through. Thanks to all their hard work, we have had to start with a whole new web page using a whole new platform. Sadly, none of our previous material could be retrieved.

So the card today is one of many As You See It Challenge designs that I will be sharing here on my Inking on the Fly blog. You will see a new design every two weeks that will hopefully inspire you to play along with the As You See It Challenge Blog! It’s fun! It’s creative! And it will get your mojo flowing for a stepping-off point toward more of your own creative genius! I know it’s true because I have experienced it first hand, folks!!

Here’s the sketch challenge on which I have based my design:

AYSI#141And here is my card featuring the Lift Me Up Stamp Set and the Up and Away Thinlit dies from Stampin’ Up! I also used the Outdoor Adventure Framelits dies as they work in quite nicely. Actually, there are a LOT of stinkin’ dies used for my card this week! Yikes!! You can see the Stitched Shapes Framelits are in the mix as well, which will be available for purchase on the 16th!
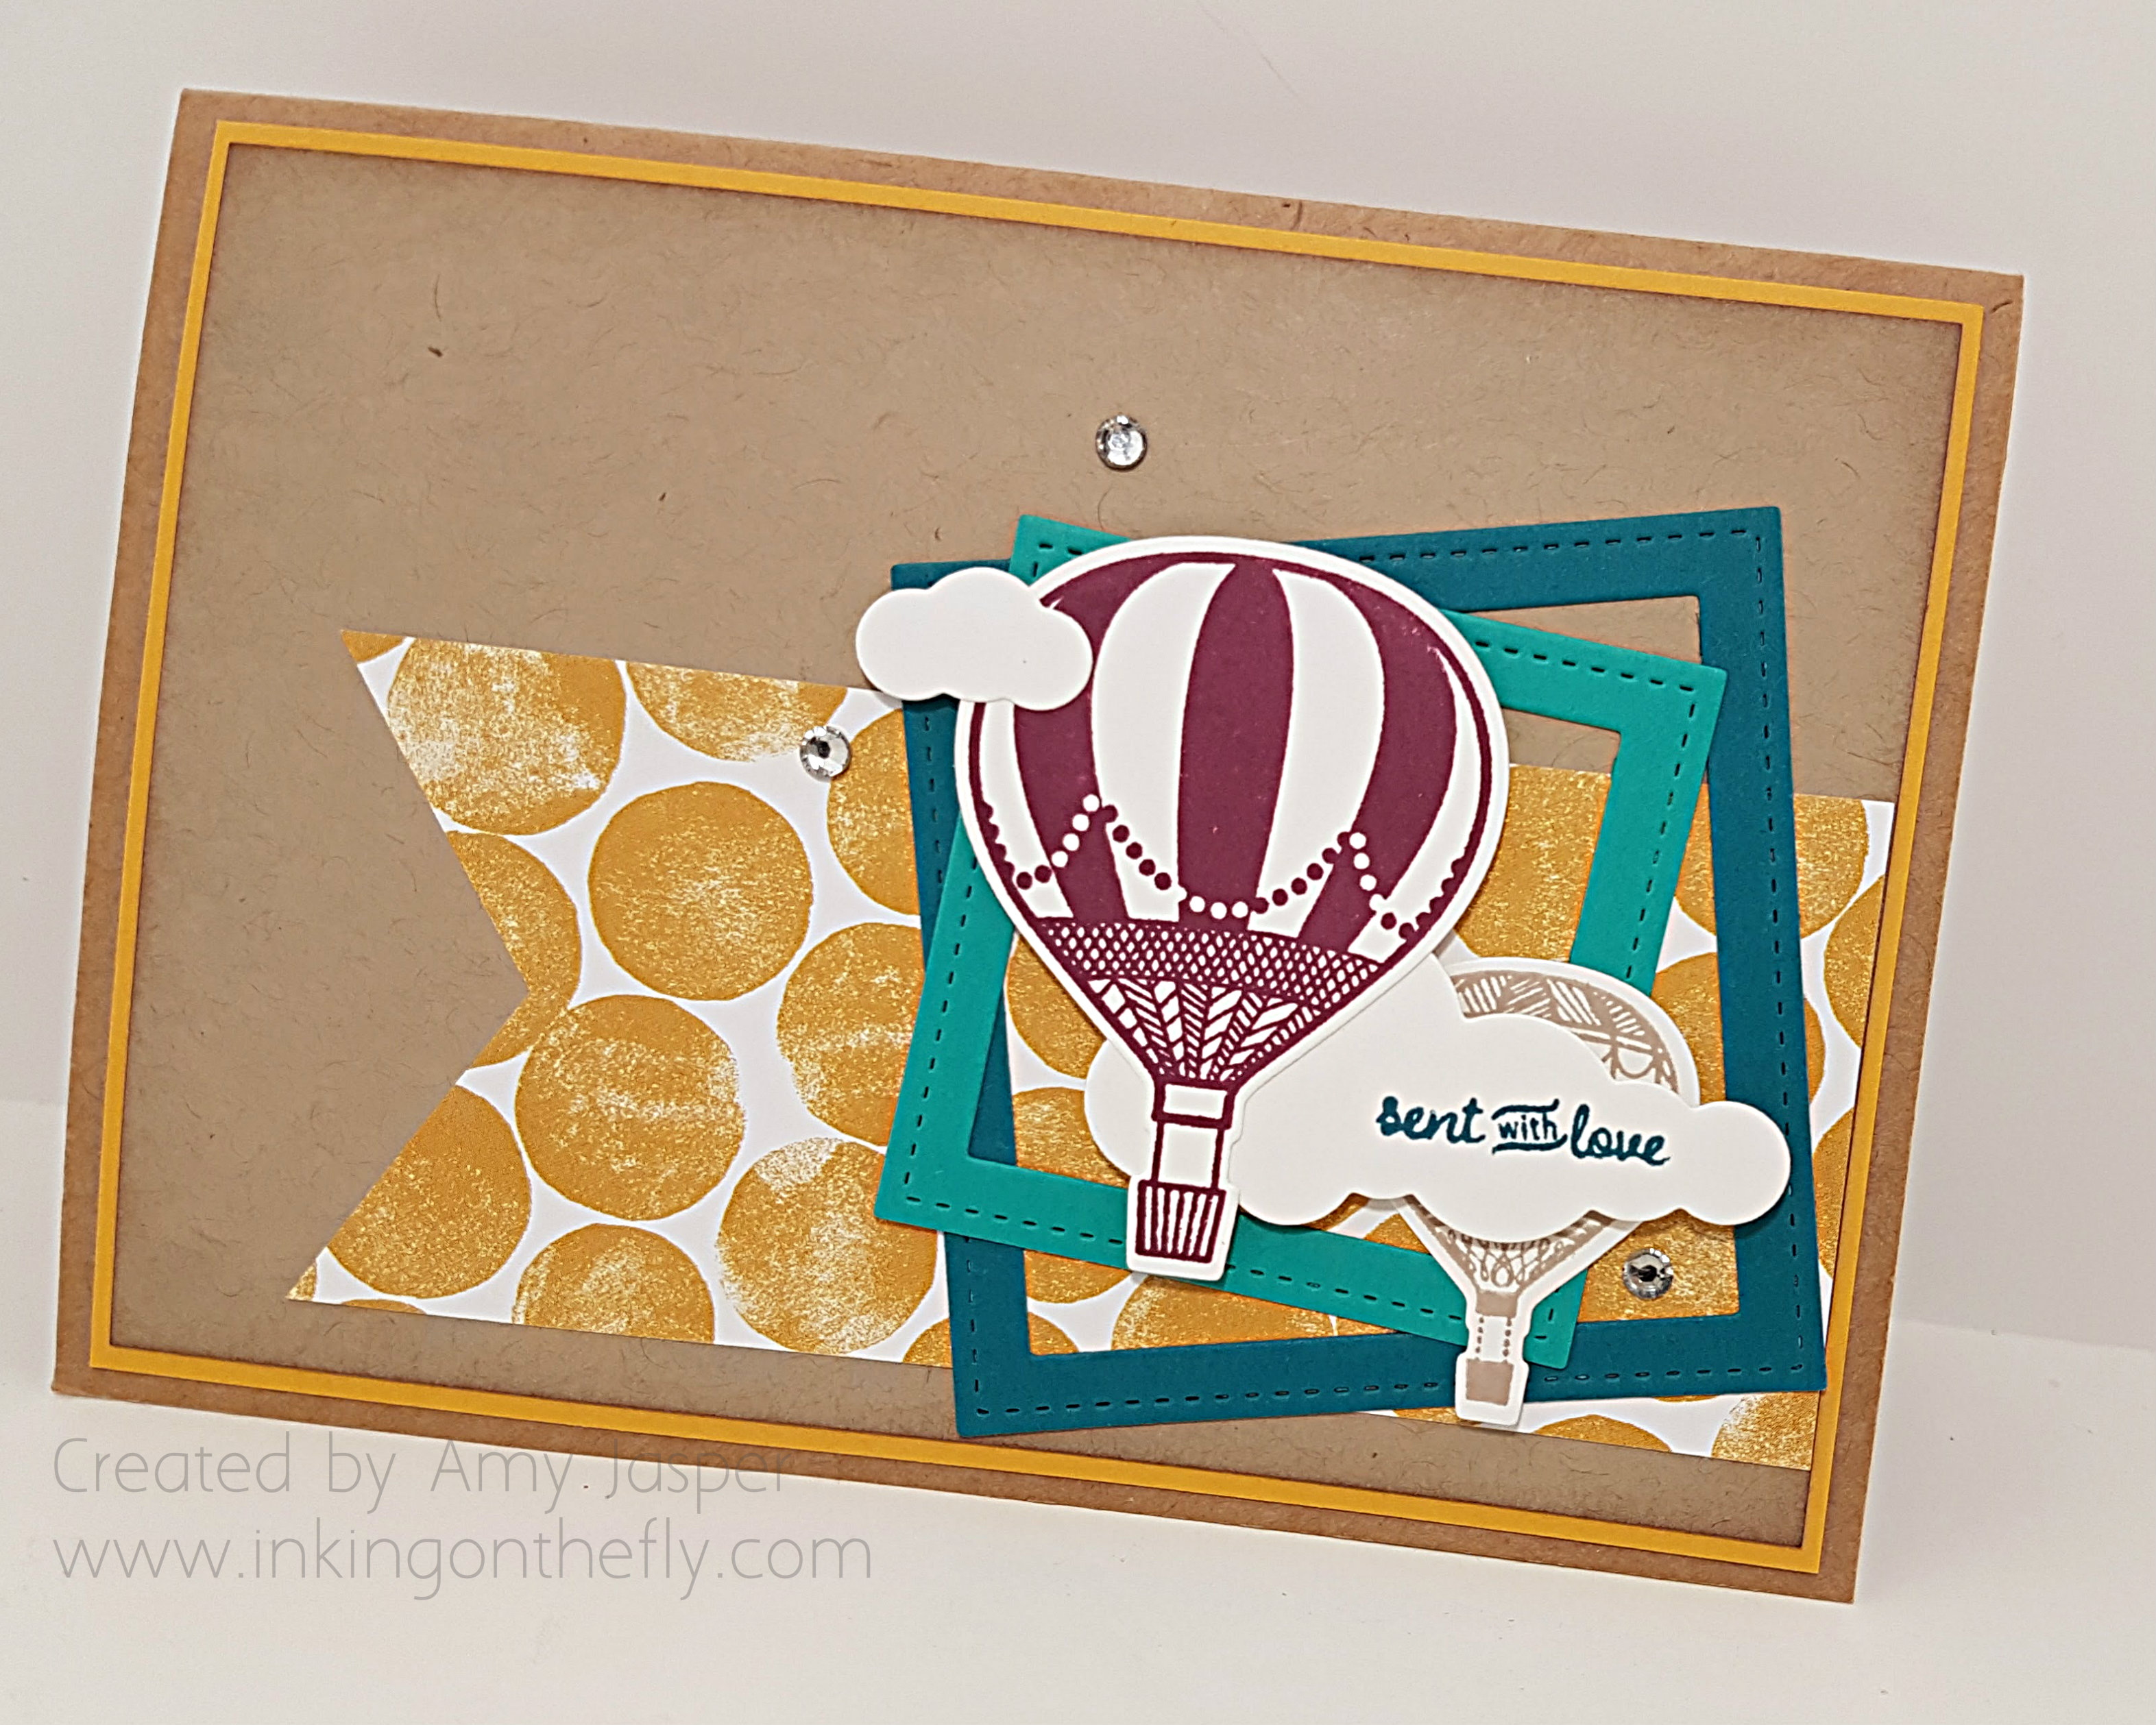
Sending Smiles Shadow Box Card by Amy Jasper www.inkingonthefly.comThe inside if the card it the fun part. More dies, of course.
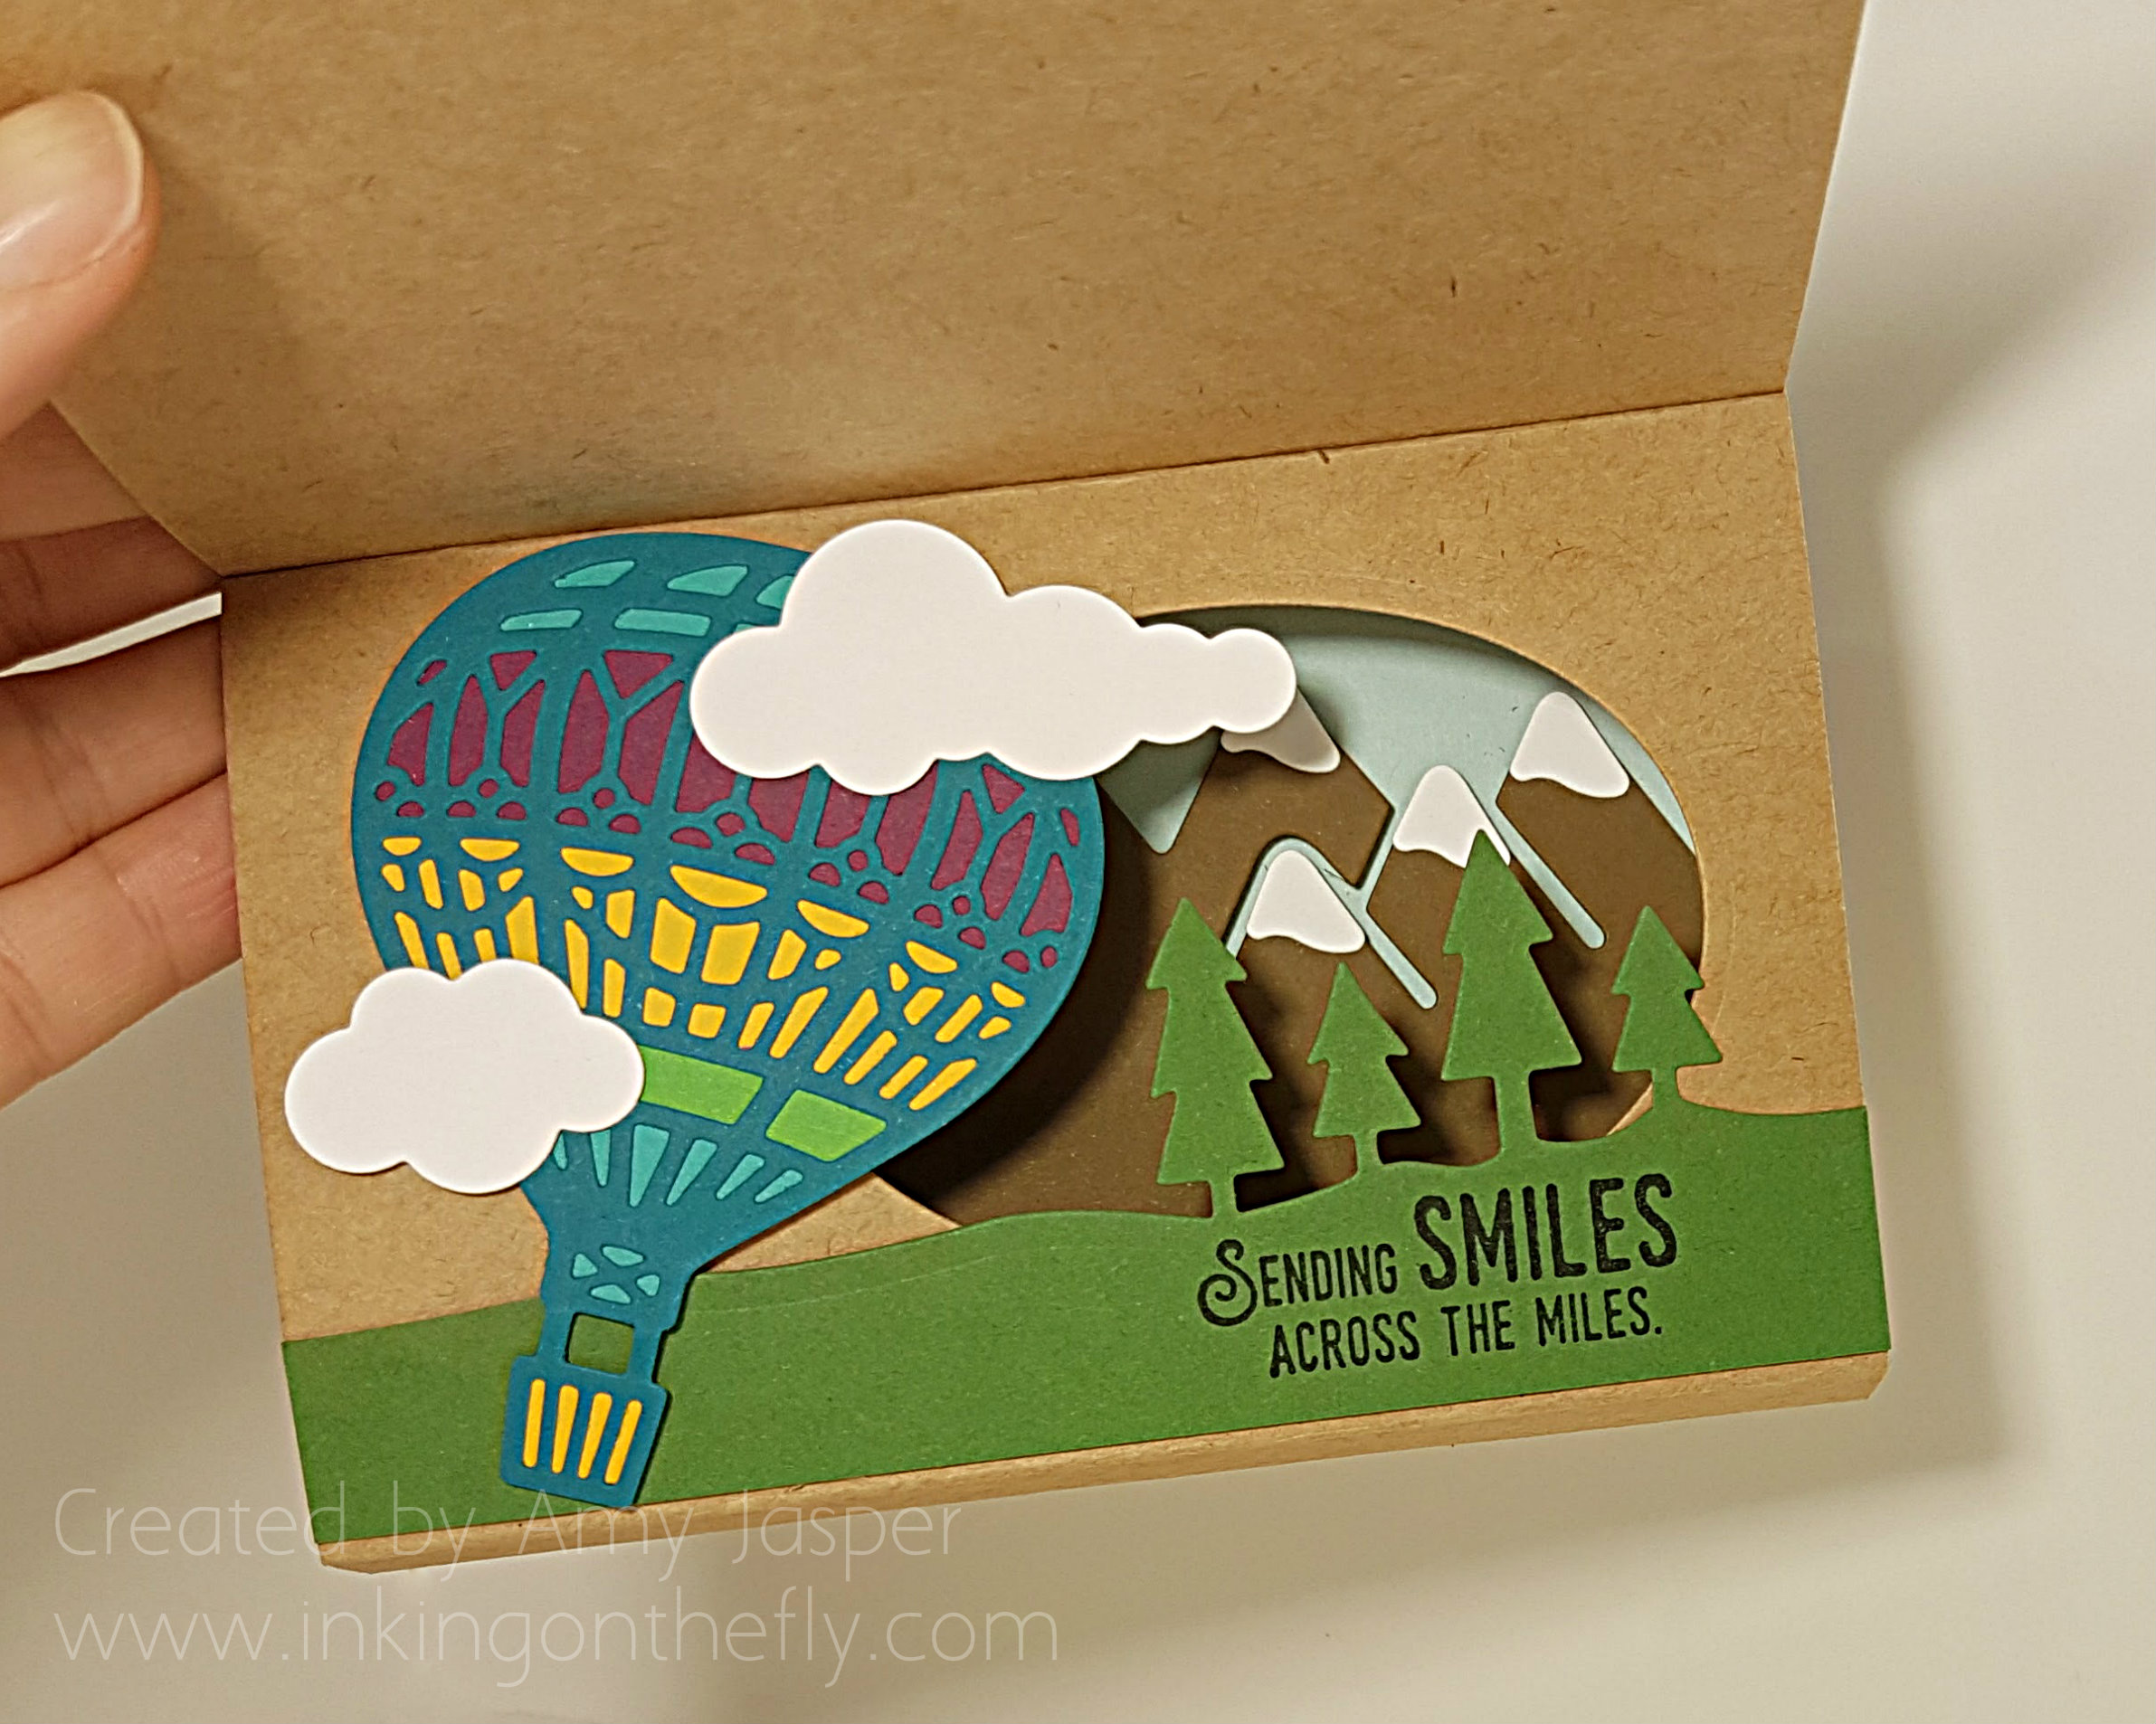
Sending Smiles Shadow Box card inside - by Amy Jasper www.inkingonthefly.comThe base of this card is super easy to make and finishes to a 4″ x 5.5″ card. I started with a 12″ x 5.5″ piece of Kraft cardstock. Once you have your piece of cardstock cut for the base of the card, you can score it to prepare for your fancy folding. I love using my Simply Scored tool and scoring stylus for projects like this – it gives me quick measuring and deep impressions that are easy to see and fold so nicely. I scored the paper at 4″, 7.5″, 8″, and 11.5″. Once you’ve precut your “window” on the inside of the card (this is going to be the section between the 8″ and the 11.5″ score marks), you can fold along your score lines, using your Bone Folder to make the folds nice and crisp.

You can’t really see it well in the photos, but the folds all fold in the same direction until the 11.5″ score line meets the inside of the card front, where you adhere it in place. Oh dear, maybe I’ll have to add pictures later … Let me know how it goes.

The rest of the design is simply layering, stamping, and die cutting (LOTS of die cutting!).

Now that you’ve seen my design inspired by the As You See It Challenge sketch, why not try the sketch yourself. Head on over to the As You See It Challenge Blog and see what the other designers have come up with and get creating!! But before you do anything else, be sure to leave me a note to say that you stopped by!
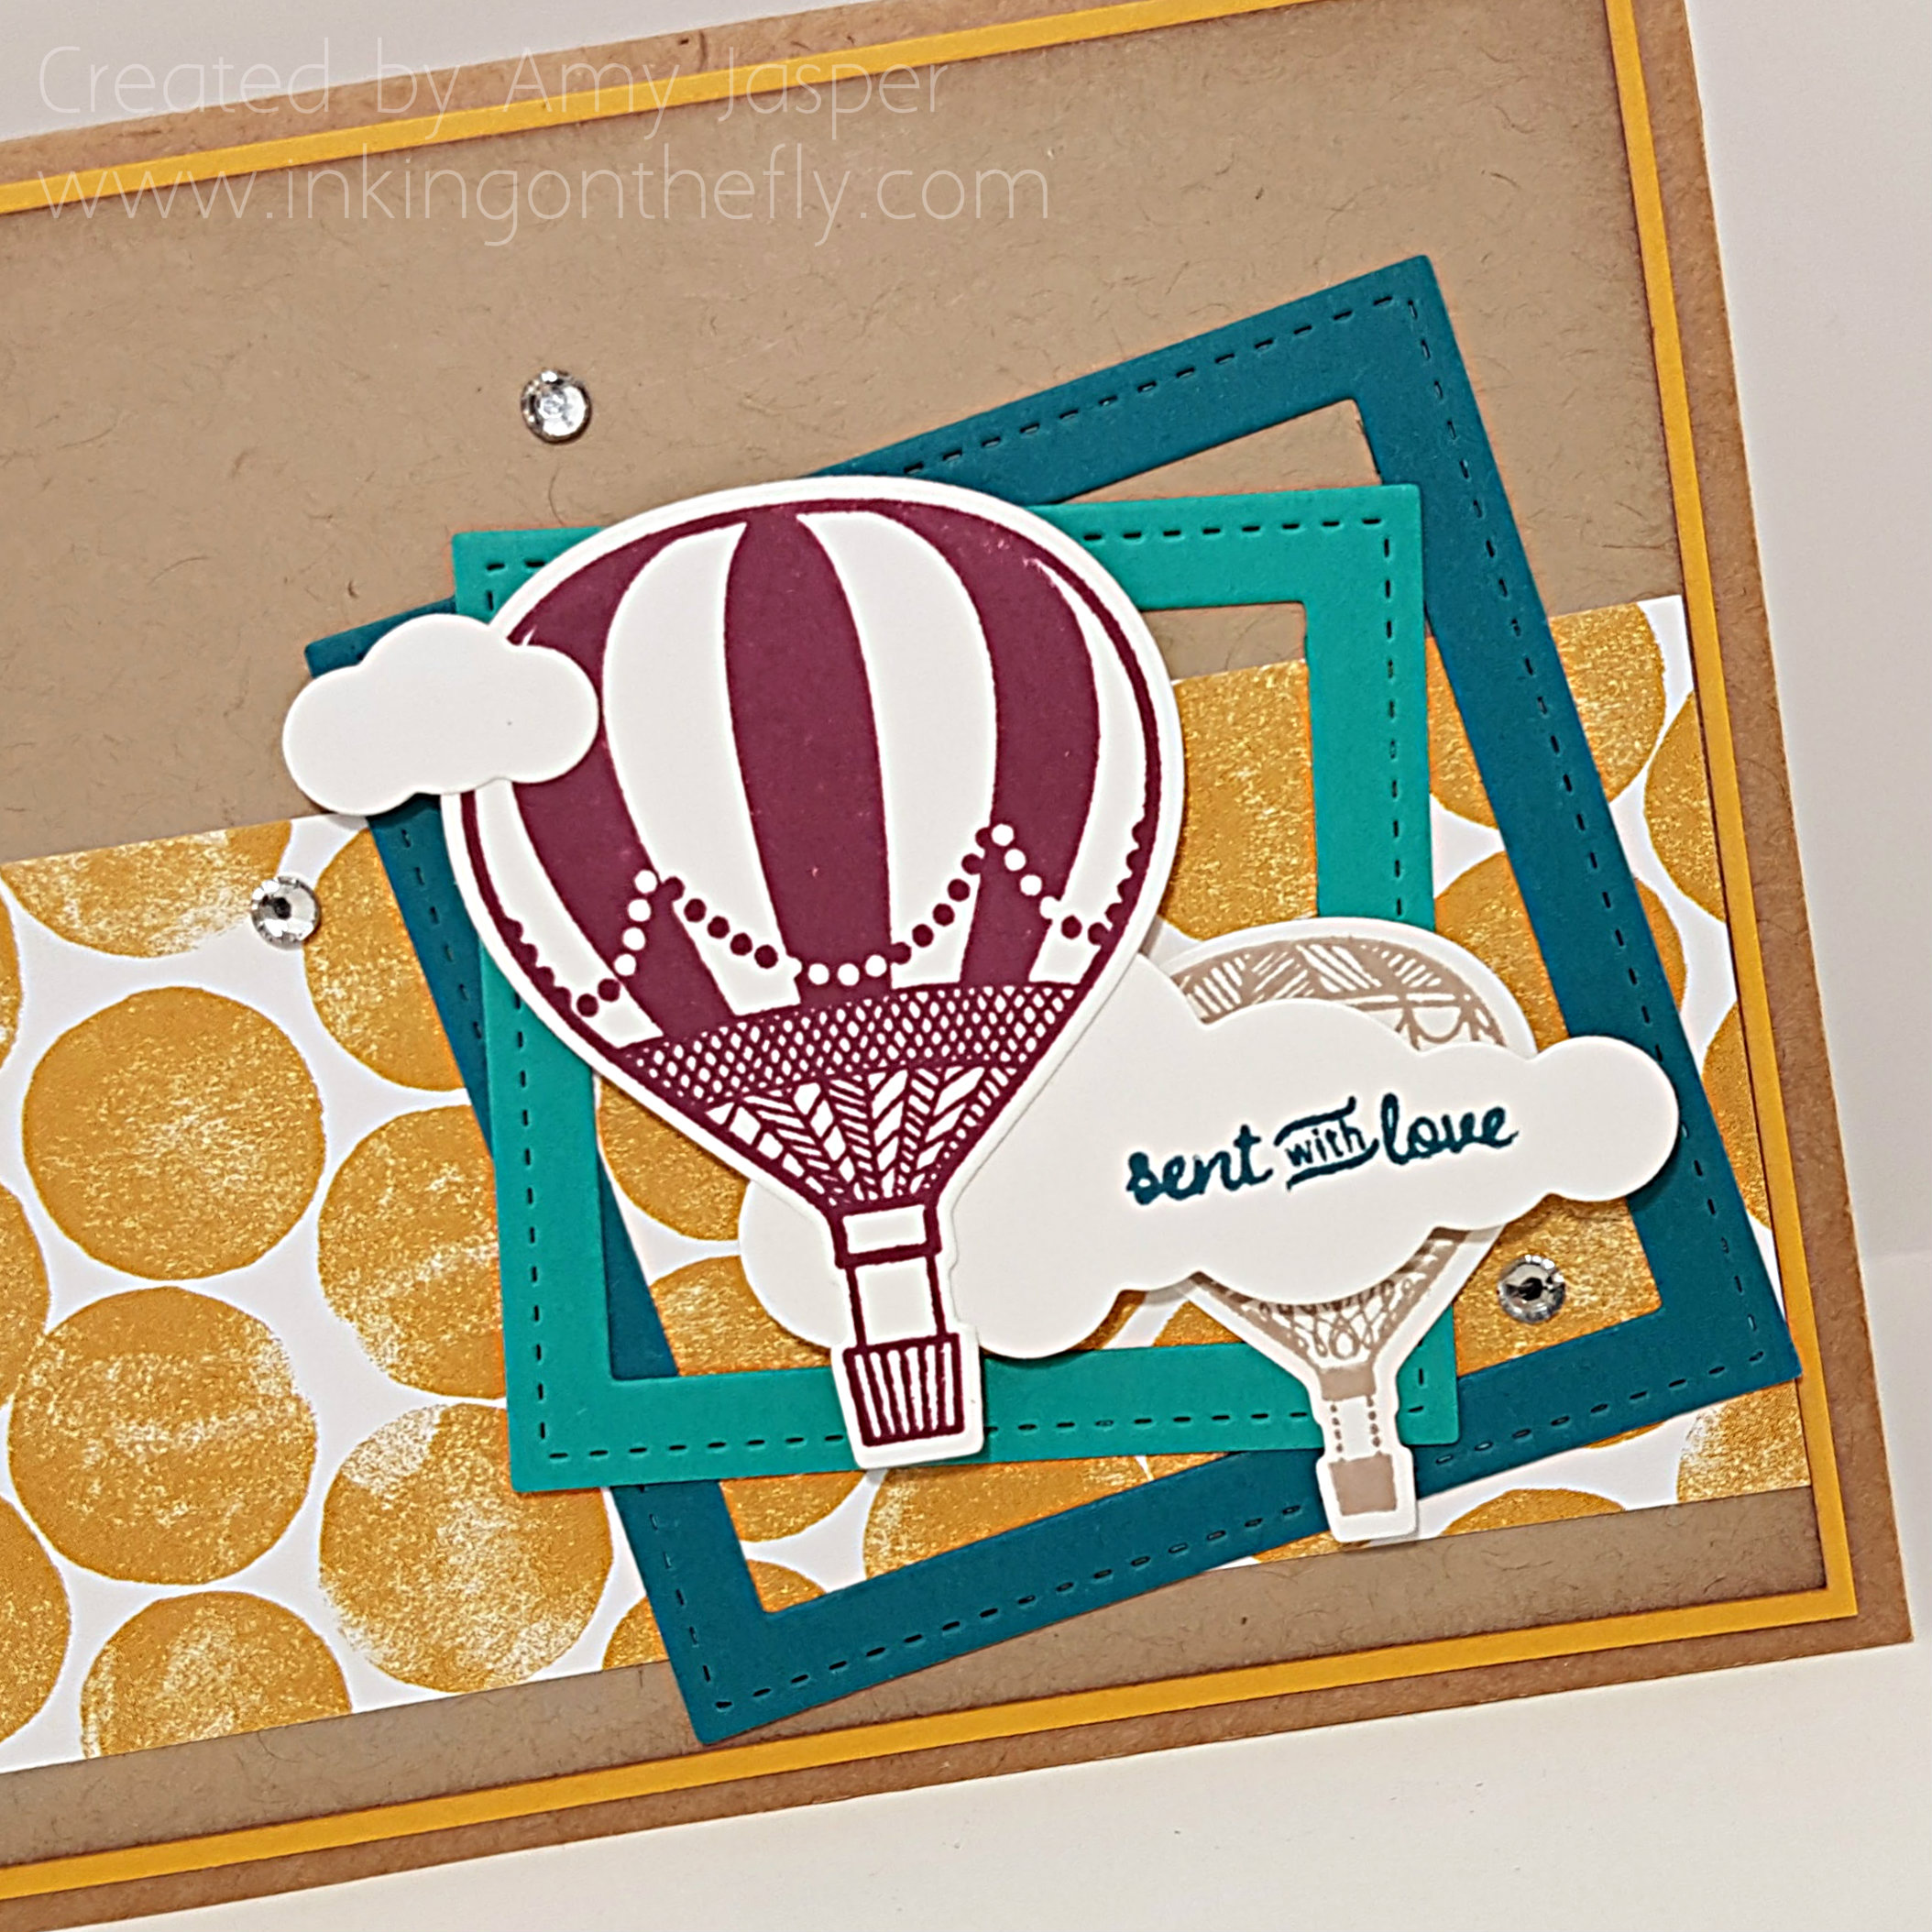
Sending Smiles Shadow Box Card by Amy Jasper www.inkingonthefly.comSupplies used are all from Stampin’ Up.

  • Paper: Kraft Designer Paper, Crushed Curry Cardstock, Crumb Cake cardstock, Serene Scenery Designer Series Paper Stack, Island Indigo Cardstock, Whisper White Cardstock, Rich Razzleberry Cardstock, Cucumber Crush Cardstock, Garden Green Cardstock, Soft Suede Cardstock, Soft Sky Cardstock.
  • Stamps: Lift Me up stamp set, Sealed with Love Stamp set.
  • Inks: Crumb Cake, Island Indigo, Rich Razzleberry, Jet Black Stazon
  • Embellishments: Basic Rhinestones
  • Tools: Big Shot, Precision Plate, Up and Away Thinlits Dies, Stitched Framelit Dies, Outdoor Adventure Framelit Dies, Simply Scored, Bone Folder.
  • Adhesives: Stampin’ Dimensionals, Tombo Multipurpose Liquid Glue, Fine Tip Glue Pen
 

Save

Gold and Blushing Wedding Card

I thought it was time to give my Floral Phrases Bundle a test ride!

Of course, I started with a challenge from the As You See It Challenge Blog. I design a sample card for this challenge blog once every two weeks, so that crafty stampin’ folks like yourselves can see some different ways to work with the challenge. Our hope is that you will want to try the challenge and share what you made with us by linking it to the challenge blog site. It’s fun! And it gets your creative mojo going!

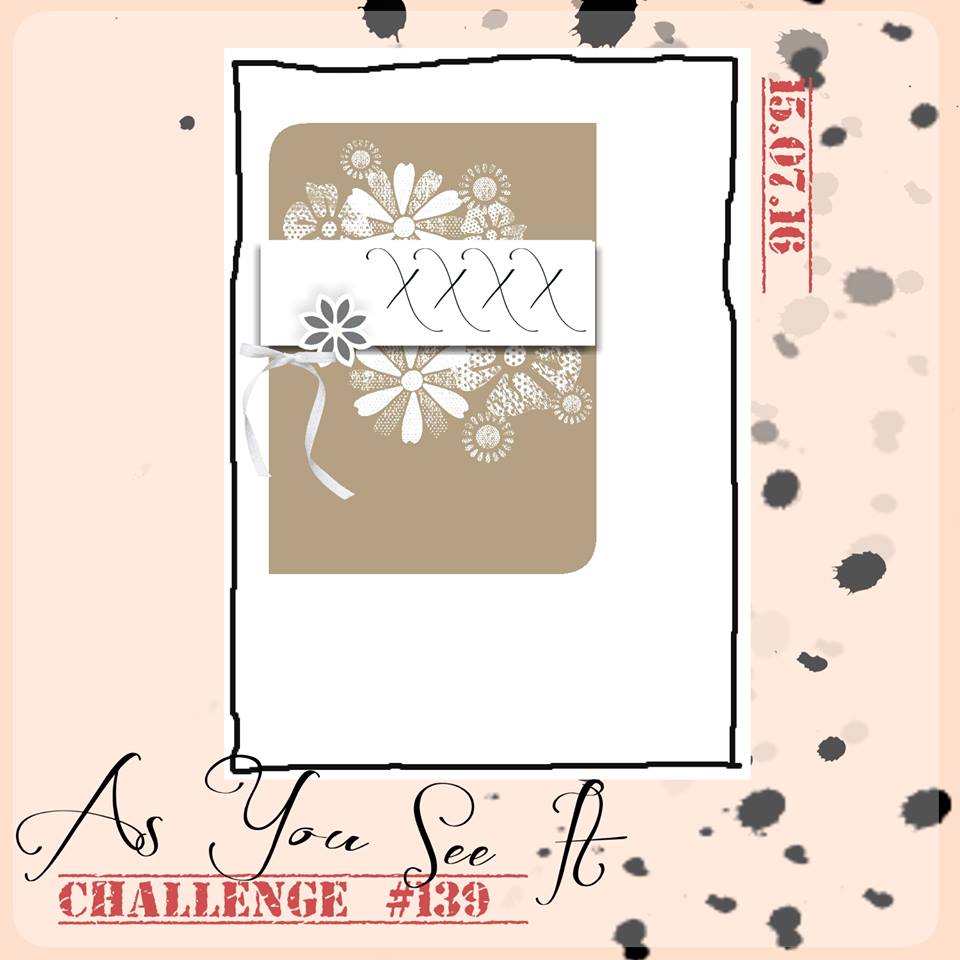
Here’s the challenge sketch:

AYSI #139Here’s my take on the challenge:

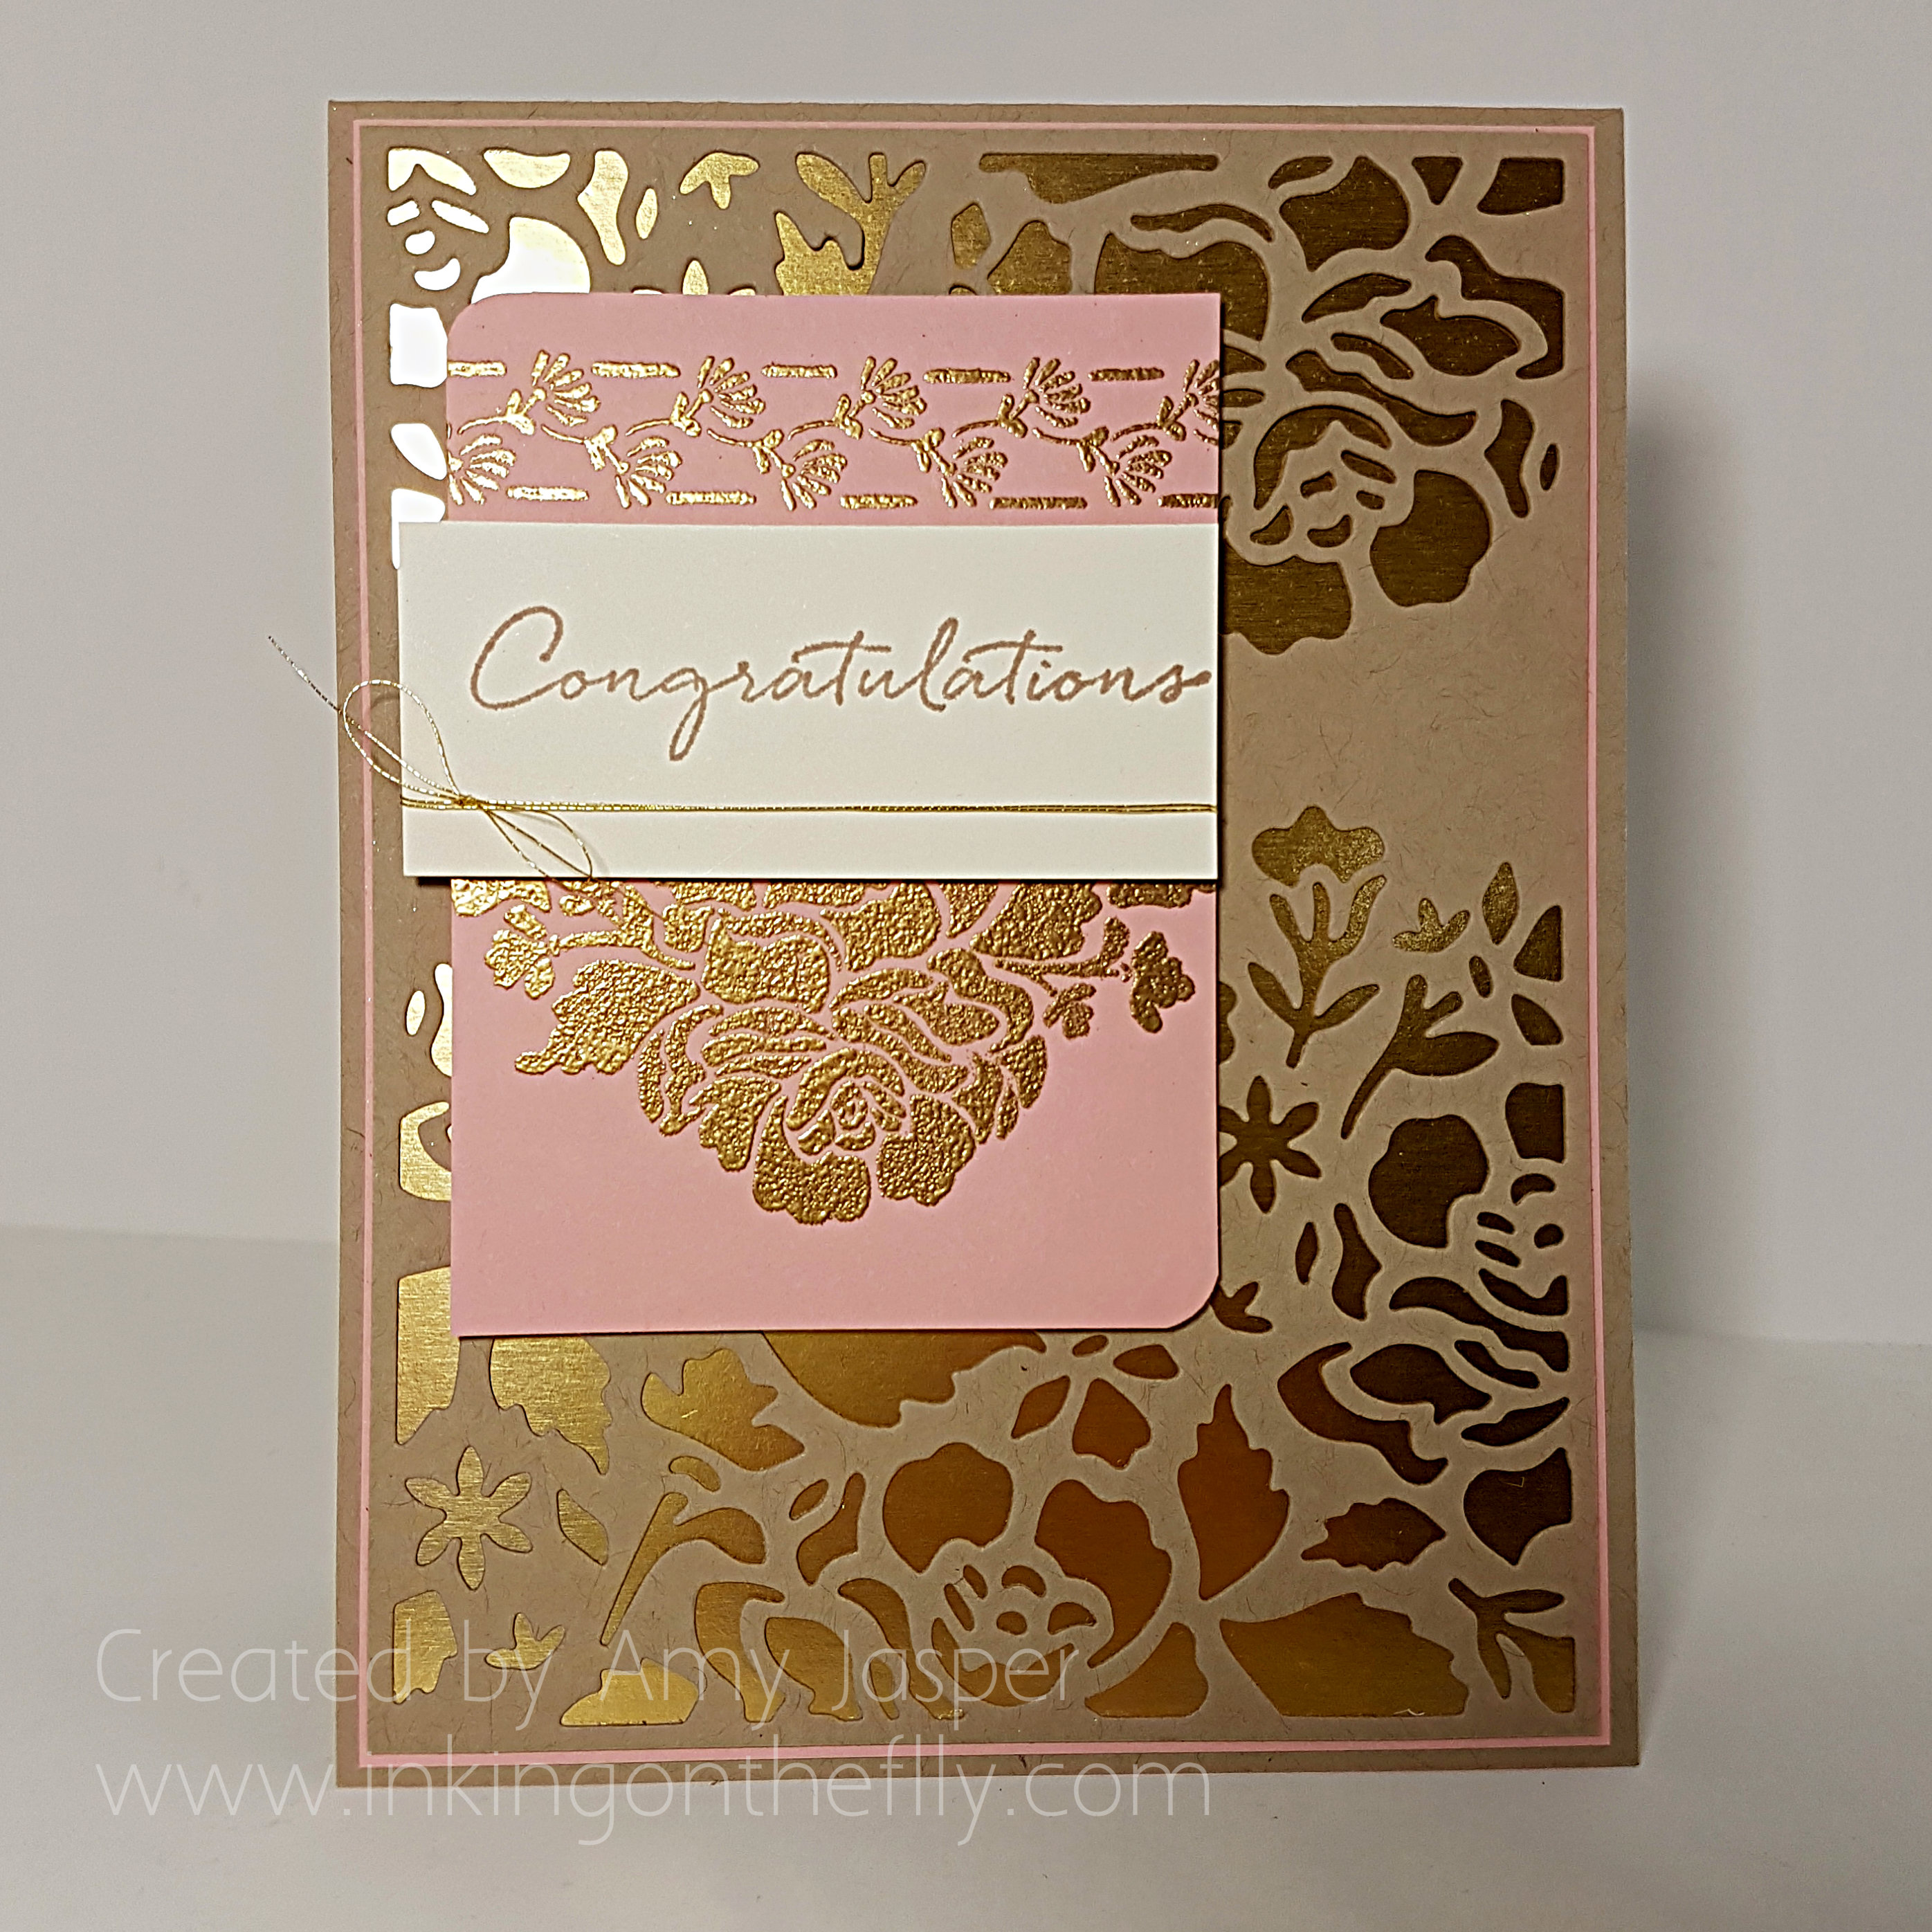
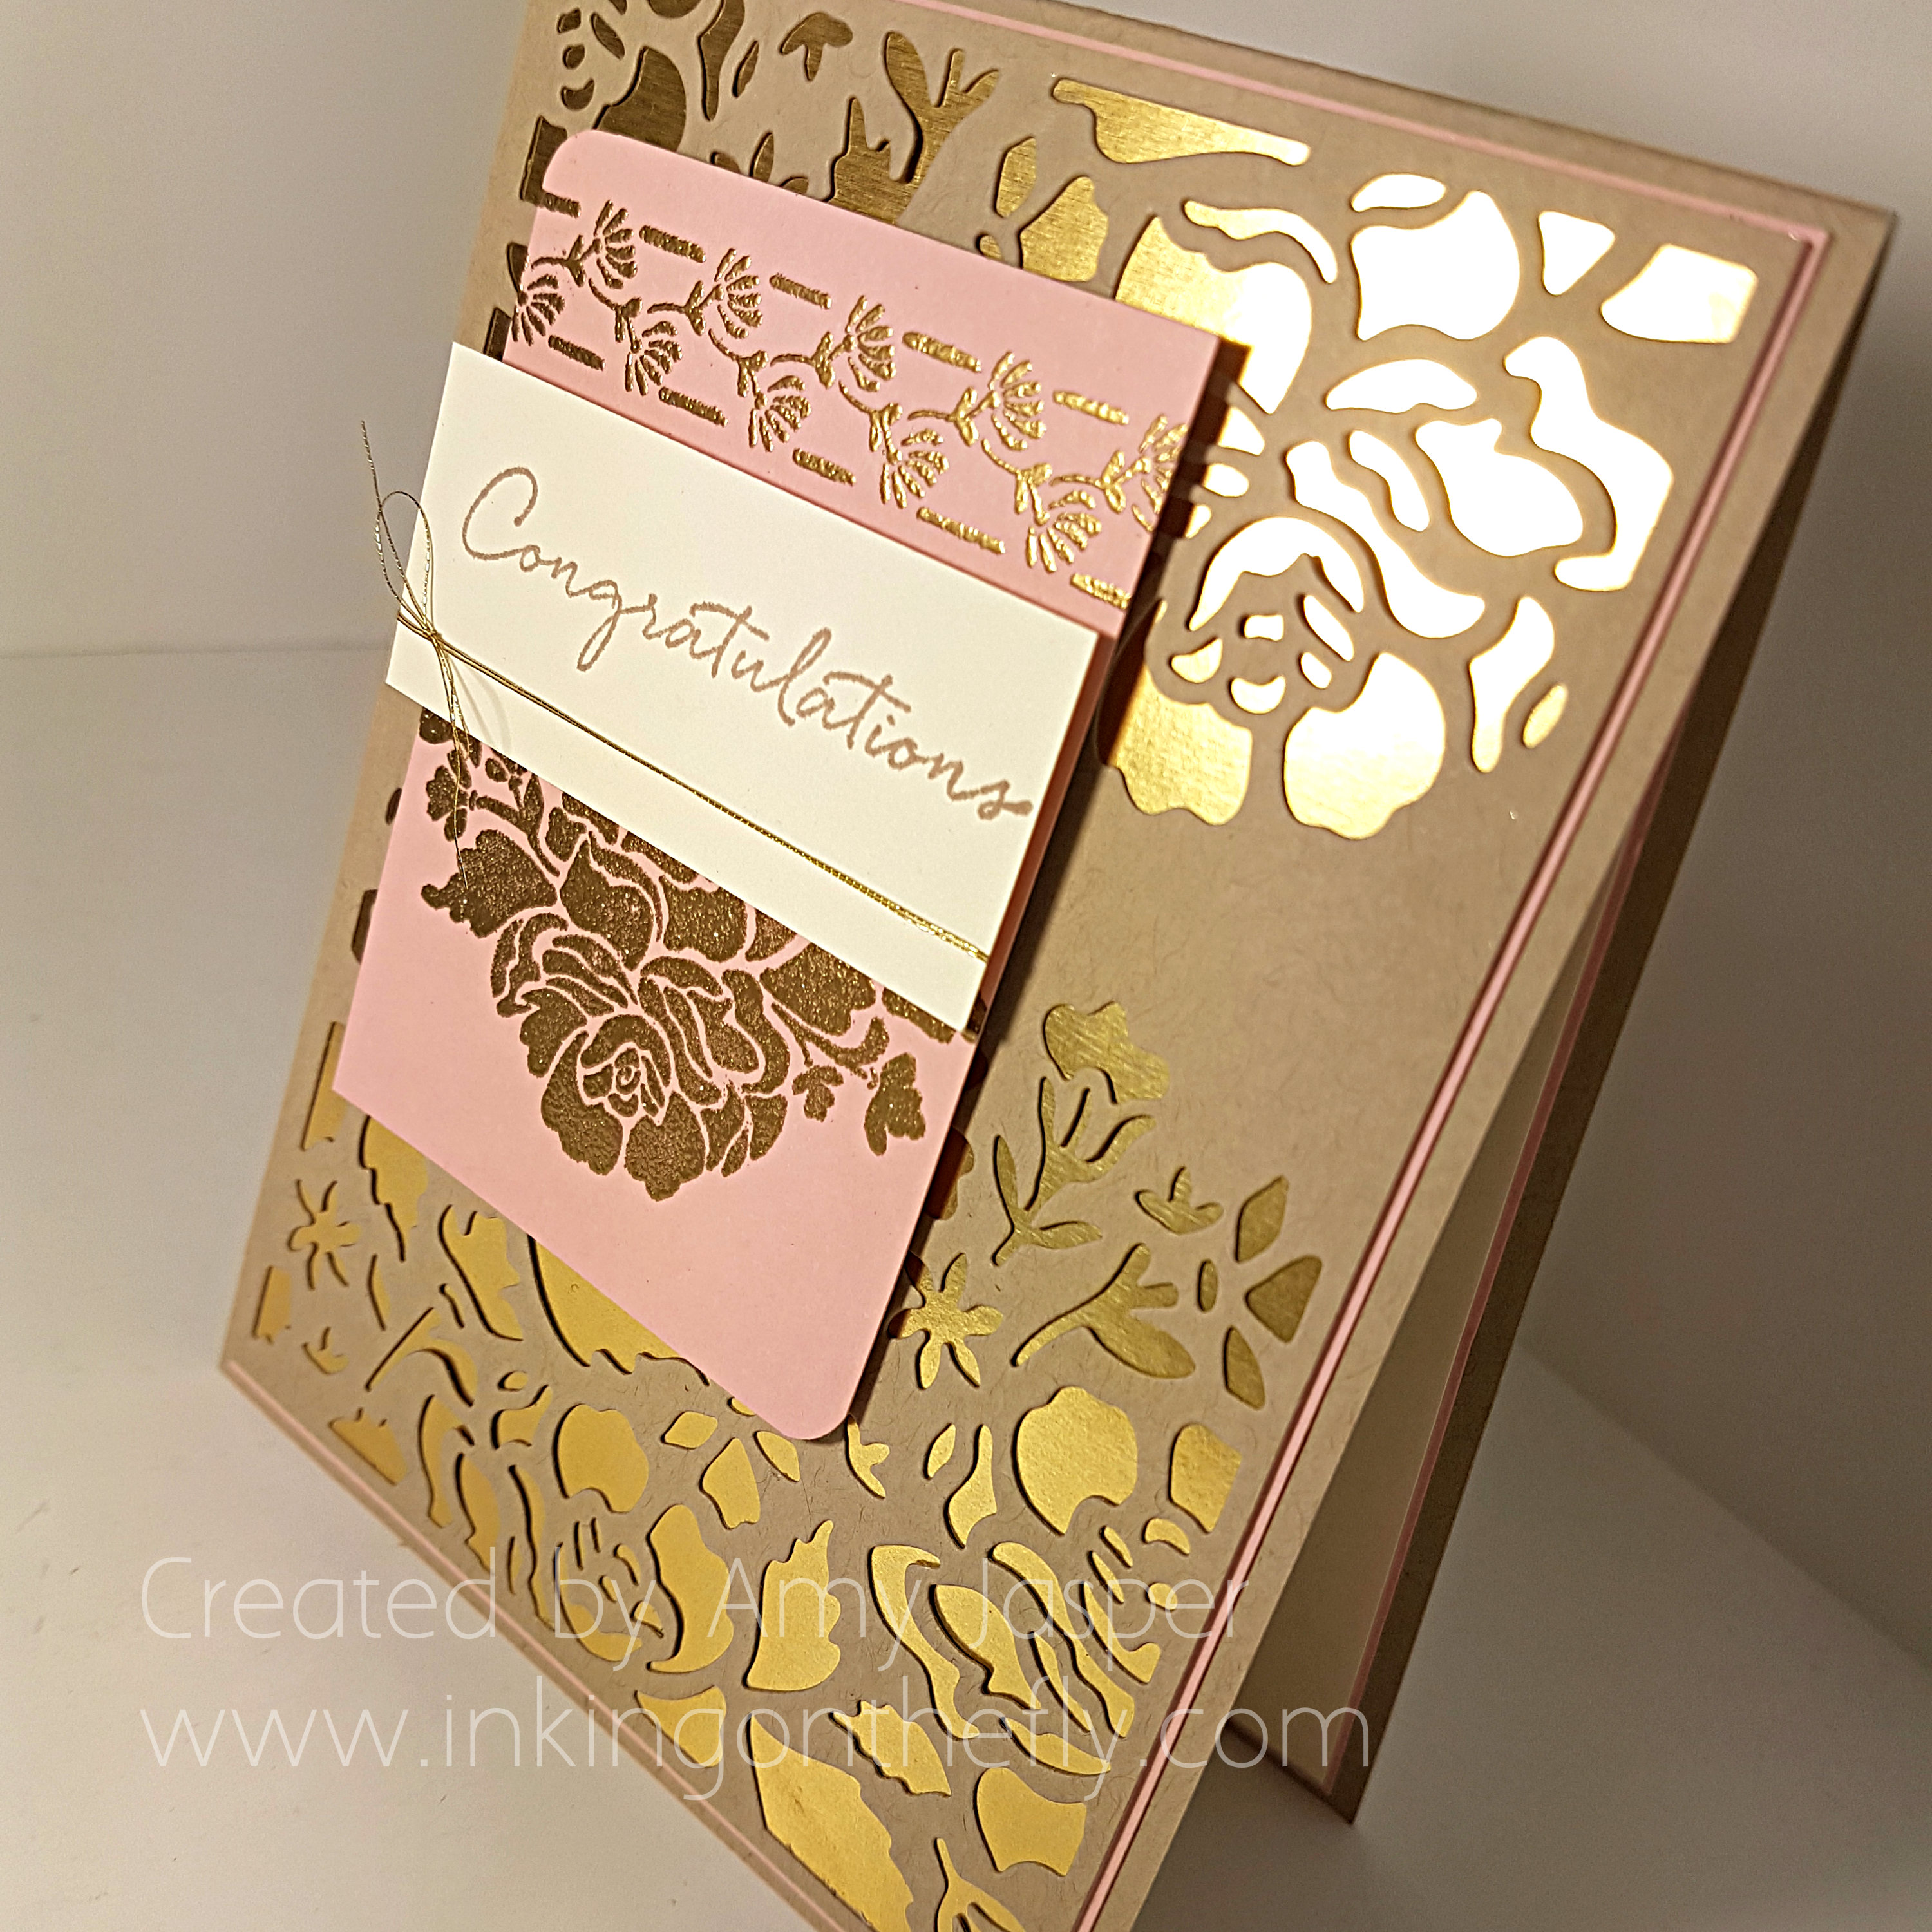
Gold and Blushing Wedding card by Amy Jasper using the Detailed Floral Thinlit die and the Floral Phrases Stamp Set from Stampin' Up - www.inkingonthefly.comI used Crumb Cake Cardstock for the card base, then a thin layer of Blushing Bride cardstock under the Gold Foil layer. The die cut Crumb Cake layer was cut using the Detailed Floral Thinlit Die with the Big Shot. I used my Precision Plate with this thinlit to ensure that all of the beautiful detailing would be easy to remove. The Big Shot Die Brush with the foam pad are extremely handy for getting all of the little bits out of the thinlit after running it and the paper through the Big Shot. I think I’d go quite nutty without it!!

Gold and Blushing Wedding Card by Amy Jasper using the Detailed Floral Thinlits Die and the Floral Phrases Stamp Set from Stampin' Up! - www.inkingonthefly.comI stamped my smaller piece of Blushing Bride Cardstock with images from the Floral Phrases stamp set with Versamark Ink (after using my handy Embossing Buddy on the paper first, of course), then applied and heated the Gold Embossing Powder. The Project Life Corner Rounder Punch finished a couple corners on that same layer before I adhered it to my card front with Stampin’ Dimensionals.

I used Crumb Cake ink with the sentiment from the Floral Phrases stamp set on the Very Vanilla cardstock, wrapped some Gold Metallic Thread around the cardstock, tied a bow (easier said than done, with this thin thread! yikes!) and adhered it all to the card front with Stampin’ Dimensionals.

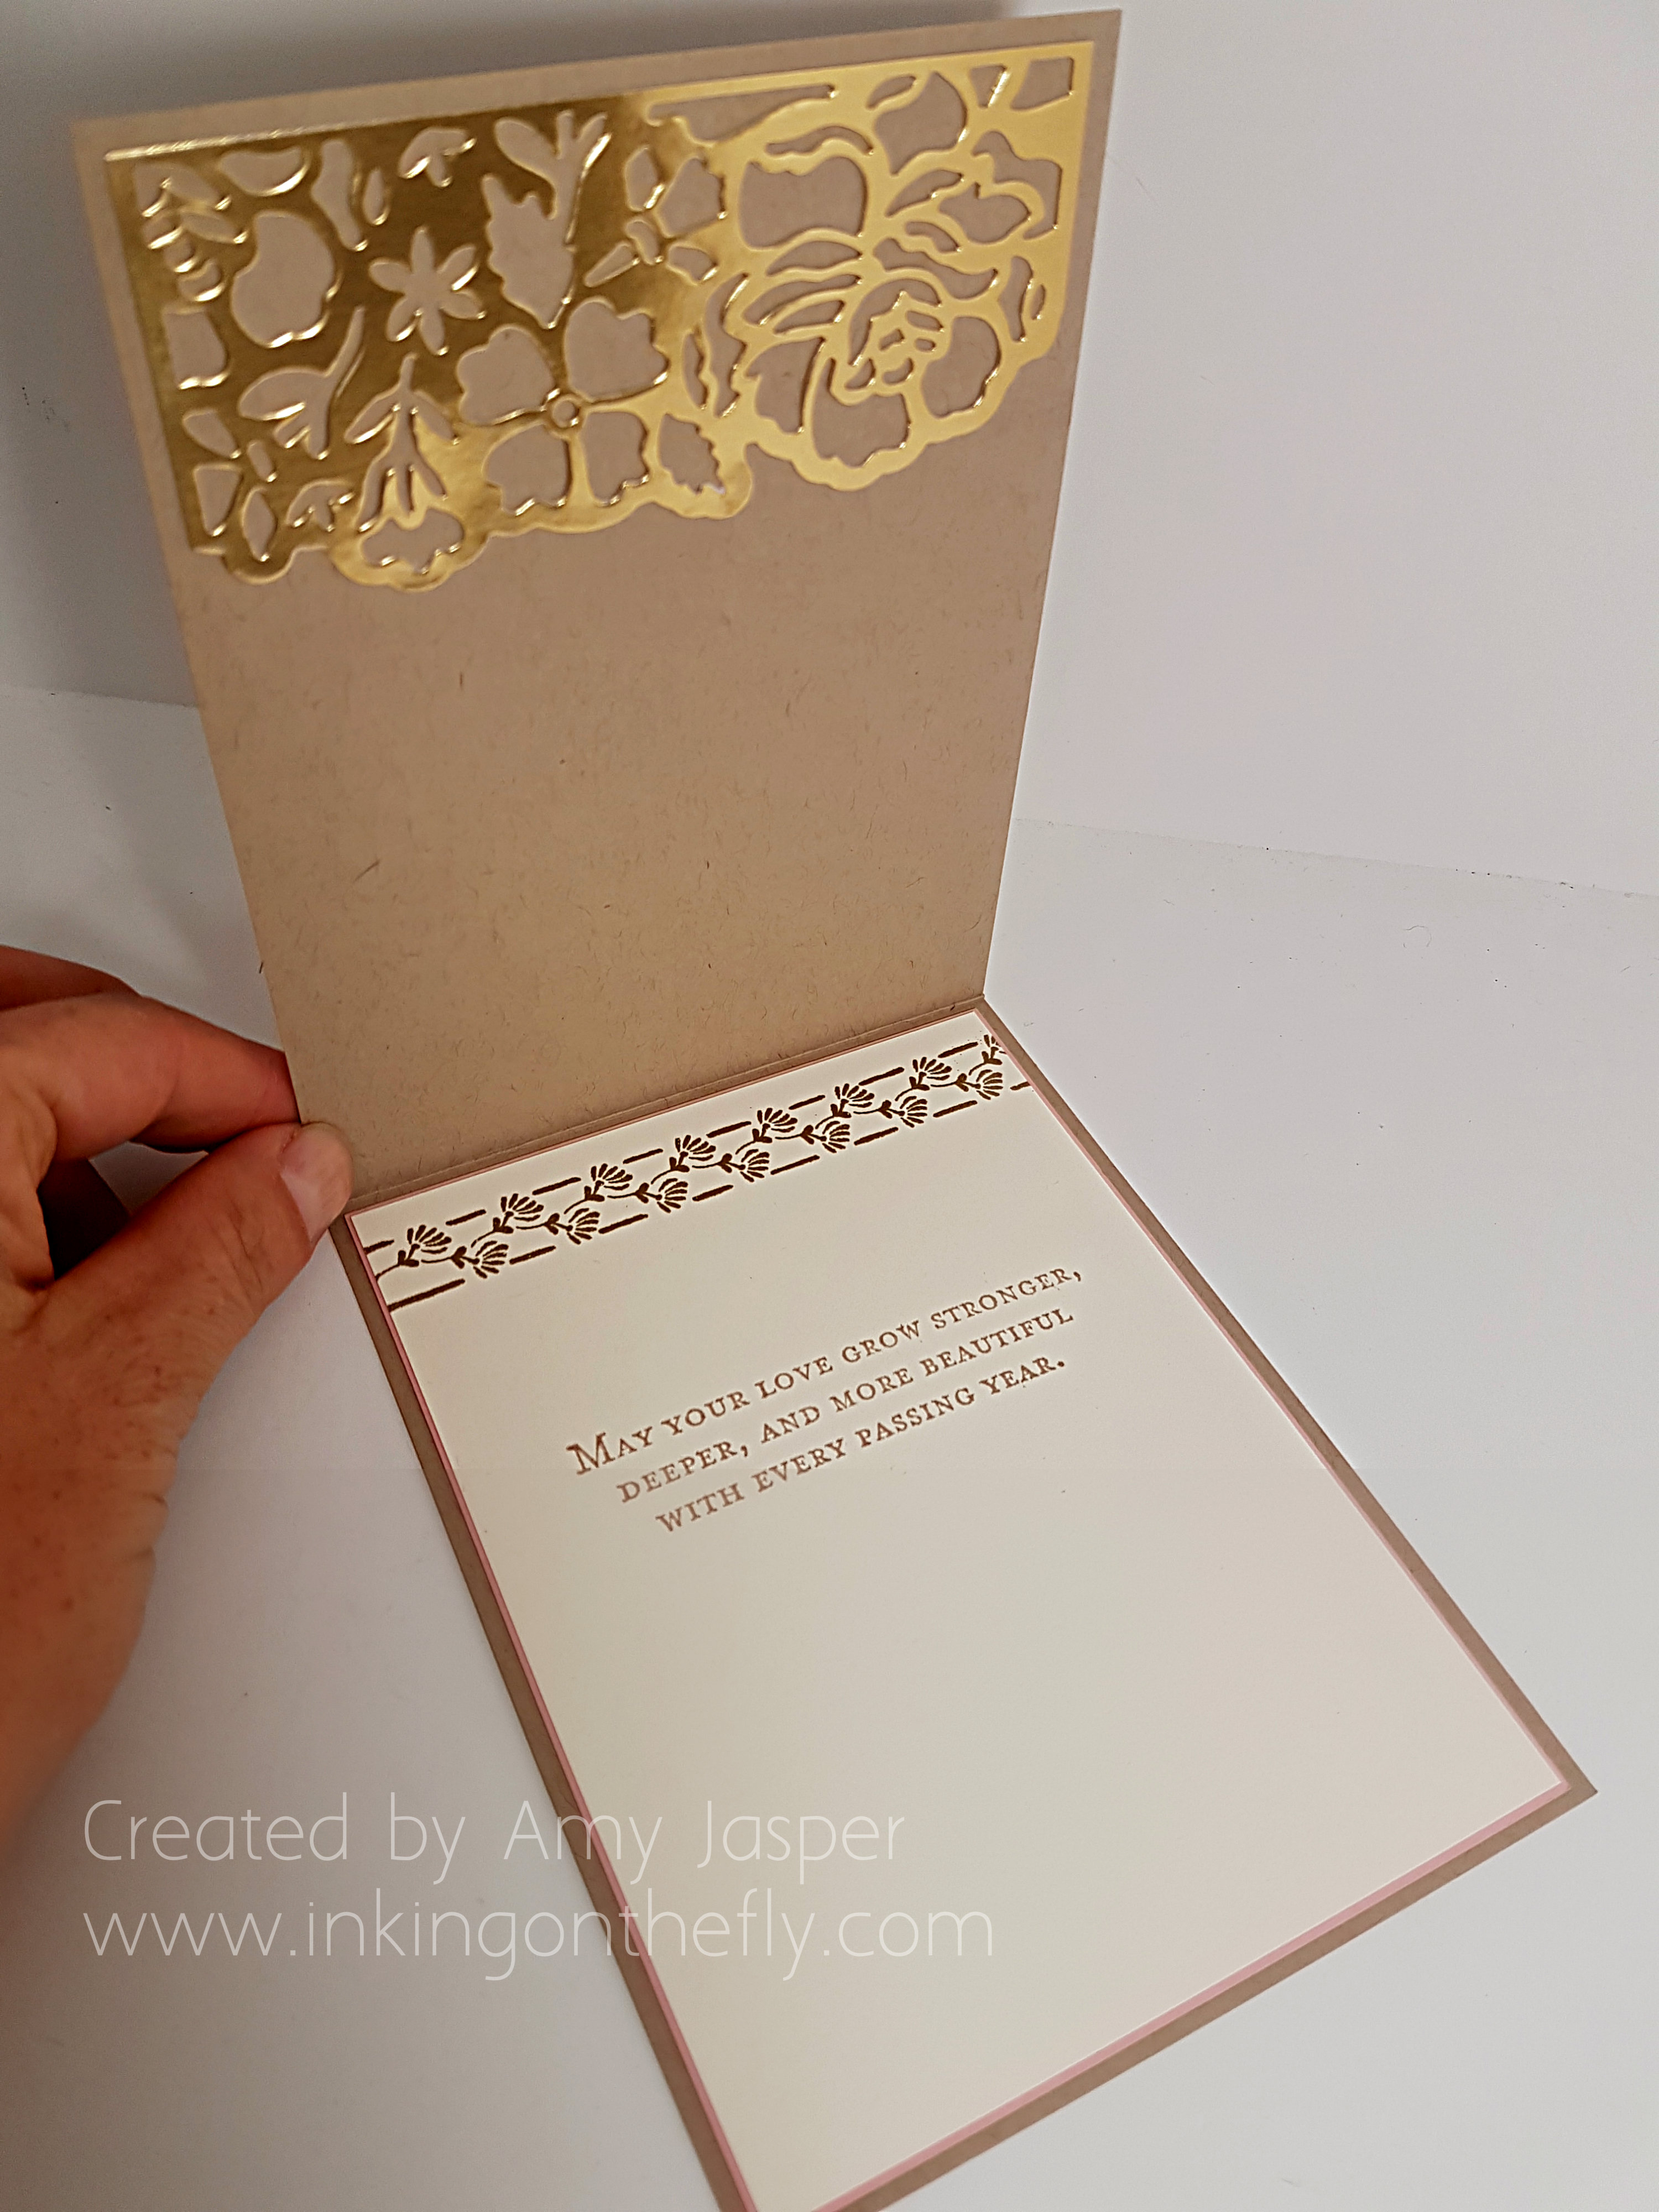
Because this is intended to be a wedding card, I added a few touches to the inside as well.

inside of the Gold and Blushing Wedding Card by Amy Jasper using the Floral Phrases Stamp Set and the Detailed Floral Thinlits die by Stampin' Up! - www.inkingonthefly.comA thin matting layer of Blushing Bride cardstock frames the Very Vanilla layer where the sentiment and decoration is stamped. The sentiment is stamped with Crumb Cake ink, while the linear decorative stamp is stamped in Versamark ink, then embossed with Gold Embossing Powder.

The lovely flourish at the top inside of the card is cut from Gold Foil paper using the Detailed Floral Thinlit and the Big Shot.

I used Tombo Multipurpose Liquid Glue to adhere the detailed die cuts to this card, but the Fine-Tip Glue Pen would be a much better choice to ensure that you don’t end up with any accidental sticky residue. The trick with either of these adhesives is to use as little as possible to avoid having it ooze out from under the paper, making an unsightly mess.

Gold and Blushing Wedding Card by Amy Jasper using the Detailed Floral Thinlits Die and the Floral Phrases Stamp Set from Stampin' Up! - www.inkingonthefly.comYou can order any of these supplies online from me be clicking on the SHOP button on this website. Stampin’ Up has a great promotion this month to earn bonus dollars toward purchases in August. Make sure you take advantage of this opportunity to get FREE STUFF!!!

“I HATE FREE STUFF!!” (said no respectable person, ever!!)

Save

Save

Save

Cleverness with Vellum

Ah. It’s good to be back and have something to share. I hope you will be patient with me and my sporadic posts. I’m hoping to post at least every two weeks from now on, in line with the new As You See It Challenge schedule. I hope you will keep coming back to check things out.

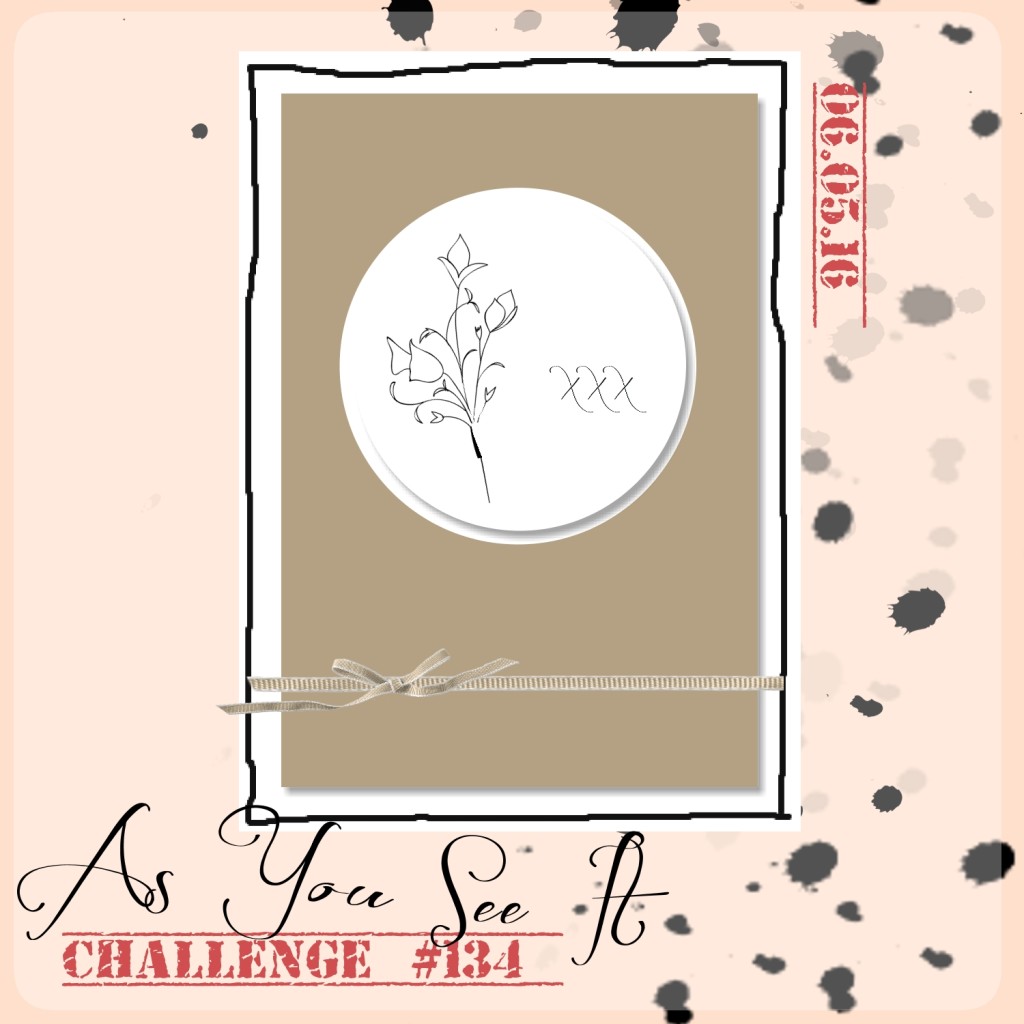
Here’s the sketch for today’s challenge:

#134aysiI decided to play this one up a bit and try a technique that I found online. I can’t for the life of me, remember who posted the tutorial that I followed to create this card, otherwise, I would have just posted a link to her video. If you know who, please say so in the comments. I have a simple picture tutorial to guide you through how this design is made. It’s pretty awesome!!

(June 2017 edit: One reader found the tutorial for me! It was Jennifer McGuire and you can find it by clicking here. Special thanks to Jessica G. for taking the time to share the link in the comments. <3 Thanks Jessica!)

Here’s my card:

IMG_9551

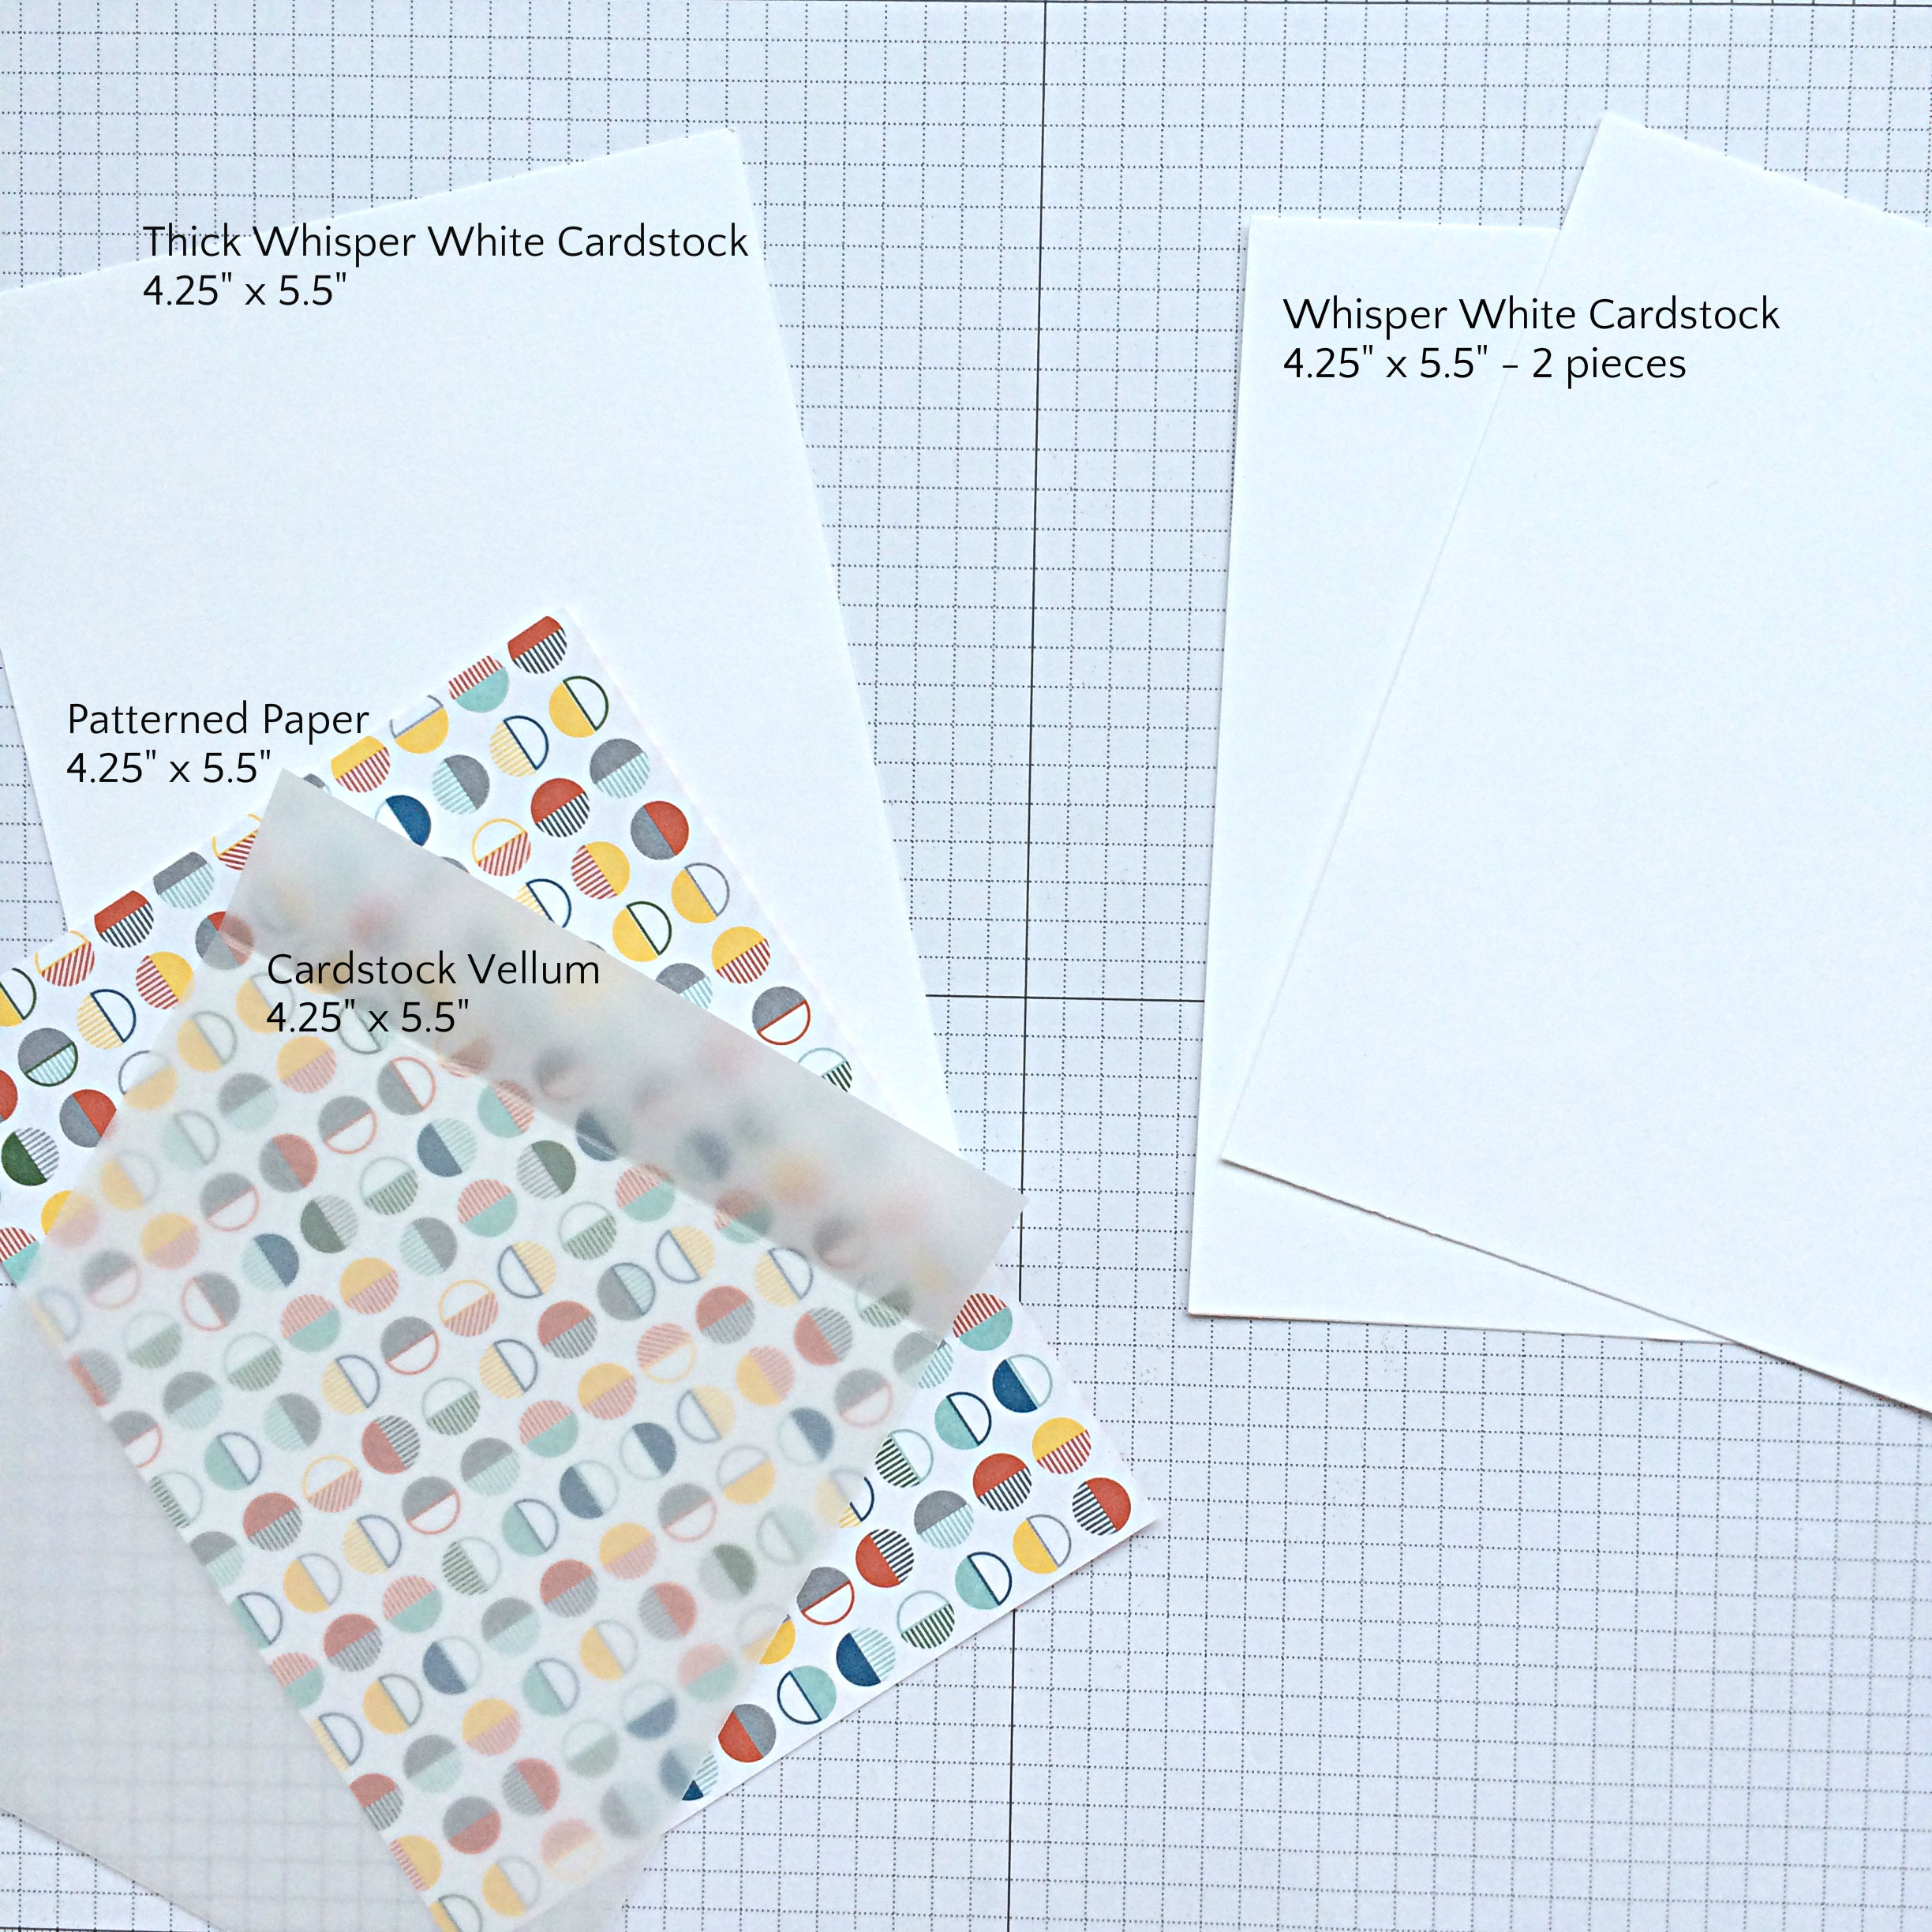
I used Thick Whisper White Cardstock, Schoolhouse Designer Series Paper, and Cardstock Vellum with Whisper White Cardstock for the card base. Here’s a photo tutorial to show how you can create this kind of Cleverness with Vellum:

#134 what you needThe Cardstock Vellum is scored 1″ from the top.

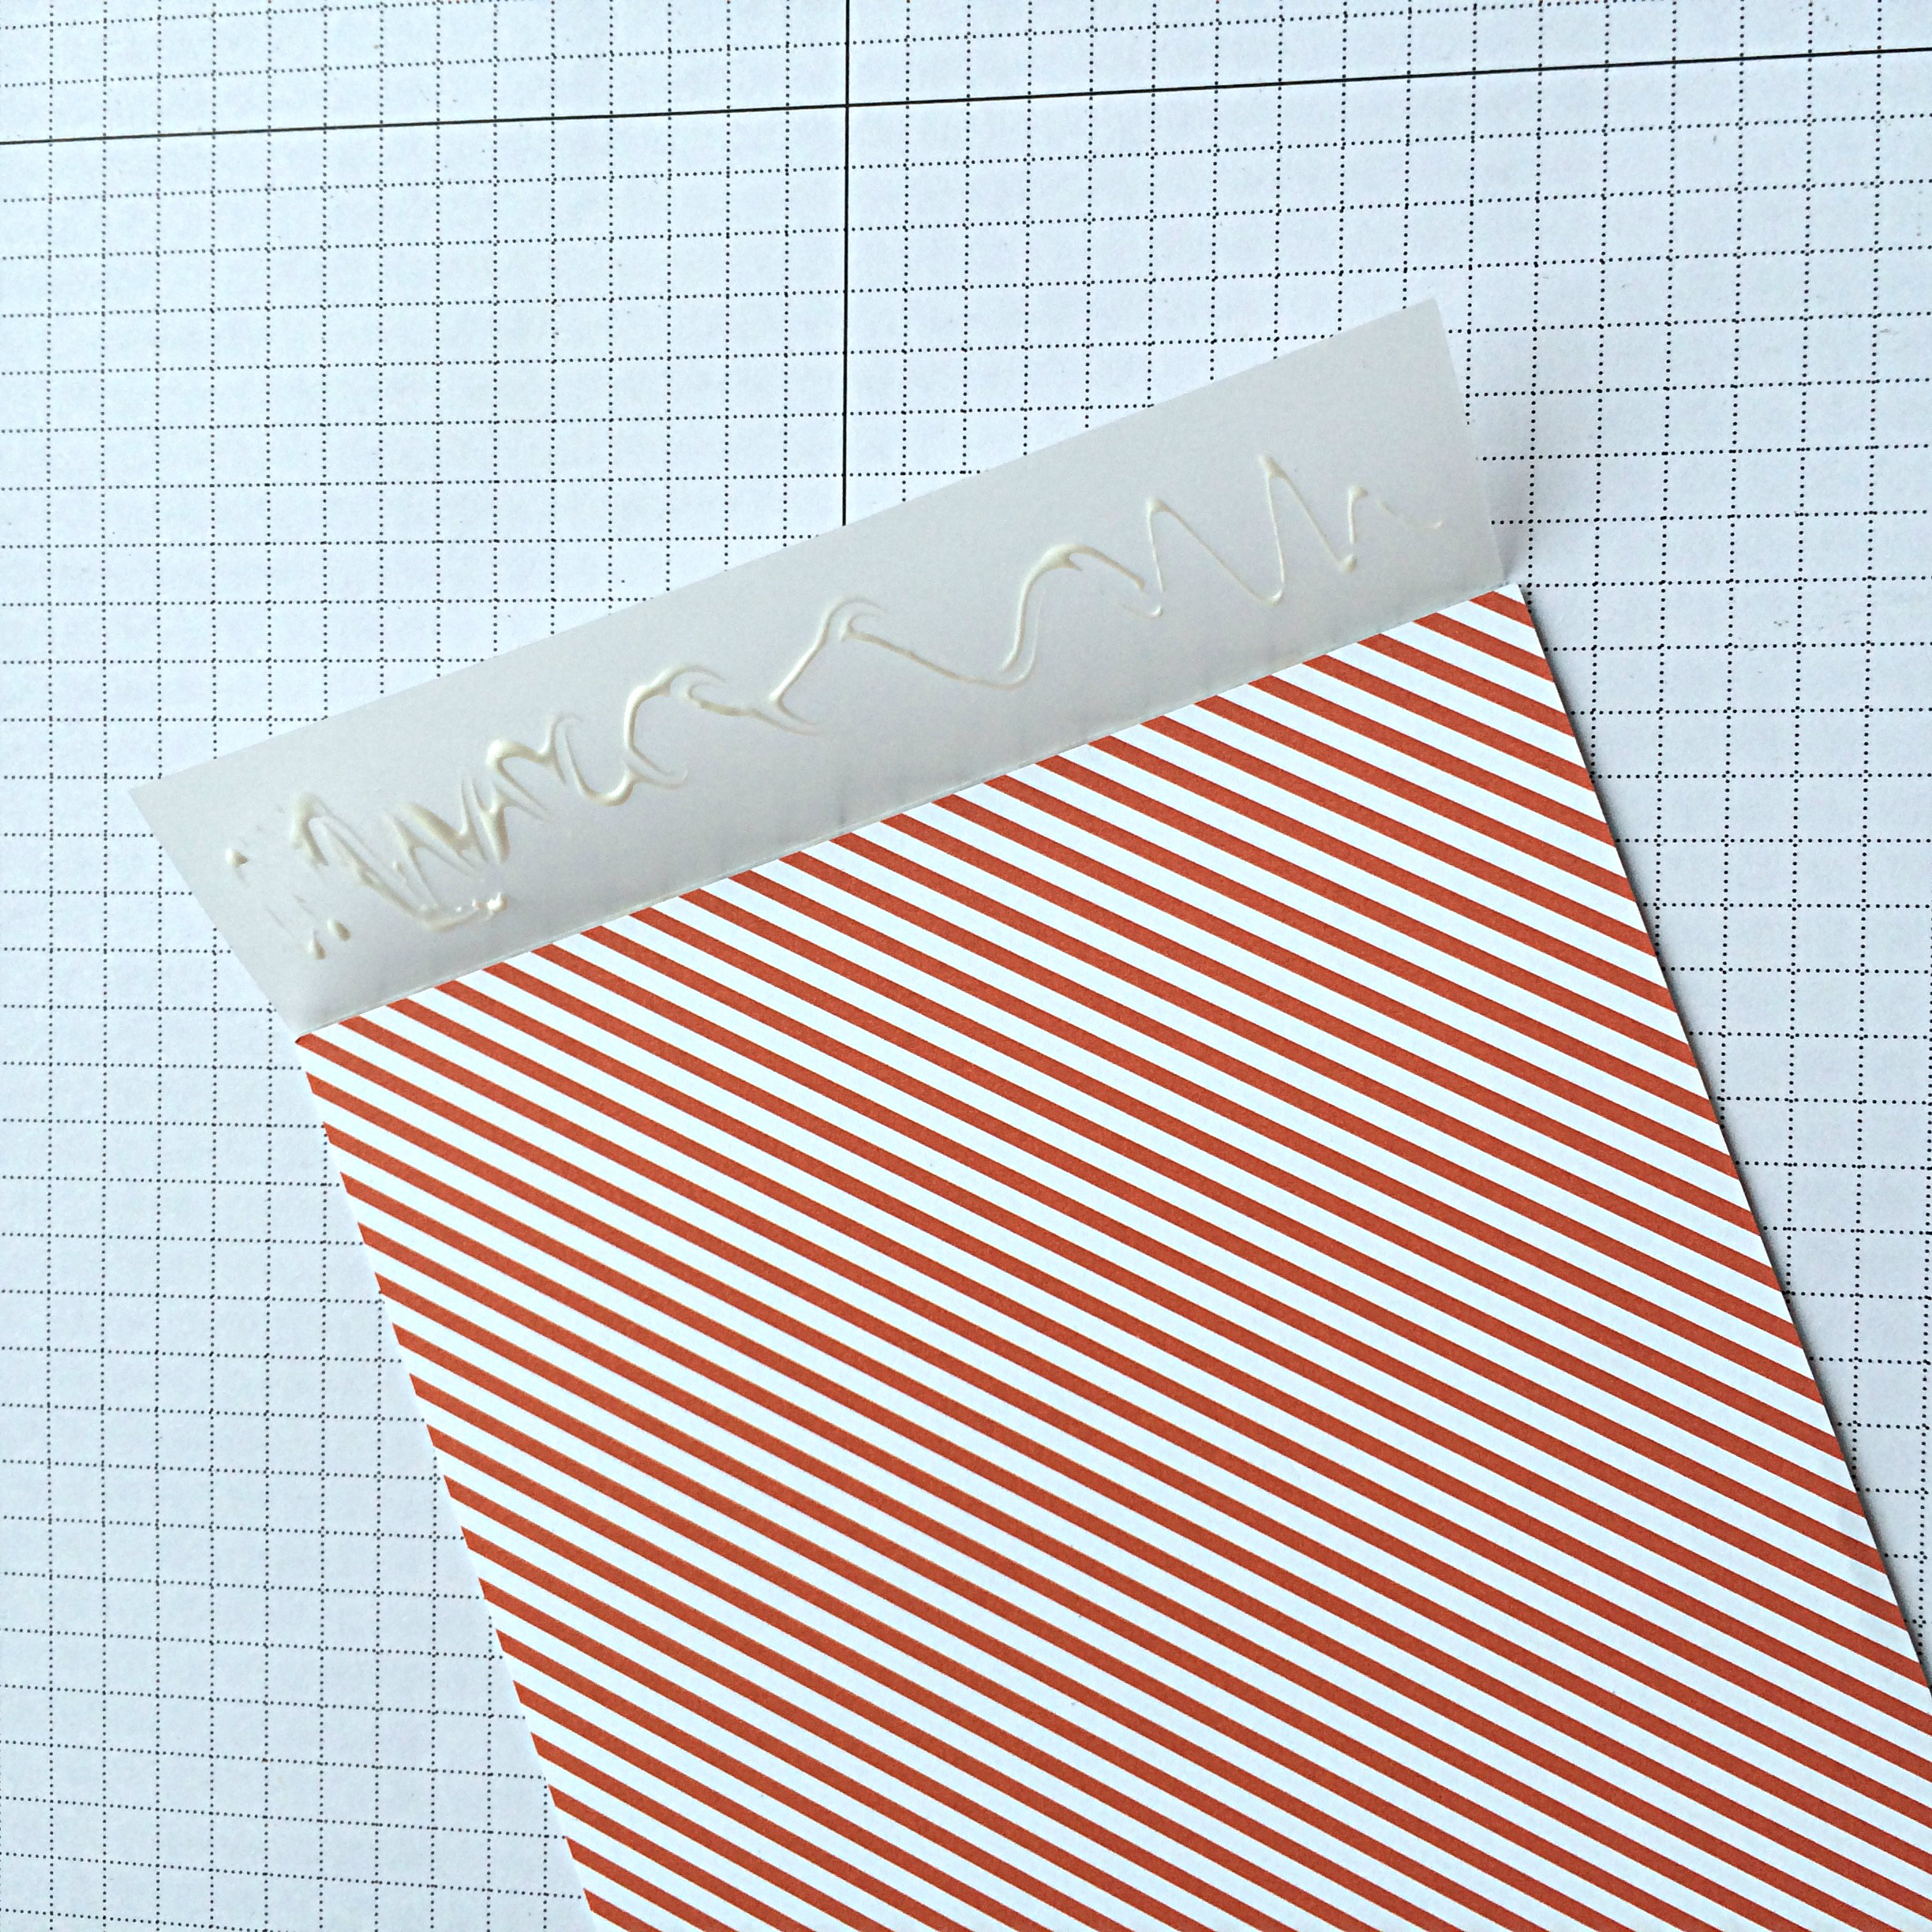
#134.2Use your Bone Folder to make that score line into a crisp fold, then adhere the 1″ flap to the wrong side of your Designer Series Paper (DSP). I like the look of a bright and bold DSP.

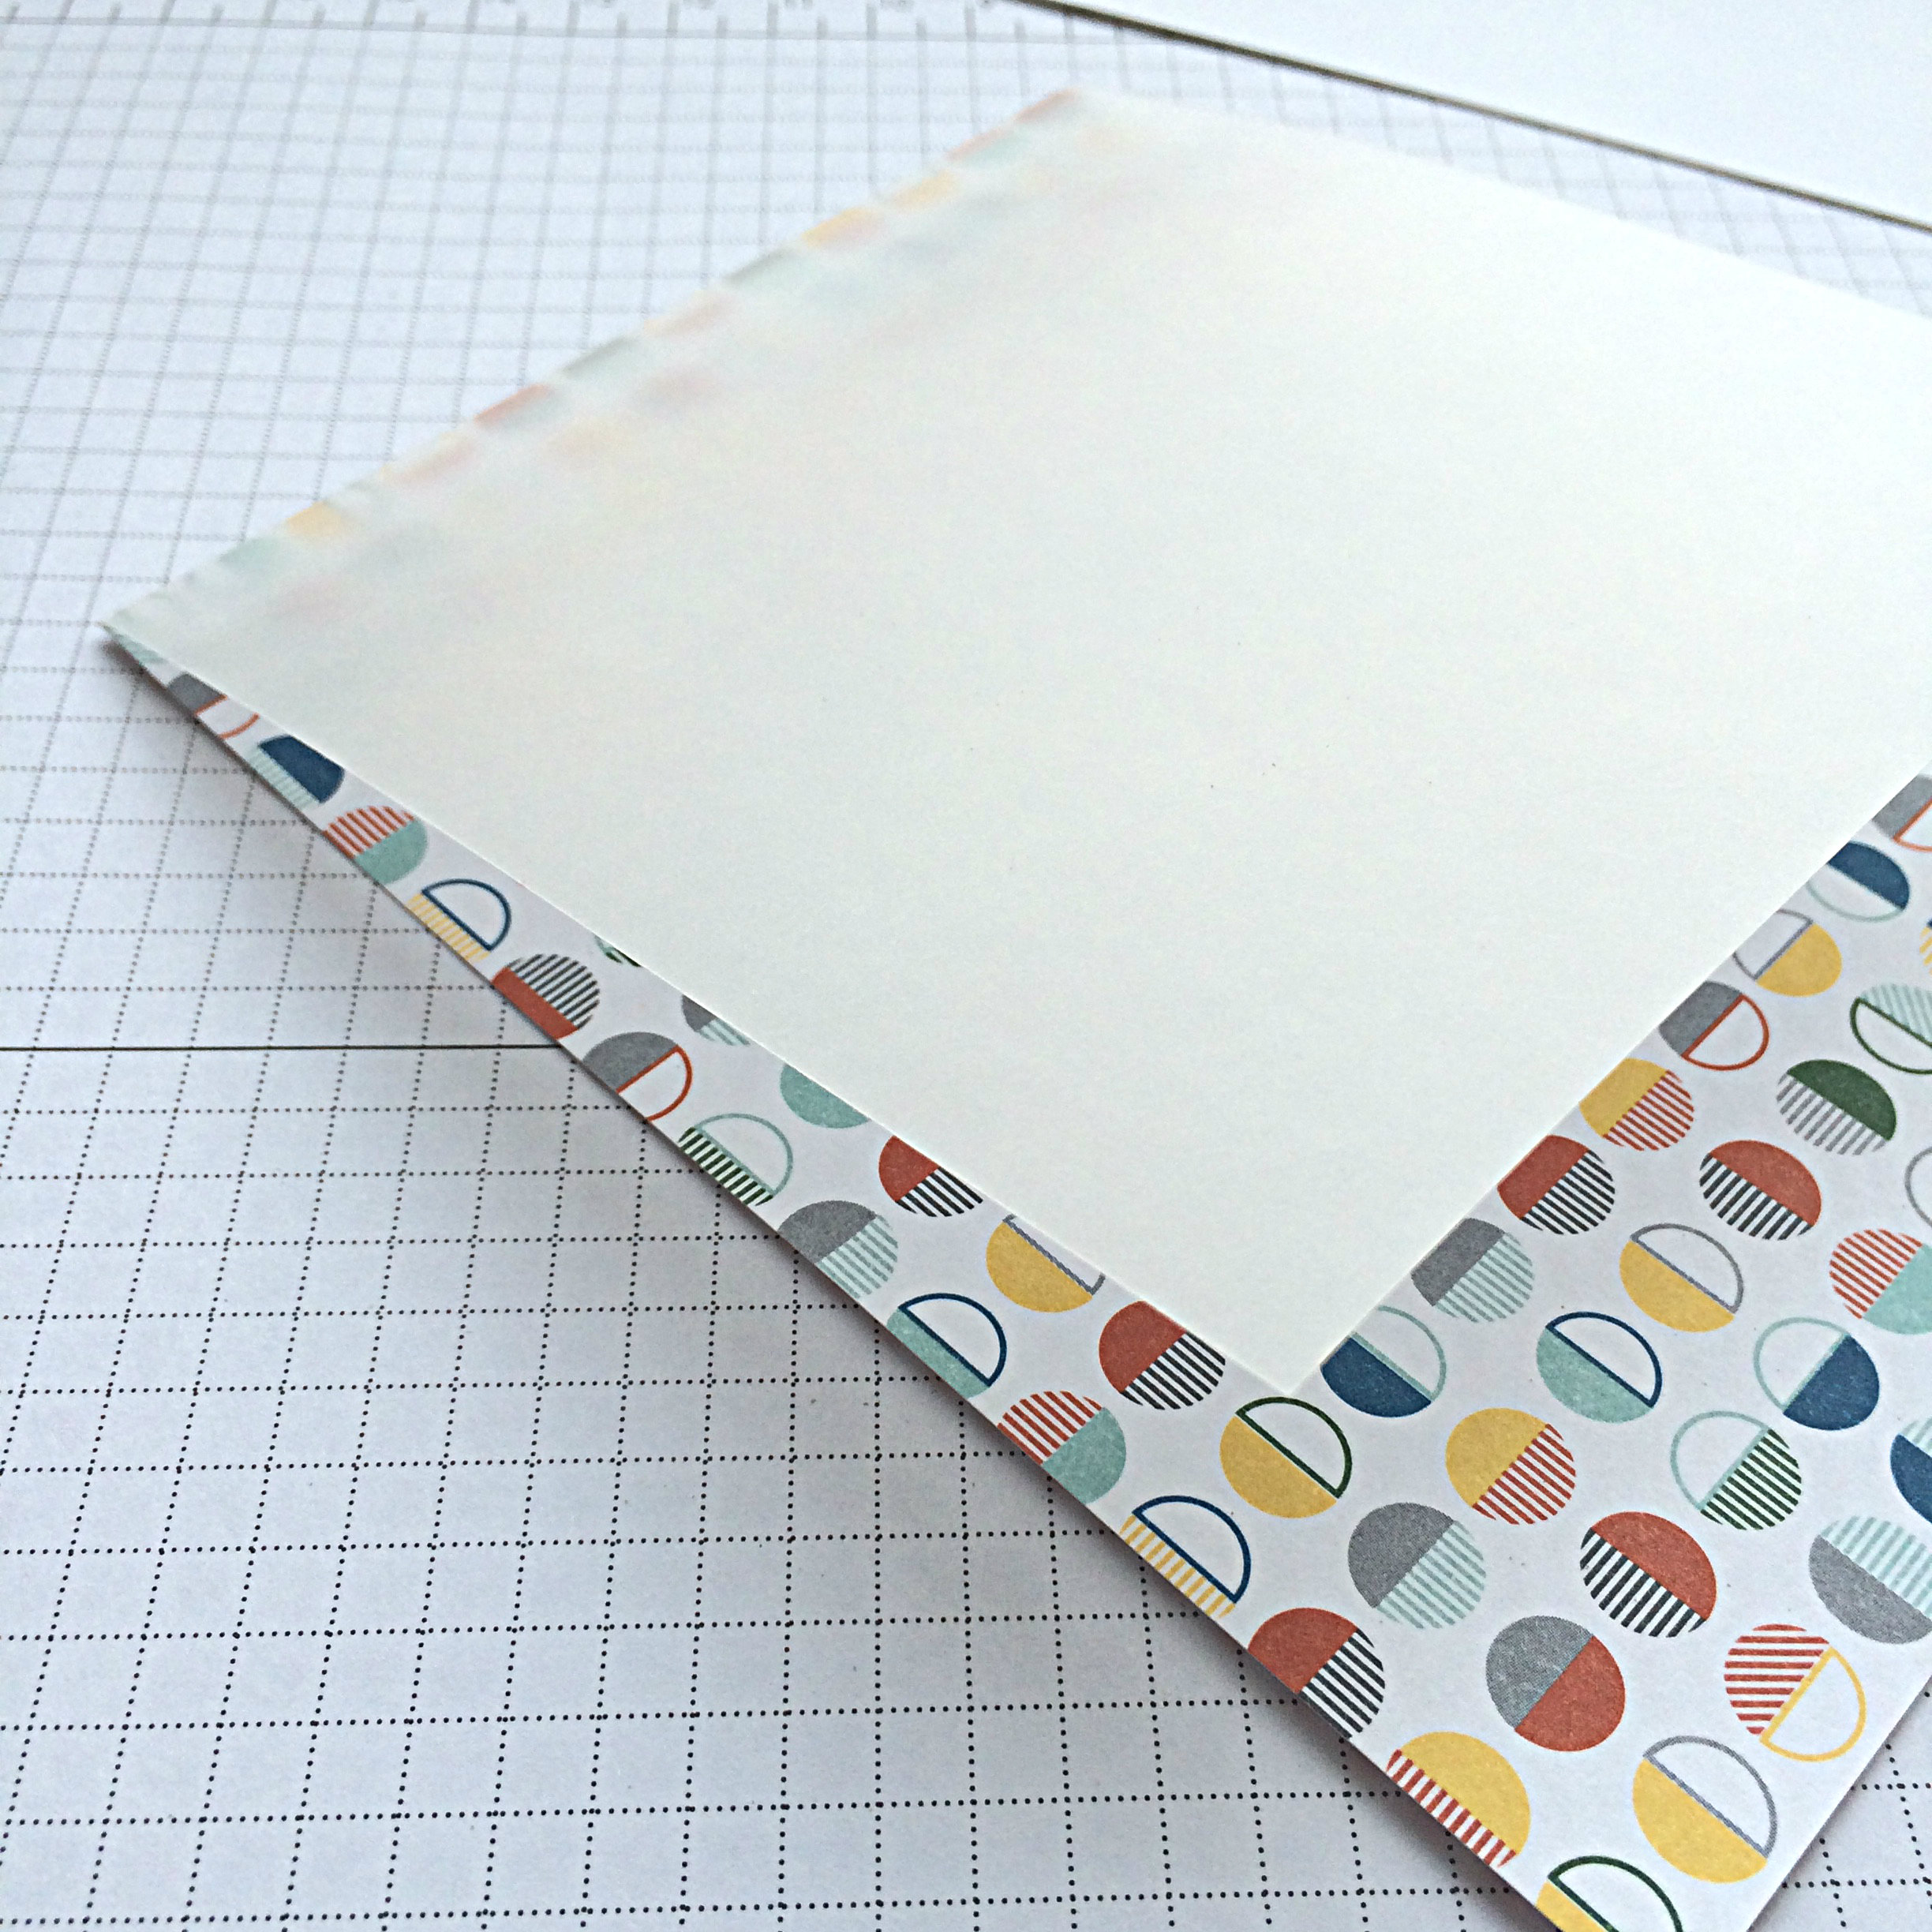
#134.3You will end up with the right side of your DSP looking like this, with the Vellum attached at the top.

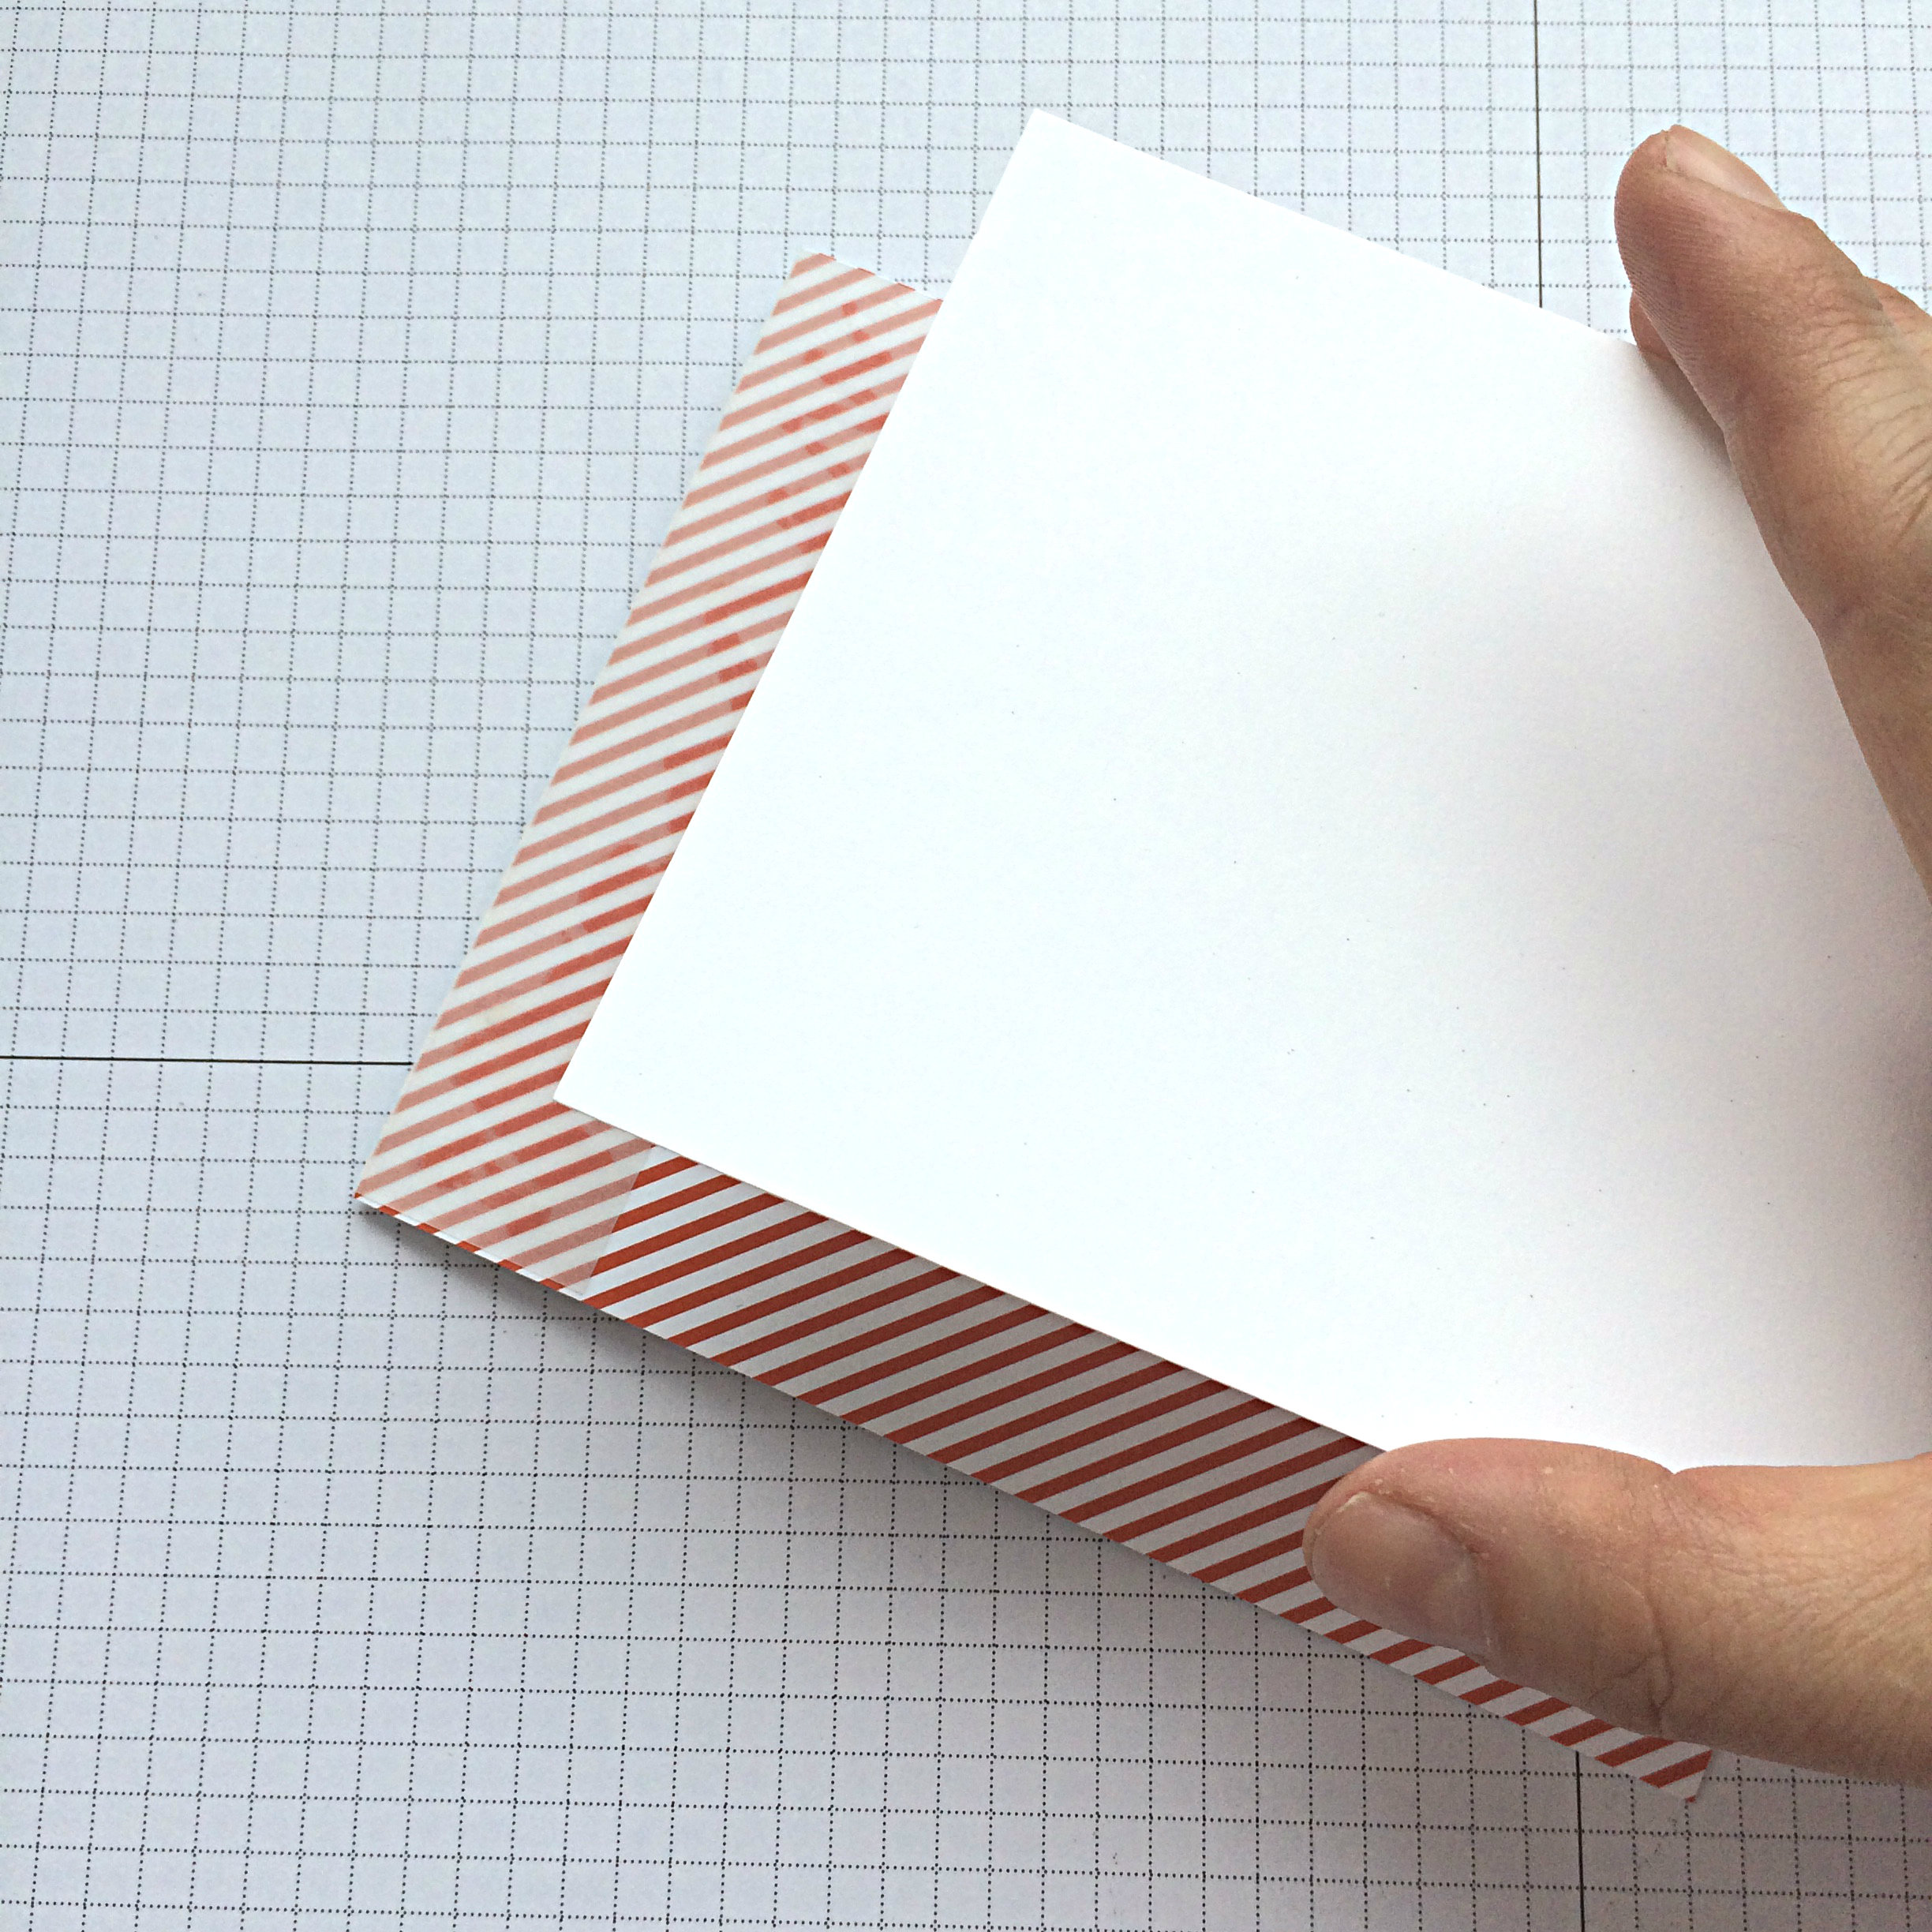
#134.4Then you will attach a piece of cardstock (I used the Thick Whisper White) to the wrong side of your DSP. Not only will this give your cardbase more structure, but it will also hide the 1″ piece of Vellum and your adhesive marks.

#134.5The next step is to cut the top of your two Whisper White cardstock pieces. I cut them both at the same time so that they will match each other EXACTLY. Because the Whisper White Cardstock is so thin, the die cuts through both layers with ease.

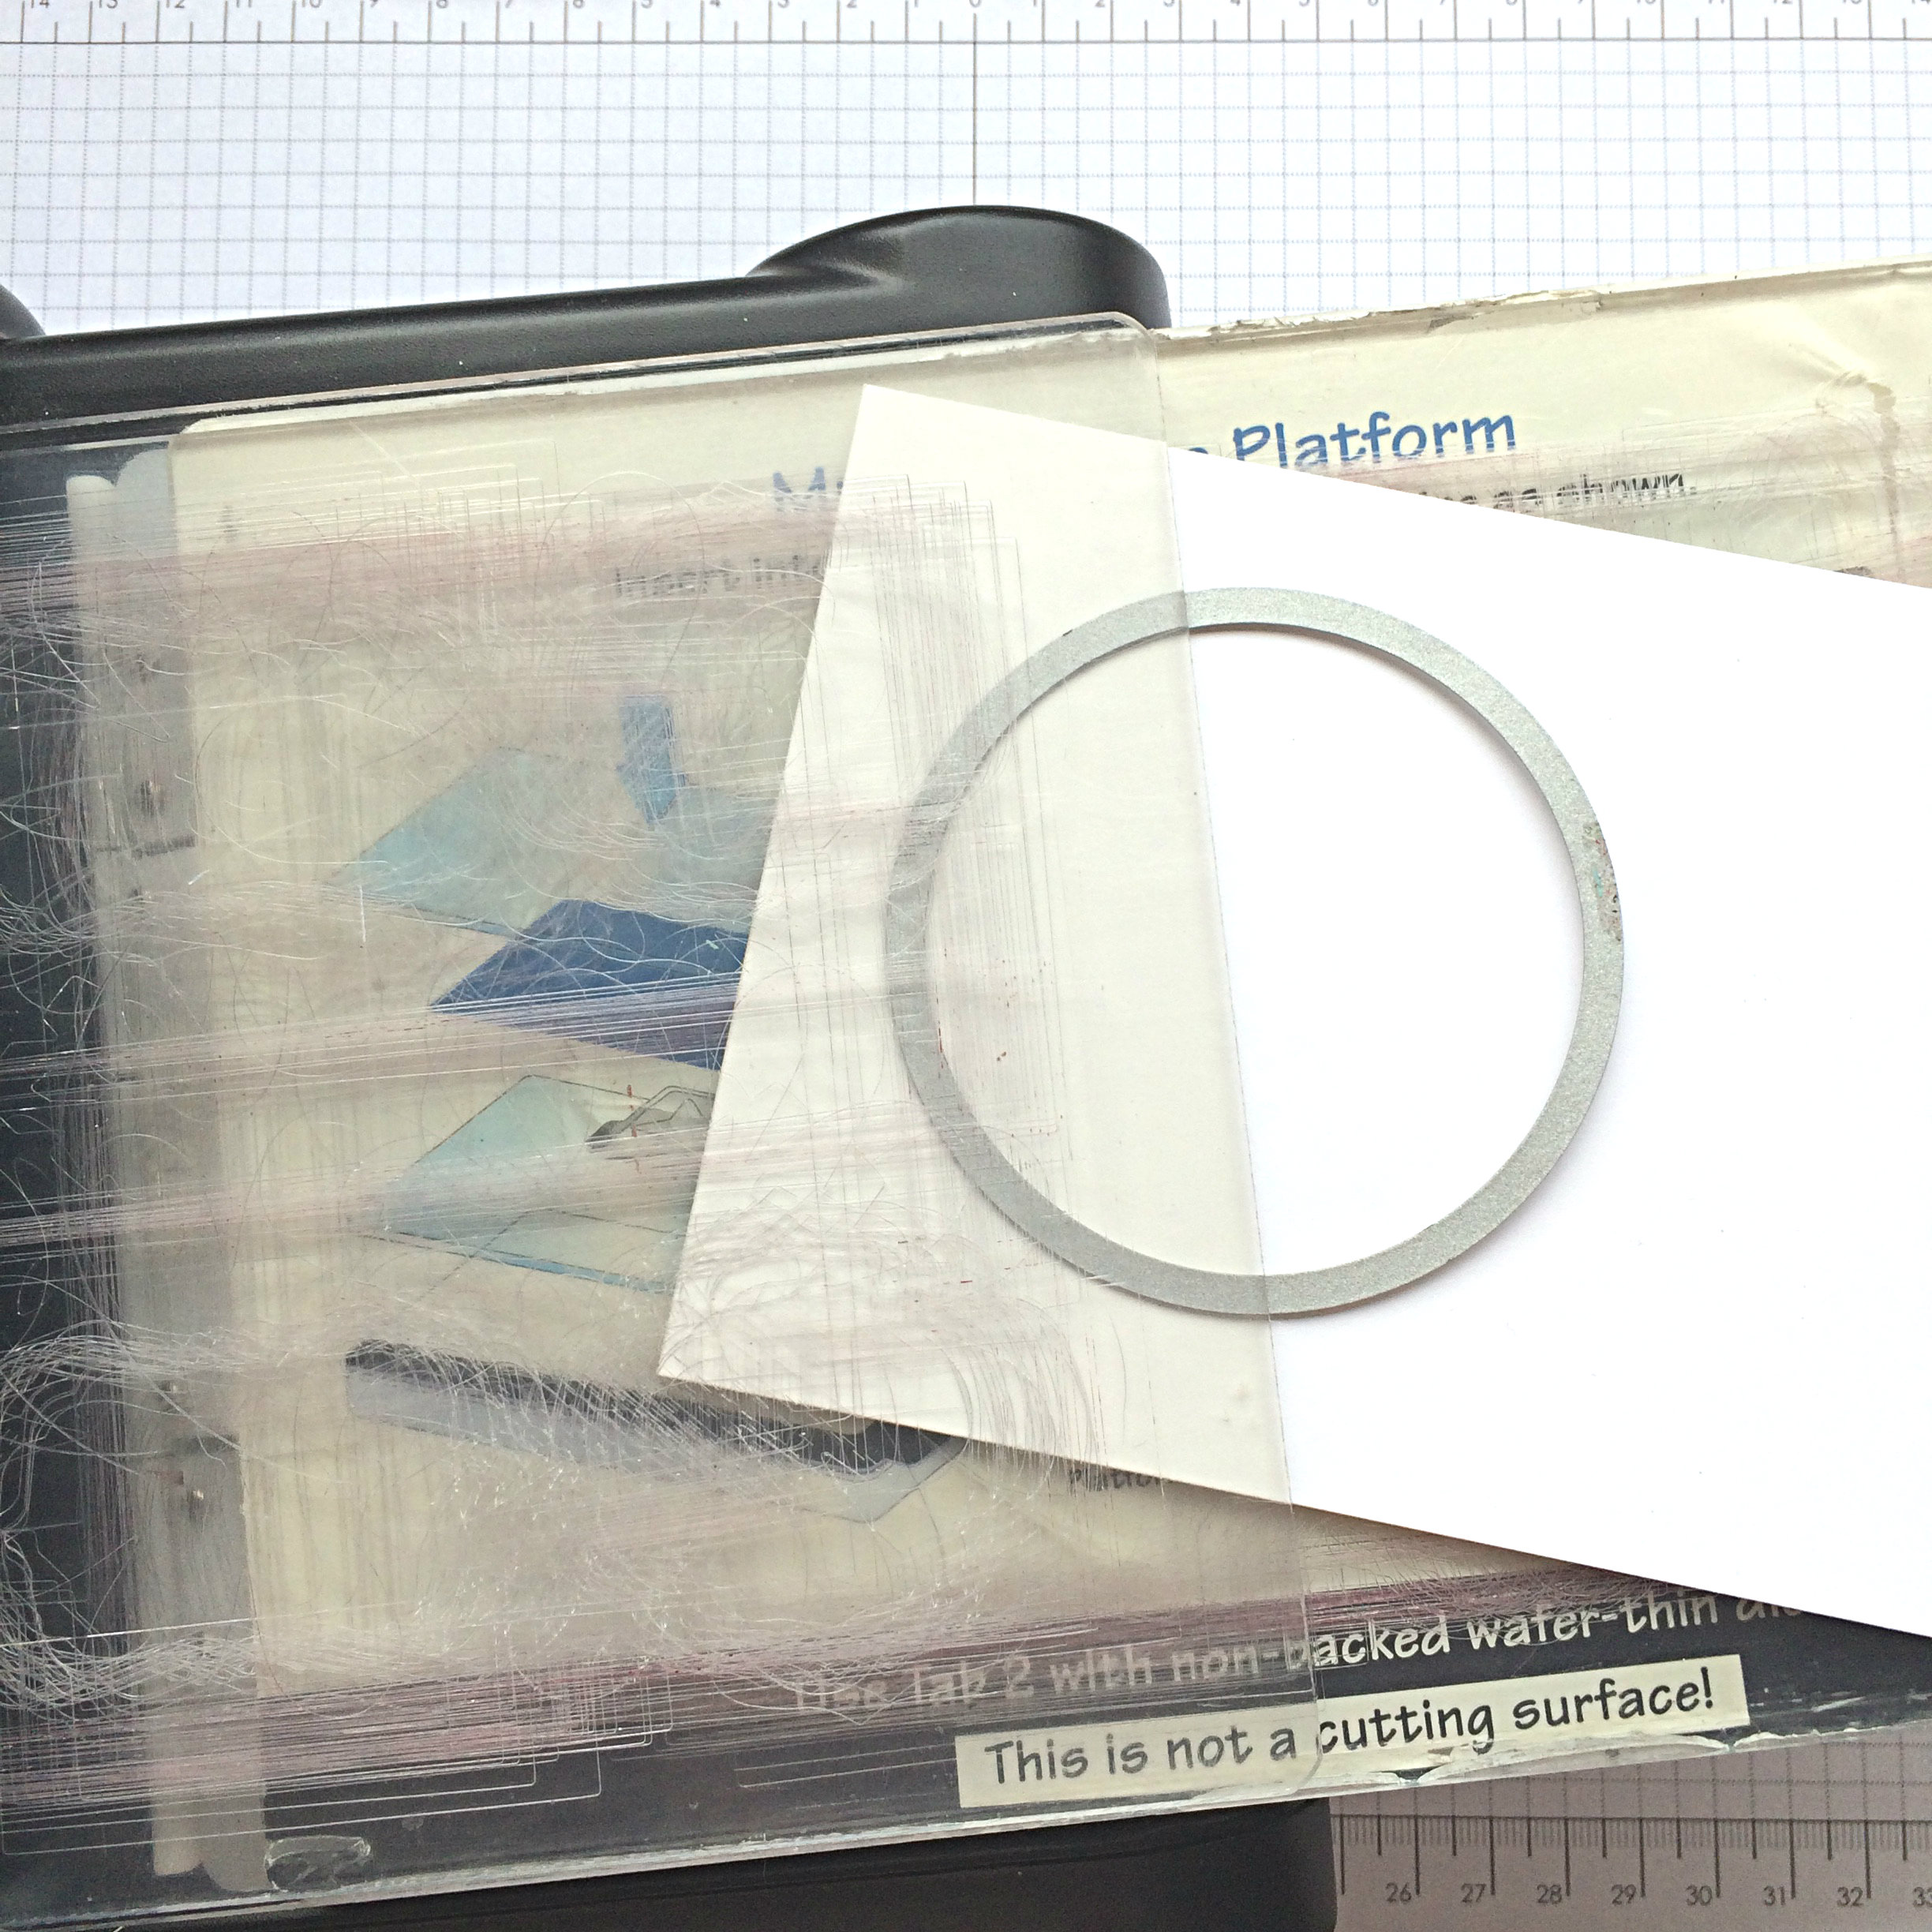
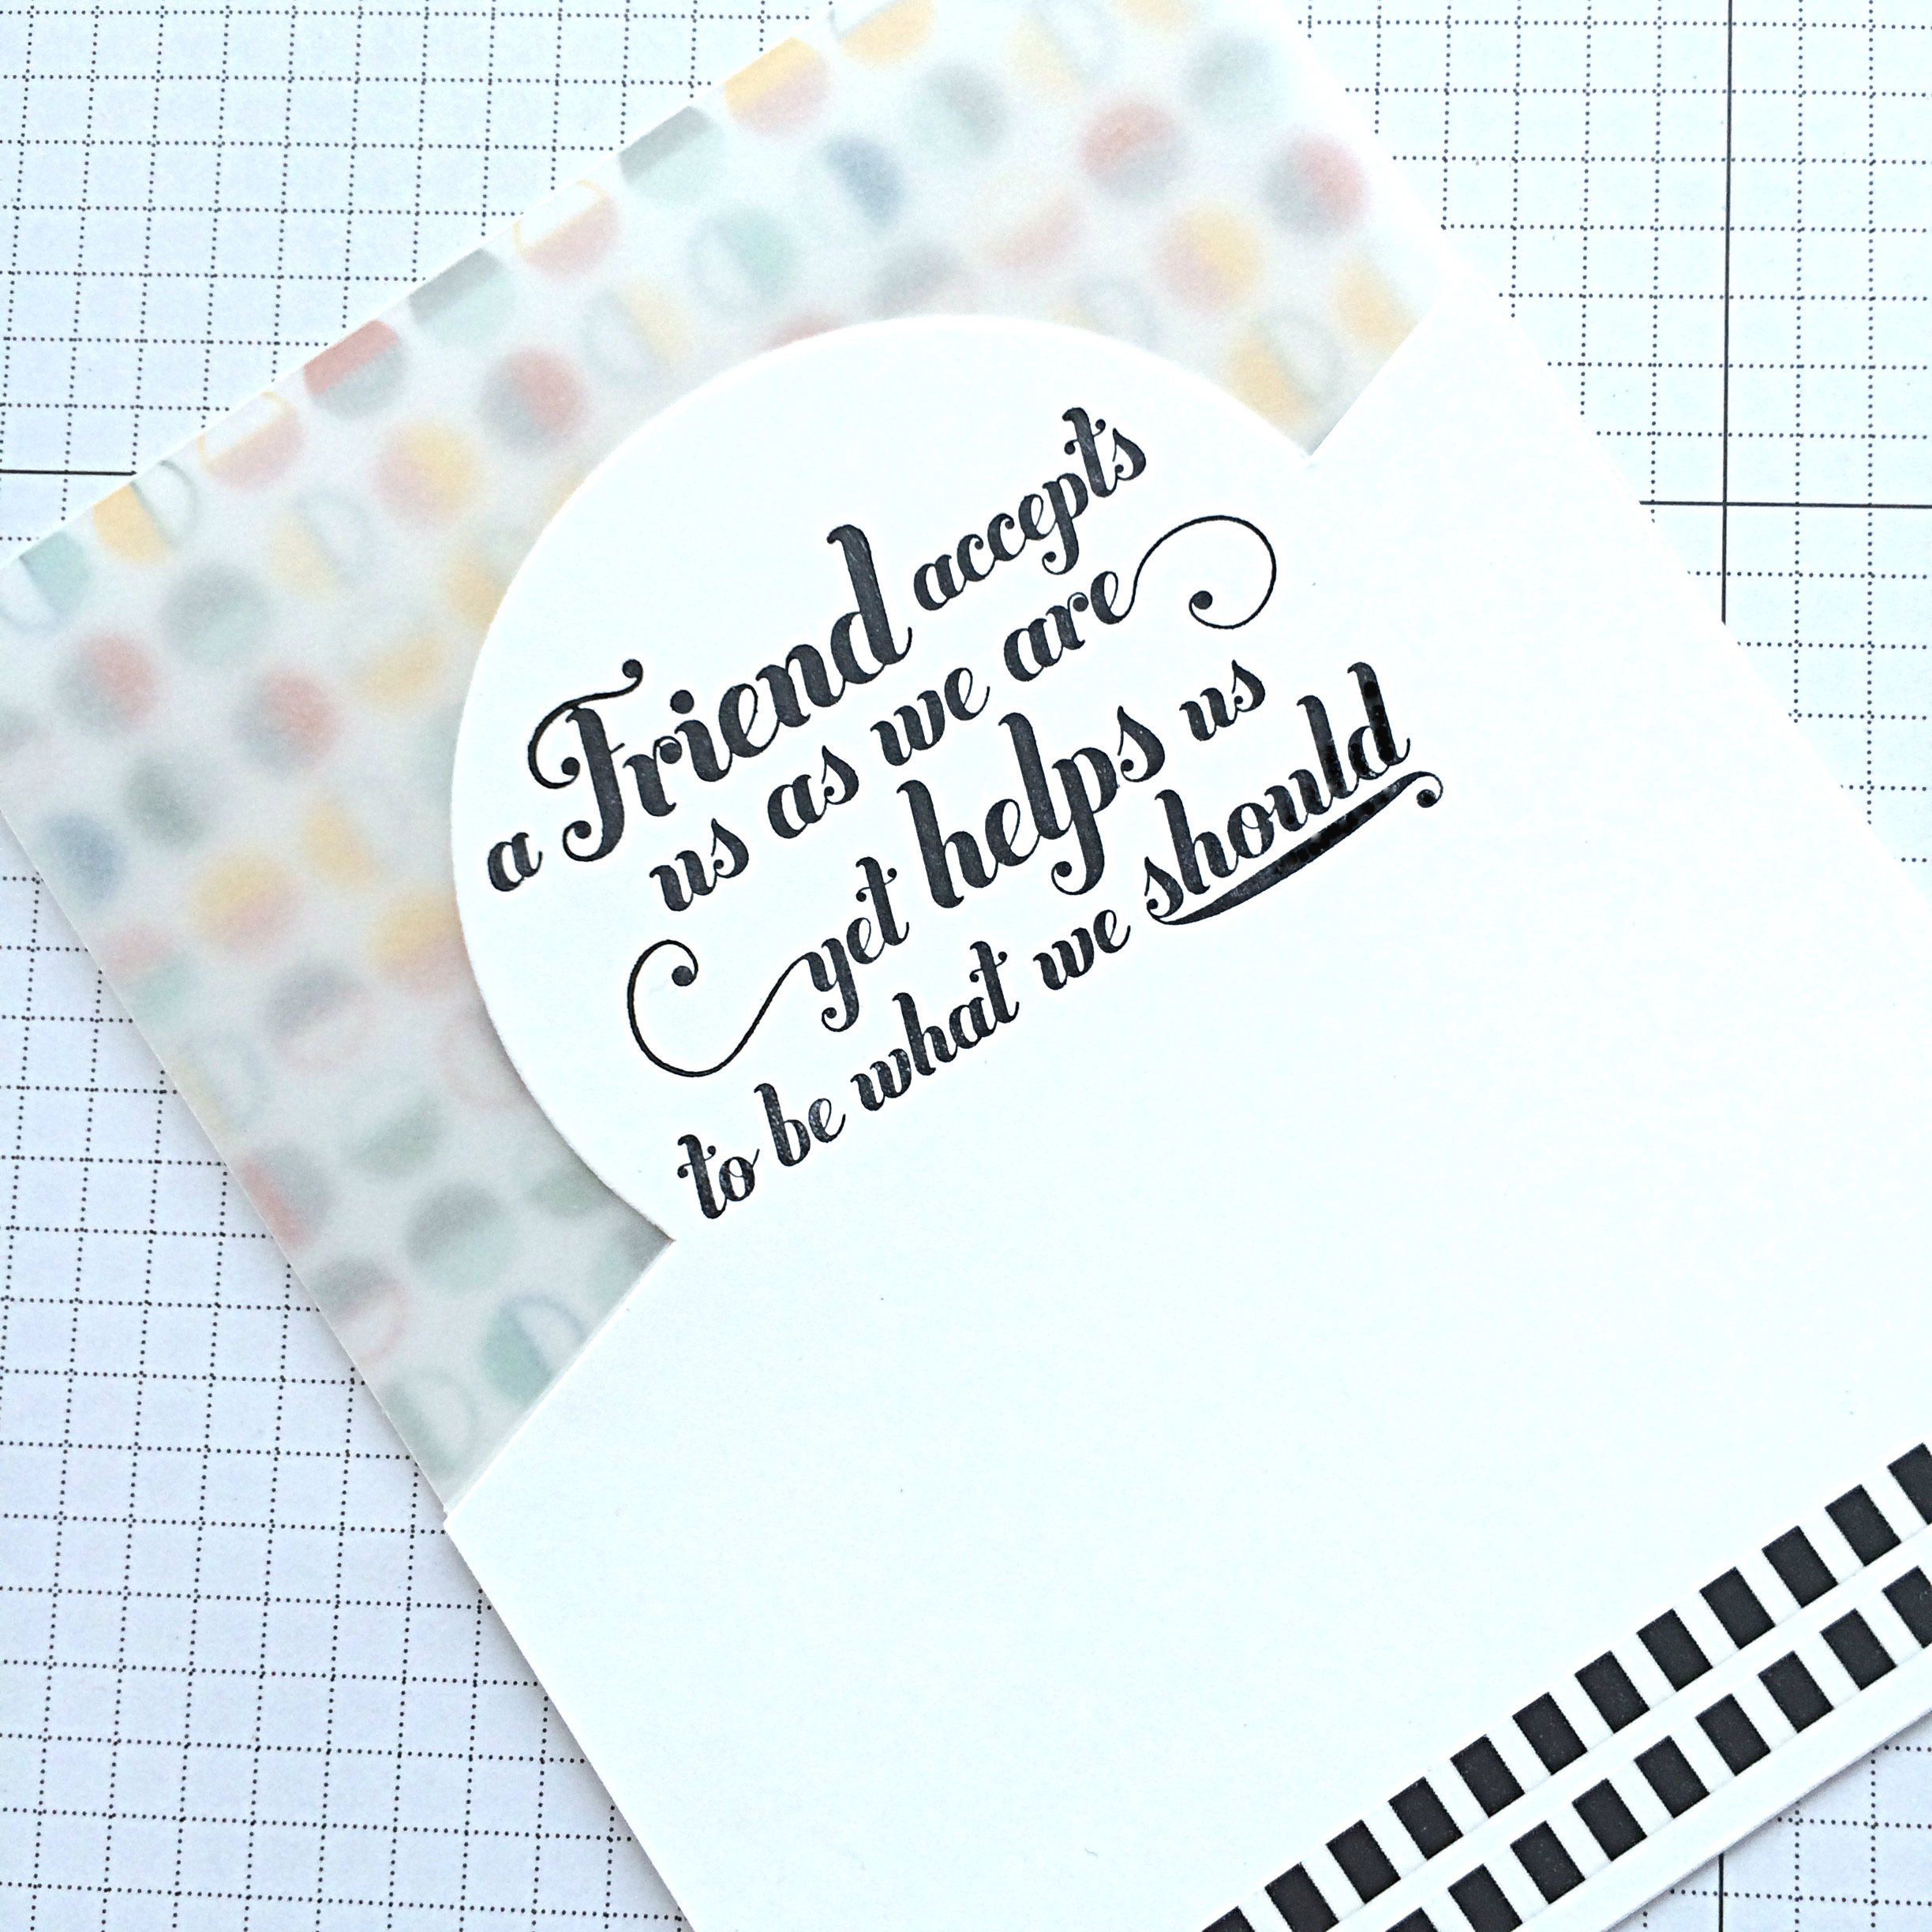
To create the half circle shape at the top, place your circle framelit where you want it, then only have the top plate cover where you want the cut part to be. It won’t cut where there isn’t any pressure. Doing it on an angle like this is an option that makes the card playful and fun.

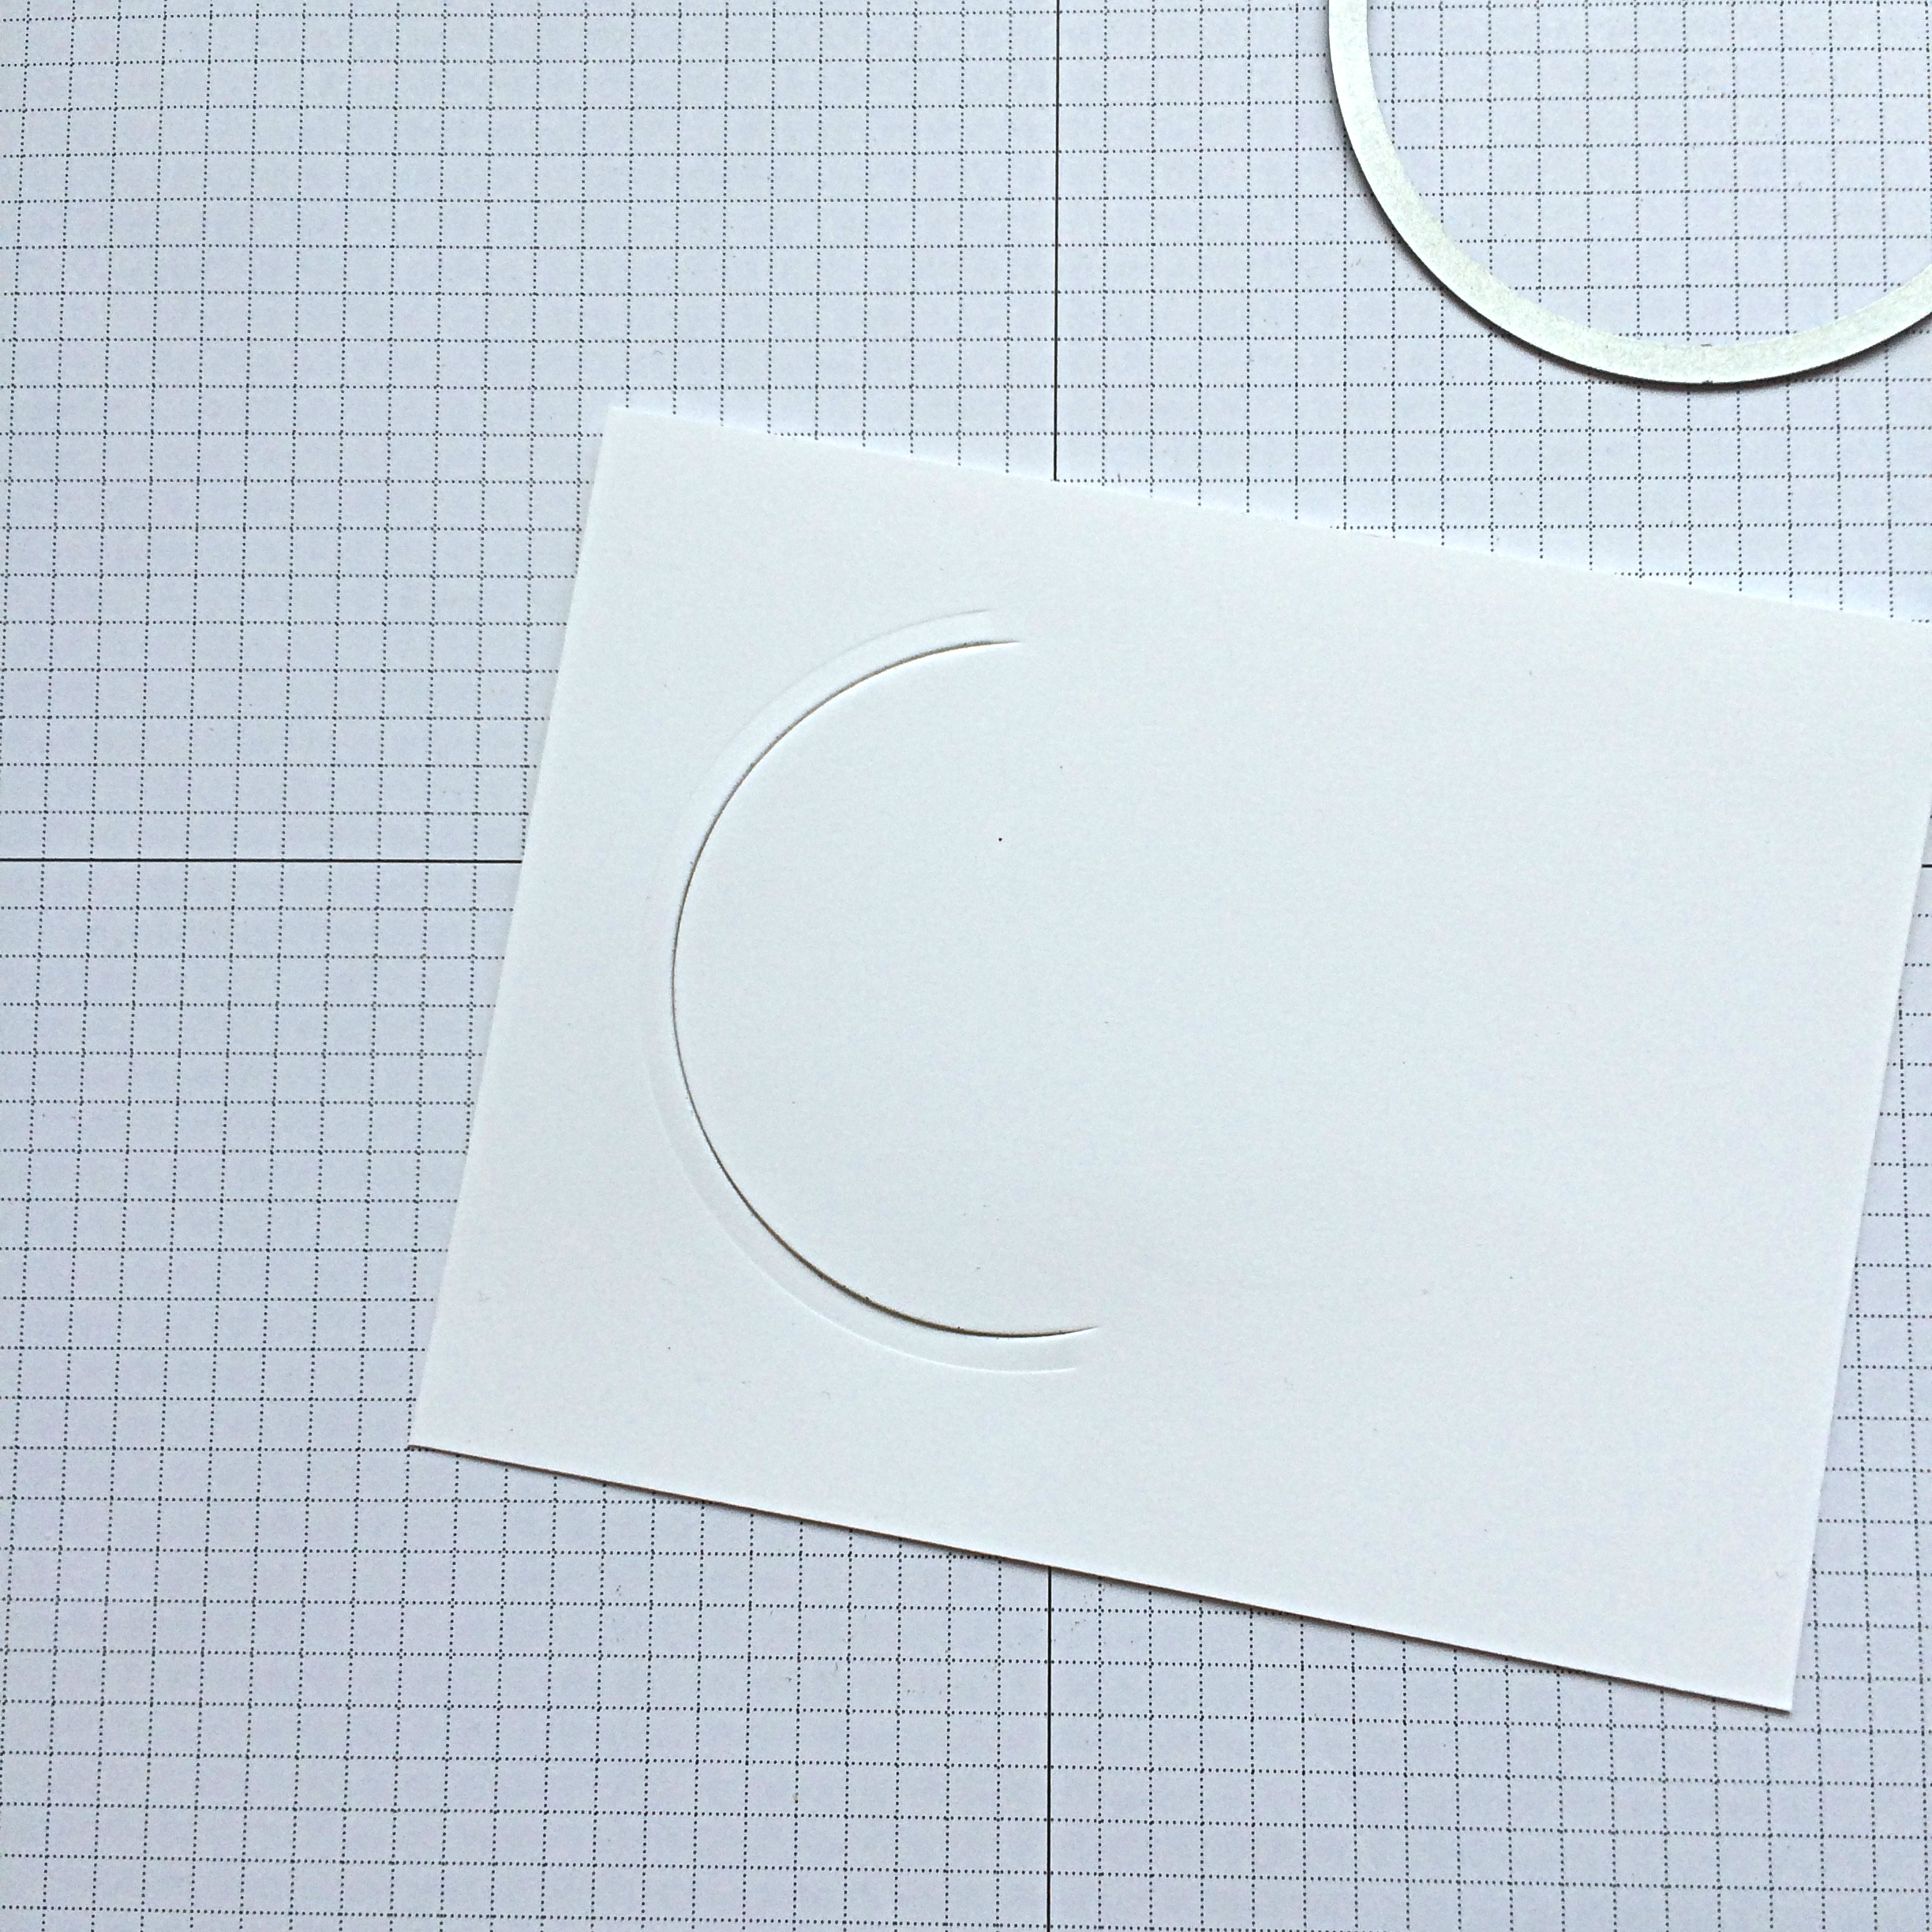
#134.6This is what it will look like when you take the two pieces of whisper white out. Keep them together for the next step, too.

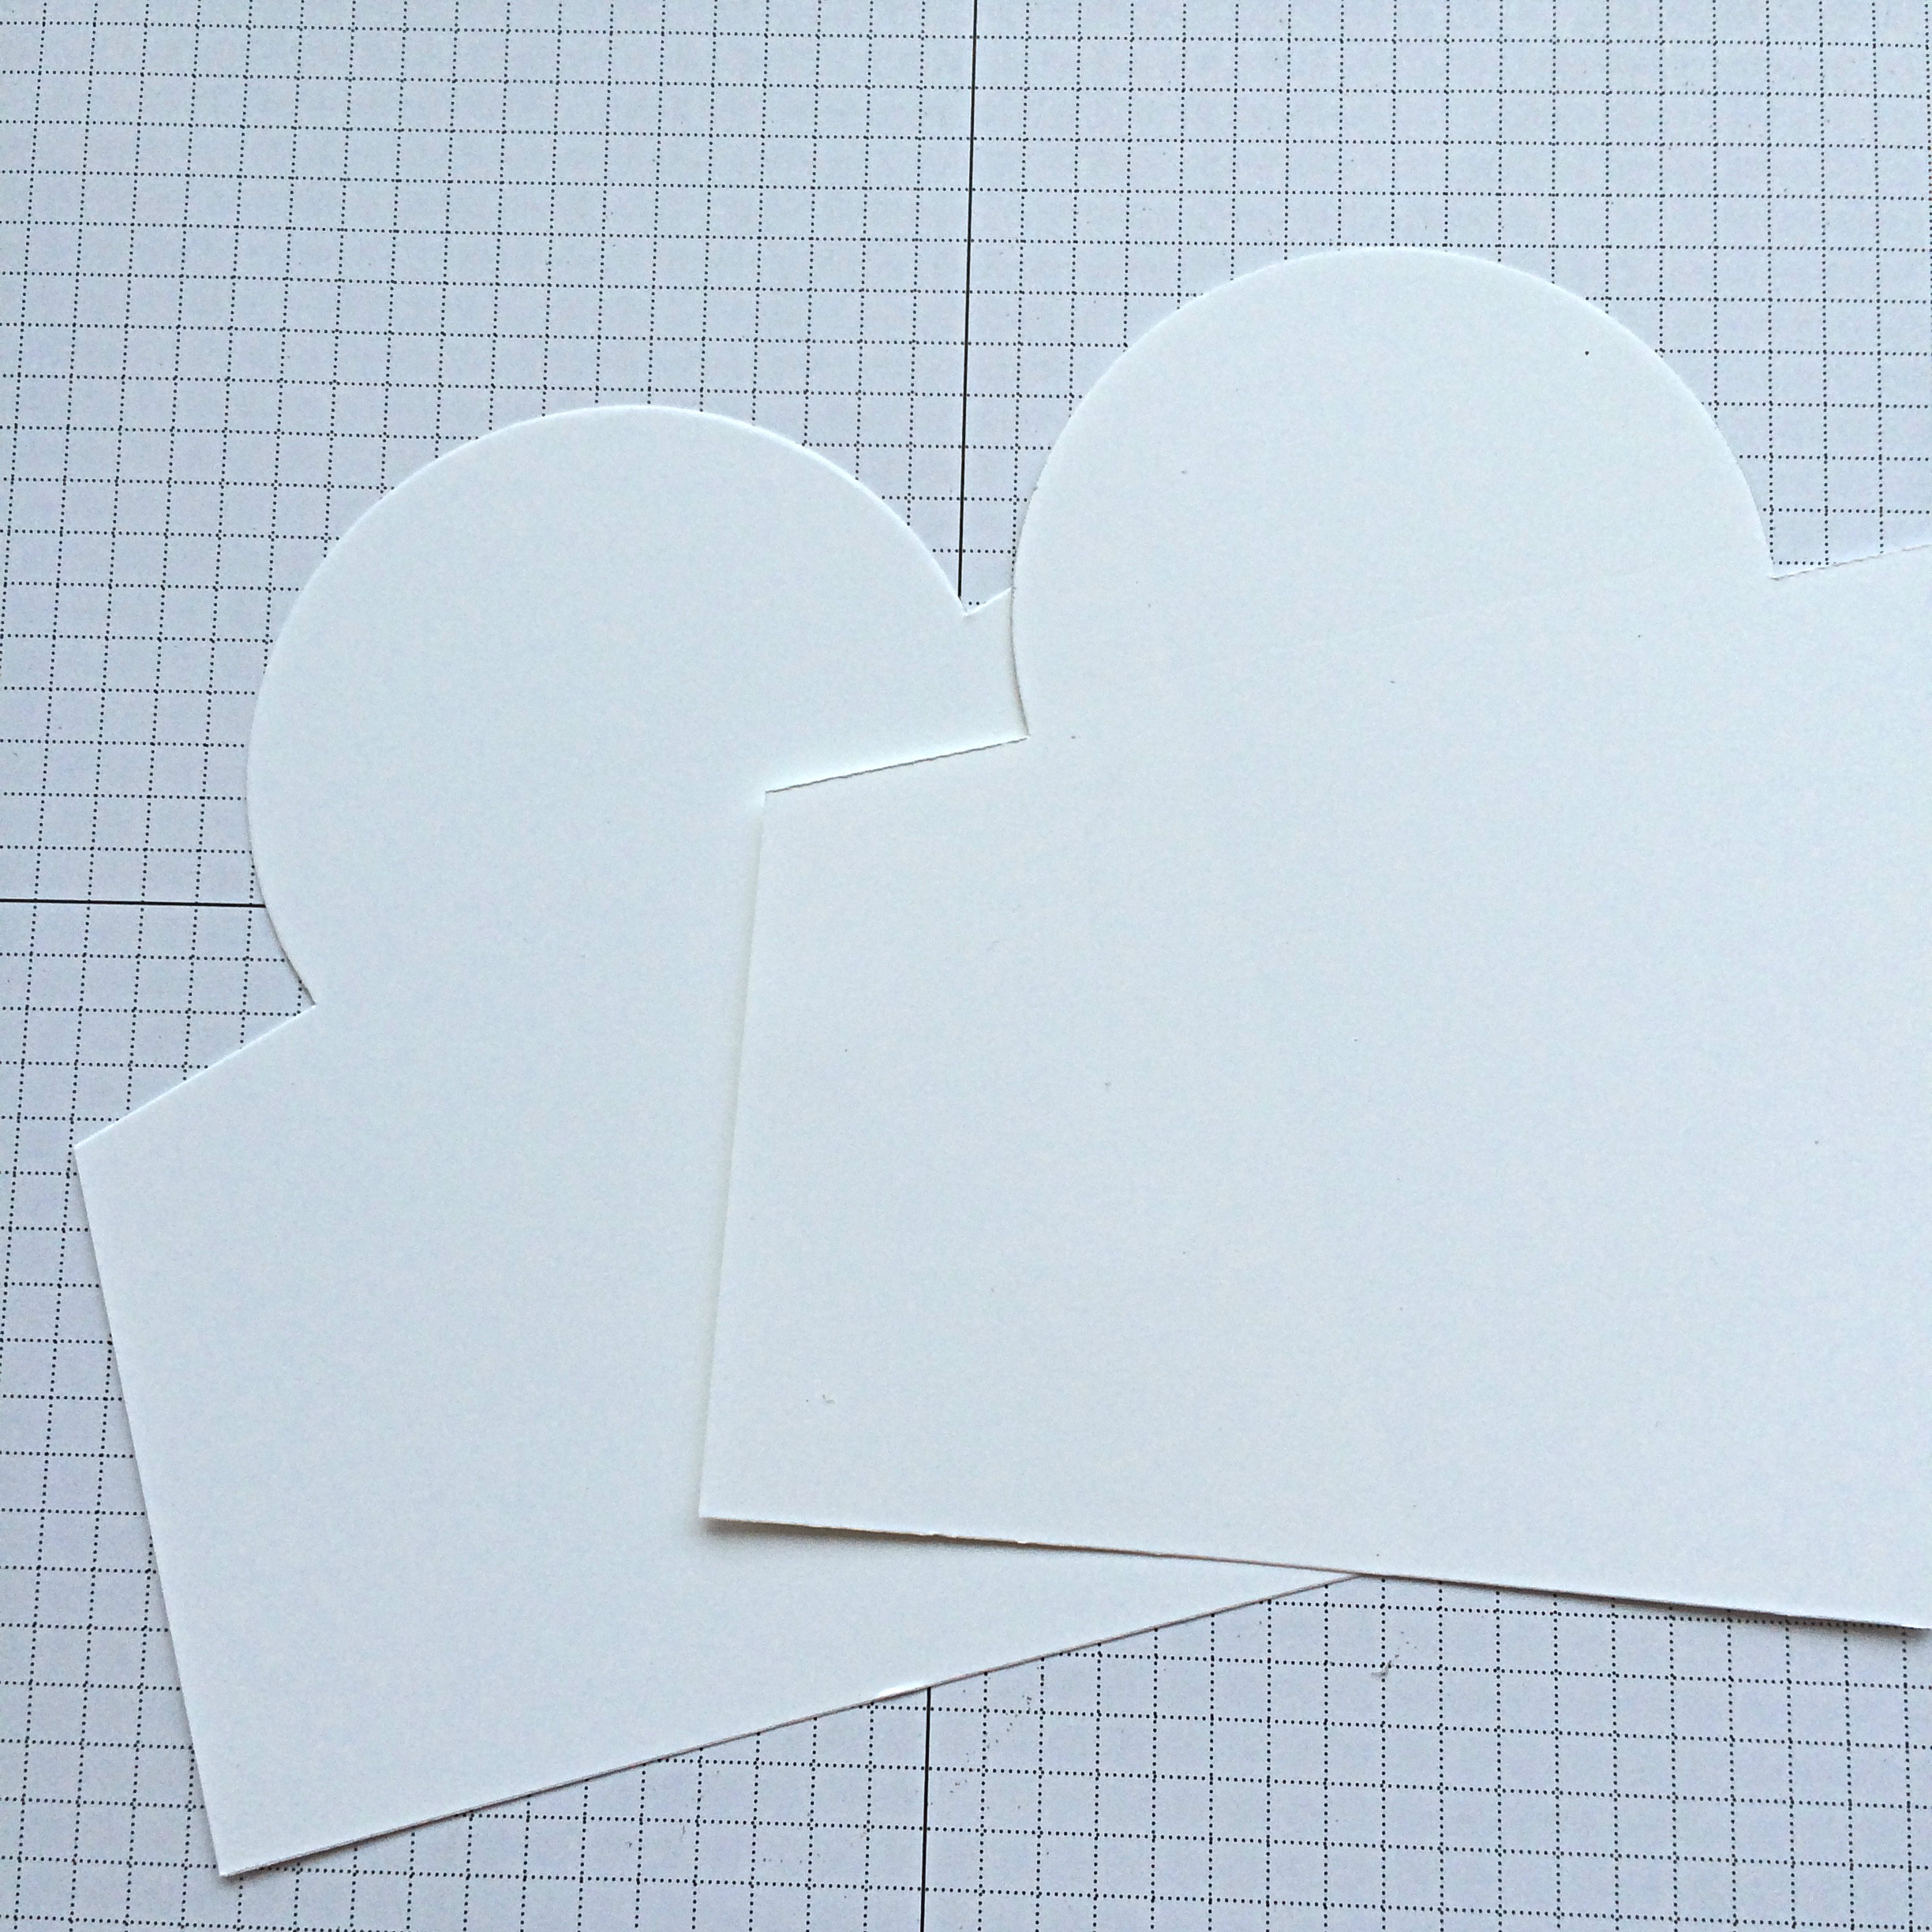
#134.7Place the two pieces of Whisper White cardstock in your cutter, so that the ruler cutting area lines up with the ends of the half circle cut in your cardstock. You will use the sliding trimmer blade to cut one side, then the other, keeping the paper in place. Be sure to lift the blade in between, so you don’t cut the circle clean off!!

#134.8Now you will have two identical pieces to attach to your vellum on the card front! The cleverness ensues!!

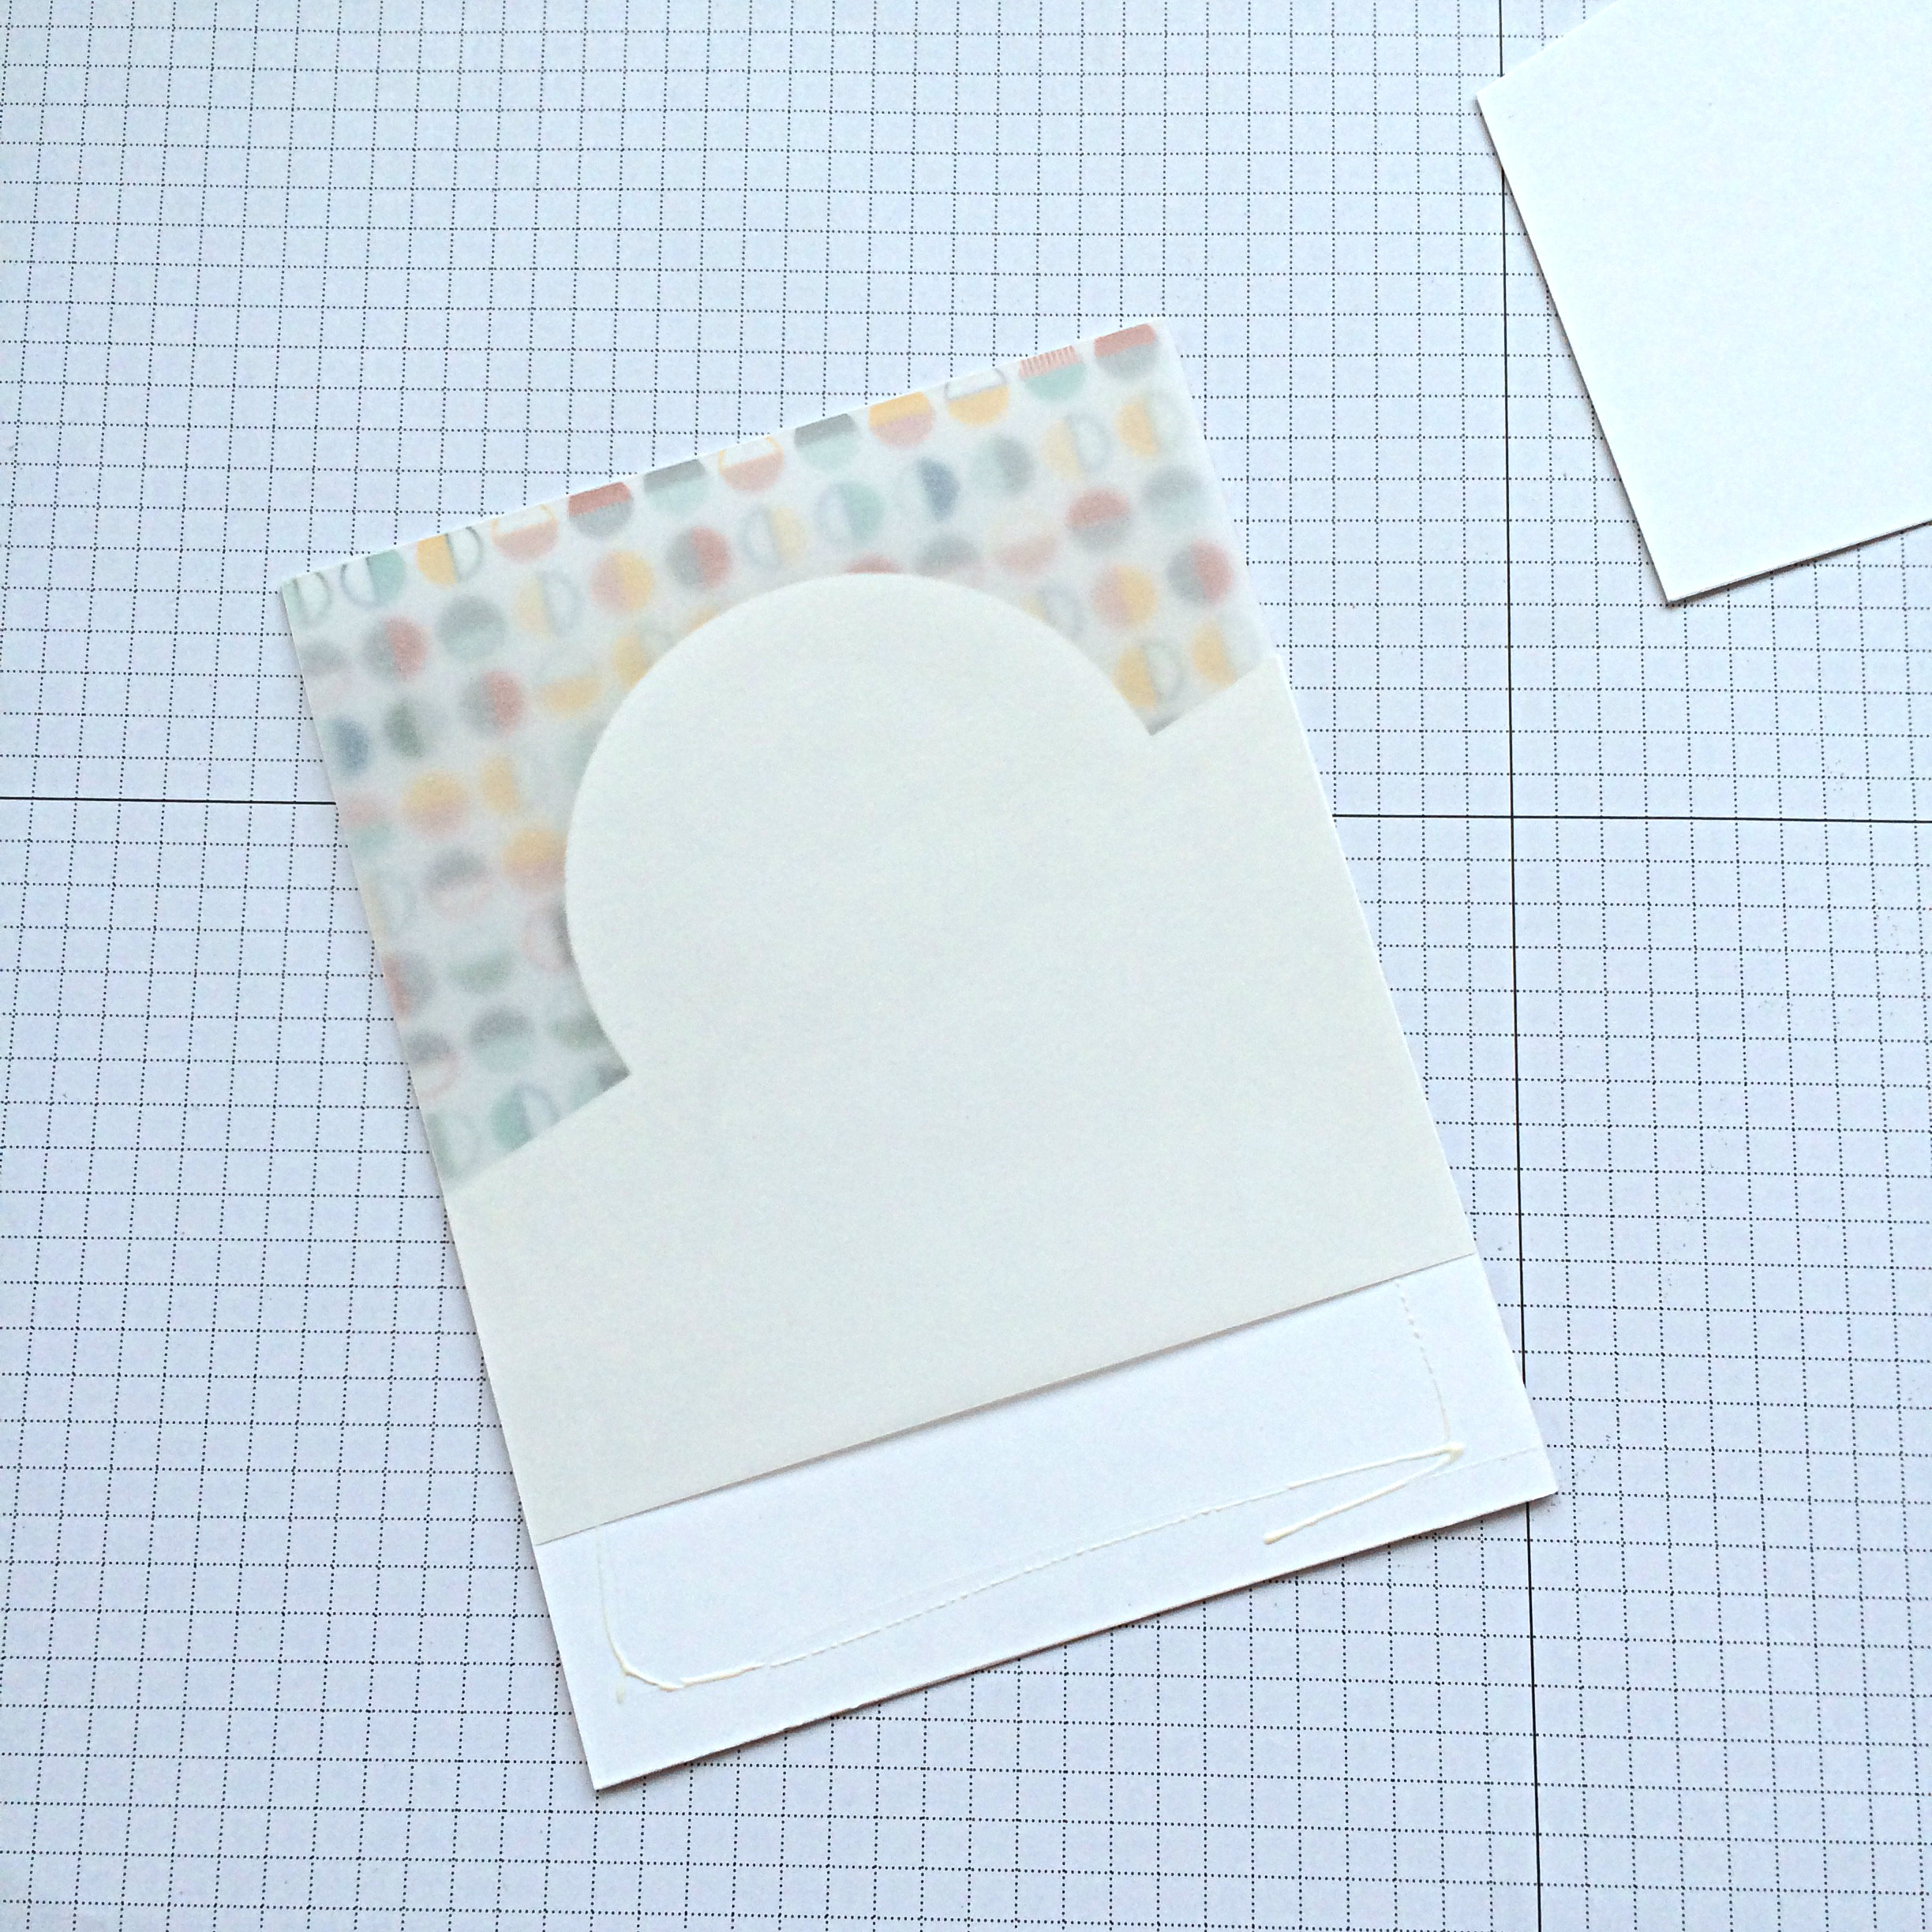
#134.9It’s easy to attach the two cut Whisper White pieces. Just apply adhesive to the front of one, hold the Vellum up and out of the way while you lay your piece over the patterned paper piece (adhesive side up!). Then lay the Vellum layer down flat over it. Then you can stamp and washi tape your other piece before adhering it over top to create a vellum sandwich.

#134.10The stamp set used here is the Feel Goods set. Sadly, it is retiring at the end of May, so if you love it, GET IT!

The washi tape at the bottom of the card is from the “This is the Life” Project Life kit from Stampin’ Up! This is on the retiring list as well AND is on sale.

IMG_9551Now that you’ve read through this tutorial and know how to make the bones of this card, try it out and see what you can create. I added a bit of flourish with a Gold Basic Metal Button (retiring), Black Baker’s Twine, Gold Metallic Thread, and two die cut leaves using the Rose Garden Thinlits: one cut from Vellum Cardstock, the other cut from Tangelo Twist Cardstock.

Be sure to check out the other cards created by our Design Team over at the As You See It Challenge Blog. And now there are no excuses, you have two whole weeks to participate in the challenge – hey, you could even submit more than one!

You can also click on the SHOP NOW button on this website to see what else is on the retiring list.

Stamp happy

&

don’t let your busy life

interfere with your creative living!

Save