fancy fold

Congrats on Greece

Do I have a fancy card for you today!!

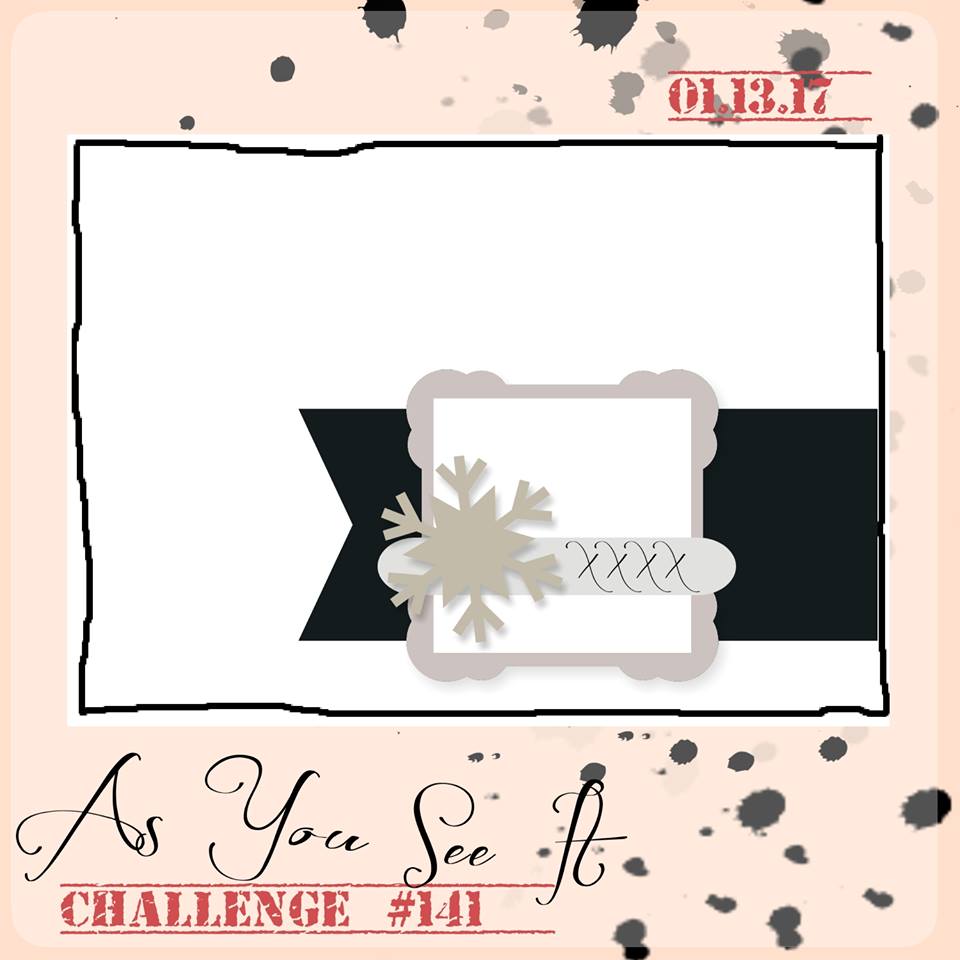
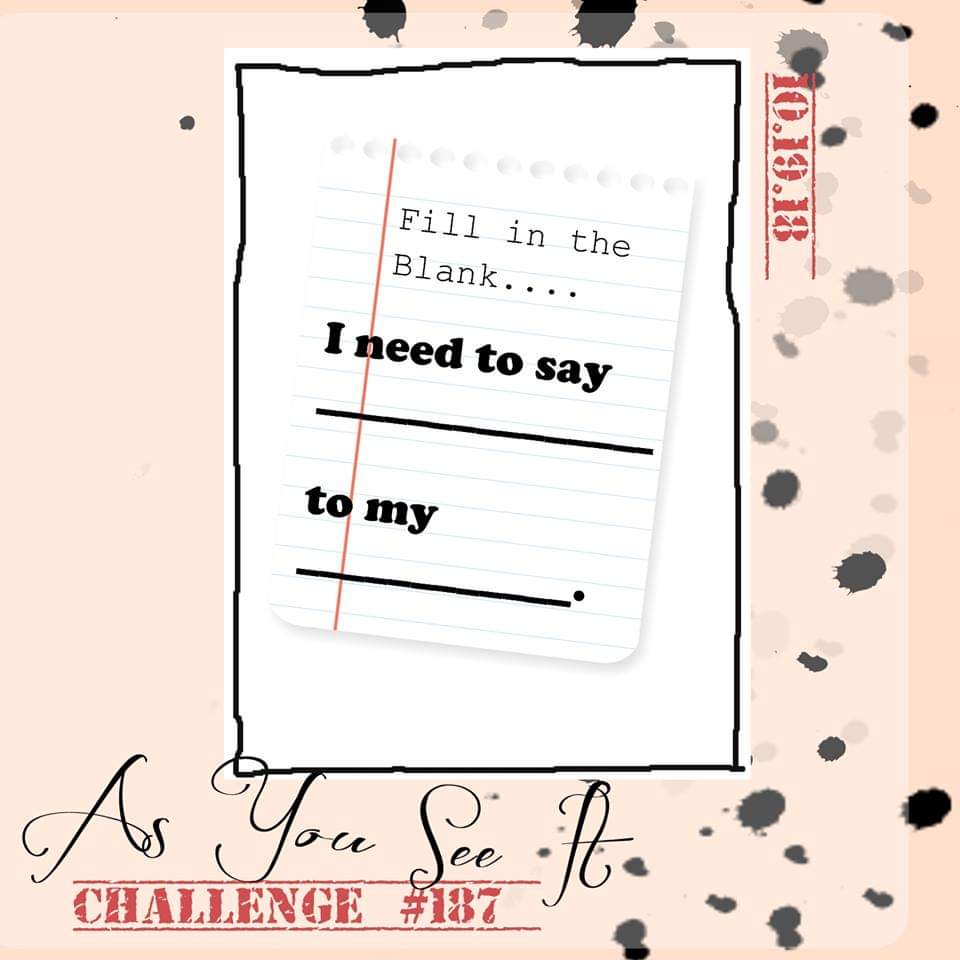
Here’s part of the inspiration from the As You See It Challenge blog:

The other part of my inspiration is my friend, hairdresser, and fellow Stampin’ Up! Demonstrator who earned the trip to GREECE!! She worked so hard this past year and SHE DID IT! I am amazed and wowed by her success and I have not yet made her a congratulations card.

So, to fill in the blanks, I need to say CONGRATS ON GREECE to SUSANNE! (sunnstampin.com)

It’s also very important that I put a shout out to the video where I found this amazing card design. Samantha Clayton at Mixed Up Craft on YouTube has a wonderful tutorial that I followed for the base and inner workings of this card. I loved her instructions and found her very easy to follow. I will post a link to her video at the bottom of this page so you can follow it as well.

I choose to change the measurements of the card so that it could fit (just) into a regular Stampin’ Up! envelope. My card is 4-1/4″ high instead of the 4-1/2″ high card that Samantha makes in her video.

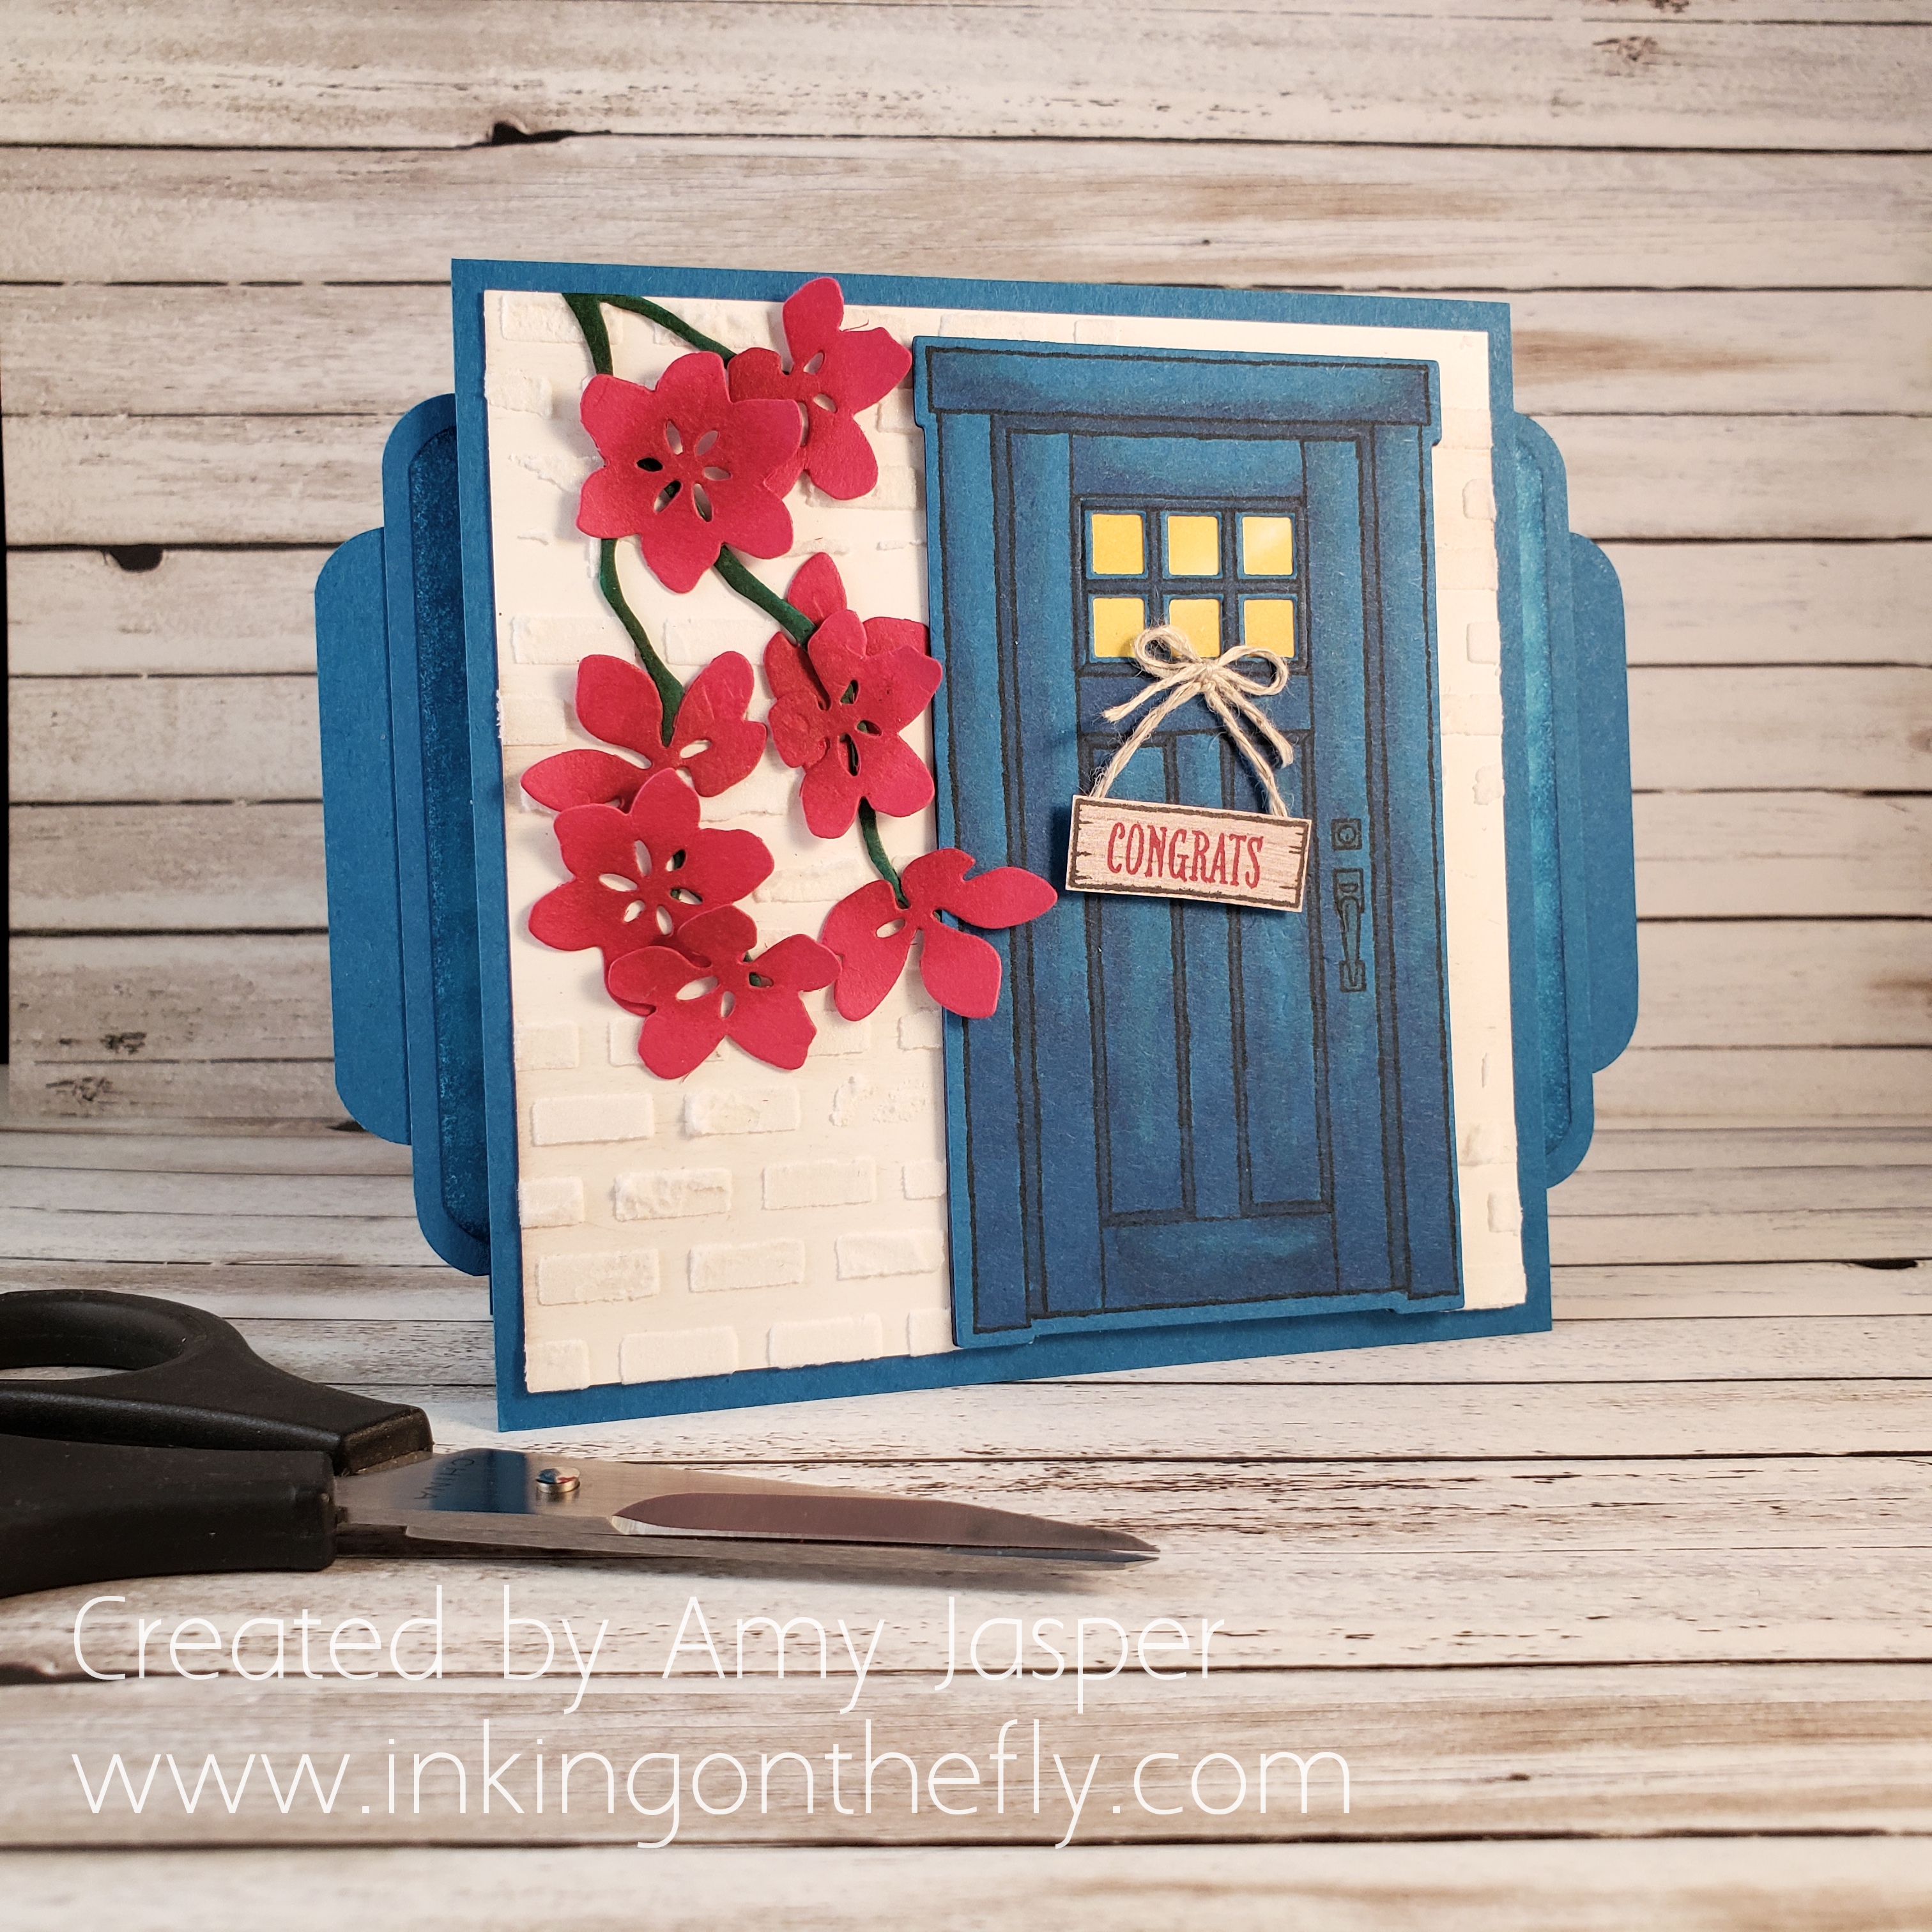
Because my friend, Su, will be going on a trip to Greece, FOR FREE!, my card is Greece inspired. My husband and I went to Greece 18 years ago on our honeymoon and one of my favourite places was the island of Mykonos. I remember the maze of a town with the stone pathways, the white buildings, the blue doors, and the bright flowers in full bloom. I’m so excited that Su gets to go to that very town. She’ll love it!

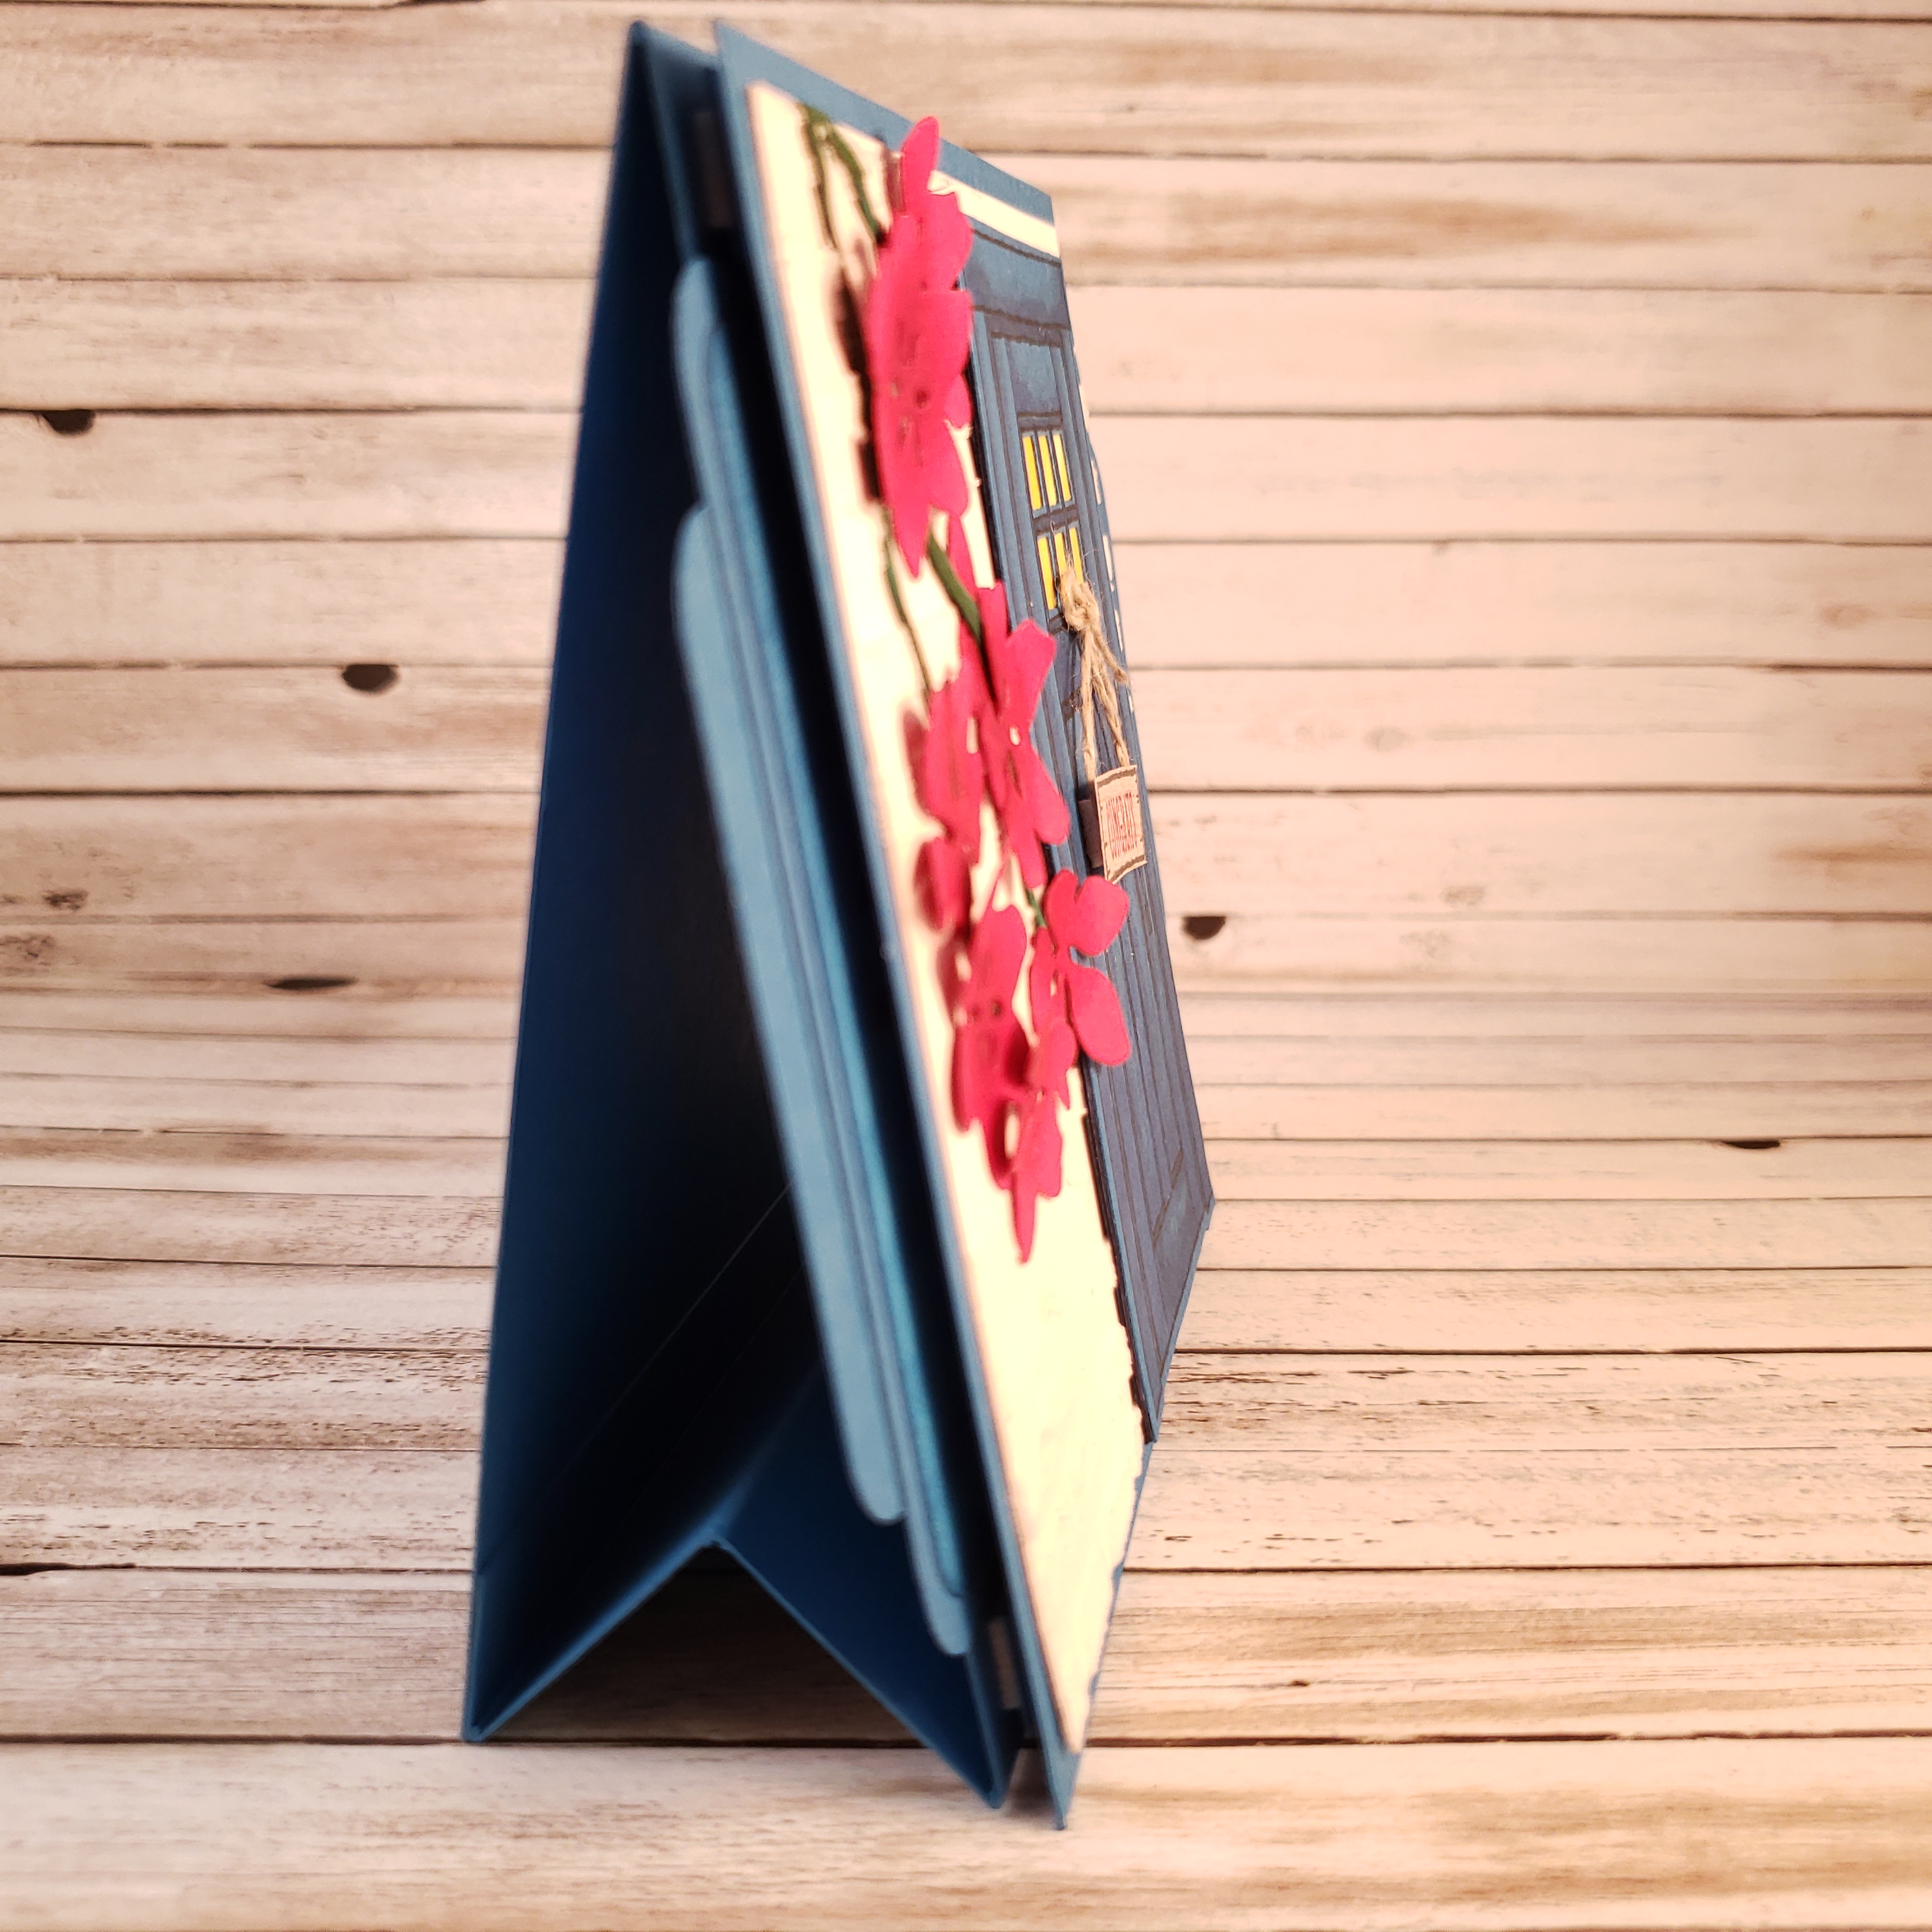
One of the things I like about this card design, is that it has it’s own built in stand. I have made many cards similar to this one in the past, but they either had to be attached to a normal card front or they laid flat like a postcard. This stand is a fabulous idea.

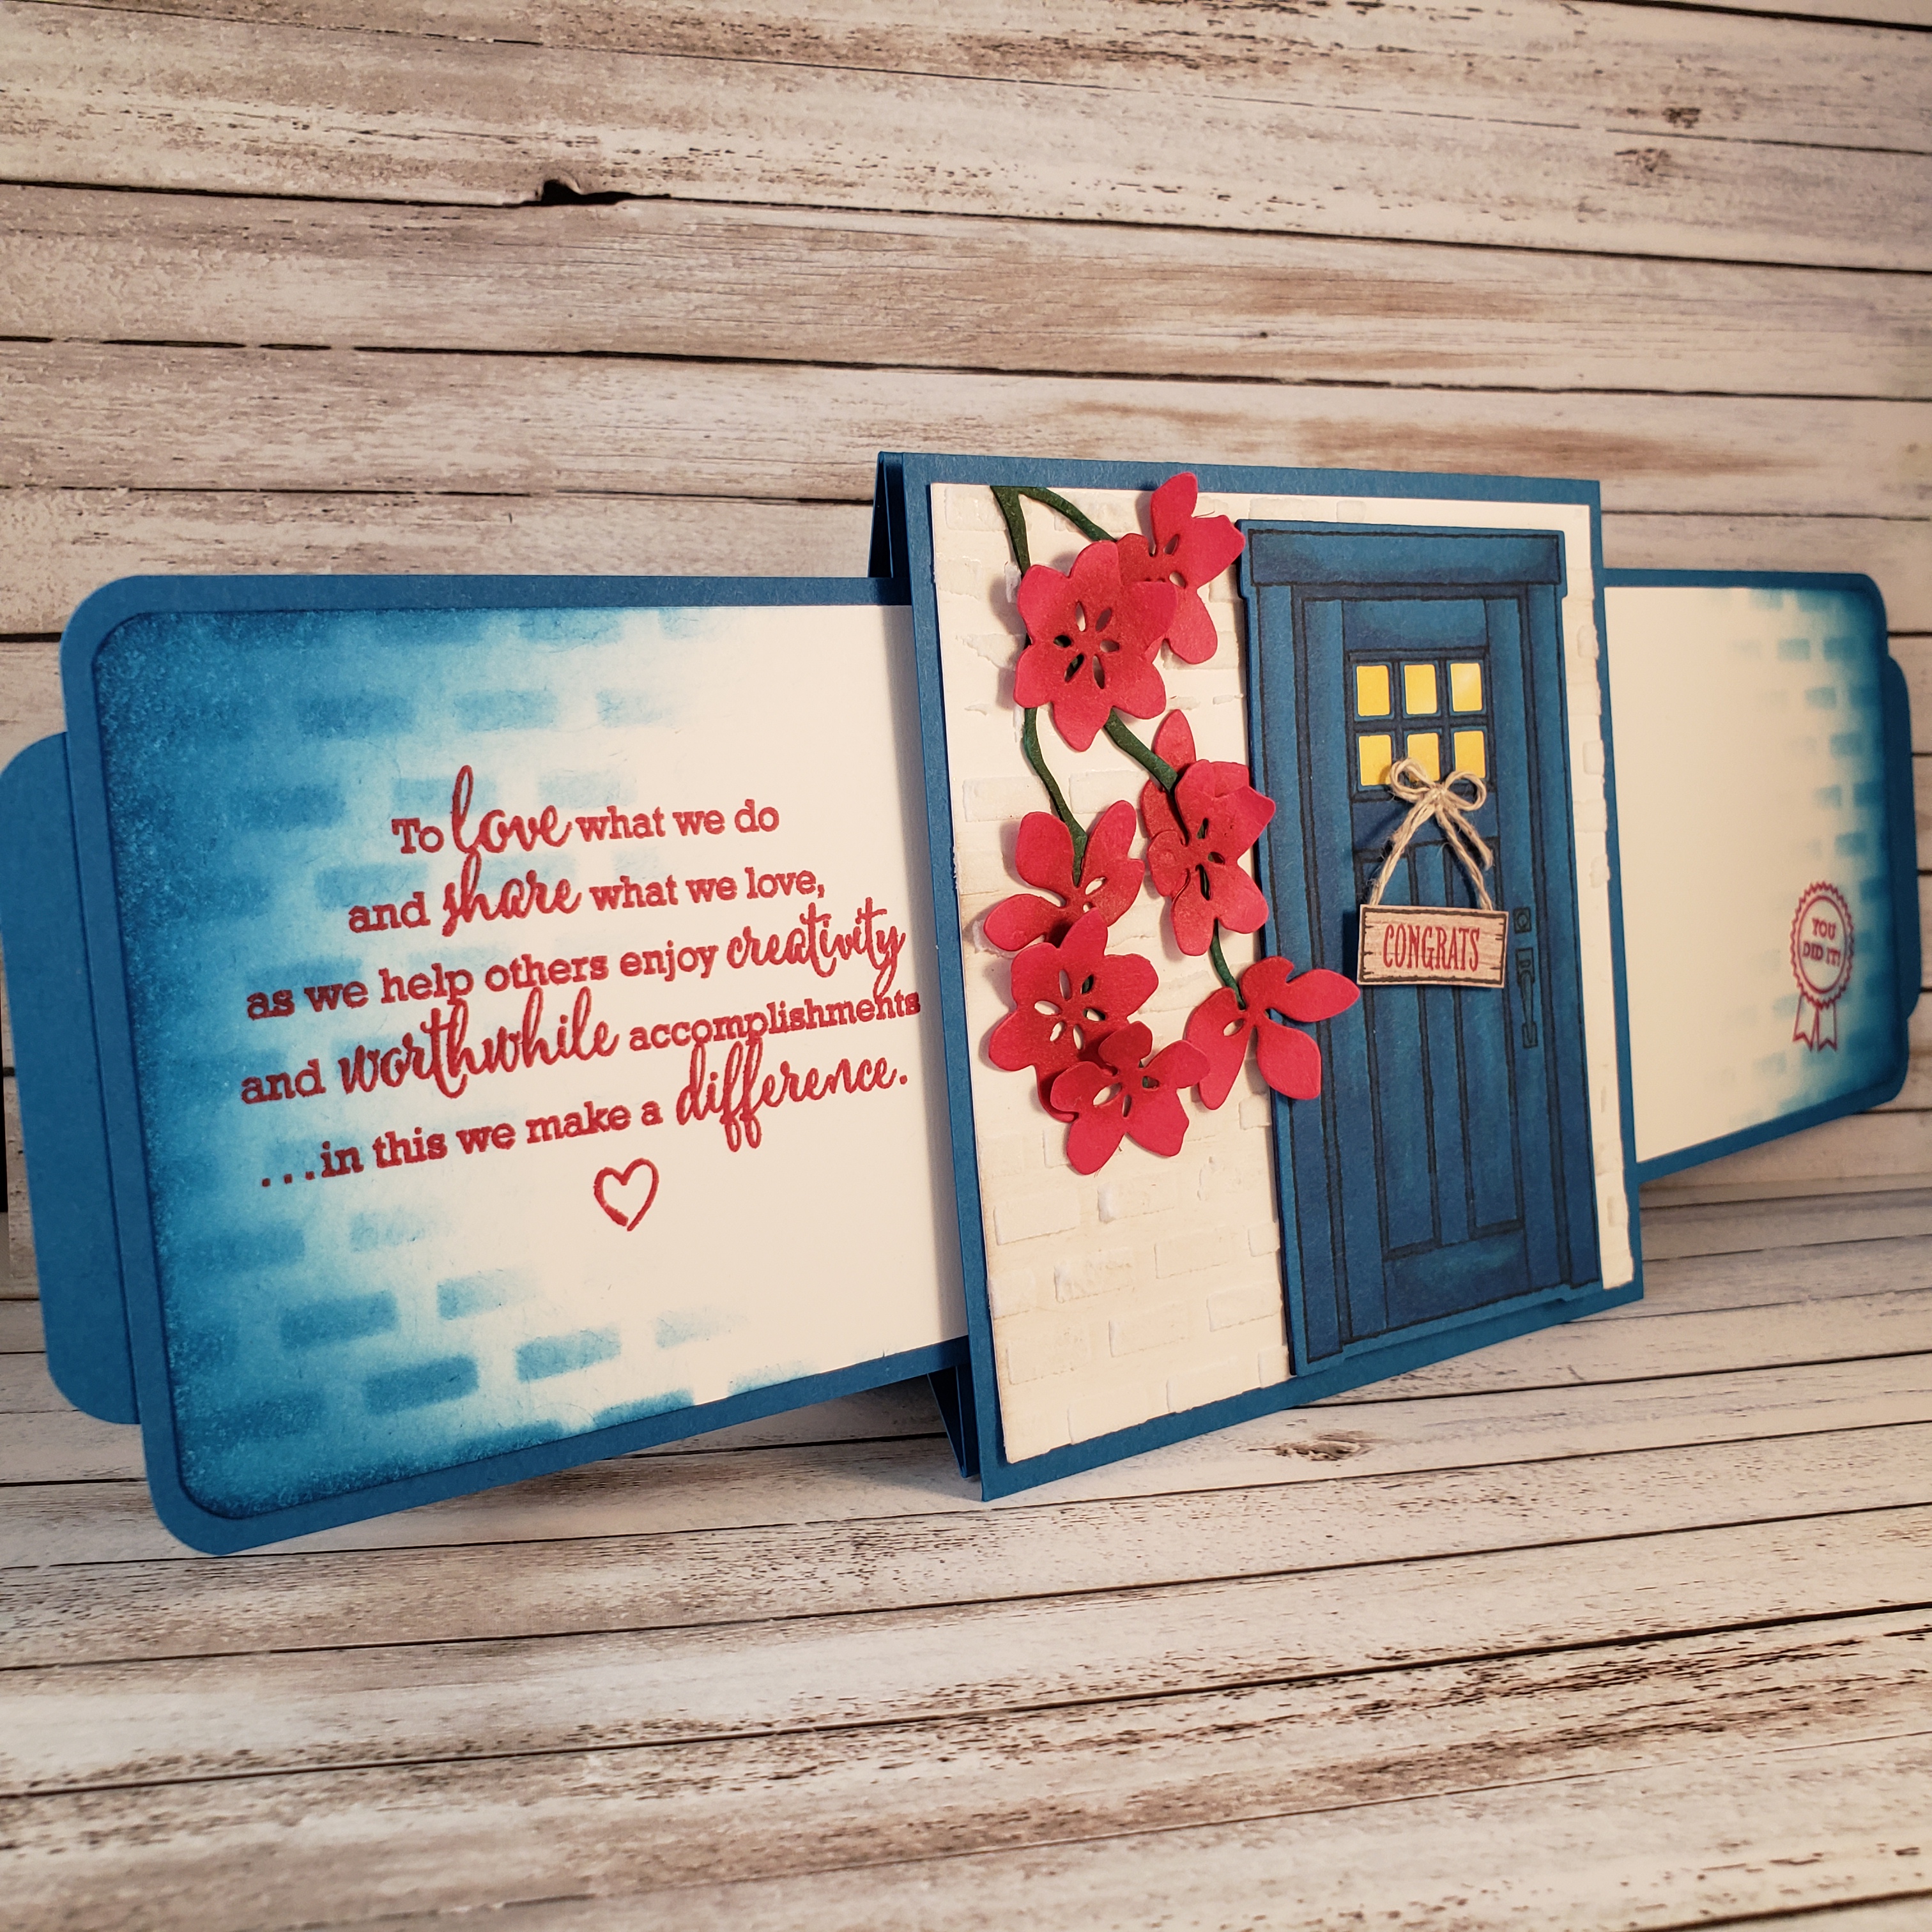
The other VERY cool thing about this card is that the tabs on each side pull out to reveal MORE! I used Pacific Point cardstock for the base colour of this card. It’s not exactly “Greece Blue”, but I think it’s the closest one that Stampin’ Up! has. The door is created with images from the At Home With You stamp set and die cut with the coordinating At Home Framelits Dies. I used Embossing Paste and the brick pattern from the Pattern Party Decorative Masks to create the white walls on the card front. I used the same brick mask, but sponged Pacific Point ink through it onto the Whisper White cardstock. Then I sponged more Pacific Point ink over the edges of the cardstock. Those slide out panels also have stamped images which are no longer available. Stampin’ Up! statement of the heart is on the left panel, while the You Did It image is from a stamp set designed just for demonstrators.

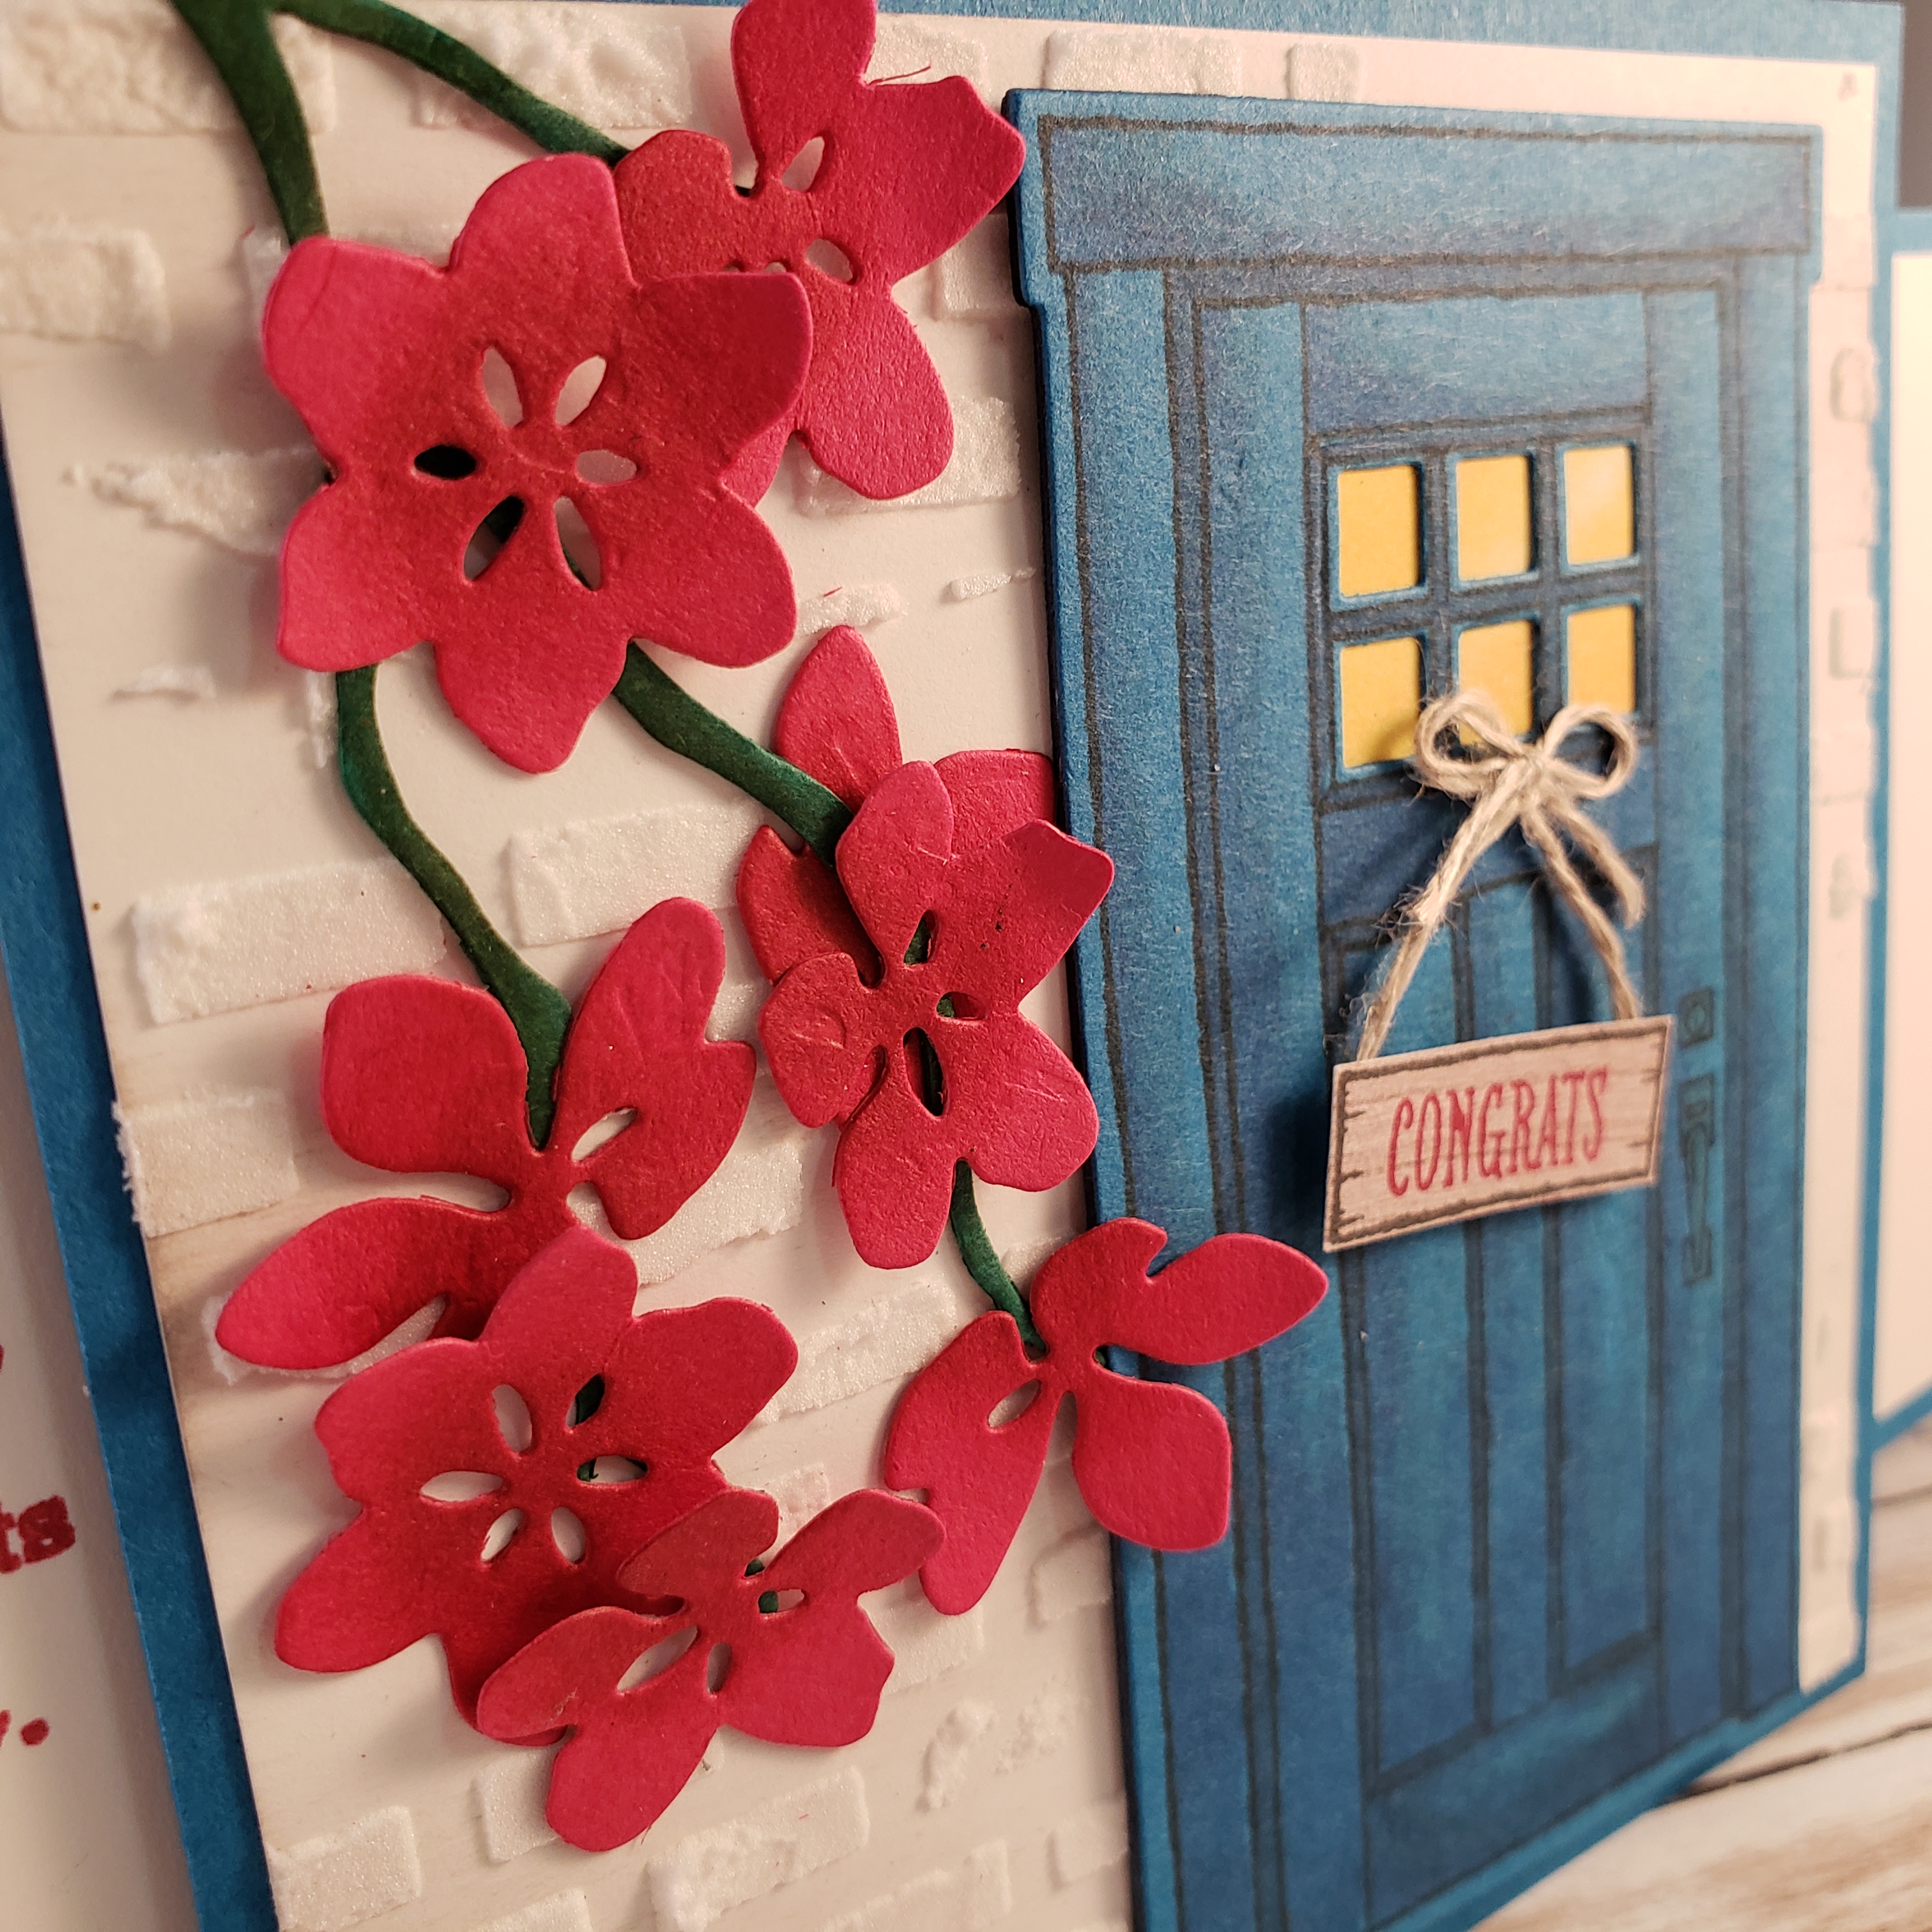
The Lovely Lipstick cardstock flowers are cut using the Seasonal Layers Thinlits as is also the Shaded Spruce cardstock branch.

The door is cut from Pacific Point cardstock, but I also used my Night of Navy Stampin’ Blends to add a little depth to the surface of the door image.

If you are interested in knowing more about other specifics on this card, be sure to leave me a comment.

As promised, here is the link to Mixed Up Craft so you can see how this card is made.

Sending Smiles Shadow Box Card

Yay! The As You See It Challenge Blog is up and running again! After tremendous technical issues, it has emerged anew, like the phoenix from the ashes! LOL! It sure feels like that after all that the folks working on it have been through. Thanks to all their hard work, we have had to start with a whole new web page using a whole new platform. Sadly, none of our previous material could be retrieved.

So the card today is one of many As You See It Challenge designs that I will be sharing here on my Inking on the Fly blog. You will see a new design every two weeks that will hopefully inspire you to play along with the As You See It Challenge Blog! It’s fun! It’s creative! And it will get your mojo flowing for a stepping-off point toward more of your own creative genius! I know it’s true because I have experienced it first hand, folks!!

Here’s the sketch challenge on which I have based my design:

AYSI#141And here is my card featuring the Lift Me Up Stamp Set and the Up and Away Thinlit dies from Stampin’ Up! I also used the Outdoor Adventure Framelits dies as they work in quite nicely. Actually, there are a LOT of stinkin’ dies used for my card this week! Yikes!! You can see the Stitched Shapes Framelits are in the mix as well, which will be available for purchase on the 16th!

Sending Smiles Shadow Box Card by Amy Jasper www.inkingonthefly.comThe inside if the card it the fun part. More dies, of course.

Sending Smiles Shadow Box card inside - by Amy Jasper www.inkingonthefly.comThe base of this card is super easy to make and finishes to a 4″ x 5.5″ card. I started with a 12″ x 5.5″ piece of Kraft cardstock. Once you have your piece of cardstock cut for the base of the card, you can score it to prepare for your fancy folding. I love using my Simply Scored tool and scoring stylus for projects like this – it gives me quick measuring and deep impressions that are easy to see and fold so nicely. I scored the paper at 4″, 7.5″, 8″, and 11.5″. Once you’ve precut your “window” on the inside of the card (this is going to be the section between the 8″ and the 11.5″ score marks), you can fold along your score lines, using your Bone Folder to make the folds nice and crisp.

You can’t really see it well in the photos, but the folds all fold in the same direction until the 11.5″ score line meets the inside of the card front, where you adhere it in place. Oh dear, maybe I’ll have to add pictures later … Let me know how it goes.

The rest of the design is simply layering, stamping, and die cutting (LOTS of die cutting!).

Now that you’ve seen my design inspired by the As You See It Challenge sketch, why not try the sketch yourself. Head on over to the As You See It Challenge Blog and see what the other designers have come up with and get creating!! But before you do anything else, be sure to leave me a note to say that you stopped by!

Sending Smiles Shadow Box Card by Amy Jasper www.inkingonthefly.comSupplies used are all from Stampin’ Up.

  • Paper: Kraft Designer Paper, Crushed Curry Cardstock, Crumb Cake cardstock, Serene Scenery Designer Series Paper Stack, Island Indigo Cardstock, Whisper White Cardstock, Rich Razzleberry Cardstock, Cucumber Crush Cardstock, Garden Green Cardstock, Soft Suede Cardstock, Soft Sky Cardstock.
  • Stamps: Lift Me up stamp set, Sealed with Love Stamp set.
  • Inks: Crumb Cake, Island Indigo, Rich Razzleberry, Jet Black Stazon
  • Embellishments: Basic Rhinestones
  • Tools: Big Shot, Precision Plate, Up and Away Thinlits Dies, Stitched Framelit Dies, Outdoor Adventure Framelit Dies, Simply Scored, Bone Folder.
  • Adhesives: Stampin’ Dimensionals, Tombo Multipurpose Liquid Glue, Fine Tip Glue Pen


Save