Woodland Embossing Folder
The Woodland embossing folder by Stampin’ Up! is so versatile for Christmas, Halloween, fall, winter, summer – it can literally be used for anything!
My new favourite is to use it to create a forest scene. I’ve seen this done by a few other demonstrators, but I ran into a few problems along the way and thought I could share my trouble-shooting with you.
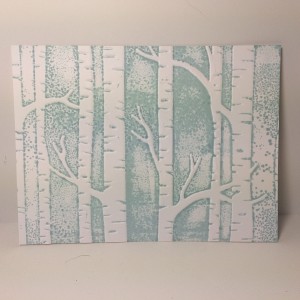
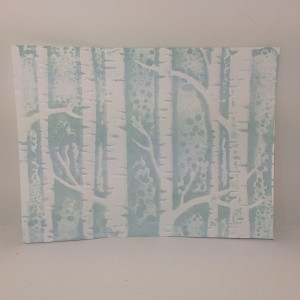
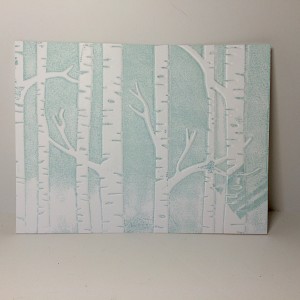
First, here’s the card I made and have since fallen in love with:
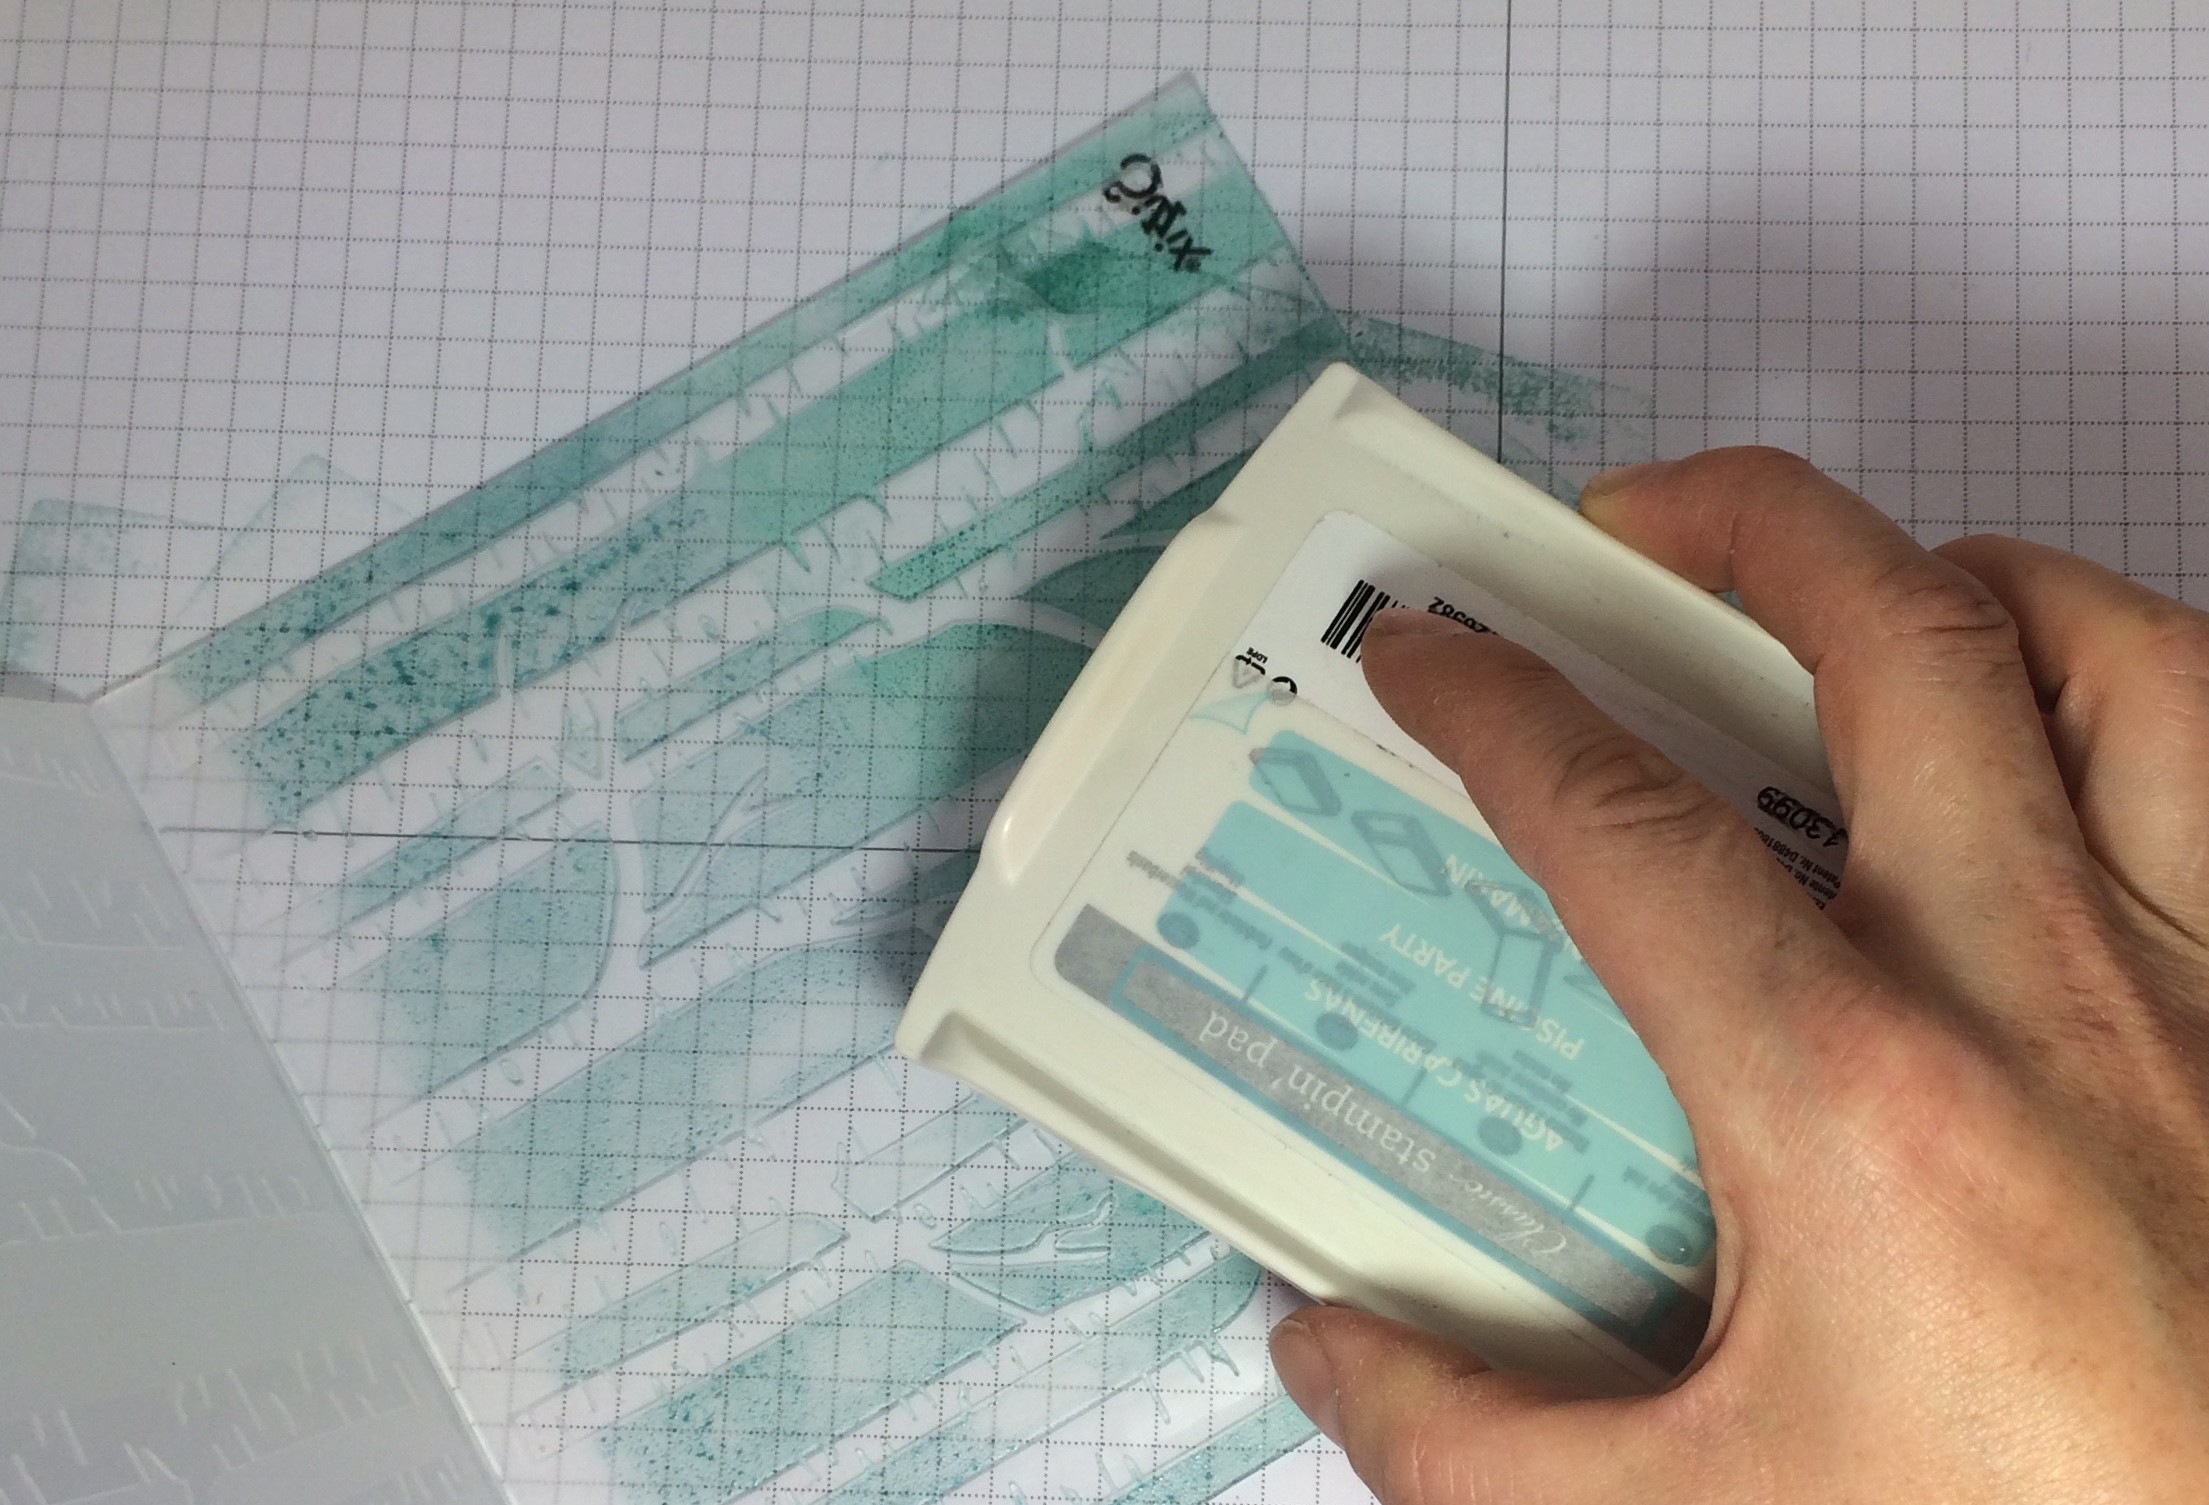
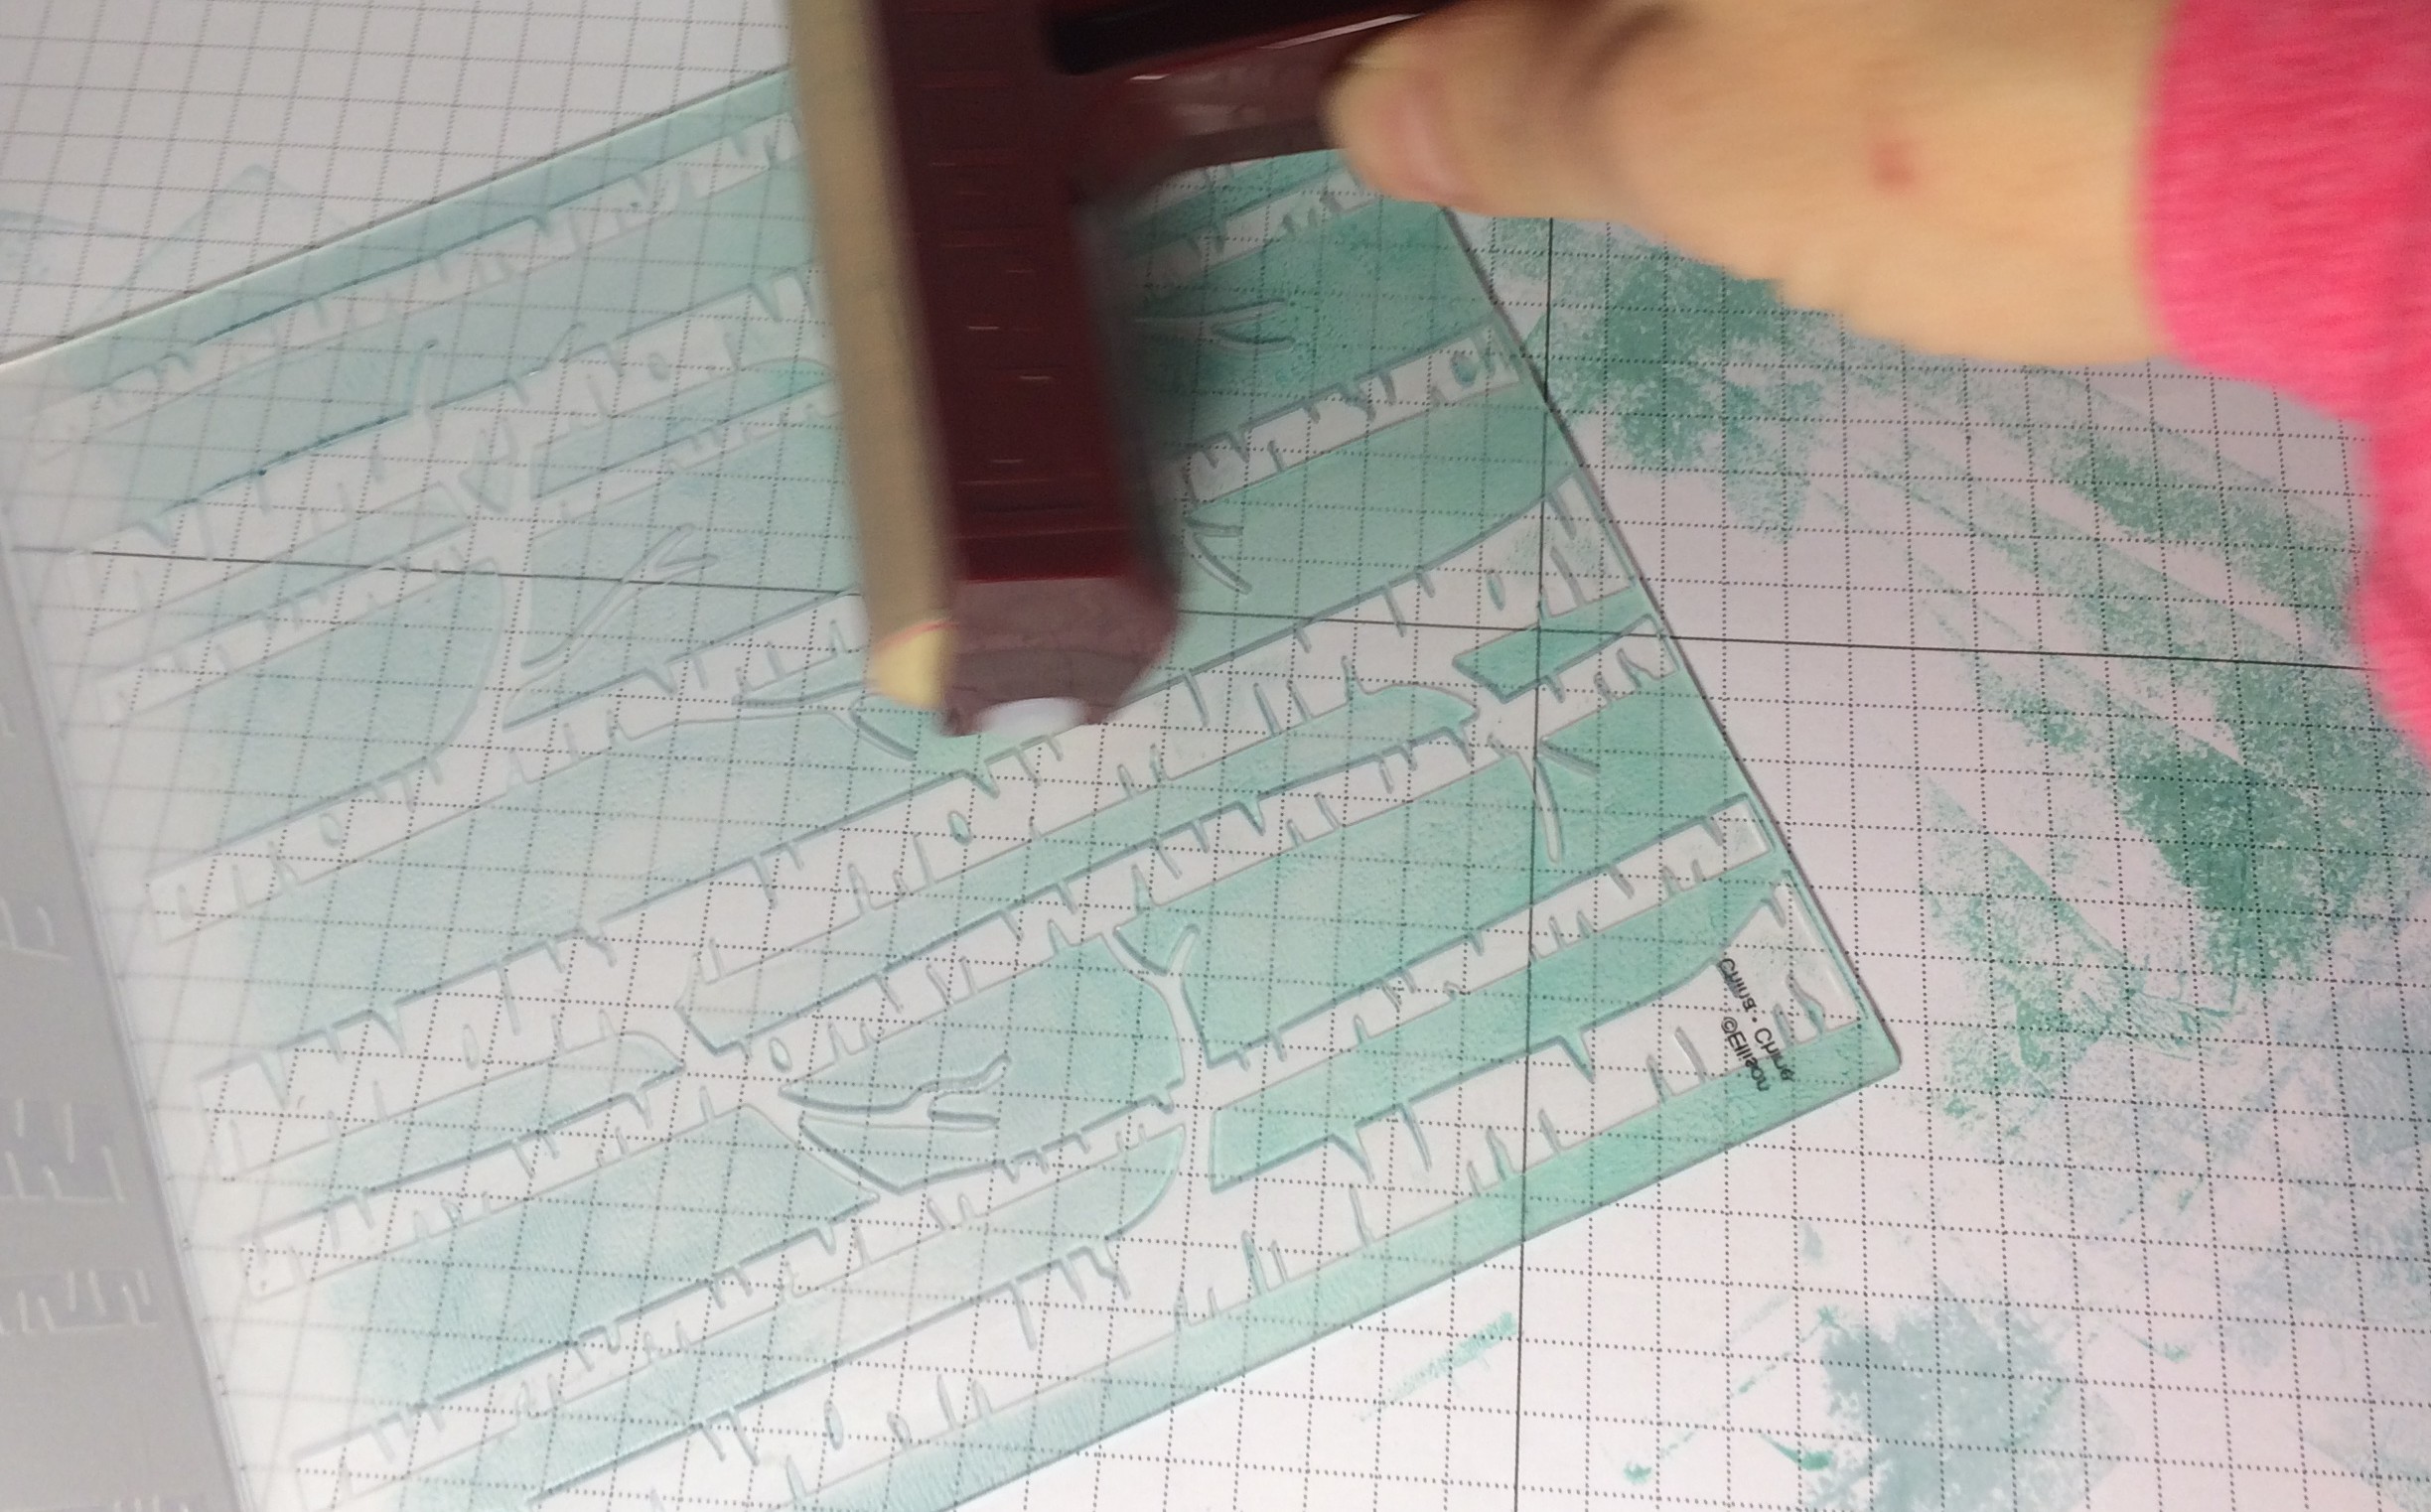
To created this card, I used a direct ink pad to embossing folder technique. This has been done before, but this time I used Soft Sky where the lower half of the sky was going to be, then used Pool Party for the upper half of the sky.
My first few attempts gave me blobs and pools of colour that didn’t jive with my expectations. This is likely because my ink pads are nice and juicy. Normally, you want a juicy ink pad for great colour distribution, but it can backfire a bit on you with solid flat sections on a stamp or when you want to use the ink pad for sponging techniques.
You could work with some of these effects for a different overall look, but I was looking for something softer and smoother.
When I get blotches of ink on a stamp (like when I used my Definitely Dahlia background stamp), I will often roll my brayer over the stamp surface after inking it to thin and smooth the ink. I decided to try it with the ink on my folder.
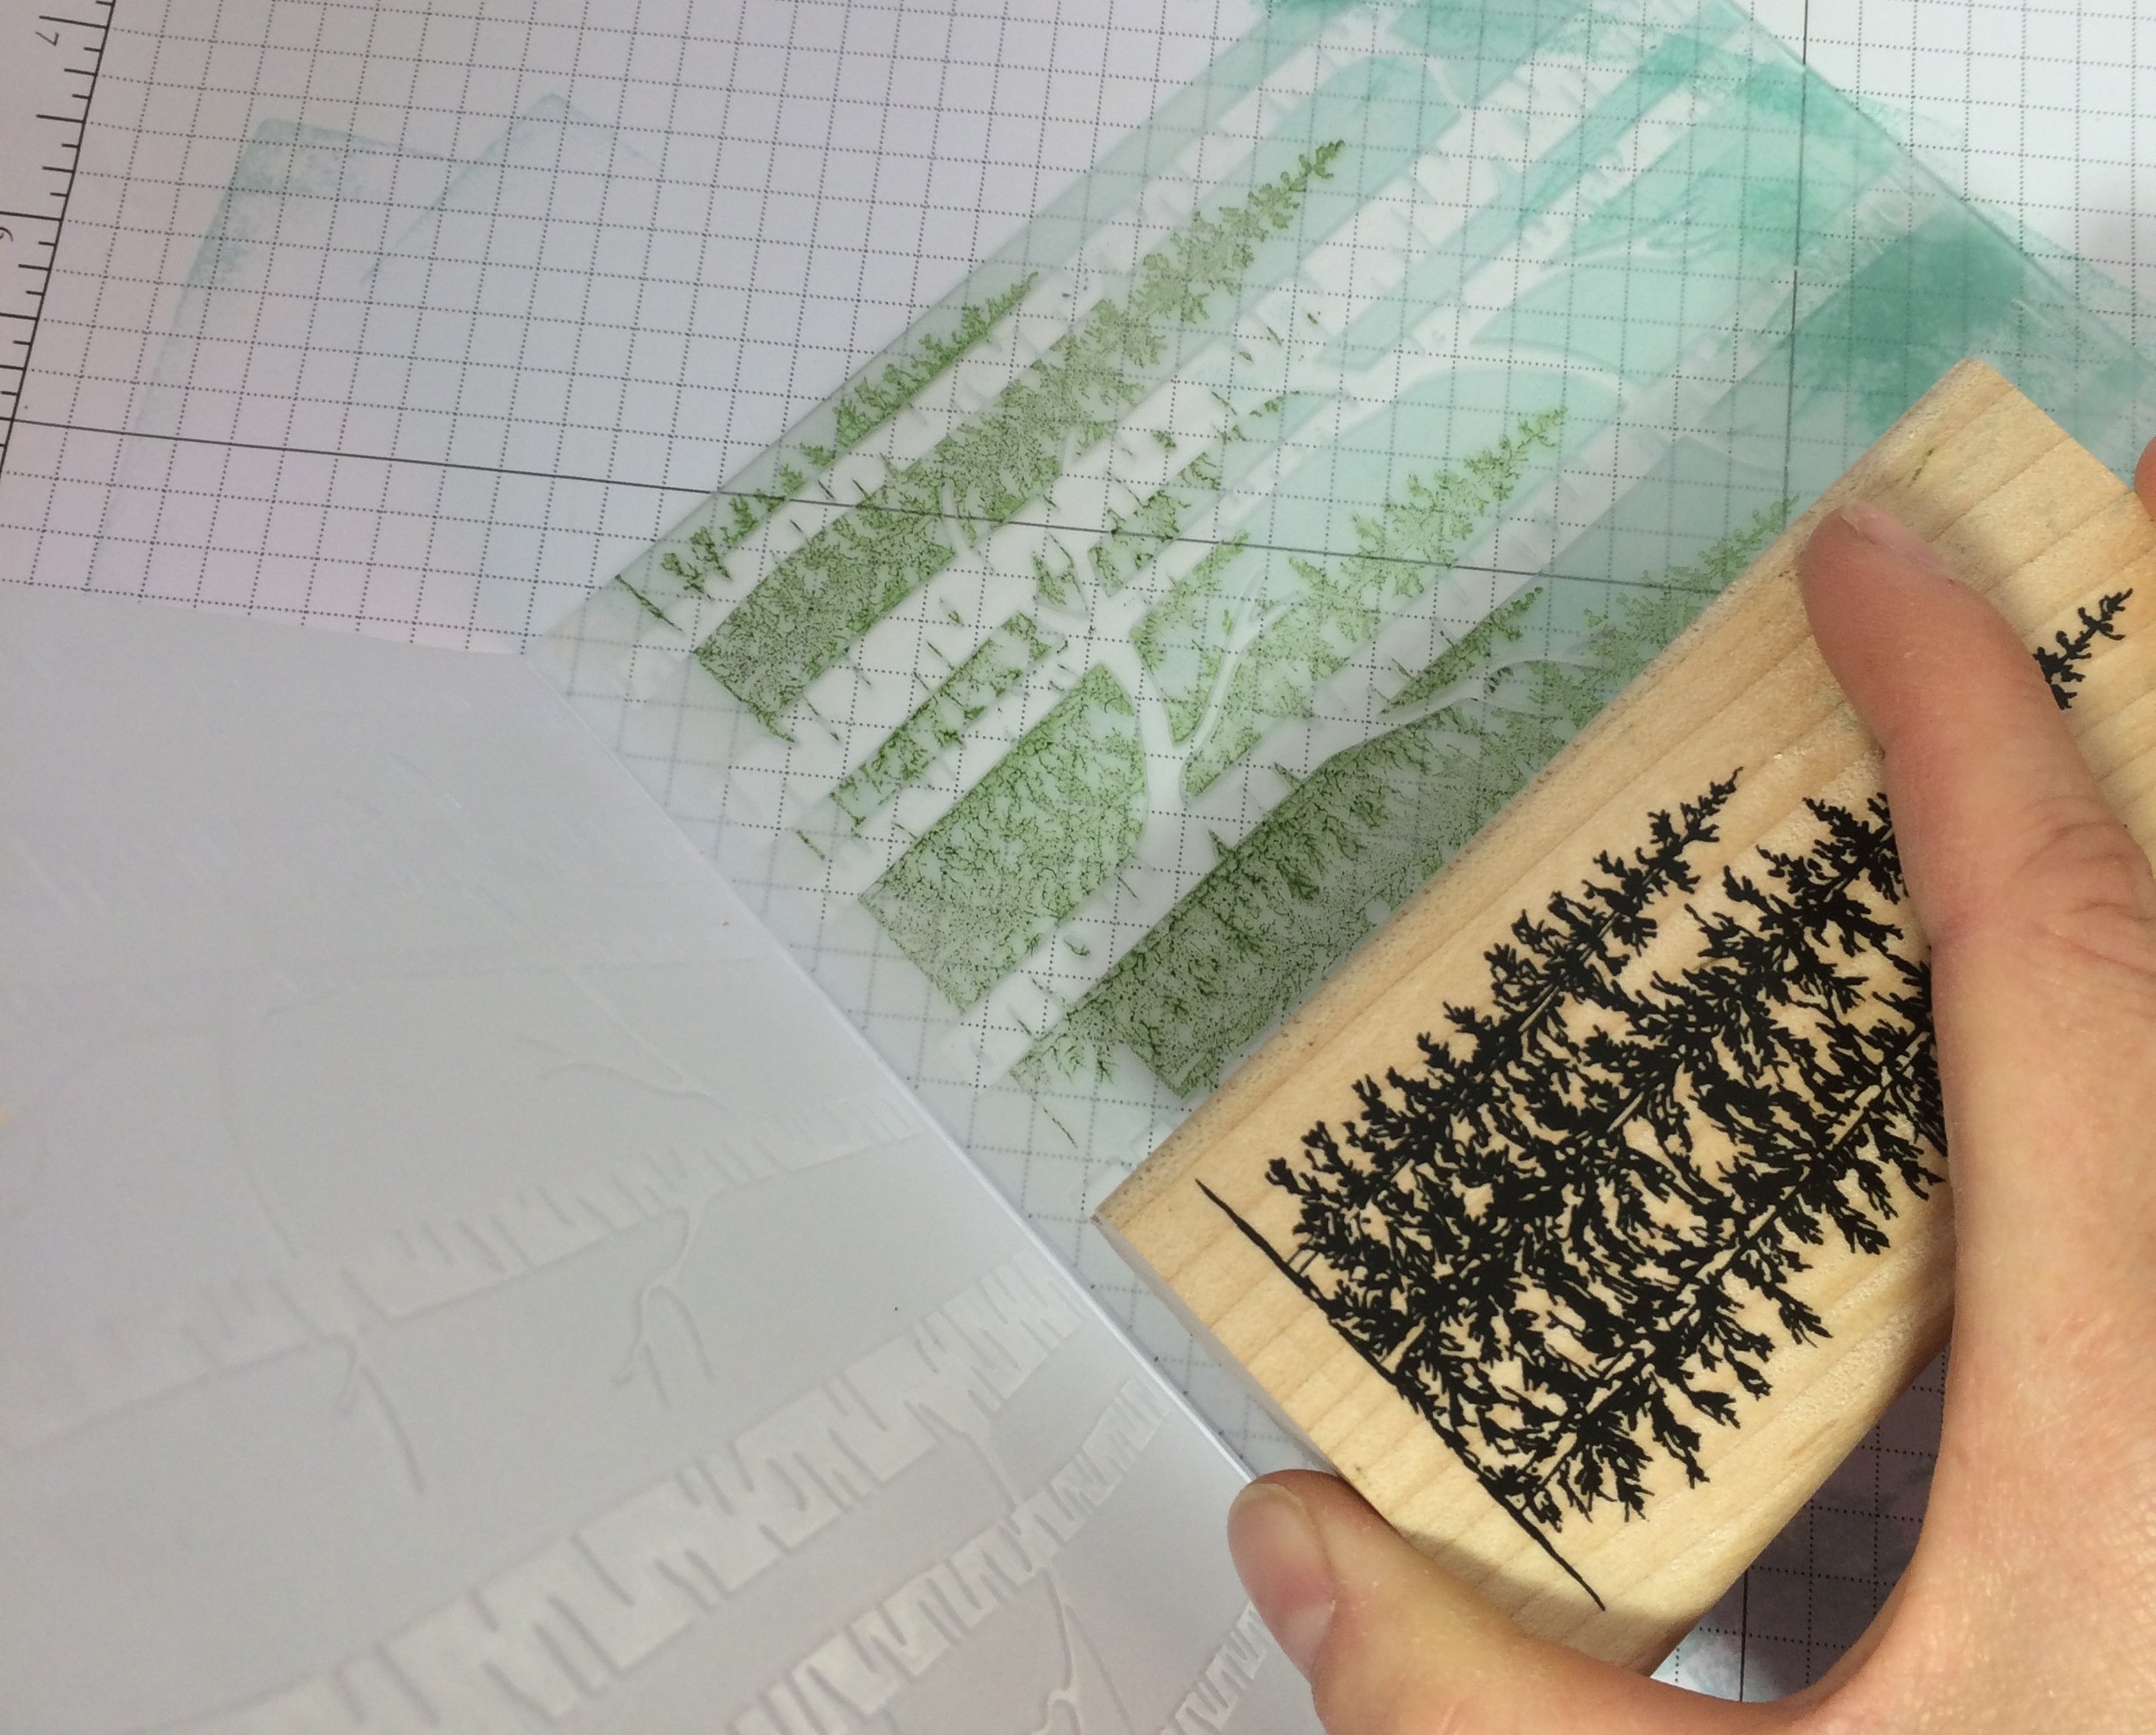
Once I sorted out my sky and decided on the Pool Party/Soft Sky ink combo, I could proceed with directly stamping my Winter Wonderland trees with Mossy Meadow ink on the Woodland embossing folder. I stamped them in varying heights and was careful to re-ink my stamp each time to ensure every tree was solid.
With my images and inking completed, I was ready to press my Whisper White cardstock. If you lay the paper on the un-inked side of your embossing folder, you will avoid the risk of smudging the ink on the cardstock. I chose to lay my paper dead center on the un-inked side of the folder so that the messy bottom area of my stamped trees wouldn’t show on my cardstock, but I would have a nice tree line showing in the middle-upper area of my cardstock piece.
Fold it all together carefully, holding it so it does. not. move, run it through the Big Shot.
Vacant areas actually work on this project, because it is an art piece. You can interpret those vacant areas as wisps of clouds or even snow.
Finishing the card was simple. I didn’t want to cover up the pretty woodland image, but wanted to highlight it as much as I could. I started with a Crumb Cake mat behind the embossed cardstock and layered that on my Thick Whisper White card base with Stampin’ Dimensionals. The sentiment from the Hostess stamp set, Six Sayings, was stamped in Early Espresso ink on a Whisper White banner. Linen Thread tied in a bow to finish it with a bit of natural texture.
The final touch is adding the 3 sequins (pronounced “seek-wins”, not “sequence”, lol!). I thought of them as Christmas ornaments hanging from the trees, but they could also be thought of as sparkly snow softly falling from the sky.
You can order any of these products by clicking the ‘shop now’ button on my website or by contacting me through my email.
Now, don’t stop there. If you liked this tutorial, go and give it a try for yourself. Don’t have that embossing folder? Play around with what you have and see what you come up with!
Now get stamping!



December 8, 2022 @ 6:21 am
I would love to be able to find this woodland embossing folder for purchase. I know it was discontinued by stampin up but I still try to find it. Any assistance you can give me would be greatly appreciated.
April 11, 2023 @ 4:49 pm
Hi Bonnie. There are some buy and sell groups where you can find retired Stampin’ Up! products. You can try Splitcoaststampers.com, look for Facebook groups, or even check out eBay. If you have a Stampin’ Up! Demonstrator, they can ask around to see if anyone has it and is willing to part with it.
December 11, 2024 @ 11:07 am
I accidentally purchased 2 of these folders and would be happy to sell 1.
December 5, 2022 @ 11:33 am
I have the sissix folder but not any SU products. Are your inks dye inks or water based? I like the effect but when I tried it with distress oxides just got a mess!!
April 11, 2023 @ 4:34 pm
This technique works best with water-based inks.
July 3, 2021 @ 2:12 pm
Oh this worked about great for me. I read your complete description and followed what worked best for you and Voila! It worked great! Thank you for posting.
July 3, 2021 @ 4:01 pm
I’m so glad to hear that you had success, Autumn! That makes me so happy. 😀
December 1, 2019 @ 1:05 pm
I don’t understand it. I have this folder. I tried the trees behind looked like crap. And how would you use a grayer if you already sponged in color,I need some help please.
Thanks
December 5, 2019 @ 6:18 pm
Hi Lynne. Sorry that you’re having trouble with the technique. In the blog post, I share how using a red rubber brayer to apply the ink to the inside of the embossing folder gives the best effect. No sponging necessary. Using a firm brayer helps to keep the ink from going on the area where the birch trees are because they are debossed on that side of the folder. You might run into trouble if you’re using pigment inks. I used the Classic Ink by Stampin’ Up! which are water based. I hope that helps!
December 10, 2019 @ 11:50 am
I too can not figure this out. Chemo fog has me being able to understand videos only. Can you doa video please for us handicappers. ? Much Stampin love!,
December 20, 2019 @ 4:12 pm
Perhaps it’s time for me to revisit this technique in a new post with a new card and offer a video. Sorry you’re struggling with it. I’m sure a video would be helpful.
November 24, 2019 @ 7:37 am
Absolutely beautiful! Thanks so much for sharing with us!
December 1, 2019 @ 7:51 am
Thank you so much for taking the time to comment, Janice. It warms my heart! Also, I have to say, I am a big fan of your email address. I love ladybugs. In fact, my business name “Inking on the Fly” actually developed from my previous blogger name “Ladybug Landing”. The “fly” in my name represents ladybugs (nature, freedom, carefree, beauty), while the full name represents my crafting lifestyle of almost always having to stamp in a frenzy! I will not allow my busy life to interfere with my creative living, but it doesn’t mean I’m not still busy, LOL!
November 17, 2019 @ 6:02 pm
If making several cards at a time do you have to clean the folder after each card?
November 21, 2019 @ 7:52 pm
Hi Barbara. You might be able to use it a couple times, but the colours and image will probably be less vibrant. Give it a try and let me know how it goes!
January 1, 2019 @ 2:52 am
Que votre carte est Jolie … ! J’aime beaucoup …
Merci pour le tutoriel très bien détaillé … je vais essayer !
Bonne année 2019 !
March 22, 2019 @ 8:28 am
I’m so glad you liked the tutorial! Thank you for taking the time to comment. 🙂
November 25, 2018 @ 11:07 am
I am wondering if you are using an embossing pad when you run the inked folder thru your machine? If not, how do the birch trees appear raised?
March 22, 2019 @ 8:33 am
Hi Sarah. The trees appear raised because the folder is an embossing folder. No embossing pad needed, just the paper in the folder, sandwiched between the clear plates, with the Big Shot platform on the bottom, then all run through the Big Shot. The embossing folder makes it easy!
October 27, 2018 @ 8:45 am
How do I get the trees so they don’t bead up. When stamping on paper not clear. Is there a better ink to use. Love this card
November 1, 2018 @ 8:05 pm
Hi Bonnie. If your ink is beading, it may be because the ink pad is particularly juicy and saturated with ink. You can either dab some excess ink off of the ink pad with a paper towel, or use a brayer to apply the ink to your stamp for a smoother stamped image. Hope that helps!
December 20, 2020 @ 8:56 am
I also have had the problem with to much ink on the trees. Didn’t think about using the brayer to apply to the tree stamp. Thanks for the tip.
February 4, 2021 @ 9:59 pm
Here’s another option: If you’re struggling with a juicy ink pad, you can try moving the excess ink “out of the way”. Use the edge of a tool that won’t harm the surface of your ink pad (I use an old plastic baby spoon that I keep in my craft room) and stroke it across the surface as if you were spreading soft butter on a piece of bread. This way, you can move the ink away from the centre of the ink pad, then use that area with less juice when you ink up your stamps. This works really well with the sponge/foam ink pads that Stampin’ Up! currently has for their classic water-based dye ink pads. This technique can make all the difference when you’re working with images that have fine lines or a lot of detail and shading in the artwork.
September 22, 2018 @ 11:49 am
The card is so very pretty! Thank you for sharing. I will try this.
October 4, 2018 @ 6:46 pm
Thank you, Rita. I’m glad you are going to give it a try. 🙂
August 27, 2018 @ 9:50 am
having a hard time making this card any tips?
September 7, 2018 @ 6:52 am
Hi Cathy. Is there a specific part of the card that is causing you difficulty? The most important points I would suggest for you to focus on are using a rubber brayer to get your ink more evenly distributed (sadly, Stampin’ Up doesn’t sell this kind of brayer anymore) and make sure you ink the side of the embossing folder that has the indented birch tree trunks so that the ink goes on the spaces between the trees rather than going on the trees themselves. Hope that helps!
October 12, 2018 @ 4:47 pm
I had a hard time as well. I have a cuddle bug, not a Big Shot😢. I found if I used a metal shim (got mine on Amazon) the color transferred nicely.
July 18, 2018 @ 10:28 am
Wonderful idea and beautiful card. Thanks for sharing x
May 17, 2018 @ 1:10 pm
Beautiful card! Thanks so much for sharing.
May 17, 2018 @ 7:10 pm
Glad you like it!
May 17, 2018 @ 1:10 pm
Thank you sharing this technique! Beautiful card.
I will try this.
May 17, 2018 @ 7:09 pm
I hope you do 🙂
May 7, 2018 @ 7:46 pm
Very nice tutorial! Thanks for sharing! I had to chuckle at the “seek wins”. Drives me batty when they are called sequence!
May 17, 2018 @ 7:08 pm
Yup. I still look at my mom when I say sequin, to make sure I said it correctly 😀
March 29, 2018 @ 6:04 pm
I must be a little stunned because I cannot figure out which side of the embossing folder you stamped. Are the trees raised on the side you stamped? If so how come they came out white. Sorry just having one of those moments where it does not make sense to me.
April 6, 2018 @ 10:58 am
Hi Marilyne. If you stamp on the side of the embossing folder where the trees are indented, then the trees will remain white. Then, when it is put through the Big Shot, the finished product will have raised, white trees. Hope that helps!
November 19, 2017 @ 4:46 pm
Thanks for documenting your creative process, and explaining so well. I am thrilled to have learned from your incredible, beautiful creation and look forward to trying it myself! Very appreciative gratitude…
December 29, 2017 @ 11:17 am
Thank you for the feedback, Donna. I’m glad you liked it 🙂
September 14, 2017 @ 6:13 pm
Great explanation! Love this card
August 23, 2017 @ 7:53 pm
I want to but the ‘woodland’ stamp. Could you tell me where I can purchase it?
September 8, 2017 @ 7:32 am
Hi Dee. The Woodland image is actually not a stamp, but is an embossing folder. If you’re in Canada, you can purchase it by clicking on the shop button on my website. If you are outside of Canada, you can search stampinup.com in your web browser to find a Stampin’ Up Demonstrator in your area.
October 14, 2017 @ 2:08 pm
I ordered mine from Amazin
November 28, 2017 @ 7:13 am
Holy mother of pearl…I never would have thought to use a rubber stamp on an embossing folder together. I love the ingenuity! Concise, easy to follow instructions are the websites people will want to follow. Thanks.
December 29, 2017 @ 11:19 am
LOL! Thanks Deo! Glad you liked it!
November 6, 2017 @ 9:43 pm
I would like to purchase the Woodlands Embossing Folder.
My contacts are below
December 29, 2017 @ 11:15 am
Hi Rene. You can order online by clicking the SHOP button on my website. If you don’t live in Canada, you can find a demonstrator in your country by going to stampinup.com. I’m glad you like the folder 🙂
June 30, 2017 @ 5:30 pm
Thanks so much Amy. I tried this using your instructions and it came out so nice the very first try!!
August 11, 2017 @ 8:47 am
I have been wanting to give this a try. Thanks for the great tutorial. I have an old truck stamp I want to put “behind” the trees
September 8, 2017 @ 7:40 am
A truck would look so cool behind the trees with this technique. I’m sure it will turn out great!
September 8, 2017 @ 7:38 am
Hi Sylvia. Thank you for taking the time to leave this note! It’s great to have feedback on my instructions and I’m so pleased that the technique worked out for you 🙂
May 11, 2017 @ 6:09 pm
I love it. I am new to stamping and hope to make several come Christmas. Thank Yu so so so much. Christina🌻
May 17, 2017 @ 9:25 pm
I’m so happy that you like it. Now go forth, new stamper, and stamp all the things!! 🙂
September 2, 2017 @ 6:22 am
Do you have any trouble with ink colours getting contaminated on your pads?
September 8, 2017 @ 7:28 am
Hi Susan, that’s a good question. No, I haven’t found that to be a problem with this particular technique. I usually use the lightest colour first to reduce the risk of contamination and I do try not to overlap my colours as much as possible. I have had contamination in the past and found that most times you can use some paper towel to dab the contaminated ink pad until the unwanted ink is removed. Then re-ink the pad to re-saturate it with the colour that it’s supposed to be. Hope that helps 🙂
December 30, 2016 @ 2:17 pm
Hi,
I’m quite sure I did this right but I still got the pine trees printed on top of the birch trees. Not sure what I did wrong. Any ideas?
January 3, 2017 @ 11:11 am
Hi Sarah,
I can’t be sure what you did, but either you stamped with too much pressure, causing the ink to get into the depression in the embossing folder or you may have stamped on the wrong side of the embossing folder – make sure you are inking and stamping on the side of the embossing folder that has the depression of the birch trunks rather than the side where the birch tree impressions are raised. You definitely don’t want ink on your birch trees for this technique. Hope that helps!
November 29, 2016 @ 9:15 am
Hi Amy,
Your step by step tutorial is absolutely perfect. I am brand new to cardmaking. The only thing I don’t understand is how do you get the sky colors on the embossing folder without getting it on the trees?
(and if it invloves a brayer, what is a brayer exactly?) So you stamp the sky then the trees on the same side of the embossing folder? Sorry I’m alittle slow and worried the blue will dry by the time I get to the trees hahaha!
November 30, 2016 @ 7:54 pm
Hi Jody. A brayer is a firm rubber roller designed for applying ink to paper, similar to a paint roller that a person would use to apply paint to the walls in their house (but smaller and made of rubber, of course, lol!). And, yes, you apply the sky colour with the brayer, then stamp the trees on the same side of the embossing folder. Because the tree areas are depressed in the folder, the firm brayer skips over those areas. If you use water-based ink, you shouldn’t need to worry about the sky drying before you finish stamping your trees. However, if there is the slightest concern, you can “huff” on the folder (like when you huff on a cold window to fog it with your breath). This will re-moisten the ink just enough to allow it to transfer to the paper when you’re ready. I hope that helps! Happy stamping! I’m so excited for you and all of your new discoveries with card-making!!
March 10, 2017 @ 5:26 pm
Thank you!!! I finally got it. Can’t wait to try on a card. Phyllis
March 25, 2017 @ 7:37 am
I’m so glad it clicked for you, Phyllis! Give it a go! You will love it!
November 1, 2017 @ 5:05 am
I love the technique but how do I get the ink off the embossing folder mine does not come off!!!
November 1, 2017 @ 12:37 pm
Hi Jane,
It is best to use water-based ink so you can easily rinse off the folder or use a baby wipe for a quick clean. I find that the Stazon Cleaner takes off stubborn stains quite well, but it depends on what kind of ink you’re using. Good luck!
August 7, 2019 @ 12:28 am
I have tried this and it hasn’t turned out very well. What side of the embossing folders do you actually ink? The raised side or the flat side of the embossing folder.
August 7, 2019 @ 12:28 am
I have tried this and it hasn’t turned out very well. What side of the embossing folders do you actually ink? The raised side or the flat side of the embossing folder.
September 18, 2019 @ 3:57 pm
Hi Karen. Thank you for your question. In the case of the Woodland Embossing Folder, if you want the trees to be ink-free, then you will apply the ink to the side of the embossing folder that results in raised trees. That means, when you apply ink to the embossing folder, it will not add ink to the deeper impression of the trees. I hope that makes sense. For other folders, it just depends where you want your ink to end up. I suggest inking both sides of the embossing folder at the same time and see what results you end up with. Most of my creative successes come from playing with my supplies.
November 20, 2016 @ 7:30 pm
Thank you so much for sharing this technique with us! Your card is just gorgeous! I have never stamped on an embossing folder before, but I am looking forward to trying this.
November 30, 2016 @ 7:55 pm
Thank you Nancy! Give it a go!
November 13, 2016 @ 12:50 pm
Gorgeous card and handy tips…I will have to be brave and try it myself!
November 15, 2016 @ 2:14 pm
You can do it, Patricia!!
January 28, 2018 @ 5:47 pm
Thanks so much for step by step instructions. It was so helpful I’m going to try it. I can’t findthis folder. I can’t find it on Amazon. I wish I had a Stampin Up demonstrator. I’m in Harrison, Arkansas. I had one when I lived in Colorado & I could just call up & order.
April 6, 2018 @ 11:05 am
There are demonstrators all over the world! You can order from anyone in your country (sadly, not me, because I’m in Canada and can only accept orders from Canadians). If you go to stampinup.com you can click on the option to find a demonstrator near you. This embossing folder is still available to purchase and there are so many other amazing and beautiful products that Stampin’ Up has to offer!
November 3, 2016 @ 1:37 pm
thanks for your ideas with the above card. never thought about those ways of effect onto my carding. Another new year’ to do’ technique with my small workshop ladies.
November 15, 2016 @ 2:17 pm
I hope your ladies enjoy this technique, Linda.
October 30, 2016 @ 3:22 pm
Thank you for an amazing tutorial…..answers a lot of my questions
November 1, 2016 @ 9:11 am
Glad you found it useful 🙂
October 29, 2016 @ 7:04 am
Bonjour, superbe carte. je ne connaissais pas cette technique et le résultat est vraiment très joli, bravo
November 1, 2016 @ 9:17 am
Merci beaucoup! Je ne parle pas français, mais Google Translate est très utile!
October 22, 2016 @ 4:58 pm
Thanks for the great easy directions I’ve been wanting to try and make a card like this but was confused on how but not now thanks to you!
November 1, 2016 @ 9:19 am
Hi Rose. I’m glad you found this tutorial helpful. Happy stamping!
October 18, 2016 @ 7:49 am
I was wondering are you putting the ink on the folder and then running it thru the big shot with the ink?
November 1, 2016 @ 9:27 am
Hi Donna, have a look at the tutorial pictures again, the info is all in there for you. Happy stamping!
October 16, 2016 @ 11:11 am
Thanks so much for taking the time to give such detailed instructions. The card is truly amazing!
September 26, 2016 @ 9:38 am
Beautiful card, a piece of art. Thanks for the wonderful directions.
October 6, 2016 @ 3:07 pm
Joni, I’m glad you liked it and found it useful. Have fun creating!
September 25, 2016 @ 9:07 am
Beautiful card! Thank you for sharing the details.
October 6, 2016 @ 3:07 pm
Daria, thank YOU for taking the time to say so. It means a lot!
September 10, 2016 @ 6:47 pm
Lovely, just lovely, thanks sooooooo much for tips n tricks, u make it look easy and now I think I can do..thanks again for sharing, your the bestest! Paper hugs
October 6, 2016 @ 3:05 pm
Lol! Thank you, Kathy! Hugs back!
September 10, 2016 @ 6:45 pm
What a wonderful tutorial…….so easy to follow….thank you!
October 6, 2016 @ 3:05 pm
Glad you liked it!
September 7, 2016 @ 9:32 pm
Thank you for the excellent tutorial. I am excited to make some Christmas cards with this technique.
October 6, 2016 @ 3:04 pm
Your welcome, Cynthia. I’m so pleased that you found it helpful!
August 23, 2016 @ 6:35 am
Thank you for showing how to do this technique. I can’t wait to try making this card.
October 6, 2016 @ 3:00 pm
I wish I could see how it turns out for you, Rebecca!
August 6, 2016 @ 12:07 pm
What a breath-taking card and interesting technique! I will be fiddlin’ with it the next time I sit down to stamp. Thank you for the great step by step!
August 8, 2016 @ 4:54 pm
Thank you! Let me know how it goes, Melissa.
August 25, 2016 @ 10:38 am
I really liked the way you laid out your tutorial. It was easy to follow and certainly encouraged me to try to make cards of varying colors (sunsets, sunrises, etc.) using your technique.
October 6, 2016 @ 3:01 pm
Glad to hear it, Barbara. Sunsets would be beautiful with this technique.
August 5, 2016 @ 4:11 pm
I have tried and tried this technique and the image does not come on the card, just kinda messy. I have stamped the image on the right part of the folder, run it through the machine and it barley shows yet it shows on the folder. I do not have a Big Shot I have a Evolution but that should not make a difference. Any tips?
August 5, 2016 @ 7:15 pm
I’m not familiar with the Evolution, but if you are successfully getting an embossed image, then the problem might be related to your ink. A water-based ink or a slow-drying ink is the key to success for this technique. Stampin’ Up! classic ink pads are a water-based ink in a firm foam pad, which release the ink beautifully and very evenly. Try adding more ink to your ink pad with an ink refill so the ink pad is nice and moist. This will allow the ink to have better coverage and should improved transfer from the folder to your paper. Let me know how it goes!
August 5, 2016 @ 10:56 am
I can not find the “Woodlands/Birch trees” embossing folder! Any ideas w here I can buy it?
August 5, 2016 @ 4:11 pm
Stampin Up has it.
August 5, 2016 @ 7:04 pm
Hi Bootsie. The embossing folder is from Stampin’ Up! If you are in Canada, you can click on the SHOP button on my website to order it online. If you are not in Canada, you can find a demonstrator in your country. Stampin’ Up! is in the following countries:
United States
Canada
United Kingdom
France
Germany
Austria
The Netherlands
Japan
Australia
New Zealand
I hope you get this folder! It is just beautiful!
August 4, 2016 @ 1:47 pm
Thanks for these instructions ,the finished card is beautiful, this is must have folder because of the amount that can be done with it.
July 25, 2016 @ 3:21 pm
I tried your technique but when I went to wash the ink of my folder it did not come off very easy. It still shows lightly.
July 25, 2016 @ 7:42 pm
Hi Donna. I’m glad you gave the technique a try! Water-base ink should rinse off easily. If you’re not finding success with that, try using your stamp cleaner or even a bit of dish soap with a soft brush to remove any remaining ink.
August 31, 2020 @ 6:43 pm
I keep a plastic tub with lukewarm dish water in it, drop the used folder in it then after it sits for awhile, use a soft brush to get the ink out of all the nooks and crannies. I use this same thing with stencils. Don’t know if I should or not, but ,hey, it works!
September 27, 2020 @ 8:58 pm
Great idea!
July 20, 2016 @ 11:50 pm
Wow I love this, thank you for sharing the technique with us.
July 2, 2016 @ 4:54 am
Your card is beautiful. Thank you for sharing how to do this technique, especially all the variations for applying the color of the sky. I can’t wait to try it myself.
May 27, 2016 @ 12:45 pm
would love to see this tutorial on youtube. I am a very visual person and I can’t figure out how the trees in the foreground stay white thru out this process.
March 23, 2016 @ 6:59 am
just found this tutorial ,love the process, thank you for the great idea
June 23, 2016 @ 11:07 am
Thank you for your comment, Barbara. I’m so pleased that you like it 🙂
March 20, 2016 @ 11:09 am
Beautiful results.
June 23, 2016 @ 11:07 am
Thank you so much for the encouragement <3
January 3, 2016 @ 8:47 am
I LOVE THIS CARD. I ALSO, LIKE HOW YOU DESCRIBED EACH STEP, BECAUSE
I JUST COULDN’T FIGURE OUT HOW TO GET THOSE TREES, CARS OR ANIMALS
BACK THERE. THANKS FOR SHOWING THE DIFFERENCE IN THE USE
OF A BRAYER, VERSES INK PADS, ETC..
YOUR CARD IS BEAUTIFUL.
January 13, 2016 @ 6:49 pm
Thank you! I’m pleased that you found it helpful.
November 21, 2015 @ 2:10 pm
I love this! Thanks for the tutorial, tips and tricks!
October 28, 2015 @ 2:41 am
Wow, it looks great. My first thought was- how you did it and then how wonderful you describe it. Thanks a lot!!!
October 27, 2015 @ 2:14 pm
Thanks Amy. I really like this technique and it’s quick to do a number of these for Christmas cards. Rinse the folder under the tap and dry it with a towel and away you go.
May 17, 2018 @ 1:12 pm
Beautiful card! Thanks for sharing this technique.
May 17, 2018 @ 7:10 pm
Thanks so much, Rita!