Honeybee in Browns
I wasted a whole bunch of time today fussing with designing a new watermark for my photos. Now it’s after midnight and technically Friday morning – the morning that this very post is going to publish at 6am.
Needless to say, my post will be brief today! I need to go to bed!
The card I’m sharing with you today is inspired by another As You See It Challenge:
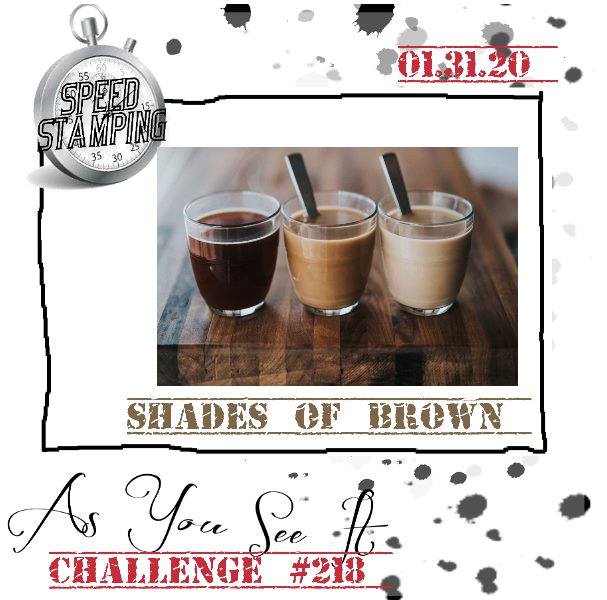
I could use some of that creamy coffee goodness right about now – well, except that I want to go to sleep soon, so … scratch that thought. I will enjoy some of that creamy wake up juice in about 7 hours instead. mmmm. It’s nice to have something to look forward to in the morning.
This challenge is meant for speed and my card design barely made it. This one took 10 minutes on the dot!! Those darn bows always take extra time!
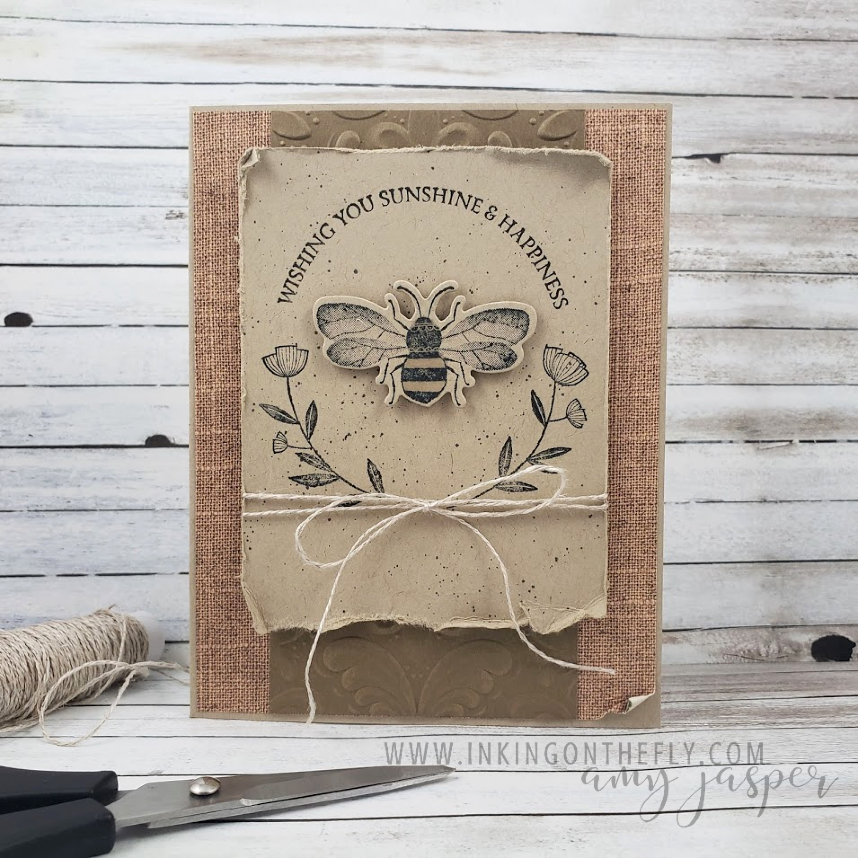
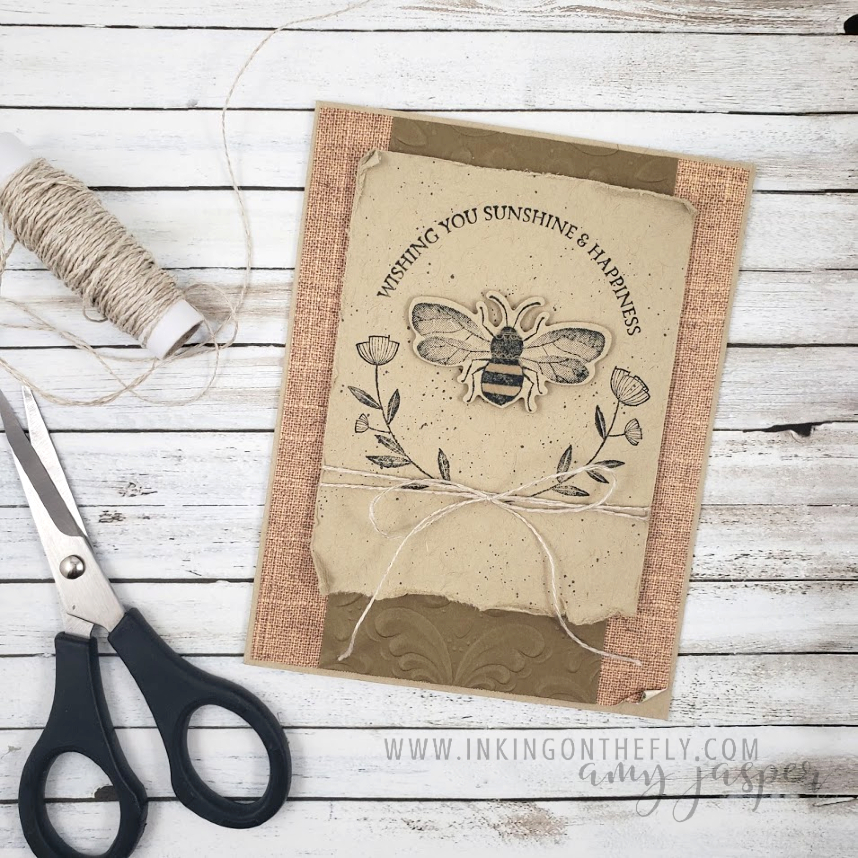
I attached the flower images and the sentiment from the Honeybee stamp set from Stampin’ Up!® all on one acrylic block so I could get them arranged the way I wanted. No time for mis-stamps in a speed challenge! They were stamped on Crumb Cake cardstock with Tuxedo Black Momento Ink. After stamping, I used my Basic Black Stampin’ Blends Marker to create the spackle background by flicking the brush tip off the lid so that the ink spatters onto the cardstock. The tip will likely get damaged eventually using this technique, but I intend to buy another black Blends Marker so I can continue using this one for this technique. It works so well!
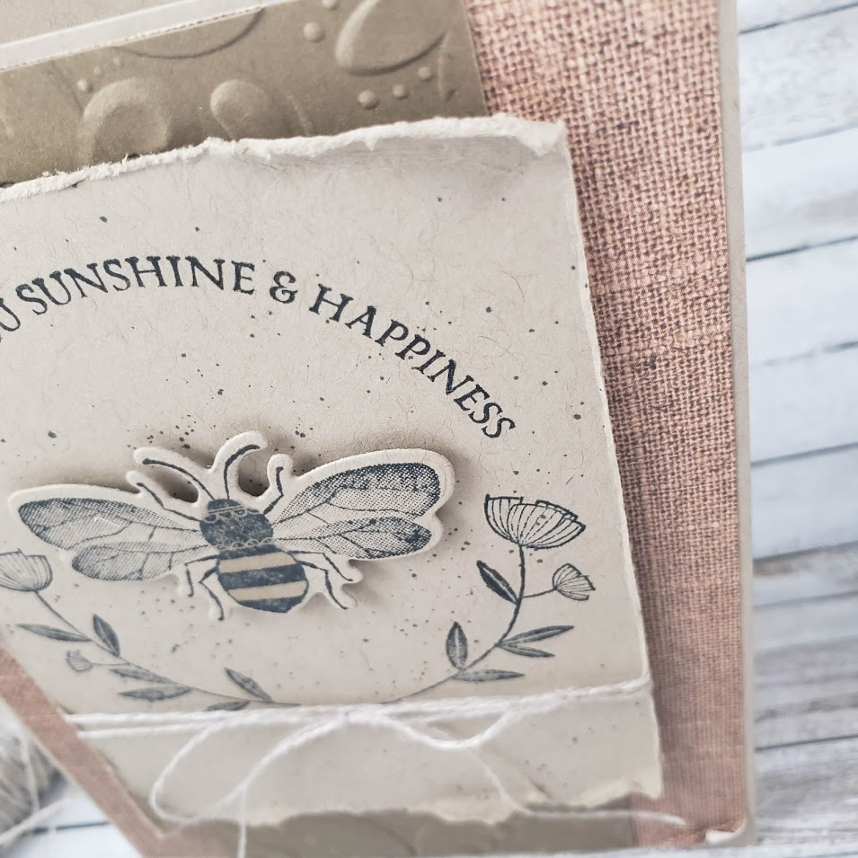
That wasn’t the only fancy technique I used – because you should always push the boundaries of your time limits, right! (Gosh no! Don’t do it!!)
I used the blade of my Paper Snips and roughed up the edges of that Crumb Cake cardstock, then I tore the bottom of the paper and rolled my corners a bit. The bumble bee image from the same stamp set was stamped on another piece of Crumb Cake cardstock and die-cut using the coordinating Detailed Bee dies. Before popping that sweetheart onto my cardstock with Stampin’ Dimensionals, I coloured its little body with the Crumb Cake Stampin’ Blends Marker.
Linen Thread is wrapped around the decorated Crumb Cake cardstock layer twice and tied in a big loopy bow before adhering it to the other layers on the card.
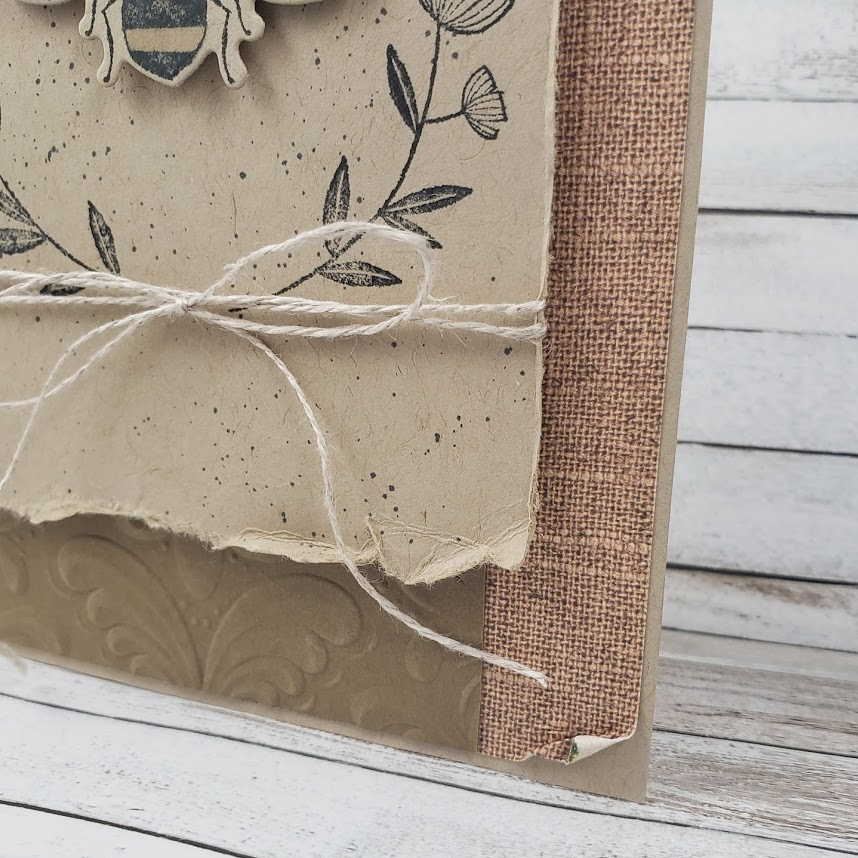
Those layers were a bit quicker (if you don’t emboss the wrong one during a timed challenge, that is – face palm, sheesh!). The card base is Crumb Cake cardstock, over which is the burlap patterned paper from the Pressed Petals Specialty Designer Series Paper pack. I added a bit more texture by rolling up the bottom right corner of the patterned paper. Lastly, the mid-layer of the card is the Soft Suede piece that is embossed using the Parisian Flourish 3D Embossing folder in my die-cutting machine.
And it is done!
… and hey, thanks for taking the time to visit me here on my blog. I never know that you visited unless you “sign my guest book” by leaving a comment. Feel free to say, “hey” and let me know where you’re from and if you ever get hyper-focused on the wrong thing and end up staying up until after midnight because you now have to do the thing that you actually should have been doing instead of that other thing.
Ya. It’s now 1:00 am. I’m off to dream land.
Z-Z-z-z-z-z-
(but my new watermark does look pretty cool)

August 5, 2023 @ 6:54 am
Love this card, my daughter’s family all of their first names begin with “B” and we call them the “B” family. Have this sent have to try something similar. Thanks for sharing.
November 6, 2023 @ 2:04 pm
I’m so pleased that you like the card. It’s still one of my favourites 🙂
March 29, 2020 @ 7:37 pm
Great card!!
April 23, 2020 @ 9:40 pm
Hey, Donna! Thanks for taking the time to comment. It’s a huge encouragement to me. Bless you!
March 21, 2020 @ 9:01 am
That’s one reason I LOVE using the browns in my cards….evokes a warm, vintage-y feel, and you really did a great job! I adore the honeybee set, and your new watermark is outstanding!
April 23, 2020 @ 9:40 pm
Aw. Thanks Sharon! I agree, the browns are cozy and comforting.
February 28, 2020 @ 11:21 am
Love, love this distressed, vintage, shabby-chic look!! And using monochromatic color scheme ~ oh my. Thank you for this!
April 23, 2020 @ 9:38 pm
I’m so glad you love it as much as I do!
February 12, 2020 @ 2:03 pm
Great card! And great watermark.
April 23, 2020 @ 9:38 pm
Thanks Dian! I appreciate that you took the time to leave me a comment. It means a lot!
February 9, 2020 @ 12:08 pm
This is gorgeous Amy! Such a contrast to my usual style but I love the distressed, vintage look you created with this set. An awesome card for 10 minutes of creativity! I don’t often burn the midnight oil any more (I think I’m too old to get away with it lol) but the watermark was worth it – very nice!
April 23, 2020 @ 9:37 pm
Thanks Joanne. Staying up late is definitely NOT good for me anymore. It’s usually not worth the icky feeling the next day.
February 9, 2020 @ 6:48 am
Great card, sparkle finishes it perfectly!
April 23, 2020 @ 9:36 pm
Thanks! I love the spackling. It’s so easy to add, too.
February 4, 2020 @ 1:08 pm
This is beautiful! I never would have thought of using brown with the Honey Bee set …. really gives it a vintage feel.
April 23, 2020 @ 9:35 pm
Thanks Laura. Glad you like it!
February 1, 2020 @ 9:29 am
Love your card! Can’t believe you made it in 10 minutes. Wow.
April 23, 2020 @ 9:34 pm
I’m getting better with practice!
January 31, 2020 @ 11:34 am
I love that distressed look you’ve got going on here, with the rough edges, twine, spackle splatter and curled paper. It reminds me of my style when I first started scrapbooking. Lovely card, Amy.
April 23, 2020 @ 9:34 pm
It’s funny how styles come and go. I see a lot of early 80’s fashion in the clothing industry lately. High wasted jeans and blouses that tie at the neckline. It happens with cards, too. Distressed is coming back, BABY!! LOL!