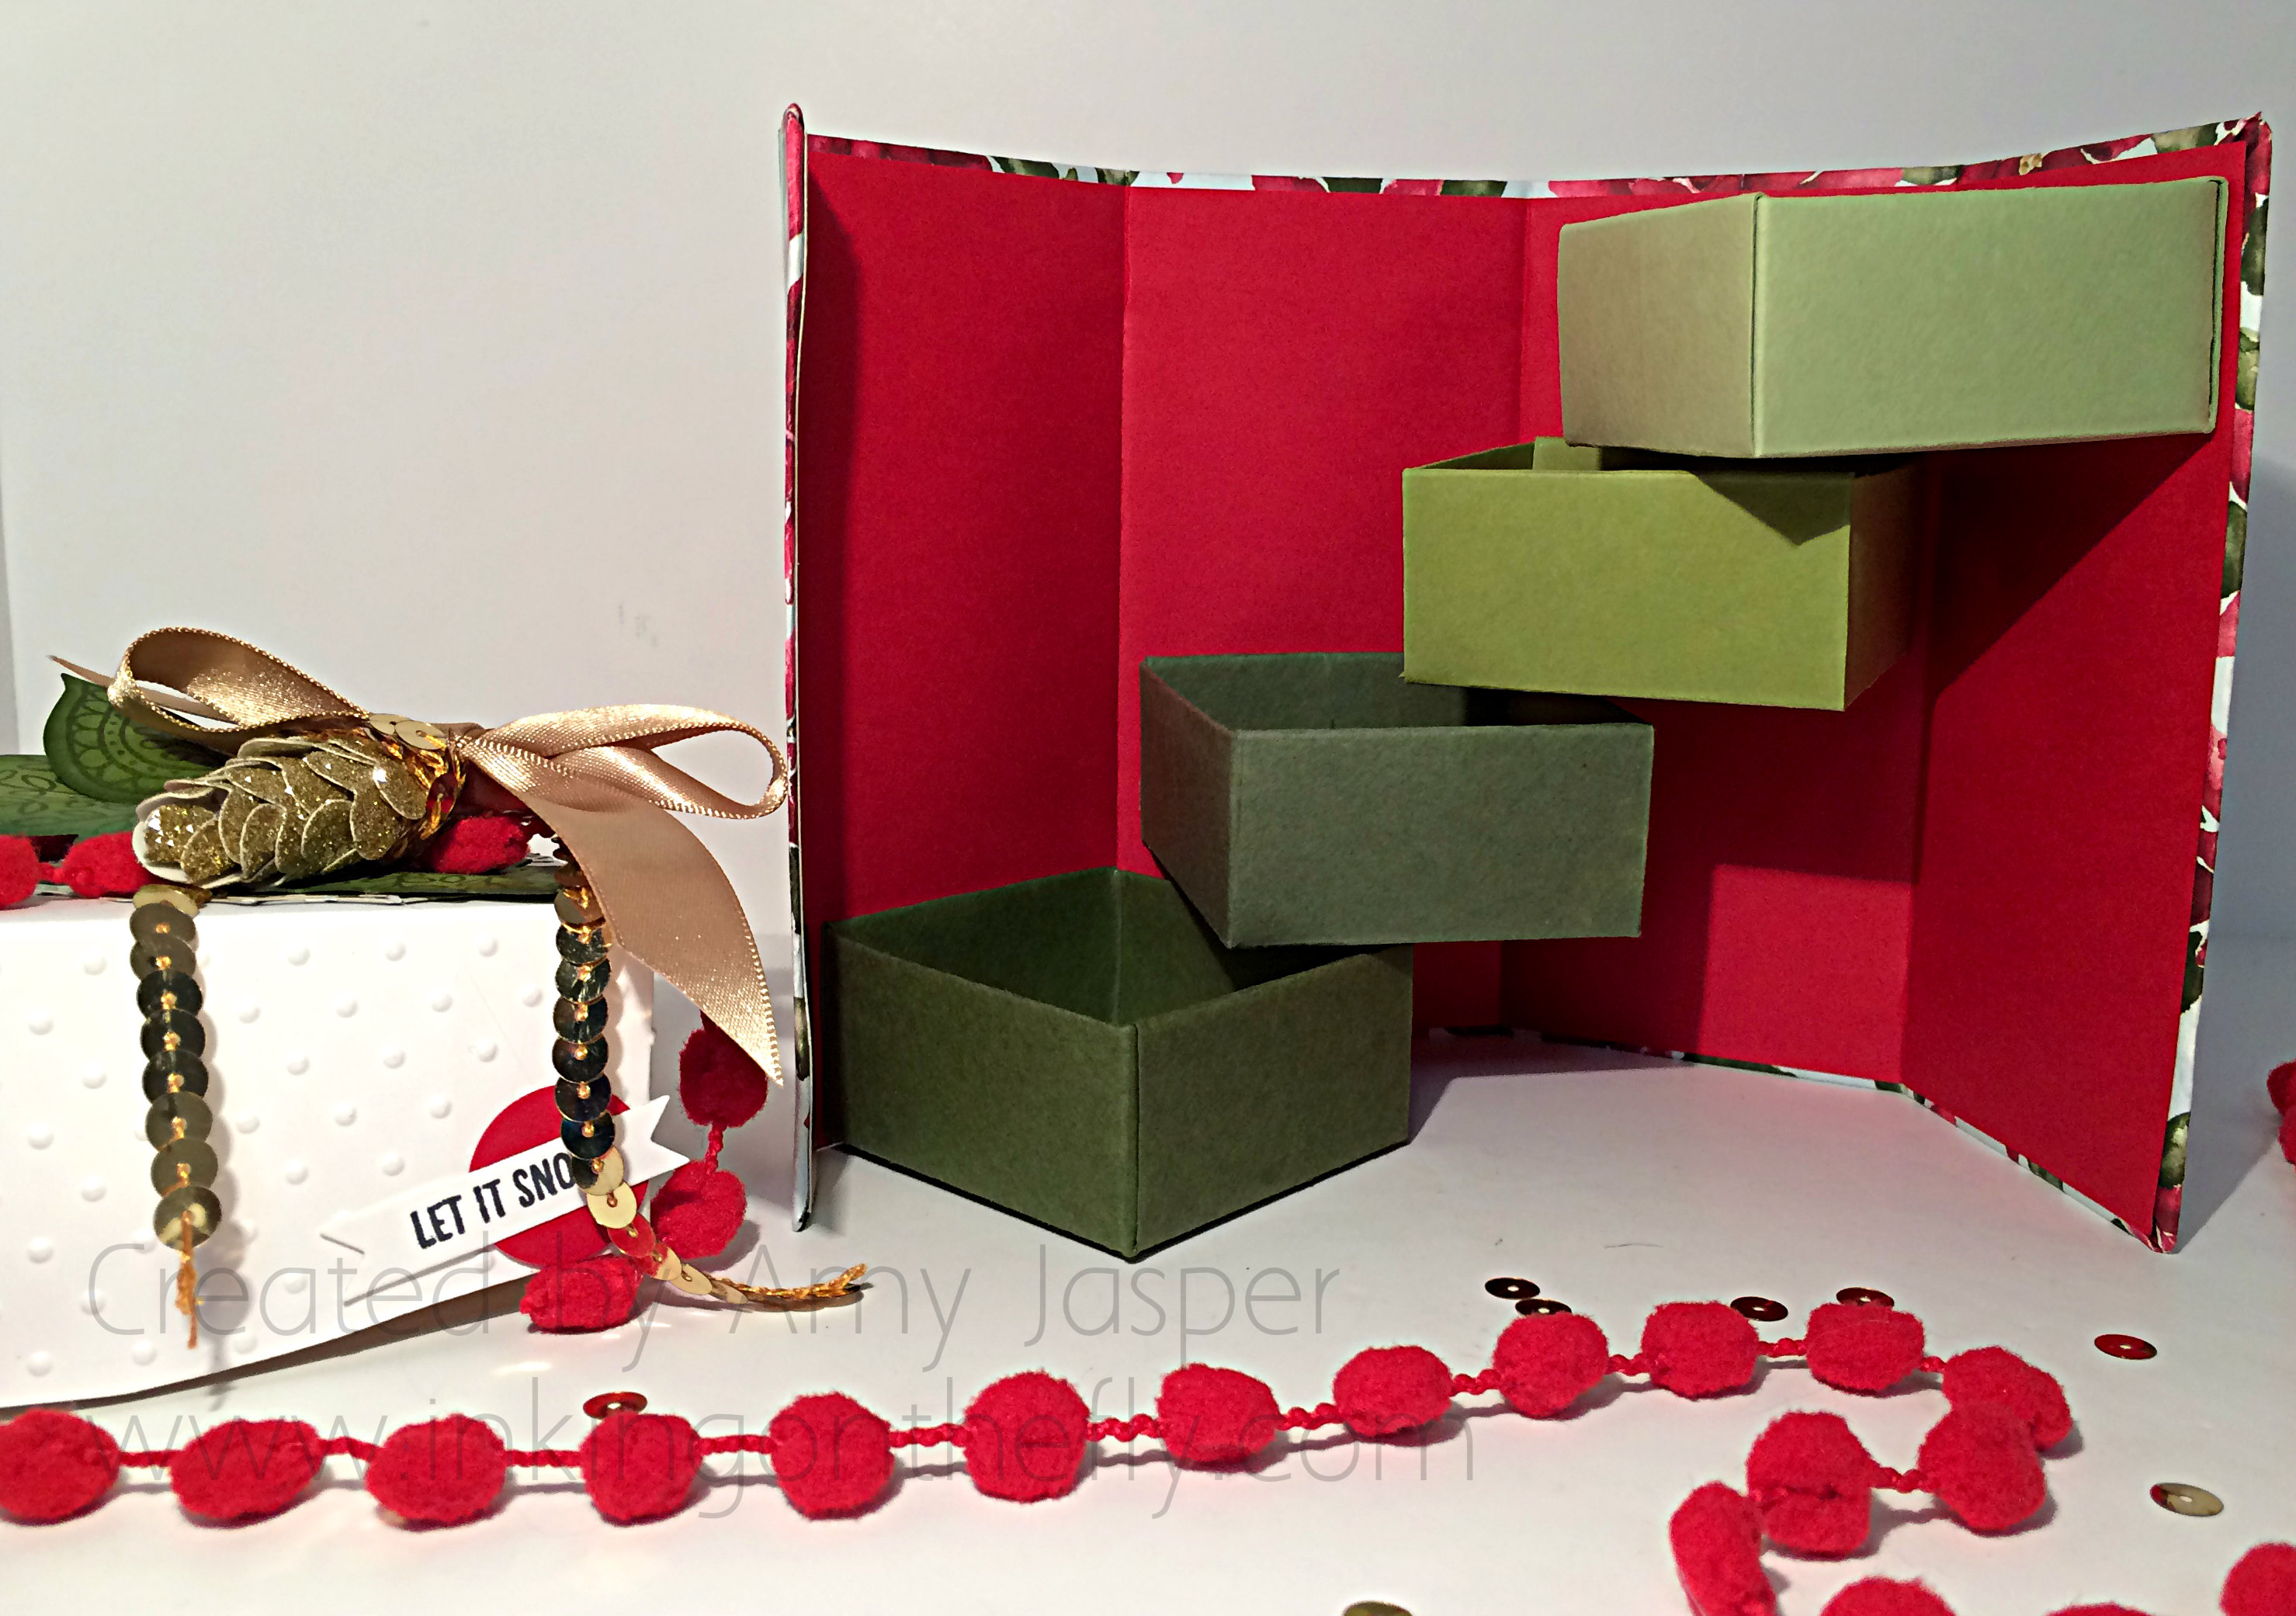
As promised, here is Part 2 of my Christmas Fantasy Box. I just needed to complete the inside of this adorable gift box so I could show you how it looks when you open it up.
Is this not adorable!! The inside of the box has these individual boxes to put in chocolates, or cookies, or jewelry. Any little gifts or storage items would work. I wonder if After Eight Chocolates would fit?
I found the directions for this box at this site. I used the measurements and the basic directions, but did my own thing for the decorating and stamping.
You can save paper by cutting it for the outside box cover to be 6″ x12″, rather than 6.5″ x 12″. There is enough to cover your Coaster Board box panels with only 6″. Also, I am finding that I prefer to fold the corners of my cover in while covering my box panels rather than trim the corners at a 45 degree angle. There is a bit of bulk, but if you’re working with Stampin’ Up!’s designer paper, it is thin enough that the bulk is not a problem. I like how folding the corner in allows full coverage over the Coaster Board panels.
Each of the individual boxes are lined with a 2″x2″ piece of the Season of Cheer Designer paper. I used Pear Pizzazz, Old Olive, Always Artichoke, and Mossy Meadow cardstock for my little boxes.
Do you see the red liner paper inside the cover? That is actually Red Envelope paper from Stampin’ Up! It’s perfect for a liner.
TIP: I love using Stampin’ Up!’s Tear and Tape for all my boxes and album covers. It holds securely and the paper doesn’t buckle under the pressure of creasing and shaping.
I can’t wait to make more of these Fantasy Boxes and fill them with goodies to give away this Christmas! Just imagine the look on your friend’s face as they lift the lid and discover the secret compartments inside!
My preparations for the bi-annual Fly the Coop Mini Retreat are slowly coming together. I love that this retreat takes place in my home, limiting the number of participants to only six people. With the small numbers, we can enjoy the cozy, intimate setting of my home without the interruptions or obligations of our everyday lives getting in the way of the good times we have! Then we can stamp away, finishing all the projects that we brought along to complete!
Things are coming along slowly because I am a very good procrastinator, doing things that shouldn’t really be given that much time when there are other tasks that should take priority. But … because of my amazing procrastination abilities, I have a great project to share with you (when I should have done a much simpler and quicker project instead, lol!)
However, all is not lost, as I will likely use this project (or a very close version of this project) for the Monthly Stampers Group appreciation night and Christmas party that is coming up in December. I get to spoil my monthly group members with special discounts, a free project (this one, whoop whoop!), and Stampin’ Up! door prizes. The members of this group are part of my stamping family and the appreciation night is my opportunity to say “thank you” for their support and loyalty.
Today, I have a very cool box to show you. I made one only once before, but thought it would be a fun project to do with my Monthly Stampers group. I haven’t completed the inside of this special box yet, so stay tuned for when I share that part with you on Saturday!
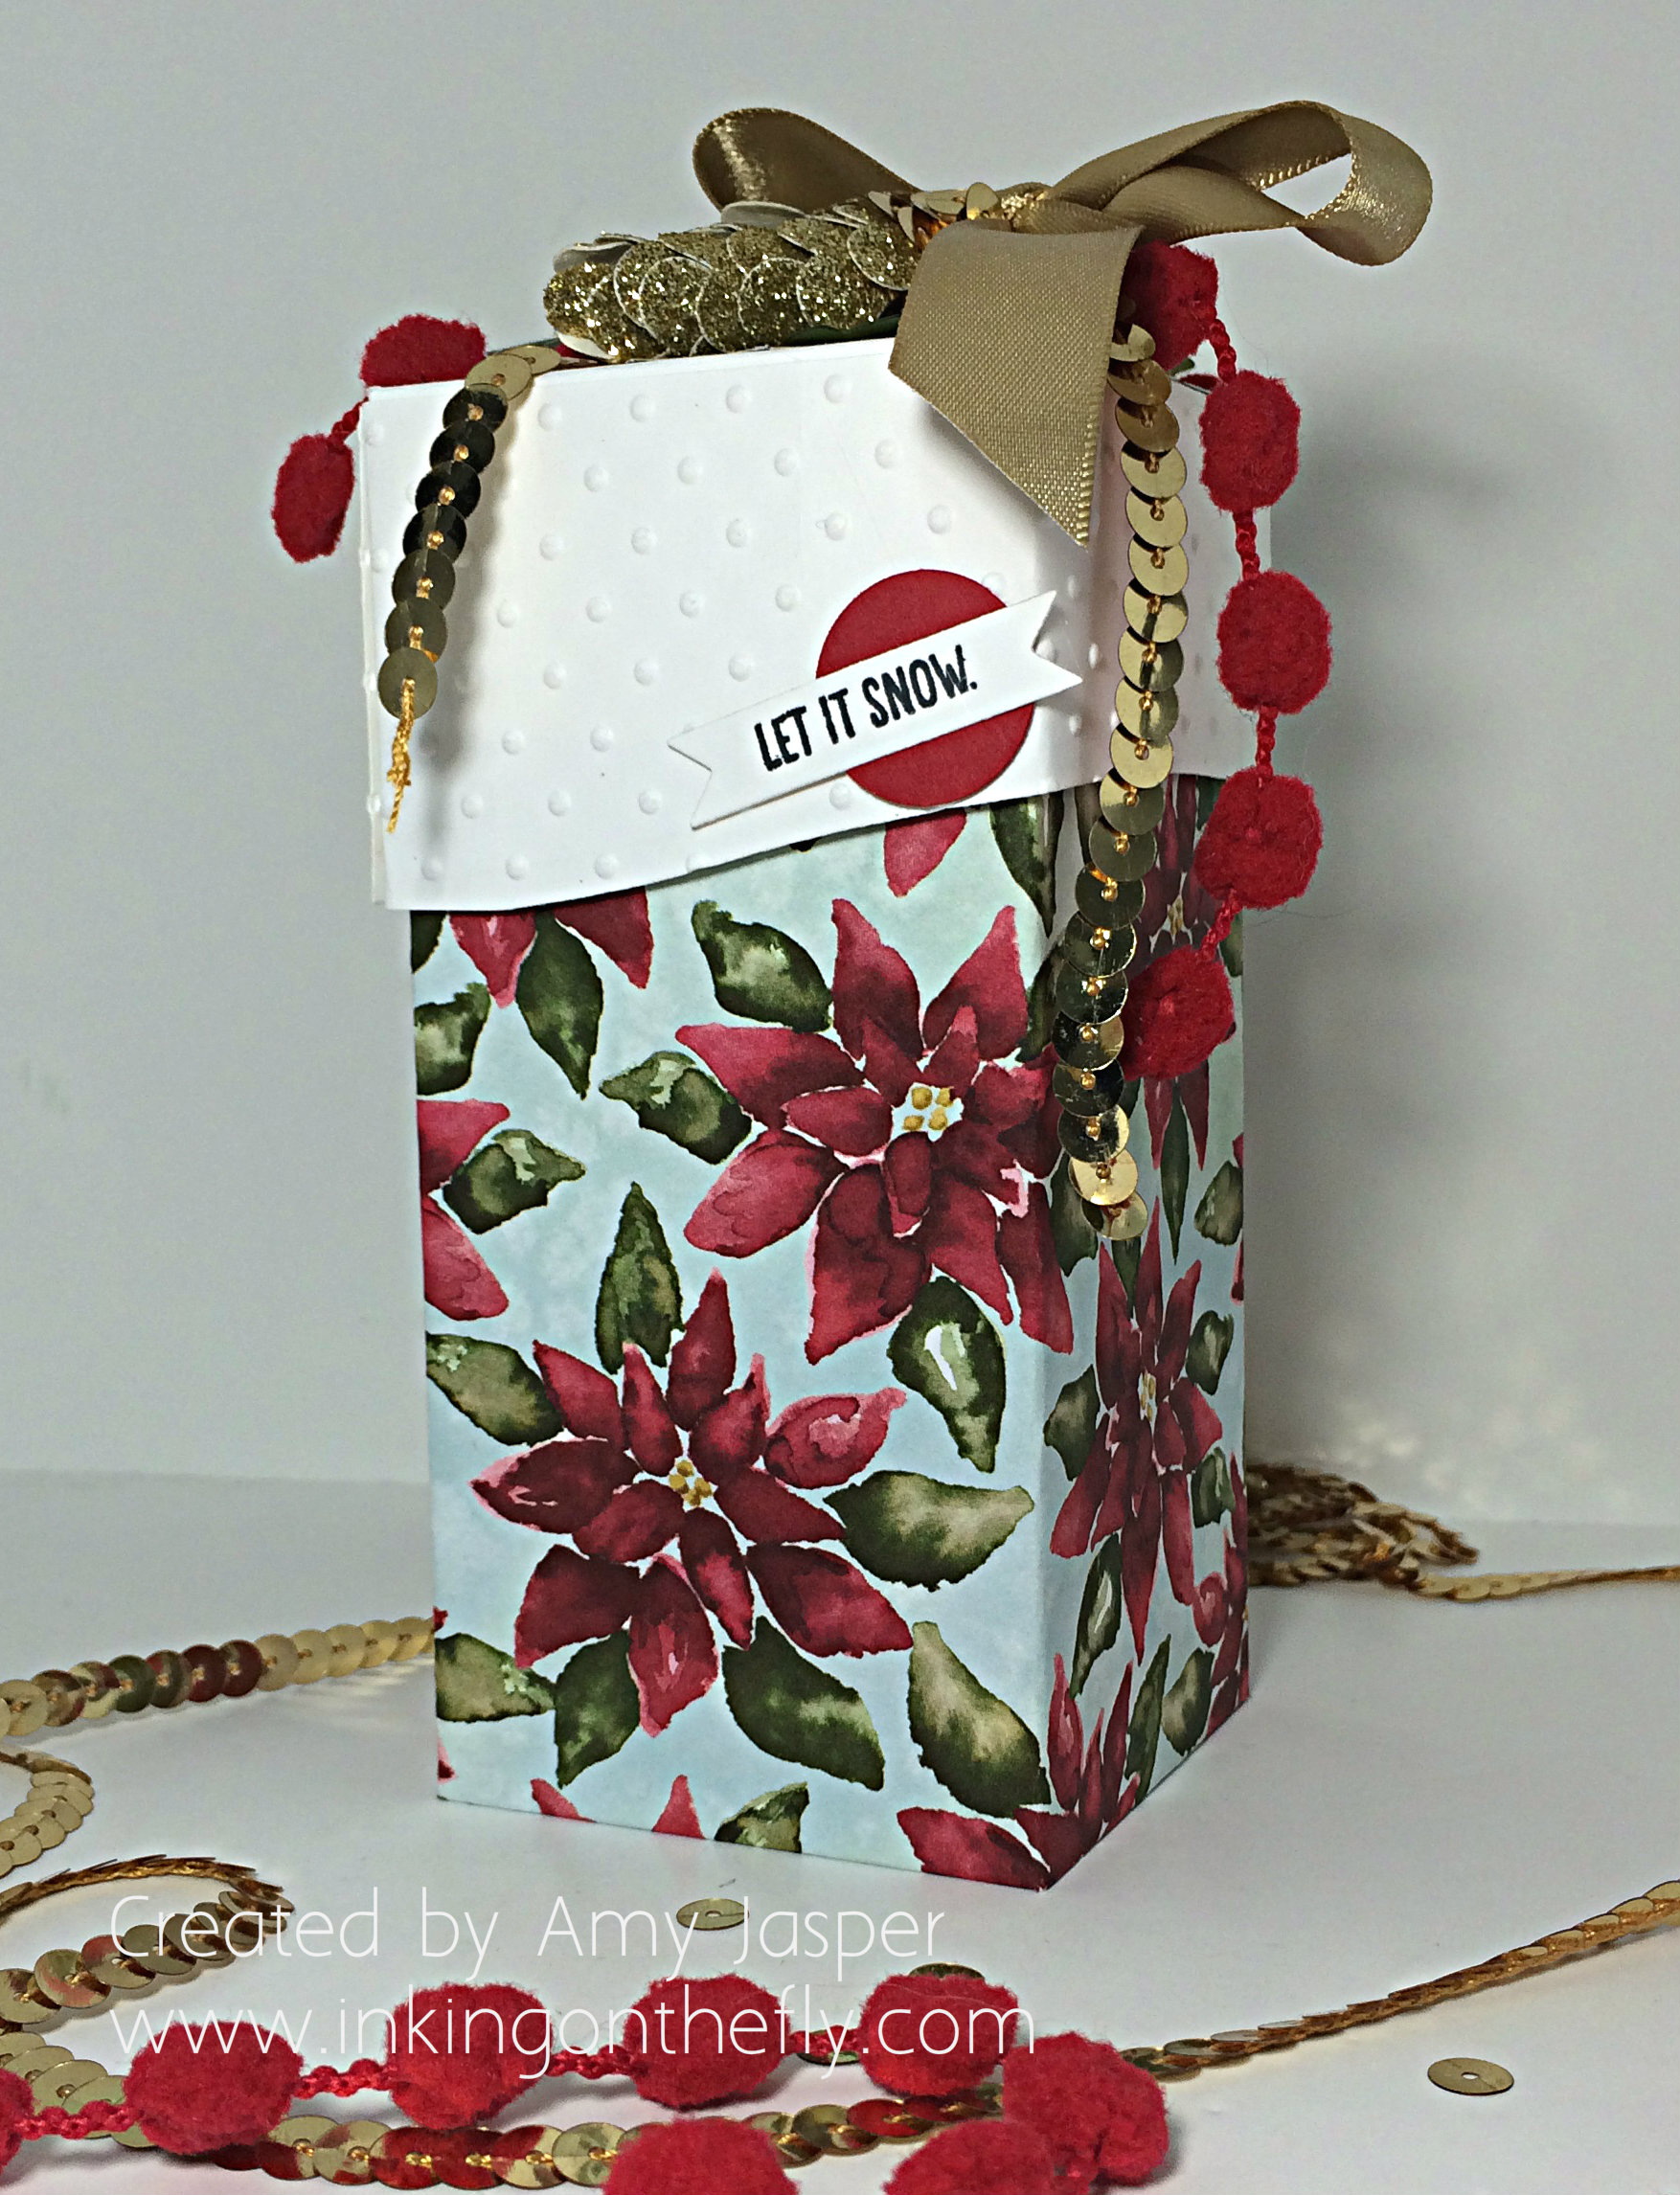
I adore how this box turned out! It’s called a Fantasy Box and has a special surprise with the inside design. No scary pop-ups, though. Just something really cool. You’ll have to come back on Saturday morning to see more!
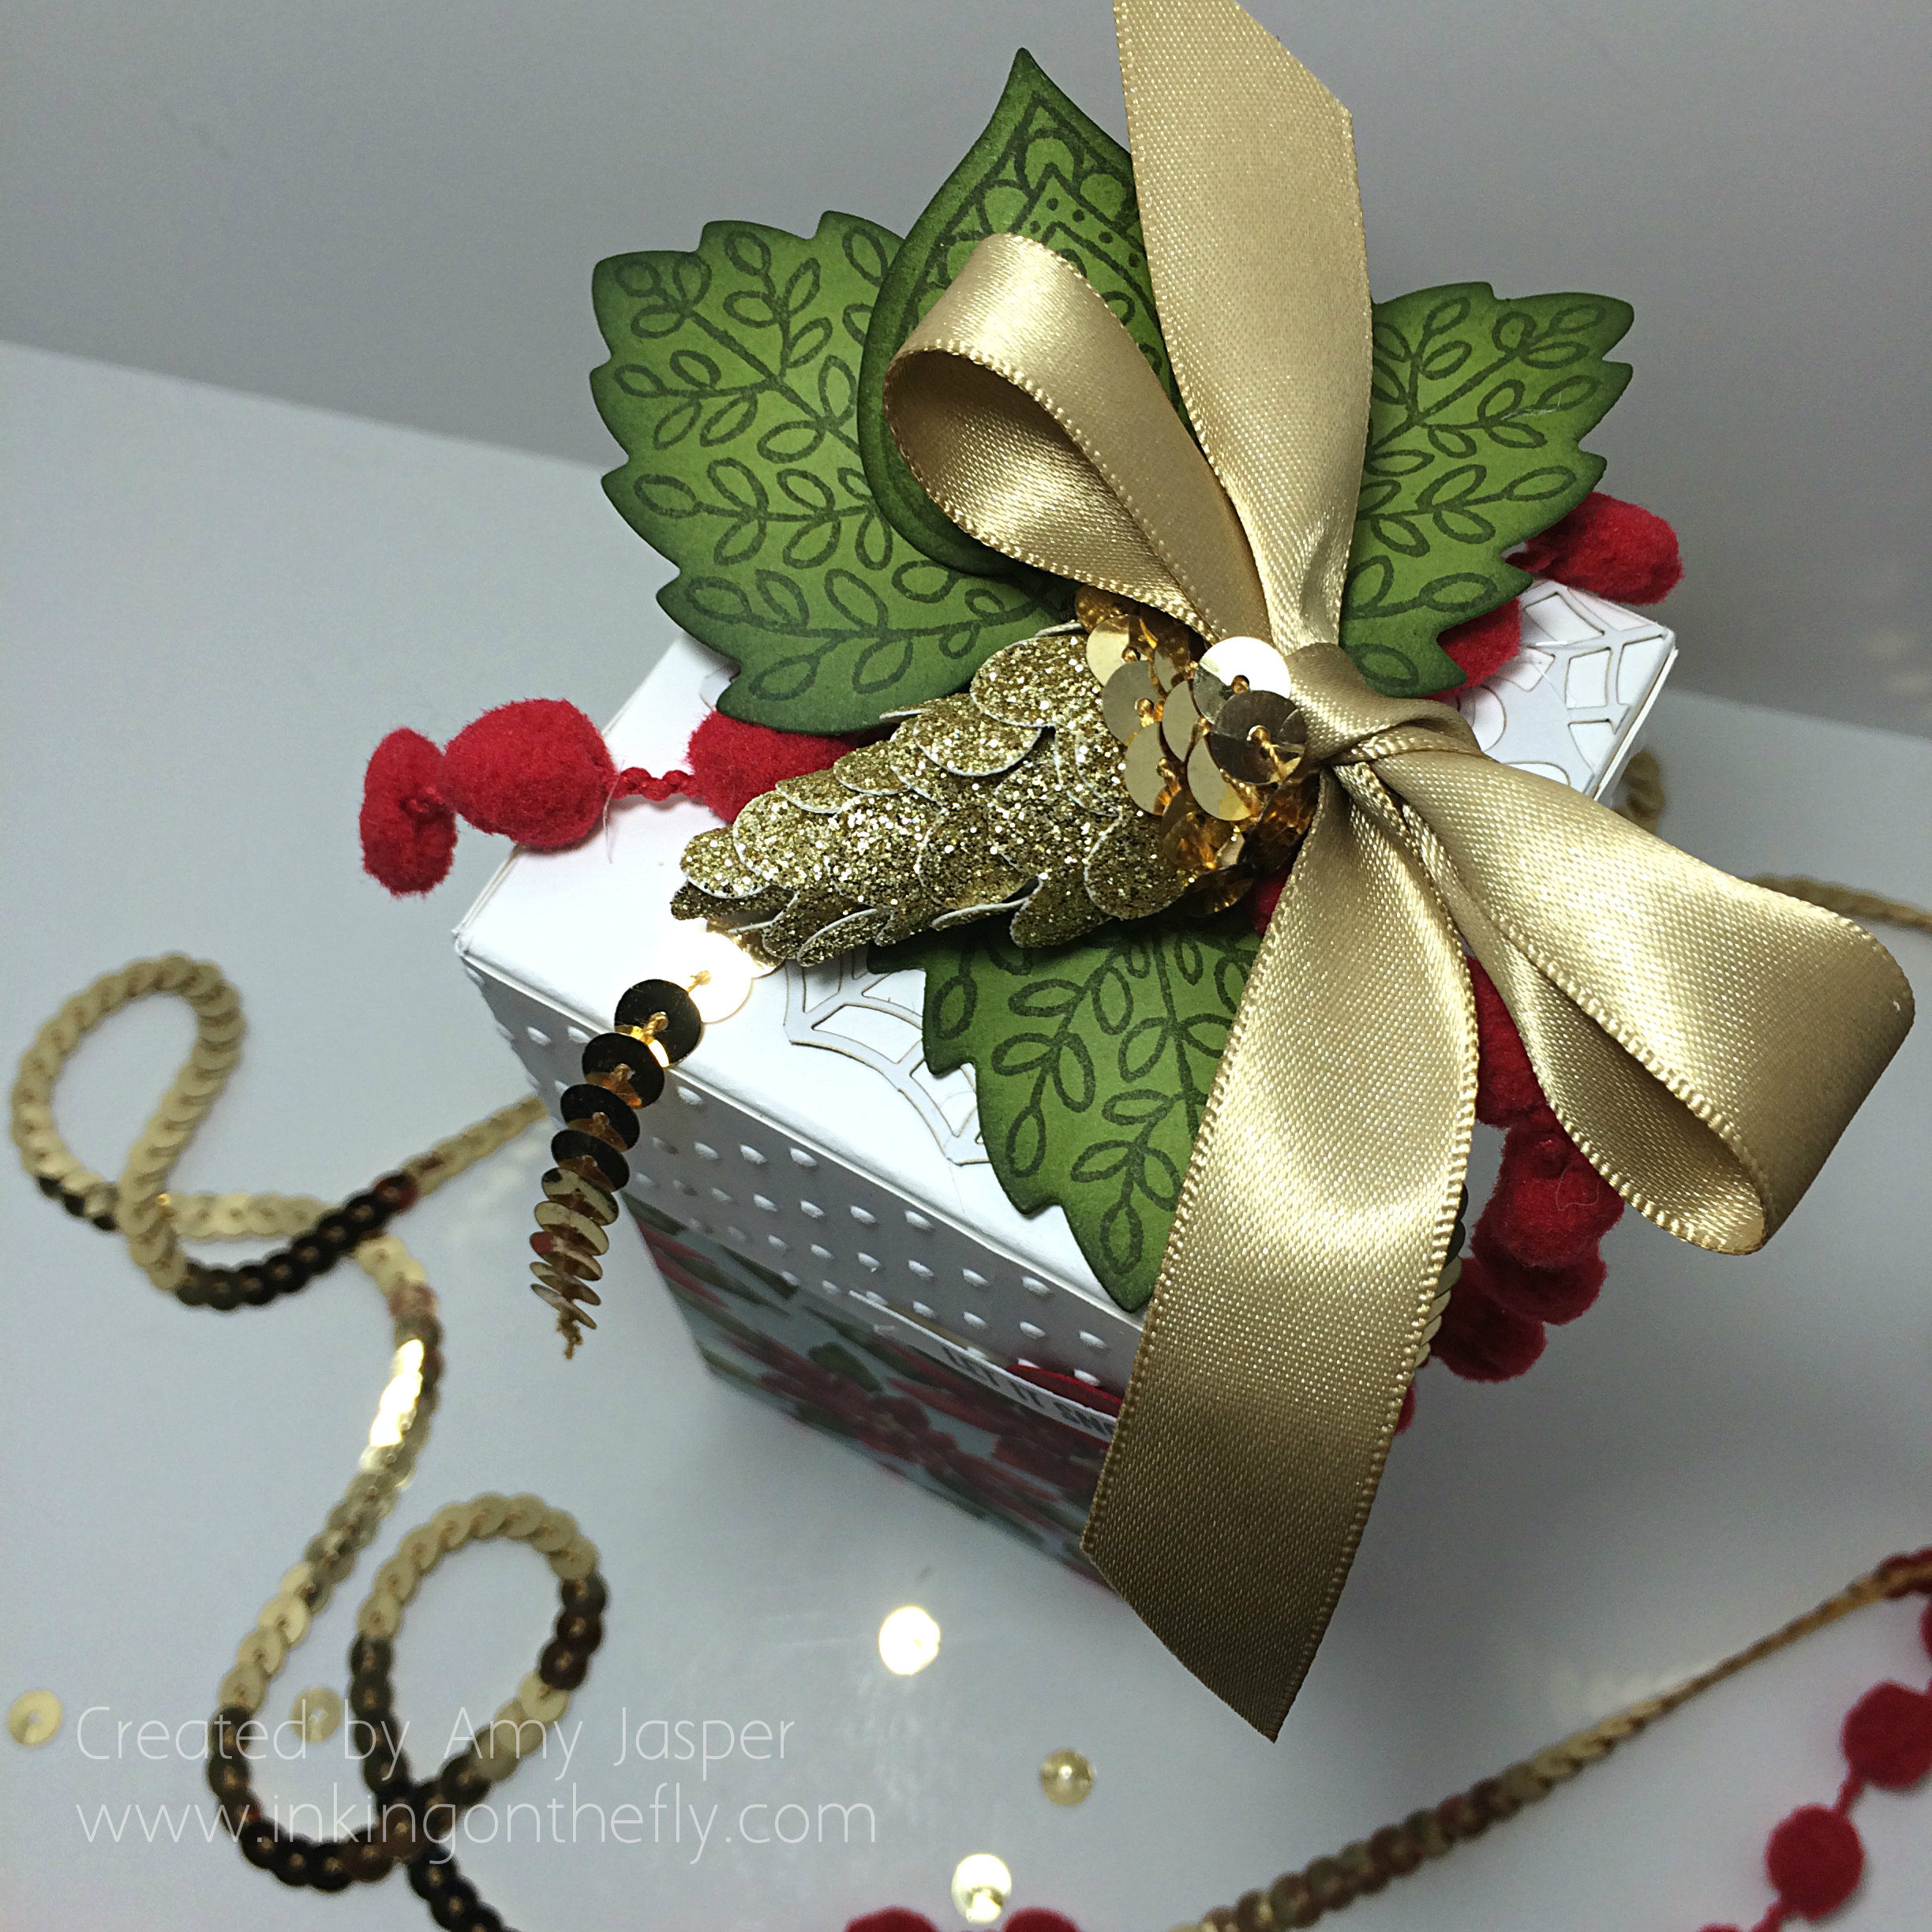
A lot of different Stampin’ Up! supplies were used for this Christmas Fantasy Box. You will find them all listed at the bottom of the page. My favourite part about the way the box looks, is the lid and topper. The Sleigh Ride Edgelits helped me create the sloping lid design.
I’m in love with this box topper. The pine cone was created by layers of paper punched little Gold Glimmer hearts. I adhered them to a mini cone-shape of paper, then wrapped the top with Gold Sequin Trim, finally topping all that with the Gold Satin Ribbon bow.
Can you see the white doily under all those leaves? It is a Spiderweb Doily from Stampin’ Up!! I simply trimmed away some of the edges and used the white side of the doily instead of the black side.
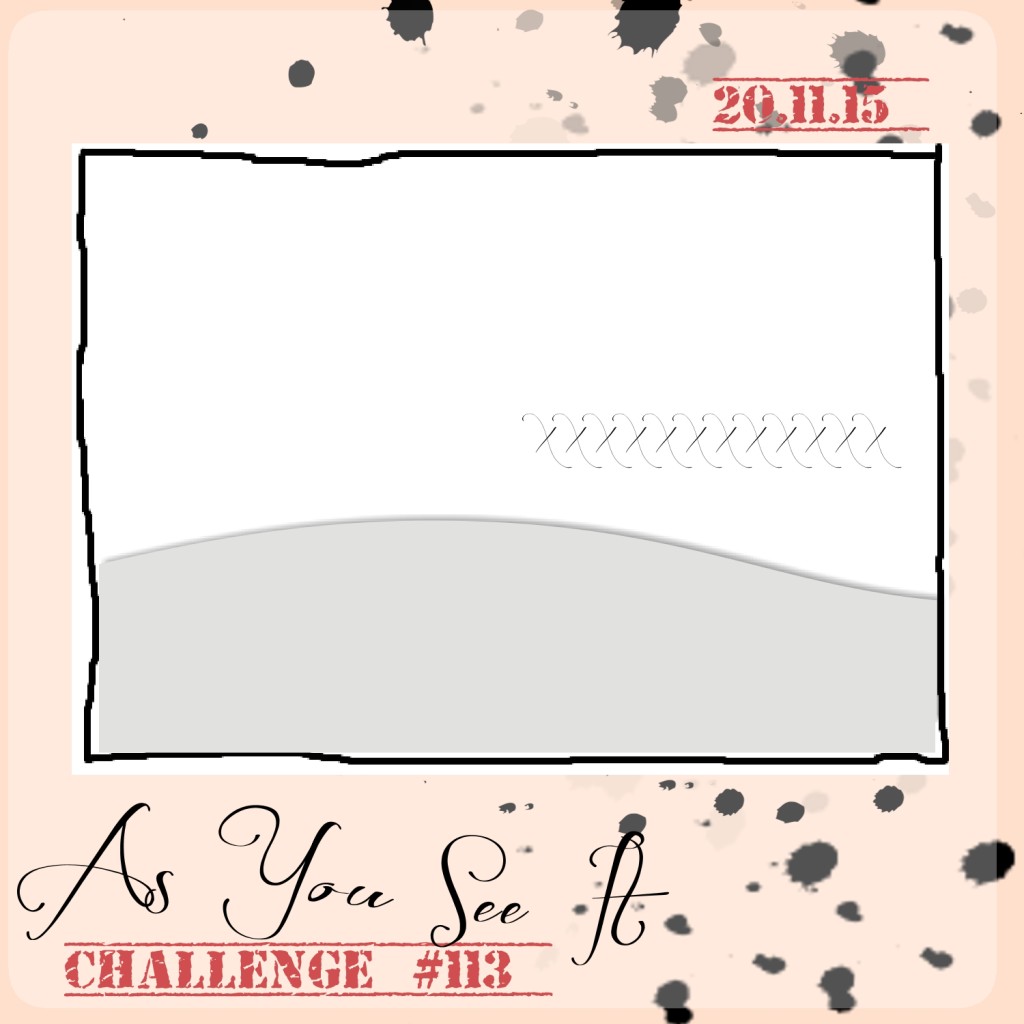
I love that I can use a challenge sketch for projects that aren’t cards. I try to think … outside the box when I design for the As You See It Challenge blog.
Come back on Saturday and check out the inside of this cool Fantasy Box. In the mean time, what will you do with today’s sketch? Don’t forget to link it up with the As You See it page, so we can see what you came up with!
Happy Stamping!
Amy.
Supplies: Coaster Board (not visible), Season of Cheer Designer Series Paper, Red Envelope Paper (not visible), Bitty Banner Framelit, Happy Scenes photopolymer stamp set, Tuxedo Black Momento ink pad, Whisper White cardstock, Real Red Cardstock, Spiderweb Doily, Red Pompom Trim, Gold Sequin Trim, Perfect Polka Dots embossing folder (sorry, it’s a retired product), Lighthearted Leaves photopolymer stamp set, Leaflets Framelits, Mossy Meadow ink, Old Olive ink, Old Olive cardstock, Sponges, Gold Satin Ribbon, Glue Dots, Tear and Tape, Fine-Tip Glue pen, Tombow Multipurpose Liquid Glue, Hot Glue, Big Shot, Stampin’ Trimmer, and Craft Scissors.
 Is this not adorable!! The inside of the box has these individual boxes to put in chocolates, or cookies, or jewelry. Any little gifts or storage items would work. I wonder if After Eight Chocolates would fit?
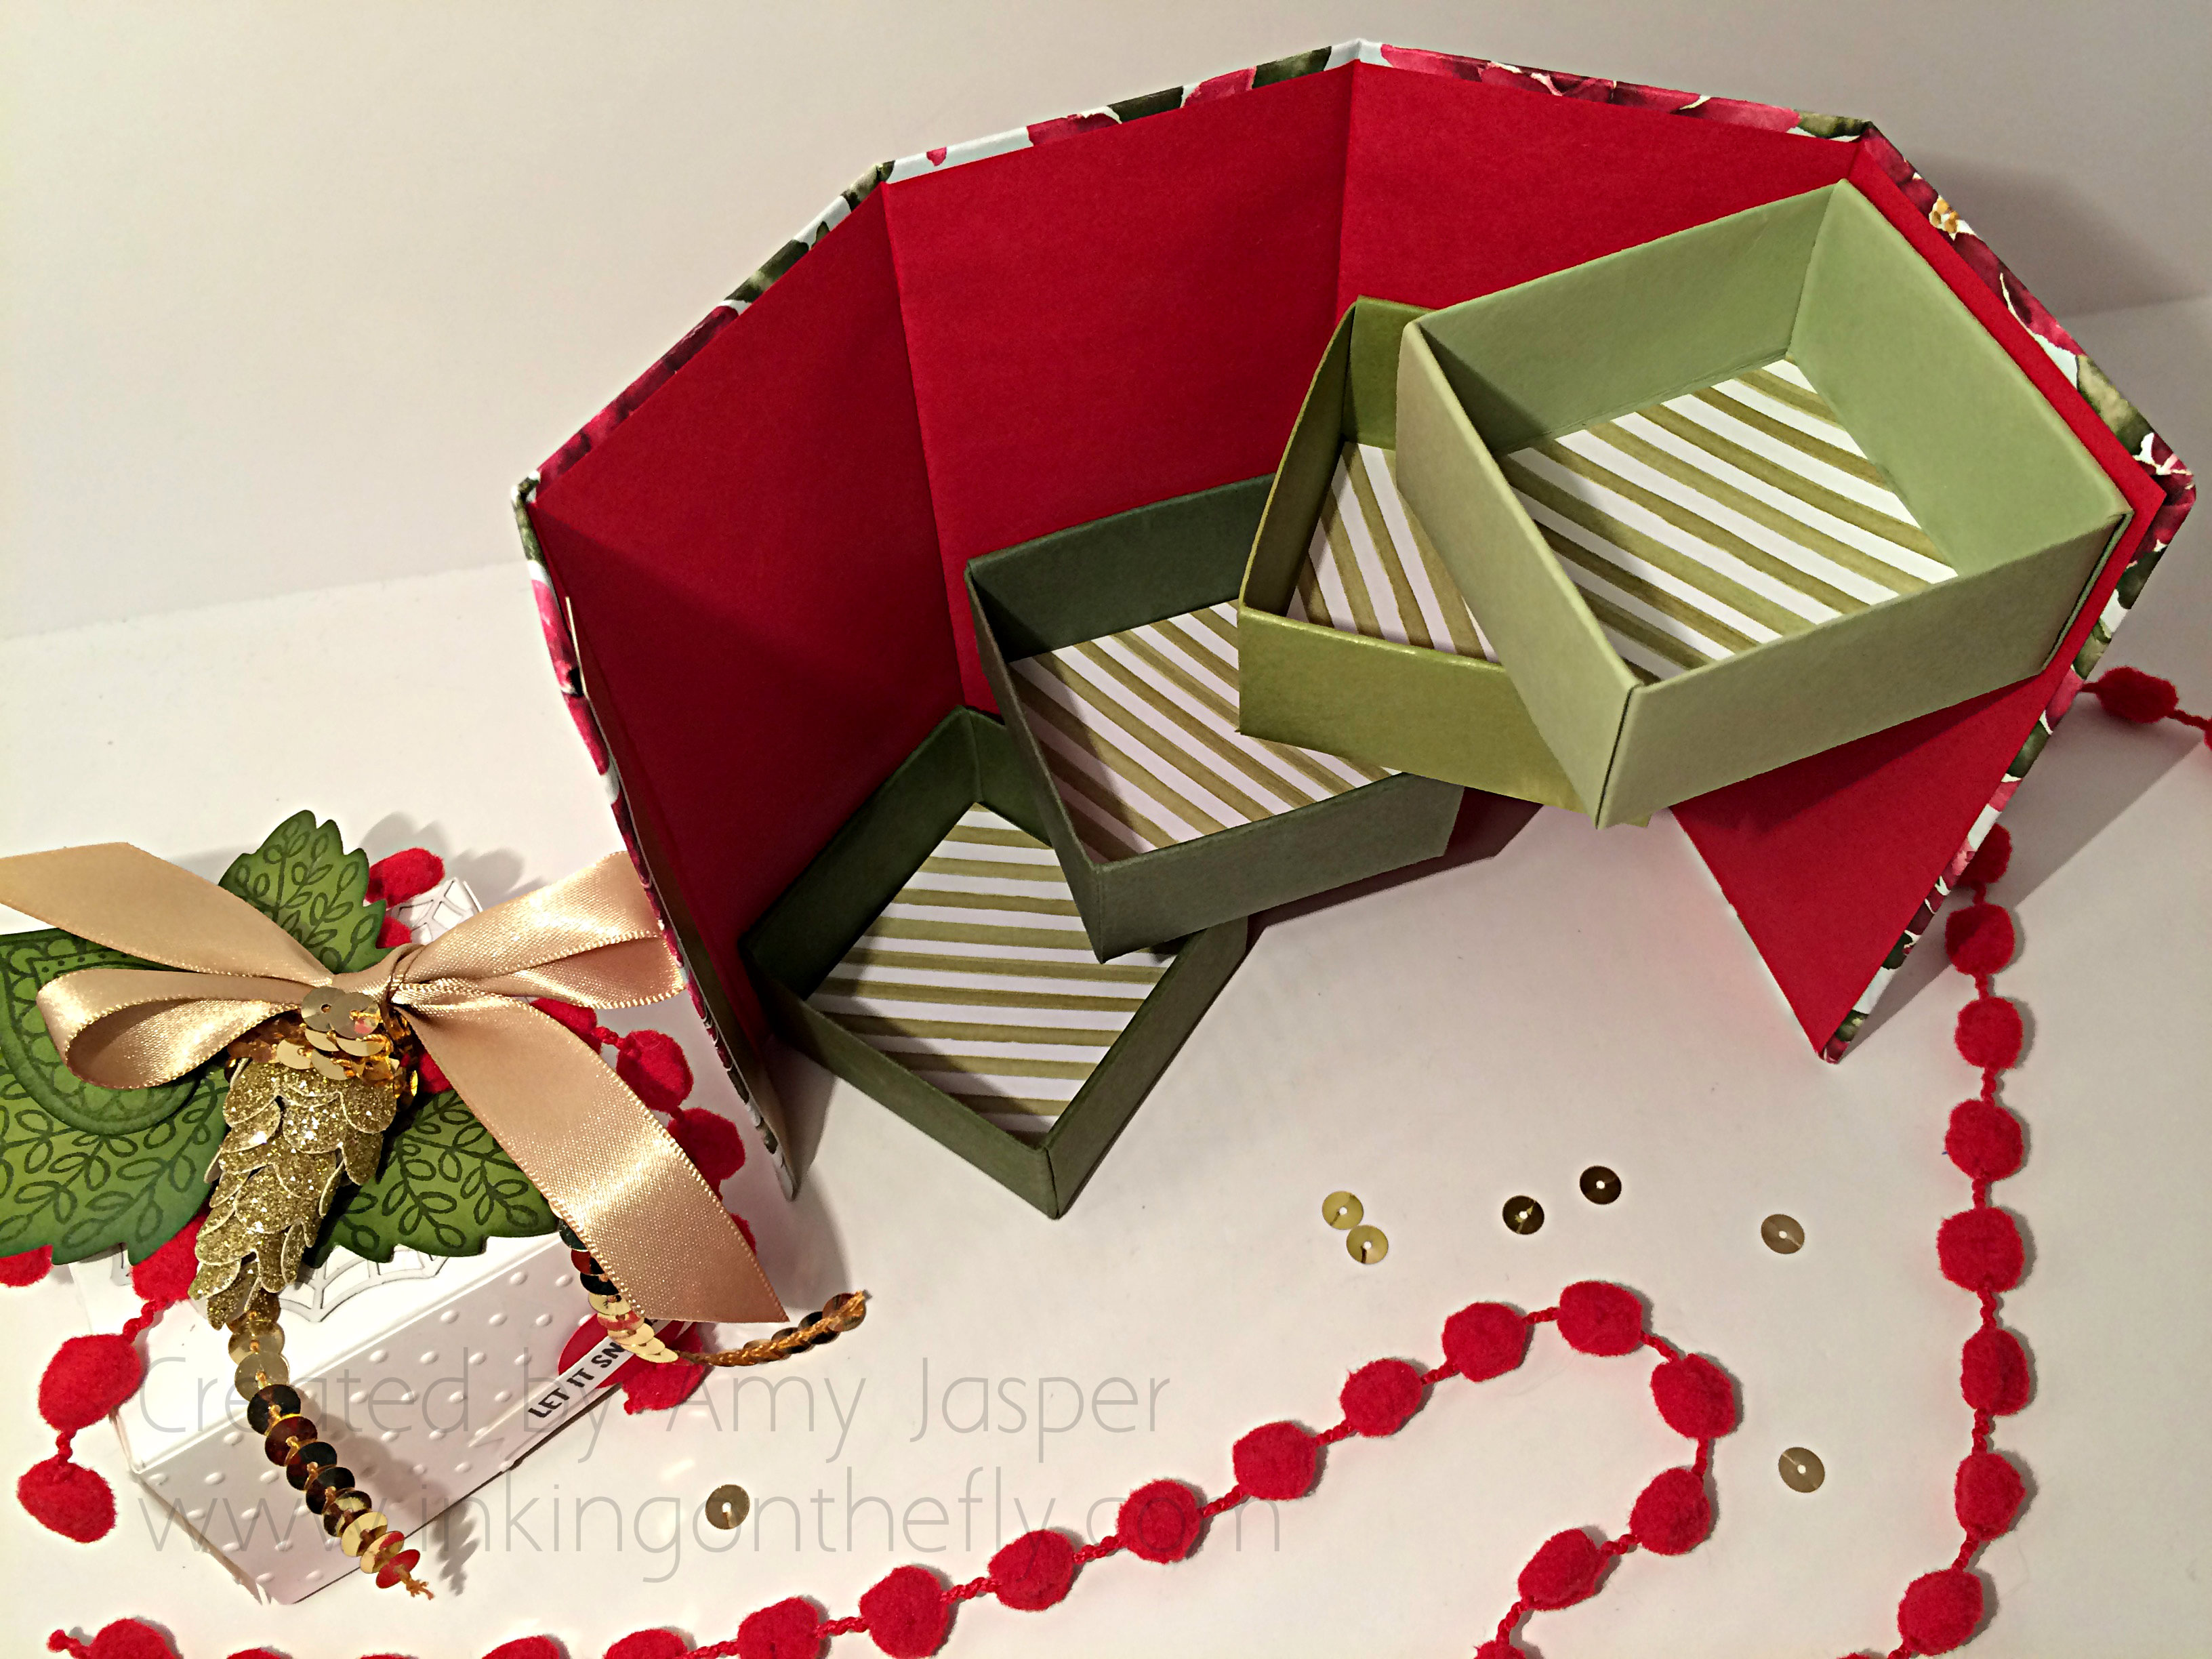 Each of the individual boxes are lined with a 2″x2″ piece of the Season of Cheer Designer paper. I used Pear Pizzazz, Old Olive, Always Artichoke, and Mossy Meadow cardstock for my little boxes.