Christmas

Merry Christmas to All Buckle Card

Have I got a fun card for you today! I wasn’t very excited for the theme this week. Not really my thing, but someone will love this card, simply because it’s so fun!

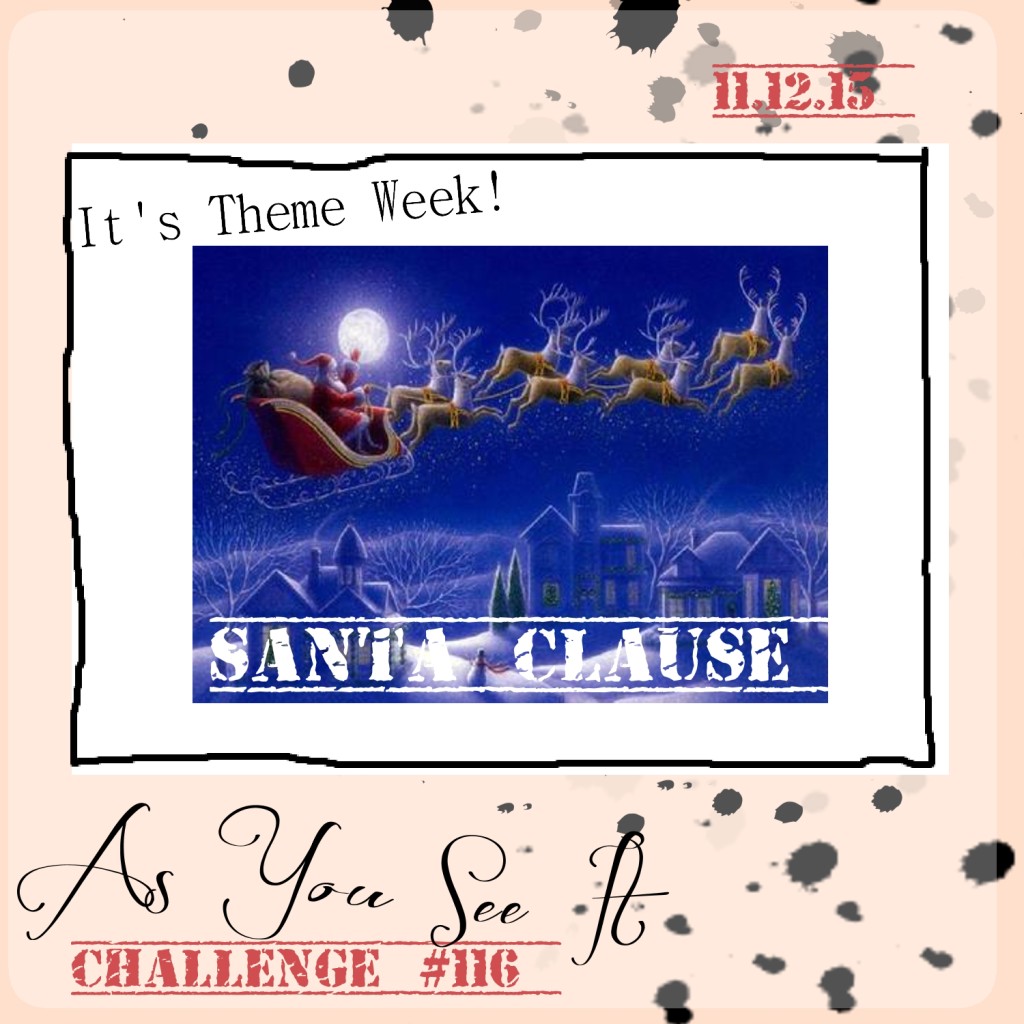
Here’s the As You See It Challenge that I started with:

AYSIChallenge116-1024x1024I really wasn’t sure where to go with this theme. I don’t have any Santa stamps or anything other than patterned paper with Santa’s on it from the Home for Christmas Designer Series Paper. In the end, I remembered a tutorial I used a while back for a Buckle Card. And that’s where I landed!

Merry Christmas to All buckle card by Amy Jasper www.inkingonthefly.com
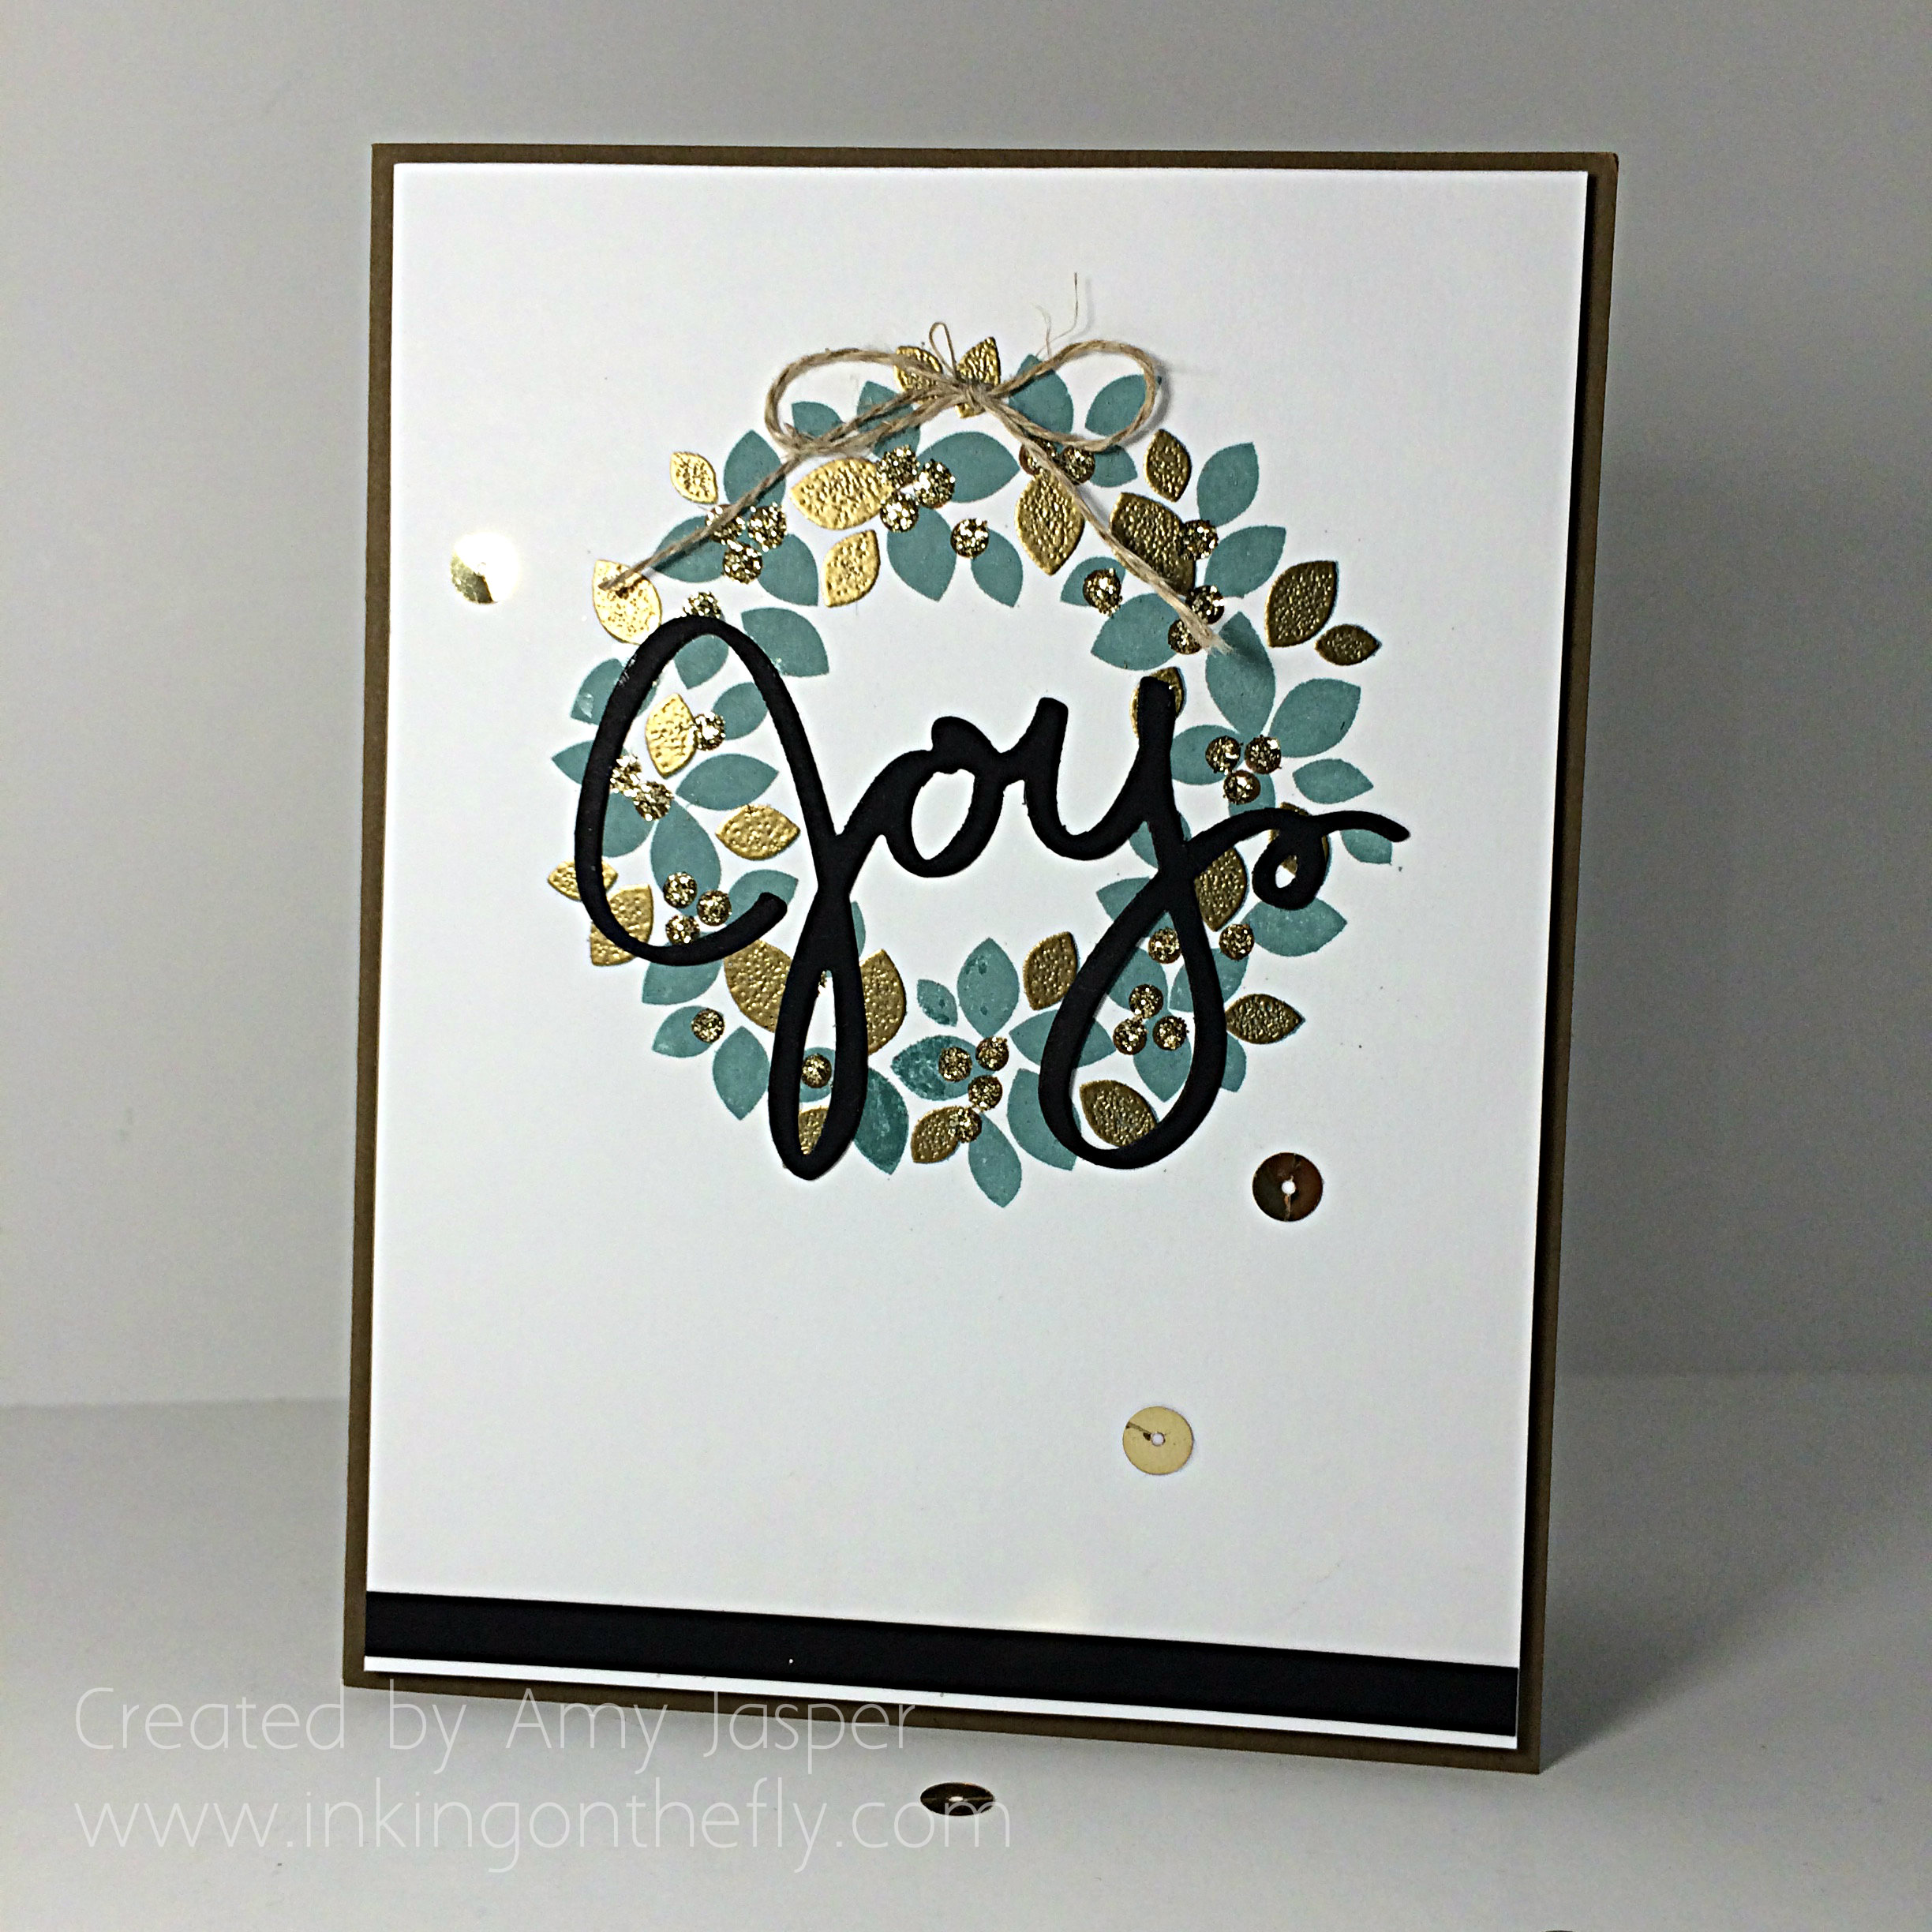
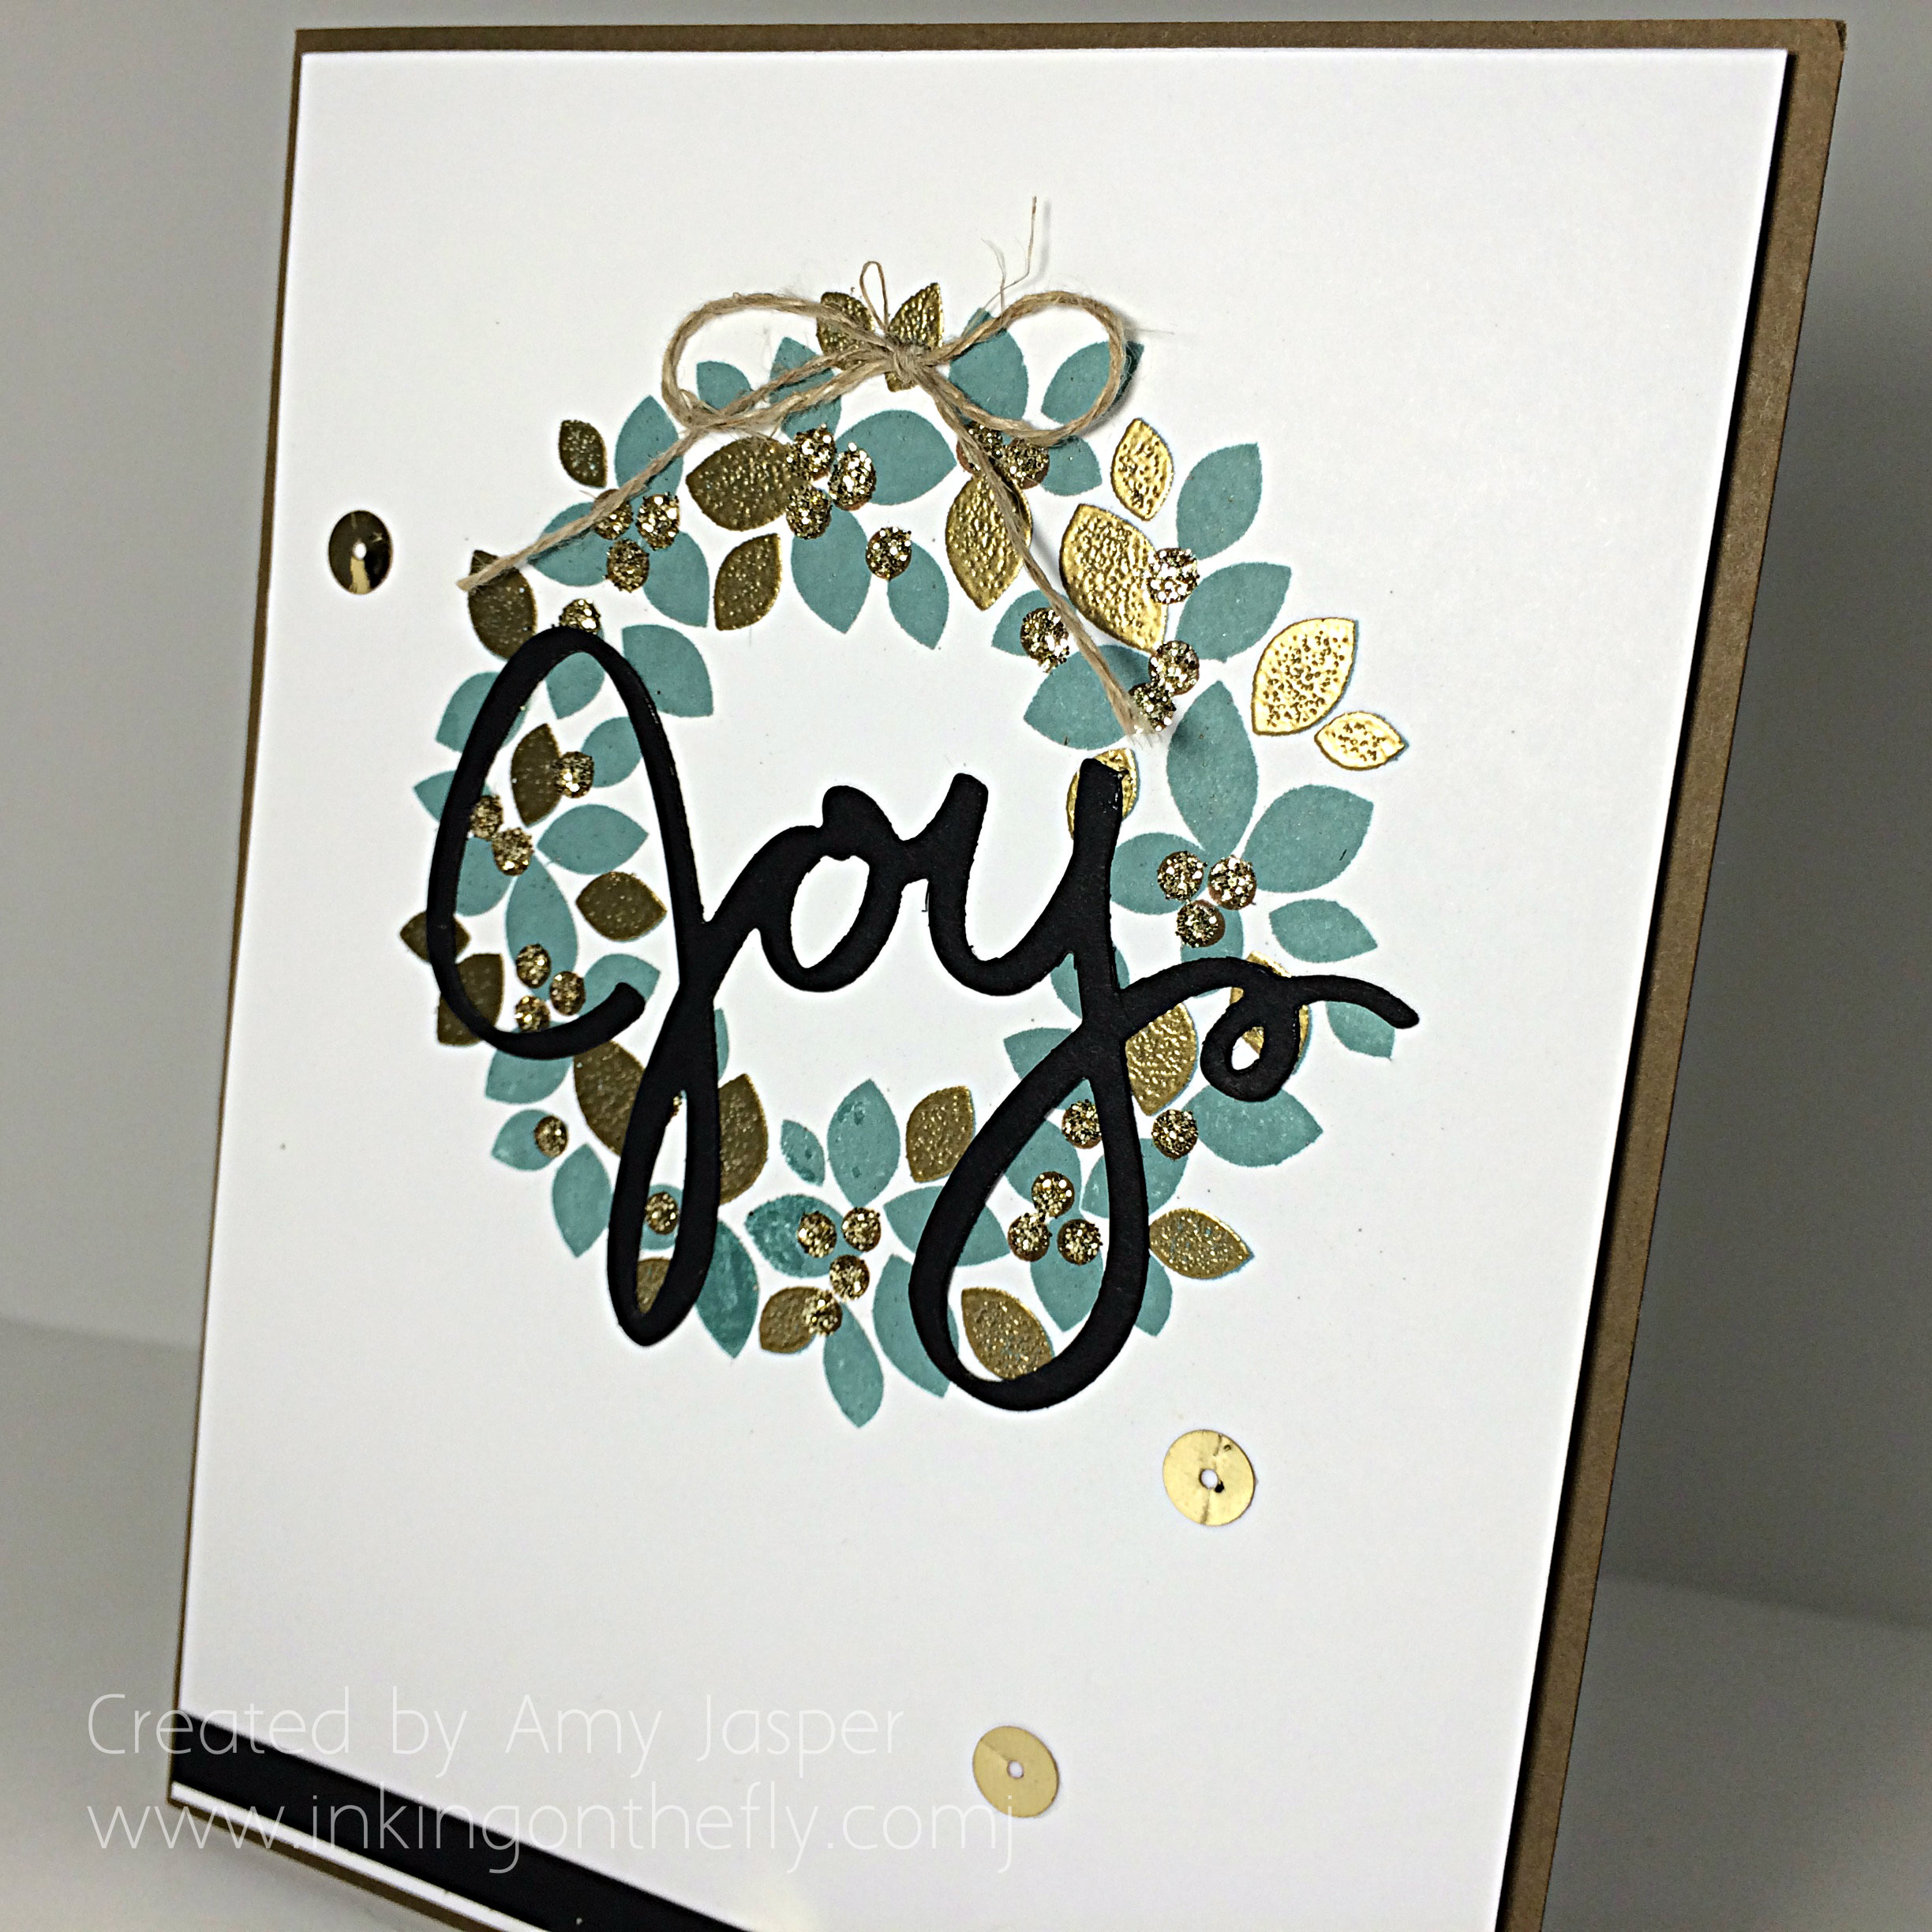
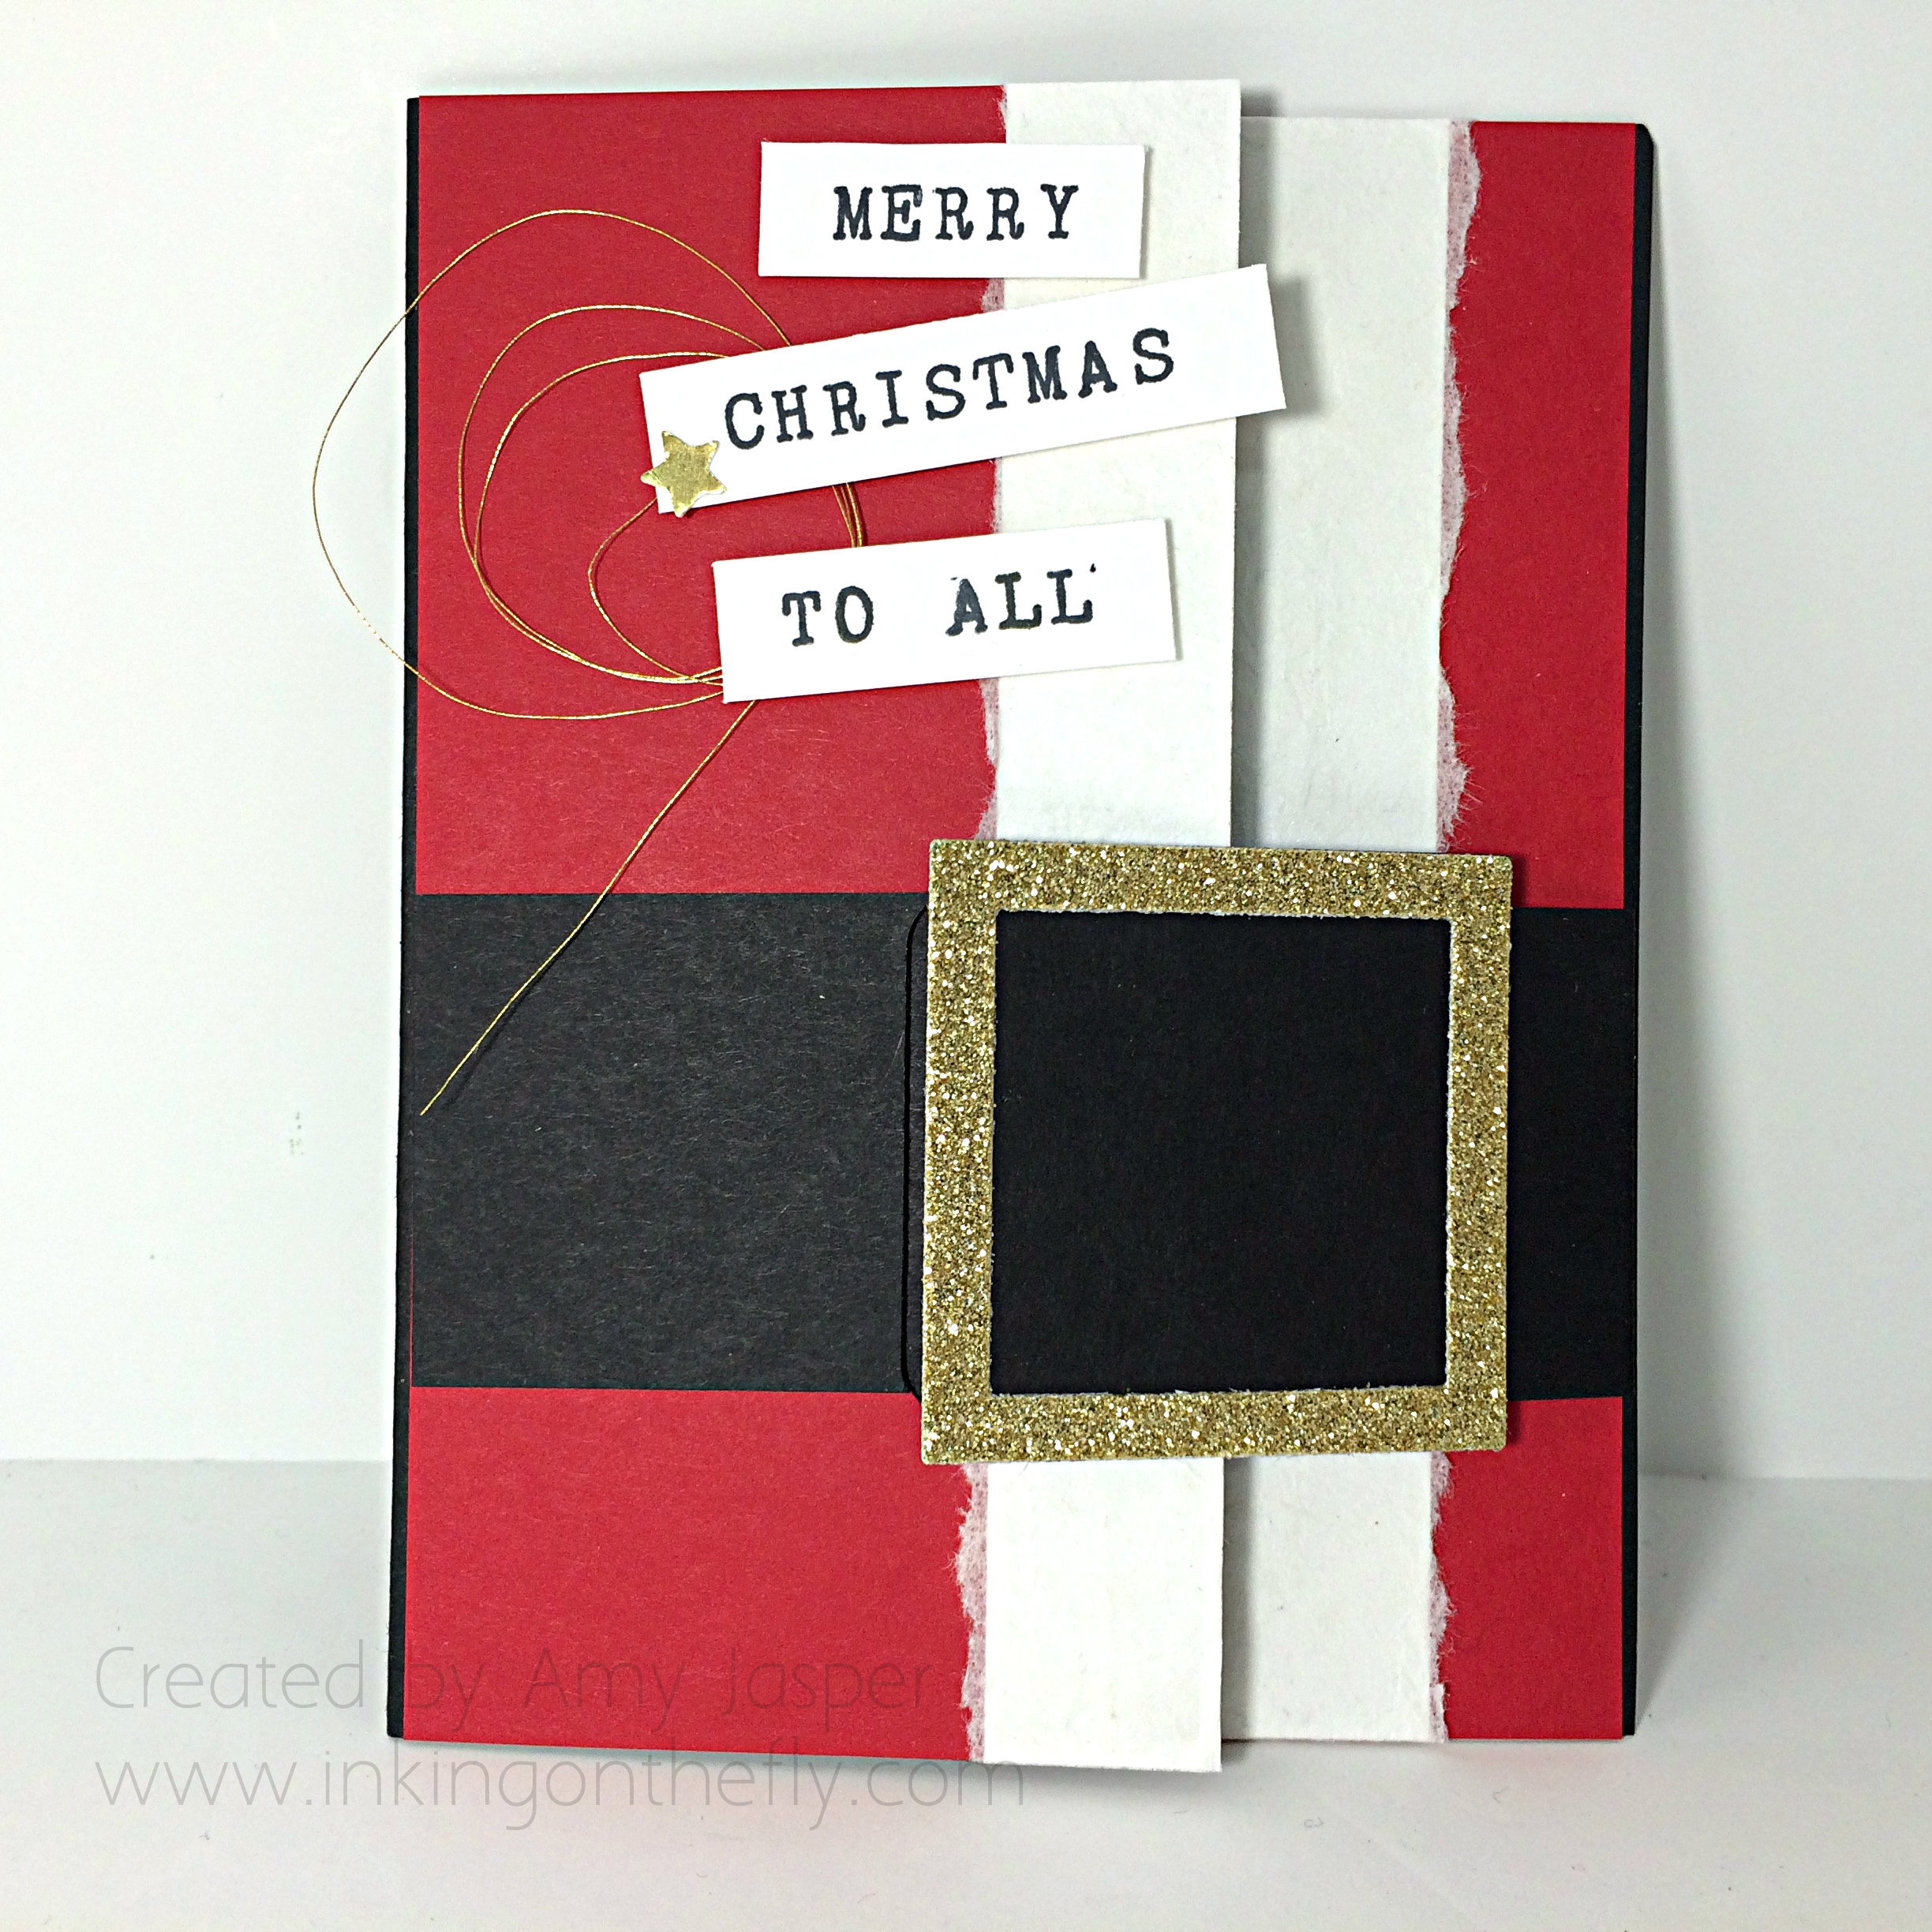
I used a Basic Black cardstock for the card base and layered it with Whisper White, Real Red, and Gold Glimmer. The words are created using the Alphabet Rotary Stamp and Momento Tuxedo Black ink. I stamped them first, then cut them out with my paper trimmer so they would be straight with less room for error. Each of the word pieces are on Stampin’ Dimensionals and the little flourish of Gold Metallic Thread is just stuck to the Dimensionals to hold it in place.

Merry Christmas to All buckle card by Amy Jasper www.inkingonthefly.com
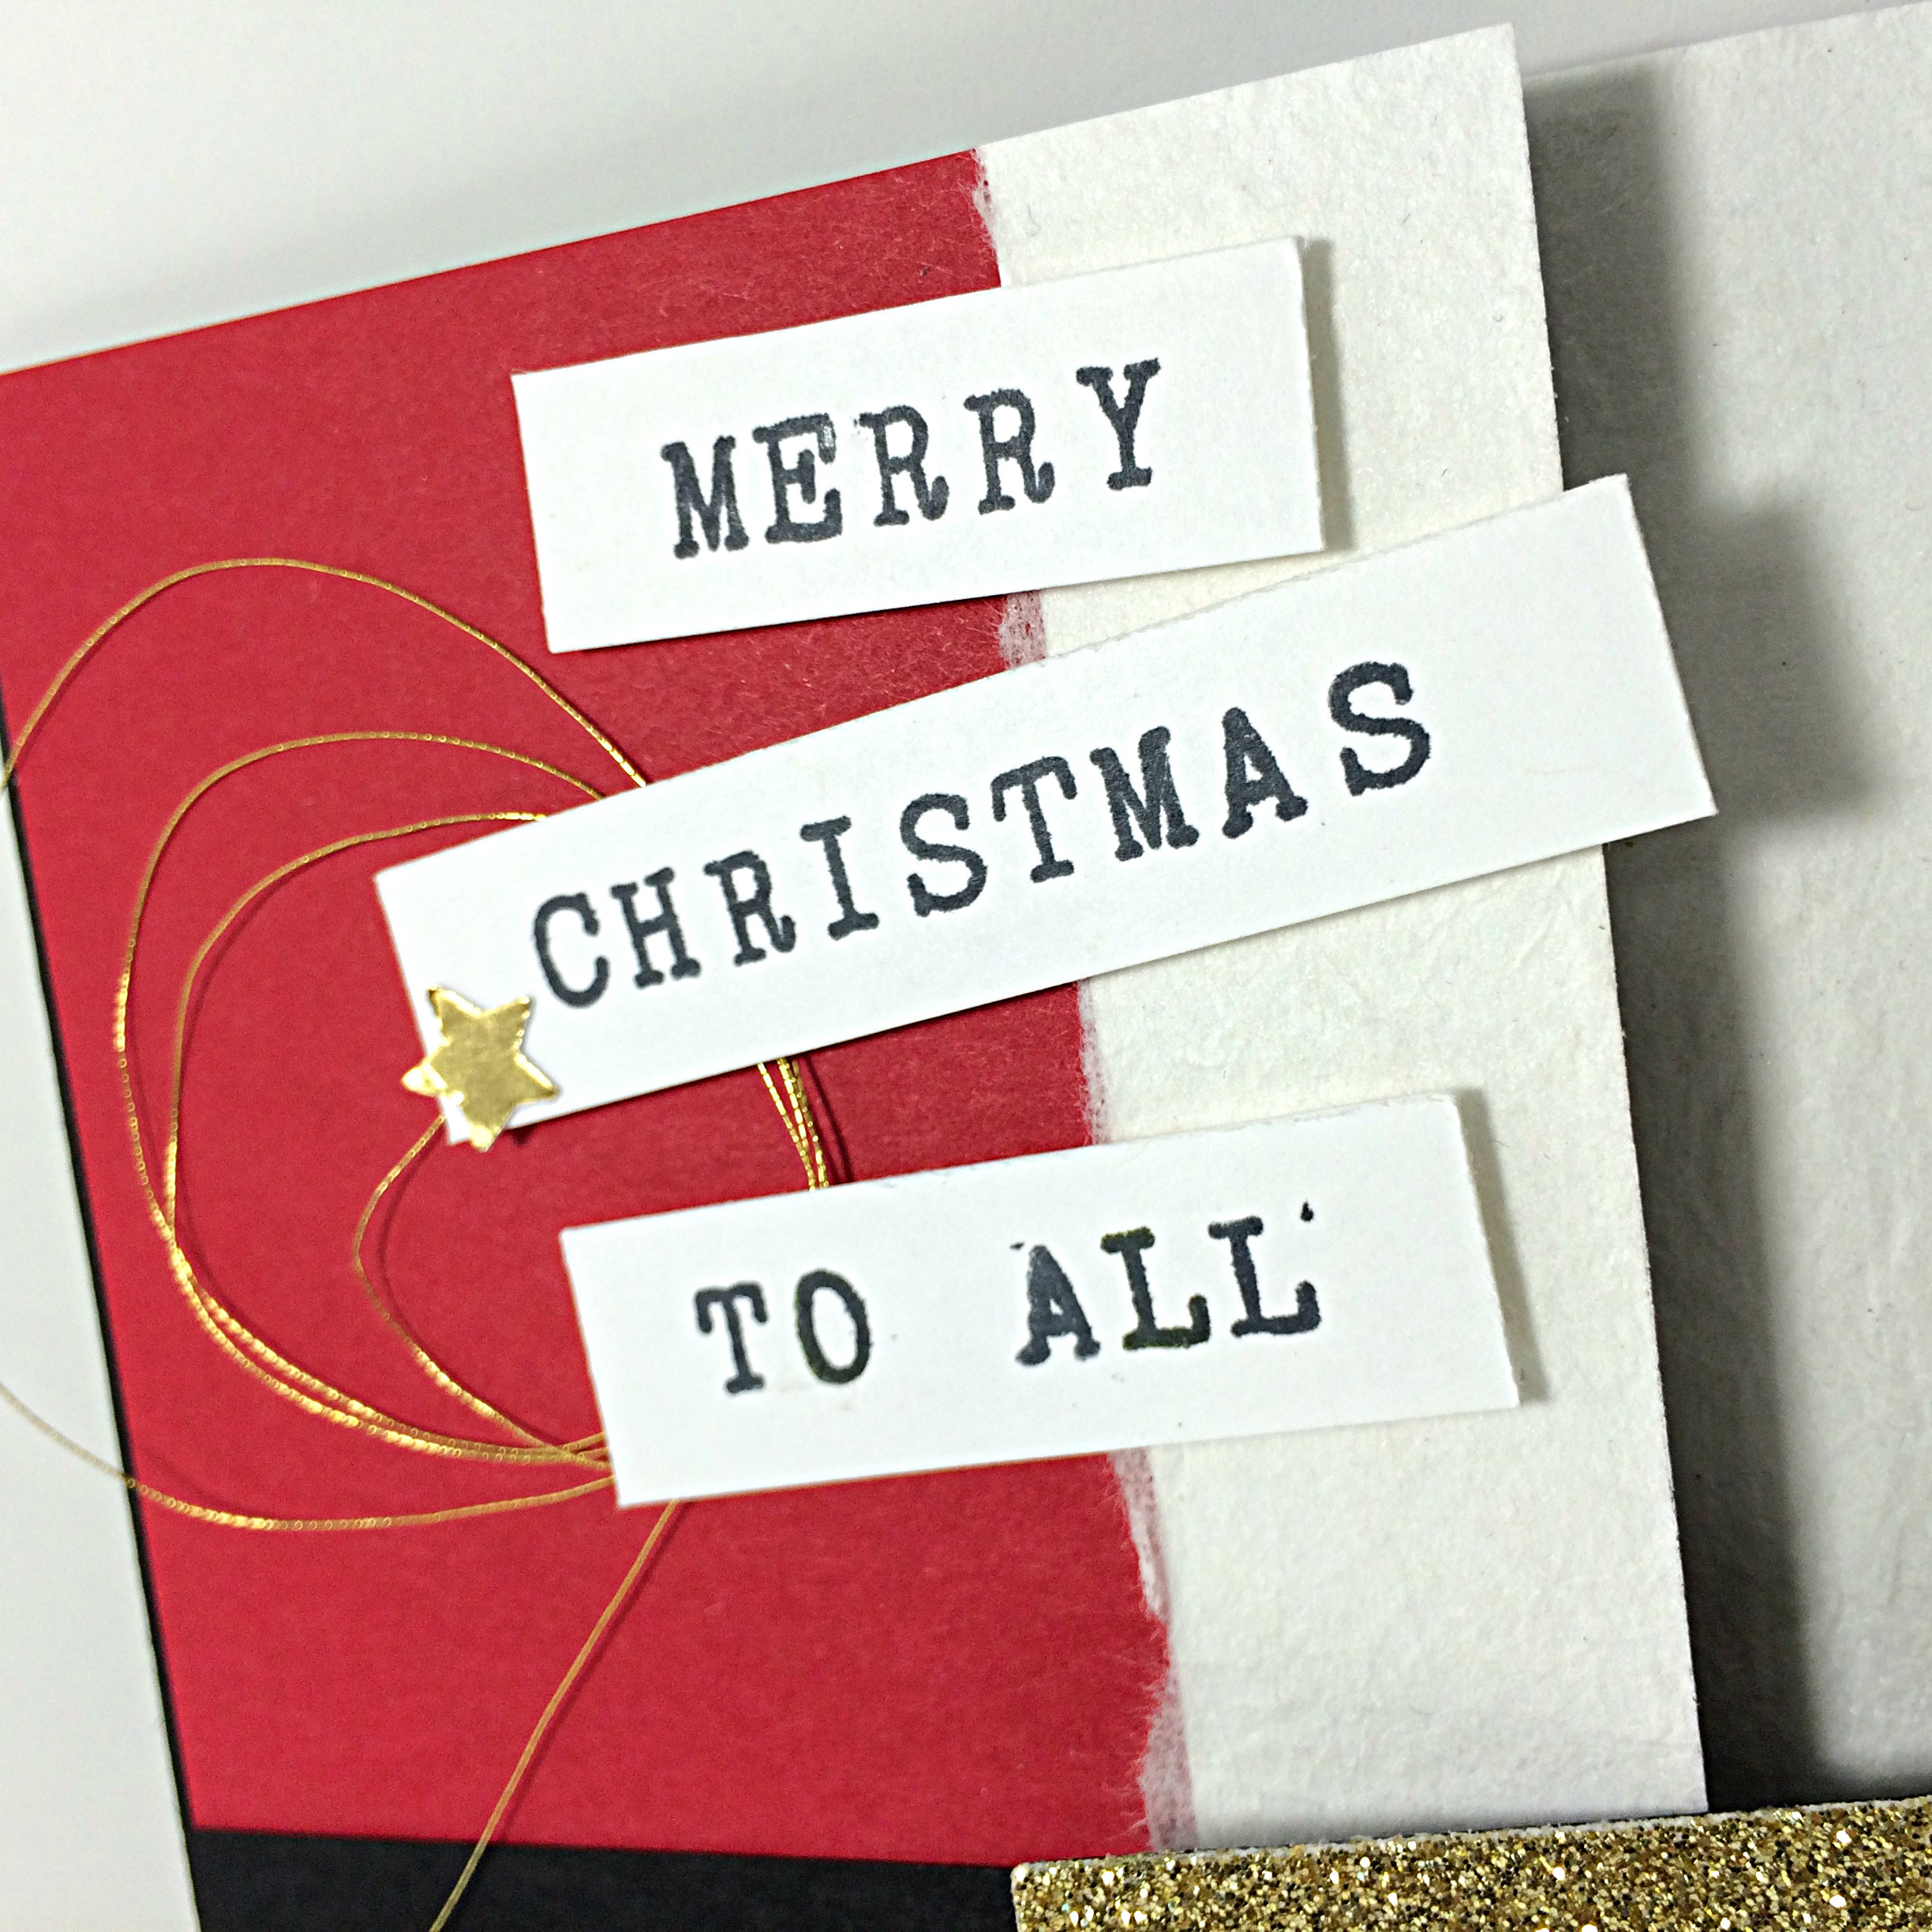
I added the little Gold Foil star by punching it out using the Stars Confetti Punch, then adhering it with the Fine-Tip Glue Pen.

Can you see the fuzzy look to Santa’s coat trim? Some Filter Paper (a heavier version of tissue paper) was flattened and adhered to the Whisper White layer after I tore the edges and crumpled it up. Santa’s coat was too flat and boring otherwise.

The Gold Glimmer paper buckle was cut using the Square Framelits and the Big Shot.

Merry Christmas to All buckle card by Amy Jasper www.inkingonthefly.com
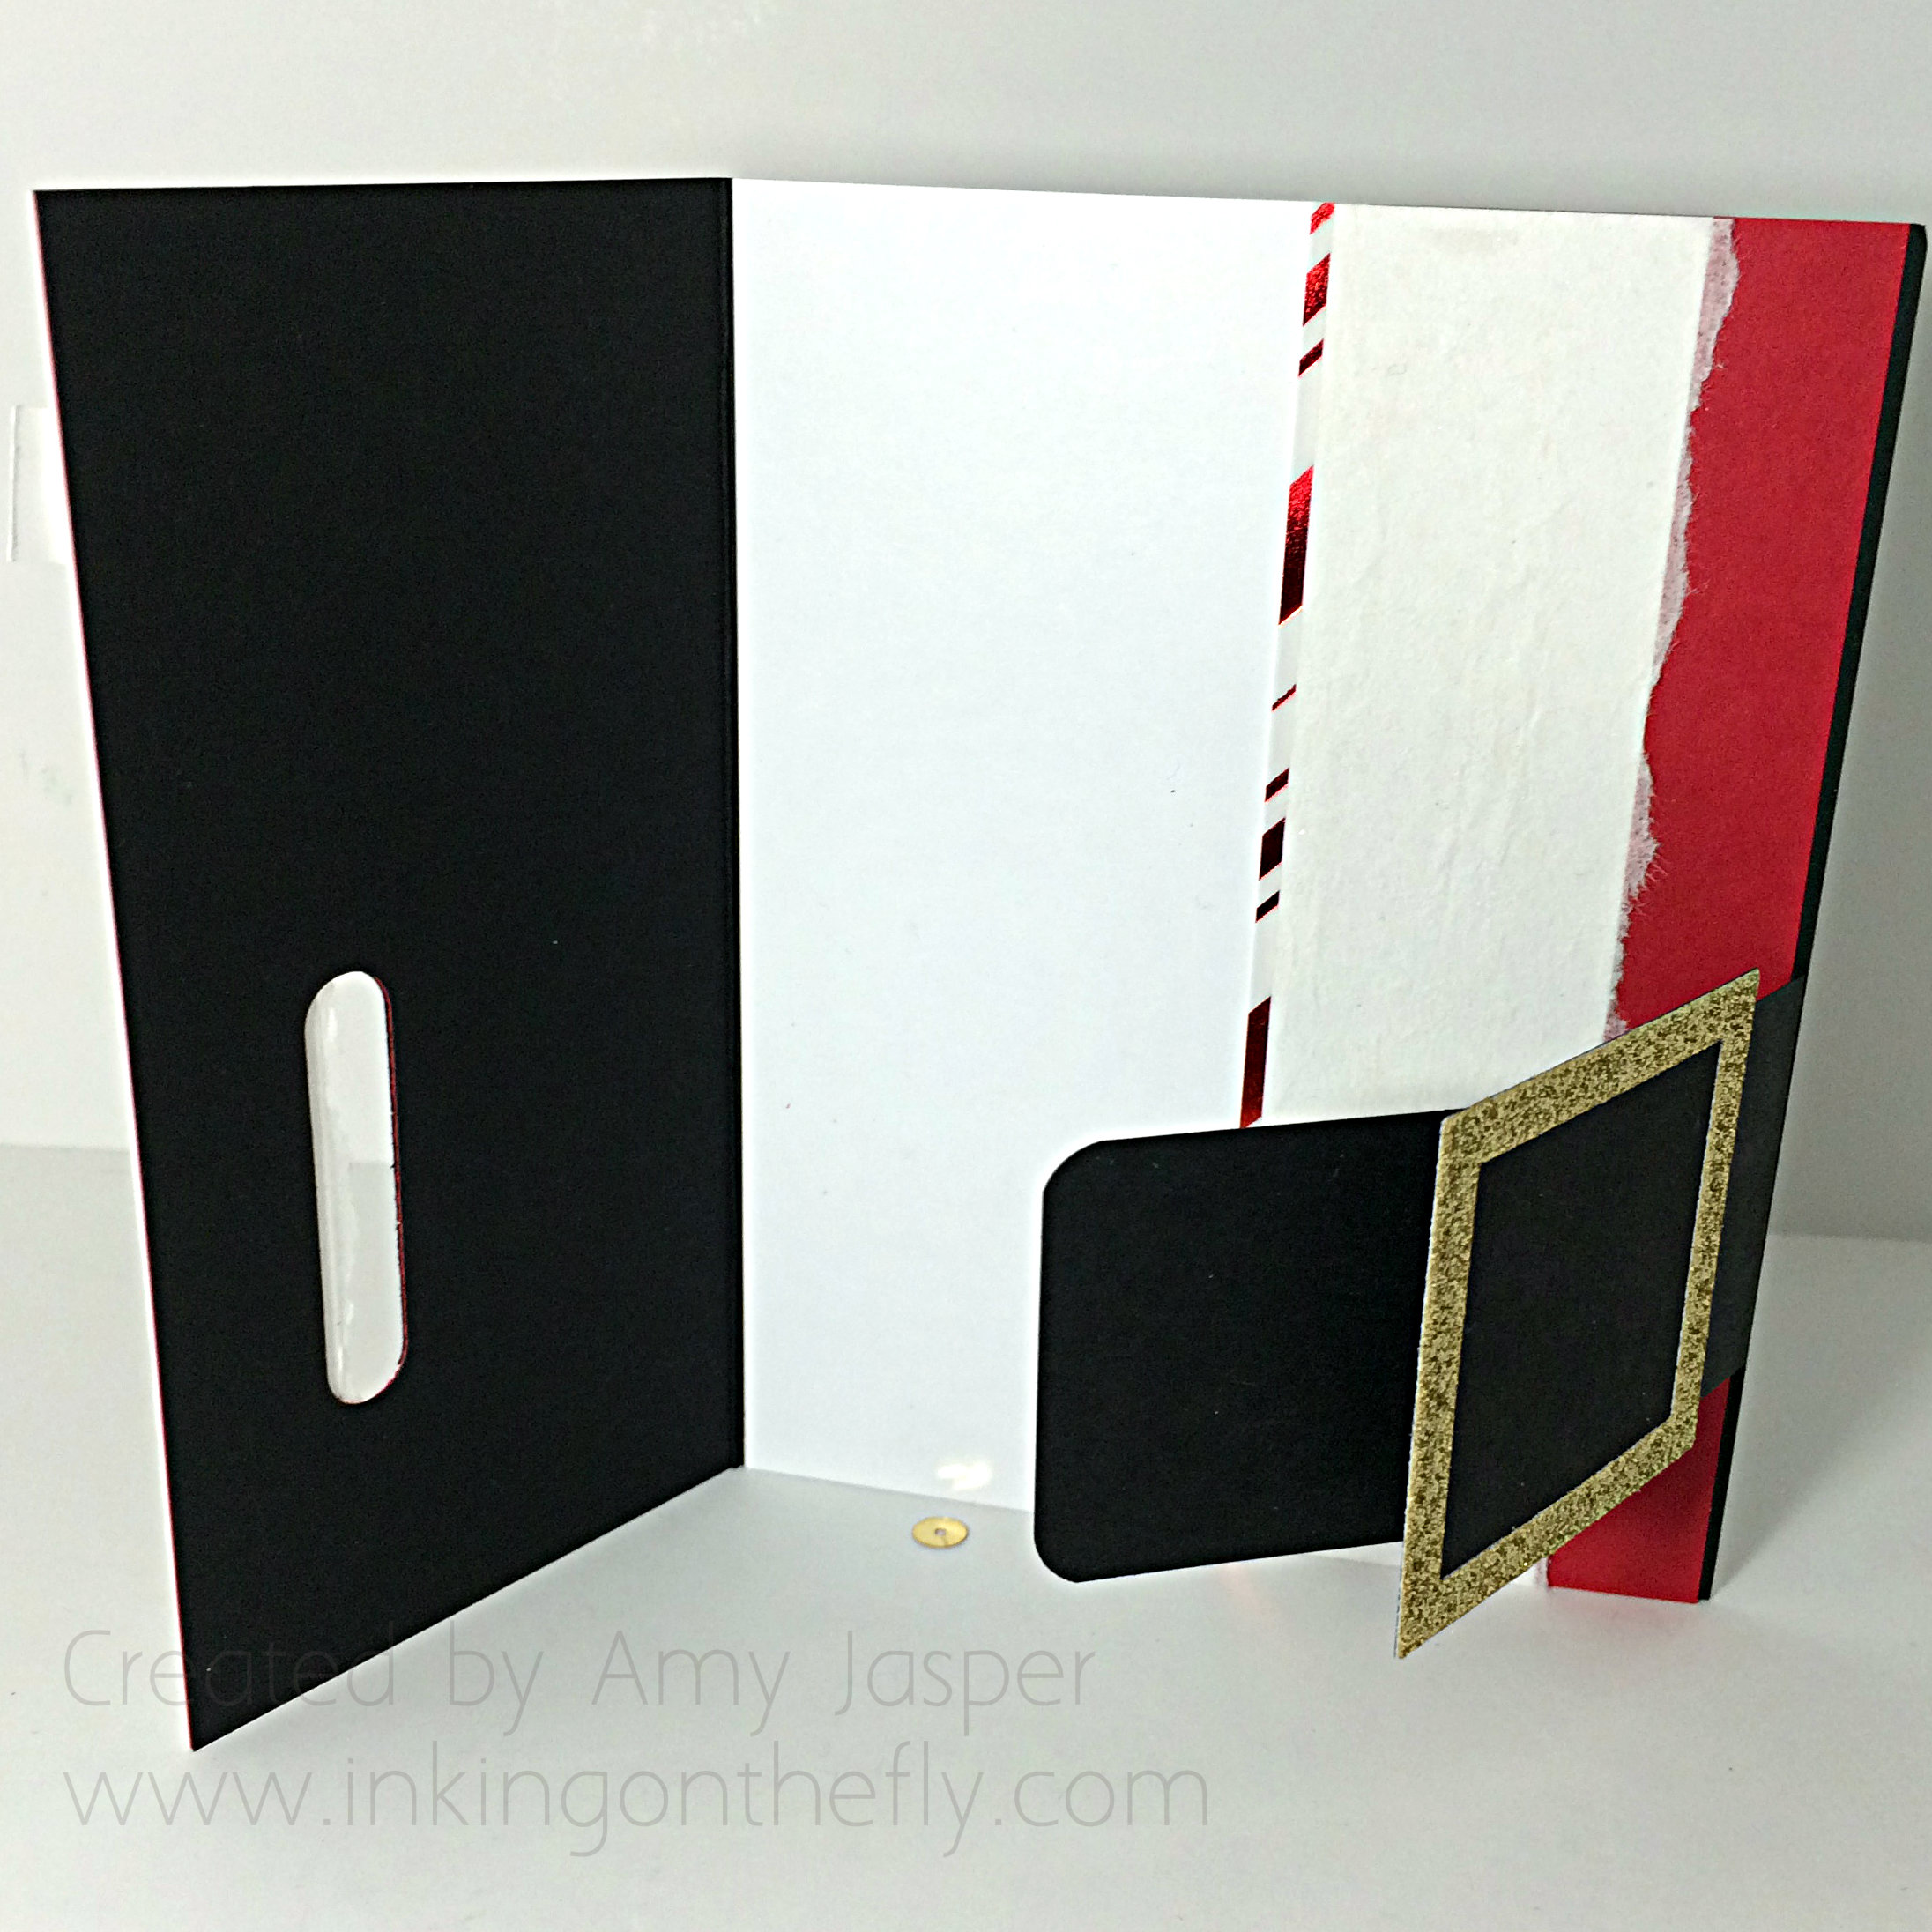
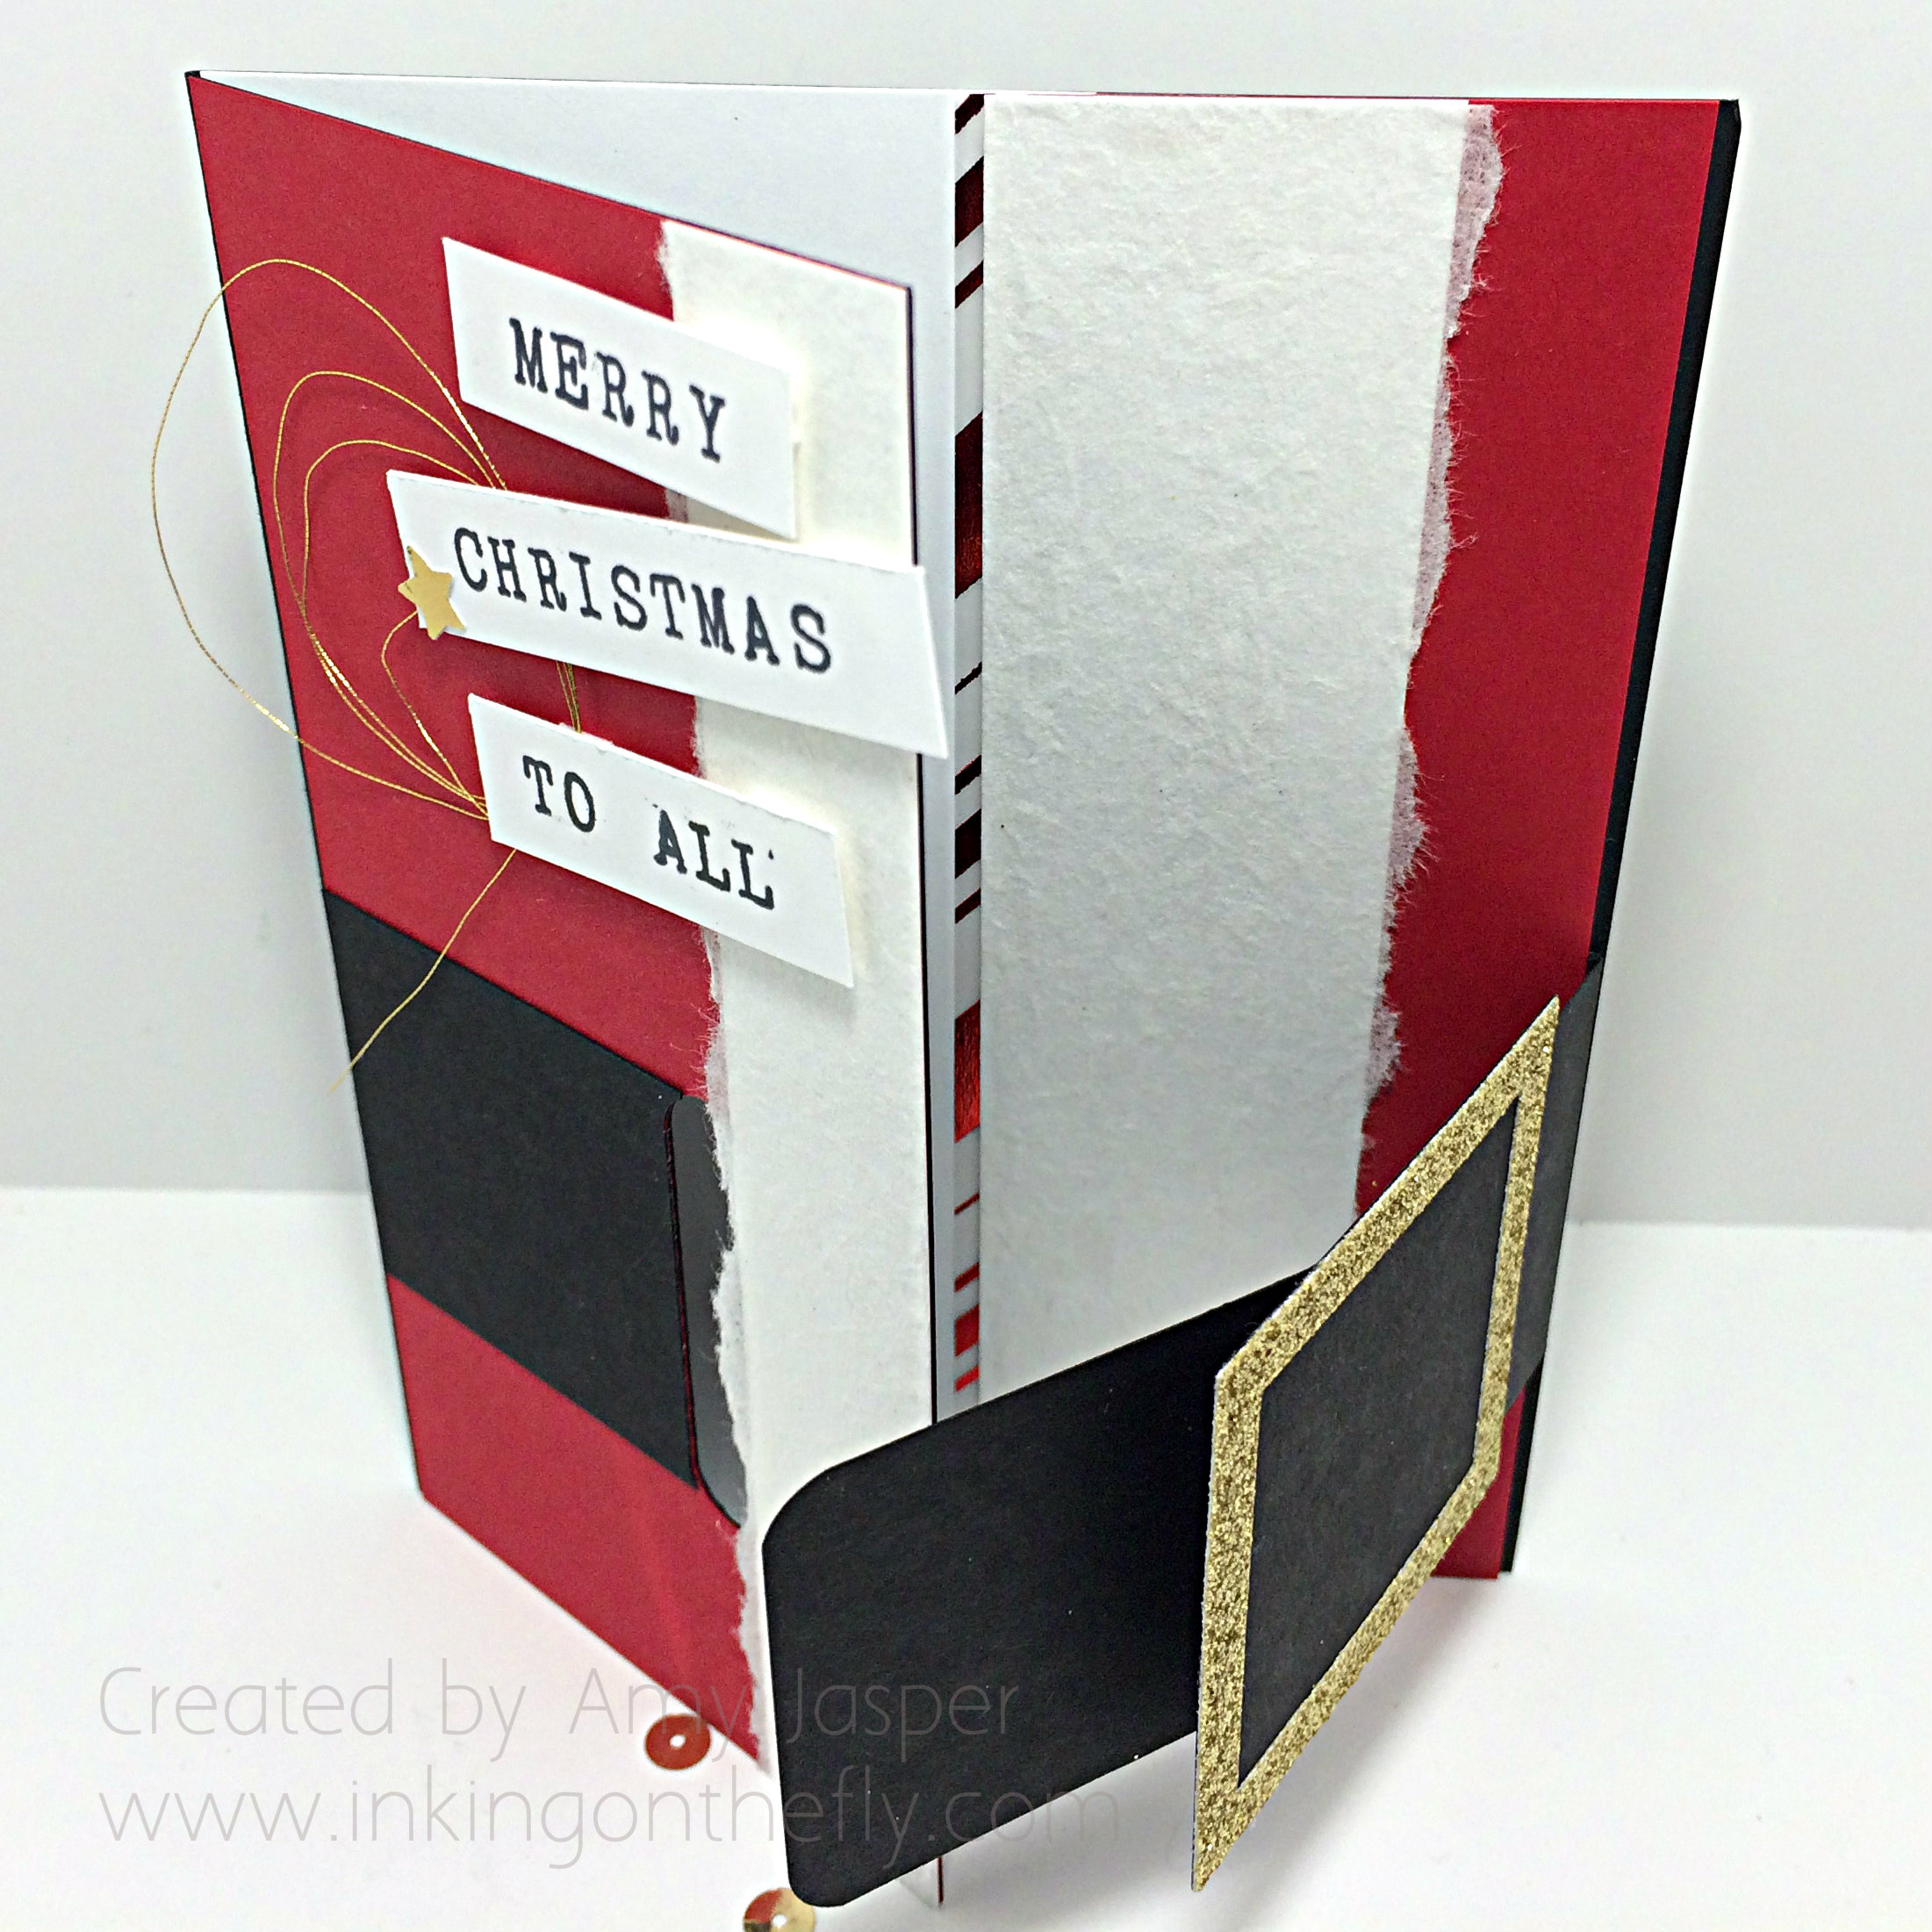
You can see inside the card a little bit and how it fits together in the photo above. I added a sliver of the Holiday Foil paper in the inside to make it pretty. The paper under the gold buckle slides into the Word Window punched slot in the front of the card. That’s how it all holds together. Isn’t it fun!

Merry Christmas to All buckle card inside by Amy Jasper www.inkingonthefly.comI still need to finish the sentiment on the inside. Any ideas what I will put?  . . .  I have to finish the the last line of that poem, of course – Twas the Night before Christmas:

He sprang to his sleigh, to his team gave a whistle,
And away they all flew like the down of a thistle.
But I heard him exclaim, as he drove out of sight,

“Merry Christmas to all, and to all a good night!”

JOY!!

What brings you the most joy in your life? I find joy in my children, my family, my friends. I get the most joy from my relationships.

But there’s also ice cream, ice cream definitely brings me joy.

… and lattes. Lattes bring me joy.

My children, my family, my friends, ice cream and lattes.

… and wine. Yup, wine brings me joy.

My children, my family, my friends, ice cream, lattes, and wine.

… and maybe vacations. Vacations, too. They bring me joy.

My children, my family, my friends, ice cream, lattes, wine, and vacations.

… and stamping.

Ok, there are actually a lot of things in life that bring me joy. Life is pretty joyful if you stop to think about it. There’s a lot of things to be sad about or angry about. But I can choose joy.

And so I do.

(most times)


Joy card by Amy Jasper www.inkingonthefly.com - Wonderous Wreath stamp set and framelits from Stampin' Up!I am pleased to be able to announce the winner of the blog candy from last week! This woman’s smile brings me joy, her cards bring me joy, her knitting brings me joy, and her hugs bring me joy – Congratulations, Seana!! You have won the blog candy! You will receive it next week when it arrives at your door!

Thank you to everyone who entered and shared their Christmas traditions with us.

I would love to hear from more of you.  So tell me … what brings you joy?

Joy card by Amy Jasper www.inkingonthefly.com - Wonderous Wreath stamp set and framelits from Stampin' Up!Write a reply/comment on this post and tell me what brings you joy. Maybe we find joy in some of the same things?

Amy.

Like this card? Here are the details: Soft Suede cardstock base, Whisper White layer, stamped with Wonderous Wreath stamp set in Lost Lagoon ink leaves, then rubbed with the Embossing buddy before stamping the Versamark ink leaves that are embossed with Gold Embossing powder, and Soft Suede ink berries that were glittered up using the Fine-Tip Glue Pen and Gold Glitter. The JOY was die cut using the Wonderous Wreath framelits and Basic Black cardstock with my Big Shot die cutting machine. The Linen Thread bow was adhered with the Fine-Tip Glue pen as were also the Gold Sequins. The strip of Basic Black cardstock was added to the bottom of the card to give it a bit of balance. Stampin’ Dimensionals were used to adhere the Whisper White later to the Soft Suede card base.

Hang a Shining Star

My favourite thing about a song, especially Christmas songs, is when someone says something in normal conversation and it sparks a song in your mind that you absolutely MUST sing out loud. As it was said in the movie, ELF, “The best way to spread Christmas cheer is singing loud for all to hear.”

My hope is that my card today will cause a Christmas song to be placed in your mind when you read the words. (Basically, I’m working on developing my talents in mind-control.)

Don’t forget to check out my previous post, Fleecy Caribou and Blog Candy, for a chance to win a stamp set! Winner will be announced on Tuesday!

Here’s today’s sketch from the As You See It Challenge blog:

AYSIChallenge115-1024x1024

The card I have to share with you today is a 3″ x 5.5″ card. The elements that I chose simply demanded to be on a narrow card design. Seriously, the cards should just make themselves if they’re going to be so demanding!!

Hang a Shining Star Card by Amy Jasper www.inkingonthefly.com

It begins with a 3″ x 5.5″ Mossy Meadow card base and the layer of patterned paper from the Merry Moments Designer Series Paper. The next layer is a Spider Web Doily that has been trimmed and turned around to show the white side rather than the black side of the doily. This, of course, was adhered with the Fine-Tip Glue Pen.

Next, the leaf image from the Lighthearted Leaves stamp set was stamped with Old Olive Ink onto Old Olive cardstock. This was then die cut on the Big Shot, using the Leaflets Framelits. I happily sponged away on the edges of my newly cut leaf using Stampin’ Up Sponges and Old Olive ink. Before adhering the leaf, I took a moment to gently curl and shape its edges.

Hang a shining star by Amy Jasper www.inkingonthefly.com

The star on this card is die cut from Silver Foil paper, using the Star Framelits. After using my Embossing Buddy to remove static, dust, and finger prints from the Silver Foil paper, I used the Alphabet Rotary stamp to create the words and stamped them on the star with Versamark Ink. Then they were heat embossed with Silver Embossing Powder and a Heat Tool.

I saw my crooked words and decided to go for it anyway. I think it adds an authentic, kind of, stamped metal look.

The star is adhered with Stampin’ Dimensionals to pop it up off the page. The Silver Sequin Trim and the Real Red 1/8″ Striped Ribbon were attached using a Mini Glue Dot.

Hang a Shining Star card and envelope by Amy Jasper www.inkingonthefly.com

Because I had an unusually-sized card, I needed to make a custom envelope to go with it. The Envelope Punch Board is the perfect tool for just that very thing. Unfortunately, the envelope sizes available on the punch board still didn’t match what I needed. I played around a bit, changing the starting size of the paper and the different positions for scoring and punching and determined this:

To create an envelope for a 3″ x 5.5″ card, start with a piece of 7.5″ x 7.5″ paper (Red Envelope Paper, in this case), using the Envelope Punch Board, punch and score at 2 7/8″. Then carry on with the punch board as you normally would until your envelope is complete.

I also took the time to trim one of the side flaps on my envelope to give it a professional finish. I just drew a pencil line where I wanted to cut, then used my paper trimmer to remove the unwanted bit of paper.

This sketch is simple and cute. You should give it a try and share it with us on the As You See It Challenge blog. We love to see your take on our challenges!!

Did my card make you sing out loud? The words on the star are from one of my favourite Christmas tunes, “Have Yourself a Merry Little Christmas”.

Do you have a favourite Christmas song? Leave a comment and let me know!