Emboss Resist with a Twist
What happens when something goes wrong on your card or scrapbook design? Do you start over or see if you can fix it?
My memory of an old technique saved the day and enabled me to fix a problem with gunk getting embedded in my heat-embossed image. And I love it!
It all began with this colour challenge from the As You See It Challenge blog:

I was a little worried with the intensity of these colours, but by using the coloured ink instead of coloured cardstock, I was able to keep my design from getting too loud.
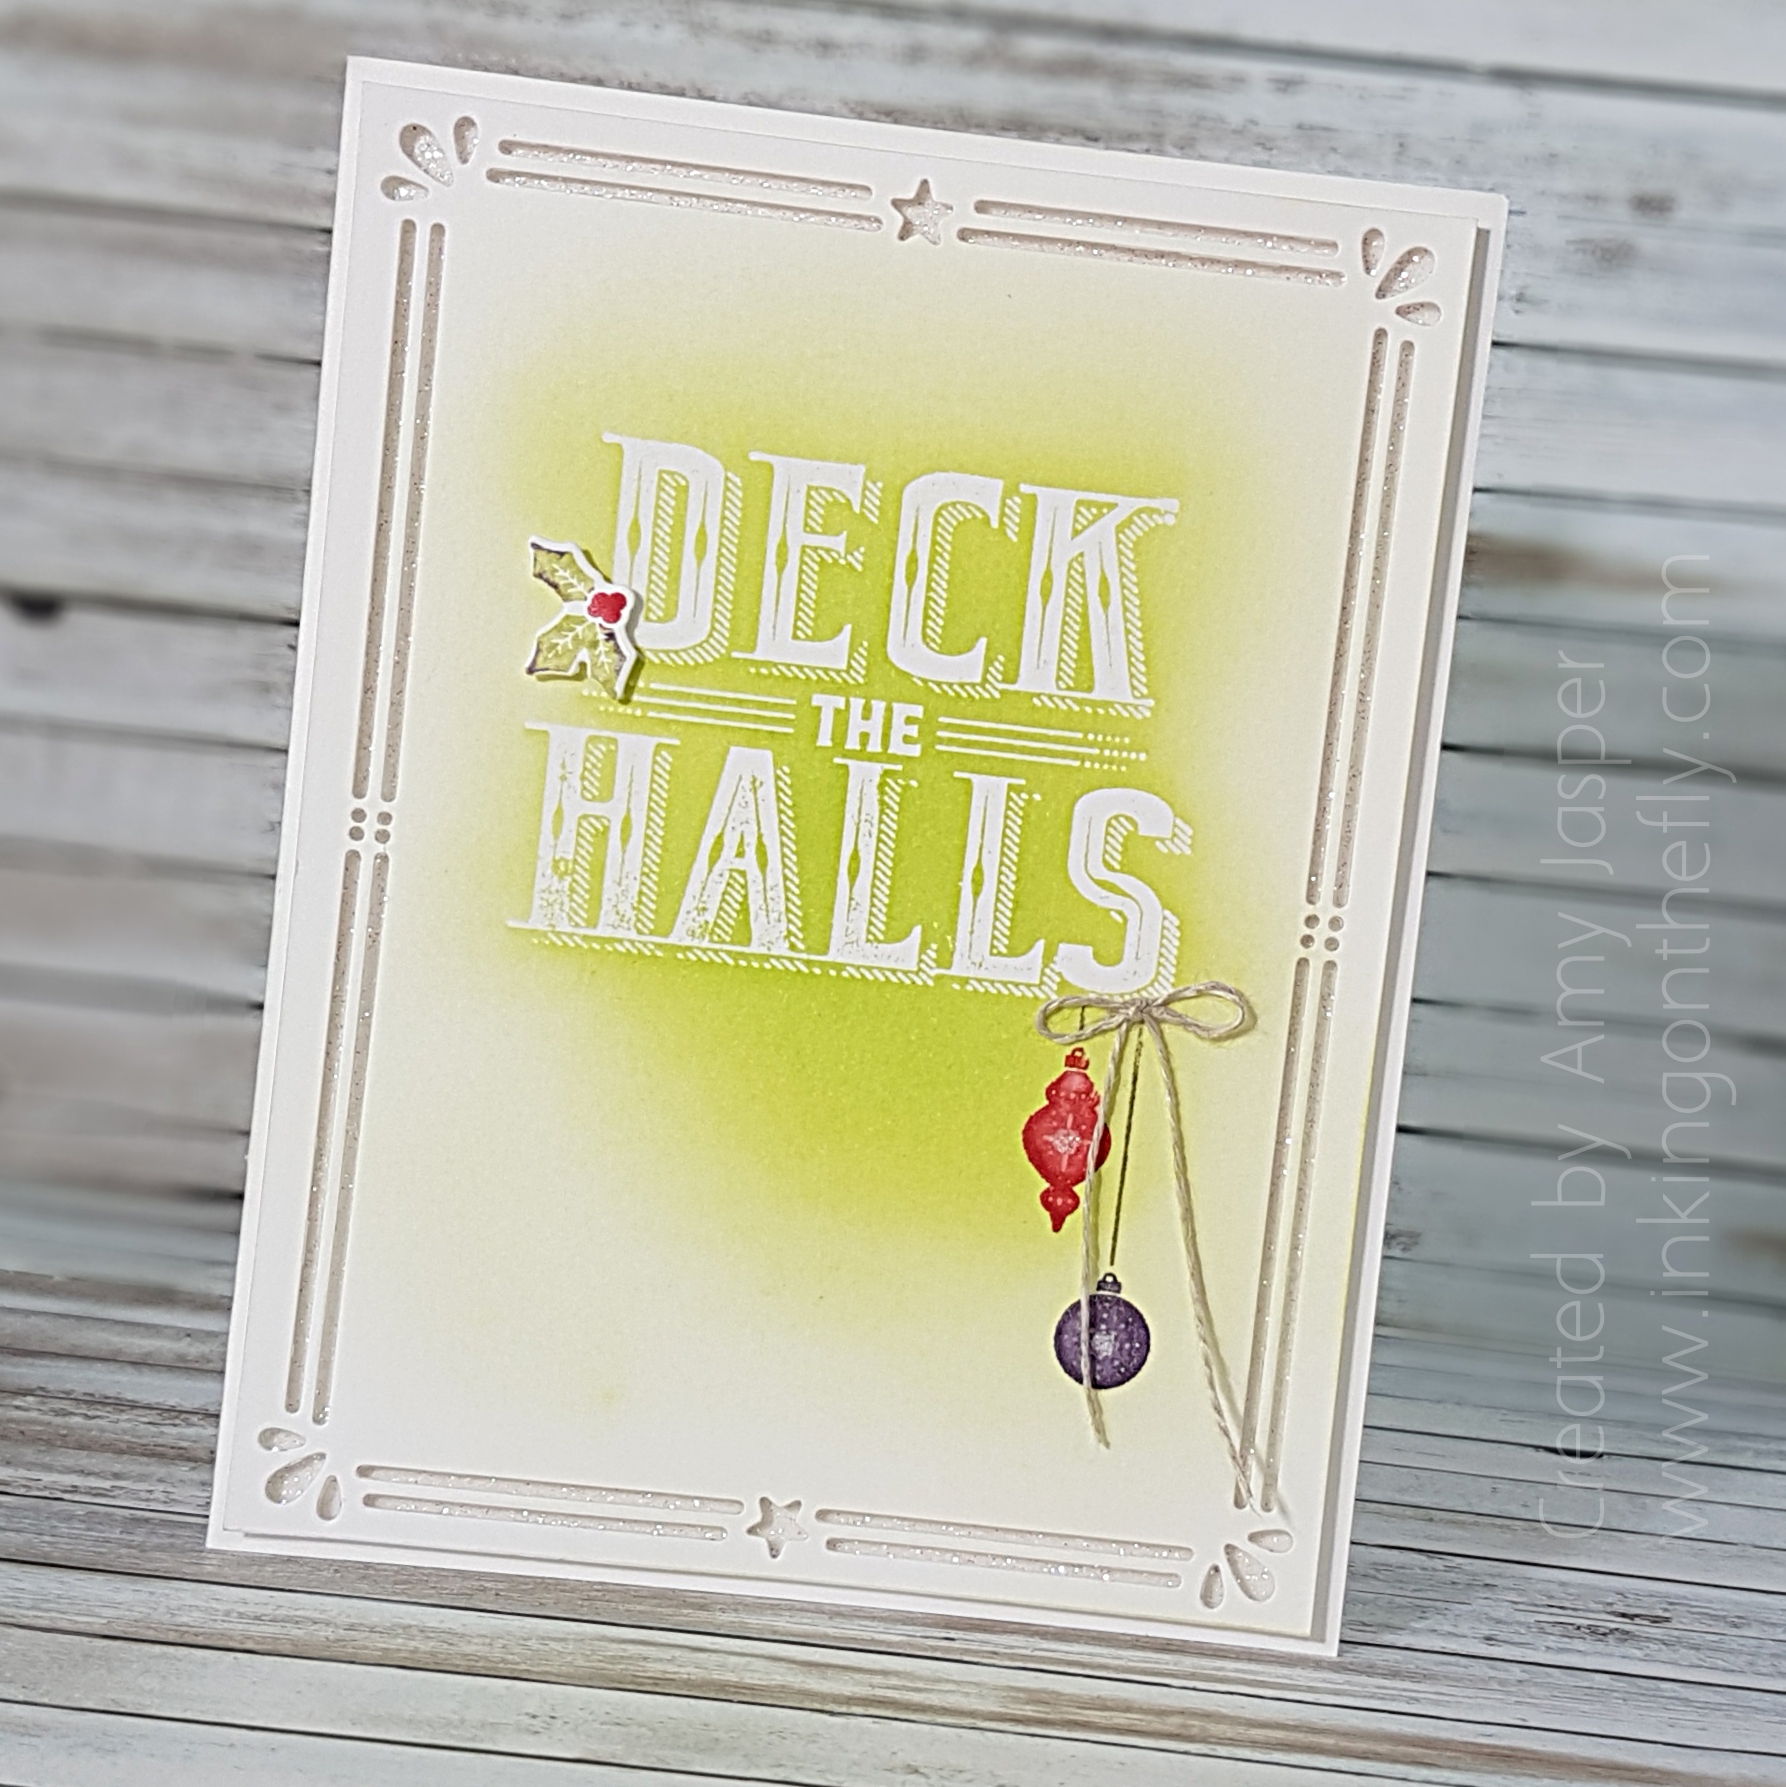
I wanted to get a jump on my holiday cards, so I went with a Christmas design using the Carols of Christmas stamp set and the Card Front Builder Thinlits.
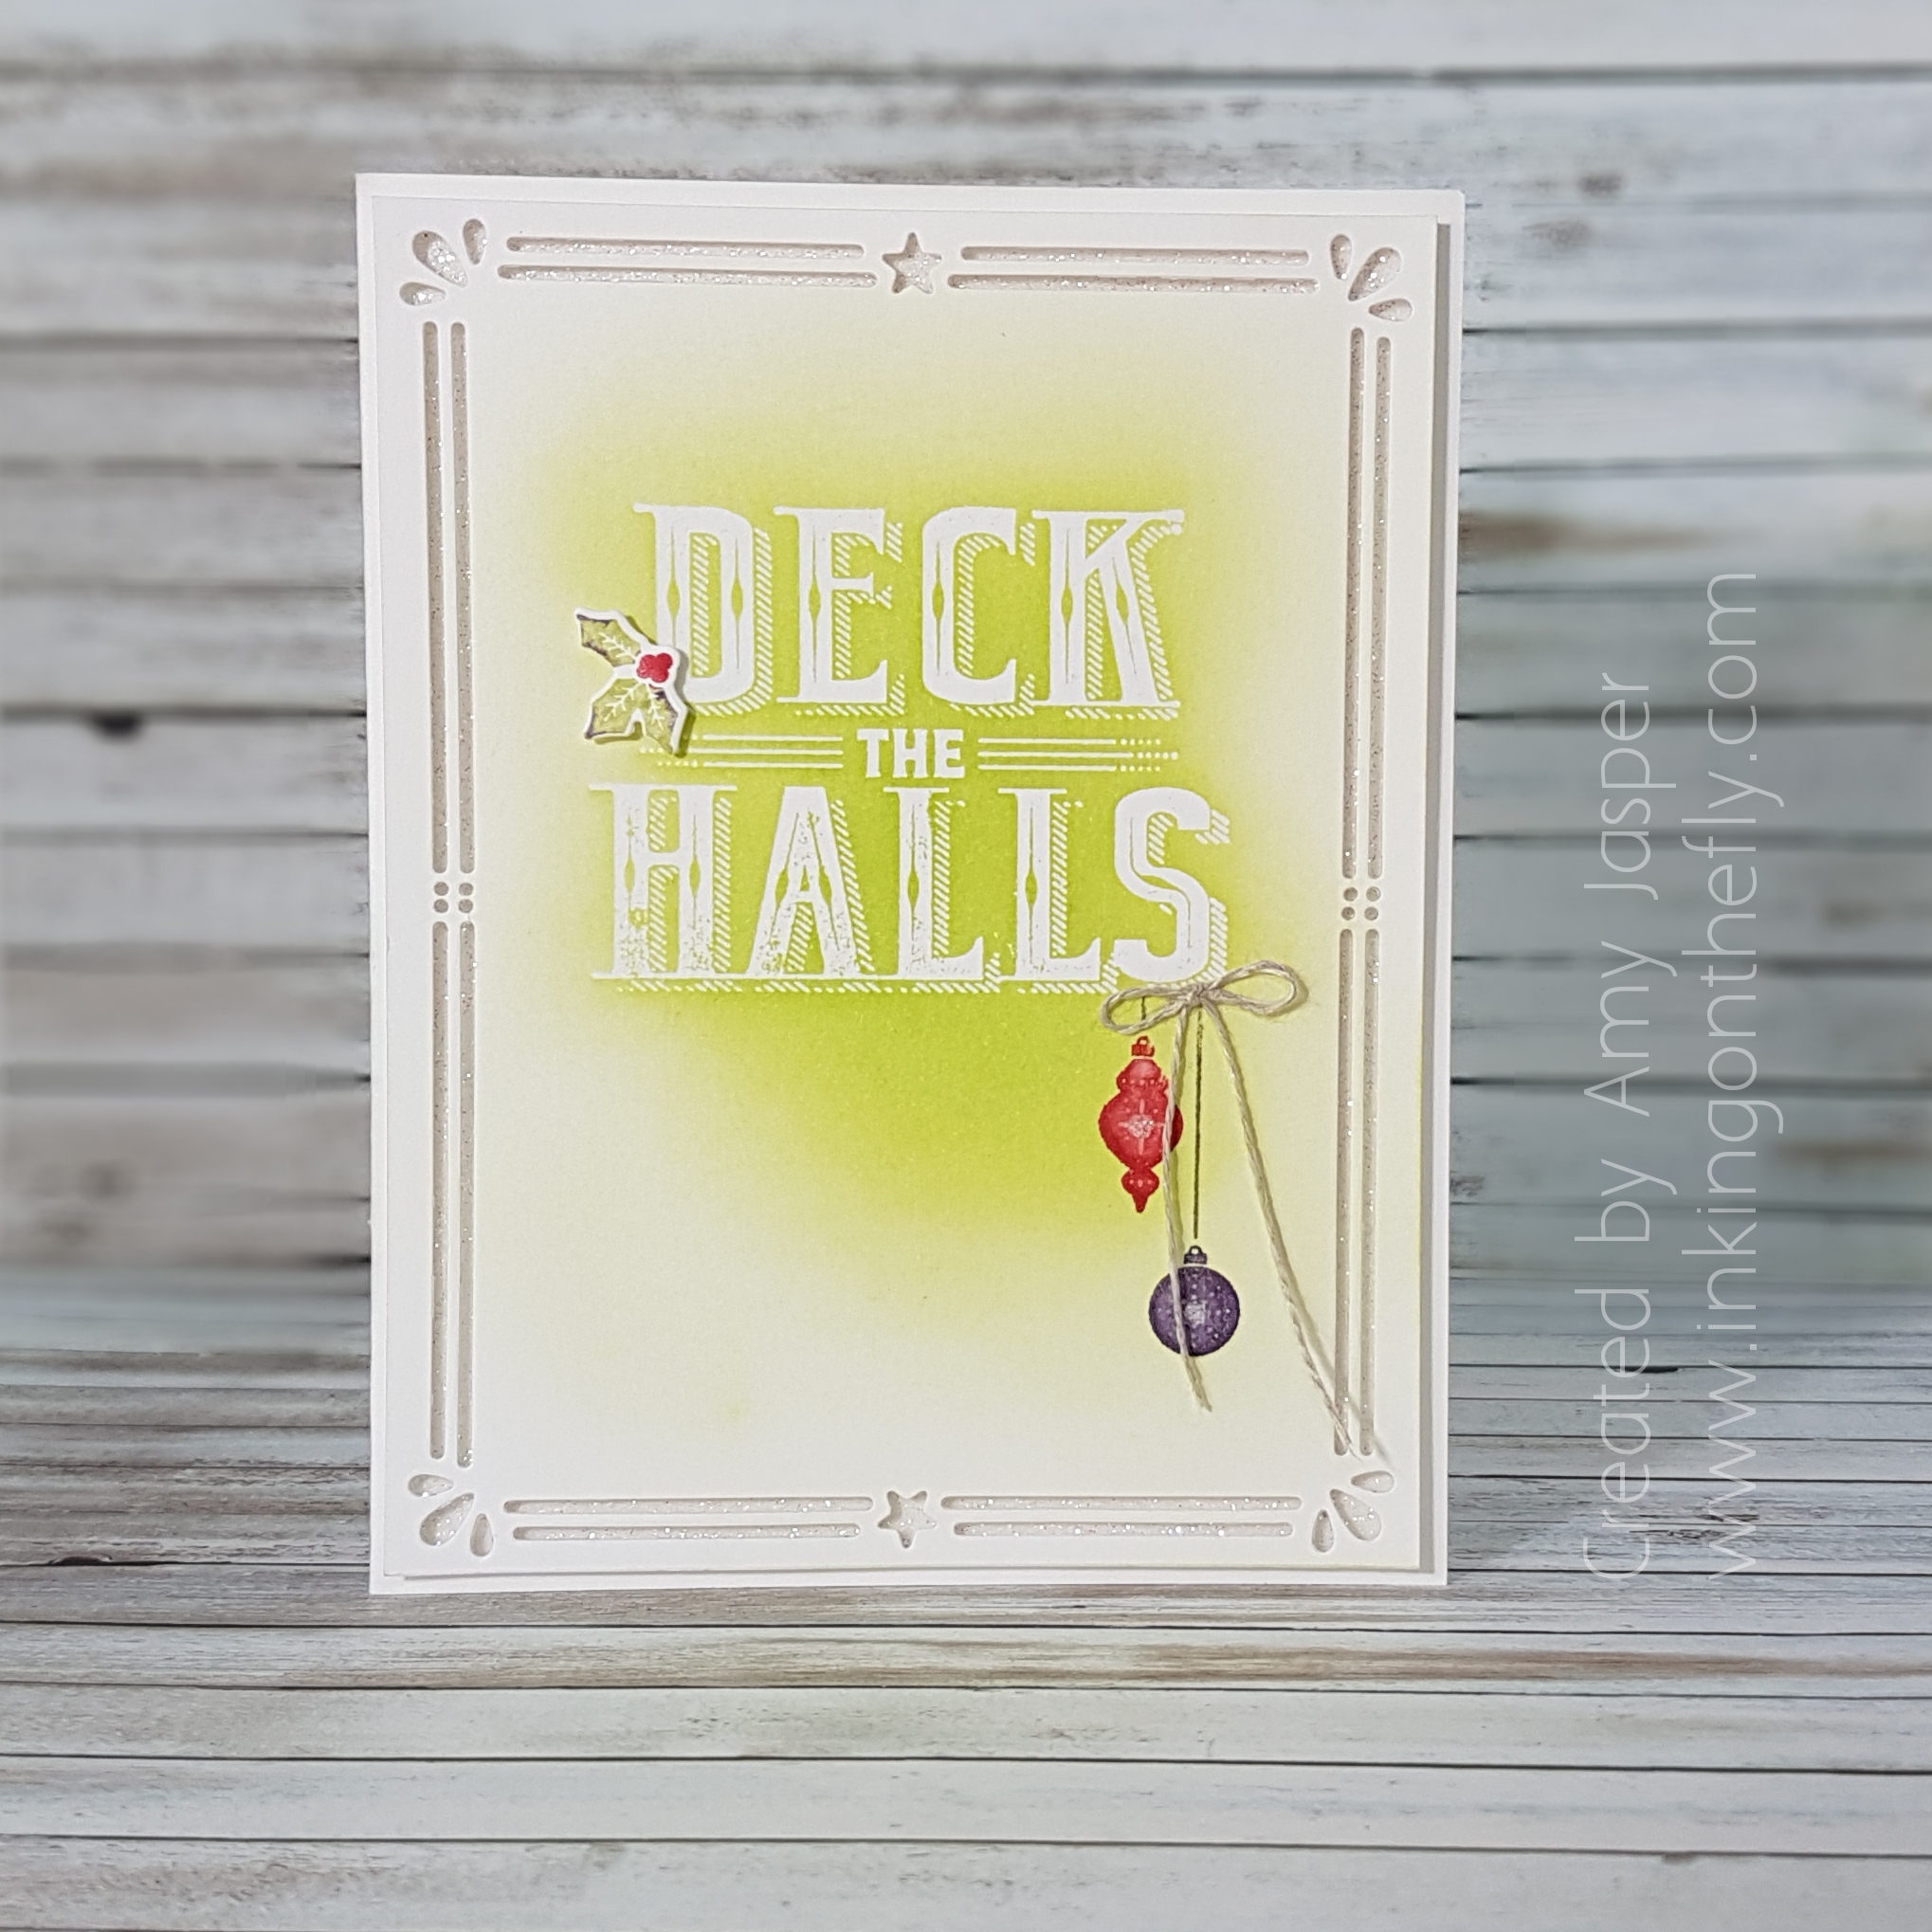 I call this technique, “Emboss Resist with a Twist” or “Emboss Resist and Wipe”. The second name definitely gives you a better understanding of what this technique involves.
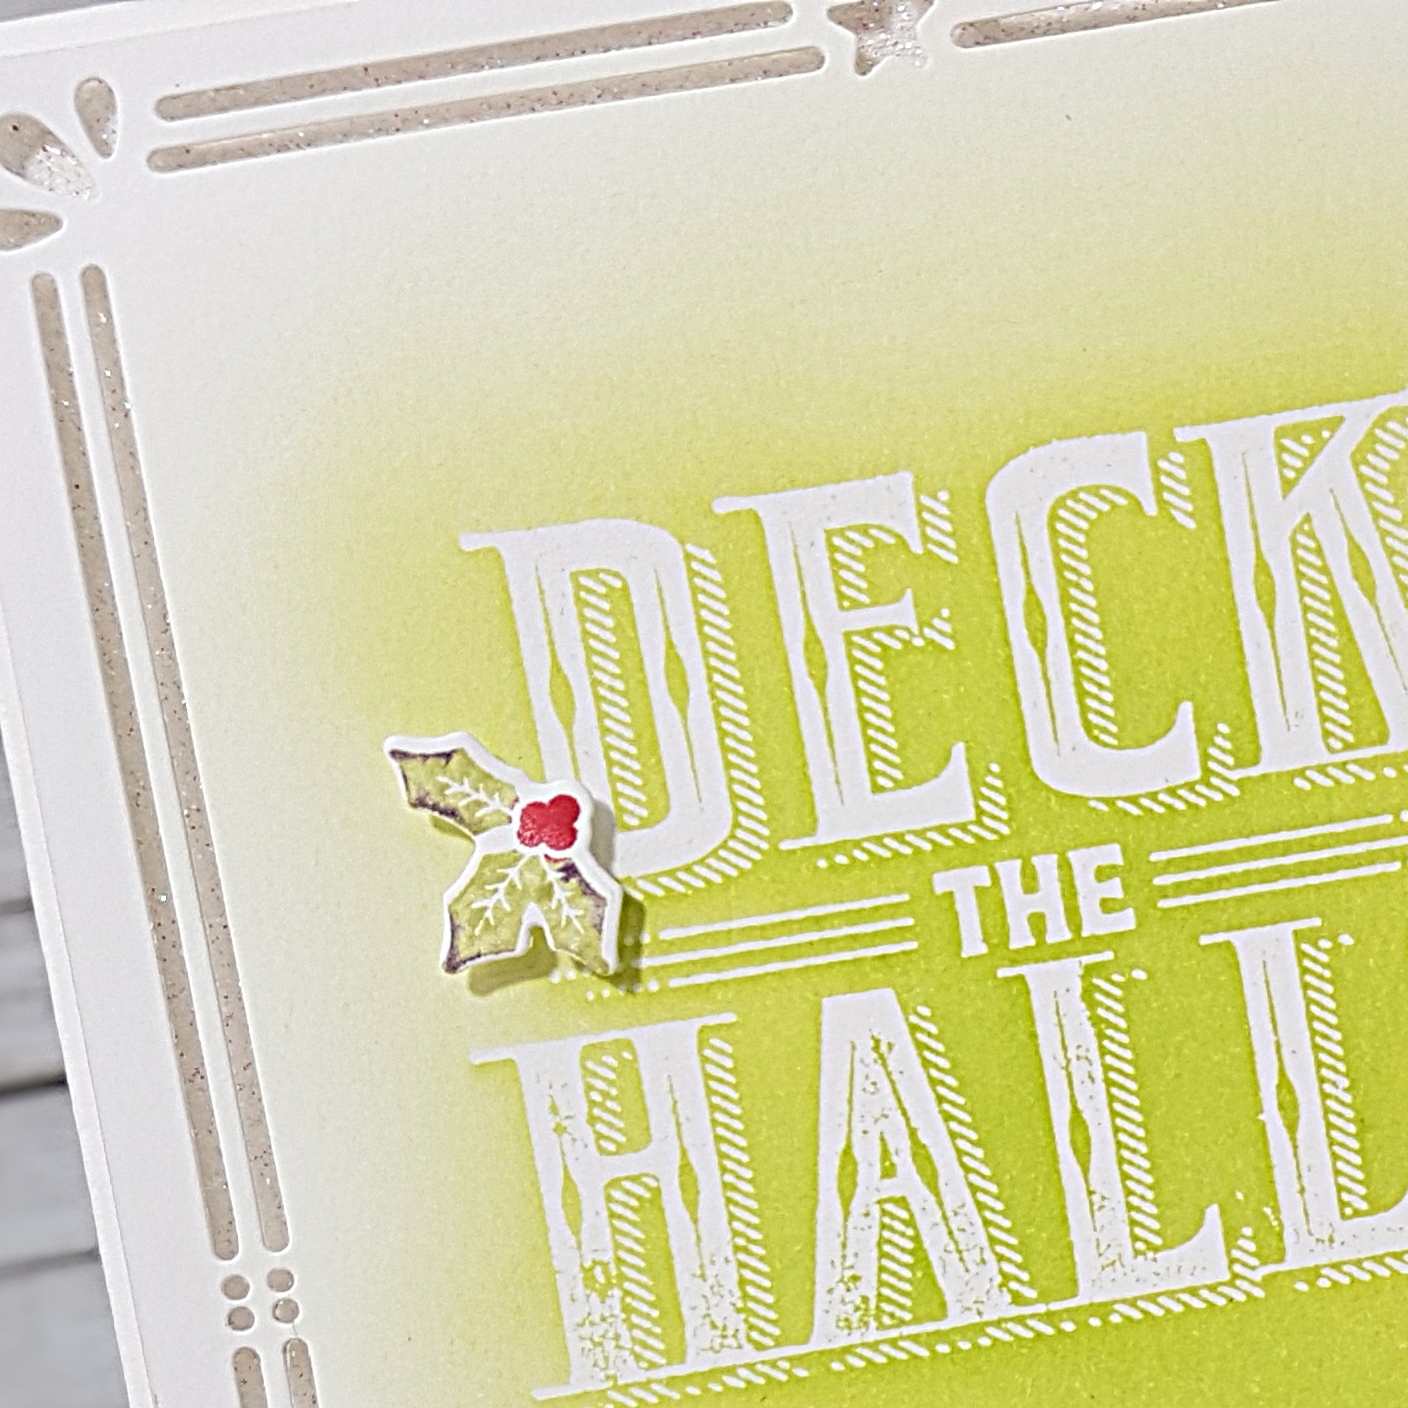
The regular emboss resist technique, as you may know, is when you heat emboss an image, usually with clear embossing powder, then sponge or paint with a water-based ink over the image. The embossed area resists the ink and often it is advised to use a paper towel to polish any ink residue off of the embossed image to make it really pop. With the “Emboss Resist with a Twist” technique, you take it another step: Heat the clear embossed image and, while the embossing powder is still warm and soft from being reheated, wipe it with a paper towel to remove it from the surface of your paper!
Wait, WHAT!?
Why would you want to remove it, you ask? Once it’s removed and all the shine has been wiped clean from your cardstock, the image remaining will be more crisp, more white, and will have a beautiful matte finish.
 Another reason to remove it is when you make a gunky mistake, like I did! I used the regular emboss resist technique, then ran my piece of cardstock through the Big Shot to cut the beautiful border from the Card Front Builder thinlit dies. To my dismay, I discovered that my dirty embossing plates left a bunch of dark specs of old paper dust and bits embedded into my embossed image!! EW! Heating and wiping the embossing finish away allowed me to clean up my mess without having to start over again!
I absolutely love how it looks!
The rest of the card came fairly quickly. I used my markers to ink up the rubber on my holly stamp from the Carols of Christmas stamp set so that I could have Lemon Lime Twist leaves with a spackling of Elegant Eggplant around the edges, but still have Real Red berries. After doing the old huffing-with-your-breath-on-the-stamp-to-remoisten-the-ink technique, I stamped the holly image and die cut it with the co-ordinating die from the Card Front Builder Thinlits. This was attached with half of a Mini Dimensional to my card front.
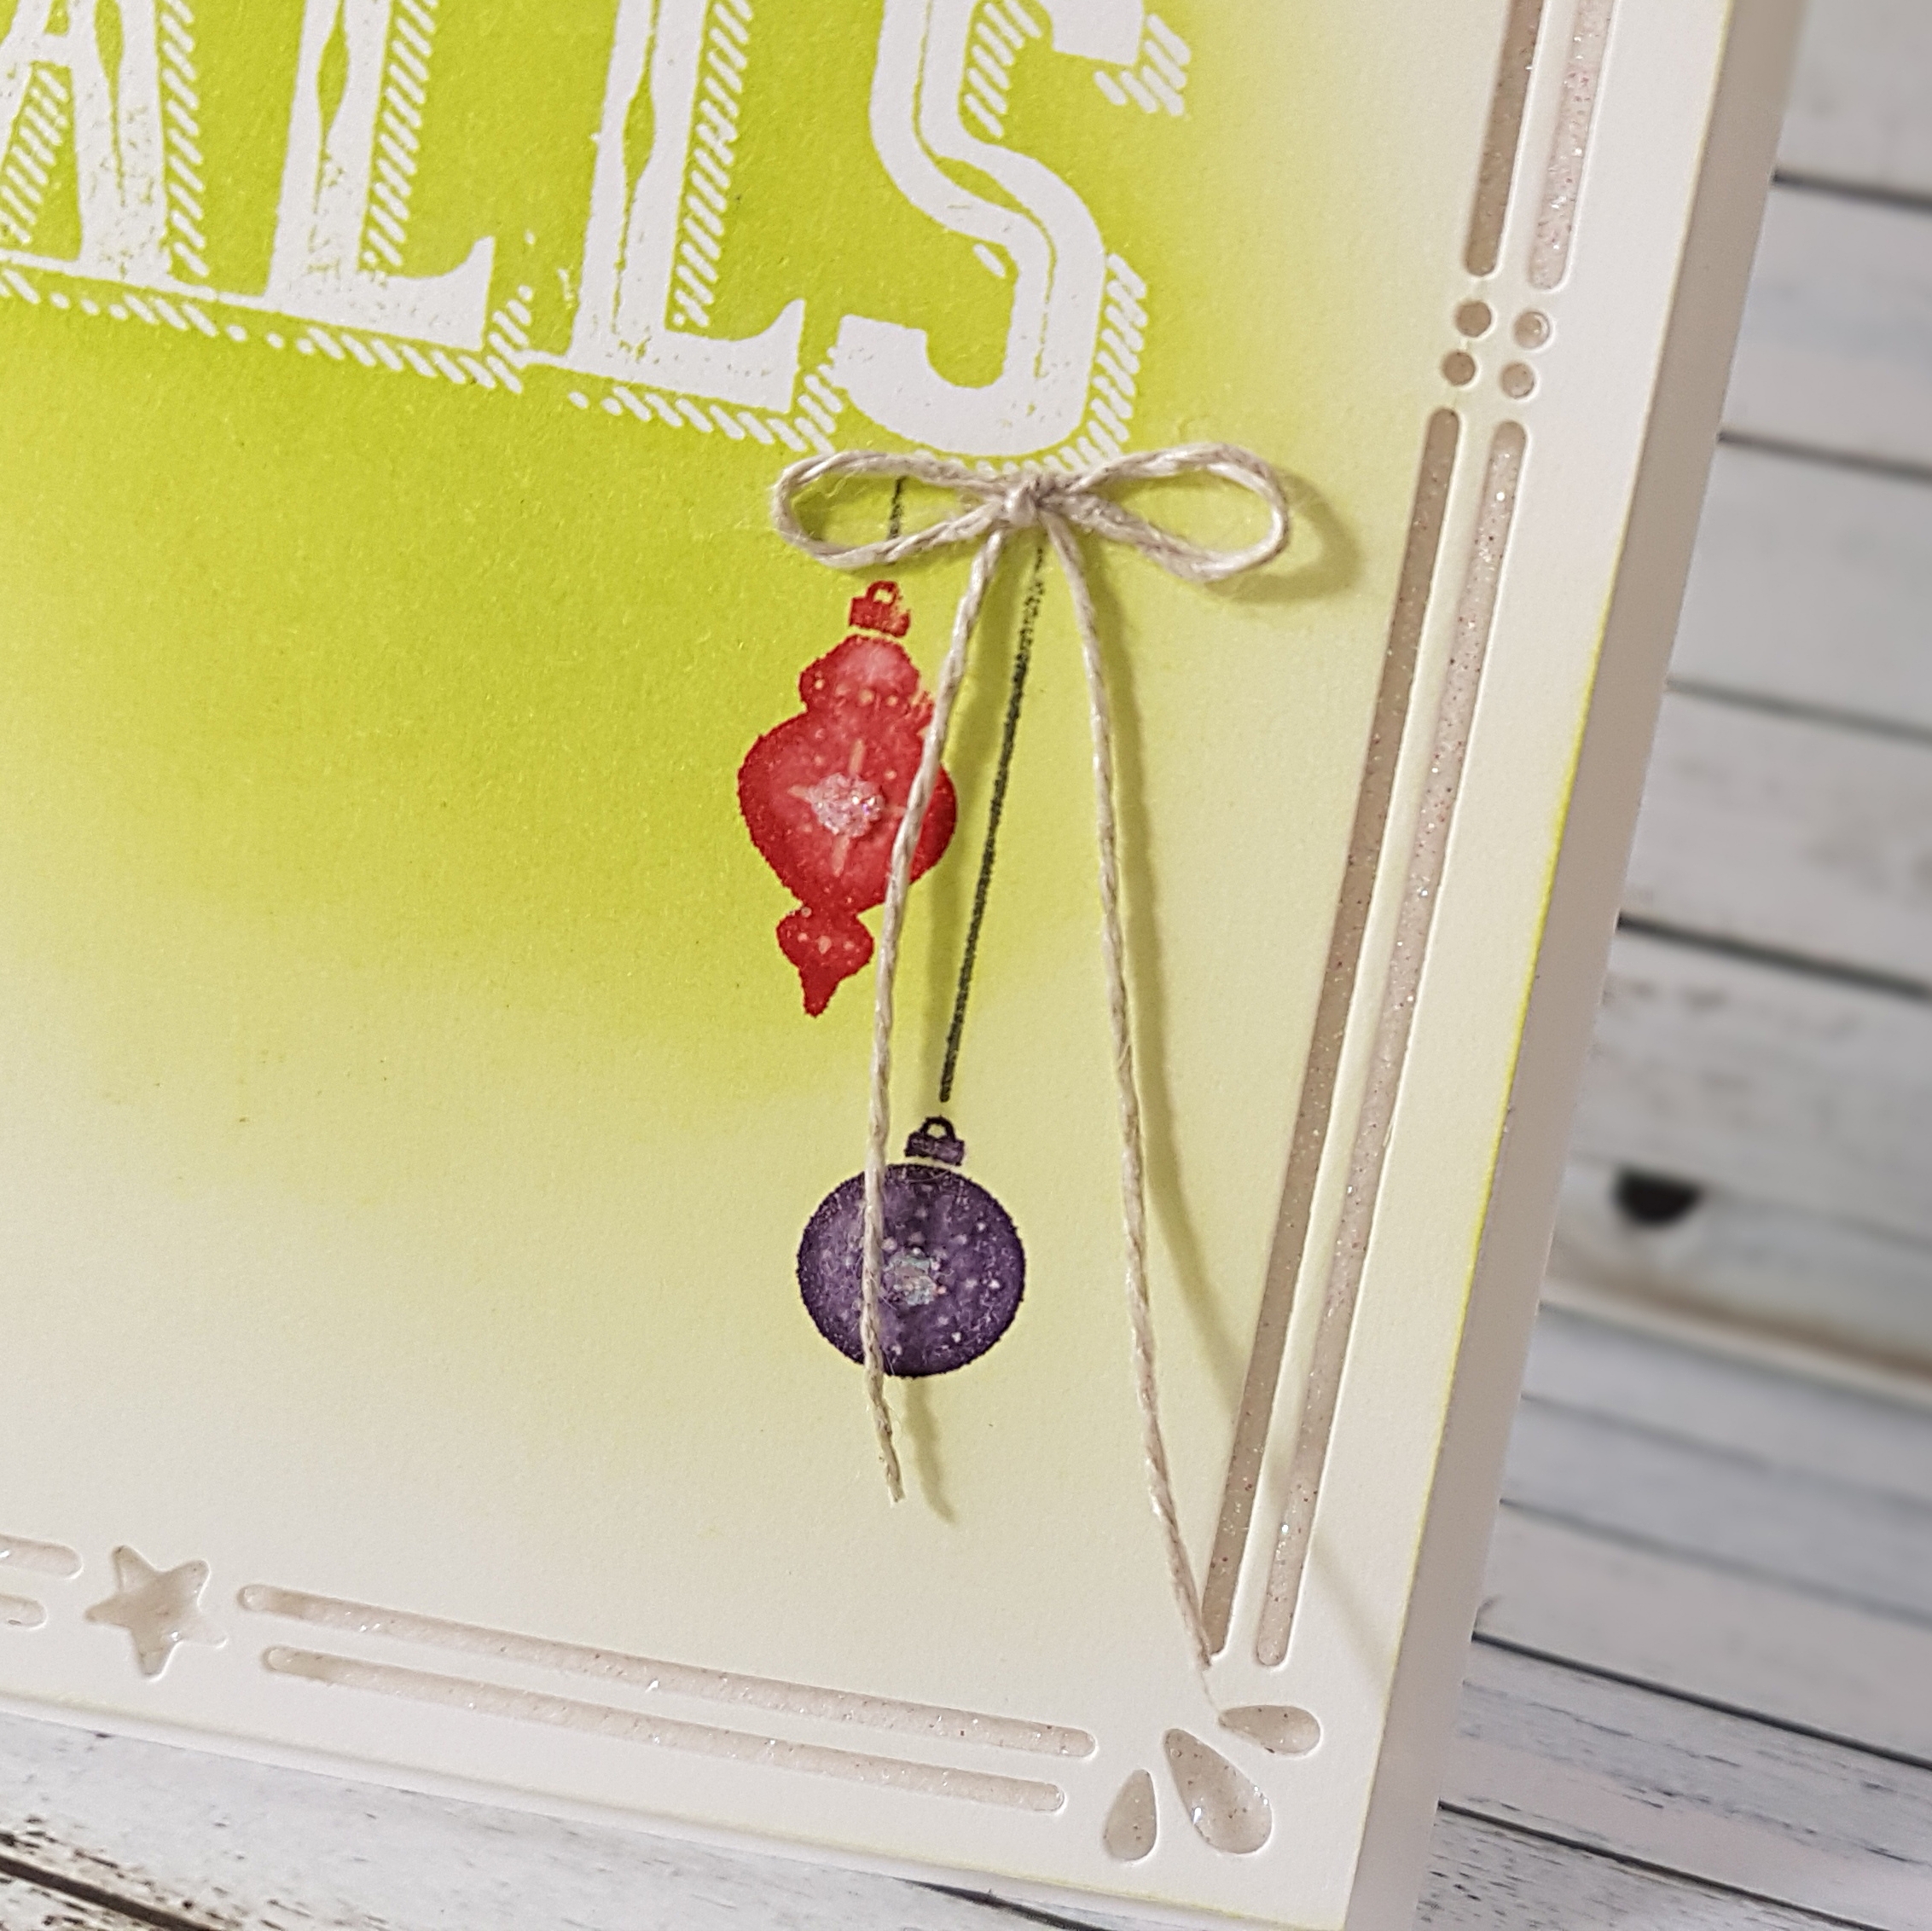 The beautiful little ornament image was also coloured with markers. I used Real Red and Elegant Eggplant to only colour two of the three ornaments, then used Basic Gray for the string of the ornament. I used a sticky note to mask the bottom of the sentiment as my stamp was too tall for where I wanted it, then I huffed once again and stamped the image. I also used a Blender Pen to blend some of the ink in the each ornament on my paper, then added a small bead glue with the Fine Tip Glue Pen to the center of each ornament to I could apply Dazzling Diamonds Glitter. The Linen Thread, tied into a tiny little bow was attached with a carefully rolled Glue Dot.
I wanted a little something-something behind my card front, so I adhered a piece of Dazzling Diamonds Glimmer paper to my card base before attaching my completed card front to it with Stampin’ Up! Dimensionals. Tip: Because of the nature of glitter, even on Glimmer Paper, I was liberal with the Dimensionals and used generous pressure to ensure good contact the the Glimmer paper. If this isn’t done, you might find that your card front detaches without your permission!
 If you’re in my area, this card will be offered at my technique class. Contact me if you’d like to join us!
Be sure to give this colour combination a try and load it up on the As You See It Challenge page so we can see your beautiful creations.

August 22, 2017 @ 1:36 pm
Love this Amy – so pretty and such a clever use of this technique. I love the lime with just a little accent of the other two colours.
September 8, 2017 @ 7:39 am
Thank you, Joanne.