2017

Macaron Dreams

Today I want to share a card with you that I CASEd from the very talented Teneale Williams. If you don’t know her artwork, you definitely should have a look. This gal makes beautiful things!! Her original card used a different stamp and a different colour combination, but the layout and the background technique is pretty close.

Macaron Dreams by Amy Jasper www.inkingonthefly.com
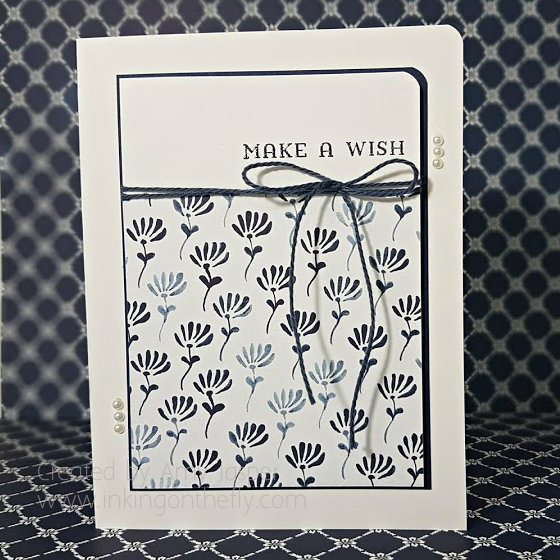
I think the background technique is the most interesting part of this card. This is created using the small woodgrain stamp from the Timeless Textures stamp set and Versamark ink. The image is stamped repeatedly over the page first horizontally, then again vertically, overlapping the images over and over. So easy!

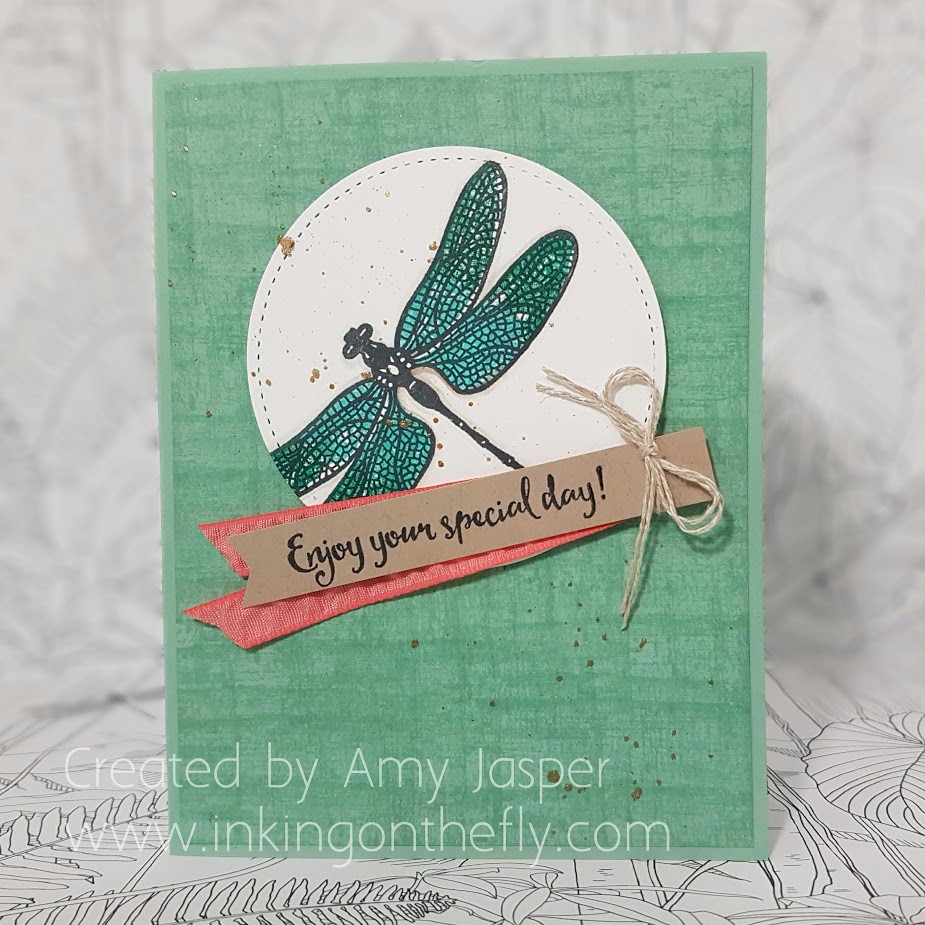
The dragonfly image from the Dragonfly Dreams stamp set was stamped with Tuxedo Momento Black ink, then the solid wings image was stamped over top after applying ink to the stamp itself with markers – Emerald Envy on the tips and Bermuda Bay closer where the wings would connect with the body. I also added some shading around the dragonfly using a Blender Pen and some Crumb Cake ink.  After stamping the images, I die cut the circle using the largest circle of the Stitched Shapes Framelits. This I adhered to the textured backgound layer with Stampin’ Up Dimensionals.

Macaron Dreams card by Amy Jasper www.inkingonthefly.com
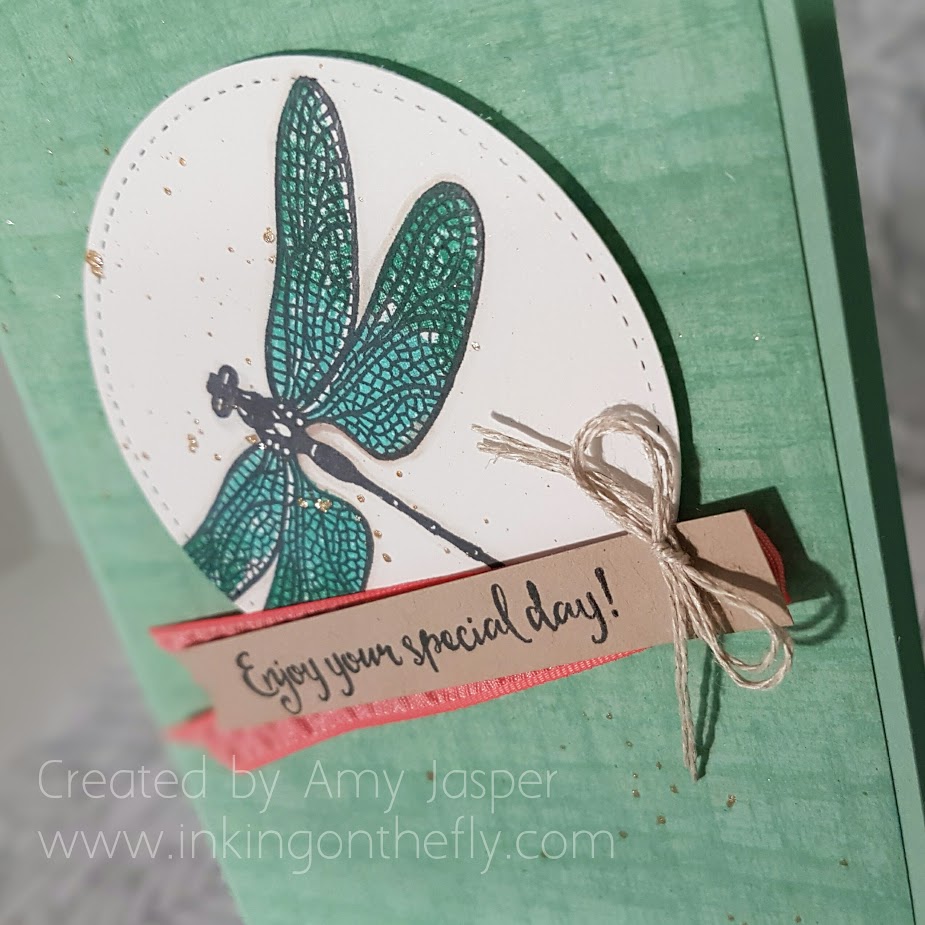
After adhering the circle, I used the Gold Wink of Stella brush and tapped it on my finger over the two layers to create the splash of gold flecks. The layers were then adhered to the card base.

The sentiment was stamped on a strip of Crumb Cake cardstock, of which I flagged the one end with my paper snips. I folded a strip of the Flirty Flamingo and tied it to the back of the Crumb Cake cardstock with a doubled up piece of Linen Thread. This was all attached to the front of the card with one Stampin’ Up Dimensional and a few well placed Glue Dots.

I’m happy to report that this card is pretty enough that I would be happy to show it off, but easy enough that my 8 year old was able to make one as well. I’d show you a picture of her perfect stamping, but she already wrote inside and stuck it in an envelope to give to her sister for her birthday.

I could learn a few things from this girl!

Macaron Dreams card by Amy Jasper www.inkingonthefly.com

Save

Hugs and Kisses (but mostly kisses!)

Let’s start at the beginning – it’s a very good place to start.

This card design begins with a sketch.

#142Almost as soon as I saw this sketch, I thought of using lips instead of the stars. I have been obsessing over my lips a little bit lately as I have discovered some new lipstick that stays on all day! (I may or may not have a mild addiction at this point, but I’ll keep you posted). A unique thing about my new lipstick is that you finish the application with a clear and very glossy gloss to “seal” in the colour and to nourish and moisturize your lips. I’m not used to having such glossy lips and, let me tell ya, I had to apply a LOT of that gloss in the beginning as my lips adjusted to the change in my pucker routine. All that to say, I wanted the lips on my card to be GLOSSY!!

Hugs and Kisses (but mostly kisses) by Amy Jasper www.inkingonthefly.comThe stamps used on this card are from the Sealed with Love photopolymer stamp set by Stampin’ Up. I attached the image of the lips and the word “kiss” on the same block so I could stamp them together. Because I wanted glossy lips, I used Clear Emboss powder and heat set them. Now, if you have ever added emboss powder to Stampin’ Up Classic inks, you may have noticed that the ink often dries faster than you can apply and heat the powder, resulting in a flat, very un-glossy (let’s call it … “matte”), finish. I wanted glossy, dag-nab-it! So, I first inked my stamp in Versamark, then in the classic ink of my choosing. That way, the Versamark ink would help the area stay moist long enough for my powder to stick to it to be heated to a beautiful glossy gloss finish.Hugs and Kisses (but mostly kisses) by Amy Jasper www.inkingonthefly.com

You may be wondering how I stamped the image 12 times and didn’t go just a little bit nutty having to clean off my stamps each time before inking again with Versamark (we all KNOW what happens when you use a dirty stamp on your Versamark ink pad – let’s all try to avoid that, shall we!). So, after inking my stamp with Versamark, I would then ink it into the coloured ink, stamp it, then reapply only the coloured ink, stamp it, then I did it a third time. After that, I quickly cleaned off my stamp and started again with Versamark and the next colour. Until I filled in the area with lips and kisses.

The hugs and kisses sentiment was stamped with Tuxedo Black Momento Ink. I wrapped the Basic Black Baker’s Twine around the Whisper White Cardstock twice before tying a bow.Hugs and Kisses (but mostly kisses) by Amy Jasper www.inkingonthefly.com

I didn’t feel like using doilies (as the sketch shows), so I used one of the photopolymer stamps from the Sealed with Love Stamp Set and curved it on my block as much as I could (it kept lifting up in the middle because I curved it so sharply, but I persevered!). I stamped it twice on the card base with Tuxedo Black Momento ink.

For added interest, I used the Project Life Corner Rounder Punch on the upper right hand corner of all my paper layers. The Basic Black Cardstock is adhered directly to the Flirty Flamingo card base, then the Whisper White layer is attached with Stampin’ Up Dimensionals.

The final touch was to add the tiny Basic Rhinestones to the heart flourishes on the card.

All in all, this card was pretty easy to make. I would even go as far as to call it quick and simple! You could even skip the embossing and call it easy-peasy!!

How about you try the sketch for yourself now. You might even feel pretty happy with it and upload it the the As You See It Challenge. Hey, you might even be picked as a favourite!Hugs and Kisses (but mostly kisses) by Amy Jasper www.inkingonthefly.com

Save

Save

Blue and White Wishes

I have a sweet and simple card for you today AND I have another sweet and simple card (but a little less so) for you tomorrow! WHAAAAA!!?? Two blog post in a row!? I KNOW!! I can hardly believe it myself!

My card today was inspired by the As You See It Challenge #142 – a sketch. AND it was also inspired by NOT pink, lol! When all of the As You See It designers unveiled our designs for this challenge, we discovered that the majority of us used PINK! I guess we all have Valentine’s cards on the brain.

So, friends, tomorrow, you will see my pink card, but today you will see my blue and white wishes card that I threw together at the last minute and loved how it turned out – so fresh and clean.

Here’s the As You See It Challenge sketch:

#142When I was thinking of “not pink”, my thoughts turned to the unopened pack of Floral Boutique Designer Series Paper that has been sitting in my stamp room (I keep trying to make myself call it a “studio”, but it always sounds too pretentious). It has some pretty images that I thought could work for this sketch.

Blue and White Wishes card by Amy Jasper www.inkingonthefly.comI like the simplicity of this card AND it only took a few minutes to put together. BONUS!

I used a Thick Whisper White card base, on which I used my Project Life Corner Rounder Punch on the top right corners for added interest. The supplemental layers also have the top right corner rounded.

The 3-1/4″ x 3-1/4″ square piece of Floral Boutique Designer Series paper was applied to the bottom portion of the 3-1/4″ x 4-1/2″ piece of Whisper White cardstock. The sentiment from the Window Shopping stamp set was stamped with Night of Navy ink and embossed with Clear Emboss powder and my Heat Tool. To have the powder stick properly to the ink, I first inked my stamp with Versamark ink, then inked it with Night of Navy, resulting in a perfectly embossable (it’s a word, right?) sentiment!

Blue and White card by Amy Jasper www.inkingonthefly.comThe Night of Navy Solid Baker’s Twine was the perfect match with the Floral Boutique paper and the Night of Navy Cardstock. This I wrapped around the Whisper White cardstock and designer paper combo and attached it with Stampin’ Up Dimensionals to the 3-3/8″ x 4-5/8″ Night of Navy layer (which was adhered directly to the Thick Whisper White card base). The little rows of three Basic Pearls were the perfect finishing touch for this simple, yet elegant, card.

Now you try! Use the sketch from the As You See It Challenge blog and see what wonderful things you can create!!