I will not be able to write many details today as one of my fingers is impeding my ability to type on my keyboard. You see, I had an incident with a knife while chopping vegetables and seriously injured the index finger of my left hand (not my dominant hand, thankfully). I have not been crafting much since this happened over a week ago as everything takes a bit longer to do with the limits and pain that my finger has been causing me.
I was able to do some crafting yesterday and am happy to share my finished project.
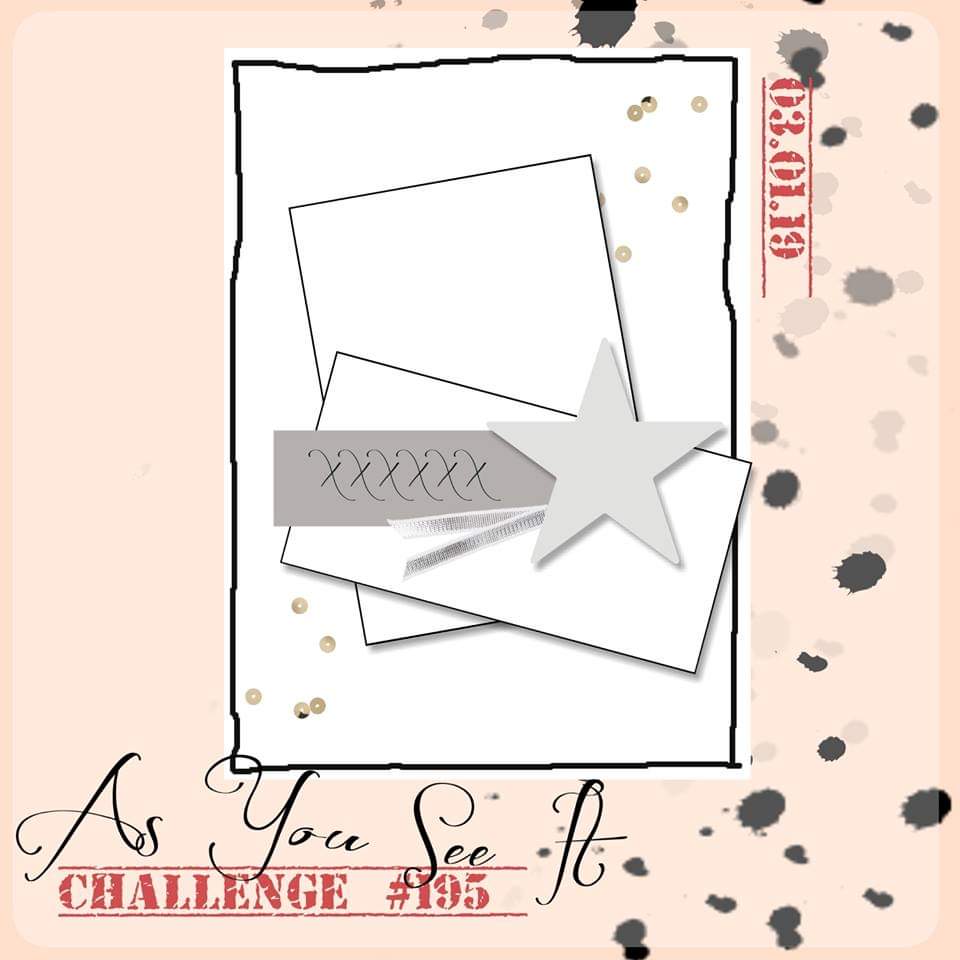
This is the sketch challenge from the As You See It Challenge Blog that inspired my design.
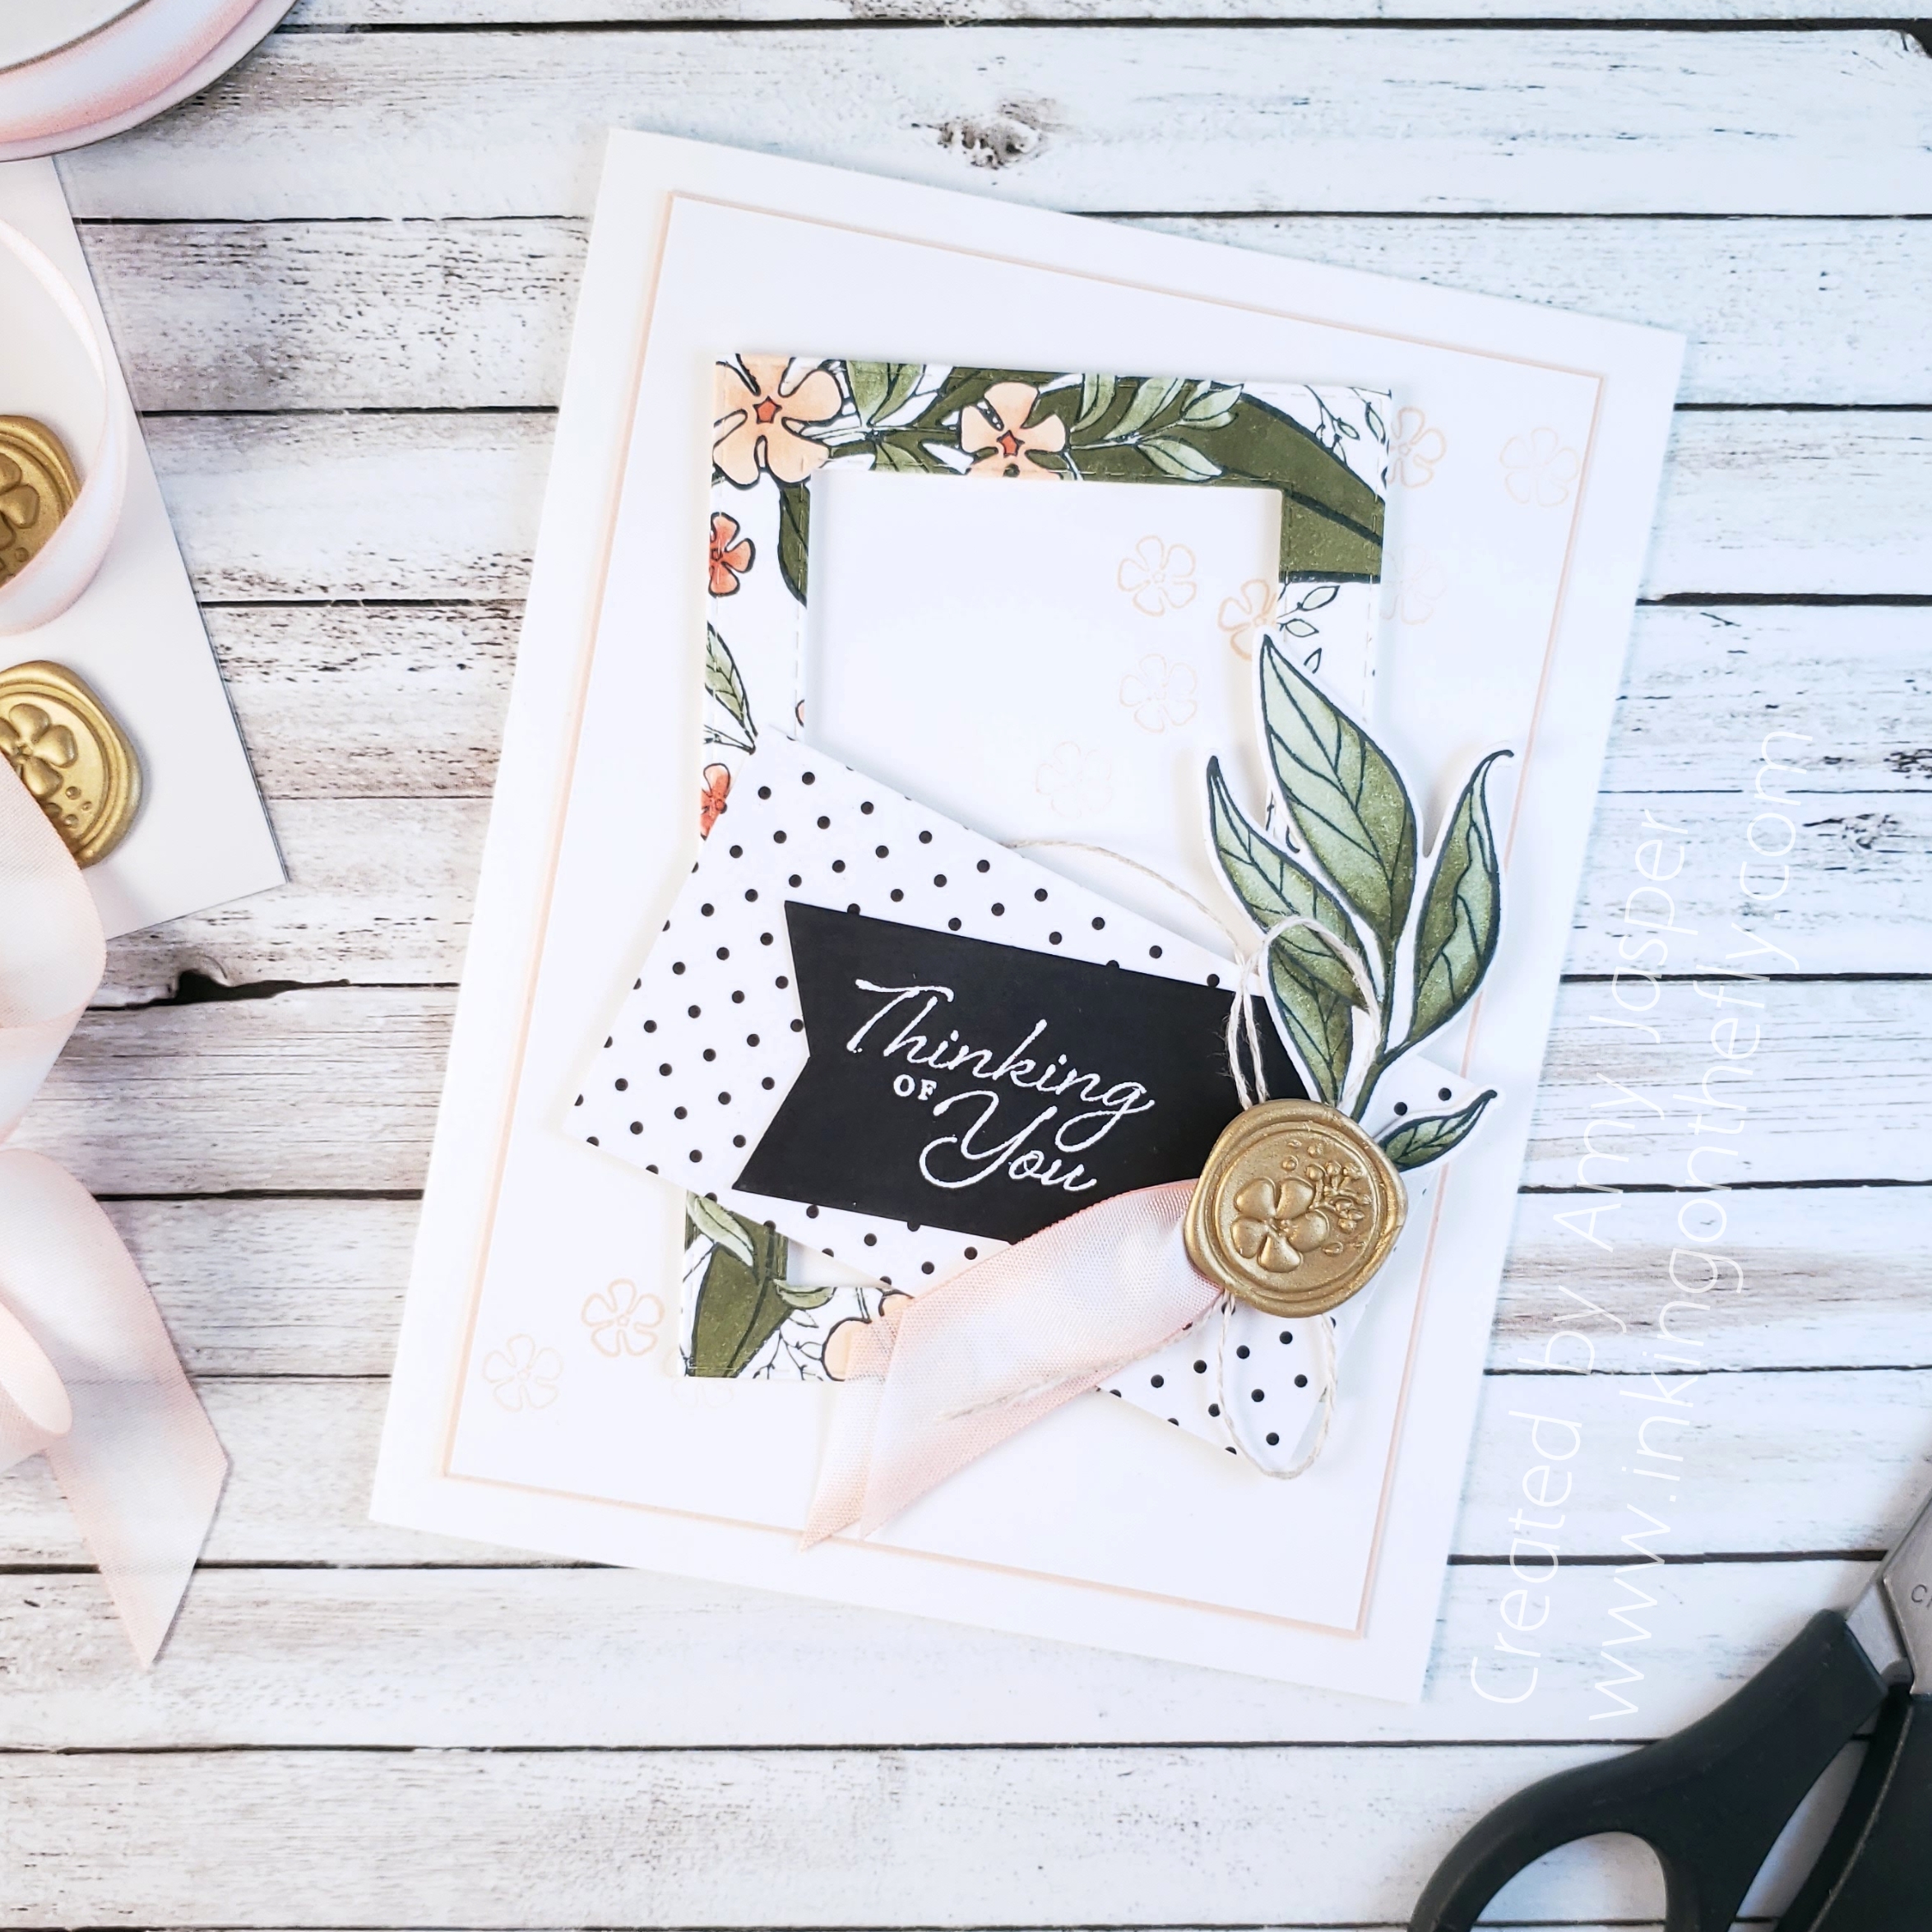
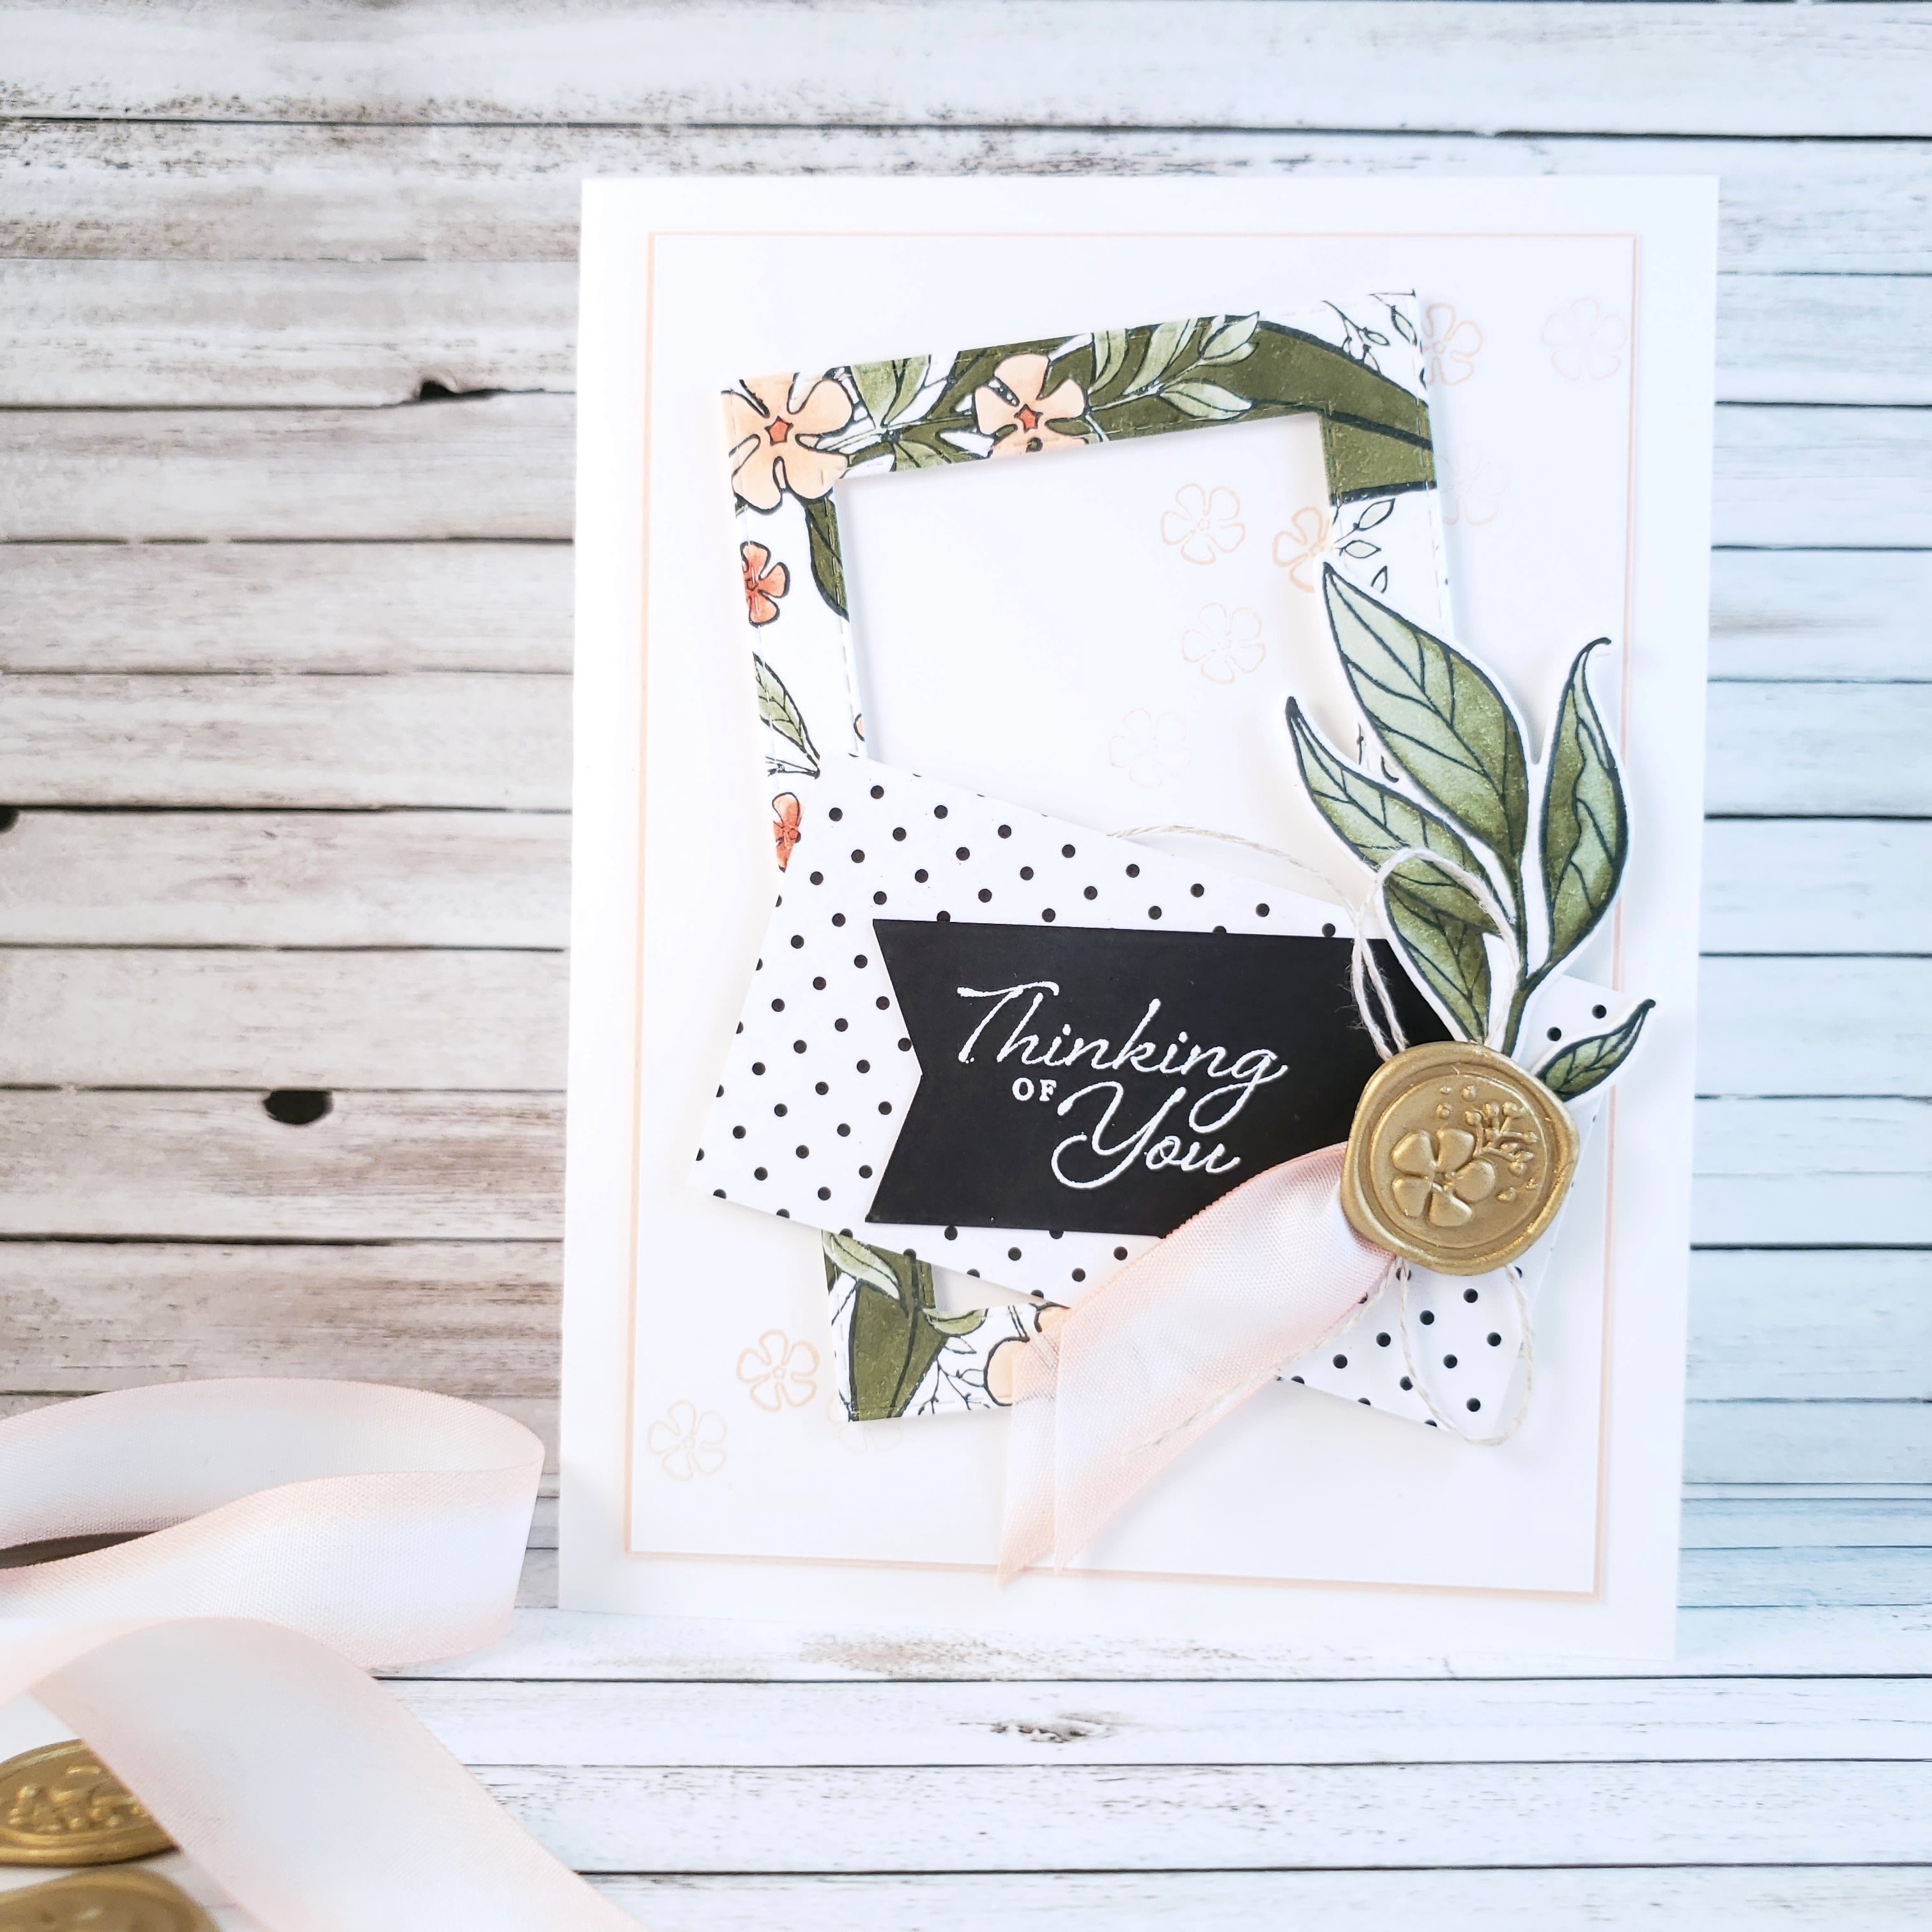
I chose to use the Wonderful Romance Stamp Set and my Stampin’ Blends Markers for this pretty card.
The stamped and coloured paper was cut into a rectangle frame using the Stitched Rectangle Framelits. The soft colours in corals and greens make this design soft and bright at the same time.
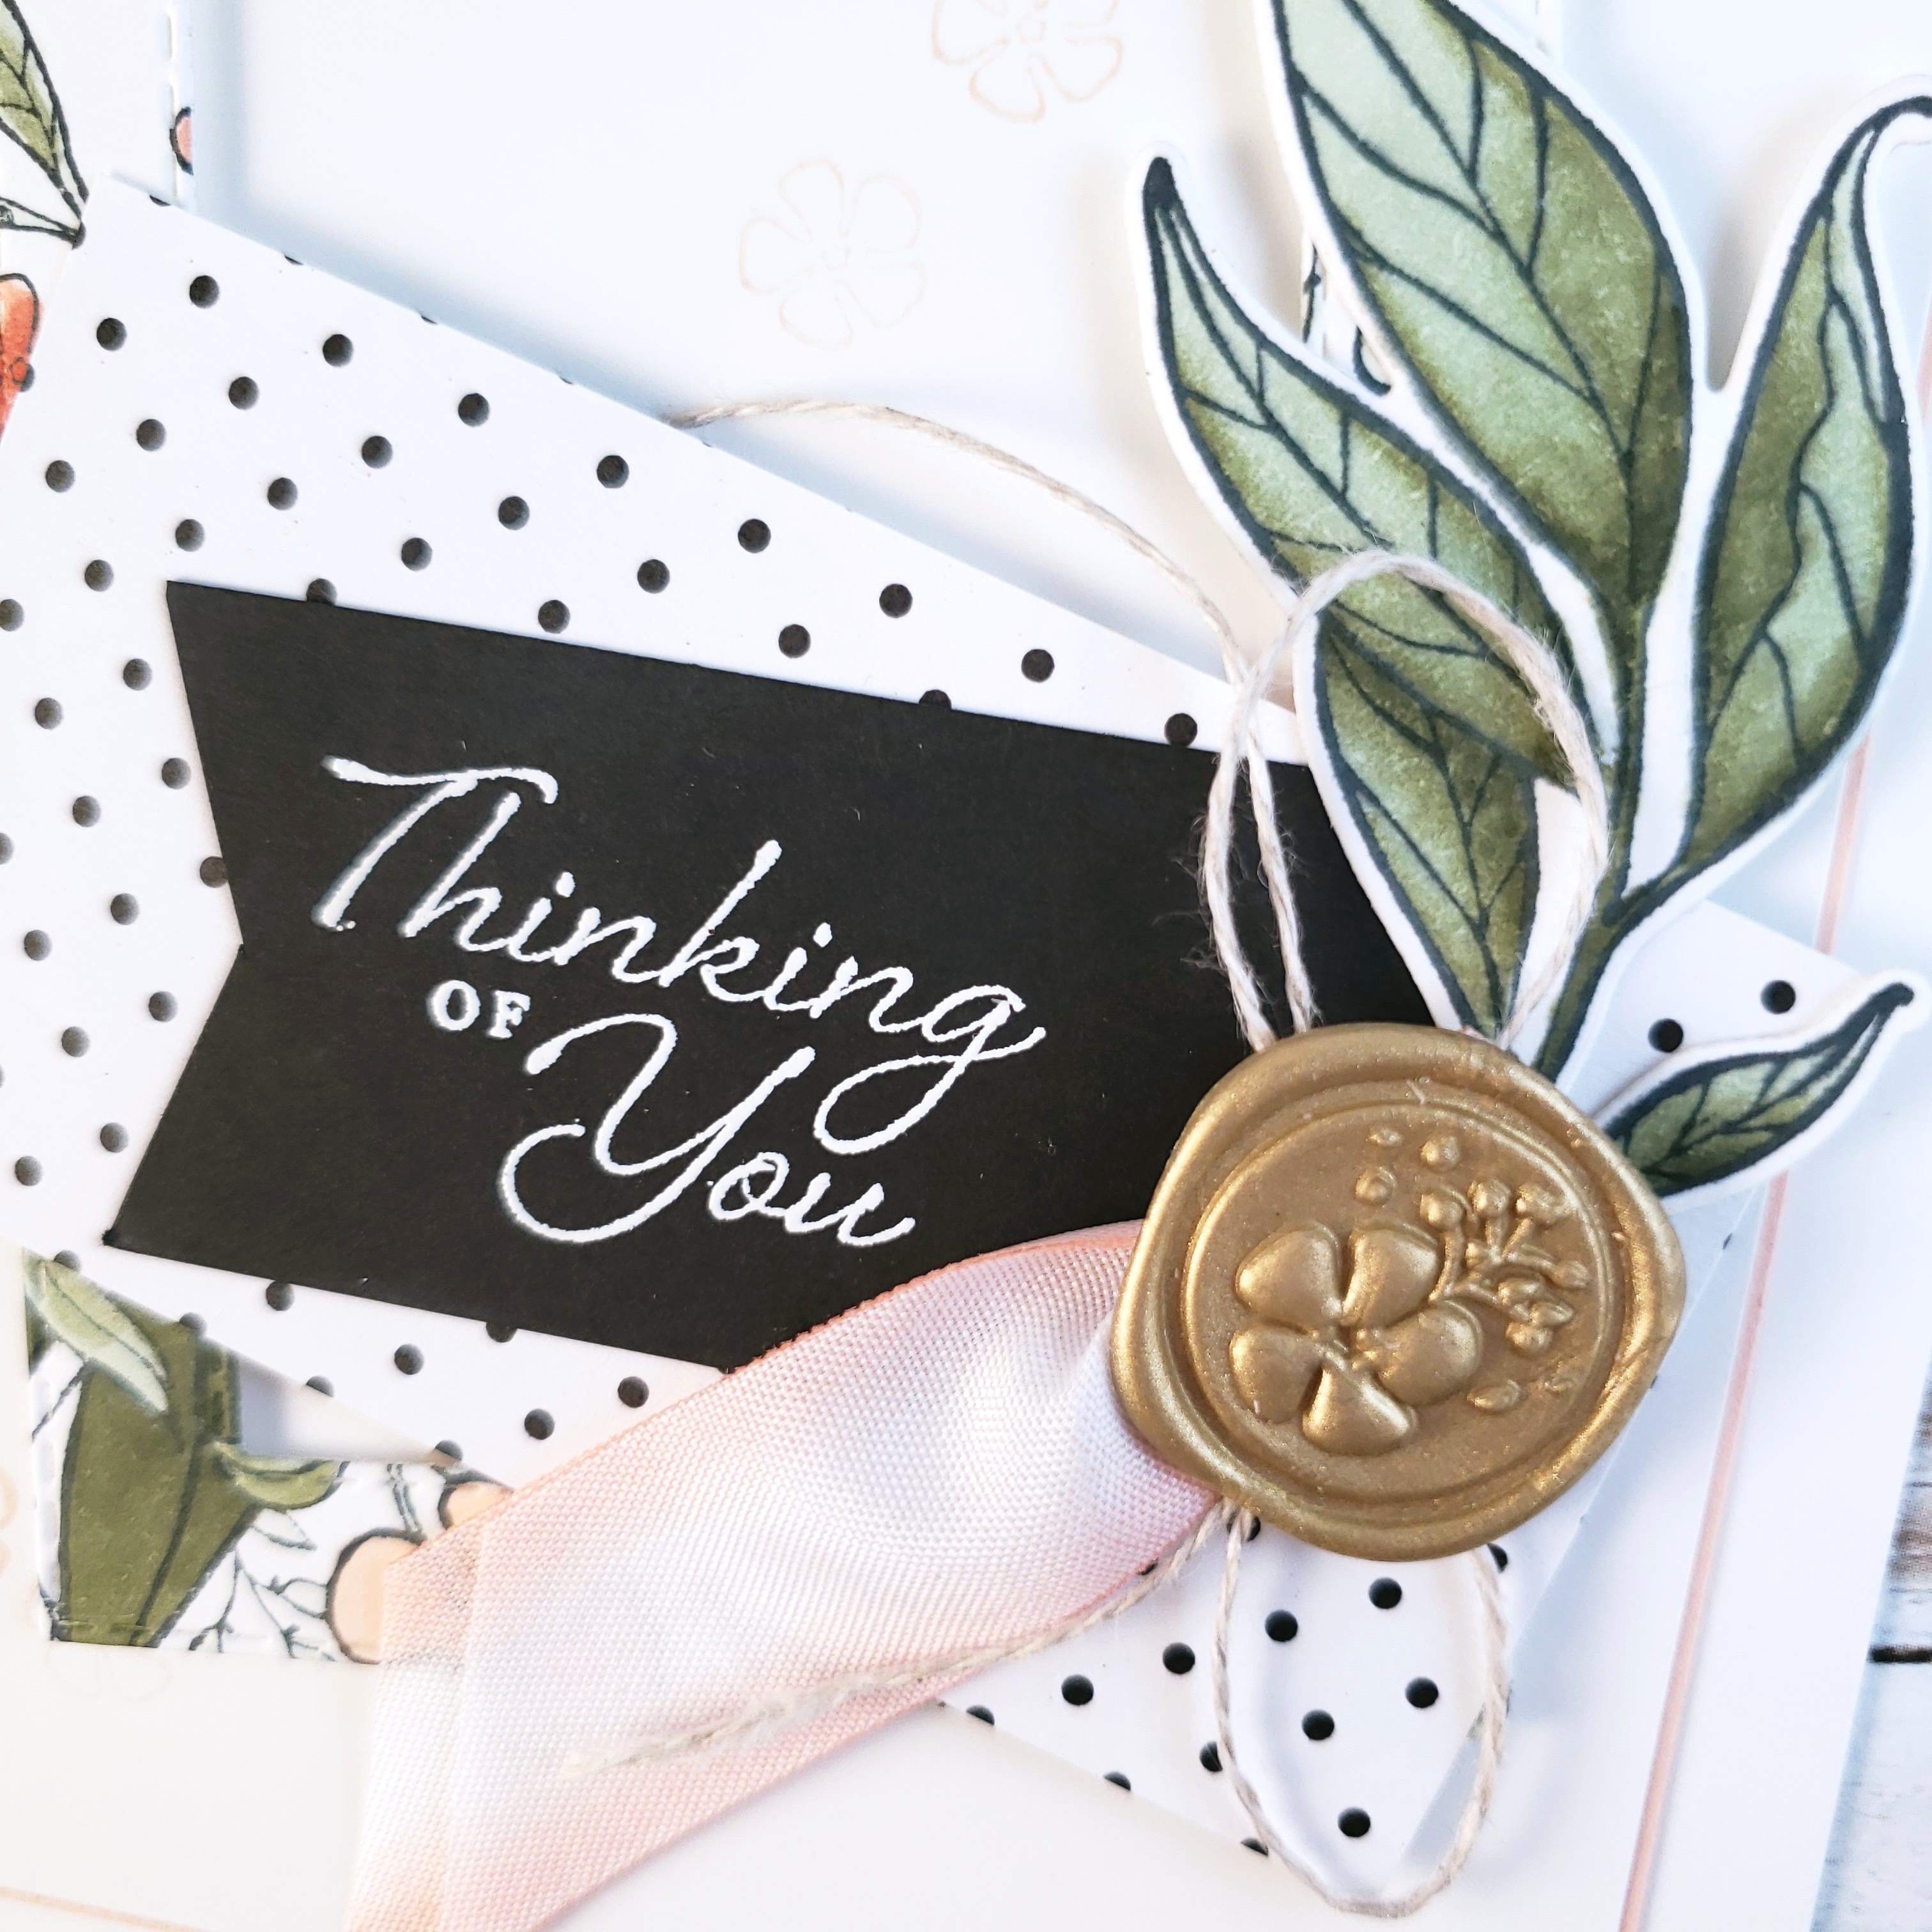
In the close-up, you can see the polka dot pattern paper from the Botanical Butterfly Designer Series Paper and the vintage gold seal embellishment with the beautiful ribbon. As usual, all of the supplies I use are from Stampin’ Up! and are available for purchase on my online store.
Leave a comment to say hello or ask any questions. I’ll be happy to hear from you!
What is a simple card for you? I often find it difficult to create a simple card design, but I think I’m getting better at it, mostly out of necessity as I frequently find myself in a hurry. I call my business Inking on the Fly for just that reason – I’m often doing things on the fly! I don’t like it that way. I much prefer to have the time to enjoy the process – to get lost in my creations. Inking on the fly is better than not inking at all!
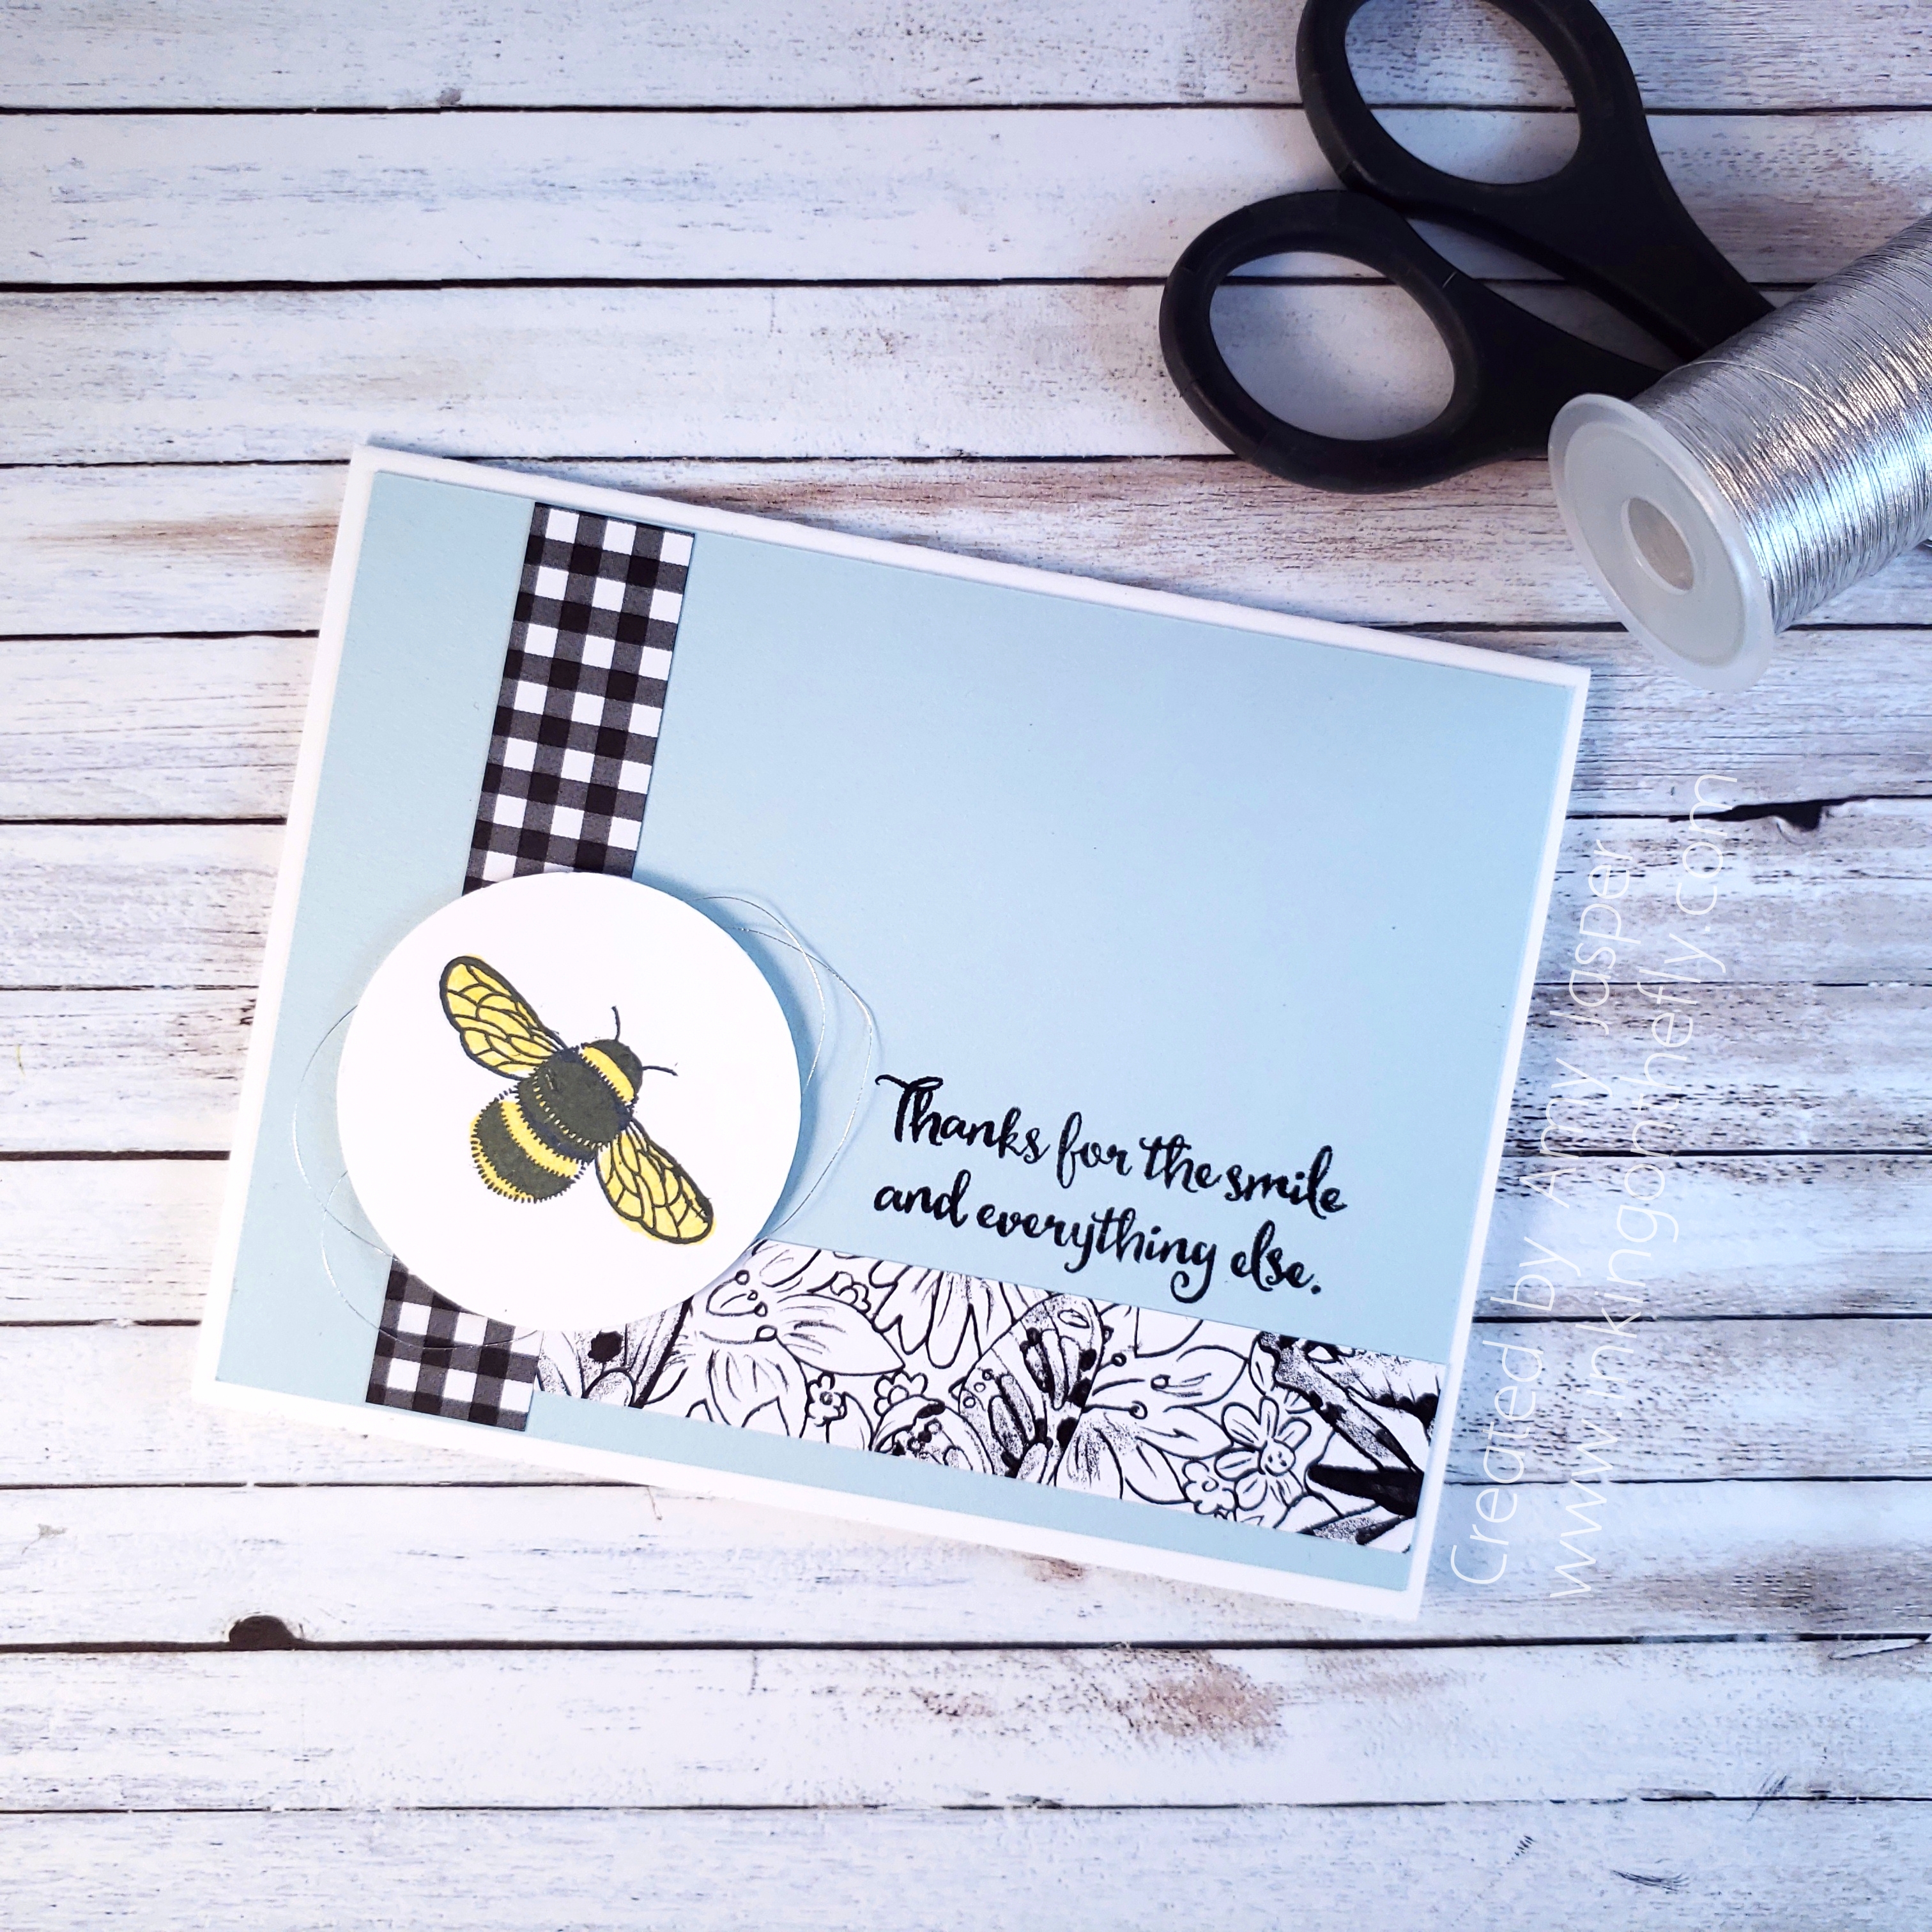
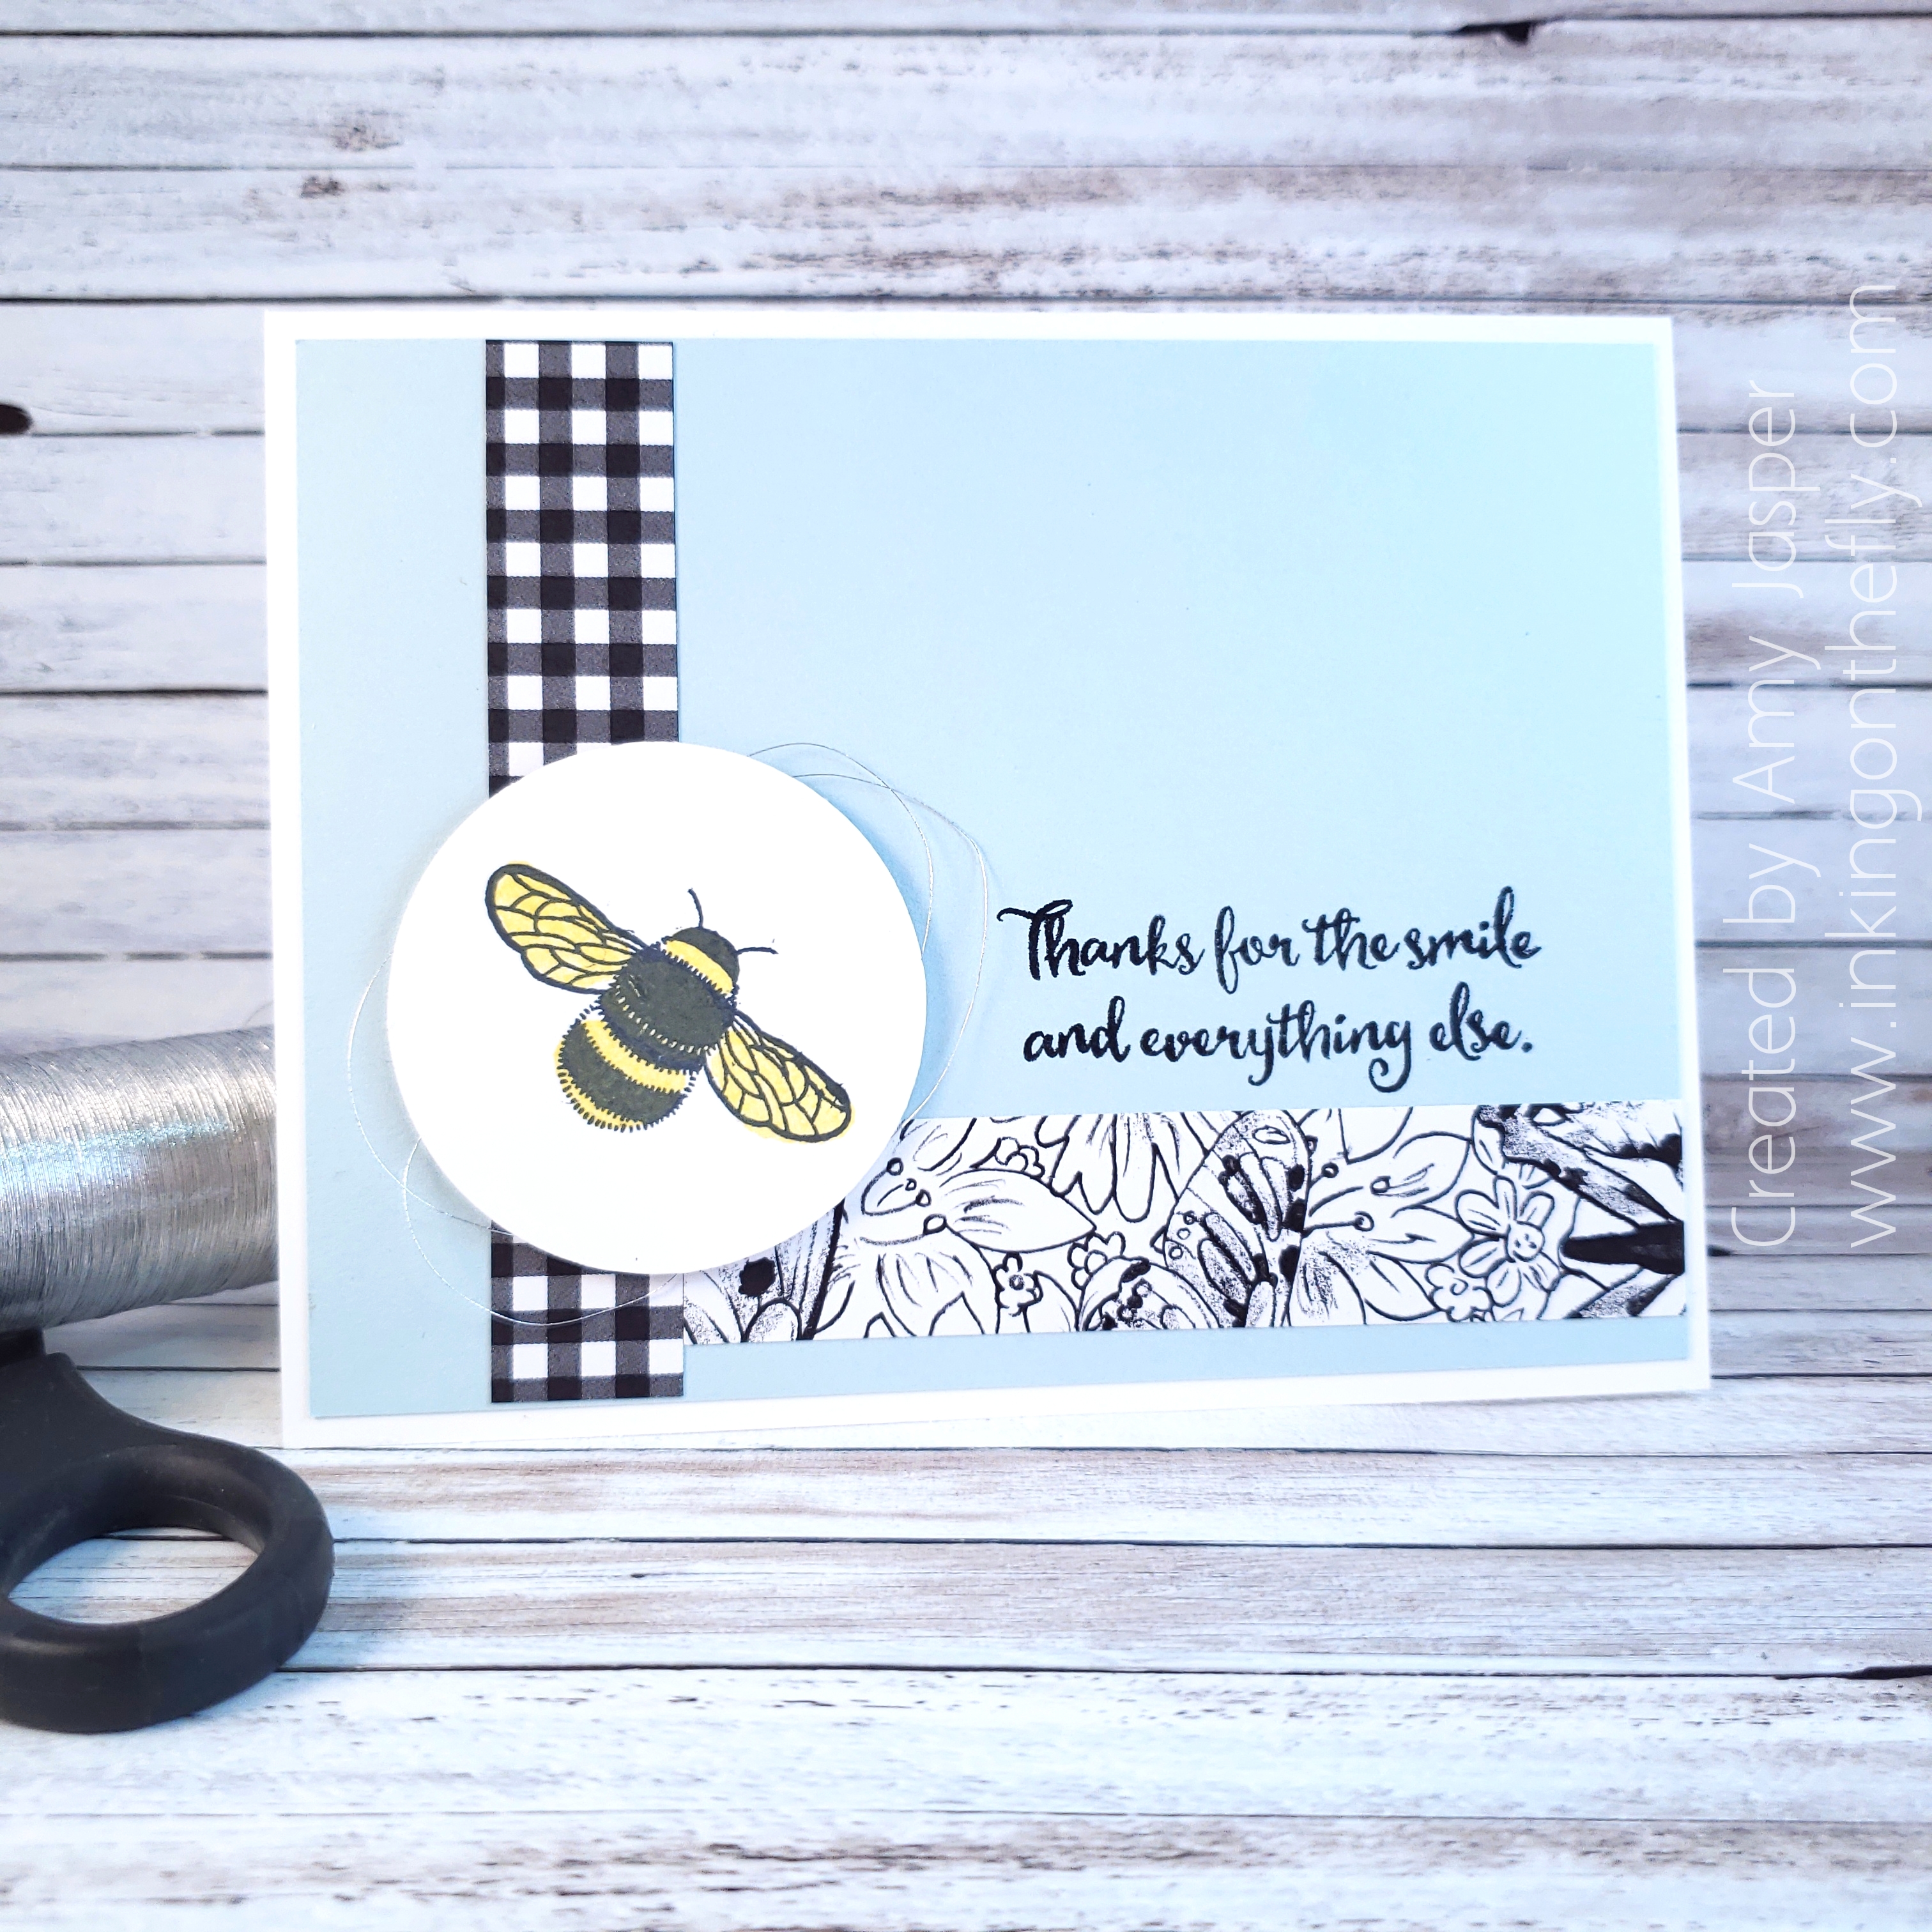
When I think simple, I think of punches and patterned paper. No Big Shot, no sponging, no fussy cutting, and limited or no colouring.
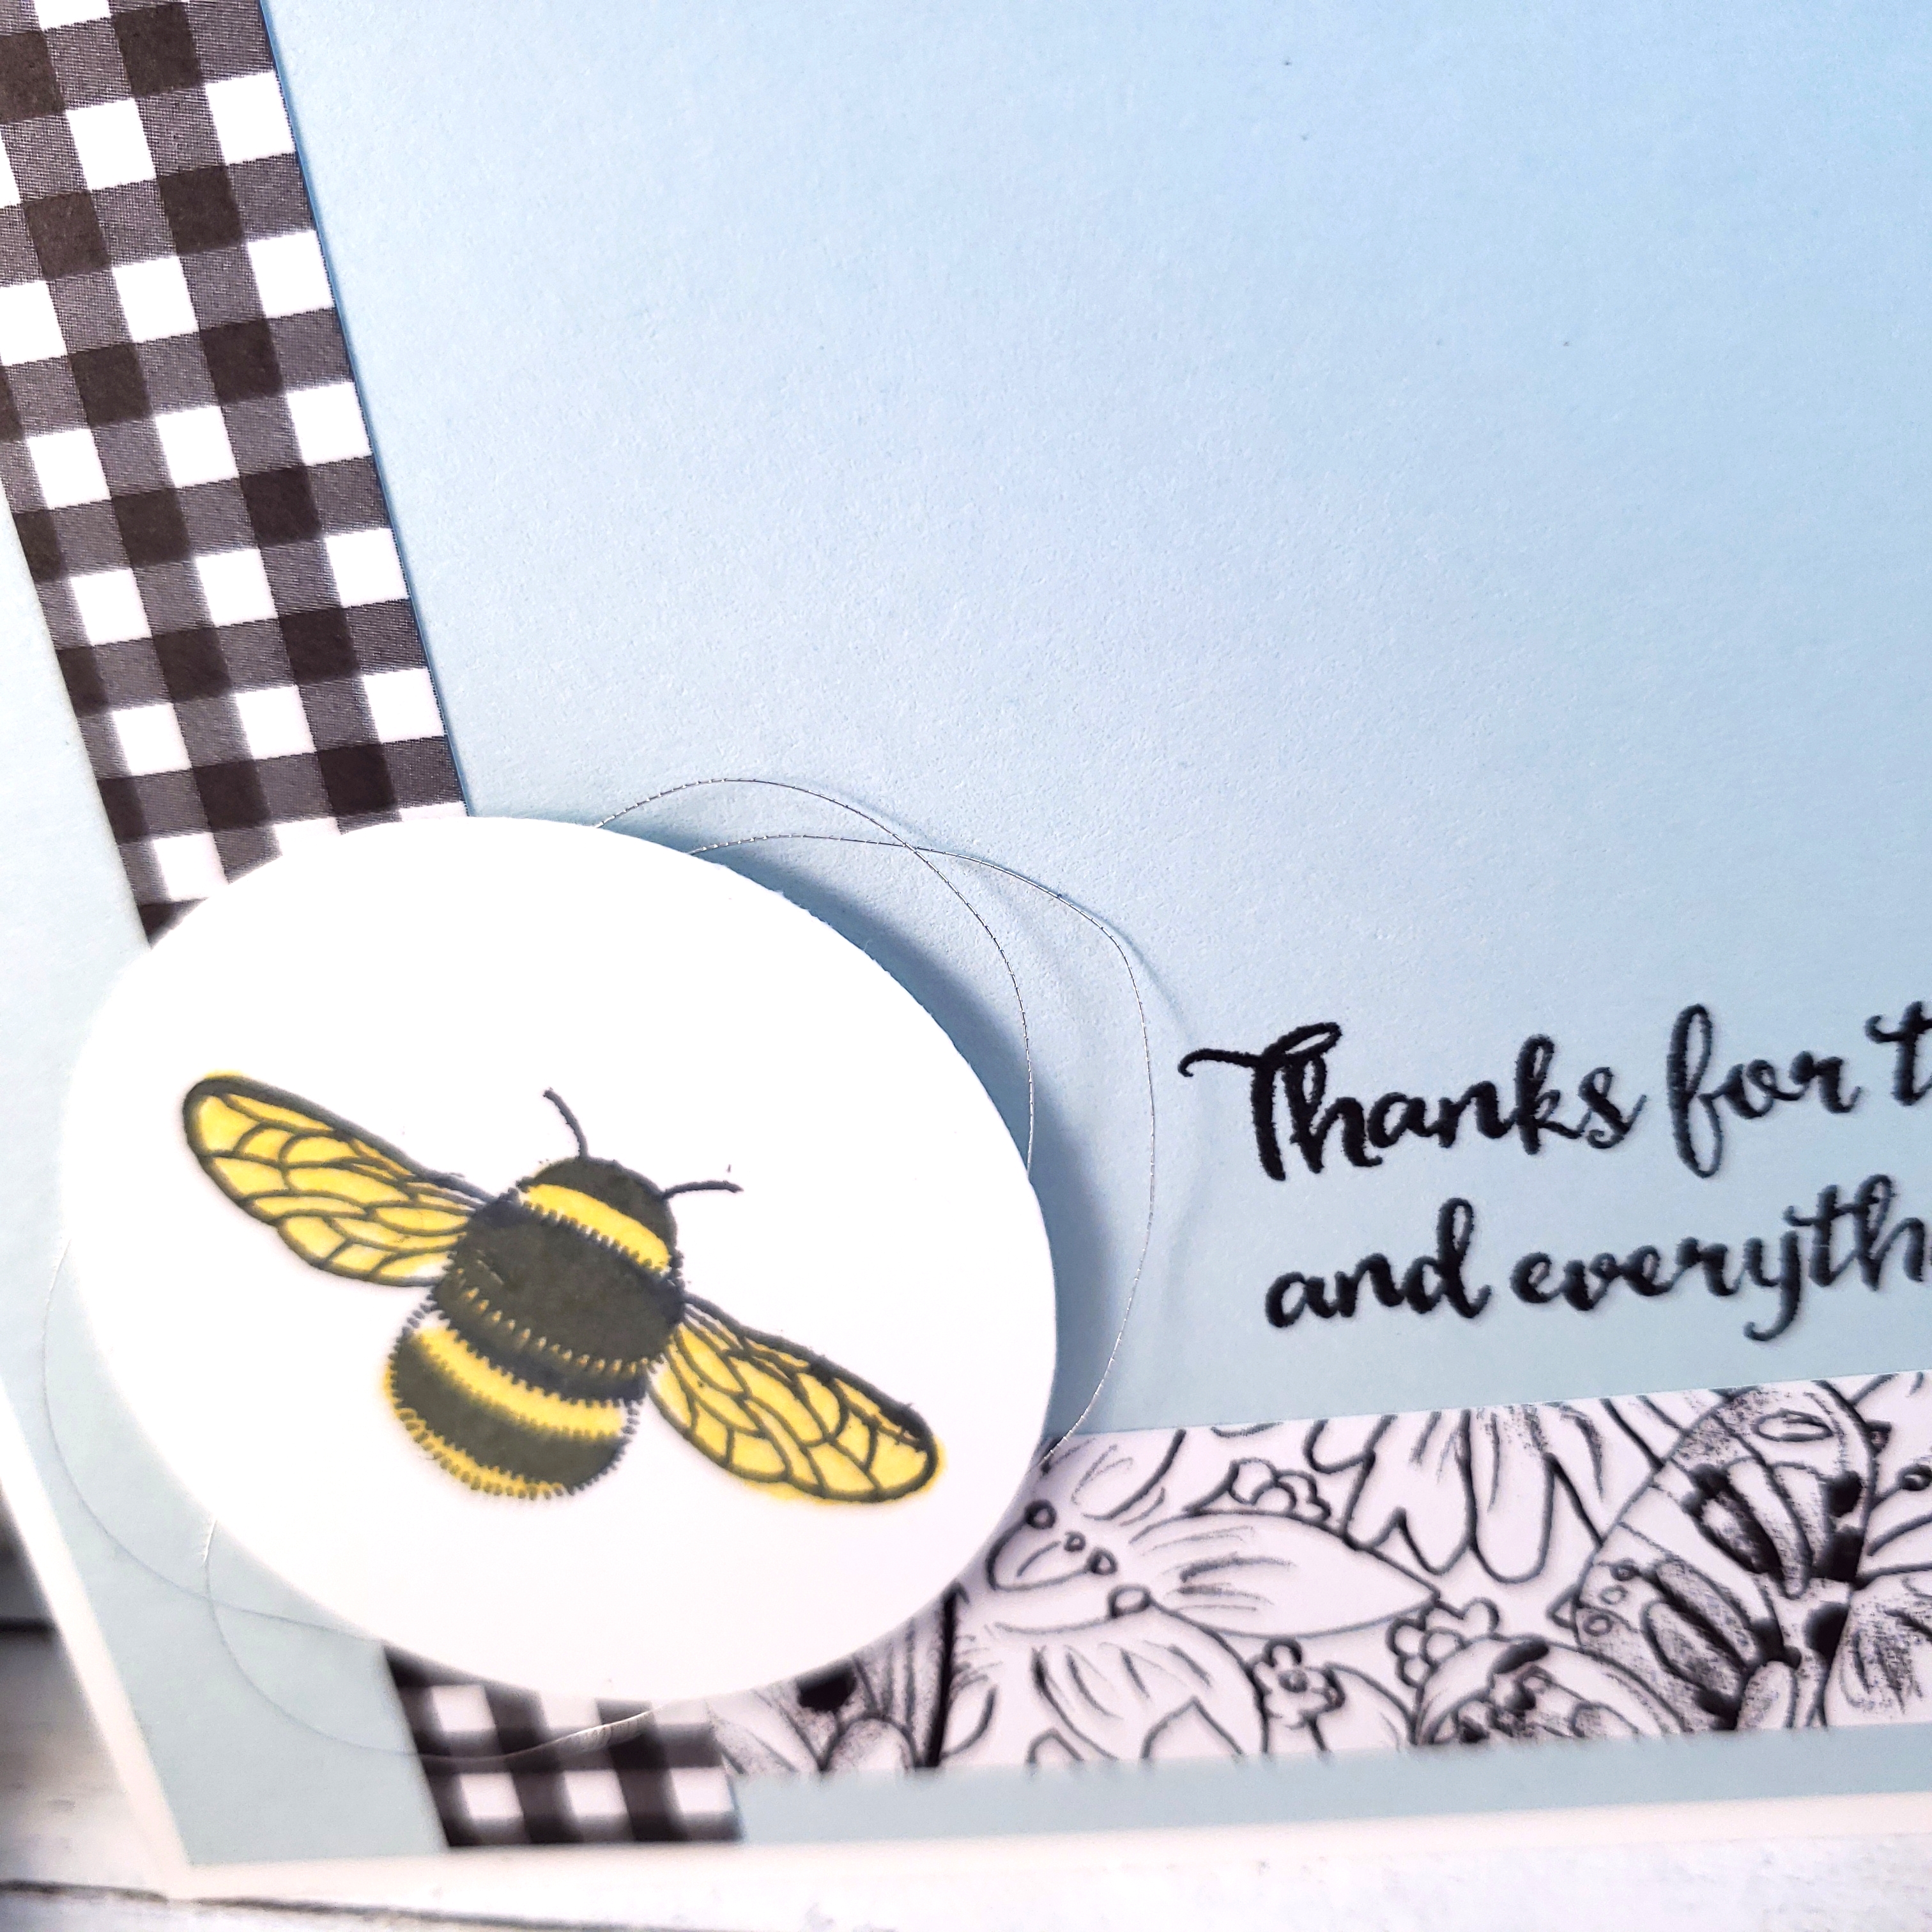
I used Thick Whisper White for the card base, then added a layer of Pool Party cardstock. The black and white strips of Botanical Butterfly Designer Series Paper add a touch of interest. You can get this beautiful paper for FREE with a $60 purchase until the end of March. Sometimes, stock runs low, so I don’t recommend waiting until the end. Get your paper soon!
The sweet little bumble bee from the Dragonfly Dreams photopolymer stamp set is a two-step stamp process with Daffodil Delight and Momento Tuxedo Black inks. After stamping on the Whisper White cardstock, I used the 2″ circle punch for the quick cut out and attached it to my card with Stampin’ Up! Dimensionals. Of course, being me, I had to also add the loops of Silver Metallic Thread to the back of the circle first, to give my card that little something-something without complicating the design.
The final element was to add the sentiment from the Dragonfly Dreams stamp set using Momento Tuxedo Black ink.
So quick and so simple. Don’t you think!?
What do you think of when you think “simple”? Why not share that with us over at the As You See It Challenge blog? We’d love to see your creations!
If you like any of these products, be sure to head on over to my online store by clicking on the menu on my blog and click on the SHOP option. You can browse products there and see what suits your fancy! Contact me if you have any questions.
(If you are shopping from outside of Canada, sadly, you will not be able to shop with me, but I’m sure you will be able to find a Stampin’ Up! Demonstrator in your area who would be happy to help you.)
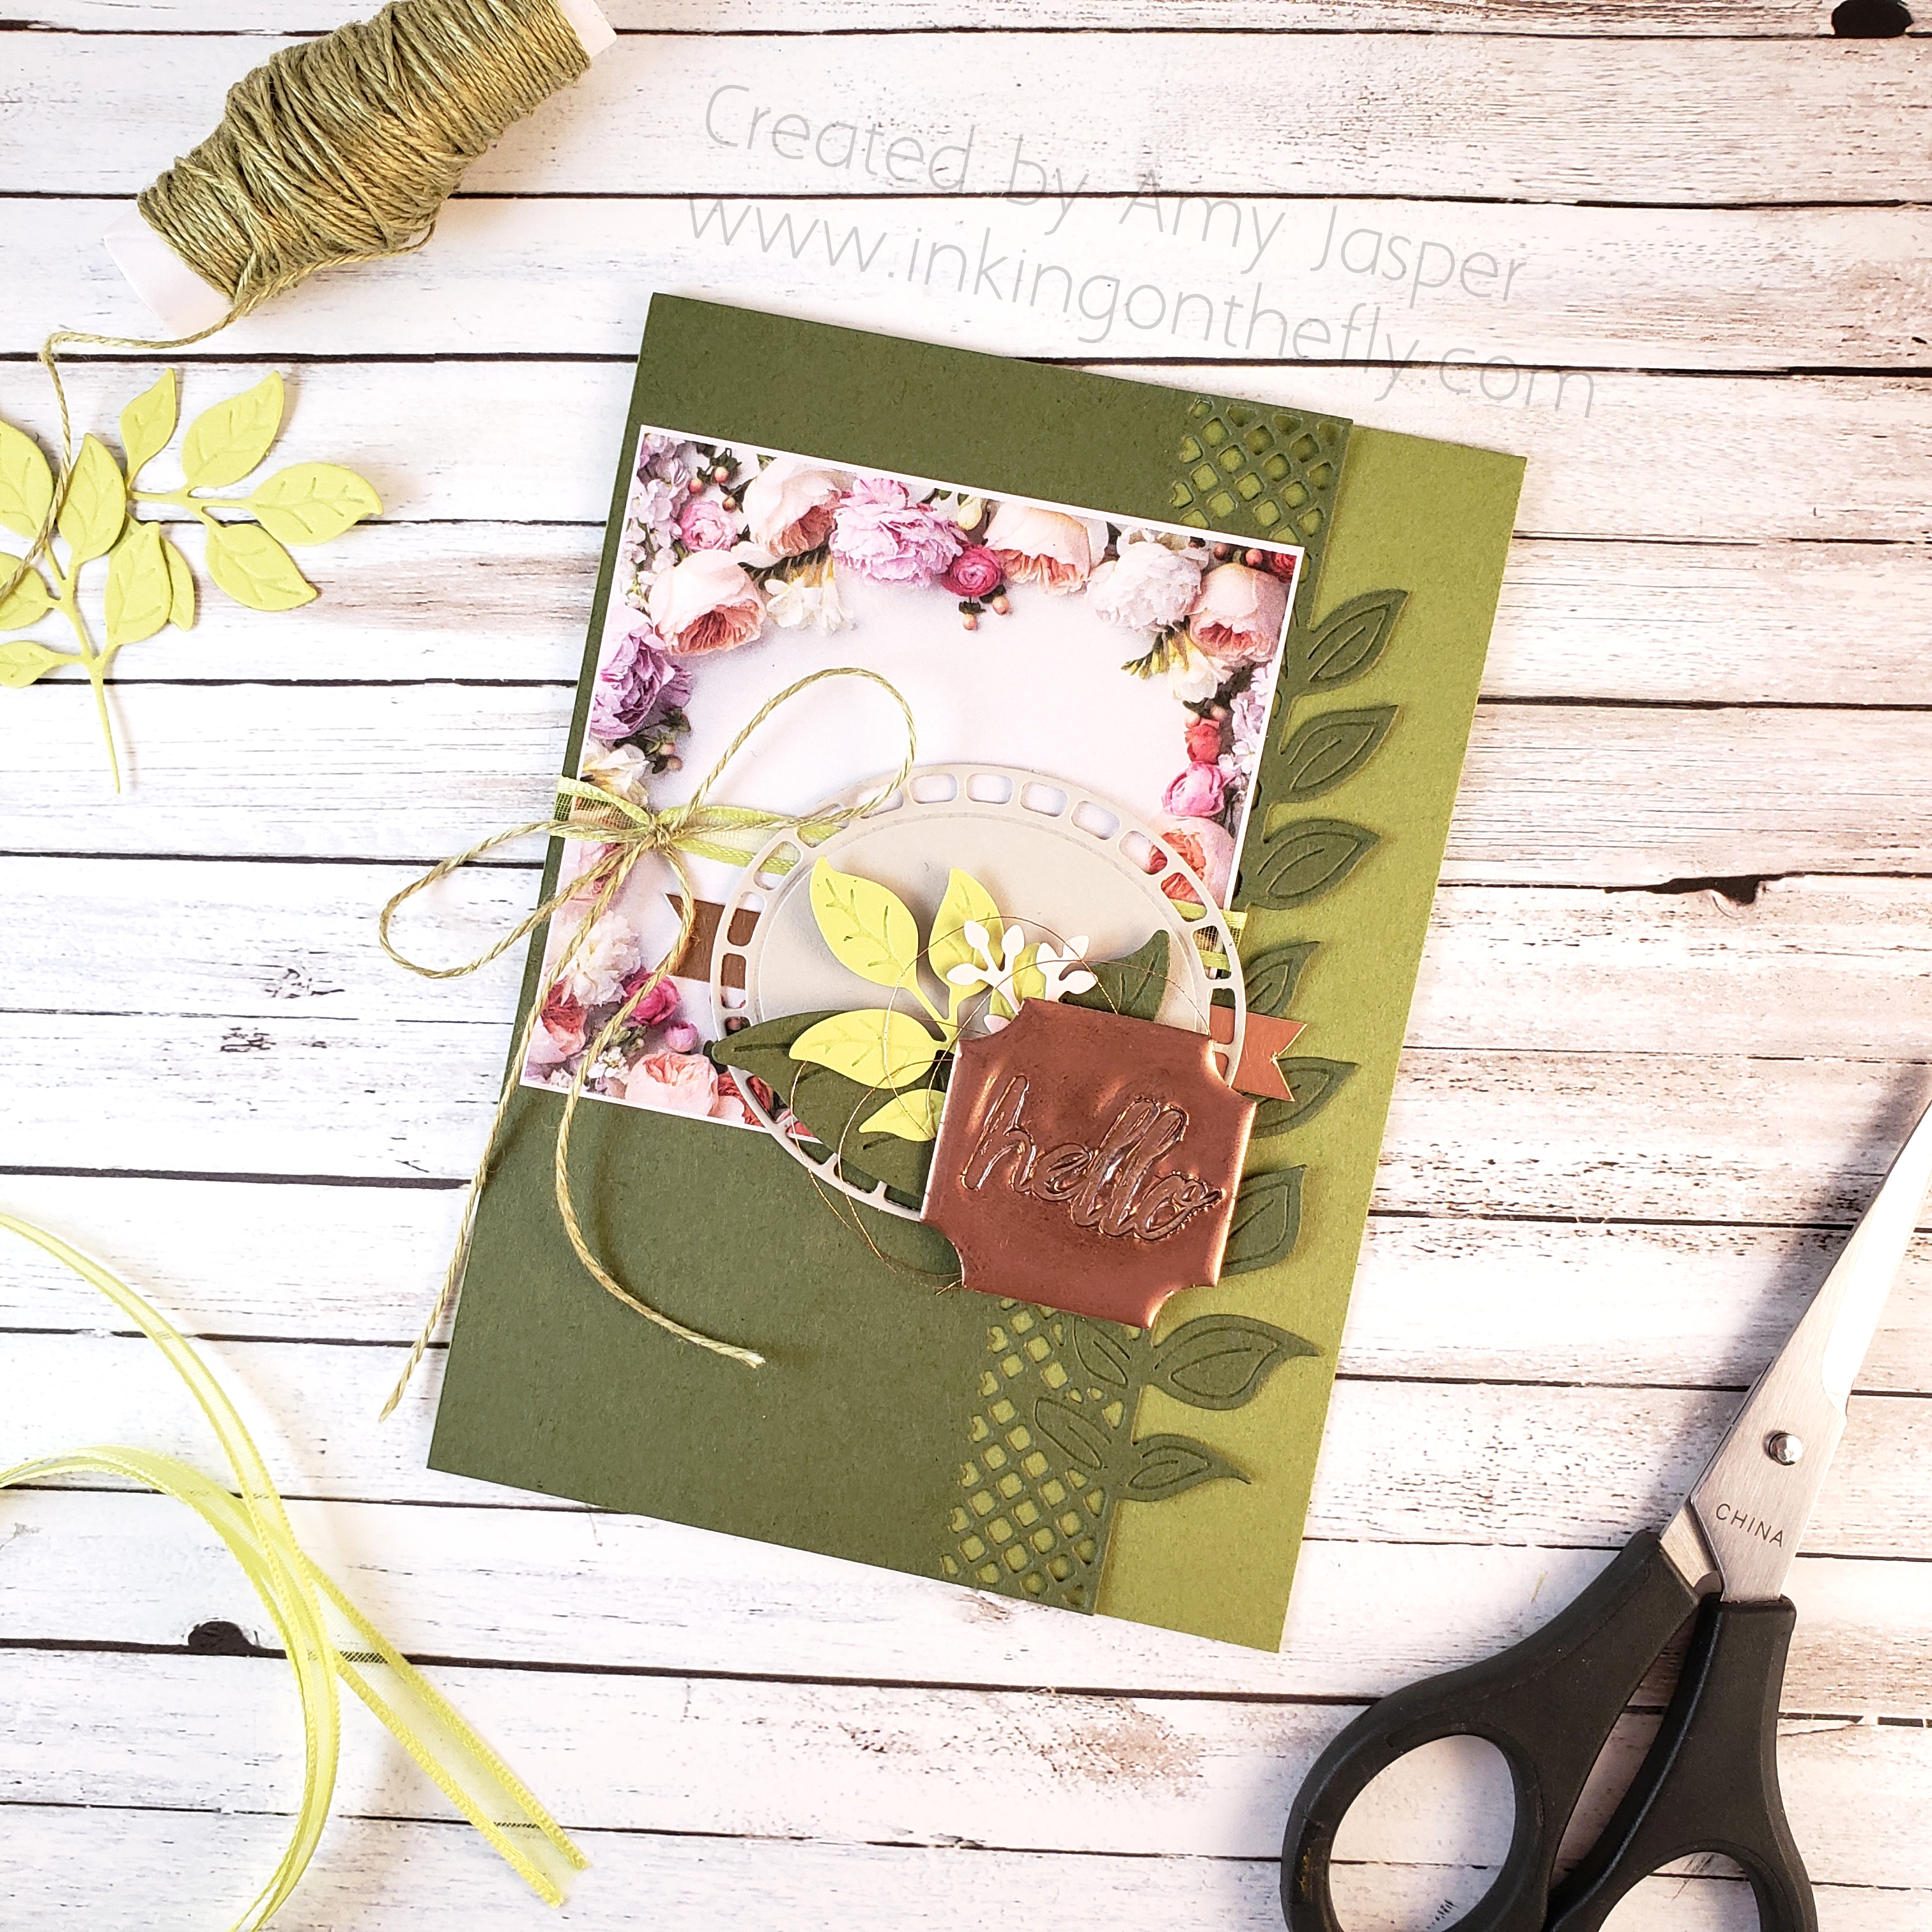
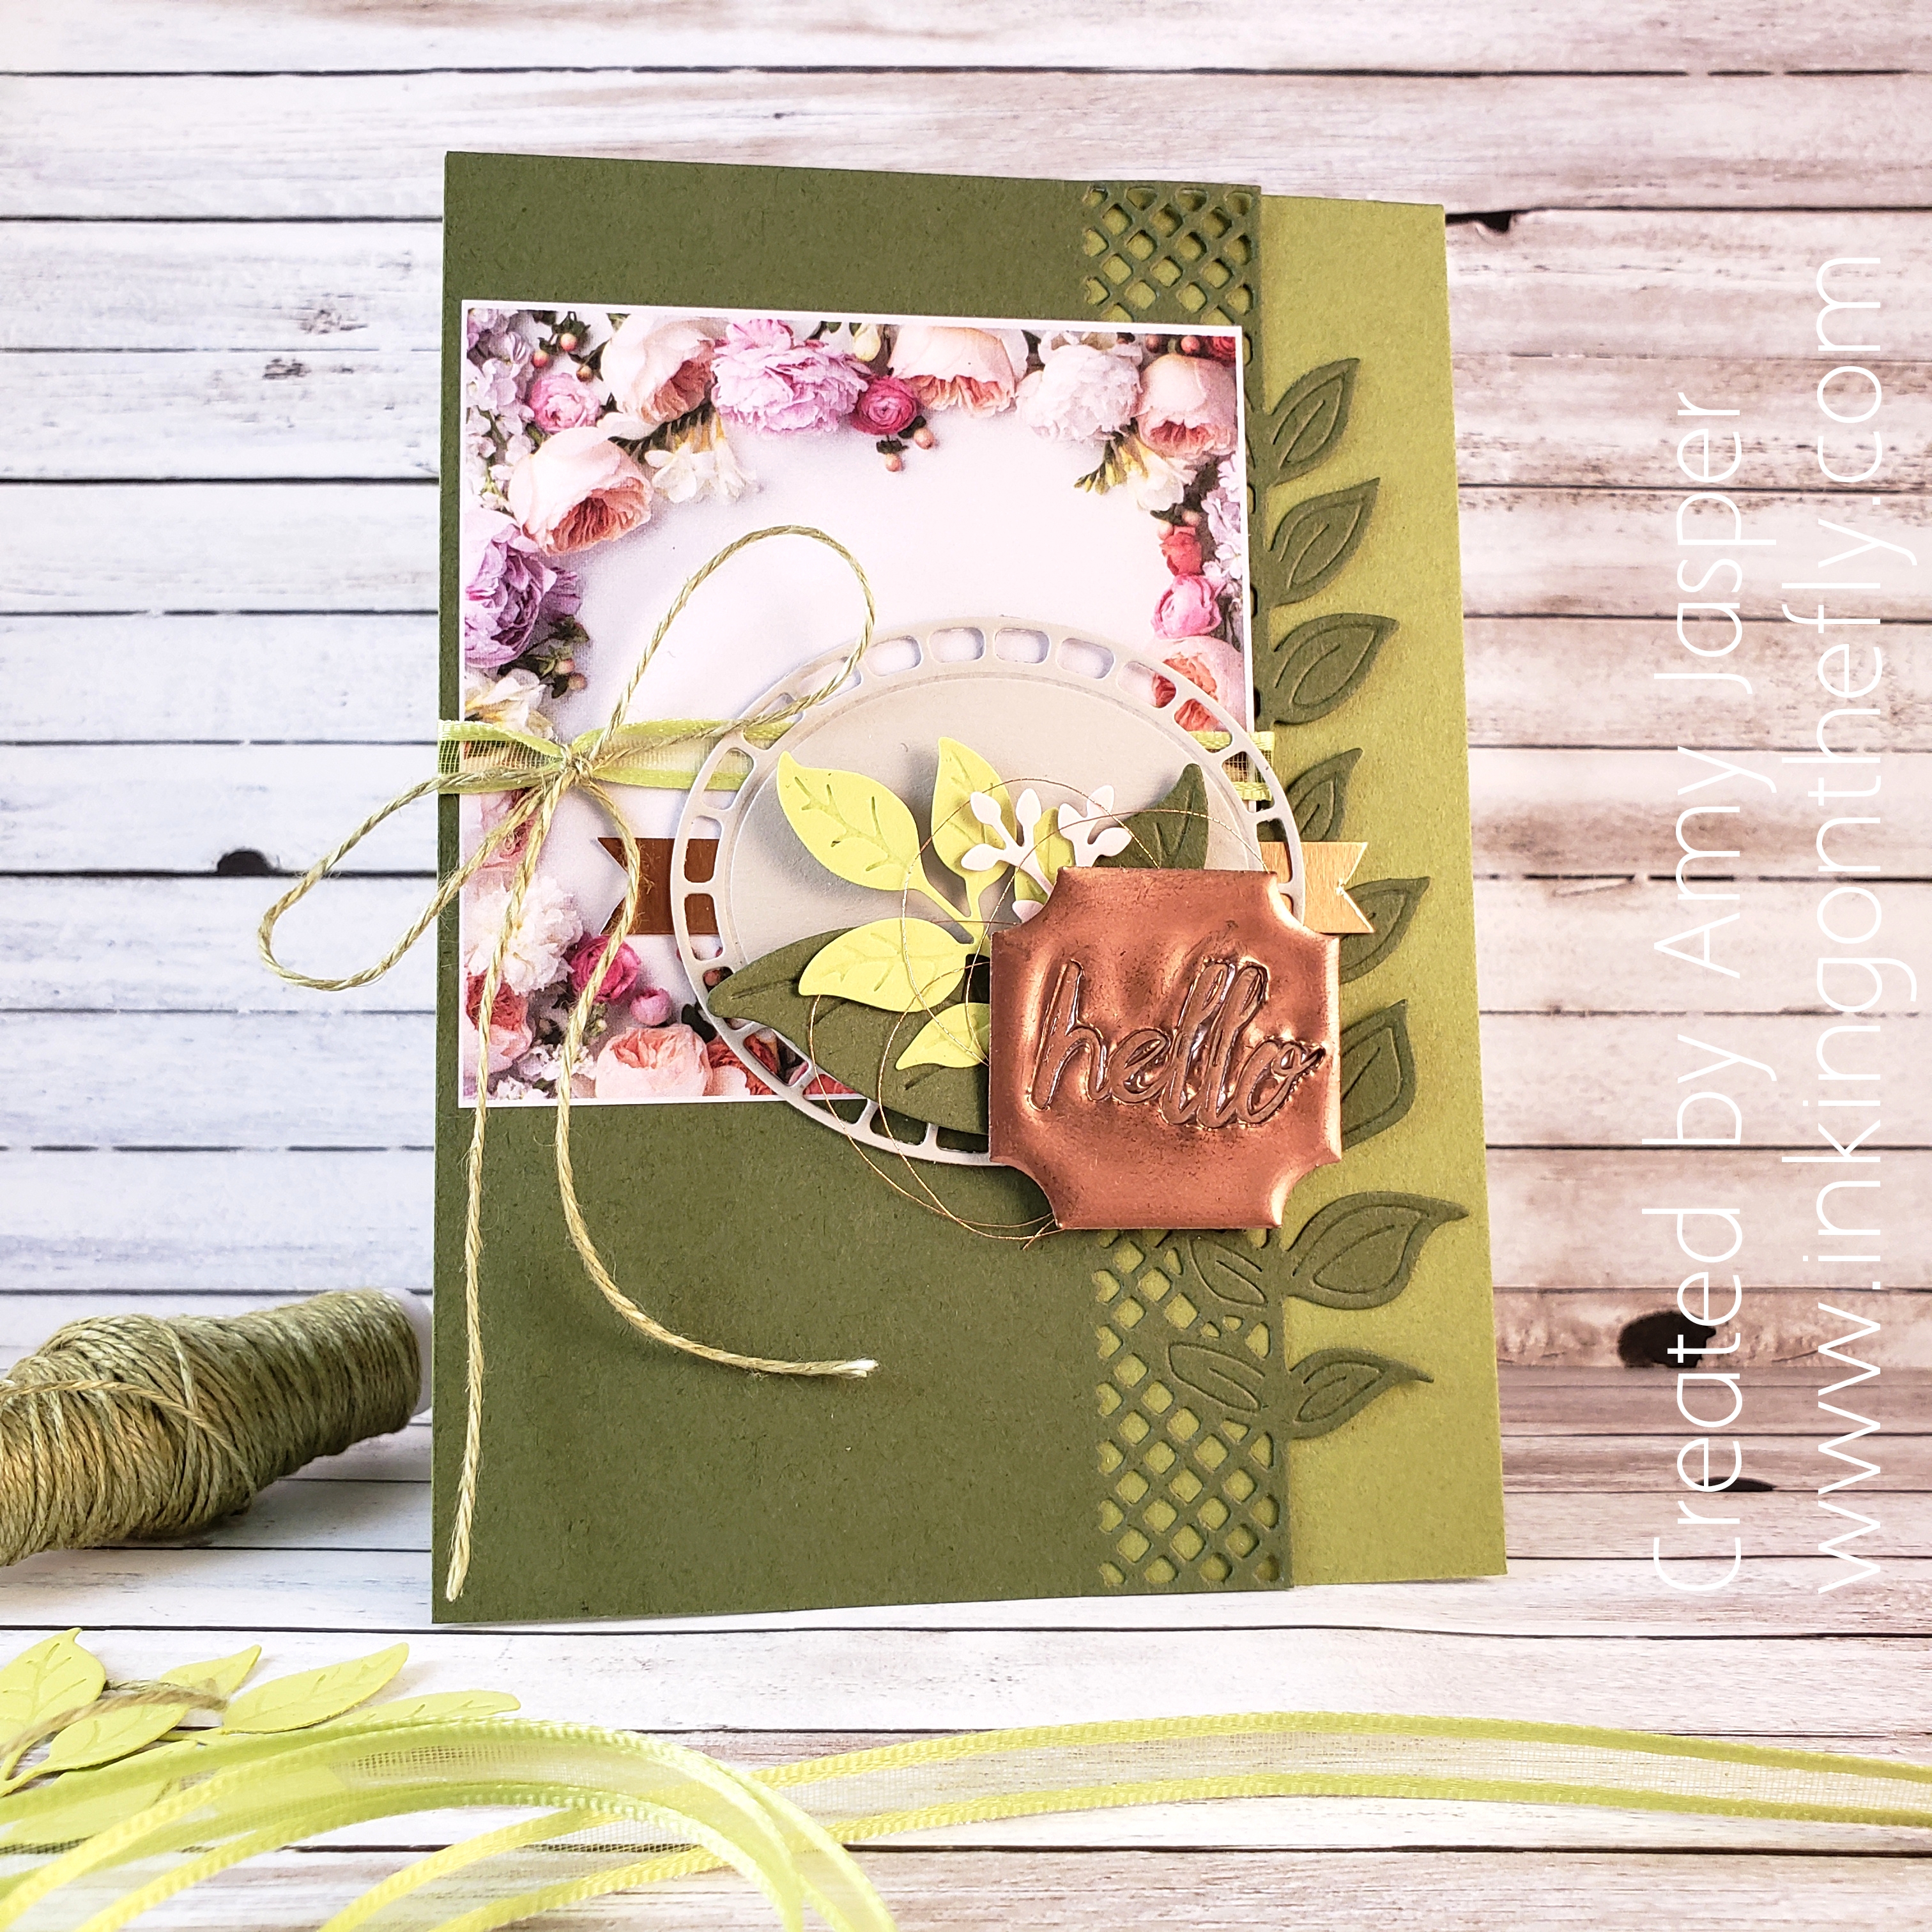
Check out today’s card design that shows off the super fun faux metal technique.
It all starts with a challenge, Yo!
Does that make me sound hip, cool, dope? Yeah, probably not.
The As You See It Challenge Blog has a theme for us this week.
I wanted to use a technique that I haven’t played with for a while – faux metal. But it should actually be called “faux stamped metal” because stamping into metal is an actual real thing (all the pretty jewelry!). My card uses Copper Foil, Copper Metallic Thread, and Copper Embossing Powder along with the beautiful florals from the Petal Promenade Designer Series Paper and the Wonderful Floral Framelits Dies.
The card base is Old Olive cardstock, but I ended up working with a 4″ x 5-1/2″ card front rather than my usual 4-1/4″ x 5-1/2″ simply because I cut my next layer narrower than I liked and trimmed the base to fit. I think it looks nice a bit narrower – there’s a slightly increased delicate flair to the design. The second layer (the one that I cut narrower by accident) is Mossy Meadow cardstock, die cut using the edge die from the Wonderful Floral Framelits. So pretty! The third layer is a square piece cut from the Petal Promenade Designer Series Paper. This paper pack has a few sheets which, instead of being a typical full 12″ x 12″ patterned piece of paper, are designed to be used in specific pieces. This square was among 6 squares on the sheet of paper. There were also rectangles and a beautiful floral edge piece that I will use for future crafty projects.
Before adhering the Mossy meadow piece to the card front, I attached the Petal Promenade paper and wrapped a piece of the Lemon Lime Twist ribbon from the Organdy Ribbon Combo Pack around the two pieces of paper.
This ribbon is one of the many items that you can earn for FREE with a $60 purchase of things you know you’re going to buy anyway! (you KNOW you will!!)
I tied the Old Olive Linen Thread (NEW! I love this stuff!) around the Organdy Ribbon in a big ol’ loopy bow!
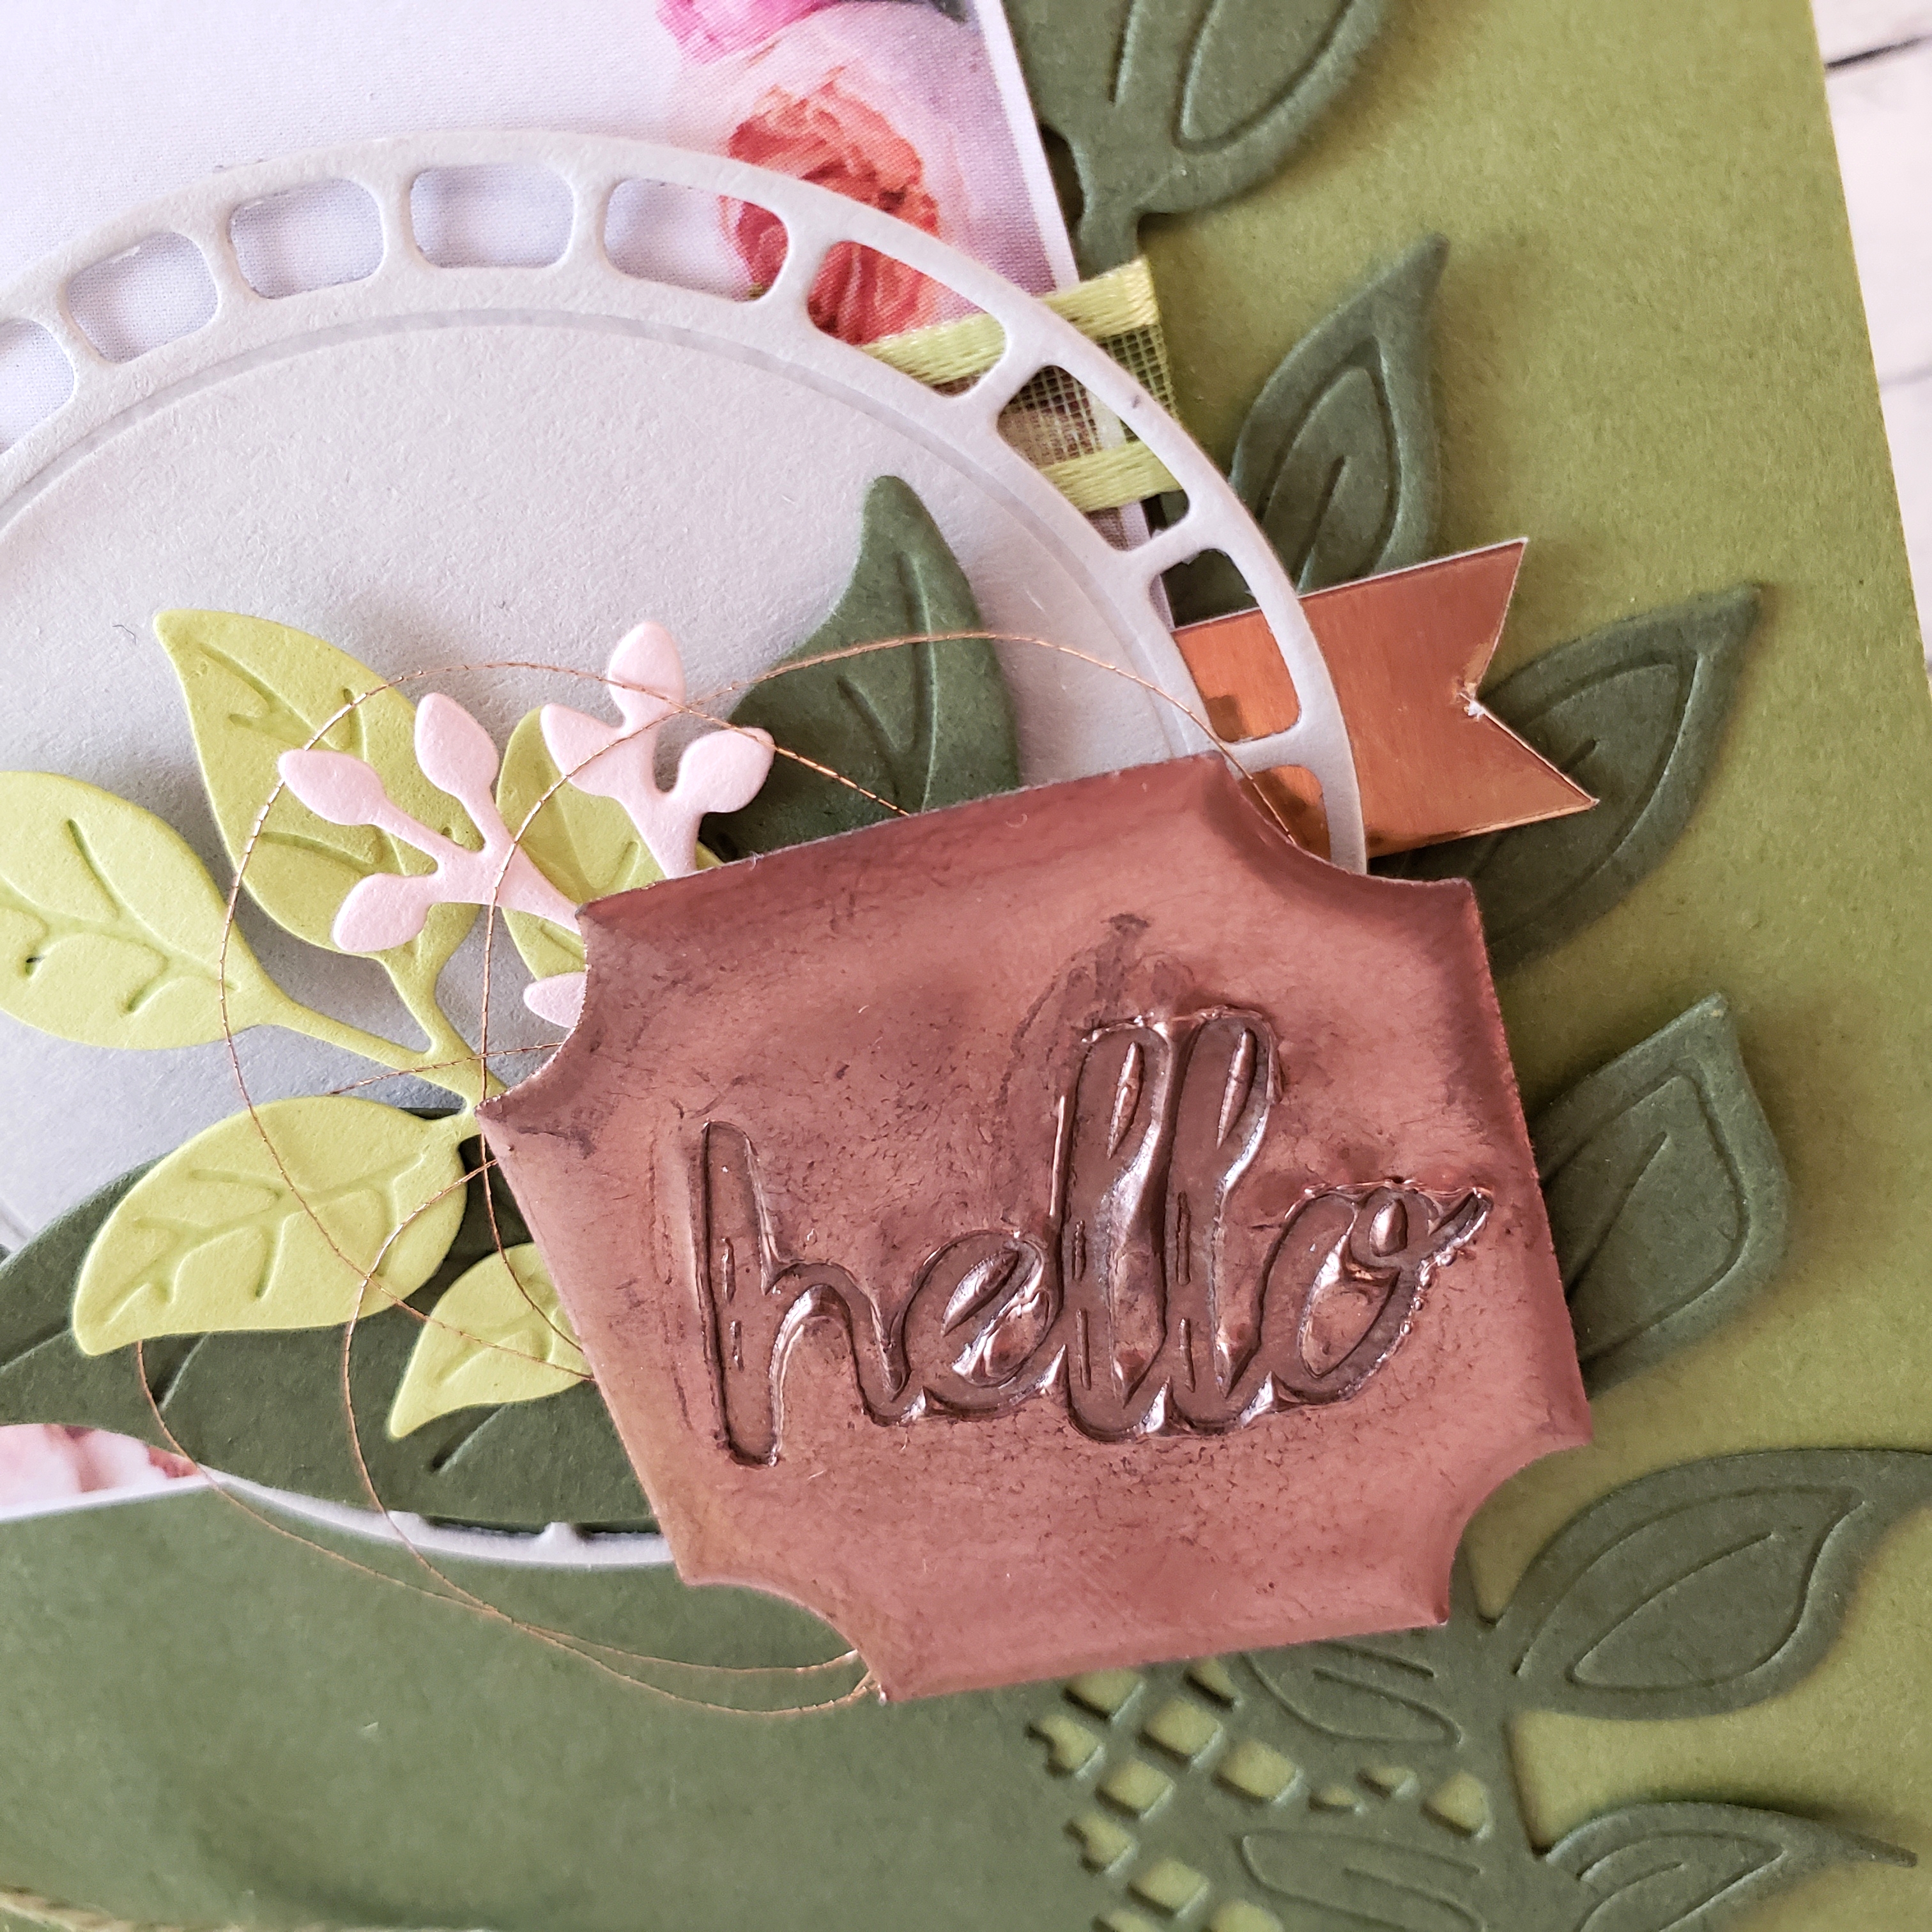
The Wonderful Floral Framelits dies played their part beautifully for the next layers. Sahara Sand cardstock for the chubby oval, Lemon Lime Twist and Mossy Meadow cardstock for the leaves and Powder Pink for the flower buds. Tucked in behind all that is a strip of Copper Foil paper with hand-cut flagged ends.
Finally, the faux stamped metal piece and the loopy Copper Metallic Thread are attached with Stampin’ Dimensionals over the stems of the leaf collection.
Have you tried creating faux metal before? It takes a little bit of time, but it’s not a difficult technique. Start with punching out a piece of Basic Black cardstock with the Darling Label Punch. The colour of cardstock doesn’t matter, since it will be completely covered with embossing powder. Place the punched piece of cardstock on your Grid Paper and apply Versamark ink to it by pressing the ink pad directly to the paper. Pick up the paper with your craft tweezers and dip it in Copper embossing powder. Still holding it with the tweezers, heat set the powder as you normally would, but then you repeat that process two more times. Yup. You want that embossing powder three layers thick for the next part of the process. Don’t worry too much about the marks left by the tweezers – that will be taken care of with the final heating that comes next.
After applying the three layers of embossing powder, place your embossed piece of cardstock on a heat resistant surface (I use a piece of tile). Again, use your Heat Tool, this time straight above (perpendicular to) your paper so it doesn’t blow away. Heat it until the tweezer marks blend into the rest of the embossing powder and you can see that the powder is fluid and moving with the wind of your Heat Tool (I hold it about one inch away from the surface). Then, without delay, set your Heat Tool aside, grab the stamp and press it into the soft, warm embossing powder. Hold it there until the embossing powder sets a bit, then peel the stamp away from the paper. This will leave an impression of the stamp in the embossing powder, just like stamping on real metal would leave the impression of the stamp in the surface of metal! I used the hello stamp from the Darling Label Punch Box set.
Now that, my friends, is “dope”, Yo!
Check out my online store if you live in Canada and are interested in ordering stamping supplies. I KNOW you can do this dope technique, too!
P.S. – If you’re wondering about any damage that you might cause by putting your stamp into hot embossing liquid, not to worry. I held a class where 7 participants each used the same photopolymer stamp with this technique. After the class, I stamped the same stamp on some cardstock and it still stamped beautifully.