card

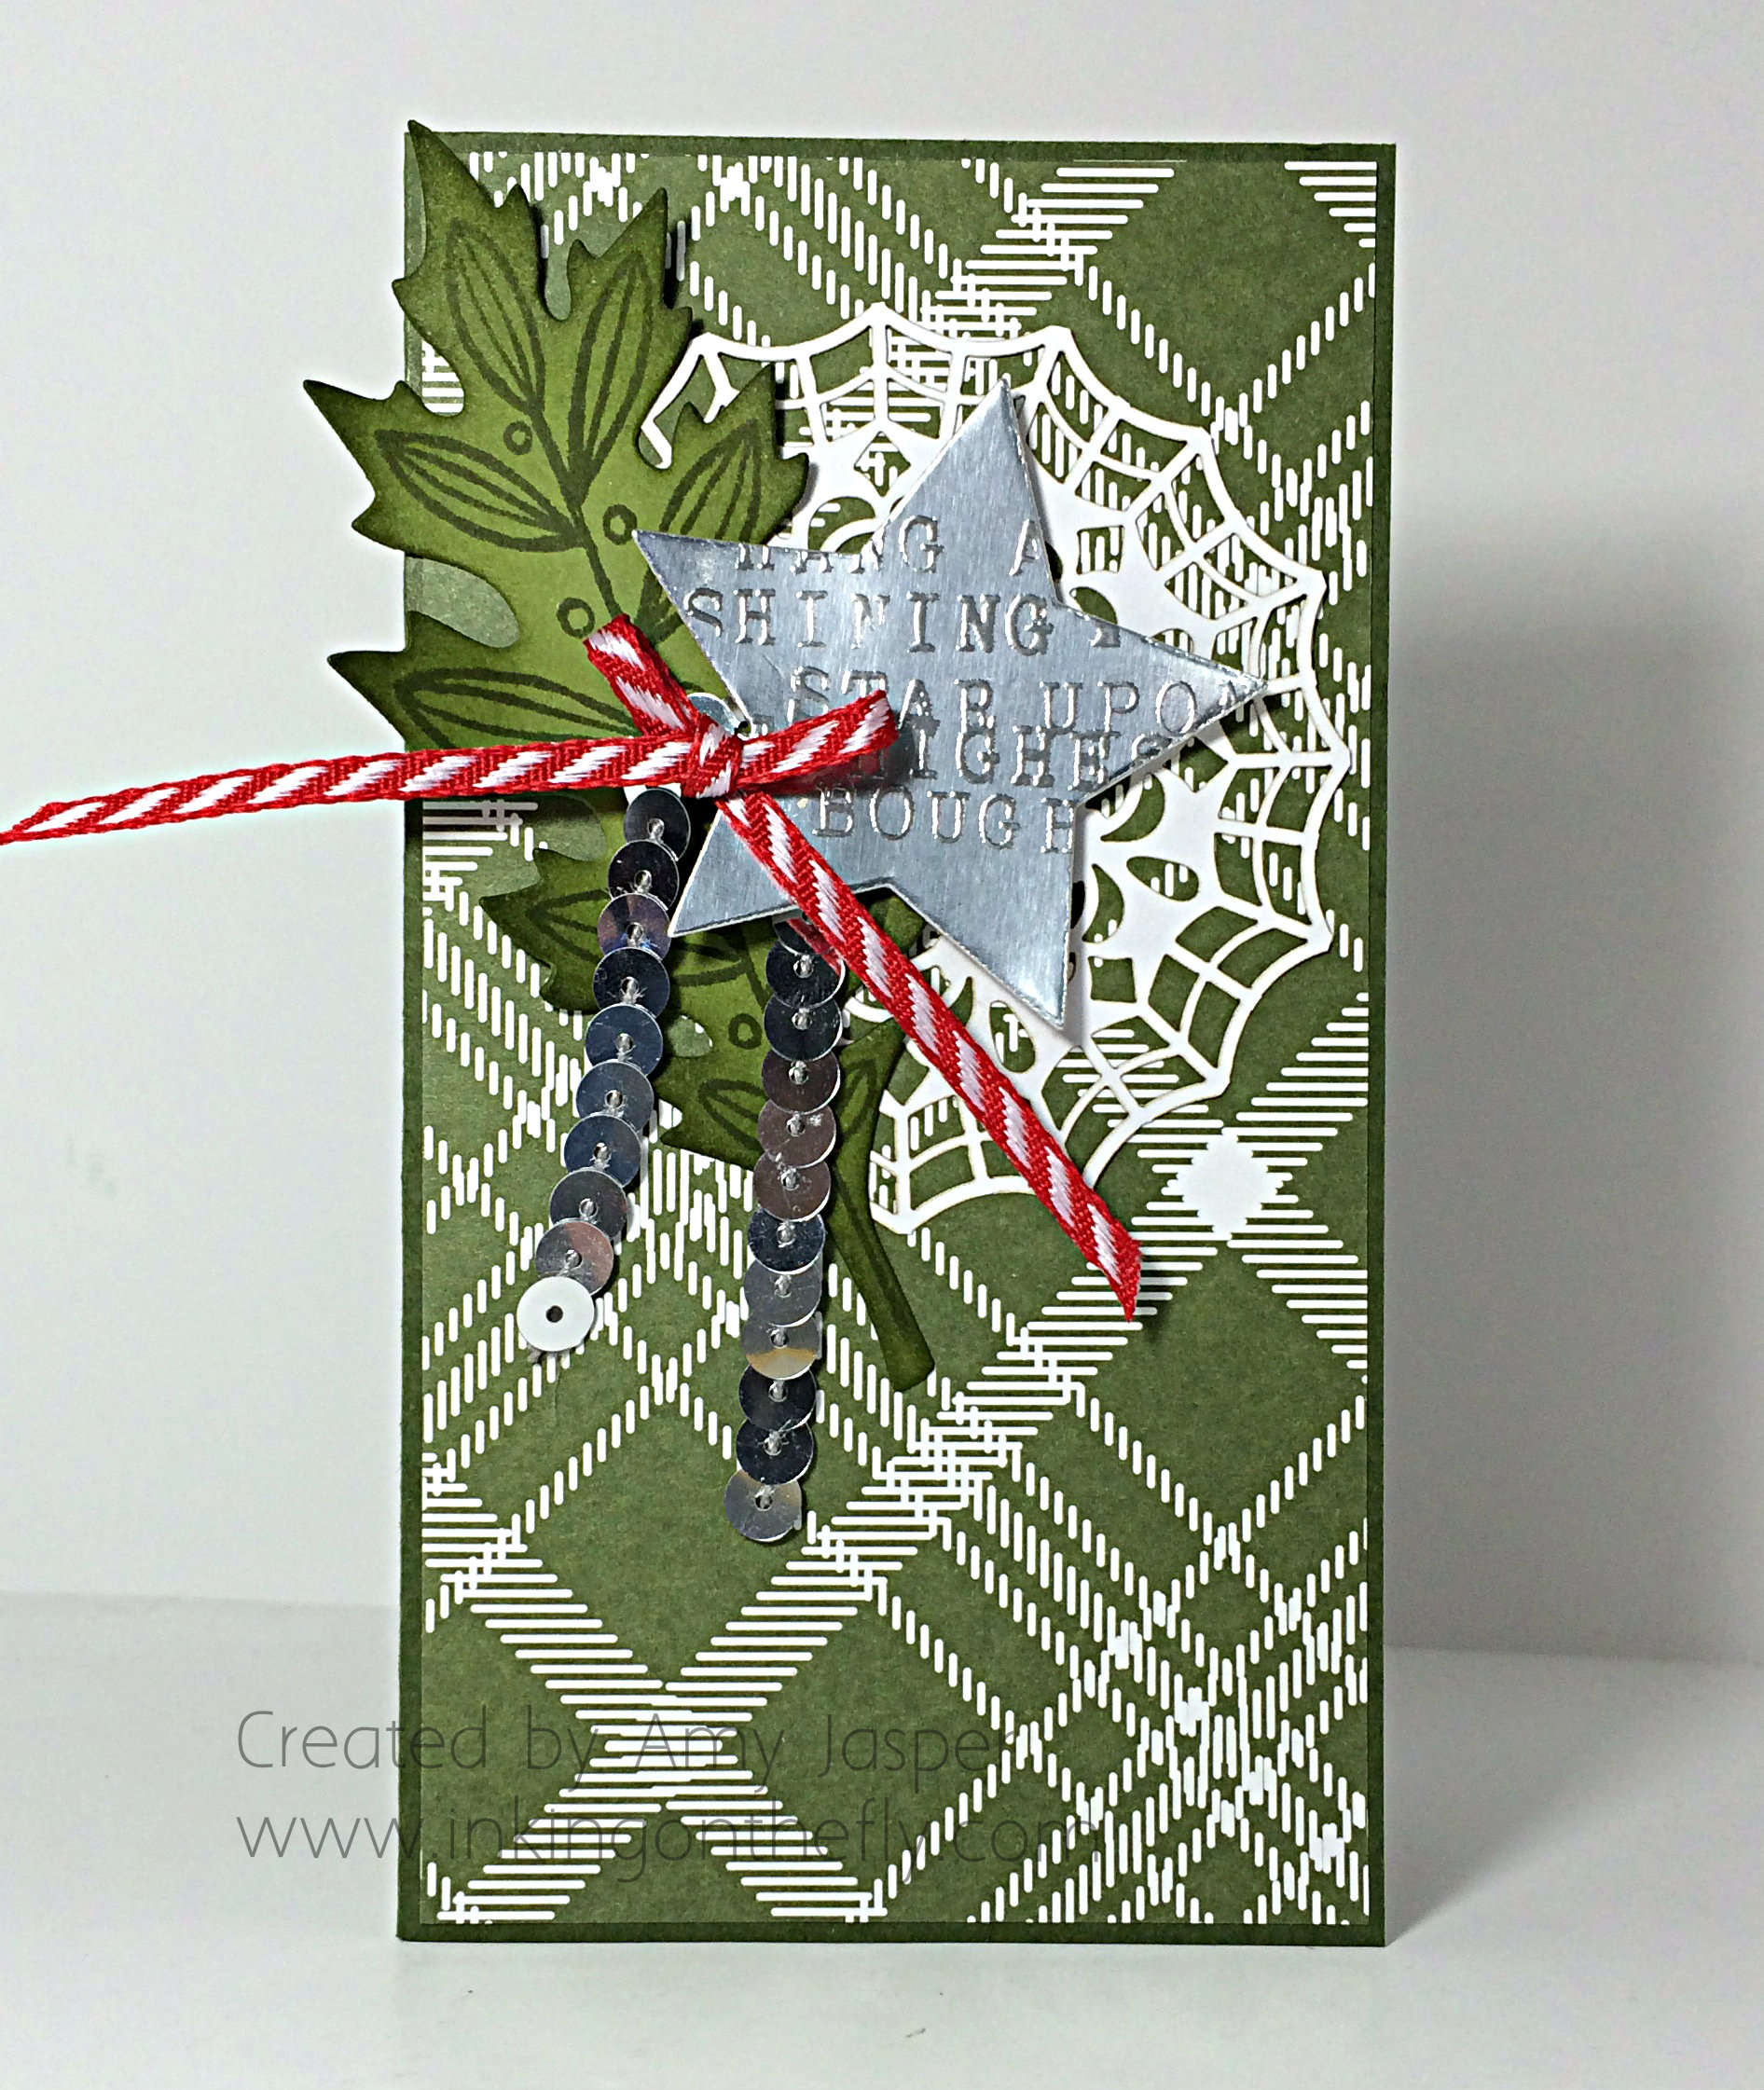
Hang a Shining Star

My favourite thing about a song, especially Christmas songs, is when someone says something in normal conversation and it sparks a song in your mind that you absolutely MUST sing out loud. As it was said in the movie, ELF, “The best way to spread Christmas cheer is singing loud for all to hear.”

My hope is that my card today will cause a Christmas song to be placed in your mind when you read the words. (Basically, I’m working on developing my talents in mind-control.)

Don’t forget to check out my previous post, Fleecy Caribou and Blog Candy, for a chance to win a stamp set! Winner will be announced on Tuesday!

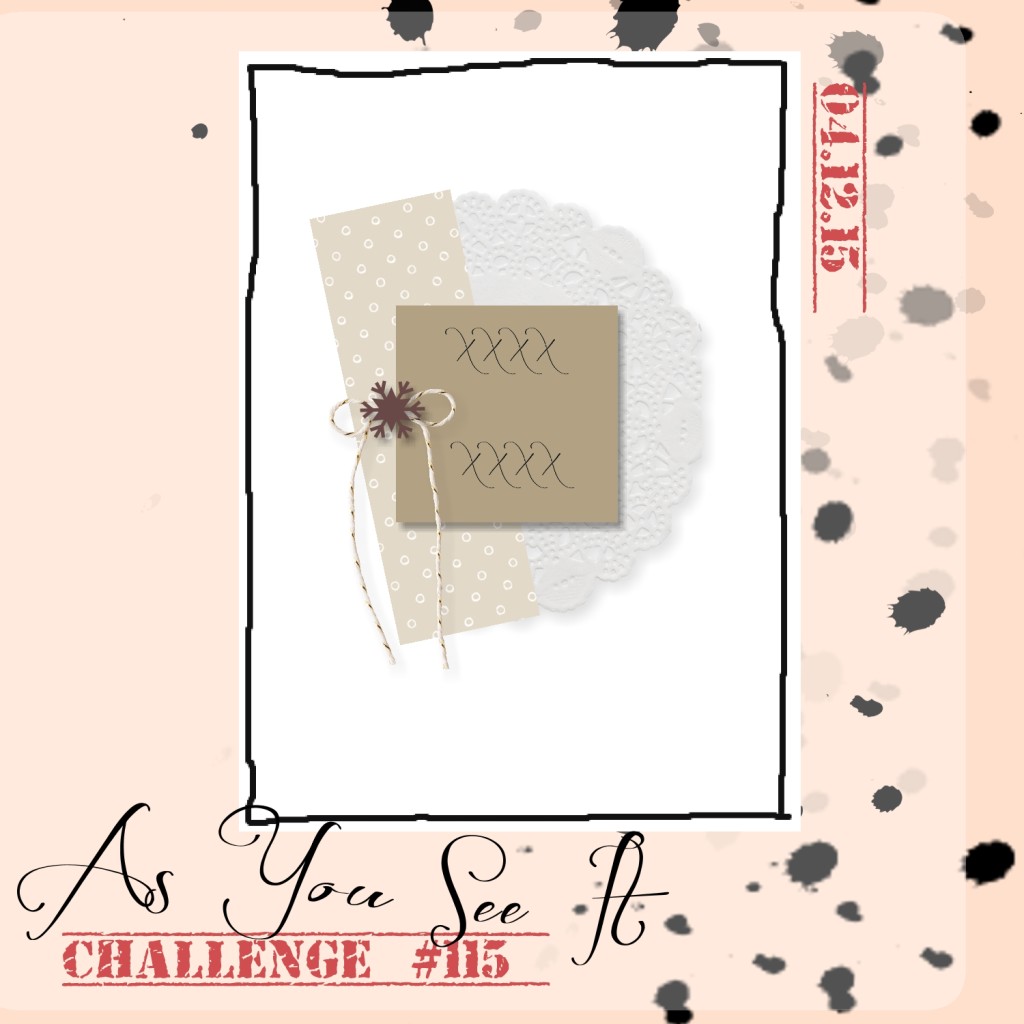
Here’s today’s sketch from the As You See It Challenge blog:

AYSIChallenge115-1024x1024

The card I have to share with you today is a 3″ x 5.5″ card. The elements that I chose simply demanded to be on a narrow card design. Seriously, the cards should just make themselves if they’re going to be so demanding!!

Hang a Shining Star Card by Amy Jasper www.inkingonthefly.com

It begins with a 3″ x 5.5″ Mossy Meadow card base and the layer of patterned paper from the Merry Moments Designer Series Paper. The next layer is a Spider Web Doily that has been trimmed and turned around to show the white side rather than the black side of the doily. This, of course, was adhered with the Fine-Tip Glue Pen.

Next, the leaf image from the Lighthearted Leaves stamp set was stamped with Old Olive Ink onto Old Olive cardstock. This was then die cut on the Big Shot, using the Leaflets Framelits. I happily sponged away on the edges of my newly cut leaf using Stampin’ Up Sponges and Old Olive ink. Before adhering the leaf, I took a moment to gently curl and shape its edges.

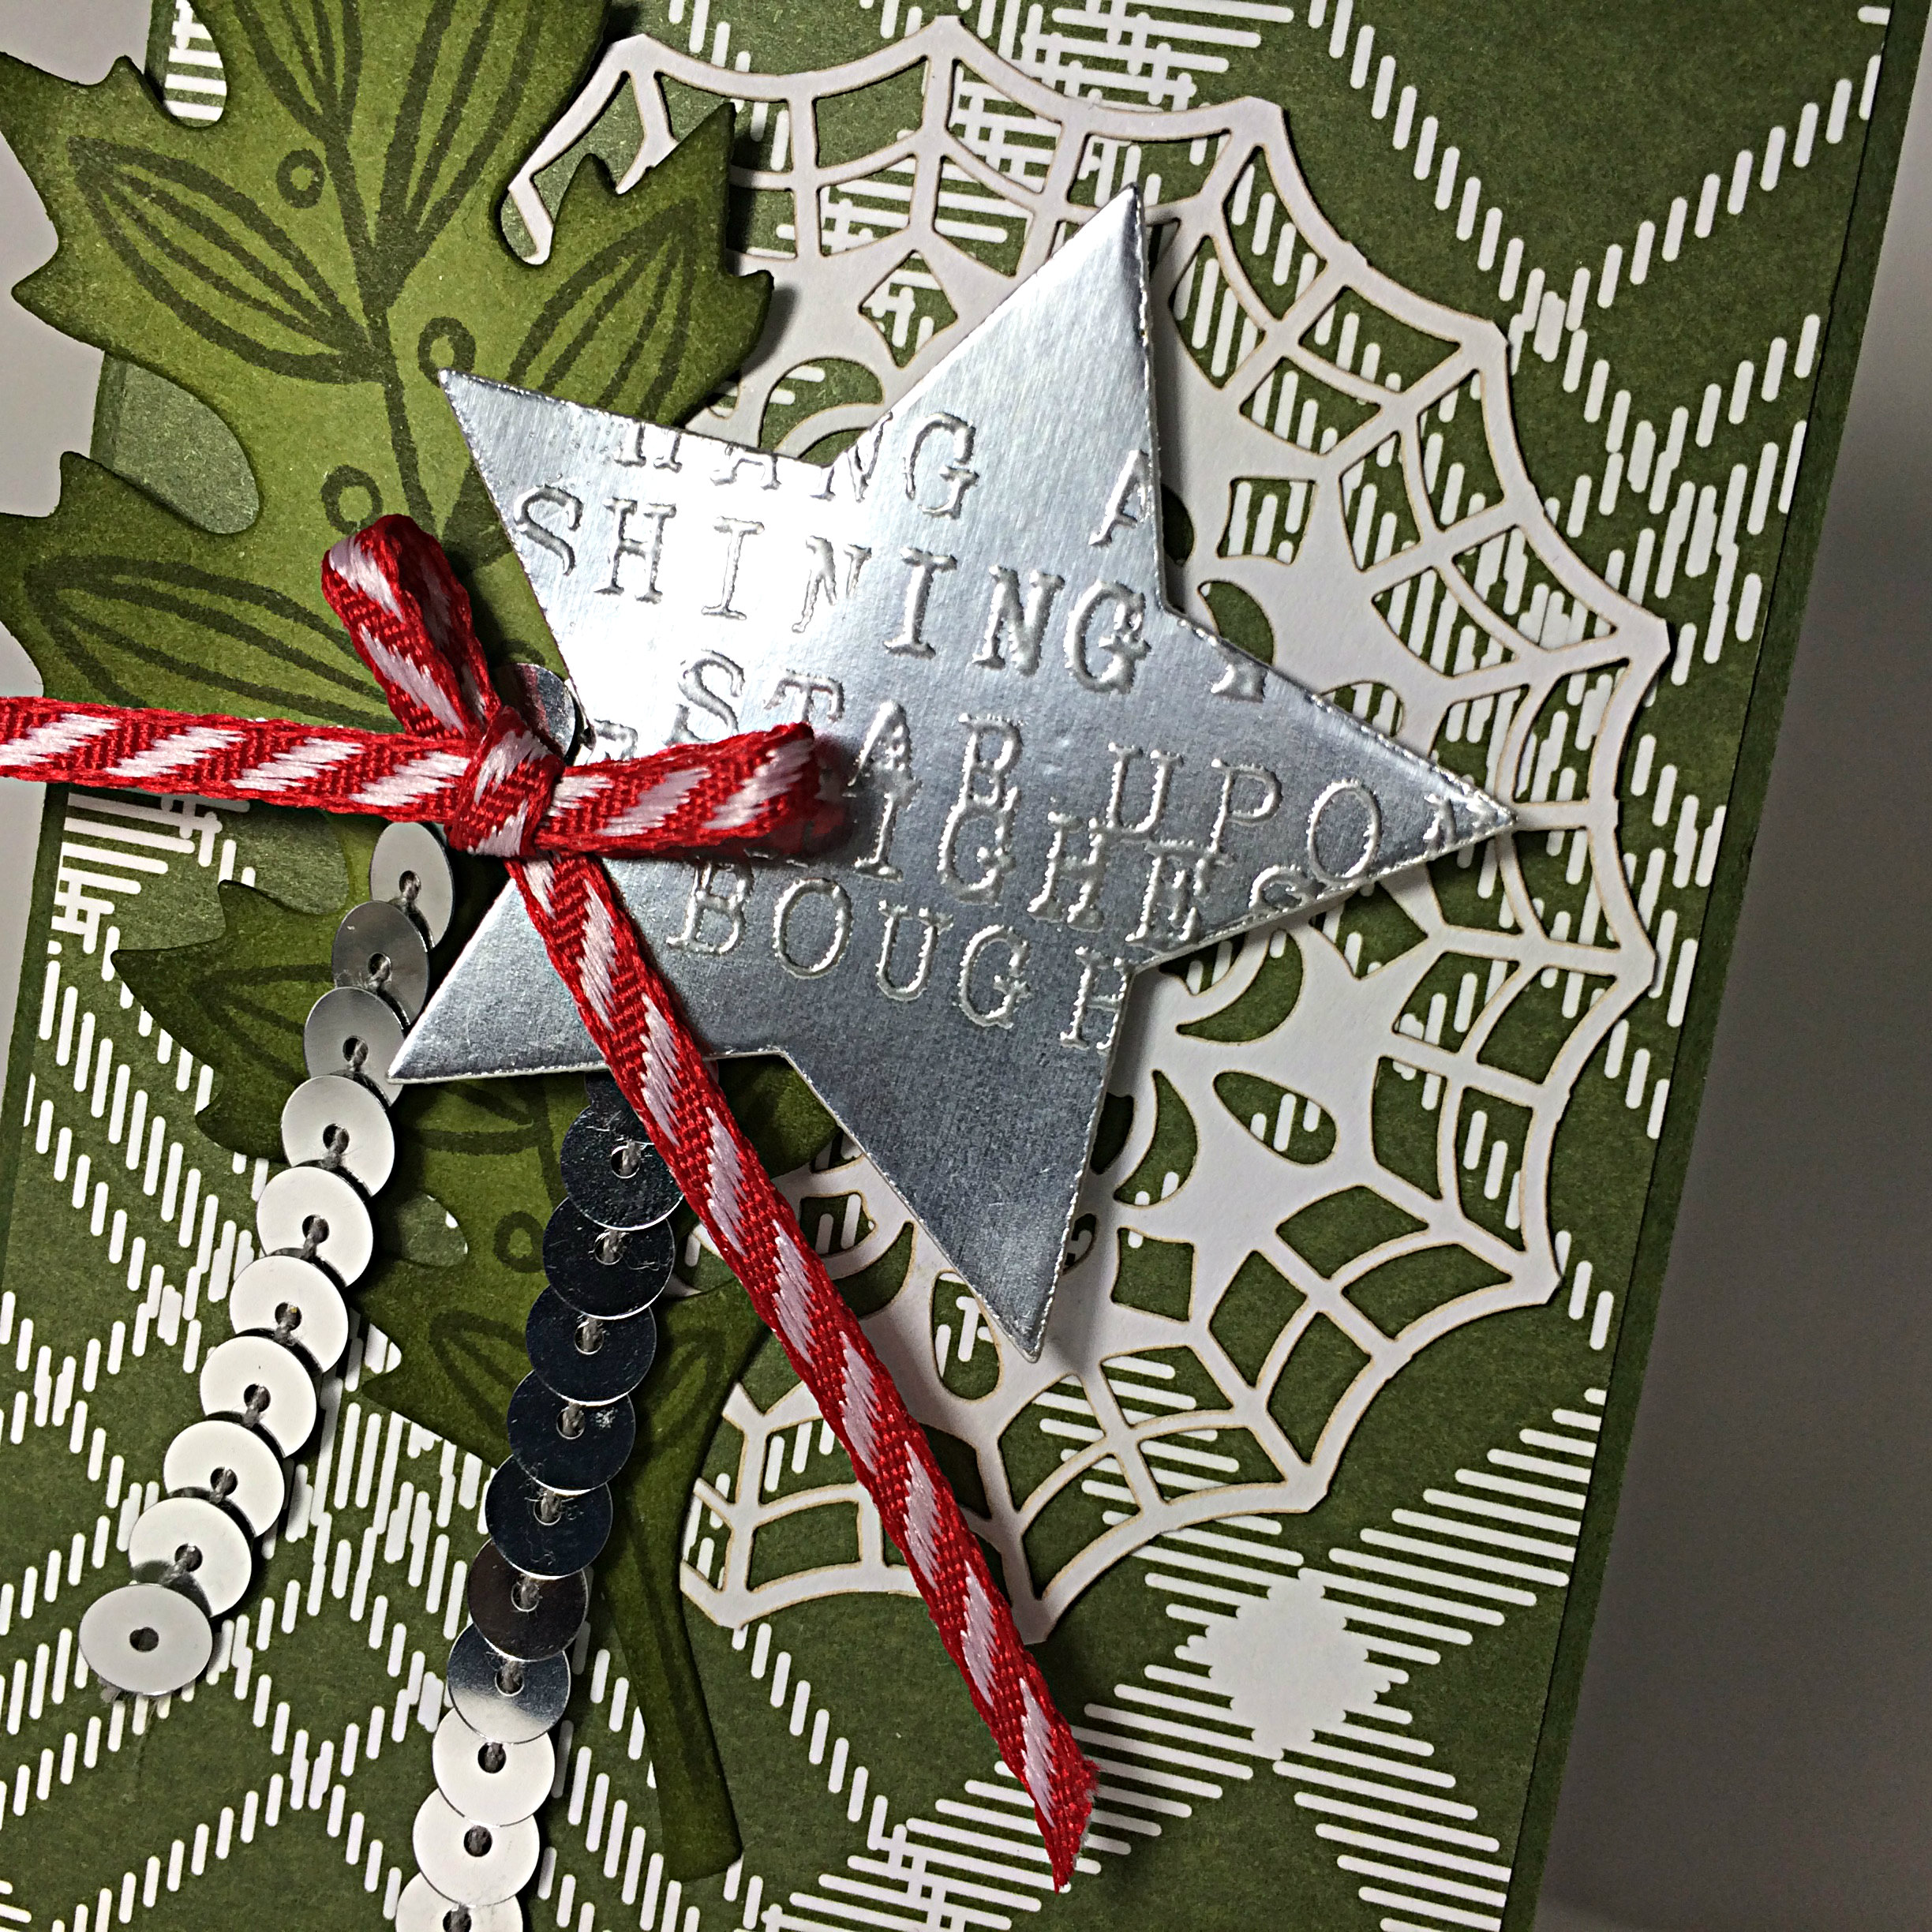
Hang a shining star by Amy Jasper www.inkingonthefly.com

The star on this card is die cut from Silver Foil paper, using the Star Framelits. After using my Embossing Buddy to remove static, dust, and finger prints from the Silver Foil paper, I used the Alphabet Rotary stamp to create the words and stamped them on the star with Versamark Ink. Then they were heat embossed with Silver Embossing Powder and a Heat Tool.

I saw my crooked words and decided to go for it anyway. I think it adds an authentic, kind of, stamped metal look.

The star is adhered with Stampin’ Dimensionals to pop it up off the page. The Silver Sequin Trim and the Real Red 1/8″ Striped Ribbon were attached using a Mini Glue Dot.

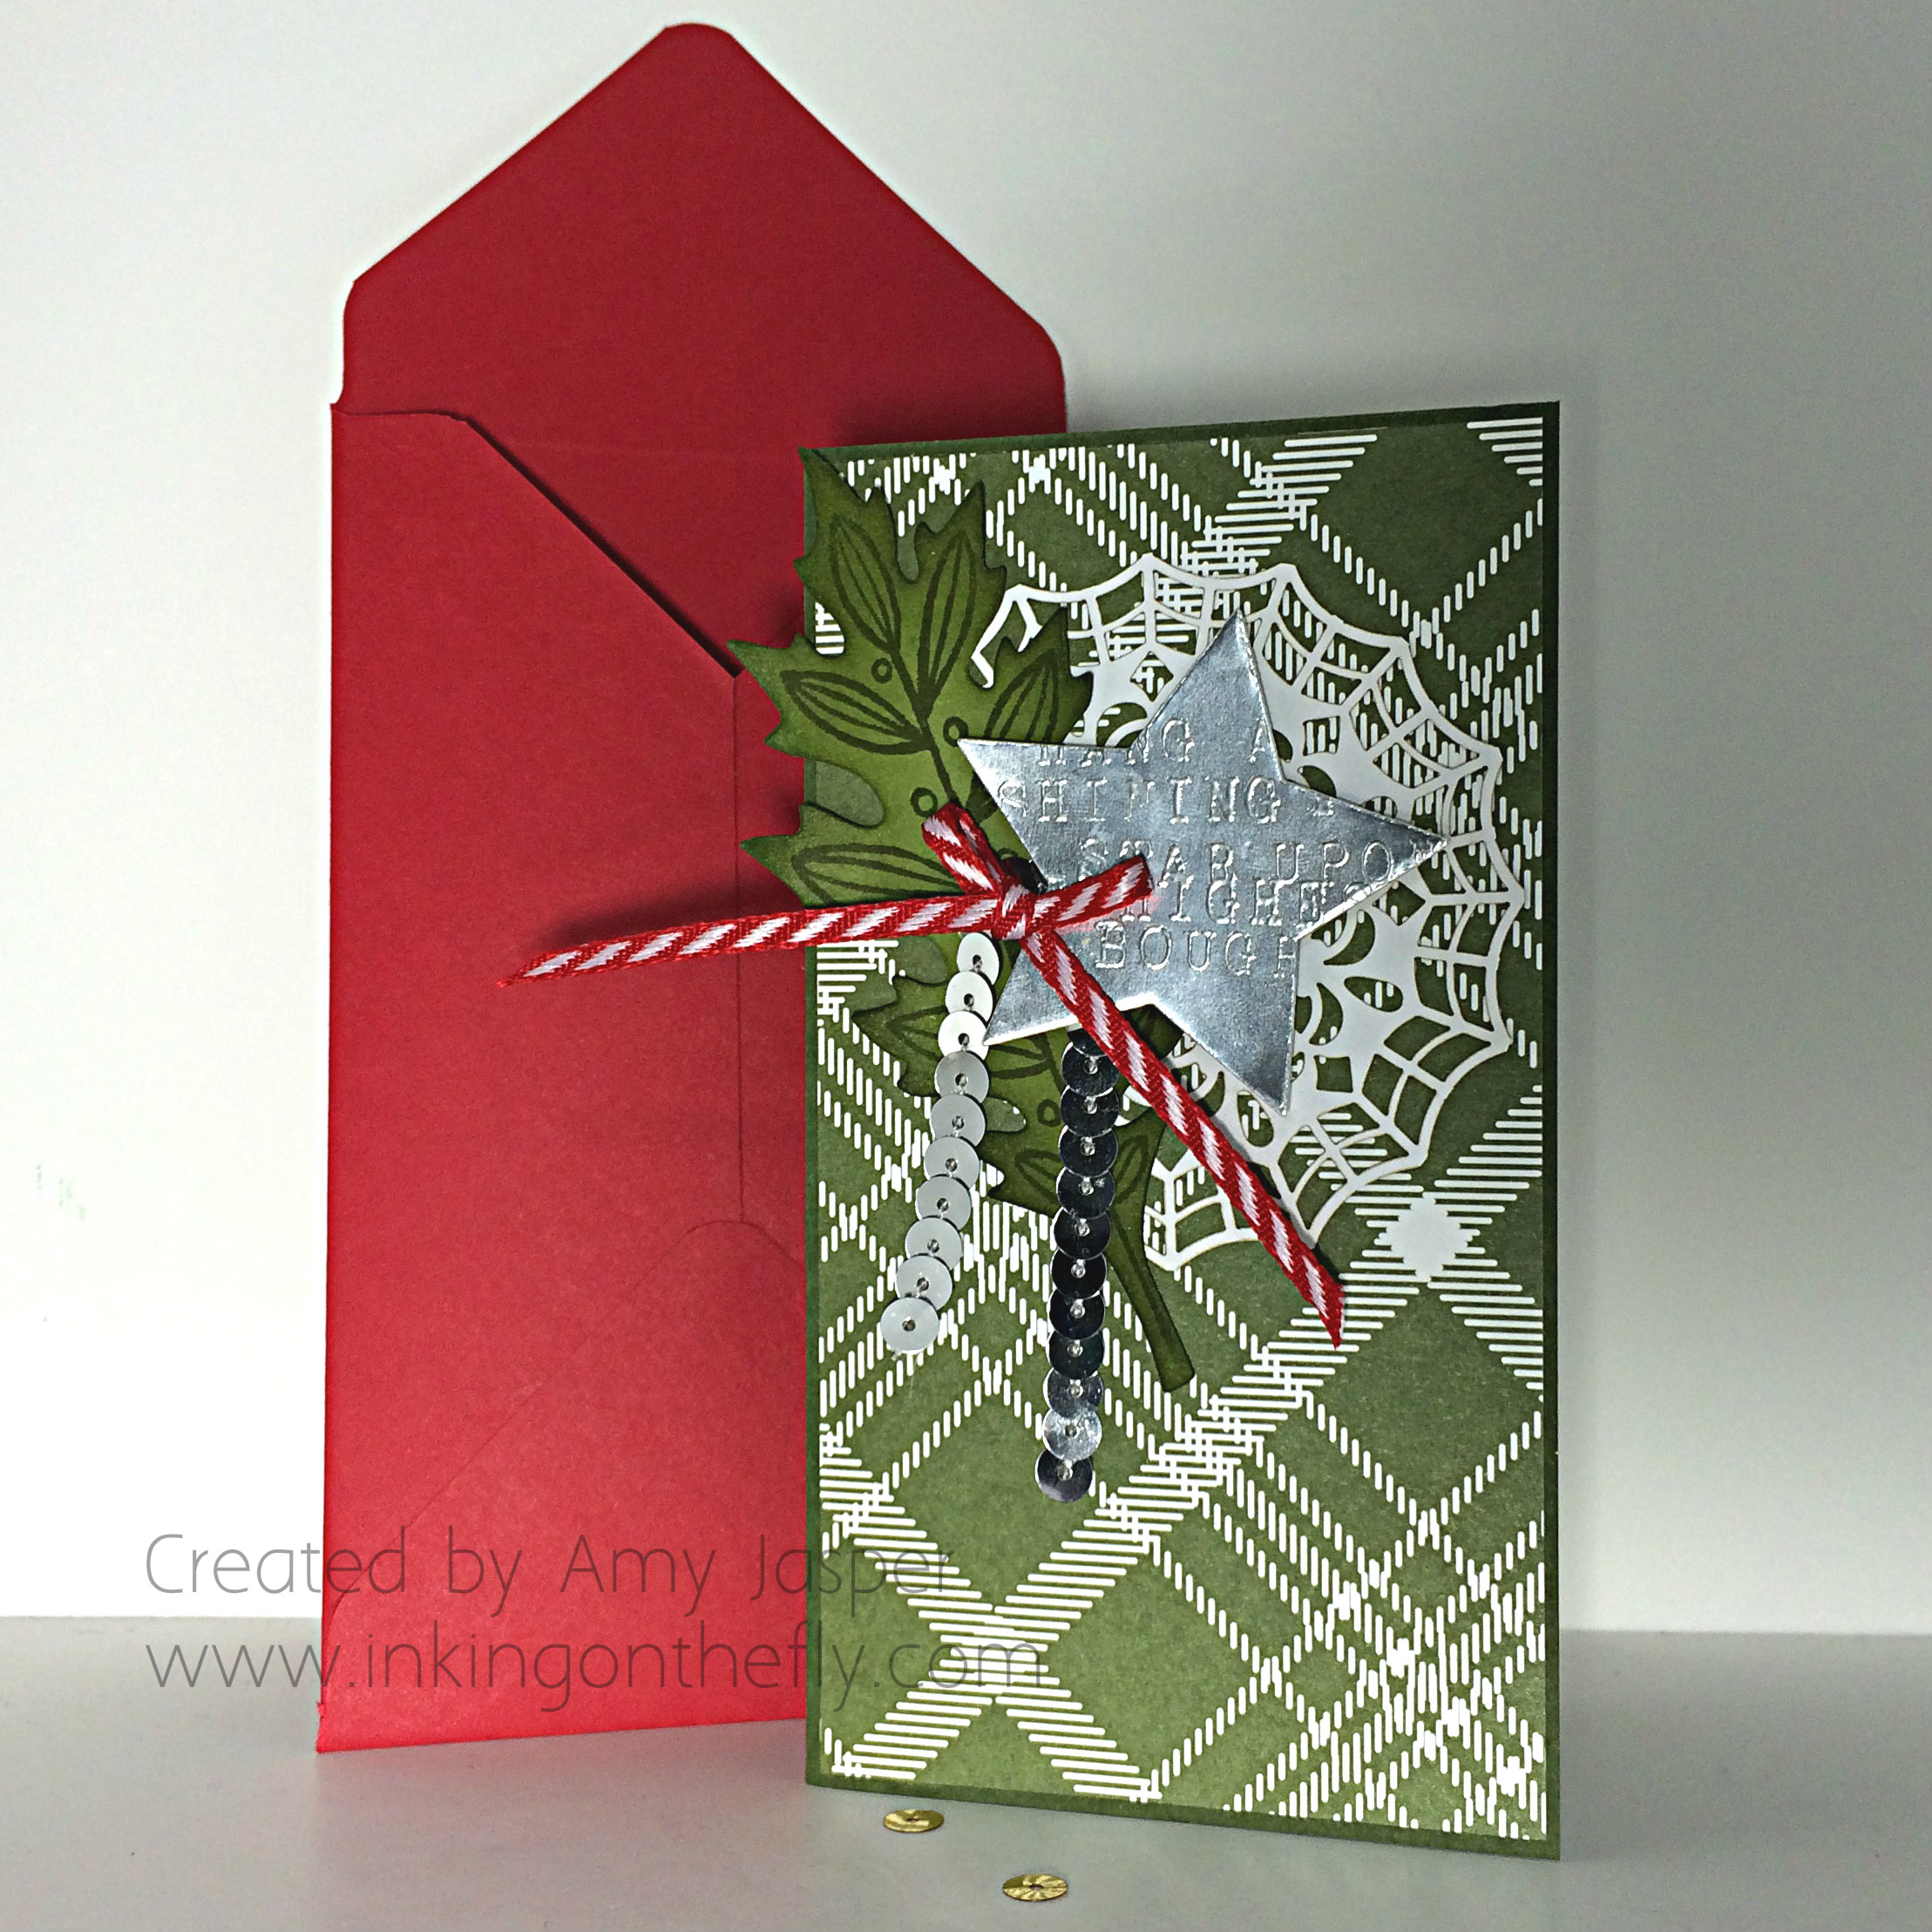
Hang a Shining Star card and envelope by Amy Jasper www.inkingonthefly.com

Because I had an unusually-sized card, I needed to make a custom envelope to go with it. The Envelope Punch Board is the perfect tool for just that very thing. Unfortunately, the envelope sizes available on the punch board still didn’t match what I needed. I played around a bit, changing the starting size of the paper and the different positions for scoring and punching and determined this:

To create an envelope for a 3″ x 5.5″ card, start with a piece of 7.5″ x 7.5″ paper (Red Envelope Paper, in this case), using the Envelope Punch Board, punch and score at 2 7/8″. Then carry on with the punch board as you normally would until your envelope is complete.

I also took the time to trim one of the side flaps on my envelope to give it a professional finish. I just drew a pencil line where I wanted to cut, then used my paper trimmer to remove the unwanted bit of paper.

This sketch is simple and cute. You should give it a try and share it with us on the As You See It Challenge blog. We love to see your take on our challenges!!

Did my card make you sing out loud? The words on the star are from one of my favourite Christmas tunes, “Have Yourself a Merry Little Christmas”.

Do you have a favourite Christmas song? Leave a comment and let me know!
Fleecy Caribou and Blog Candy

I’m curious about holiday traditions. Everywhere I go, I’m hearing about different traditions. Many I’ve heard of before, like chocolate advent calendars, touring the Christmas lights in town, or waiting in long lines to get photos with Santa in the mall.

I’d love to make it a tradition to shoot down all the tacky plastic Santa’s from people’s rooftops, but I’m pretty sure that’s illegal. Too bad. I think it would be very satisfying. Perhaps someone should add that to a rifle range somewhere… a tacky plastic Santa rifle range, lol!

More and more, I’m hearing about new traditions like wine advent calendars, or tea ones, or chocolate ones, or Lego ones! There’s Elf on the Shelf. Different movies, like Die Hard (yes, it is a Christmas movie) are enjoyed over the holidays. Some people don’t exchange gifts anymore, but give to people in need, instead.

I make Christmas crafts. Cards and decor. Gift wrap and gift tags.

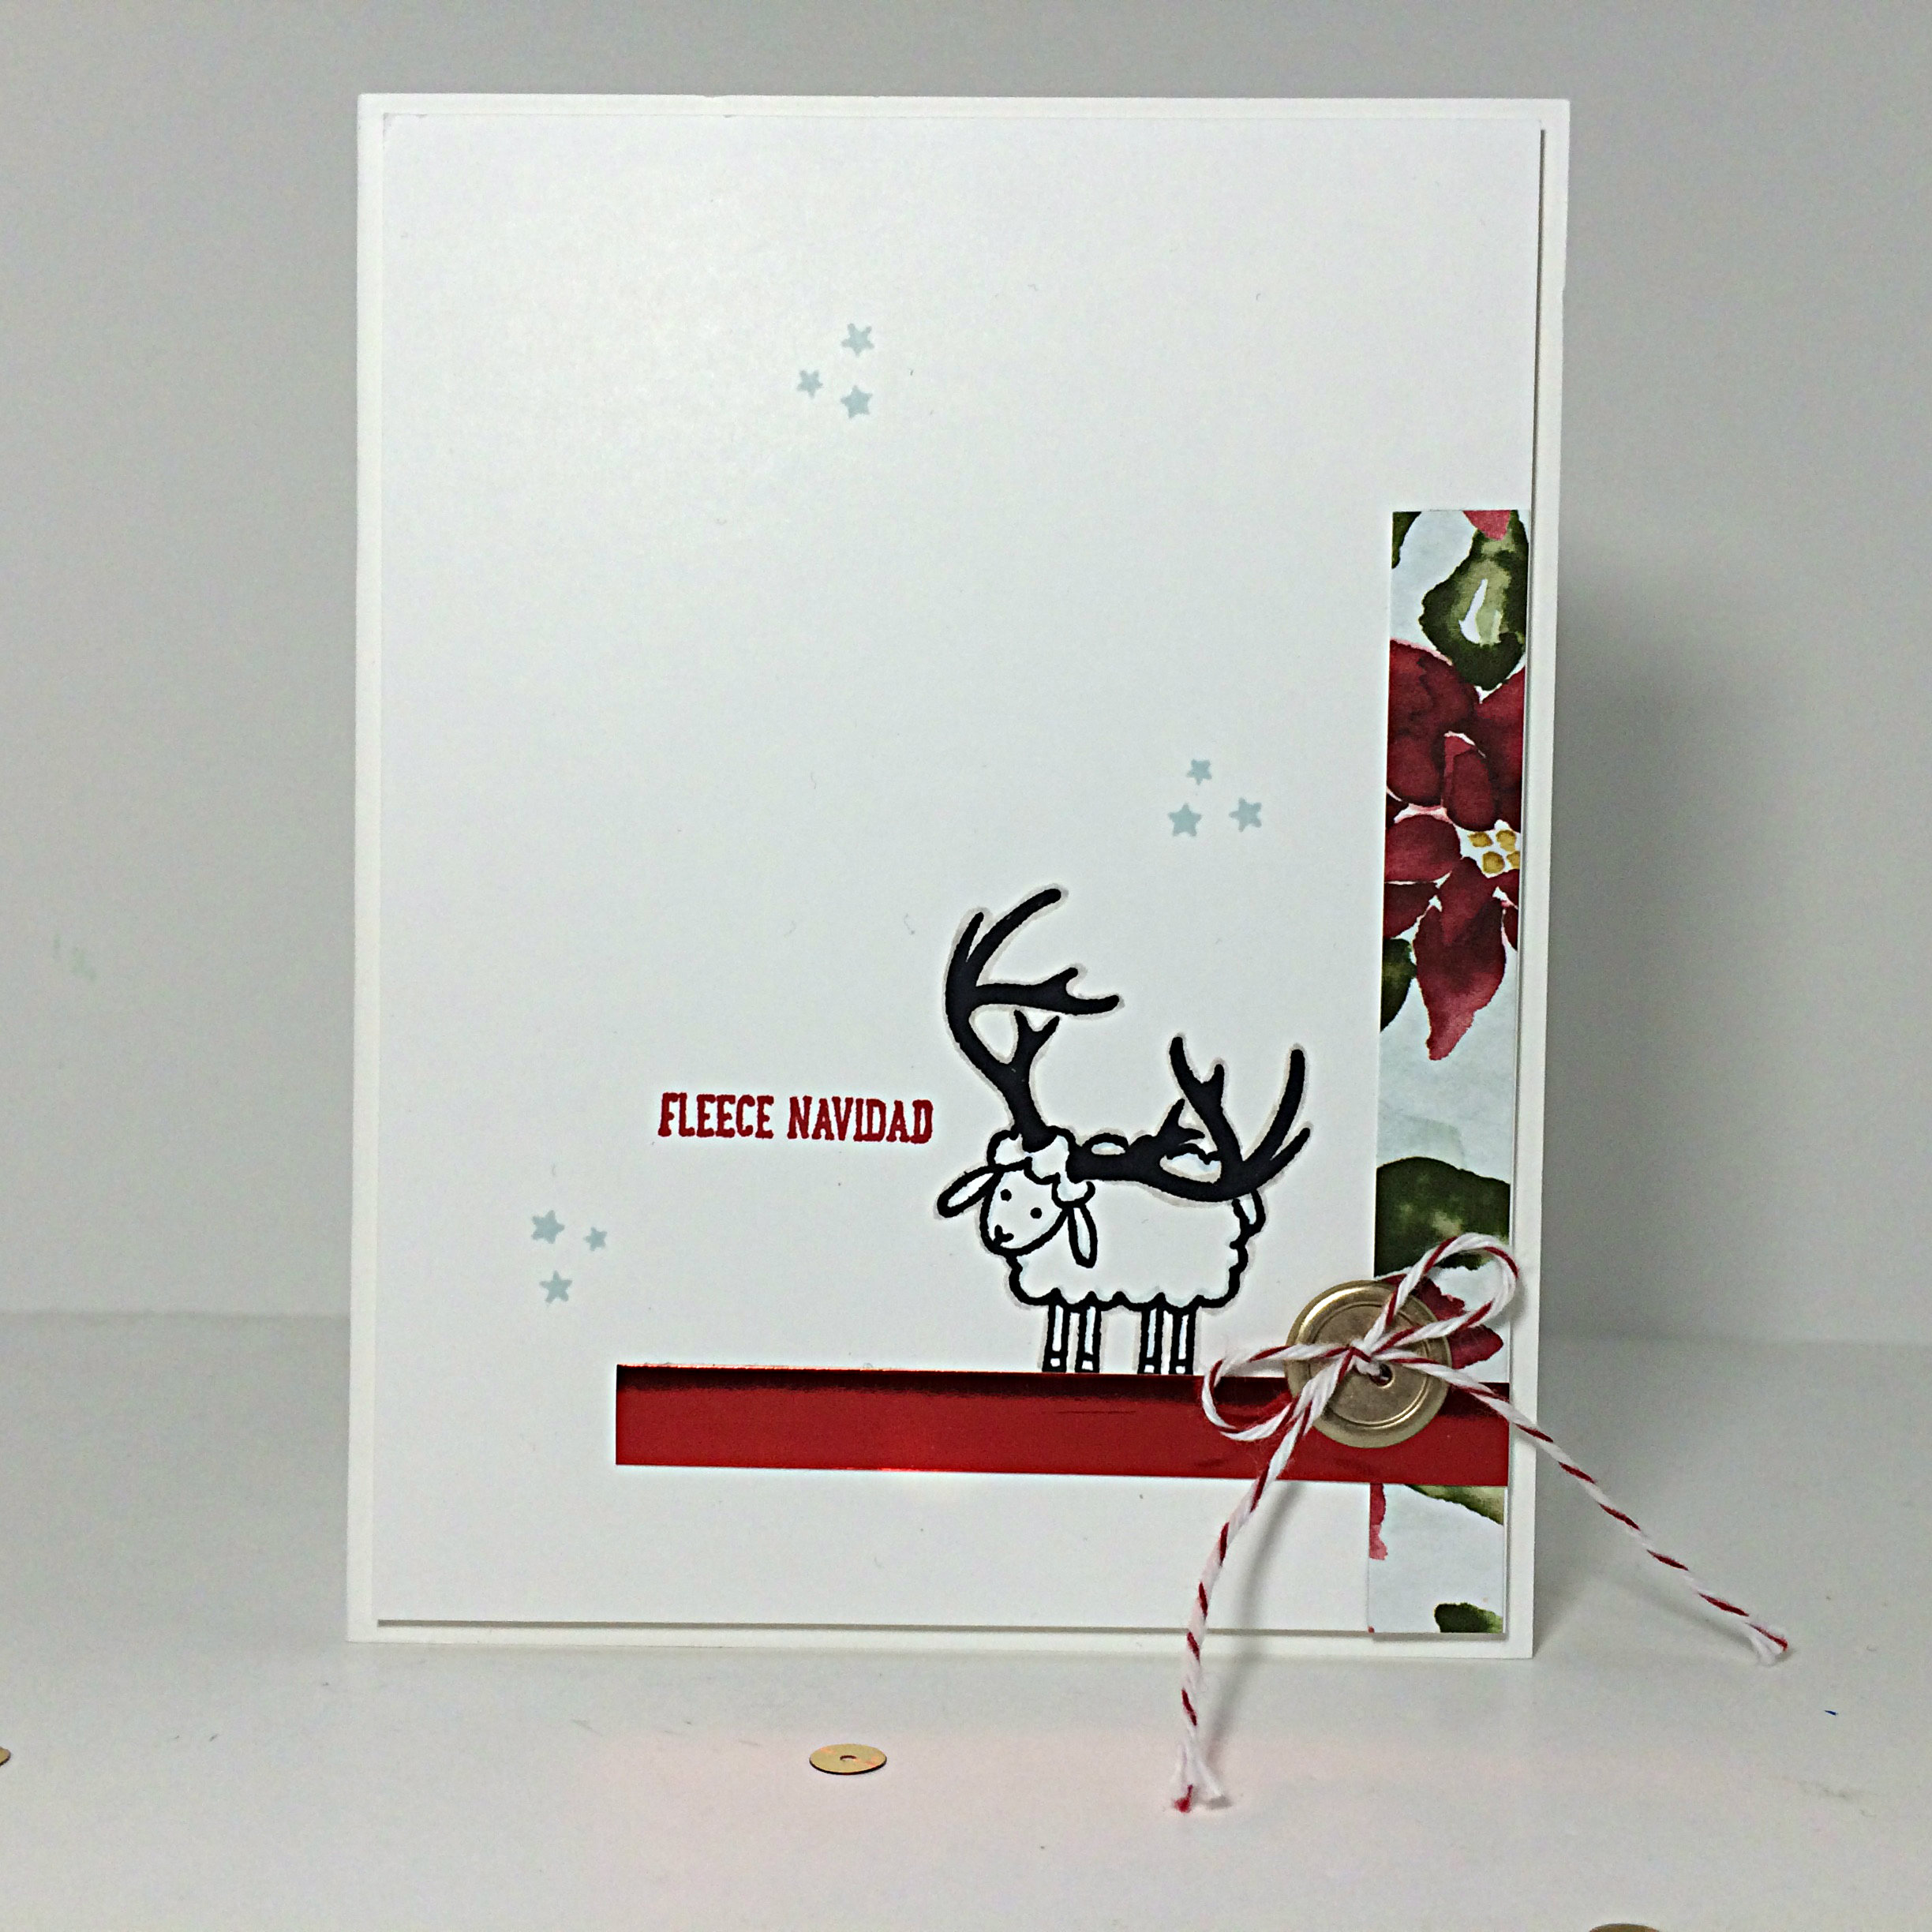
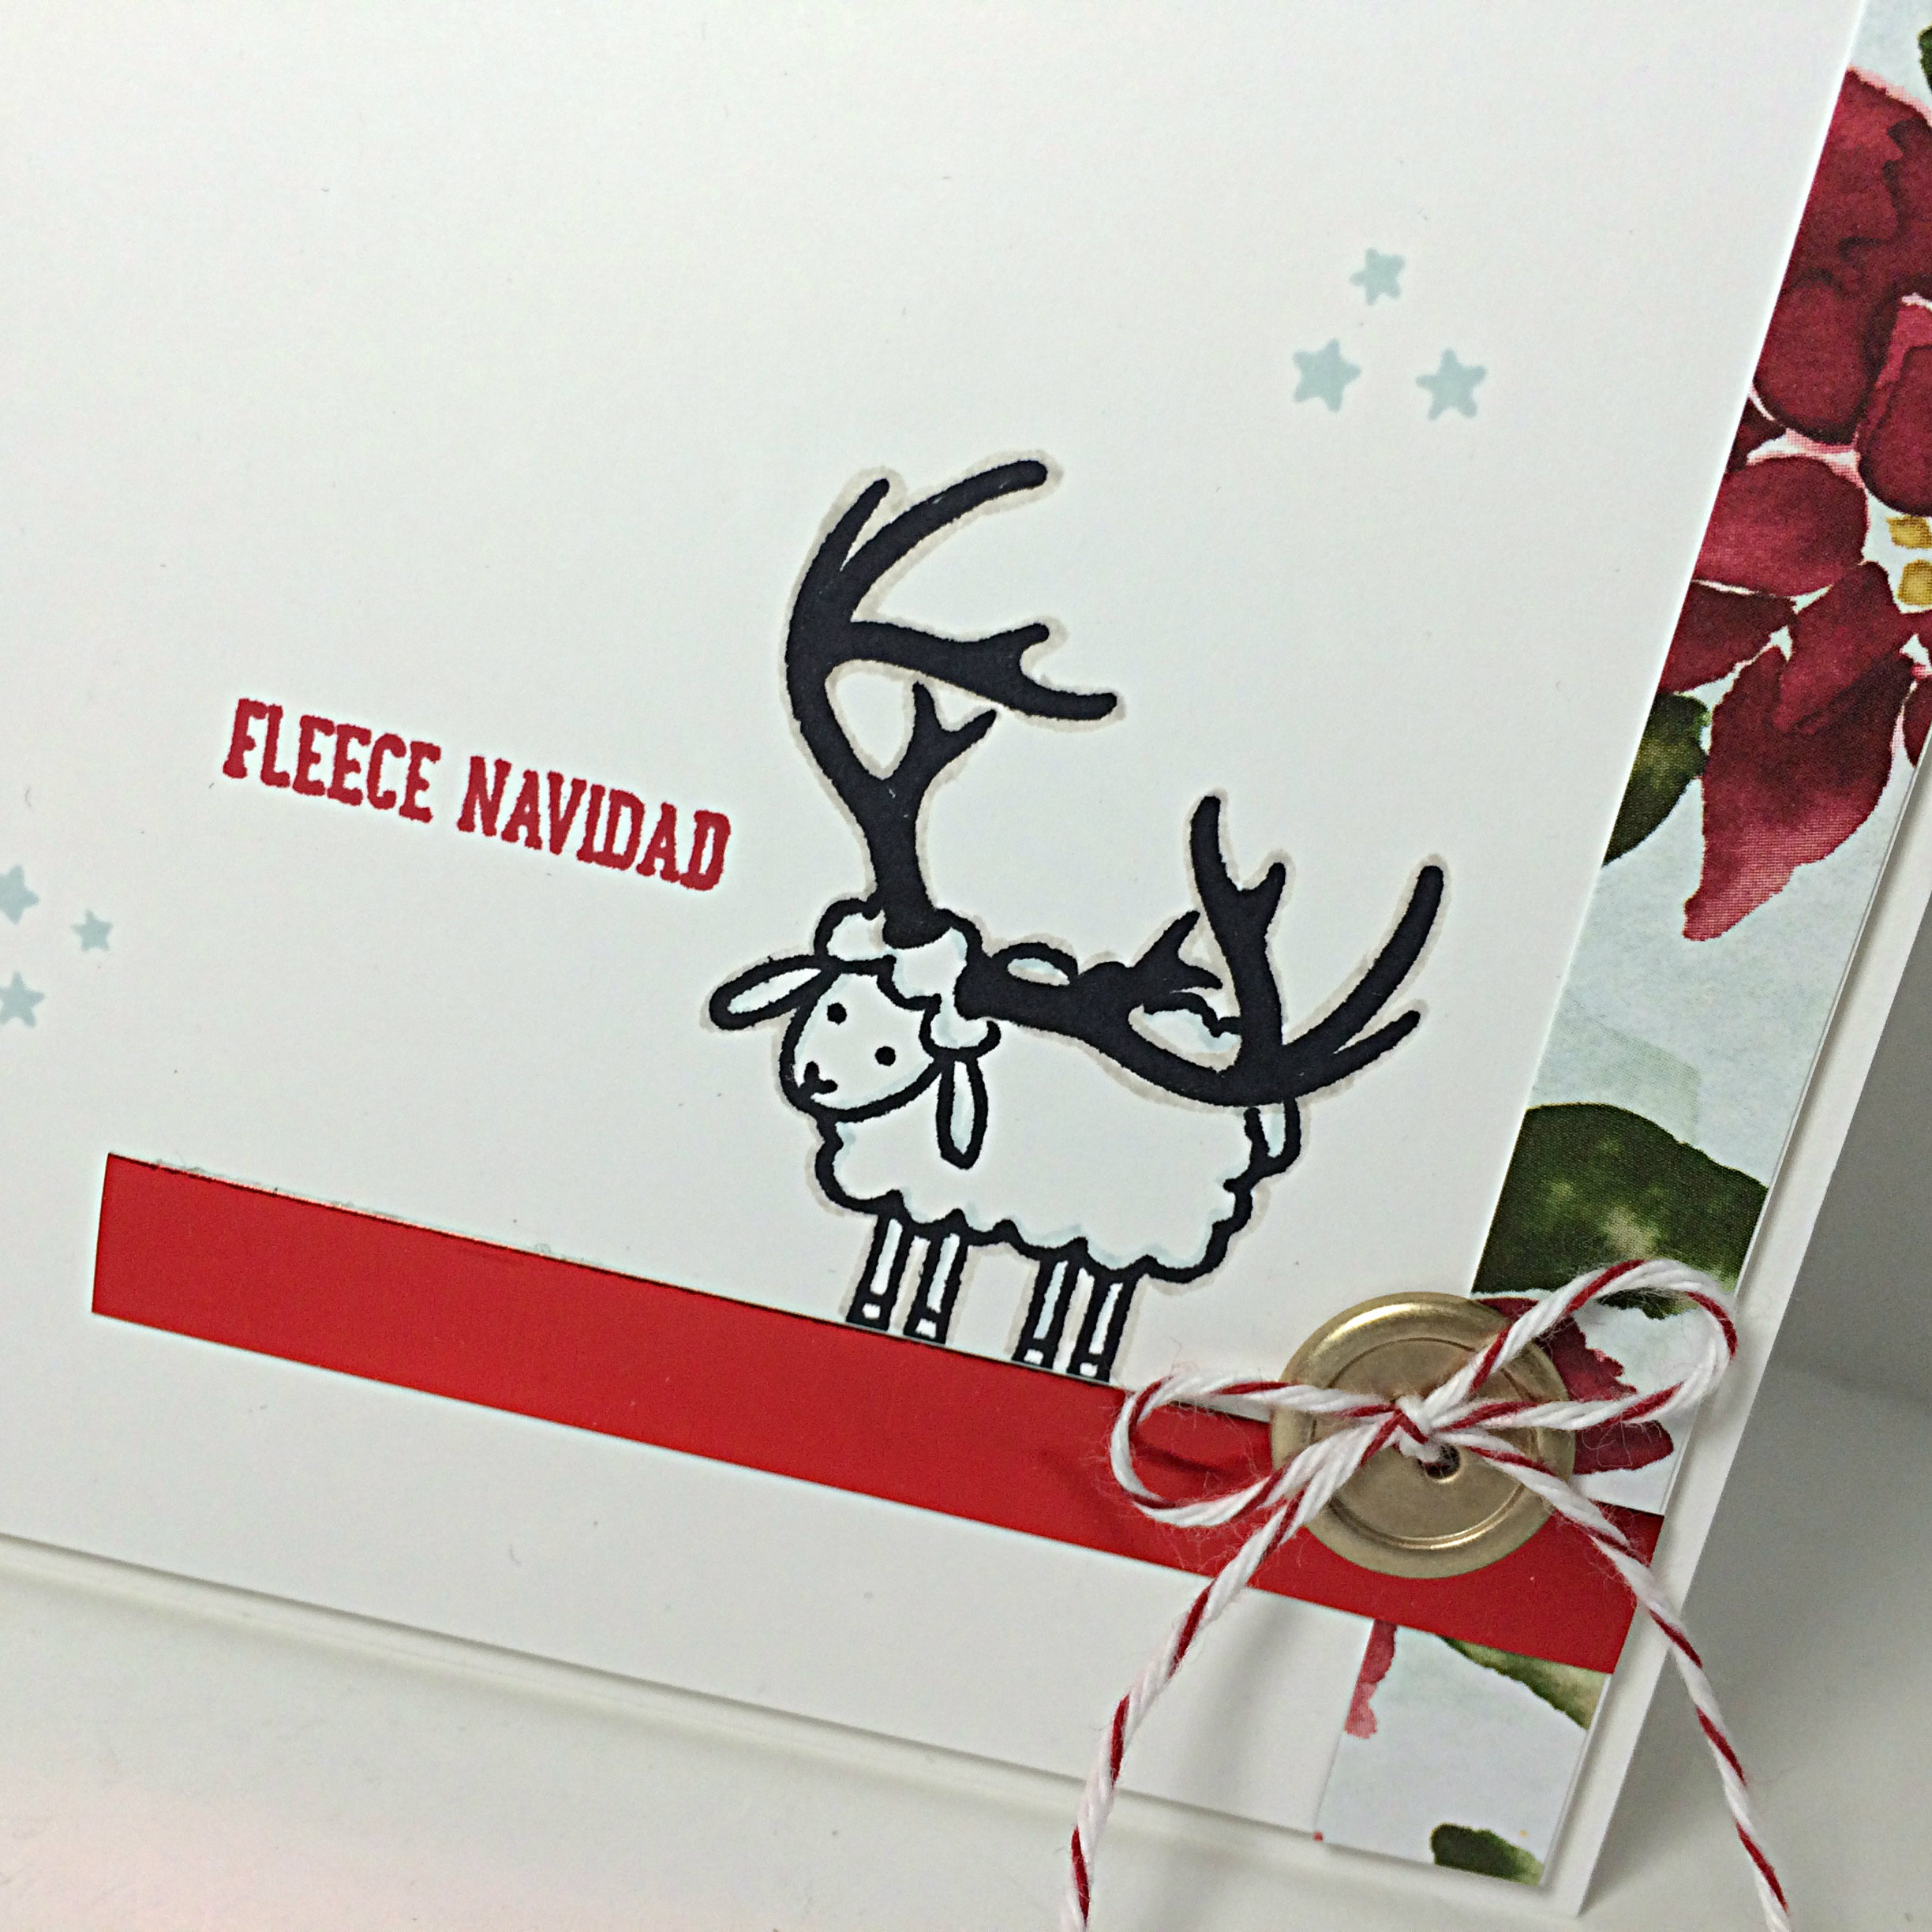
Here’s one of my simple and quick Christmas cards using the Barnyard Babies stamp set in combination with the Wonderland Stamp set.

Fleecy Caribou card by Amy Jasper www.inkingonthefly.com - Barnyard Babies stamp set - Wonderland Stamp set - Jingle all the Way stamp setI love this little lamb with the caribou antlers. I created another card with him on a previous post here.

Did you know that caribou in North America are the same as the reindeer that pull Santa’s sleigh? Just a fun fact for you.

“You know Dasher and Dancer, and Prancer and Button,

Comet and Cupid and Donner and Mutton”

Fleecy Caribou card by Amy Jasper www.inkingonthefly.com The Season of Cheer patterned paper and the Red Foil paper from Stampin’ Up are so pretty and festive together! Don’t you think?

I added the stars on this card using Soft Sky ink and the Jingle All the Way stamp set from Stampin’ Up. I used the Sahara Sand Marker to give a slight shadow outline to my image, while adding a slight blue tone to my white fleecy caribou by “in-lining” the image with a Soft Sky Marker.

It’s your turn now.  In the comments on this post, tell me what your favourite holiday tradition is from when you were growing up and/or one new holiday tradition that you have started or would like to start with your family.

Your comment and information in the entry form will count as an entry into a draw for my *blog candy today!! Be sure to check back on Tuesday next week to see if you won!!

Christmas Tagables

*Enter to Win!

Christmas Tagables photopolymer stamp set by Stampin’ Up!

*You must be a Canadian resident to enter. Please fill out the entry form below AND leave a comment on my blog about your holiday traditions. Just one entry per person please. Winner will be announced on Tuesday, December 8th.

Time for Tinsel

And here we are, in British Columbia, Canada, with the frosty cold weather finally upon us, the crunchy snow squeaking under our feet, the “whoah-that-was-close” feeling when you slip on a patch of ice and catch yourself just in time, the thoughts of Christmas decorations and all the crafty plans to make the season bright, and the cozy pleasure of drinking rum and Eggnog by the fire.

This is a season filled with warmth of heart. Family, friends, good deeds, and good food, all contribute to internal warmth when the weather outside is frightful.

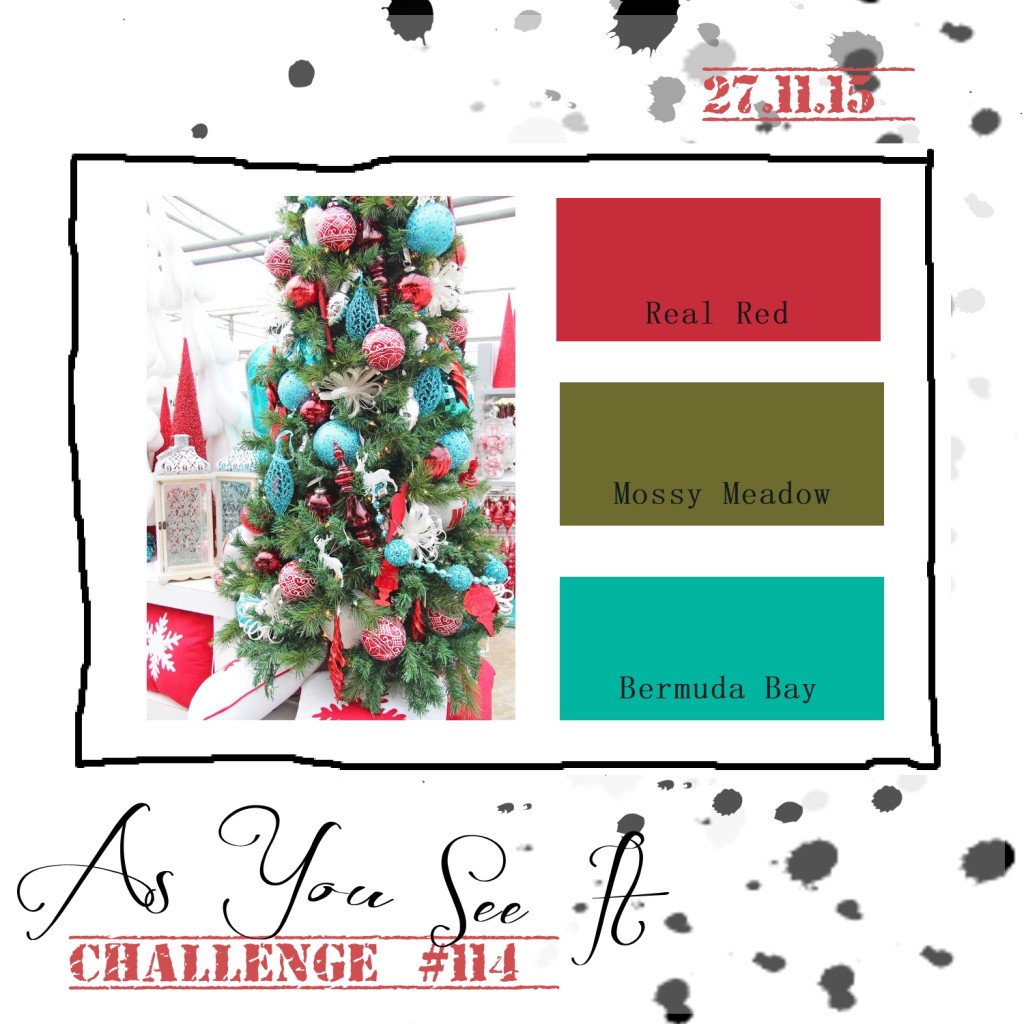
Christmas cards are part of the sharing of that warmth – warming the hearts of others. The colour challenge for today’s As You See It Challenge might help you warm someone from the inside out!

AYSIChallenge114-1024x1024

Love these crazy colours. The Real Red and Bermuda Bay combo is wild and playful, while the Mossy Meadow is the “calm it down” addition to the trio.

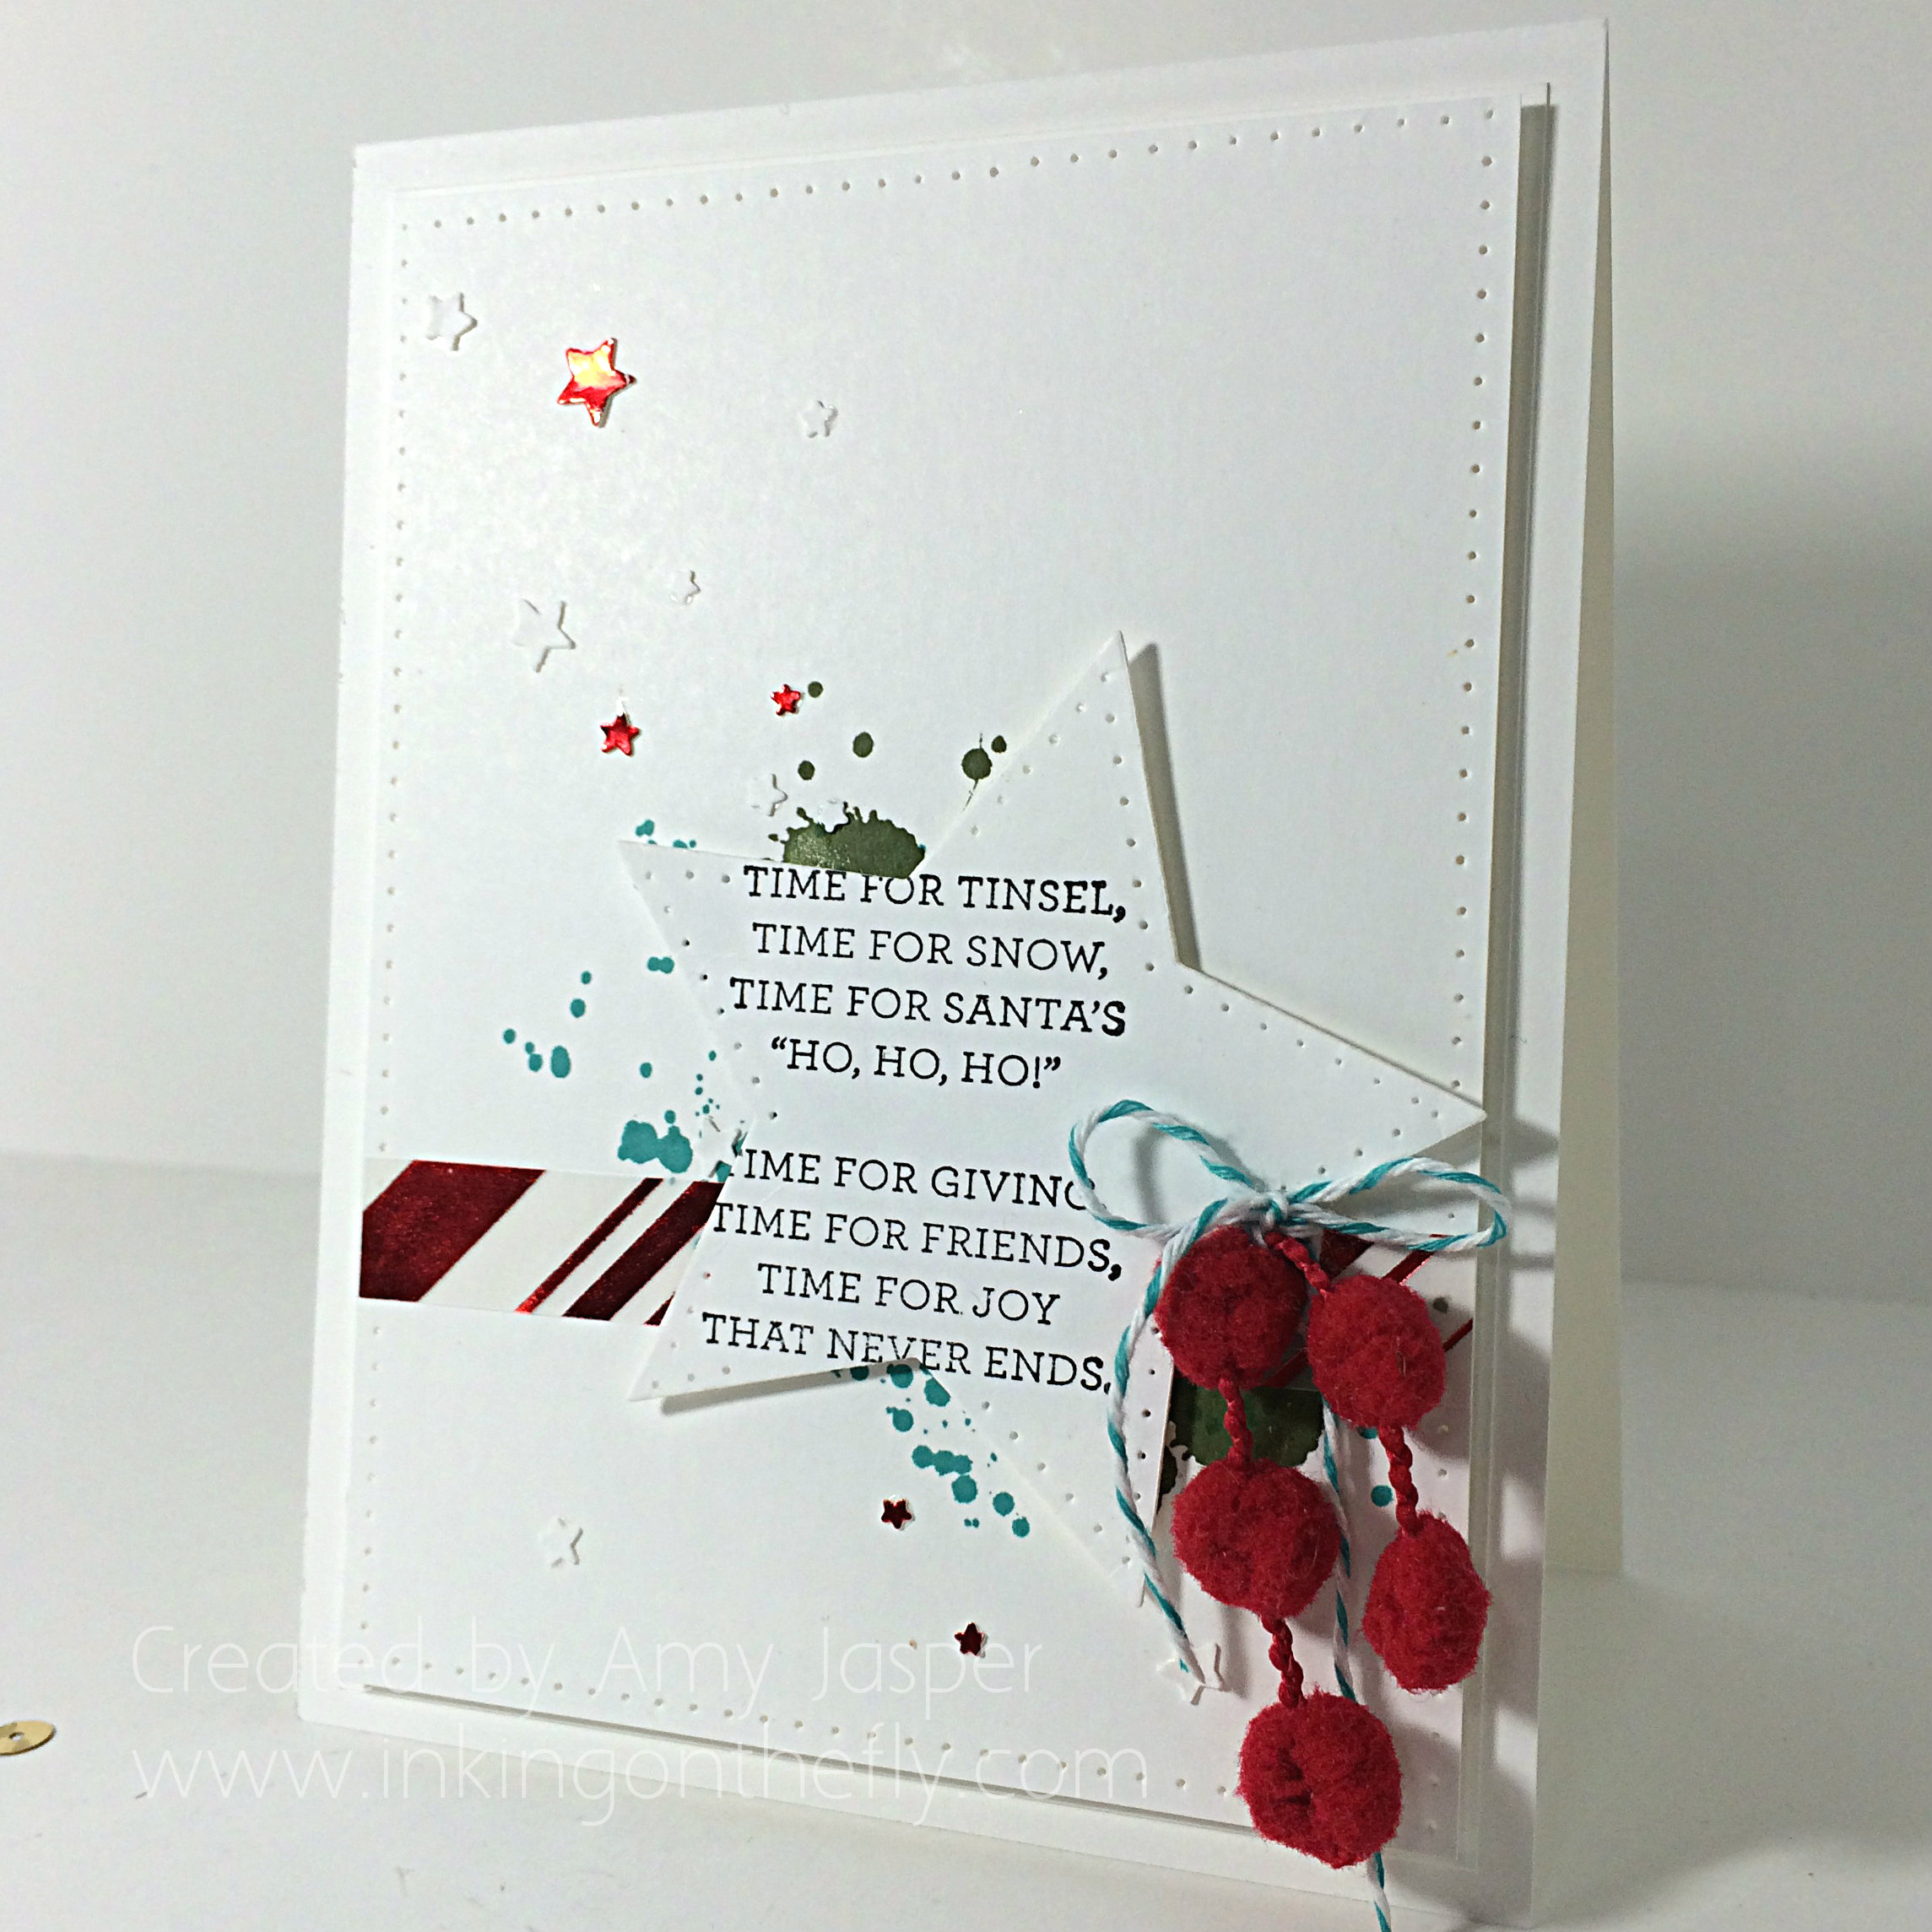
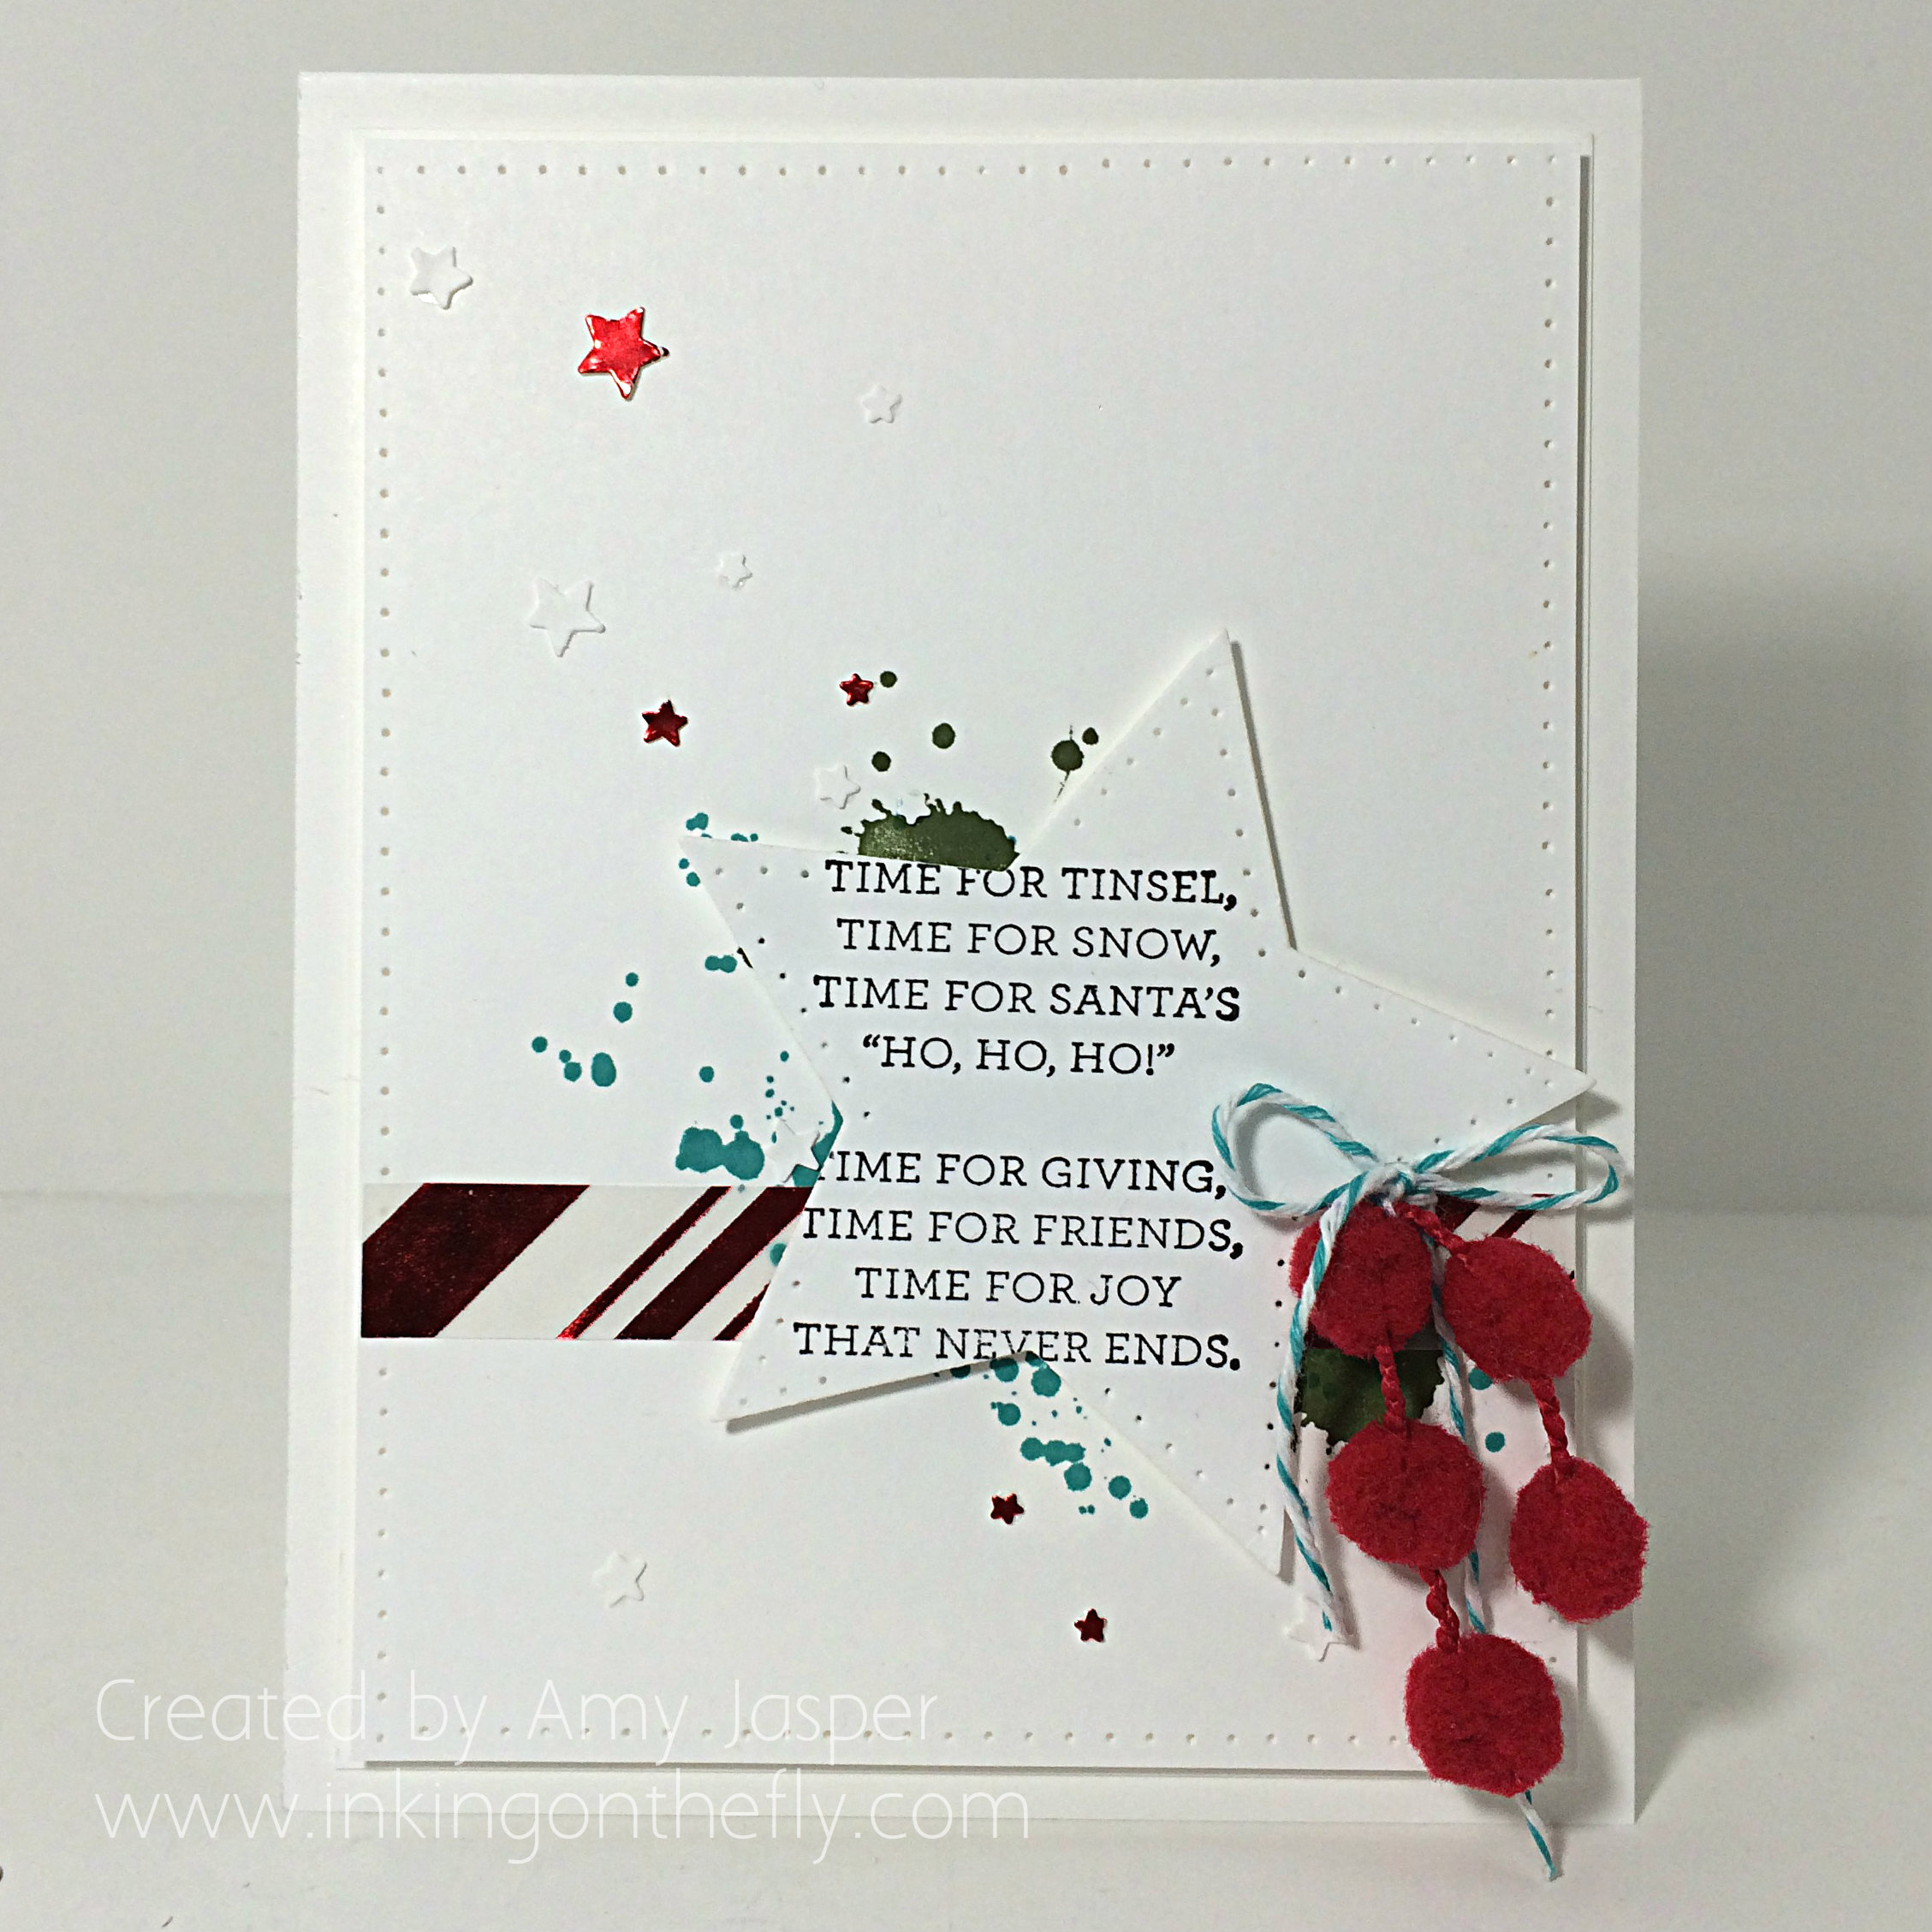
I decided to work with a lot of white space to make my card bright and wintery with pops of colour to keep it fun!

114angle

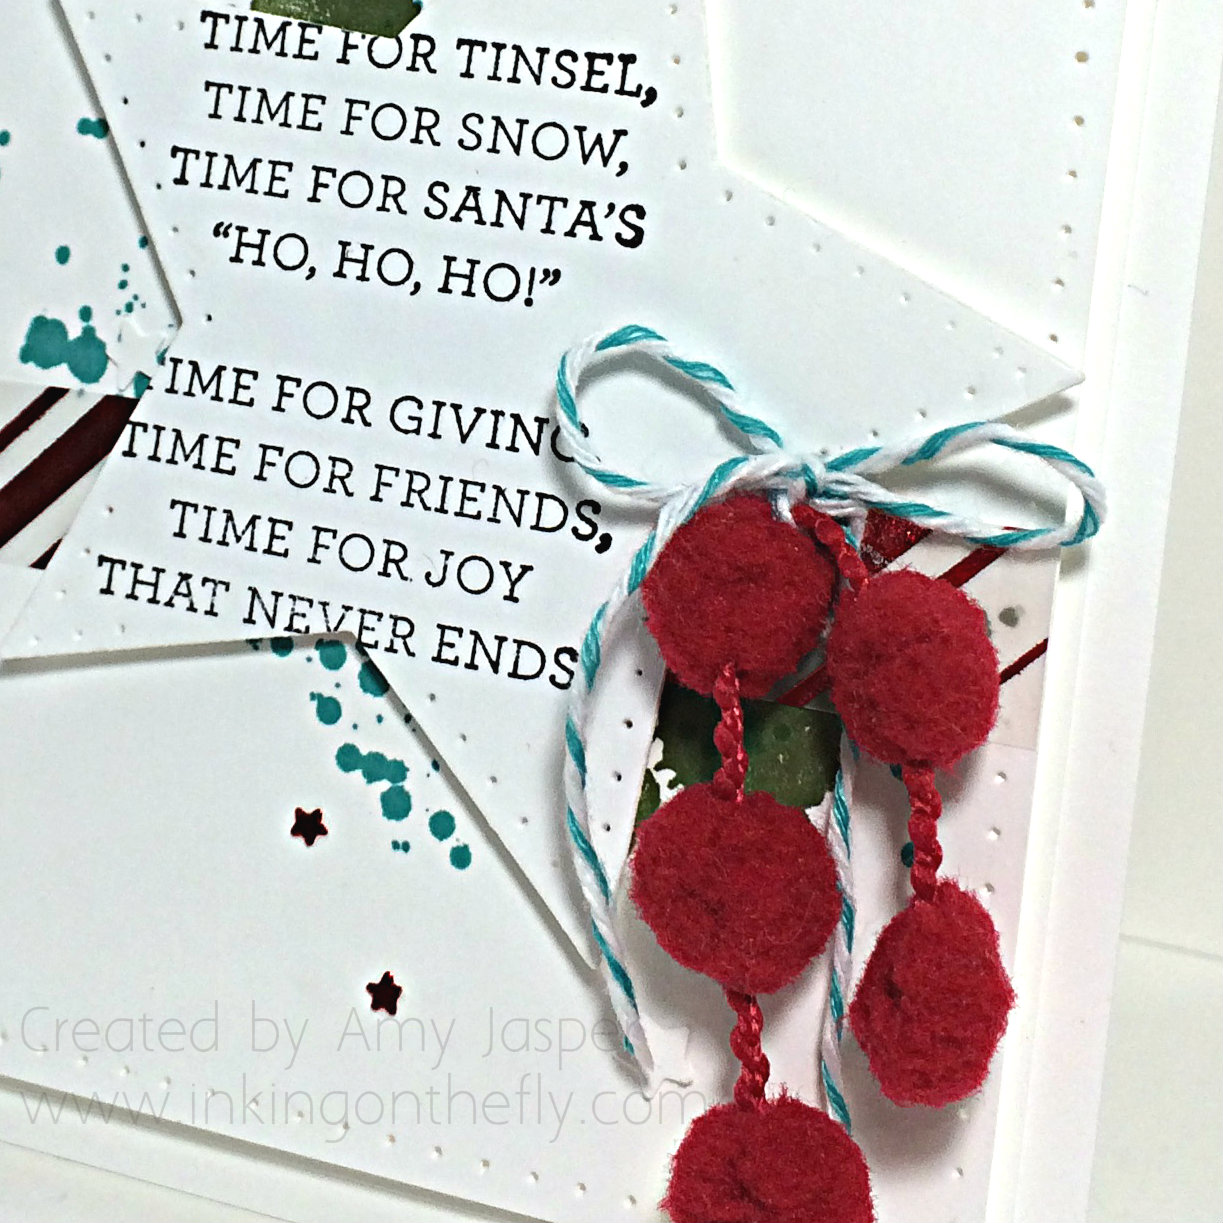
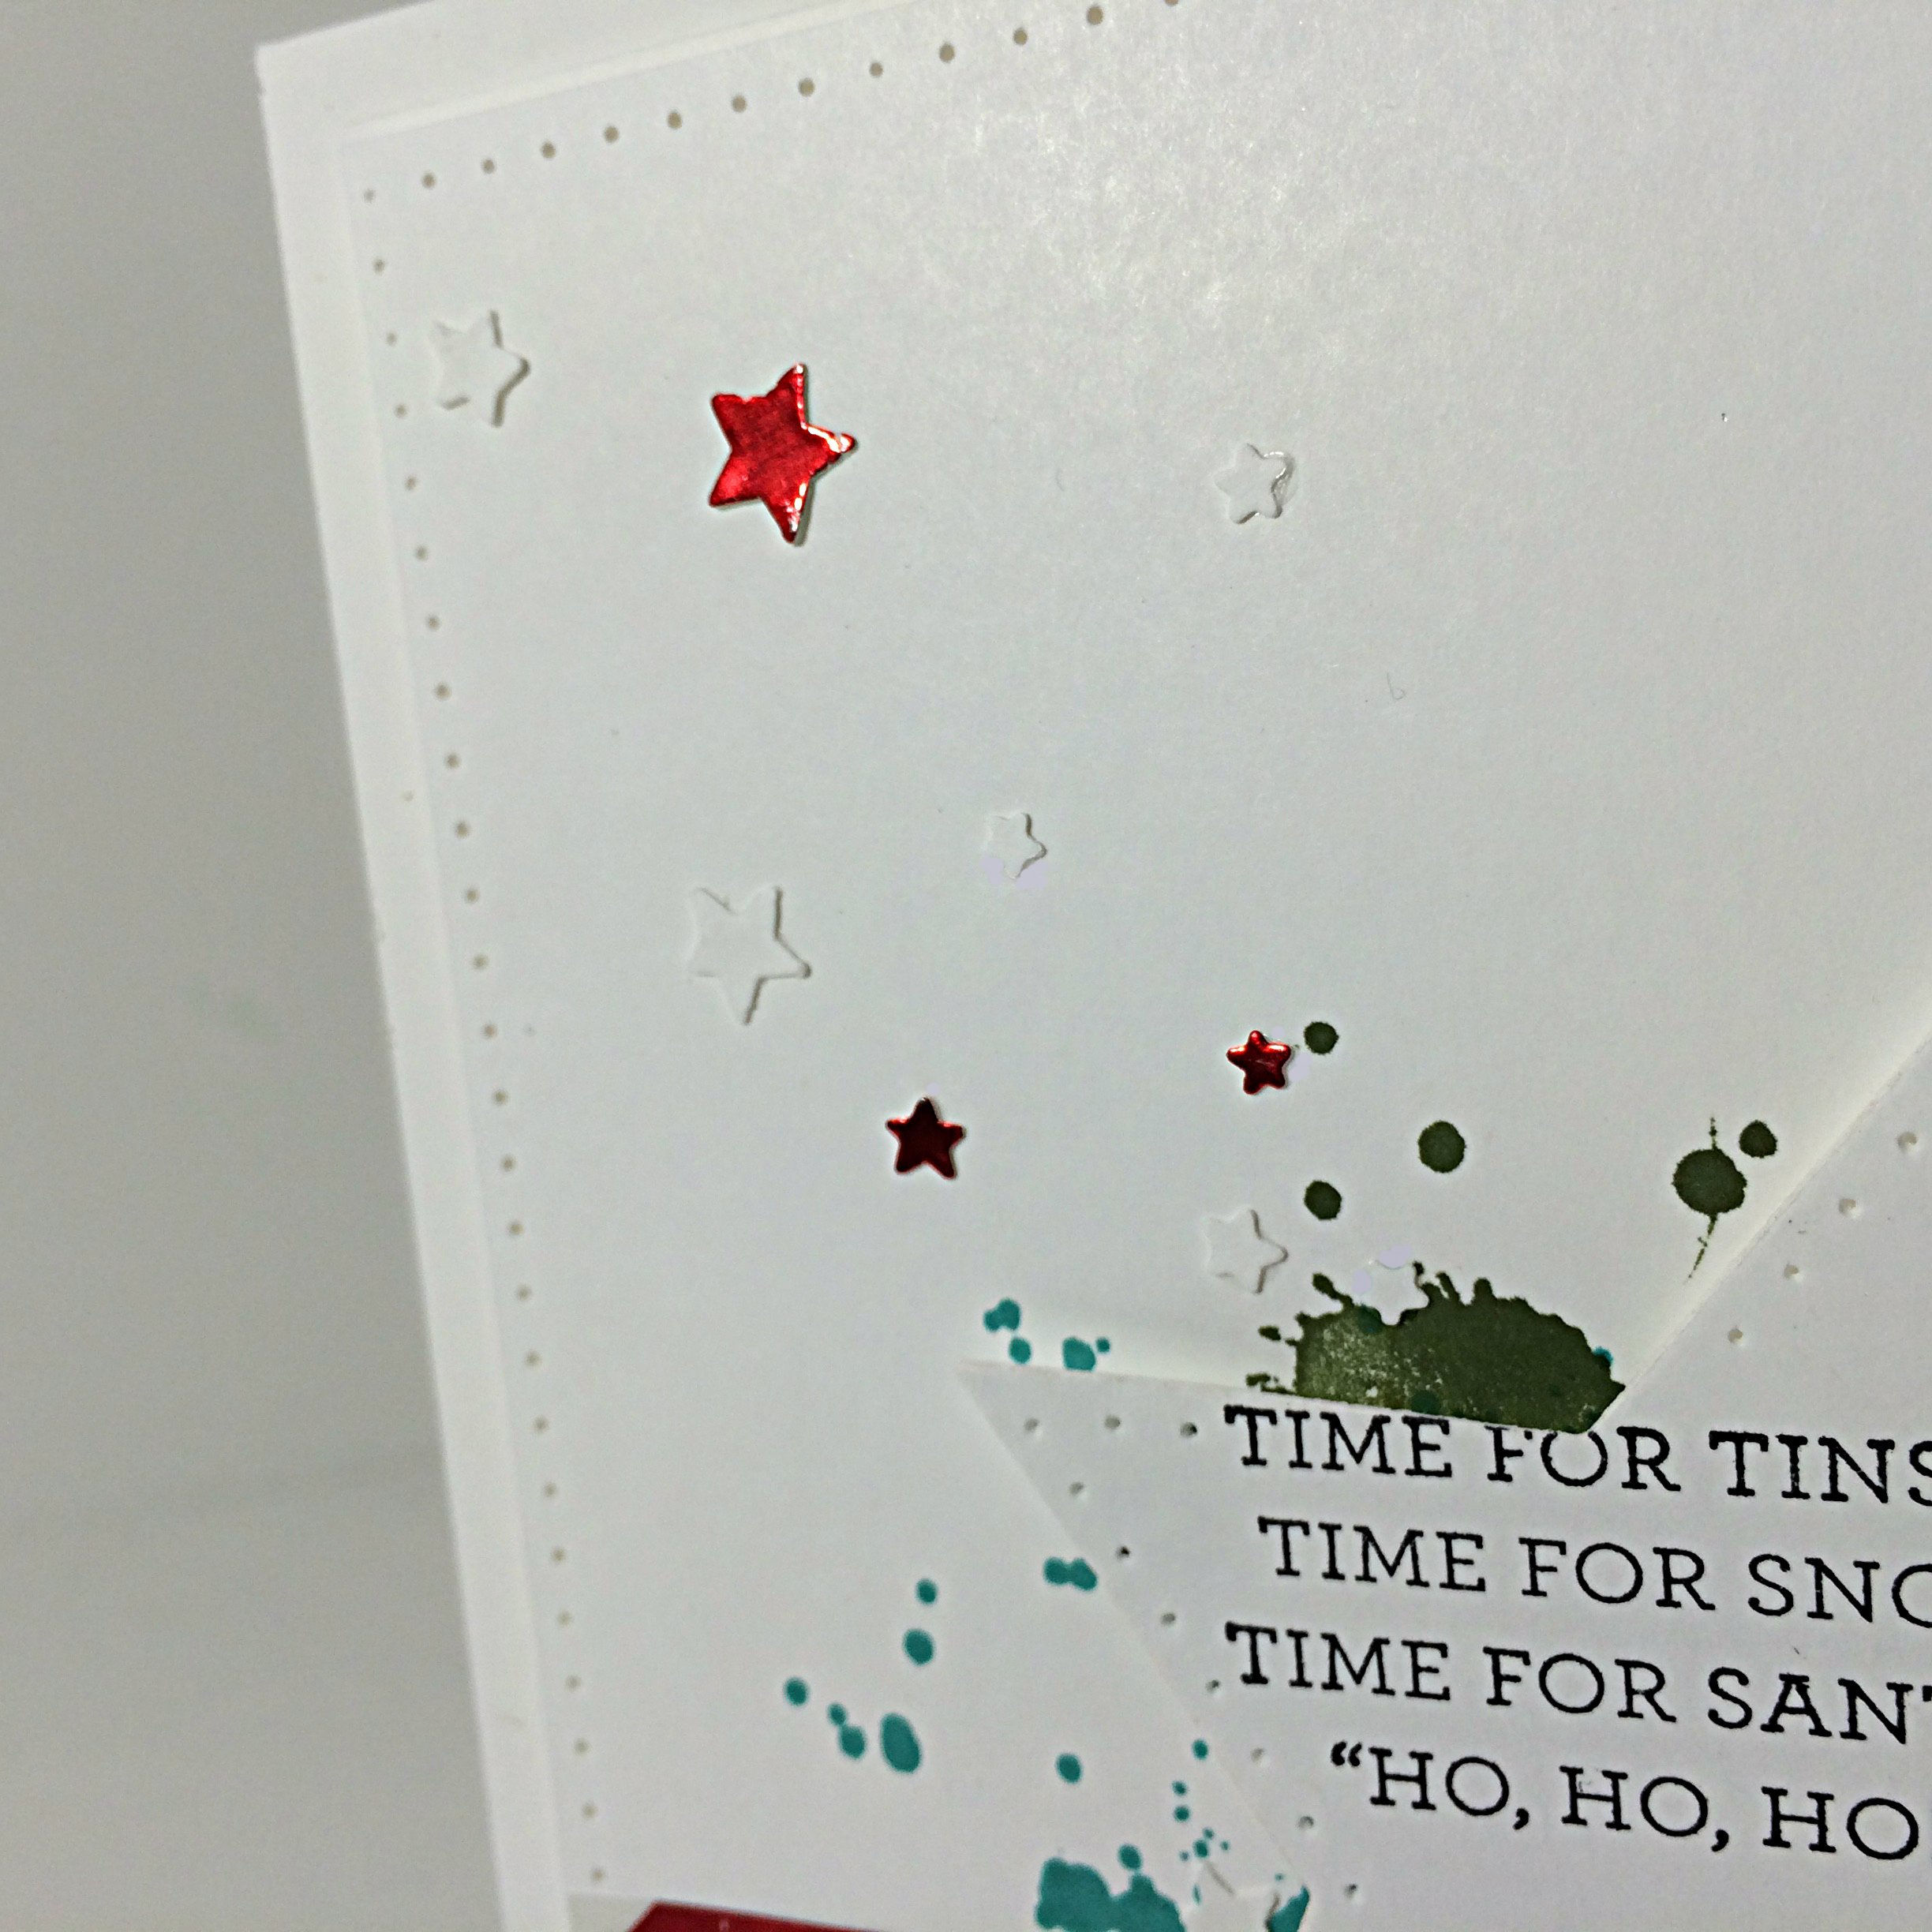
I used the Whisper White Thick Cardstock for the card base (LOVE that stuff!), then did a narrow mat layer of Whisper White under the decorated layer of Whisper White that is paper pierced all around the edge using my Paper Piercing Tool, Stampin’ Pierce Mat, and my Updated Essentials Paper Piercing Pack. That layer is raised on Stampin’ Dimensionals to allow the shadow beneath it to accentuate the paper piercing detail.

114starclose

The decorated layer of Whisper White was stamped using the splotch images from the Gorgeous Grunge Stamp Set. I used Bermuda Bay and Mossy Meadow ink. Then I added the strip of the Holiday Fancy Foil Designer Vellum, before placing my star image with the sentiment.

The sentiment is from the Versatile Christmas Stamp Set and is stamped in Jet Black Stazon Ink on Whisper White cardstock. This was then carefully die cut with one of the stars from my Star Framelits. I then used my Paper Piercing Tool again with the template to add the paper piercing detail on the star.

114starsThe star was adhered to the card front with Stampin’ Dimensionals.

The little stars were created with the Confetti Stars Punch from Whisper White cardstock and Red Foil paper. These were adhered with the very beloved Fine-Tip Glue Pen, perfect for adhering all your little detail items to your projects!

The Red Pom Pom trim and the Bermuda Bay Baker’s Twine were the perfect compliment to the playfulness of this card design.

114Amy1Be sure to stop by this Tuesday to see what I have for blog candy!! It’s coming!

Have a great weekend! Be sure to play along this week with this fun colour combination. I hope you share what you come up with by linking it to the As You See It Challenge Blog. I can’t wait to see!!