card

Quick and Simple Christmas

058headerWelcome! It’s time for another As You See It Challenge sketch! I have a simple Christmas card for you today. I was so rushed and pulled this together in about 15 minutes! Eek!

059

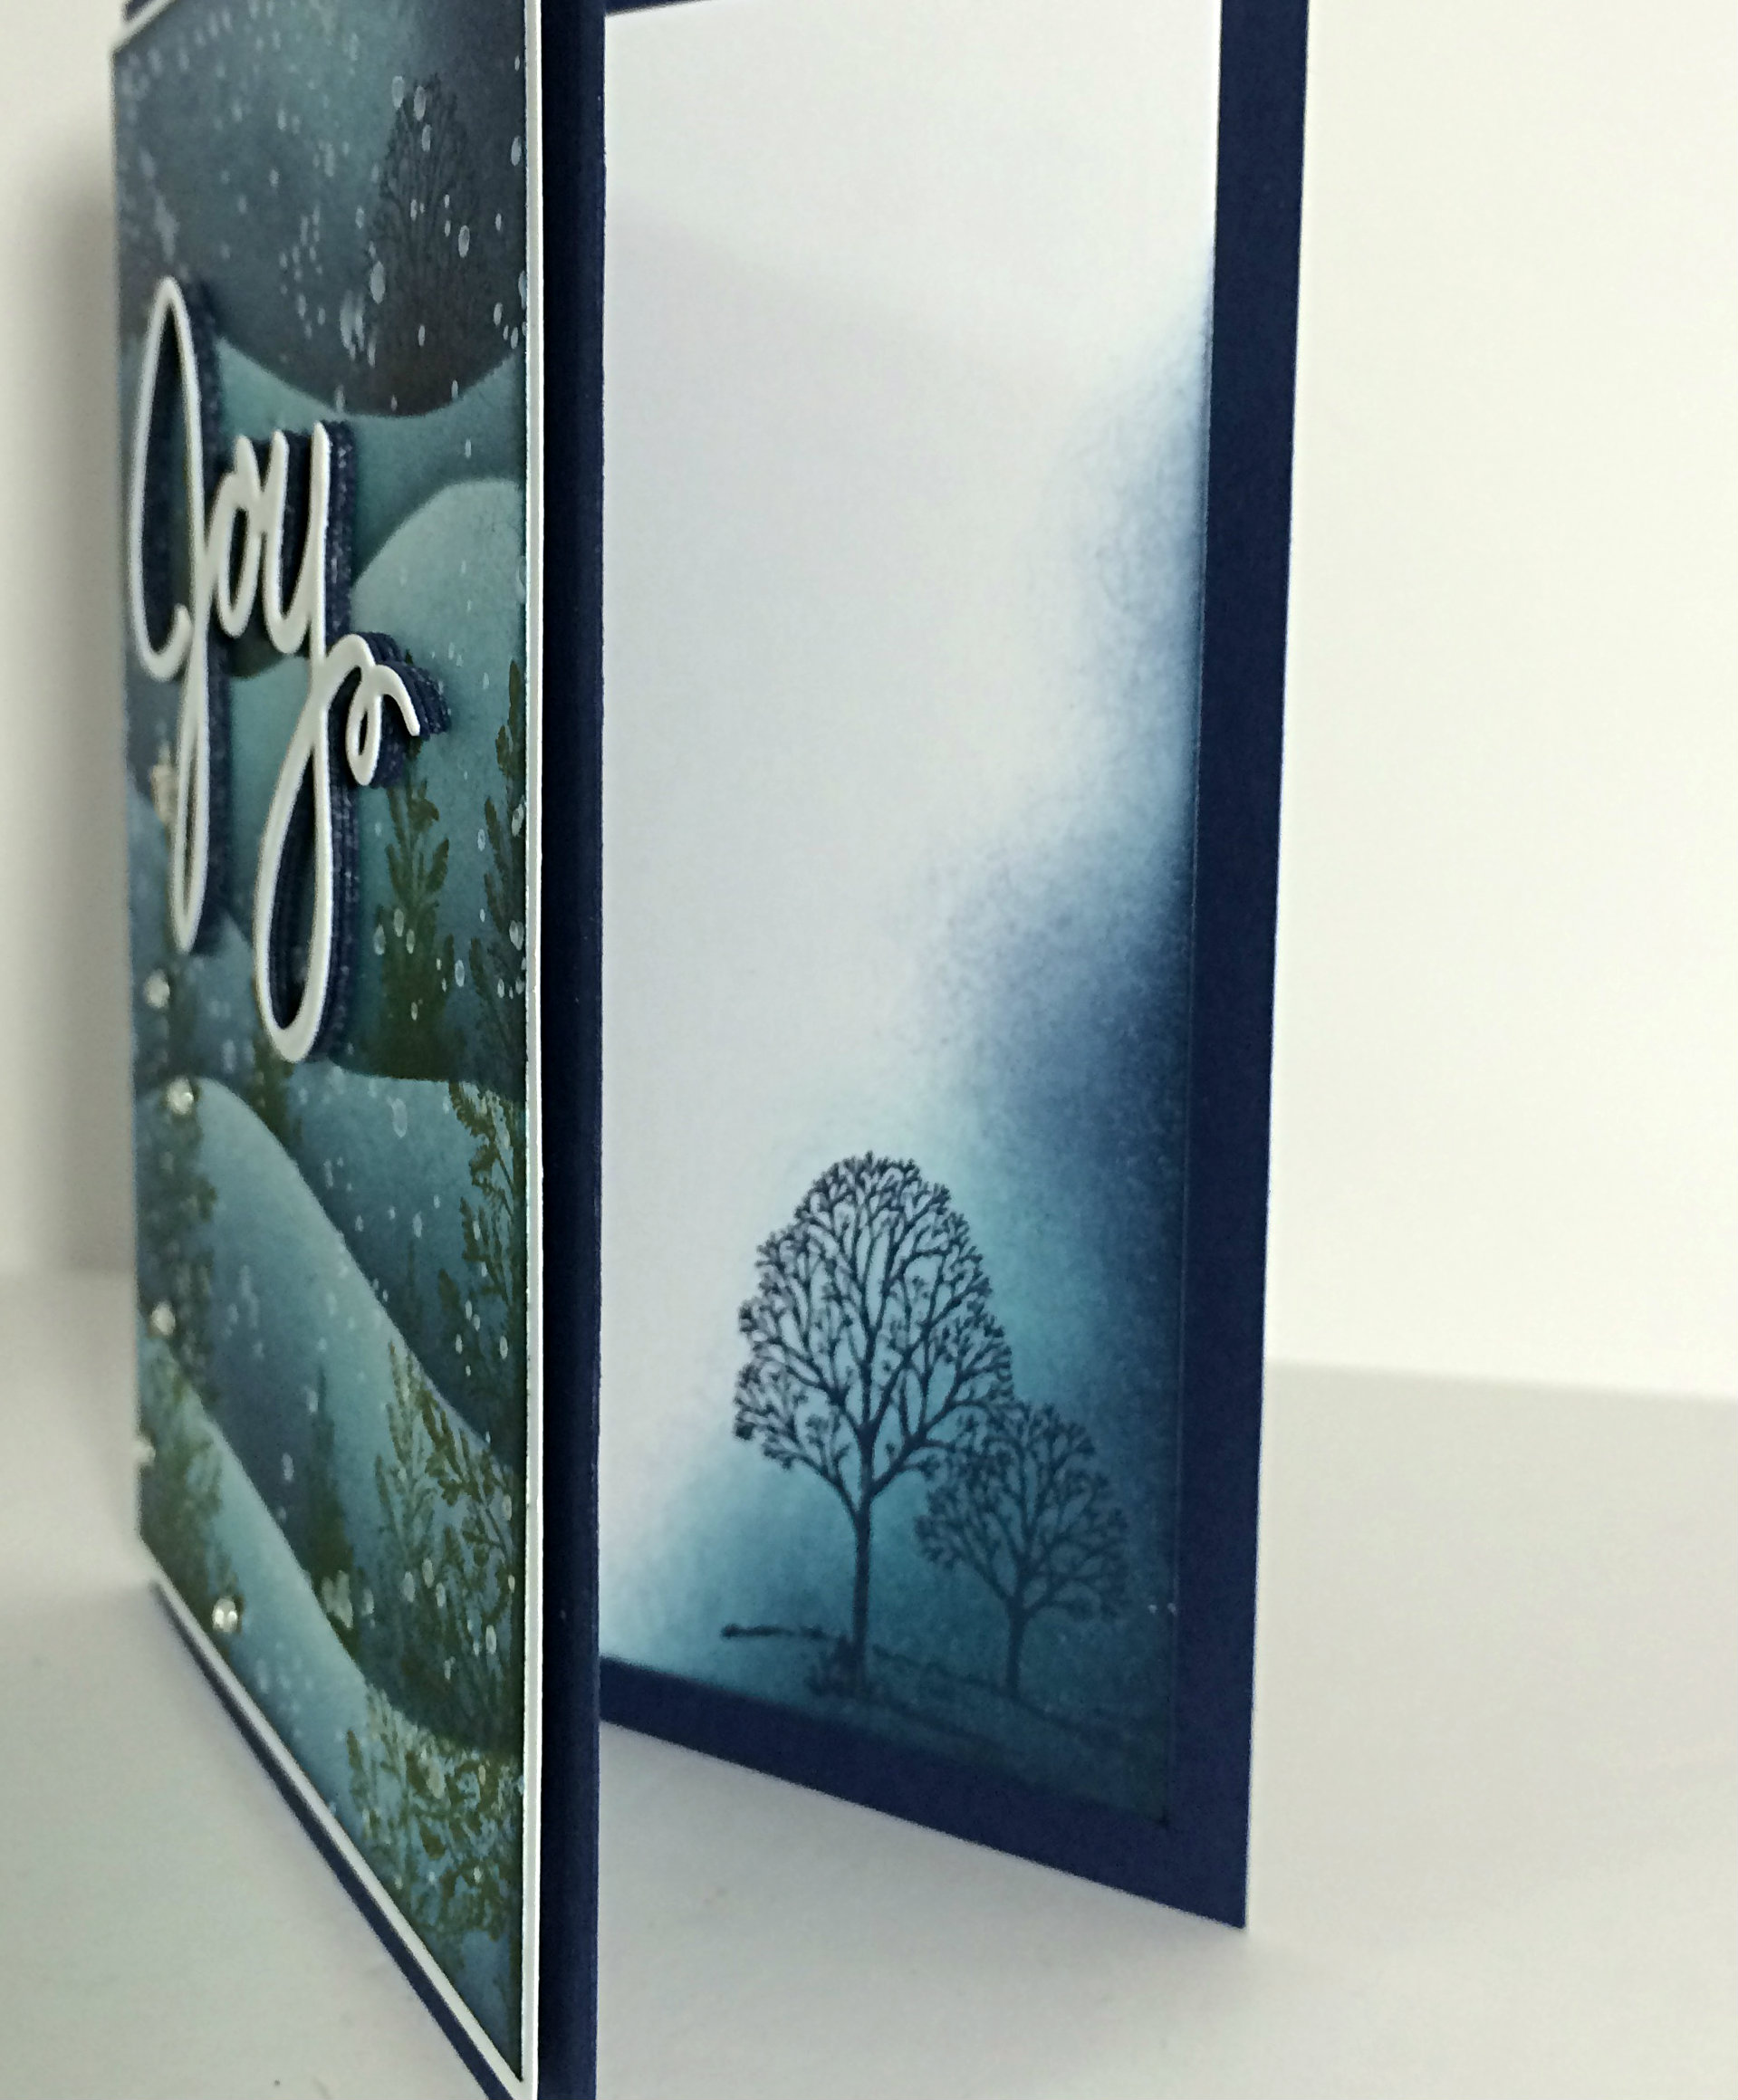
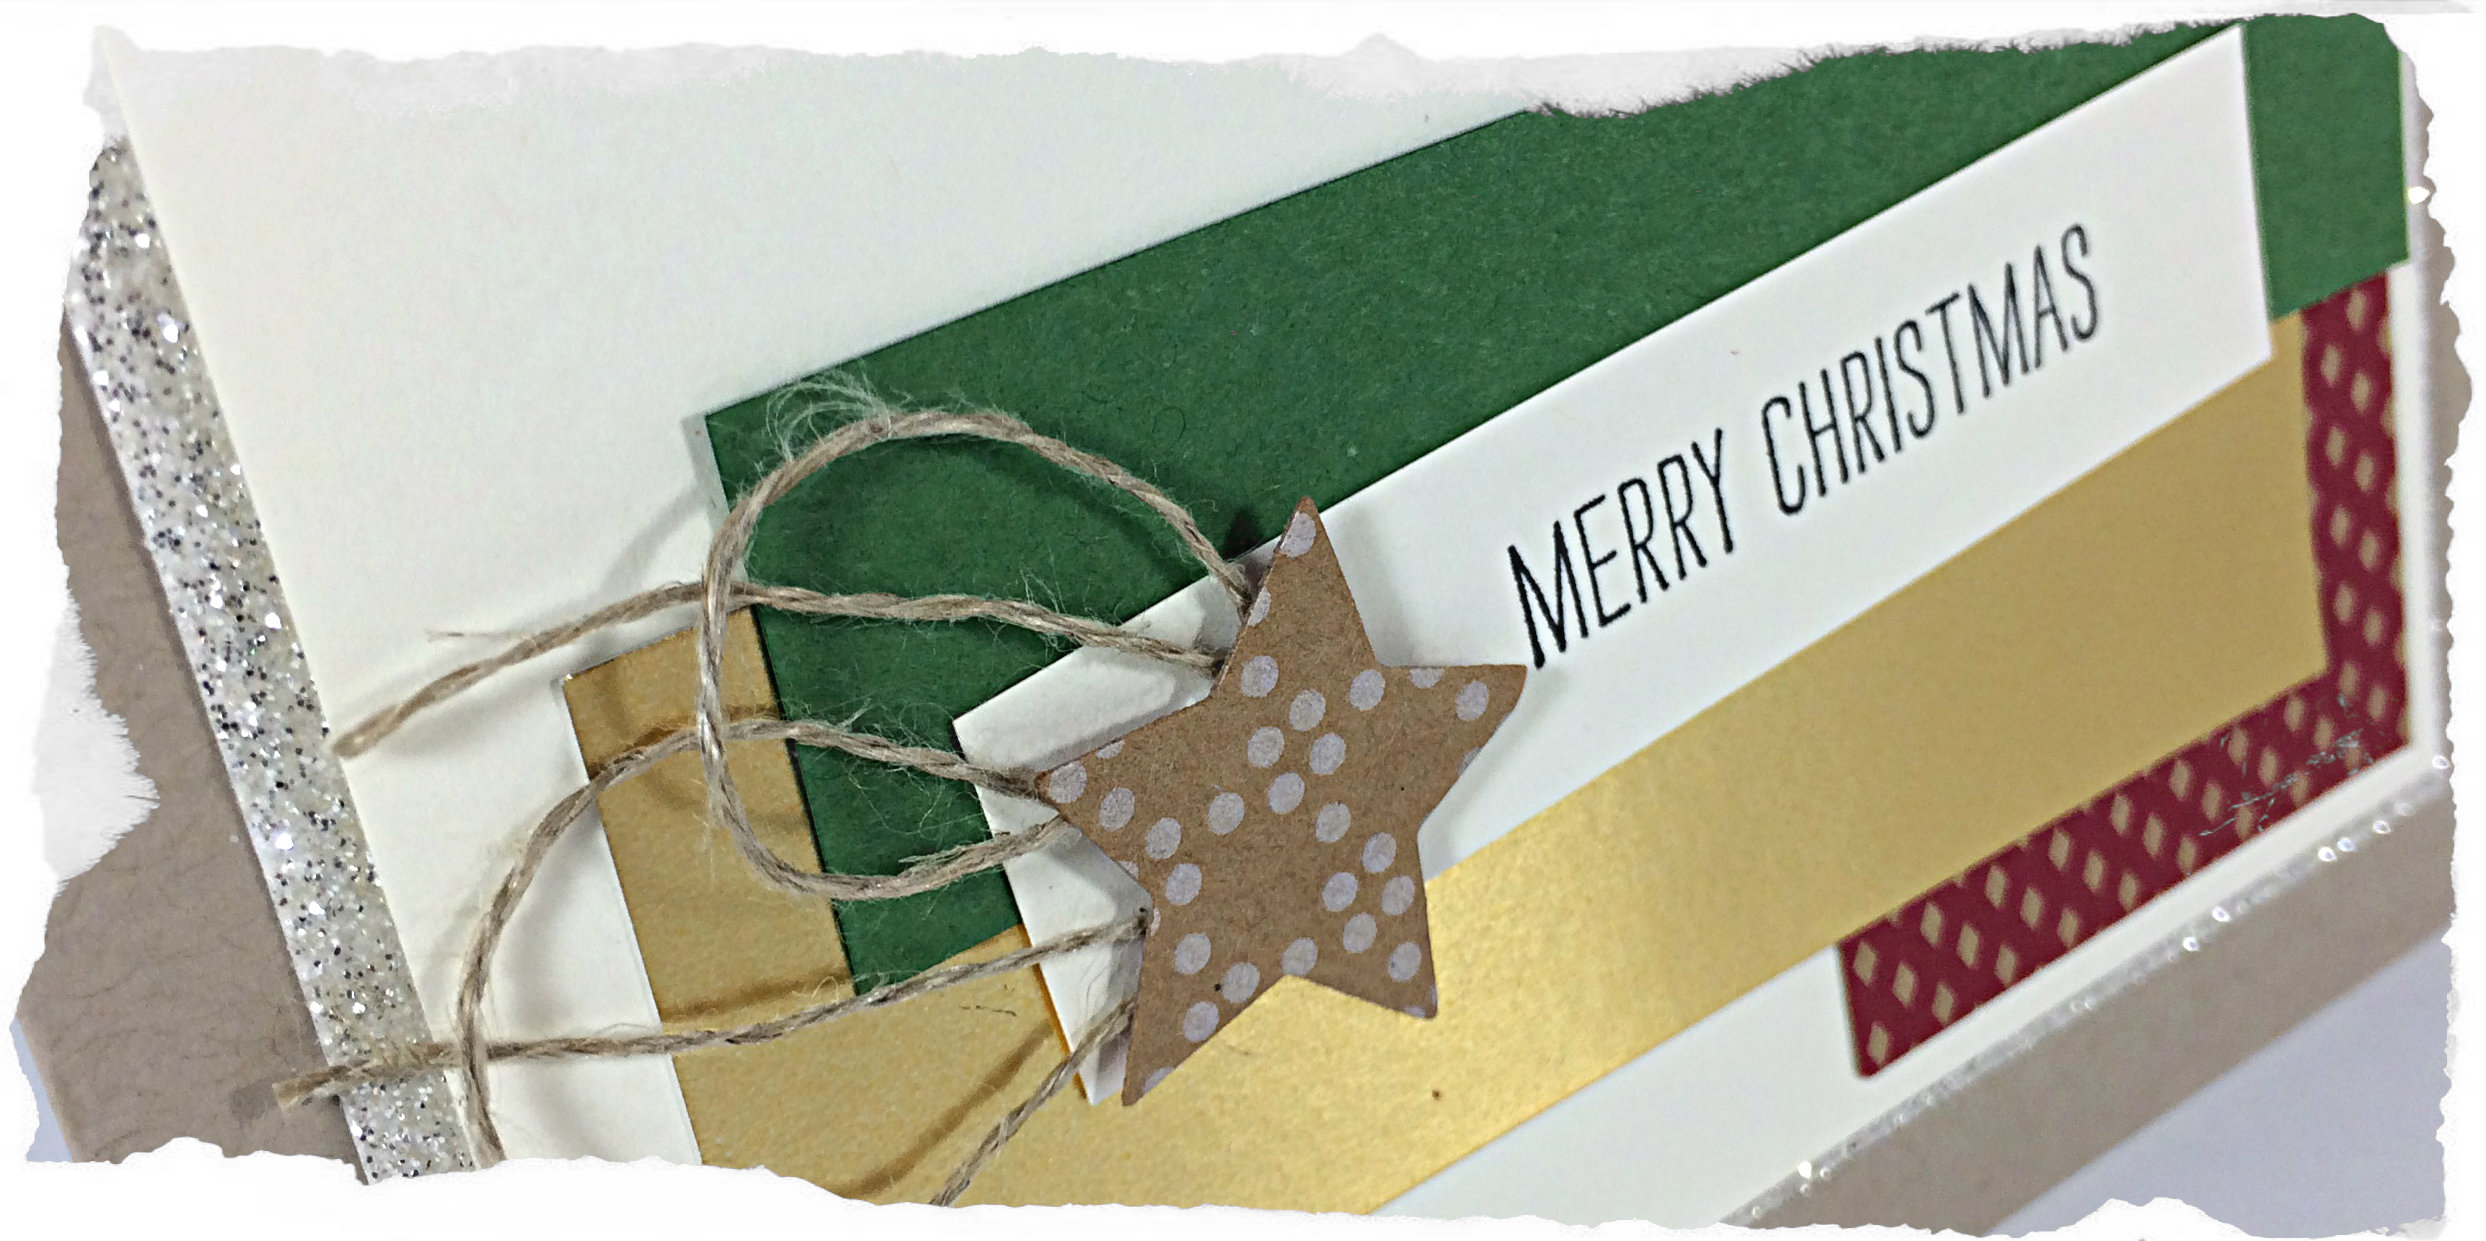
My card is not a perfect match to the sketch, mostly because I was using scraps that I had and I was too lazy to go downstairs to get my scissors or pick out different stamps or framelits.

Amy058

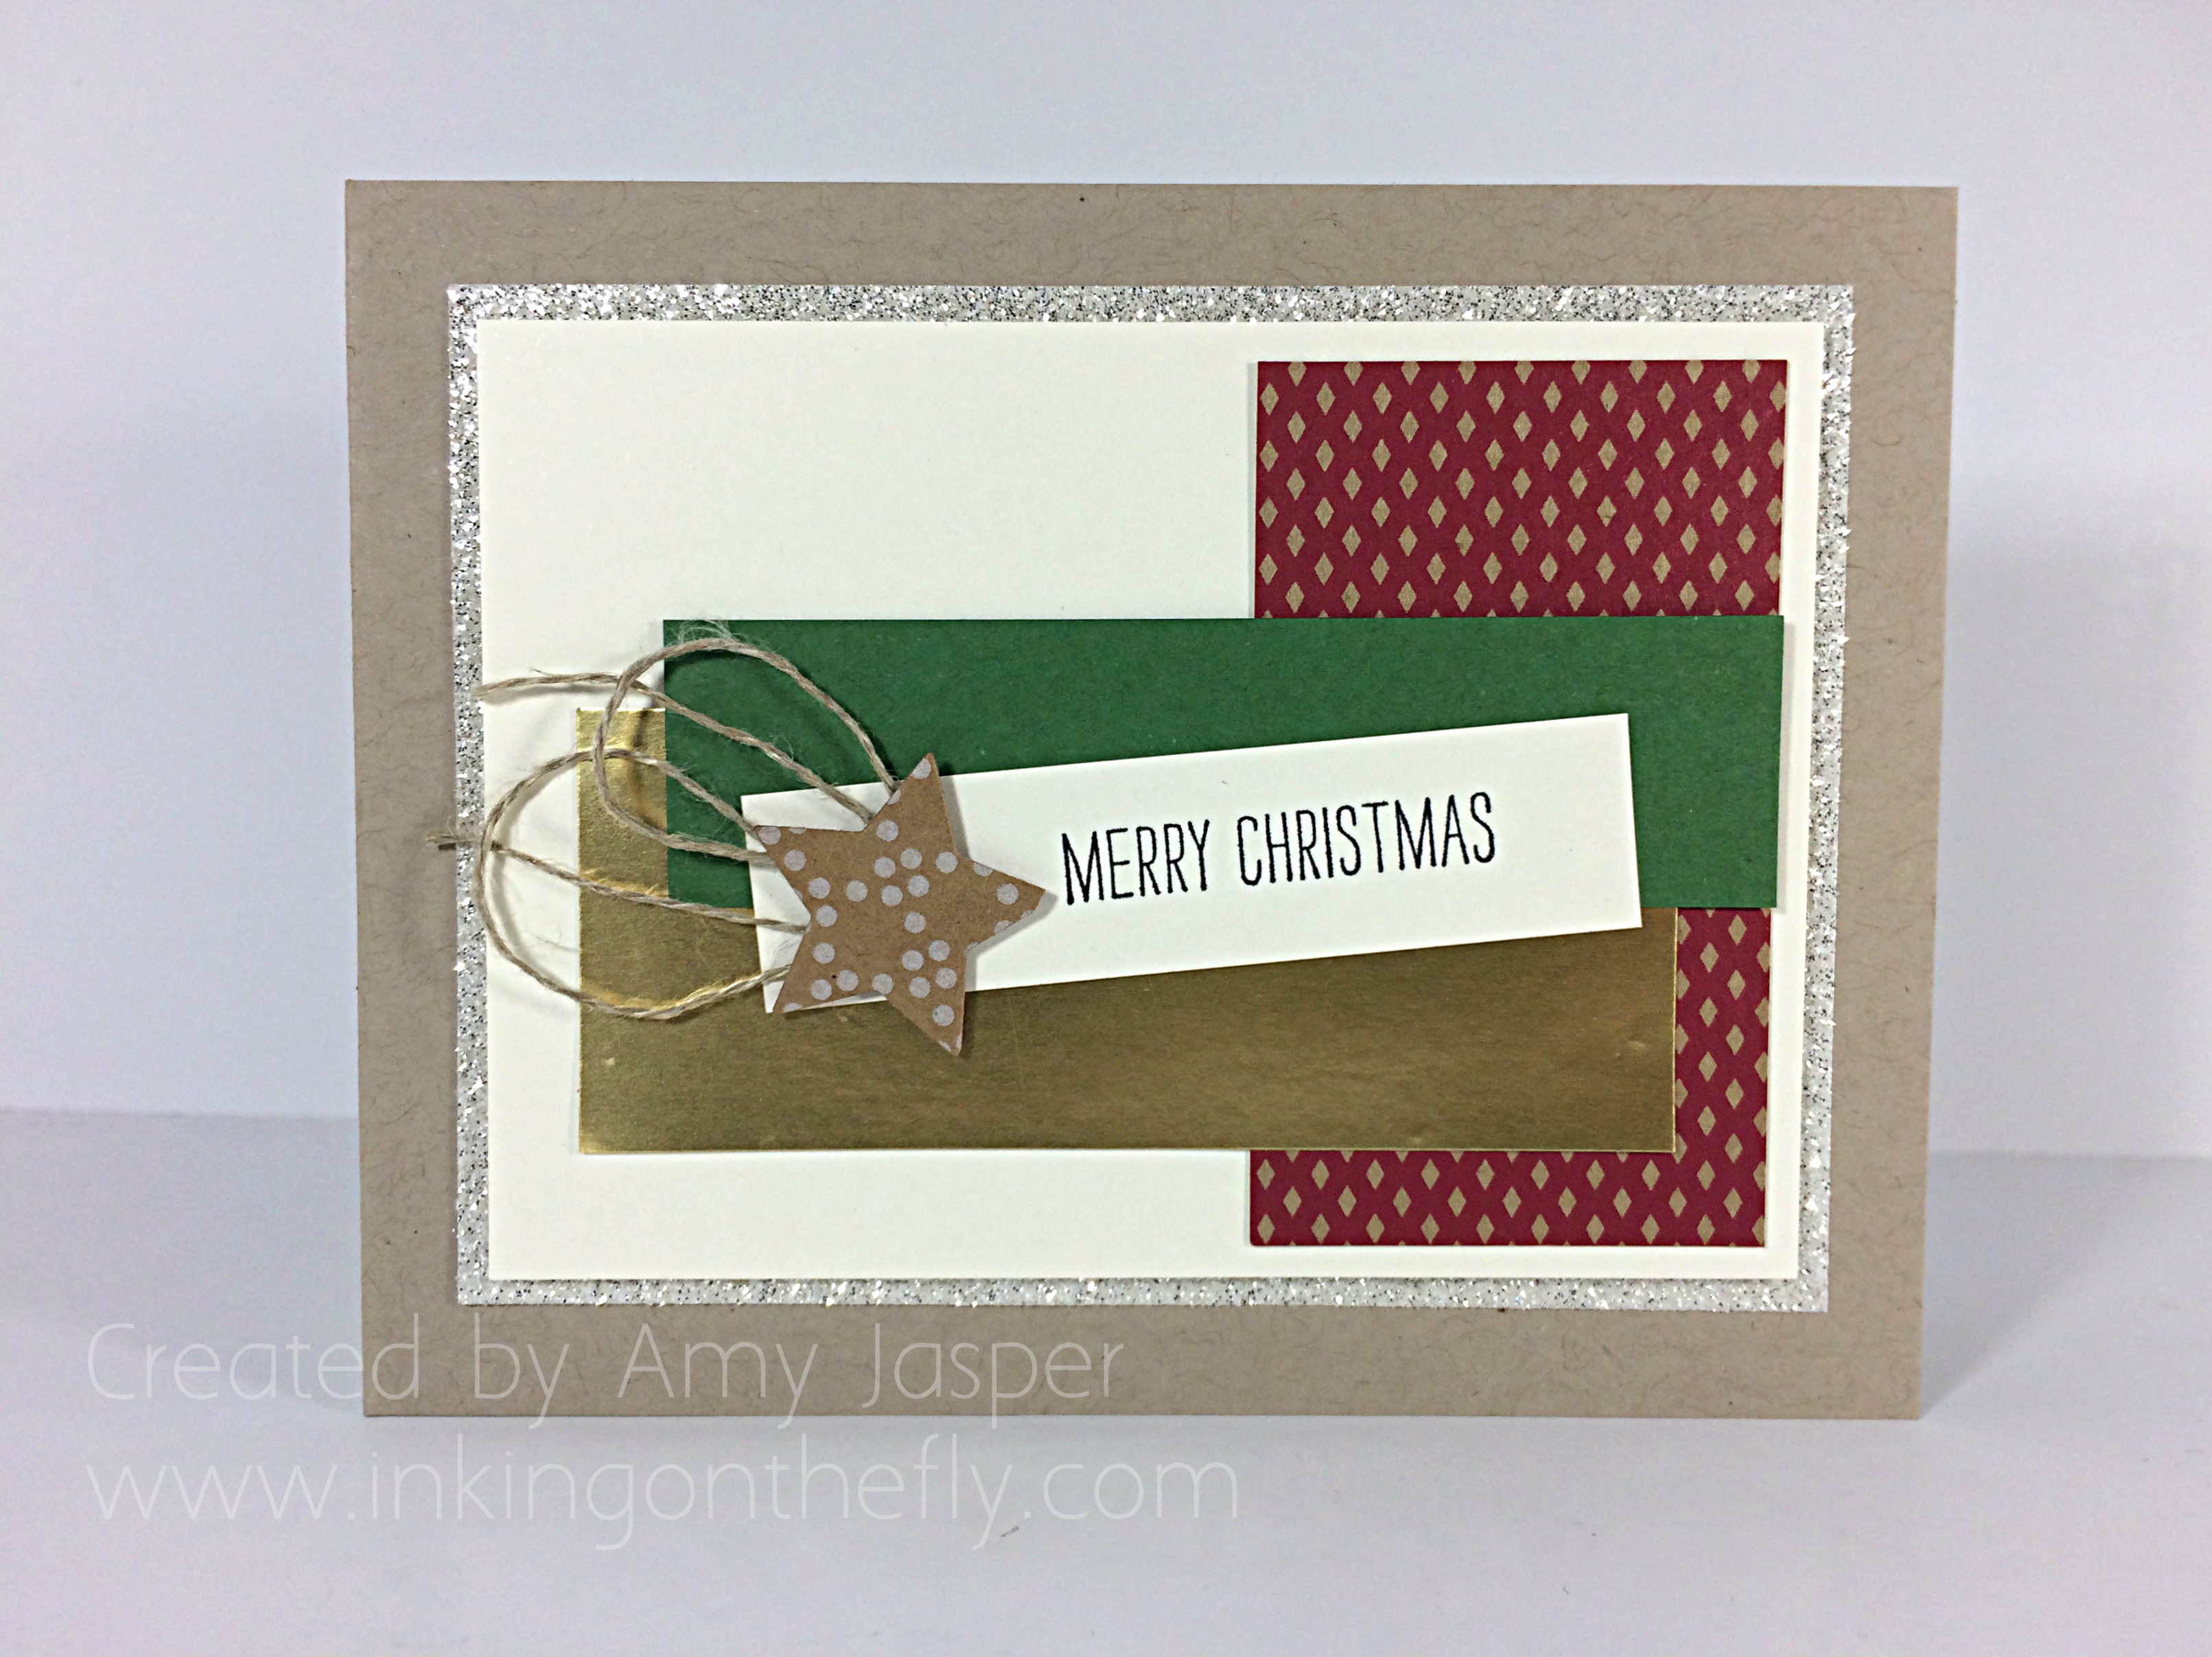
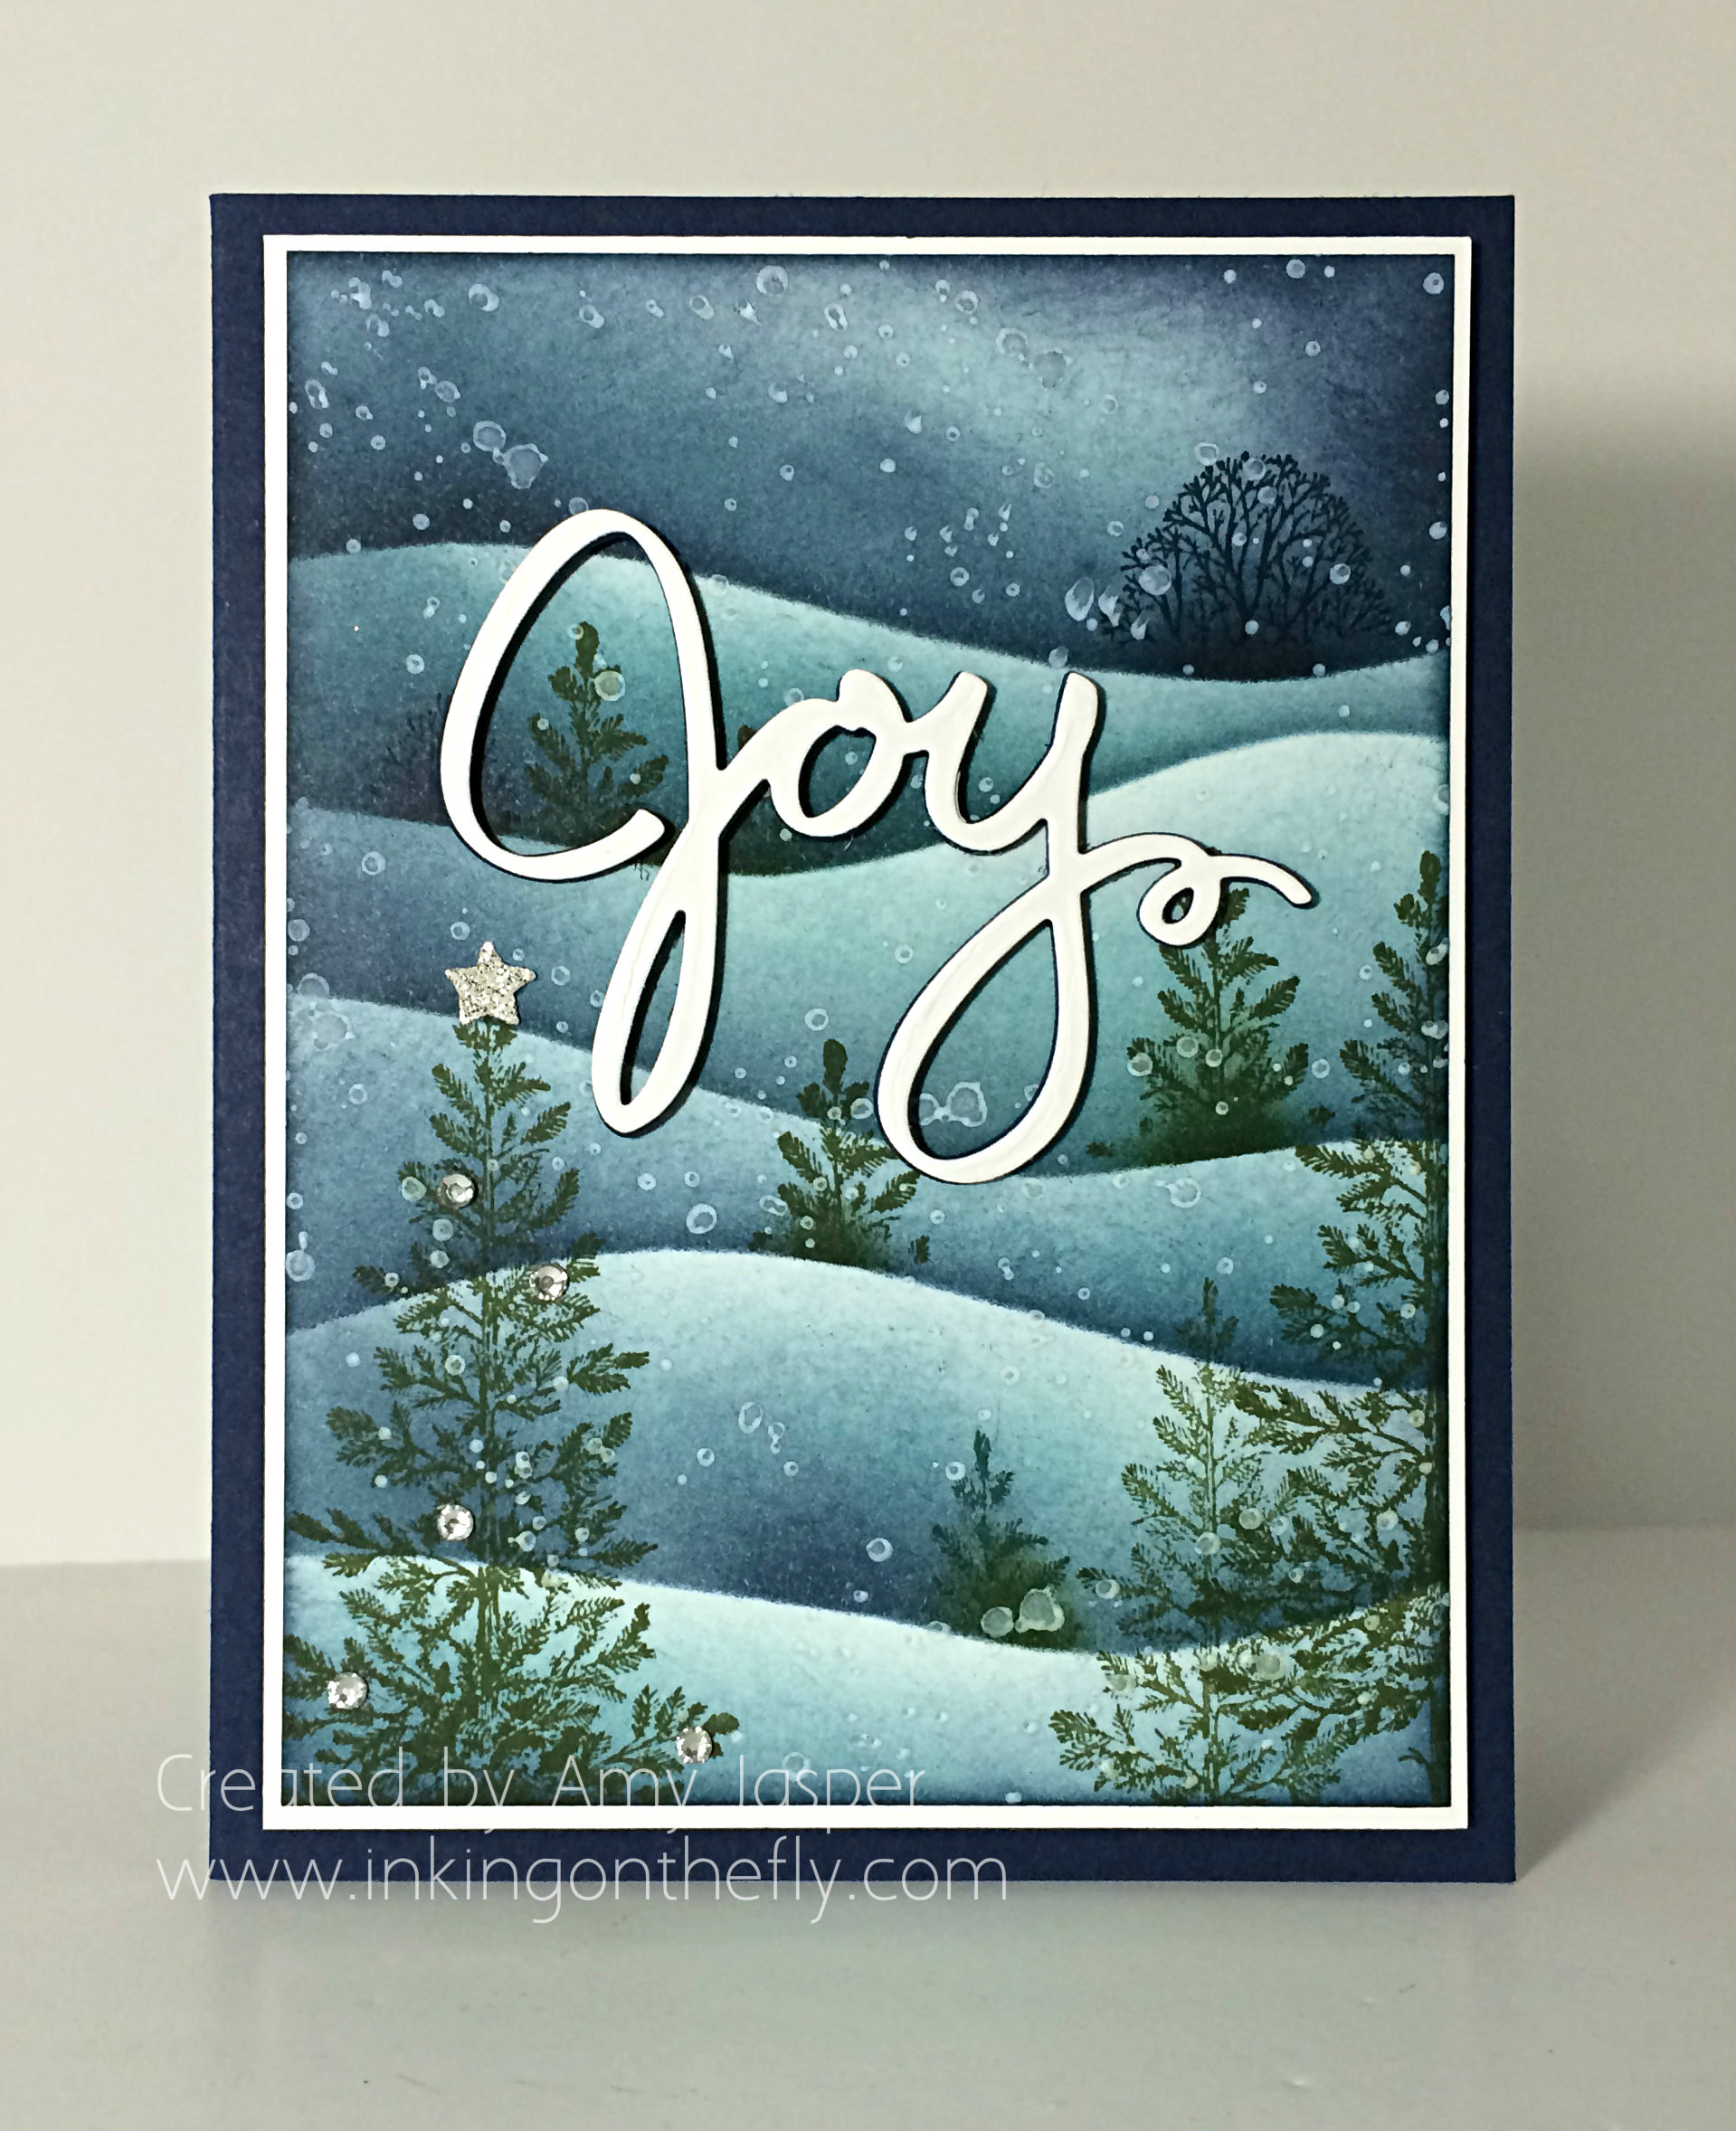
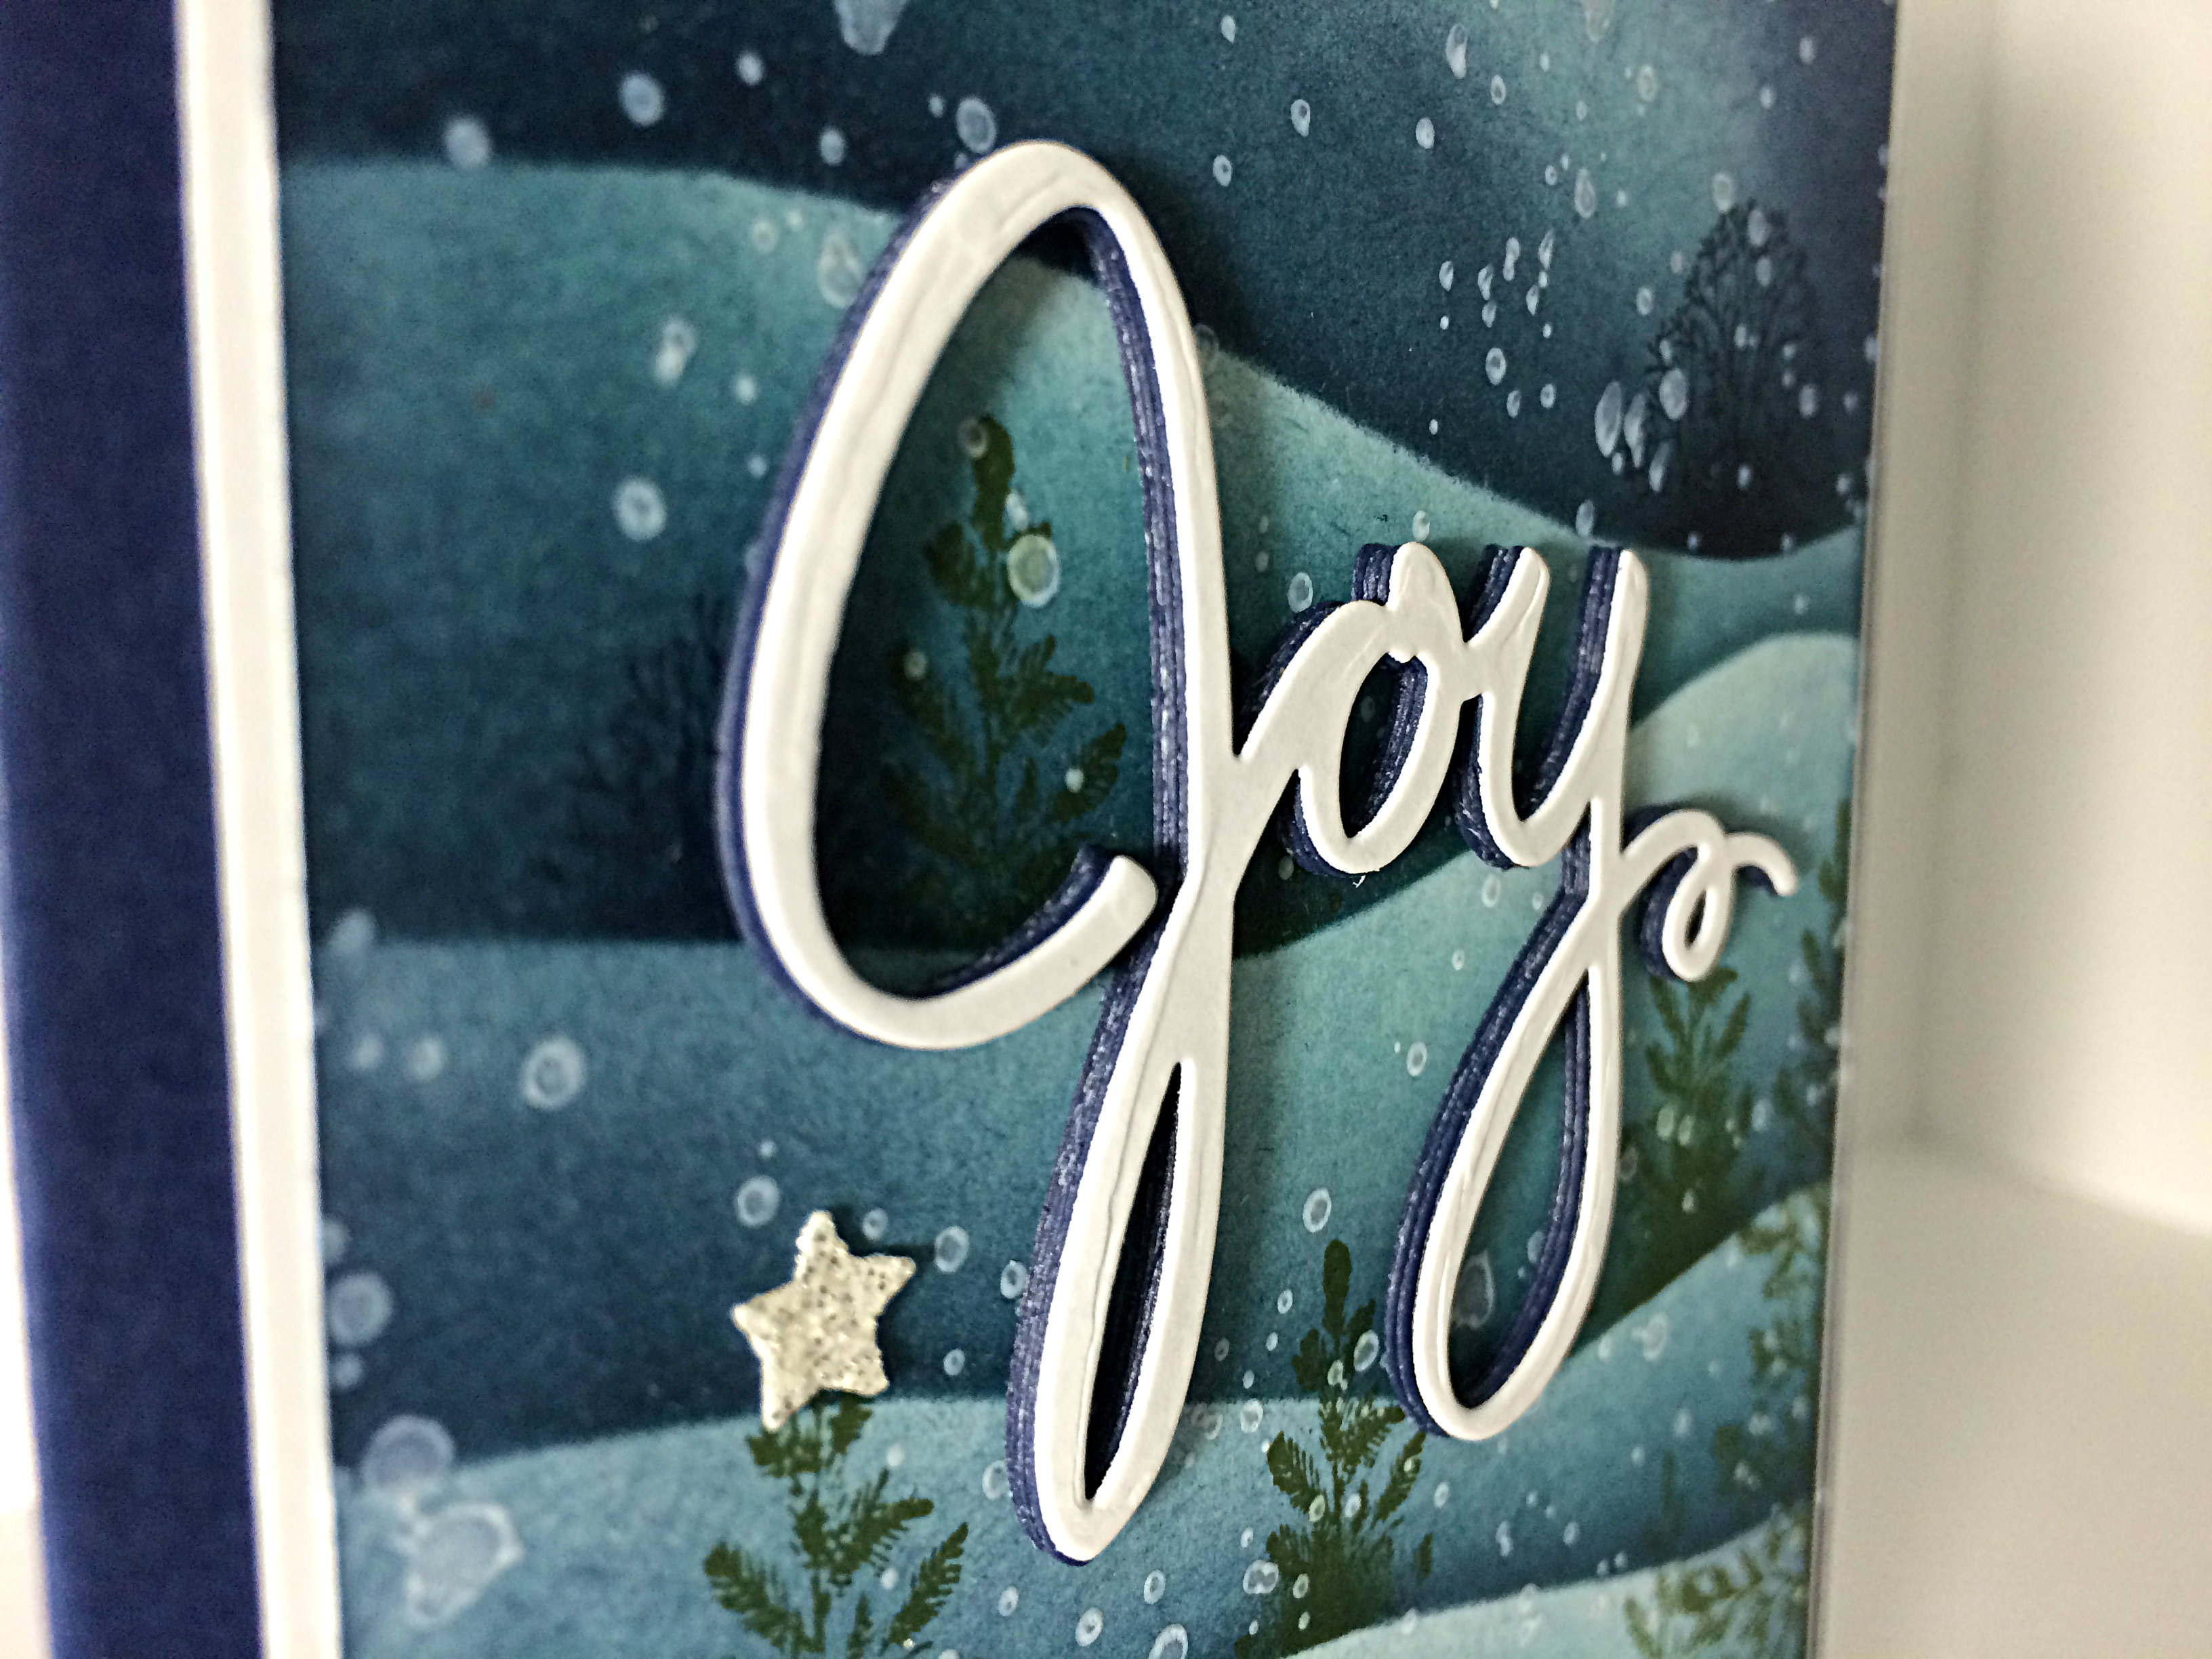
A quick and simple Christmas card. No frills. Just traditional colours and a bit of sparkle. I do have some Dimensionals under that larger Very Vanilla layer – you can’t really see it in these photos.

My latest fun is adding that little loopy bit of linen thread to my projects. To create that, I simply tie a loopy bow and fold it in half so that the loops overlap each other. Easy peasy!

059angle


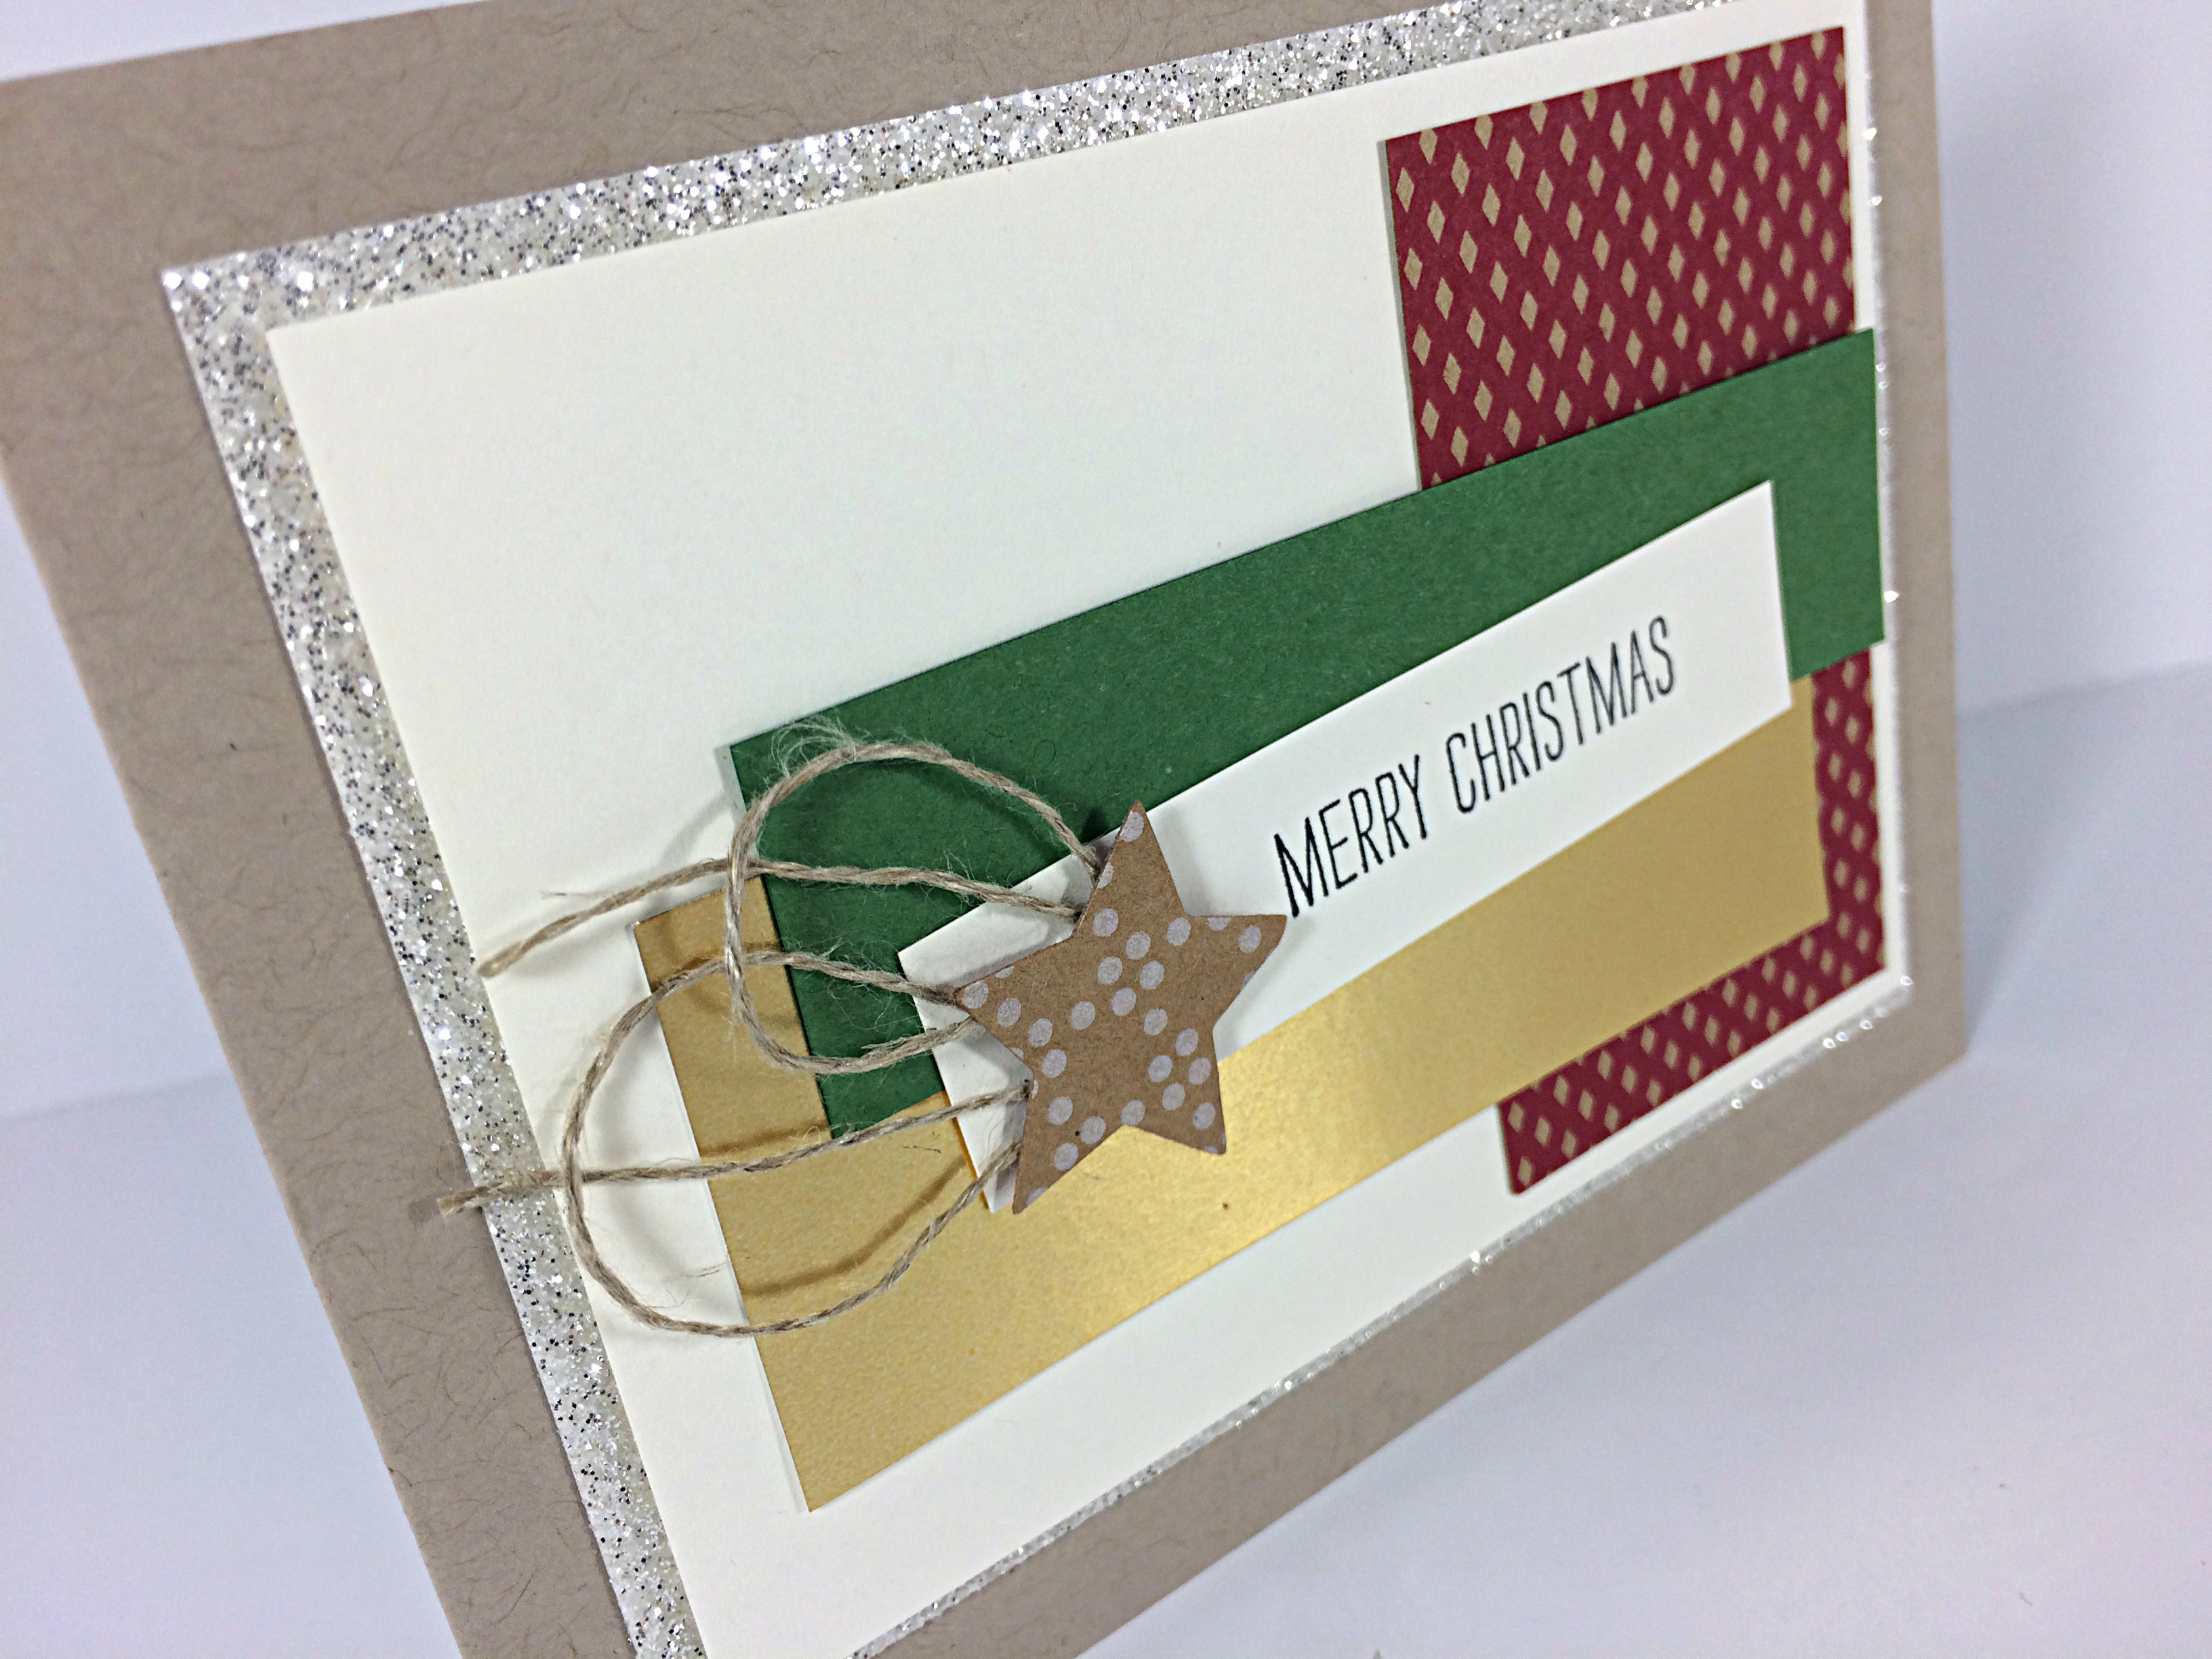
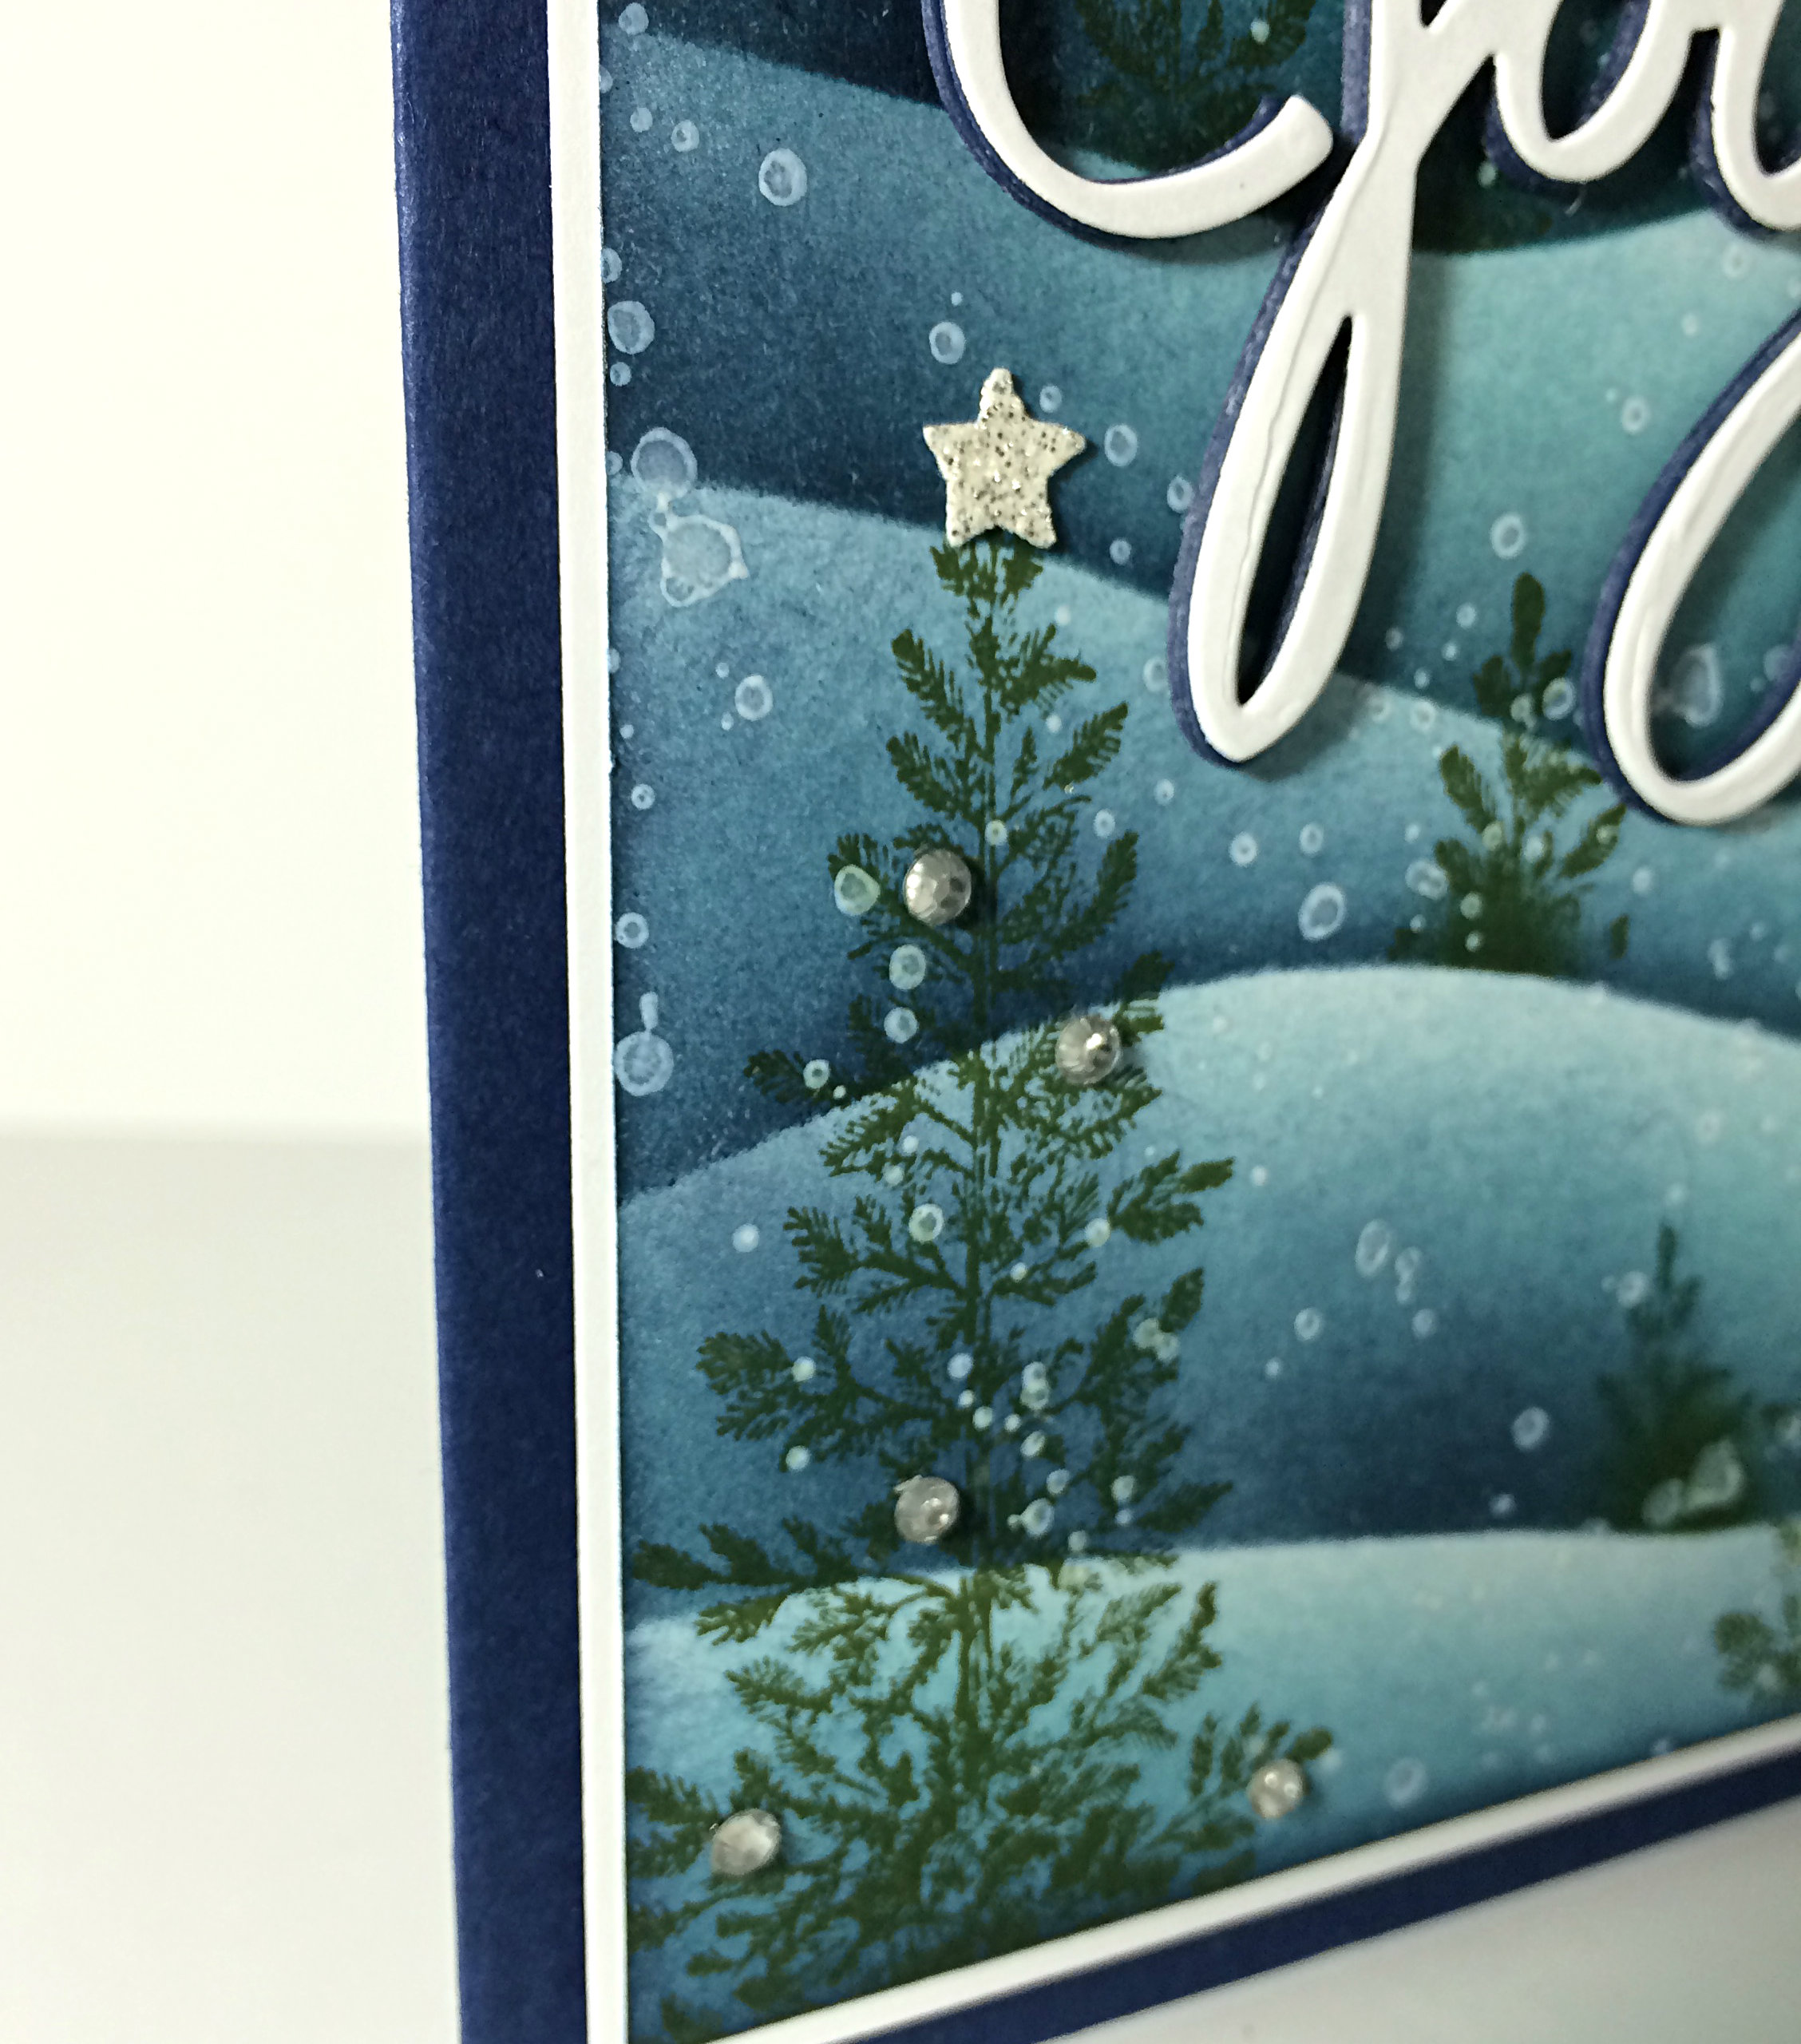
Paper: Crumb Cake cardstock, Silver Glimmer paper, Very Vanilla cardstock, Under the Tree Specialty Designer Series Paper, Gold Foil Paper, Garden Green cardstock.

Stamps: the sentiment is from the Making Spirits Bright stamp set – stamped in Momento Tuxedo Black ink.

Tools: Stars Framelits with the Big Shot

Embellishments: Linen Thread

Adhesive: Fast Fuse, Dimensionals.


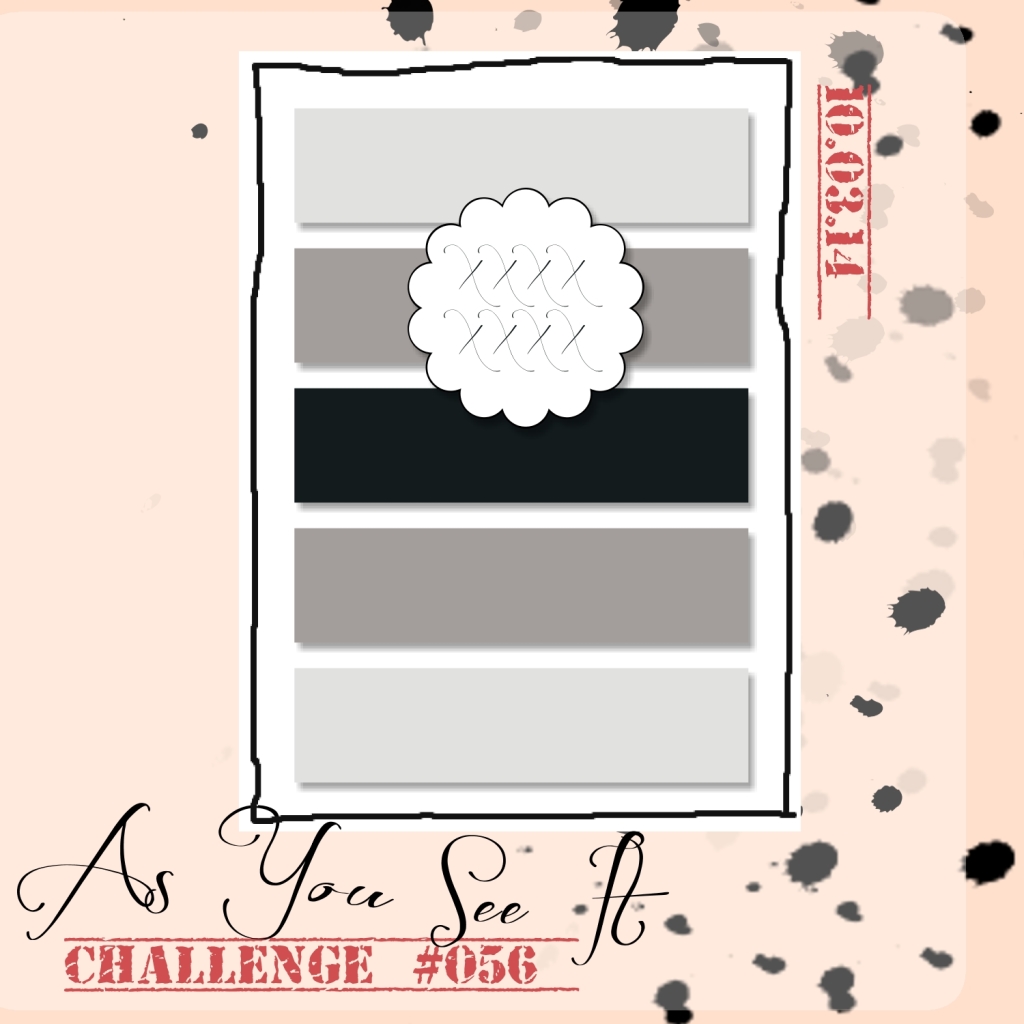
Check out what other stampers have come up with for sketch #058 over at the As You See It Challenge blog. Maybe you’d like to give it a try and see what you can do! I know I’d love to see your projects.

Amy.

Designer-Badge


Fall Cheer

057header

Here we are again on a Friday where I get to share my designs for the As You See It Challenge blog. Challenge #57 is a fall theme!

057

The theme today is fall, but I didn’t feel much like doing the leaf thing and the typical fall colours (though I didn’t COMPLETELY deviate from the theme, lol!). I was minding my own business, leading a class through their 12 Christmas cards, when I decided I’d better take the opportunity of a lull and get my challenge card designed. I grabbed a bin of scraps and looked at the stamp sets we were working with – Ah yes, there was the Making Spirits Bright stamp set! AHA!

057Amy

It is for this very stamp that I purchased this cute stamp set with various holiday glasses and sentiments. I just loved the eyeball in place of an olive!

So I still have the traditional green, yellow and orange for fall colours, but I love the addition of the blue and black. Here I have Lost Lagoon for the card base, Hello Honey and Basic Black layers over the Whisper White mat, then an Old Olive piece cut with the Top Note die in the Big Shot and sponged around the edges with a little bit of Mossy Meadow ink. Finally, the Whisper White with a splash of Tangelo Twist ink (stamped with one of the Gorgeous Grunge stamps) to show off the stamped image. I even added a touch of the Medium Night of Navy Blendability marker to the iris of my eyeball (no offense to fellow brown-eyed beauties, I just thought blue would show up a bit better)

057sideview

You can see in the image above, that I used Stampin’ Up Dimensionals under the Old Olive cut out layer and the Whisper White circle. Flat cards and I are not often friends. I try. Sometimes we gel, sometimes we don’t.

057insideAnd, Baby Cakes, I even added a fall-themed stamp to the inside of my card! I’m thankful for fun drink glasses with fun things inside them (like eyeballs) and I’m thankful for friends to enjoy them with!

For all these things, I do give thanks 🙂

Head on over to the As You See It Challenge blog and play along.

Be sure to leave me a comment about how gross an eyeball is in your drink!

Cheers!!

Amy

Designer-Badge

Winter Joy

056header
I love designing with my Stampin’ Up! inks, paper, stamps, and tools. I’ve fallen in love with this beautiful sponged winter landscape technique using Lovely as a Tree.

It’s Friday, which means it’s time for another As You See It Challenge card. We’re on challenge #56.

AYSIChallenge056

I was teaching a technique card class last night and we were working on a project using the technique in this video and remembered I needed to design a card for the challenge blog today. I thought I would use this great sponged landscape technique and add my own touch and style for my As You See It design.

056Amy

If you click on the link for the video above, you’ll see how the trees and hills were created. I used Island Indigo and Night of Navy for my sponged hills. Mossy Meadow ink was used to stamp the coniferous trees while Night of Navy ink was used for the deciduous trees. For the snow, I simply used one of the splatter images from the Gorgeous Grunge stamp set and stamped it multiple times over the completed winter scene with Whisper White craft ink.

056close

You can see in the above picture that my JOY cutout (from the Wonderful Wreath framelits) looks a little bit different than a regular die-cut piece of cardstock. We were shown this technique at a workshop at the Inspire.Create.Share Stampin’ Up! Convention this last July. The look is achieved by layering 5 or so cuts of the same framelit or punch. To make it easier to adhere each layer together, you can apply an Adhesive Sheet to your cardstock before cutting out your image. I chose to use Night of Navy cardstock for the bottom layers, then top it with Whisper White cardstock for my JOY image.

056tree

I added some Basic Rhinestones to the tree in the foreground and a little Silver Glimmer paper star on the top that I cut using my Star Confetti Border Punch.

056insideThe inside layer of my card shows a couple of trees stamped with Night of Navy ink, then sponged over top with the Island Indigo and Night of Navy combo of inks to coordinate with the card front.

Hmm. Now I’m thinking I should have added snow to those little trees inside my card. I might just go back and add that yet!

And, of course, I really like Stampin’ Up Dimensionals, so I used them to pop up the white matted layer over the Night of Navy card base.

I hope you’ll try this cute sketch! Go on over to the As You See It Challenge Blog and check out what the other designers have done. Then give it a go yourself!!

Amy

Designer-Badge