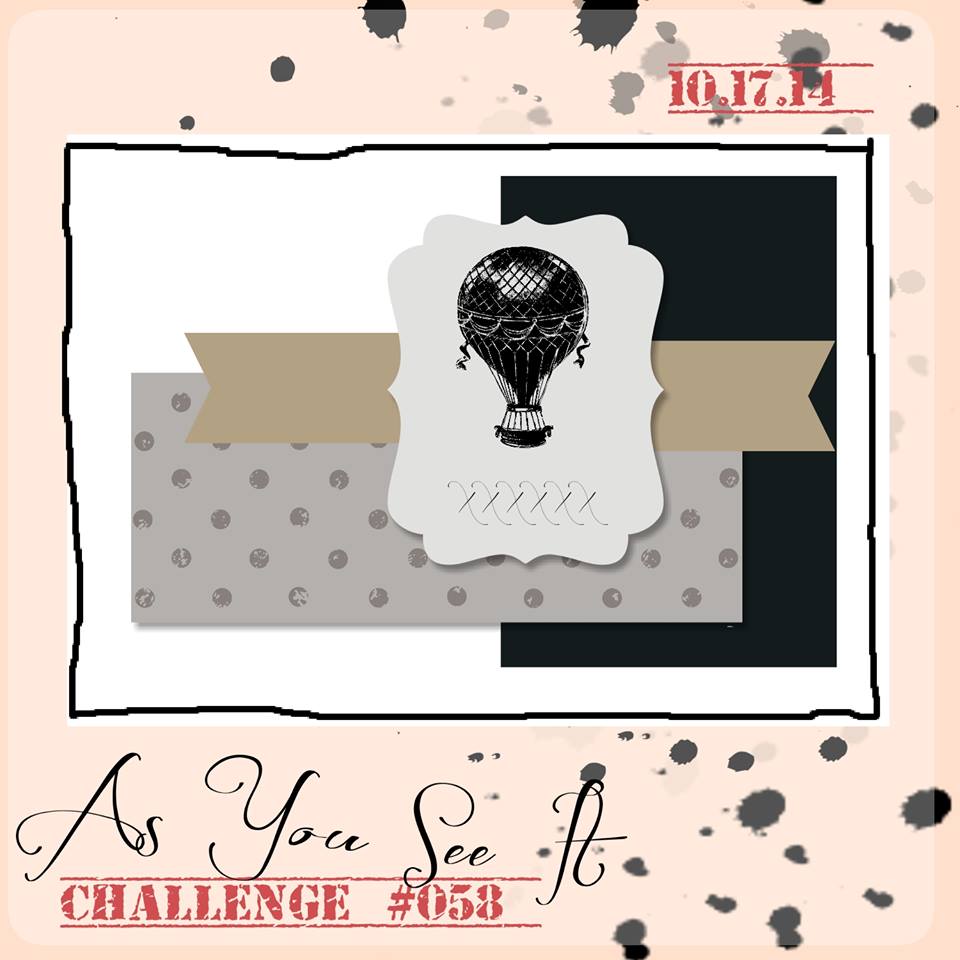
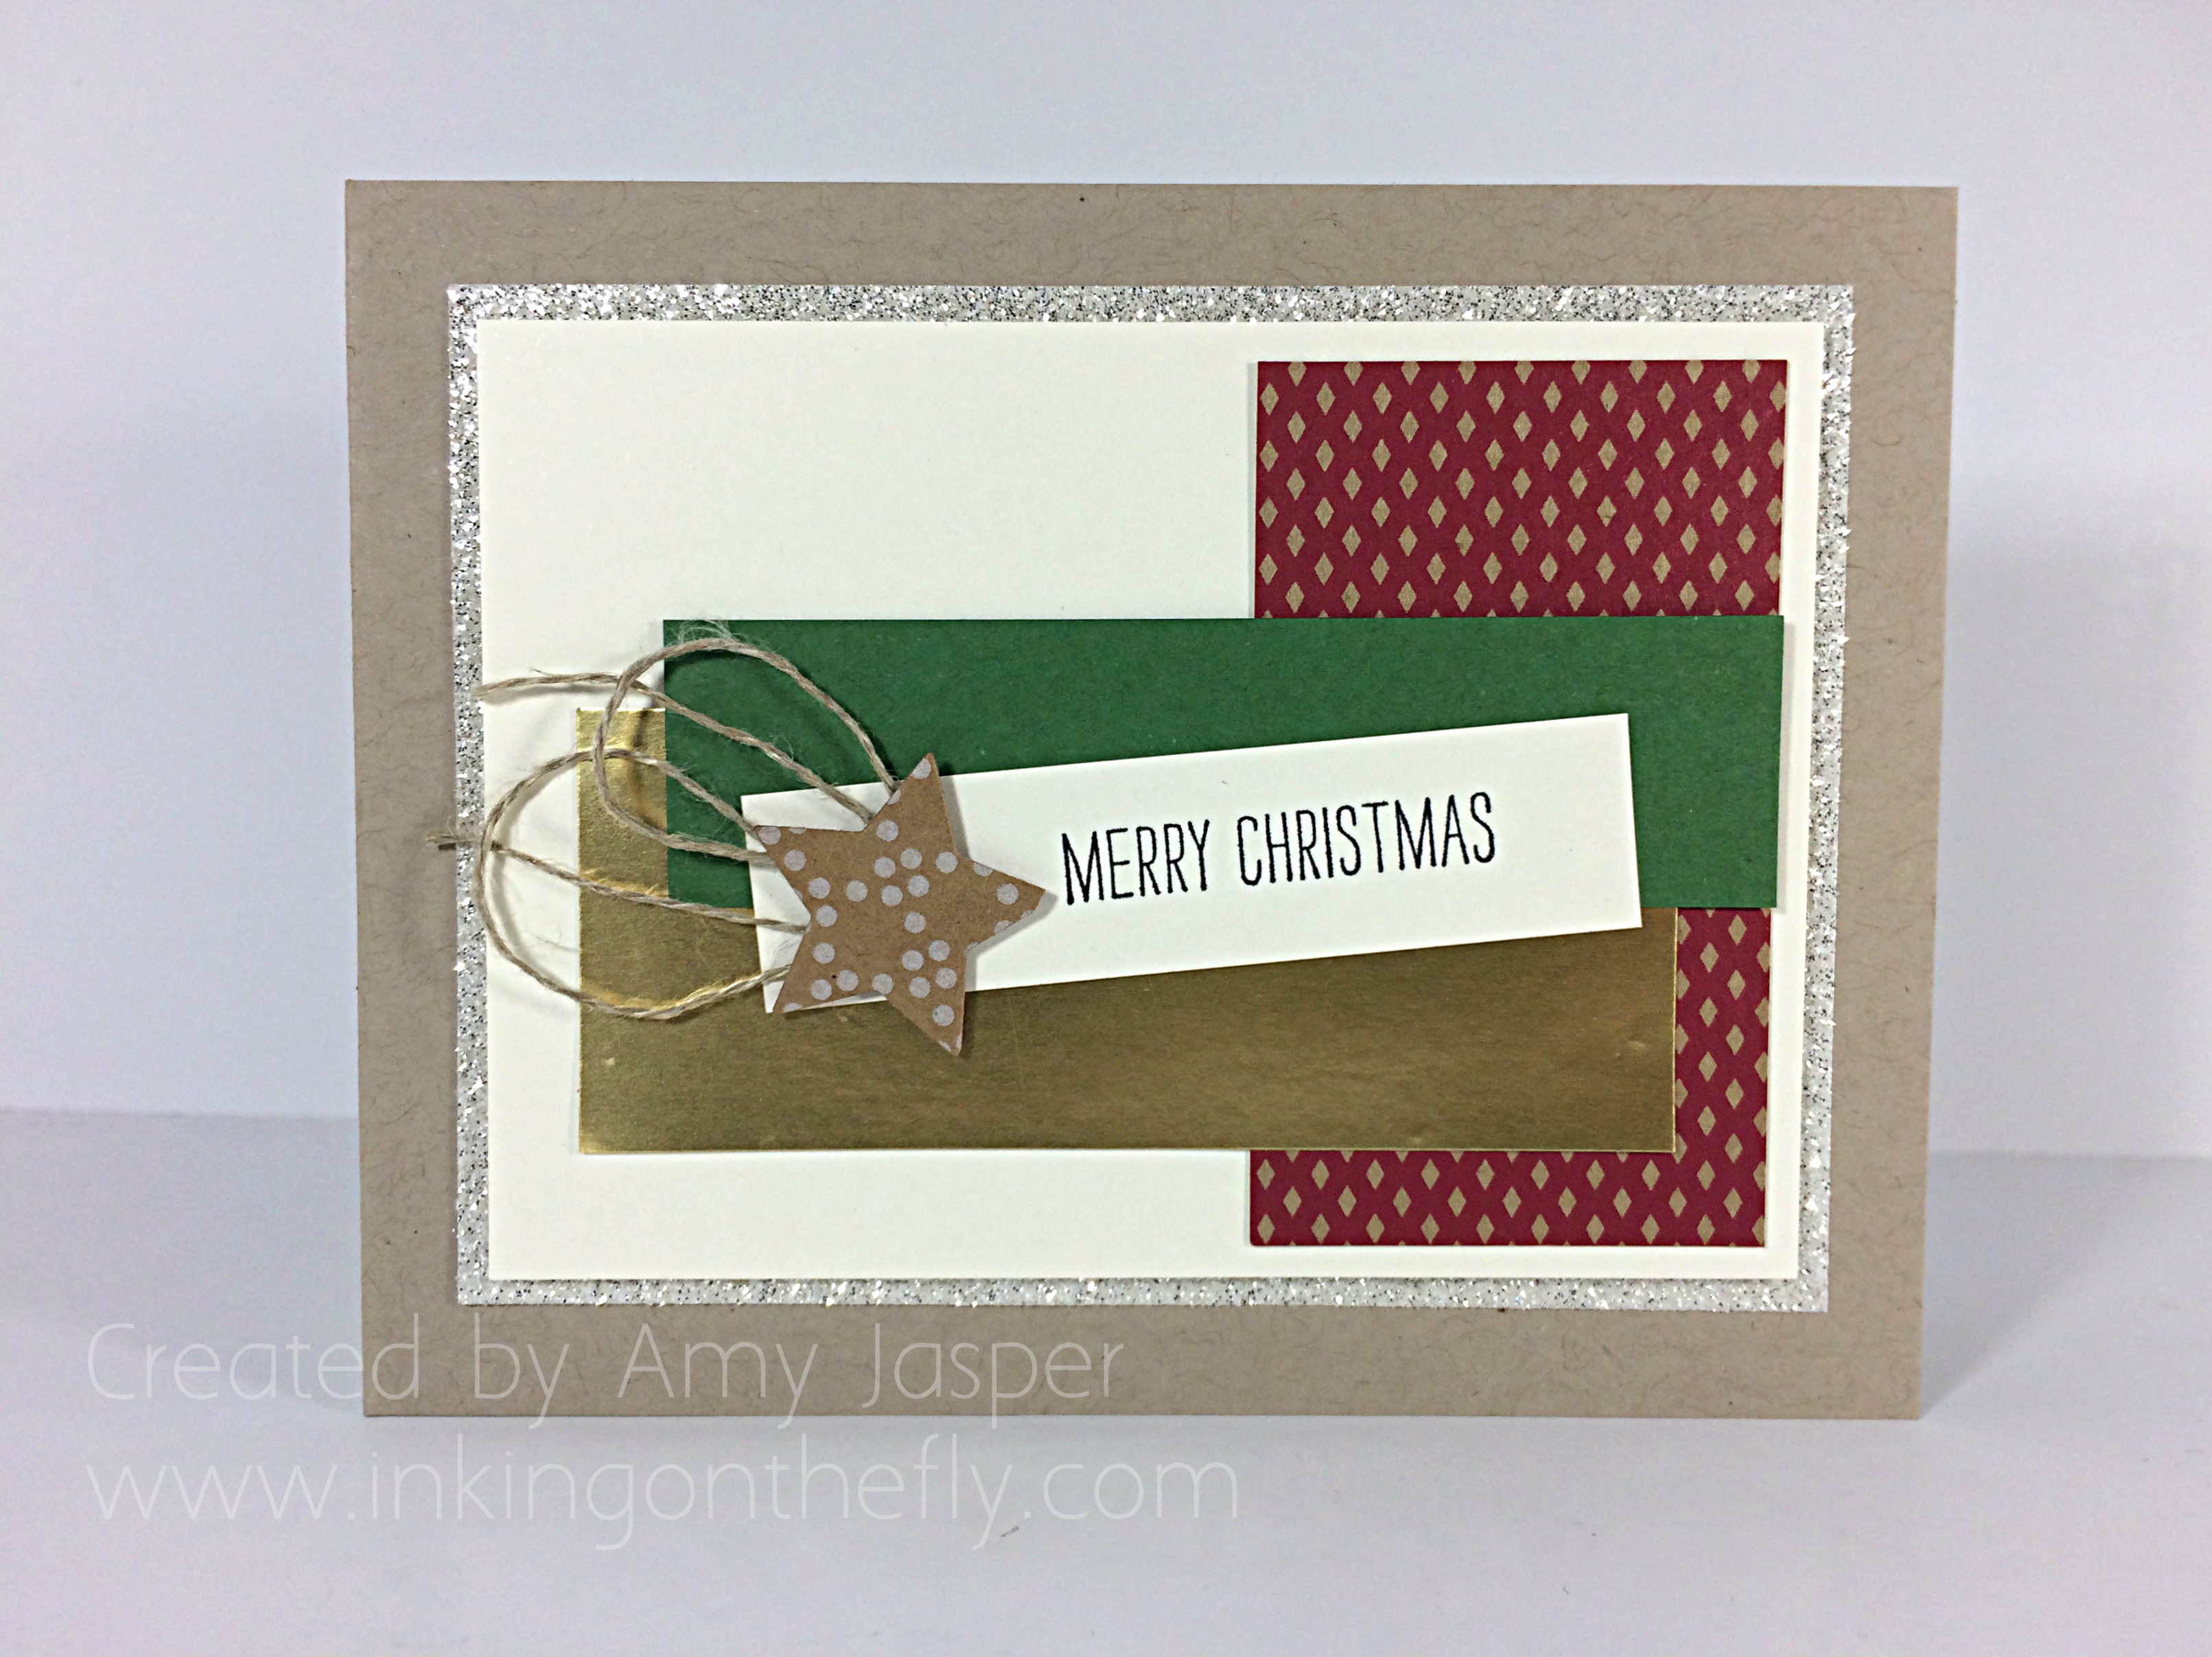
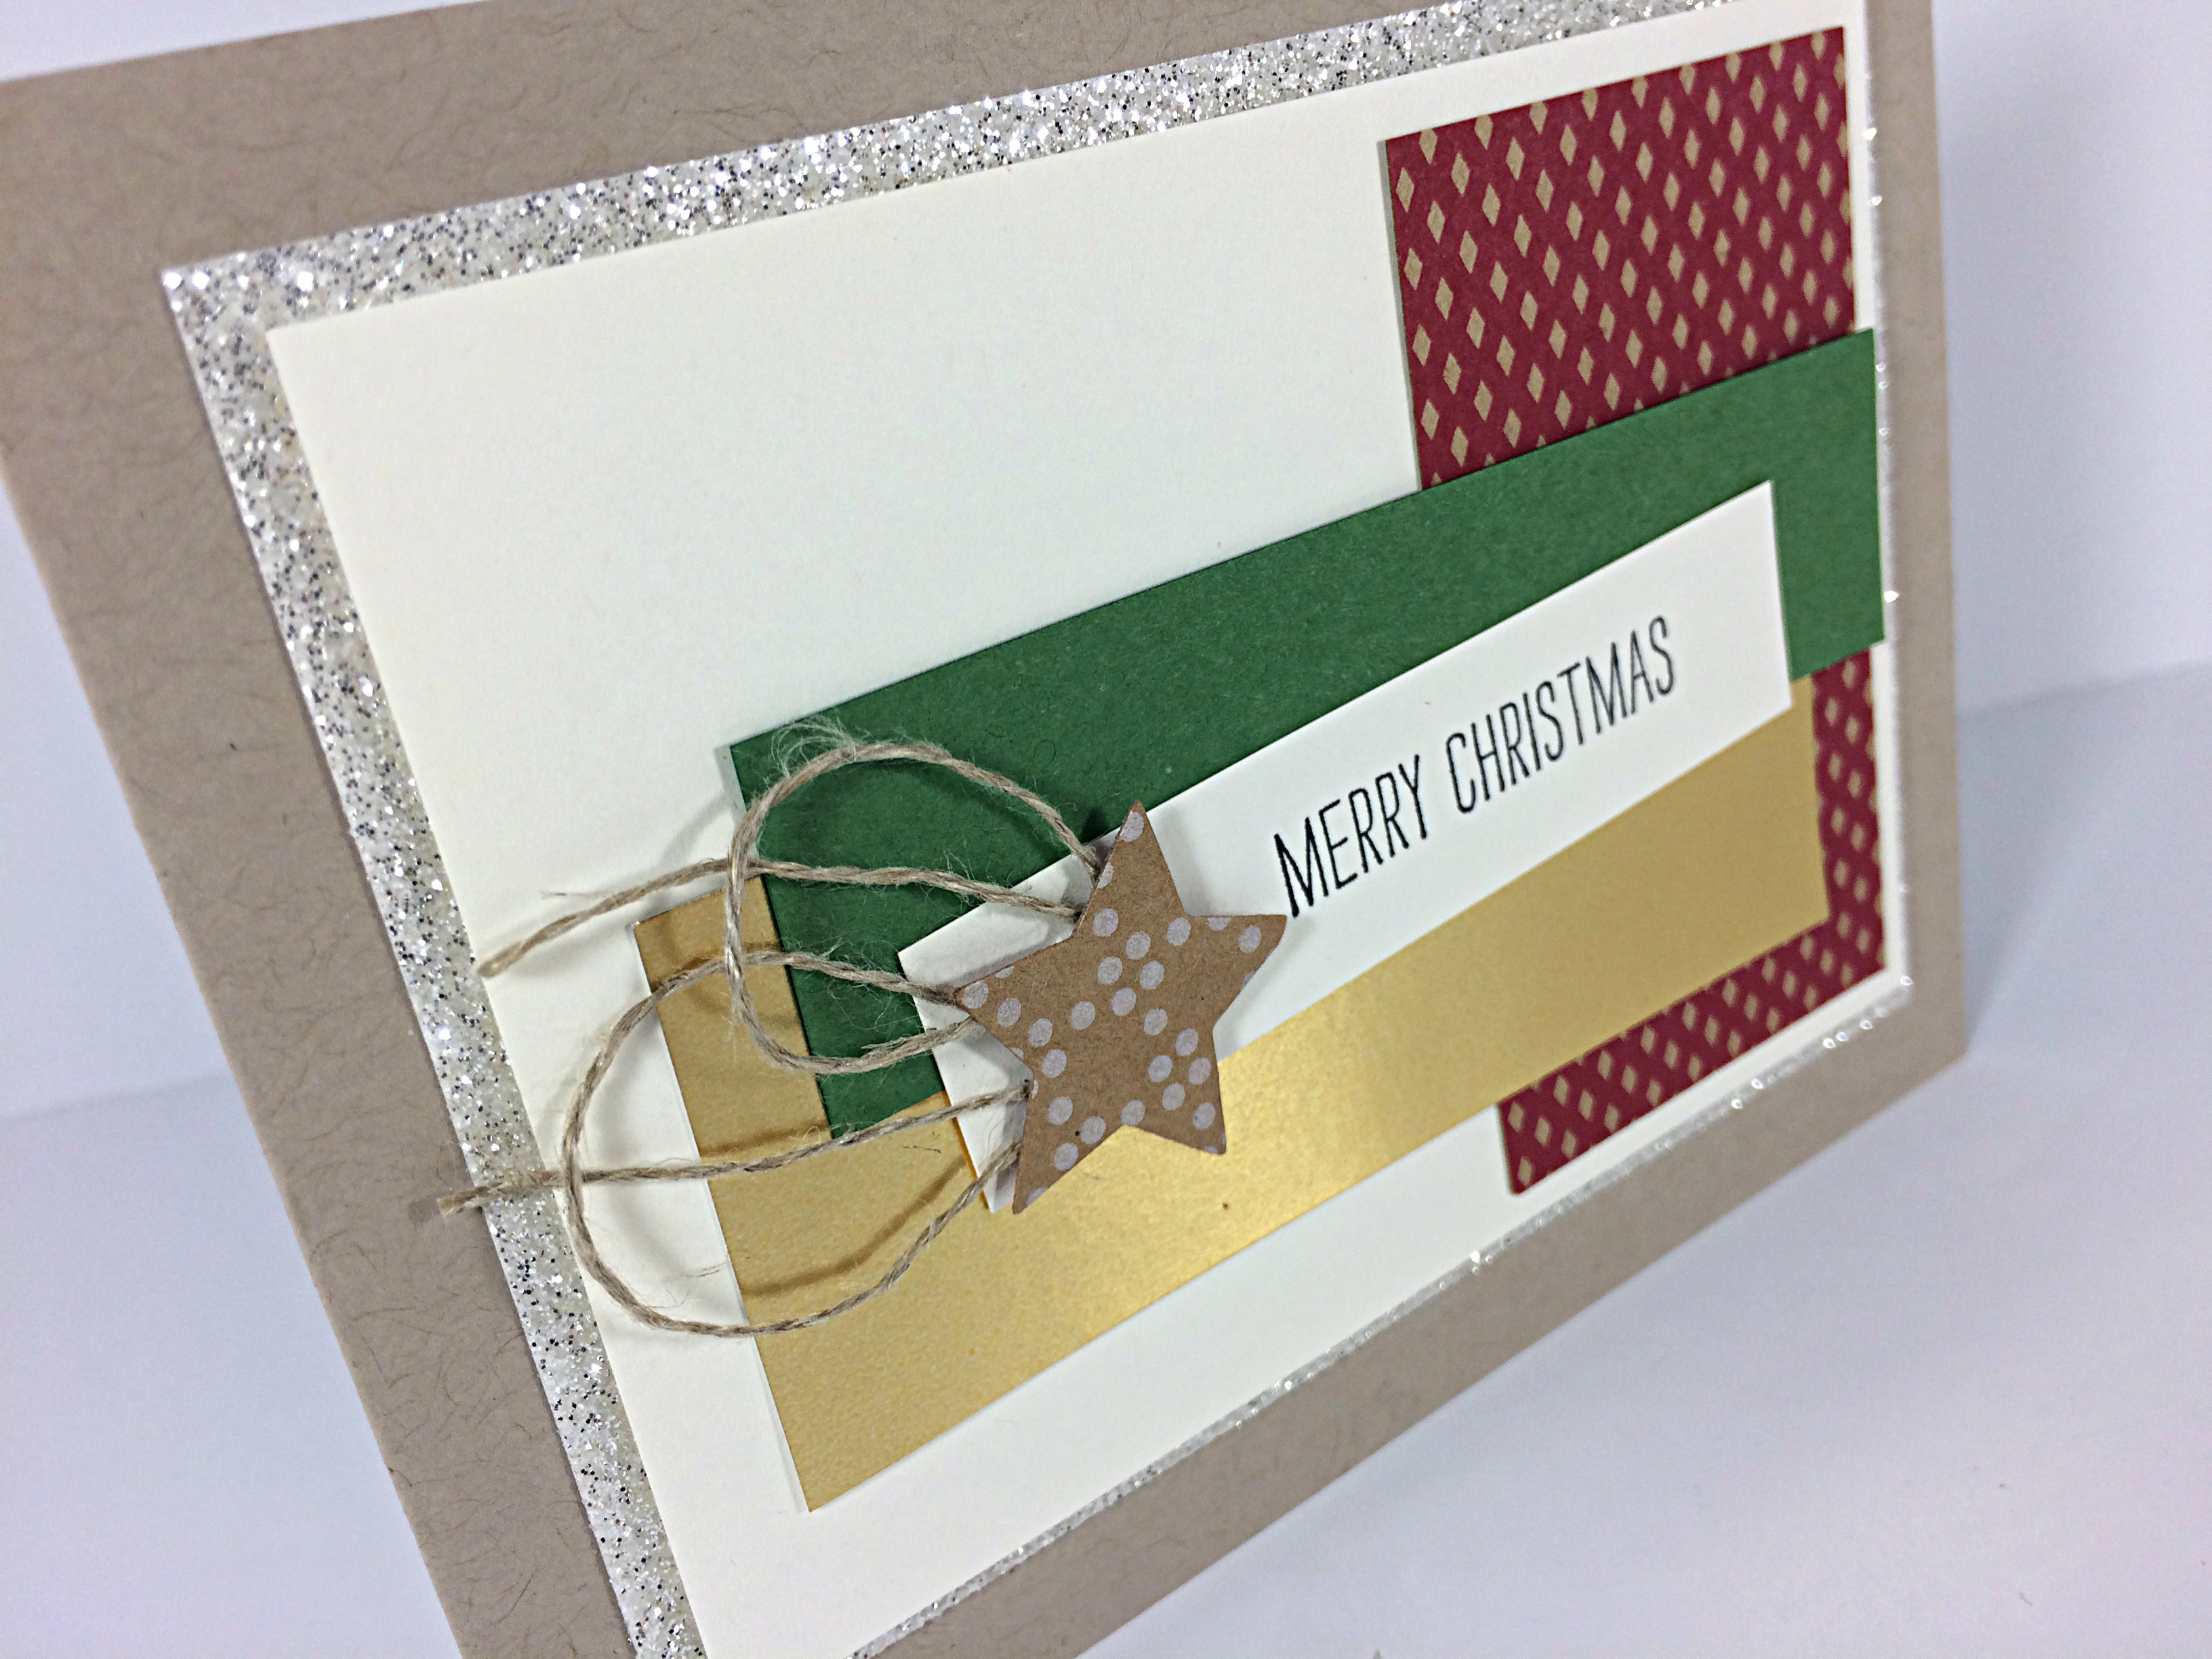
Welcome! It’s time for another As You See It Challenge sketch! I have a simple Christmas card for you today. I was so rushed and pulled this together in about 15 minutes! Eek!
My card is not a perfect match to the sketch, mostly because I was using scraps that I had and I was too lazy to go downstairs to get my scissors or pick out different stamps or framelits.
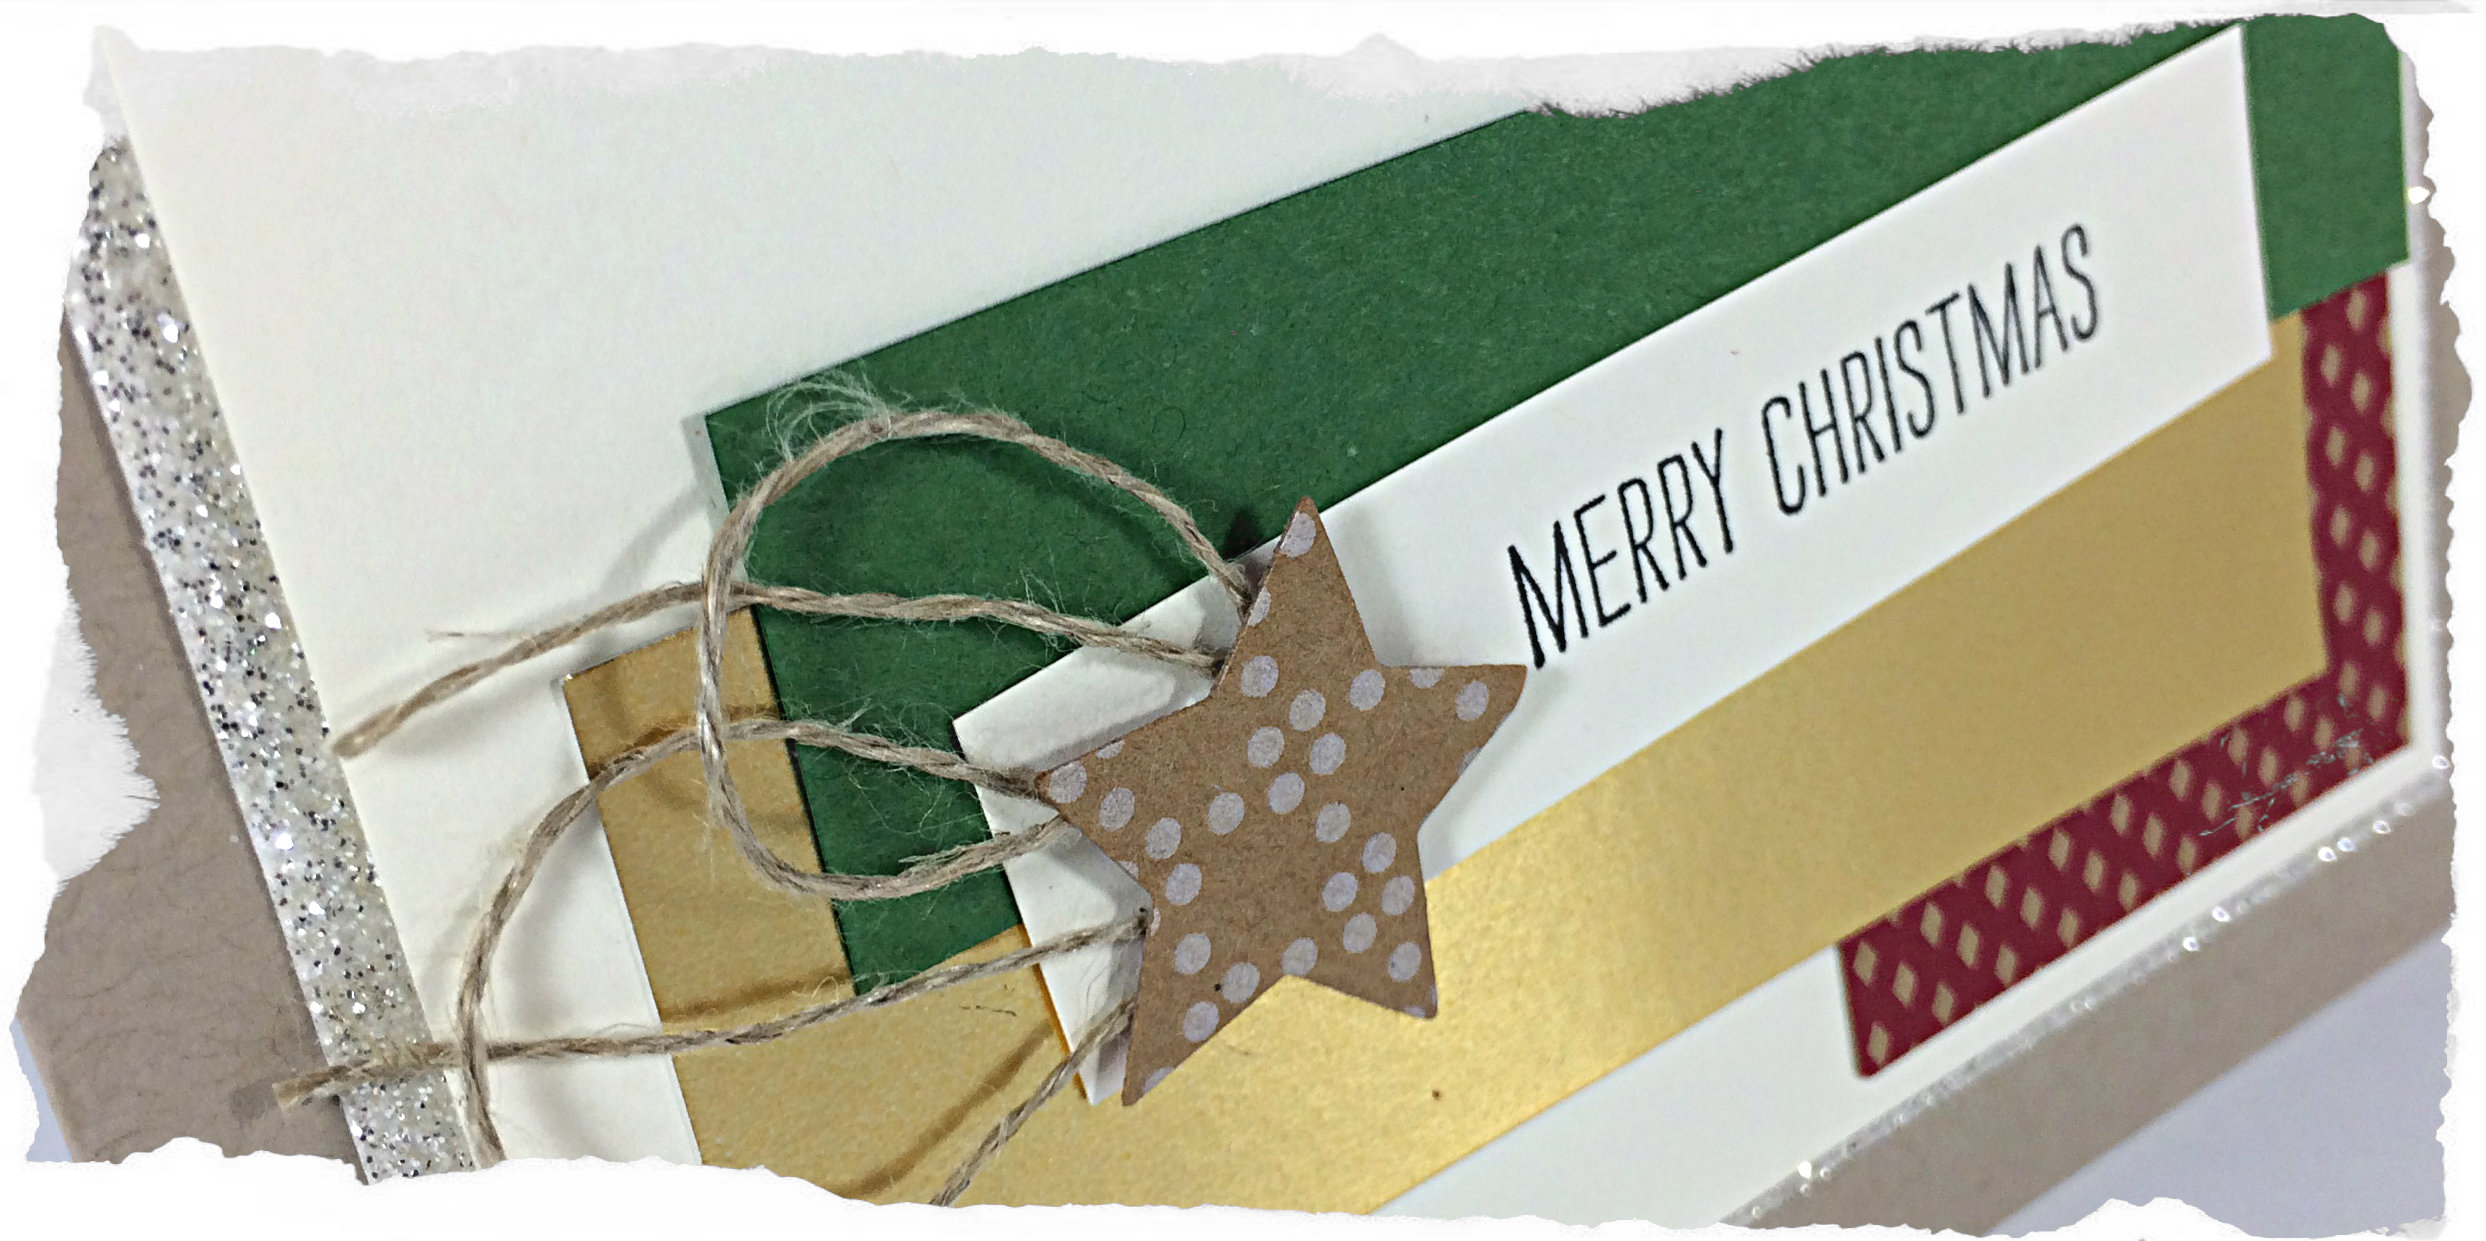
A quick and simple Christmas card. No frills. Just traditional colours and a bit of sparkle. I do have some Dimensionals under that larger Very Vanilla layer – you can’t really see it in these photos.
My latest fun is adding that little loopy bit of linen thread to my projects. To create that, I simply tie a loopy bow and fold it in half so that the loops overlap each other. Easy peasy!
Paper: Crumb Cake cardstock, Silver Glimmer paper, Very Vanilla cardstock, Under the Tree Specialty Designer Series Paper, Gold Foil Paper, Garden Green cardstock.
Stamps: the sentiment is from the Making Spirits Bright stamp set – stamped in Momento Tuxedo Black ink.
Tools: Stars Framelits with the Big Shot
Embellishments: Linen Thread
Adhesive: Fast Fuse, Dimensionals.
Check out what other stampers have come up with for sketch #058 over at the As You See It Challenge blog. Maybe you’d like to give it a try and see what you can do! I know I’d love to see your projects.
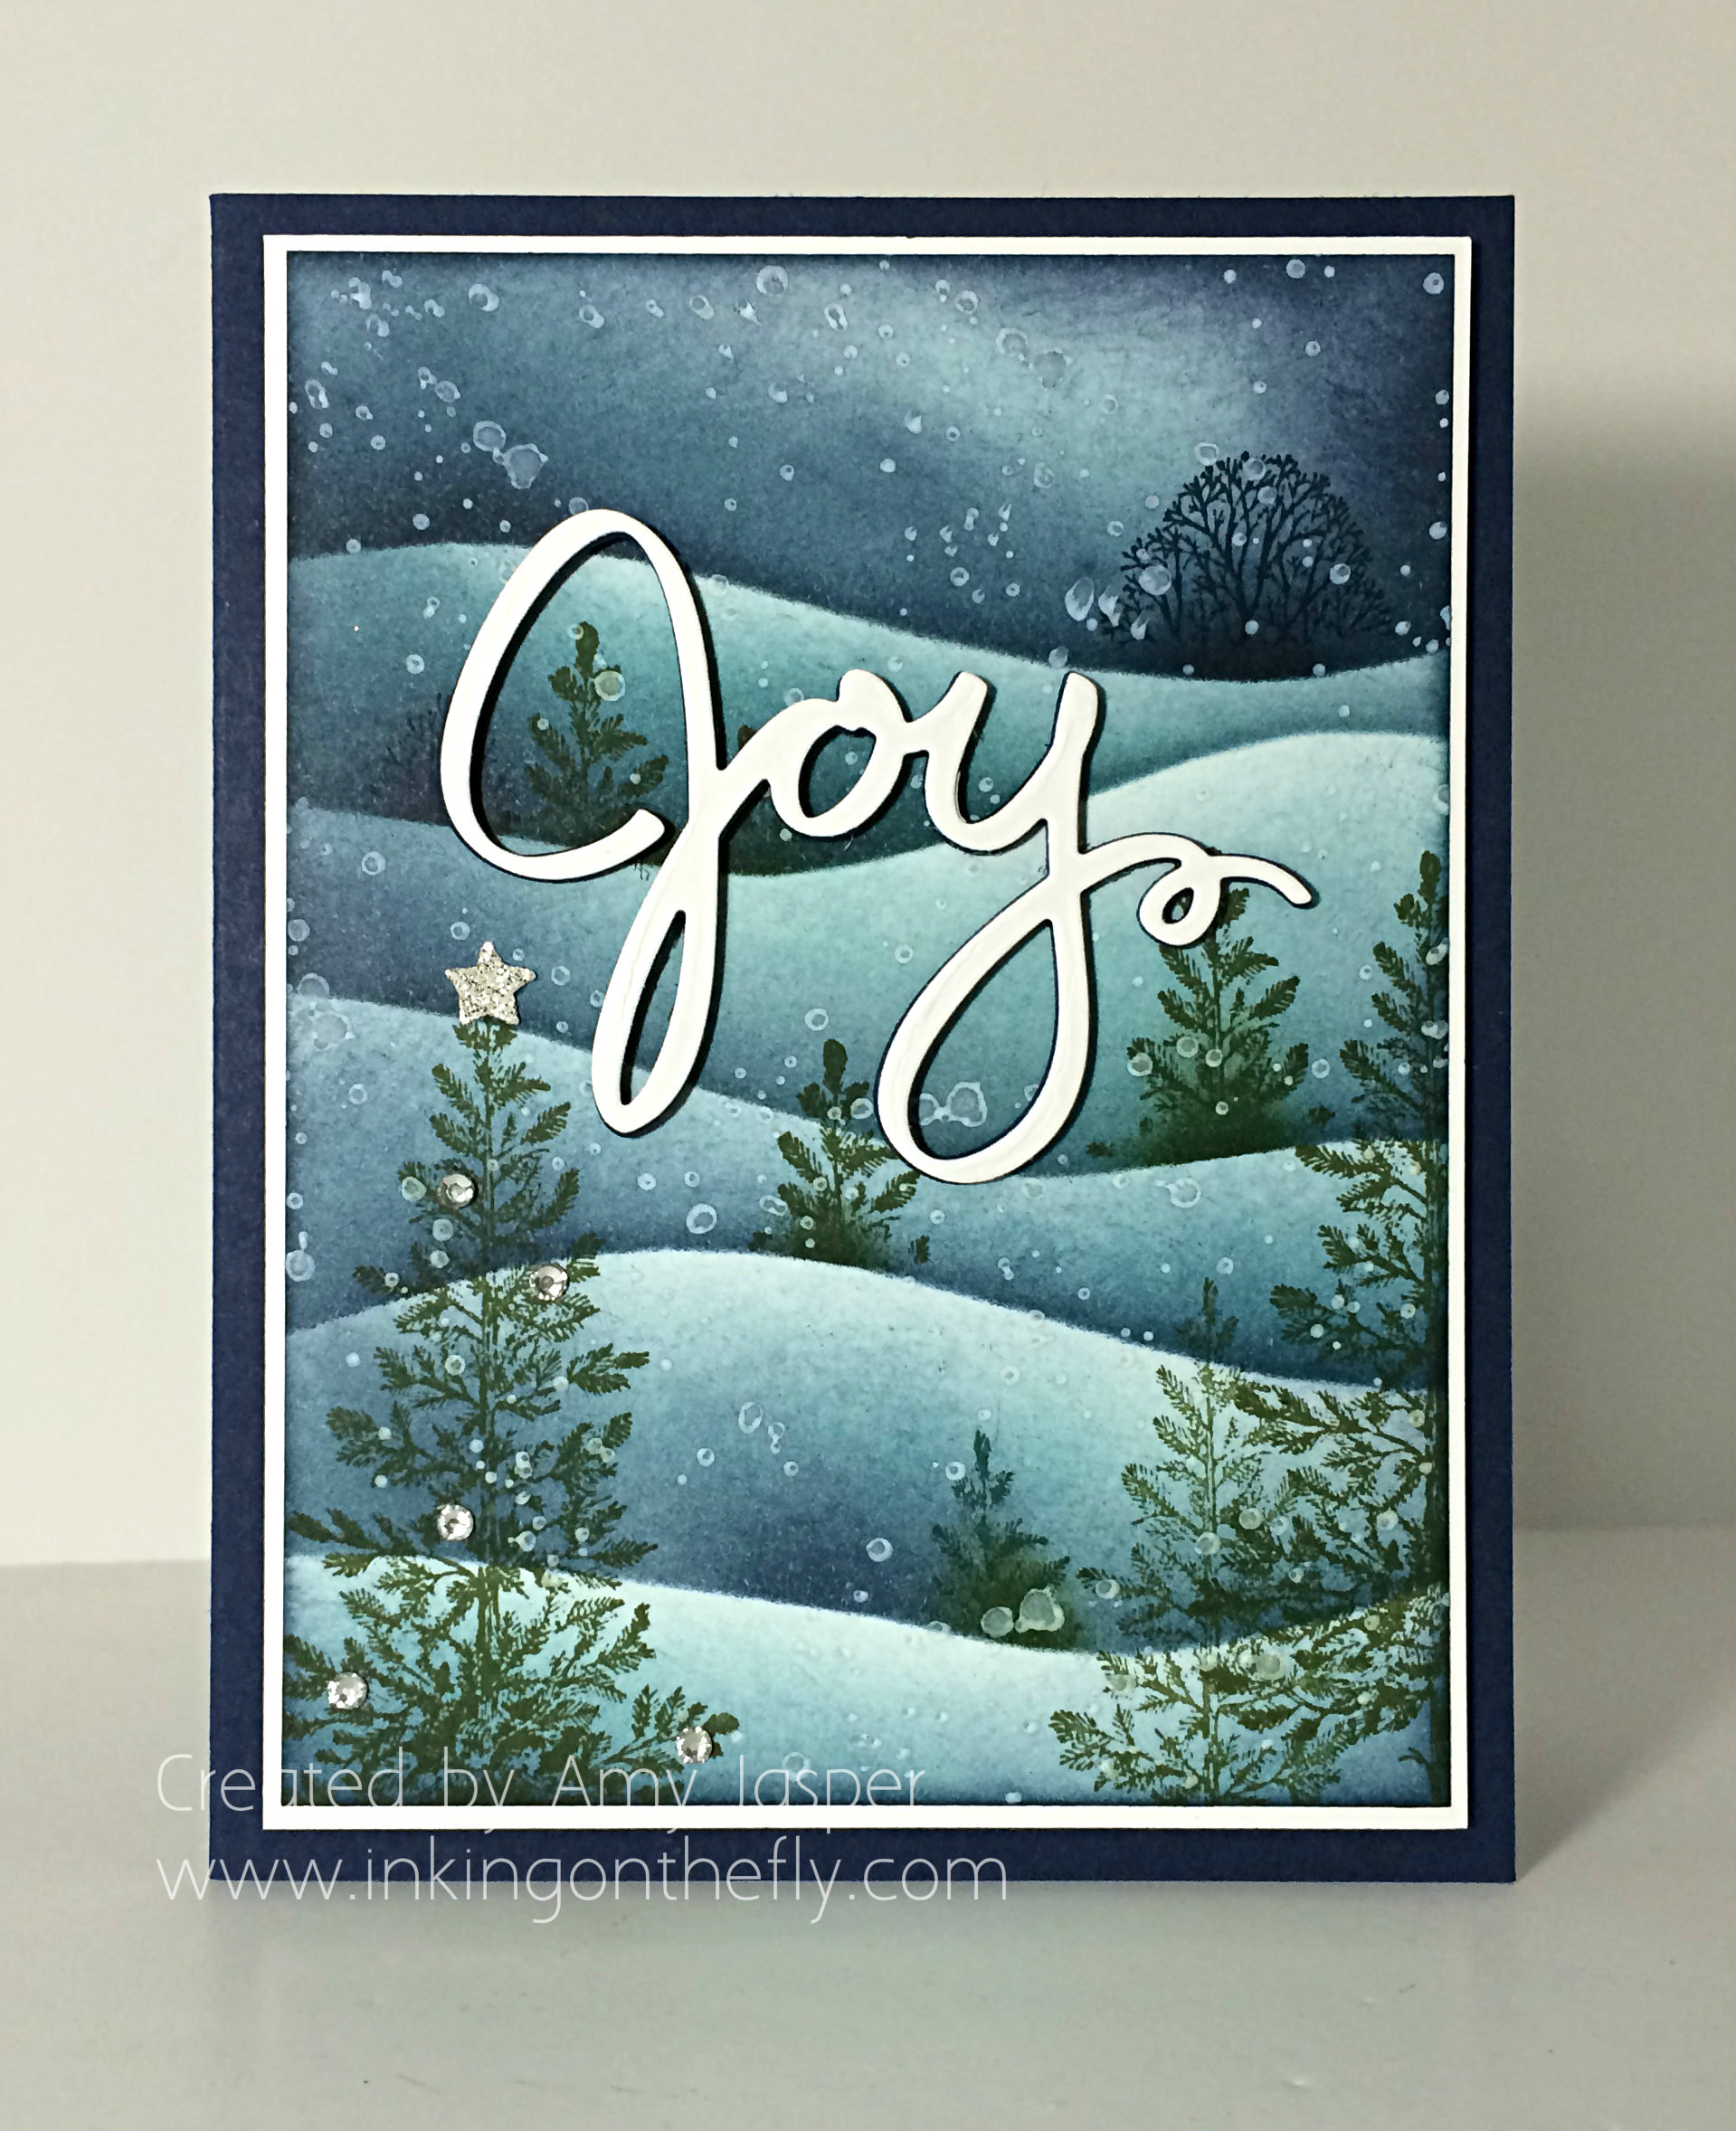
I love designing with my Stampin’ Up! inks, paper, stamps, and tools. I’ve fallen in love with this beautiful sponged winter landscape technique using Lovely as a Tree.
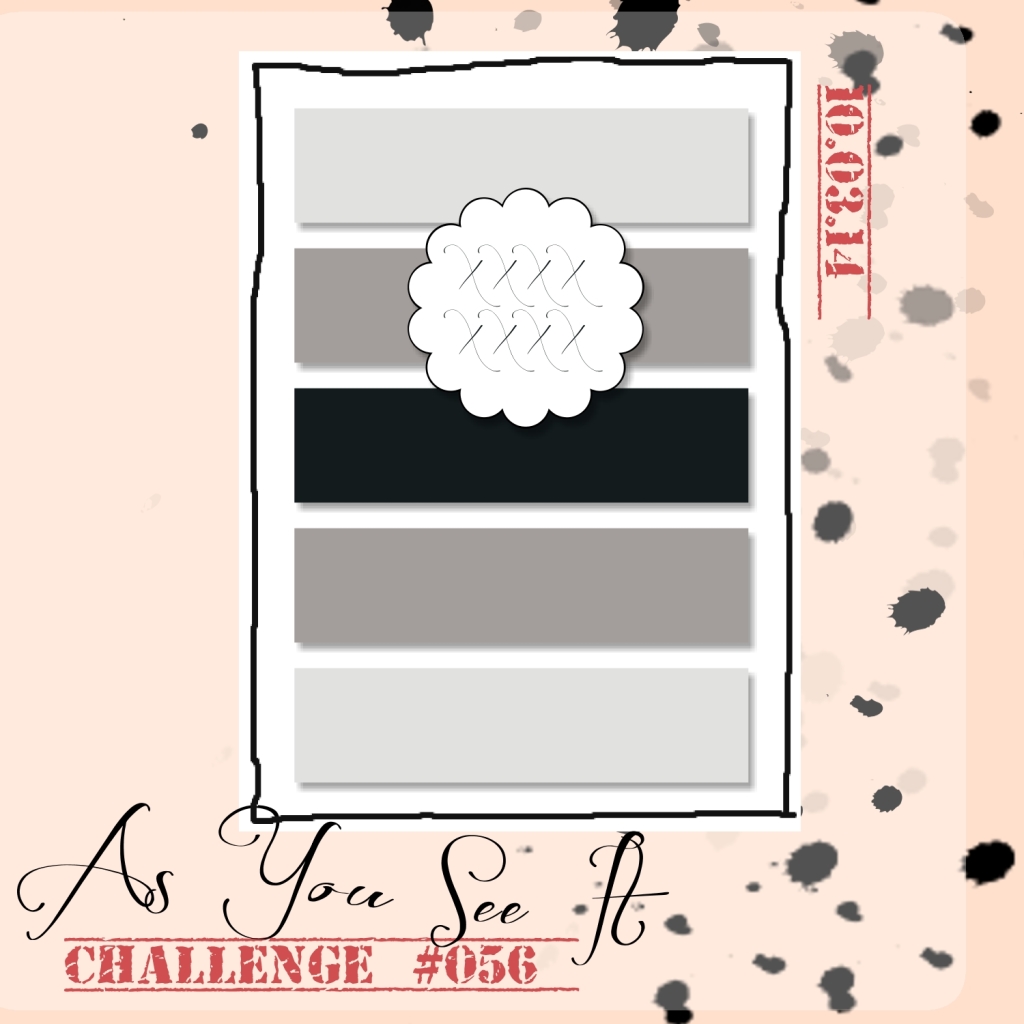
It’s Friday, which means it’s time for another As You See It Challenge card. We’re on challenge #56.
I was teaching a technique card class last night and we were working on a project using the technique in this video and remembered I needed to design a card for the challenge blog today. I thought I would use this great sponged landscape technique and add my own touch and style for my As You See It design.
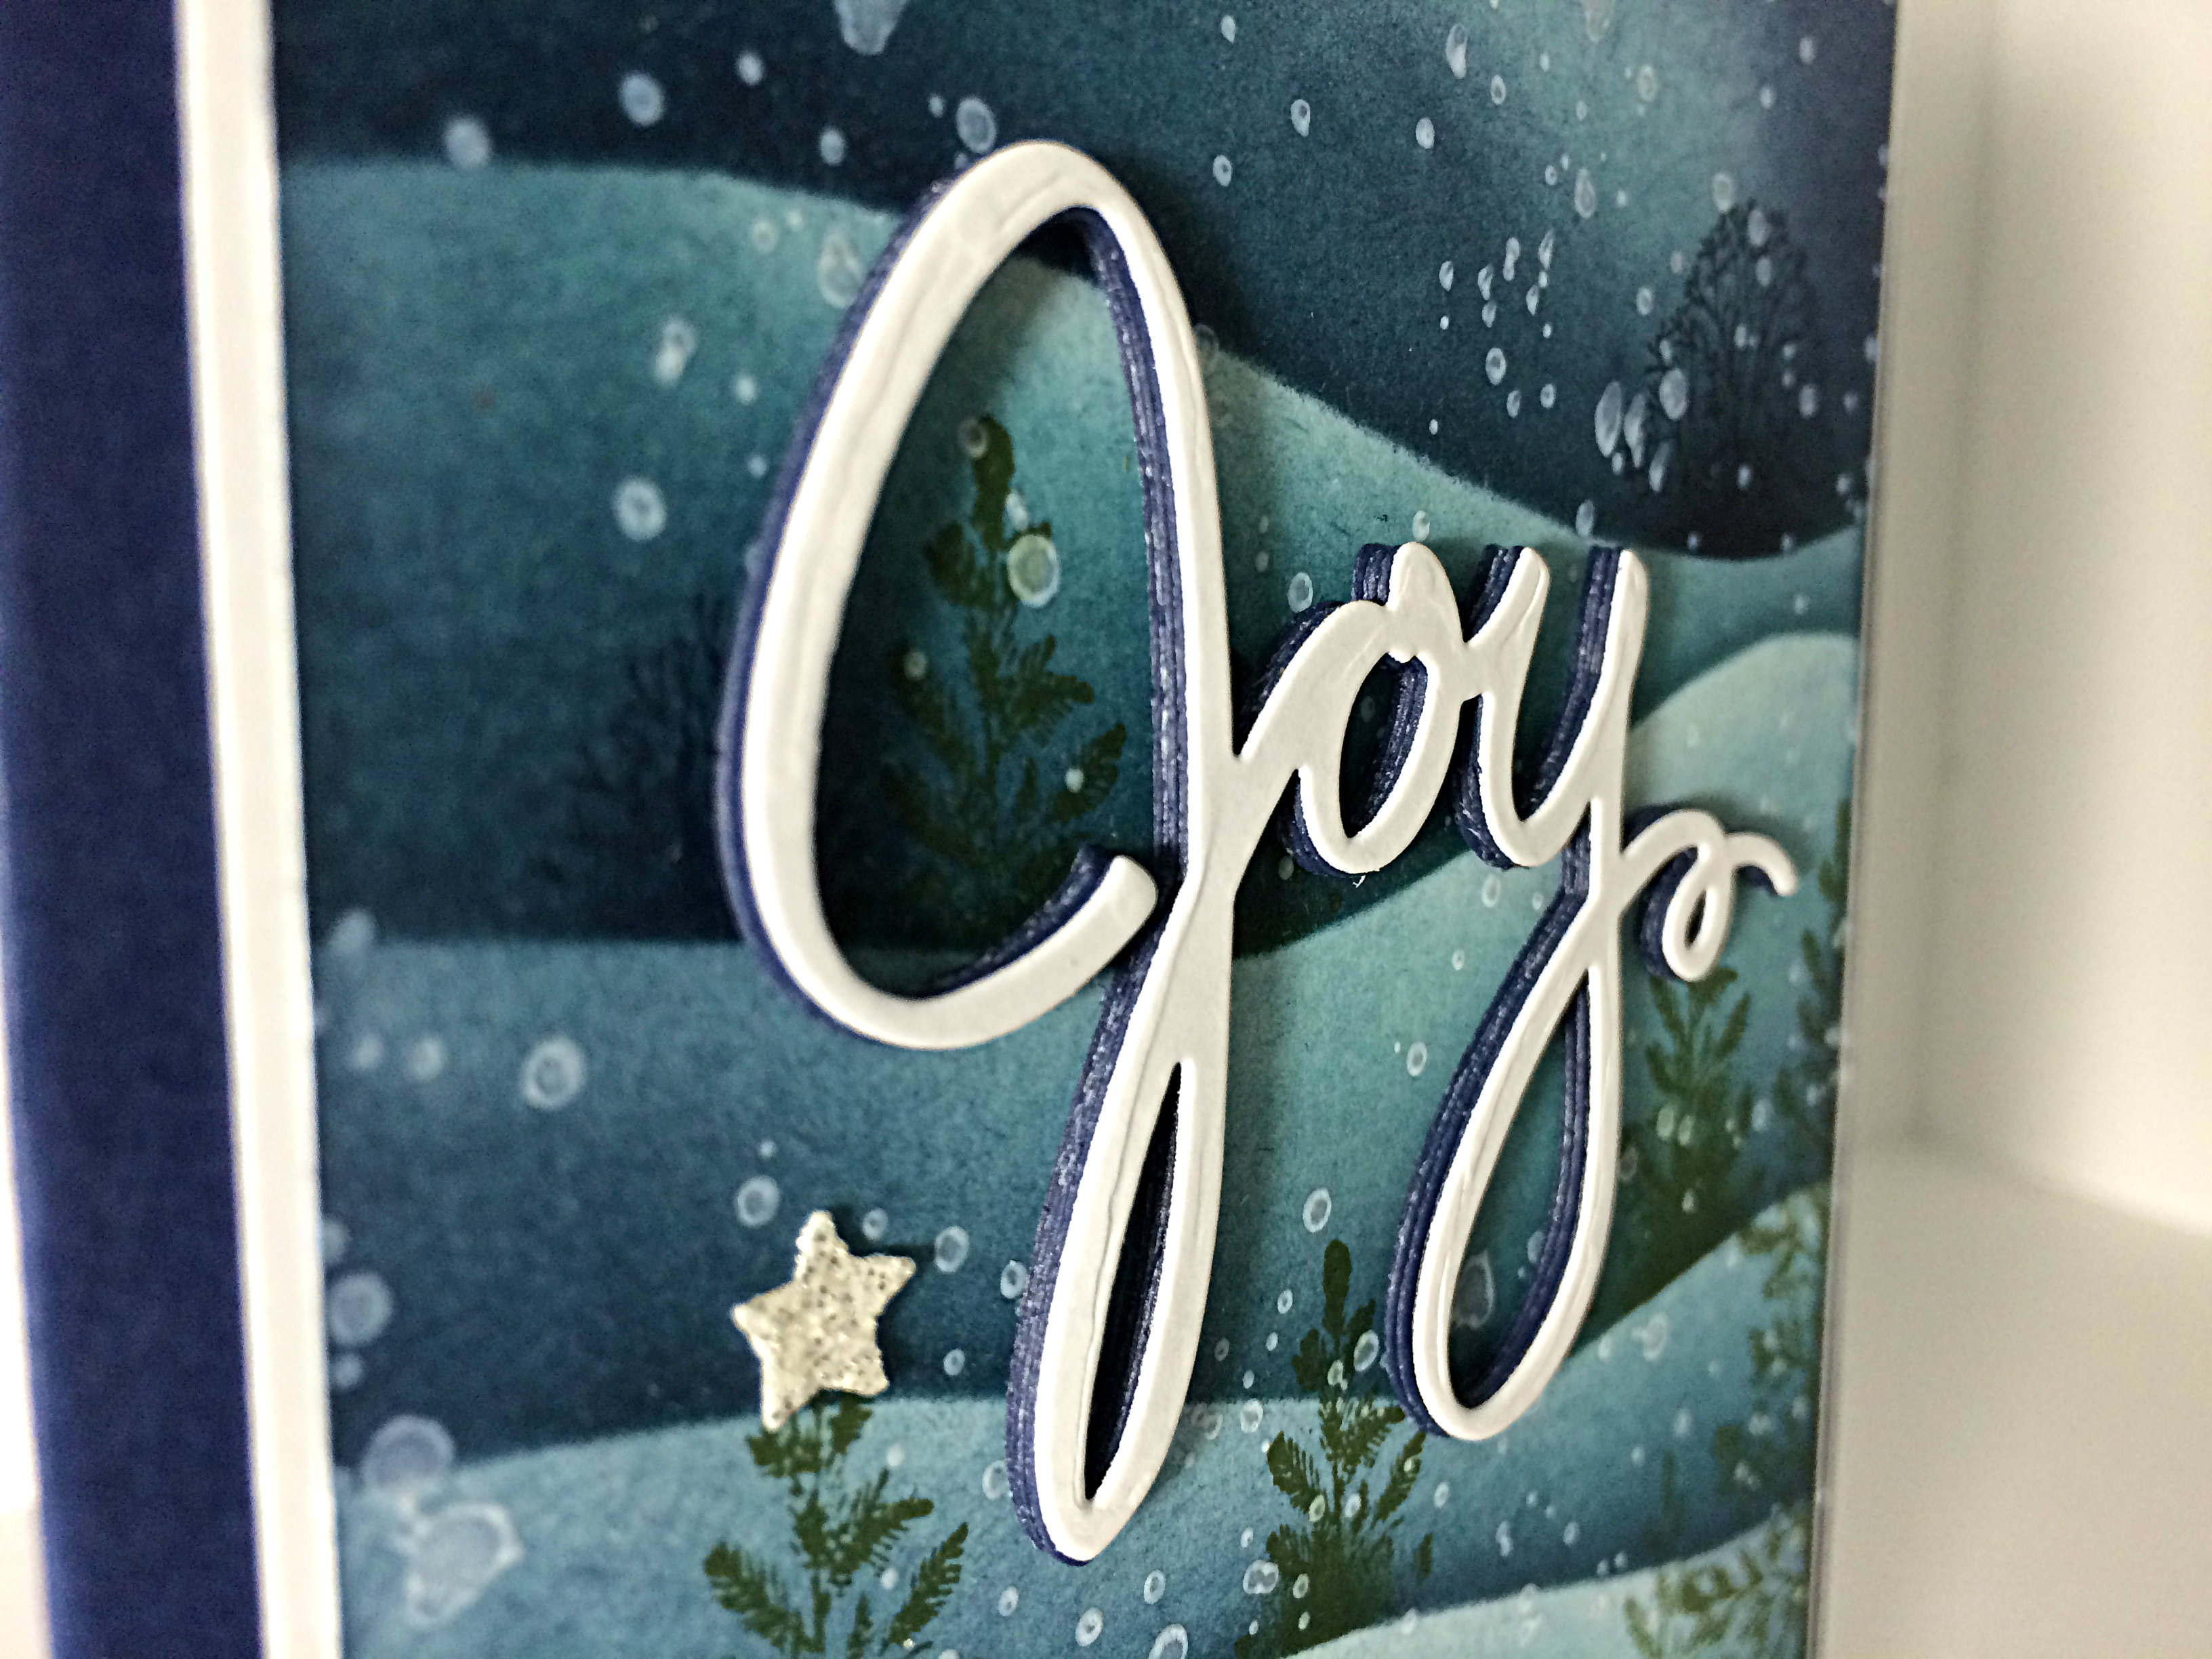
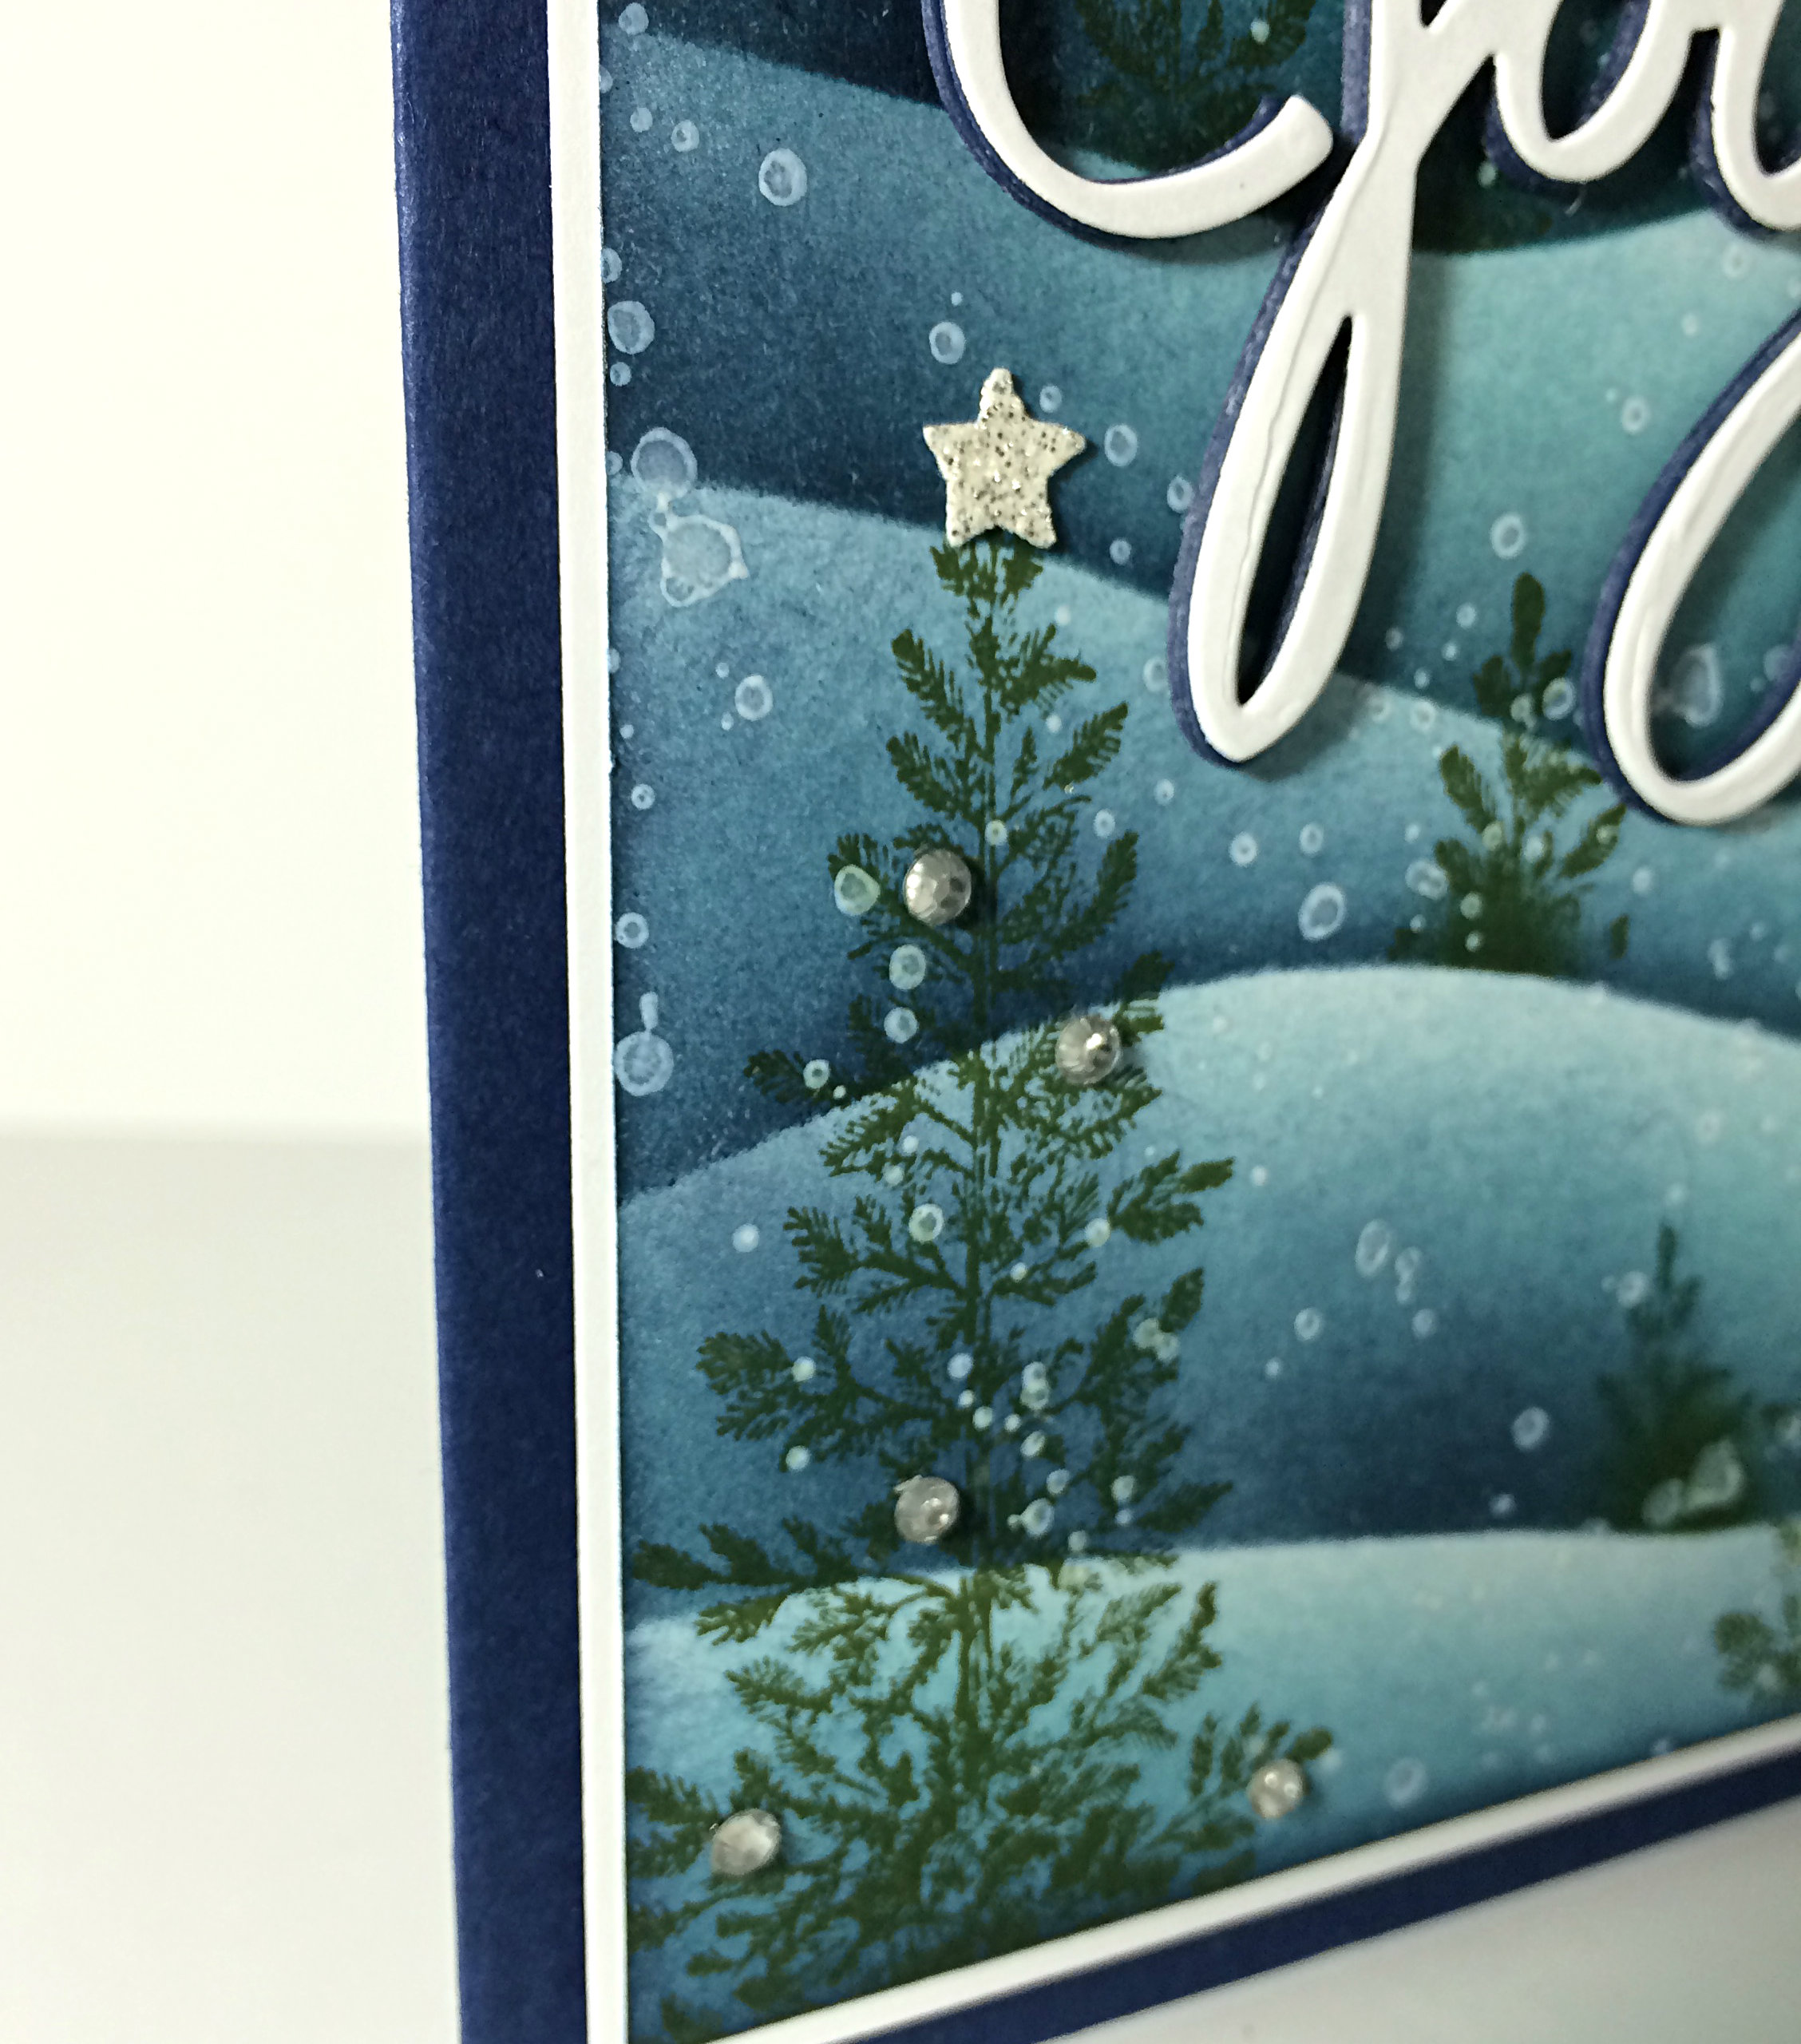
If you click on the link for the video above, you’ll see how the trees and hills were created. I used Island Indigo and Night of Navy for my sponged hills. Mossy Meadow ink was used to stamp the coniferous trees while Night of Navy ink was used for the deciduous trees. For the snow, I simply used one of the splatter images from the Gorgeous Grunge stamp set and stamped it multiple times over the completed winter scene with Whisper White craft ink.
You can see in the above picture that my JOY cutout (from the Wonderful Wreath framelits) looks a little bit different than a regular die-cut piece of cardstock. We were shown this technique at a workshop at the Inspire.Create.Share Stampin’ Up! Convention this last July. The look is achieved by layering 5 or so cuts of the same framelit or punch. To make it easier to adhere each layer together, you can apply an Adhesive Sheet to your cardstock before cutting out your image. I chose to use Night of Navy cardstock for the bottom layers, then top it with Whisper White cardstock for my JOY image.
I added some Basic Rhinestones to the tree in the foreground and a little Silver Glimmer paper star on the top that I cut using my Star Confetti Border Punch.
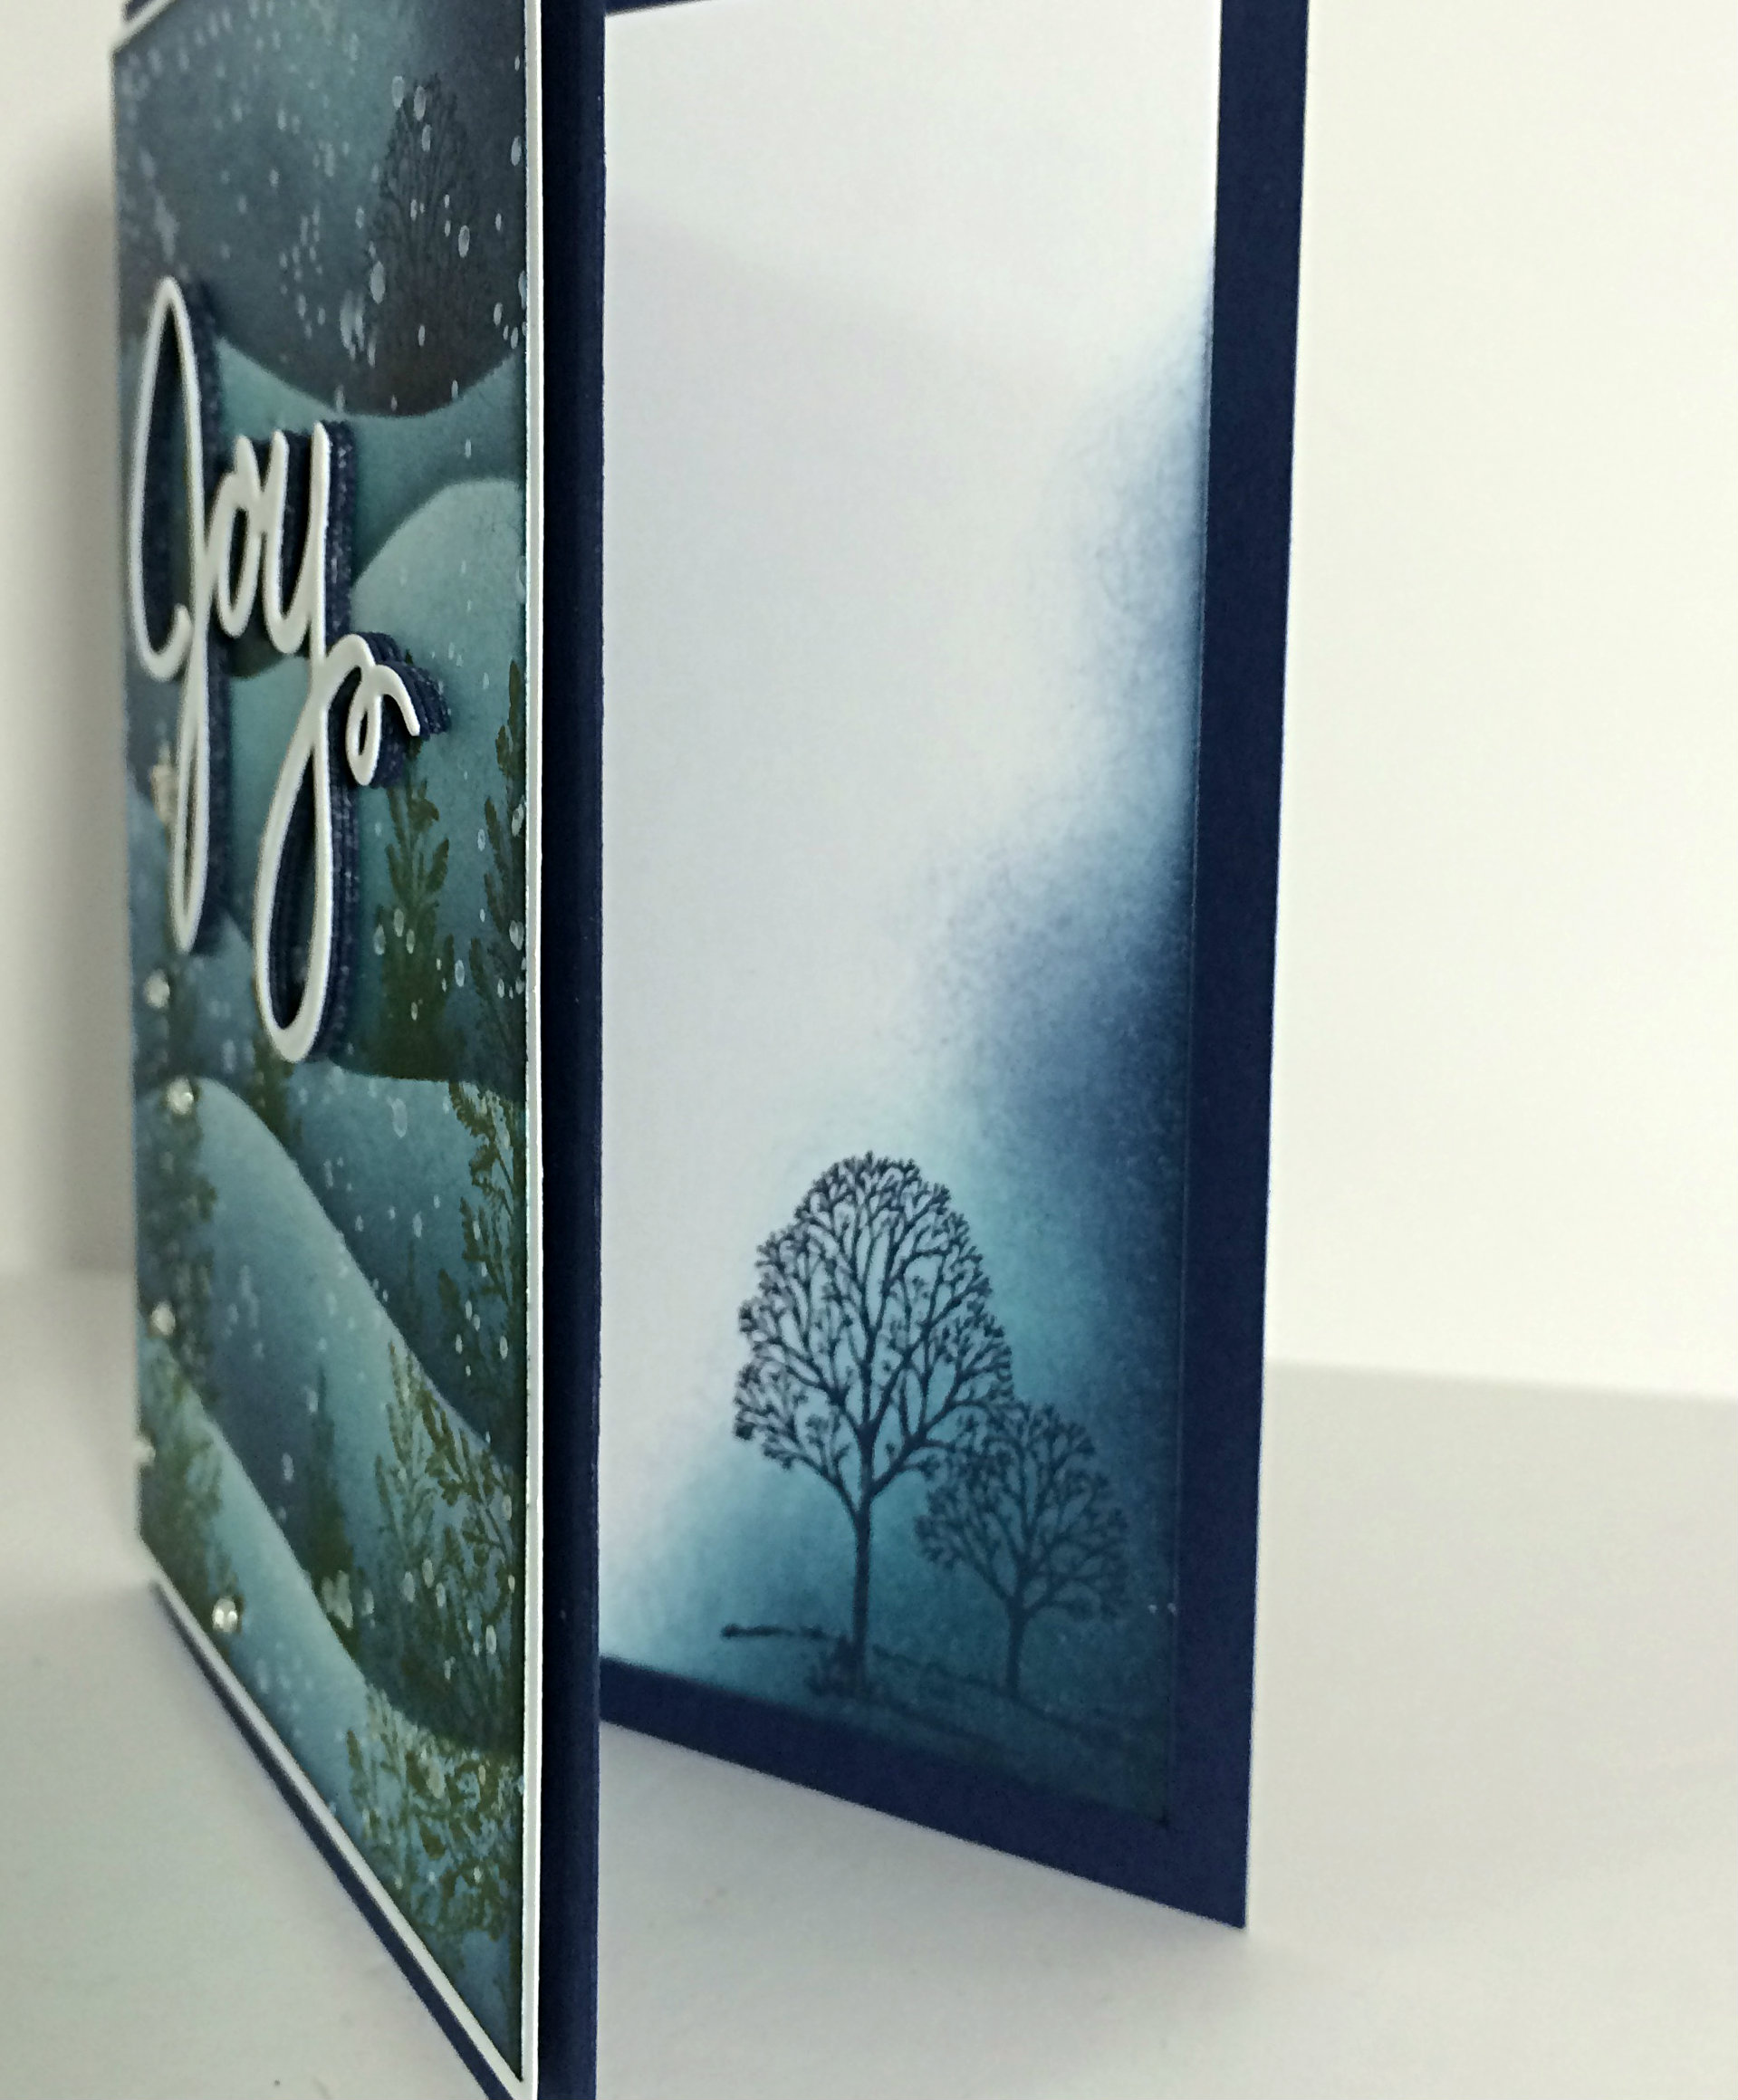
The inside layer of my card shows a couple of trees stamped with Night of Navy ink, then sponged over top with the Island Indigo and Night of Navy combo of inks to coordinate with the card front.
Hmm. Now I’m thinking I should have added snow to those little trees inside my card. I might just go back and add that yet!
And, of course, I really like Stampin’ Up Dimensionals, so I used them to pop up the white matted layer over the Night of Navy card base.
I hope you’ll try this cute sketch! Go on over to the As You See It Challenge Blog and check out what the other designers have done. Then give it a go yourself!!
I love designing with Stampin’ Up paper, inks, stamps, and tools! Today’s card uses the Bright and Beautiful stamp set with the coordinating Stars framelits. It was inspired by a friend who just hosted her first workshop as a new demonstrator. She did great!
If you don’t already know this, I am a designer over at the As You See It Challenge blog and each week I get to share my As You See It card or project design with you! This week is a very cute sketch.
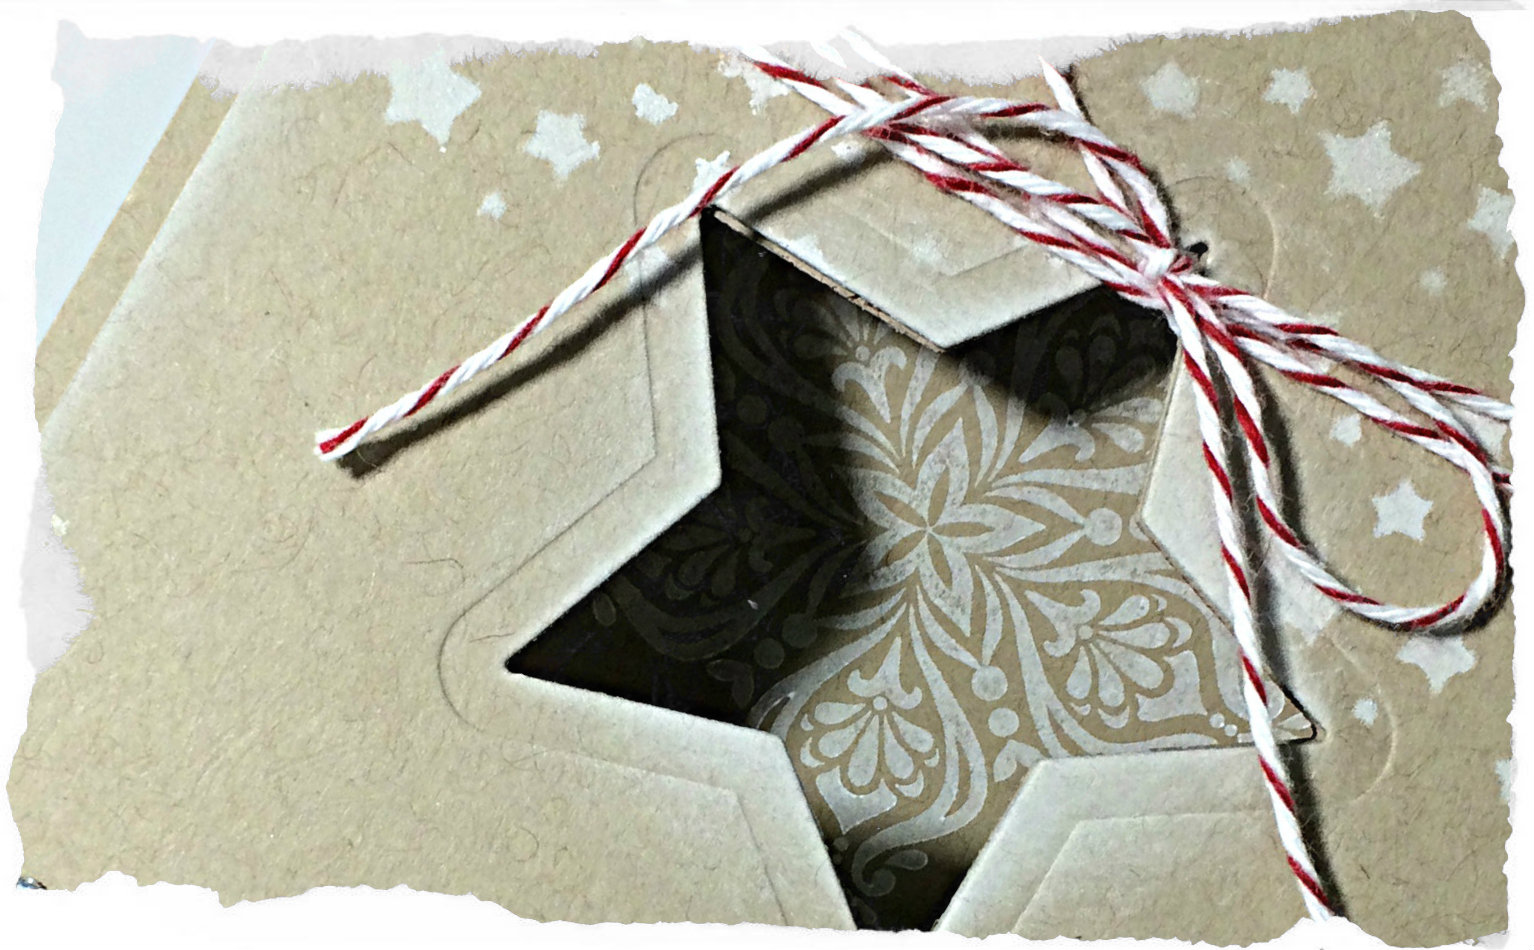
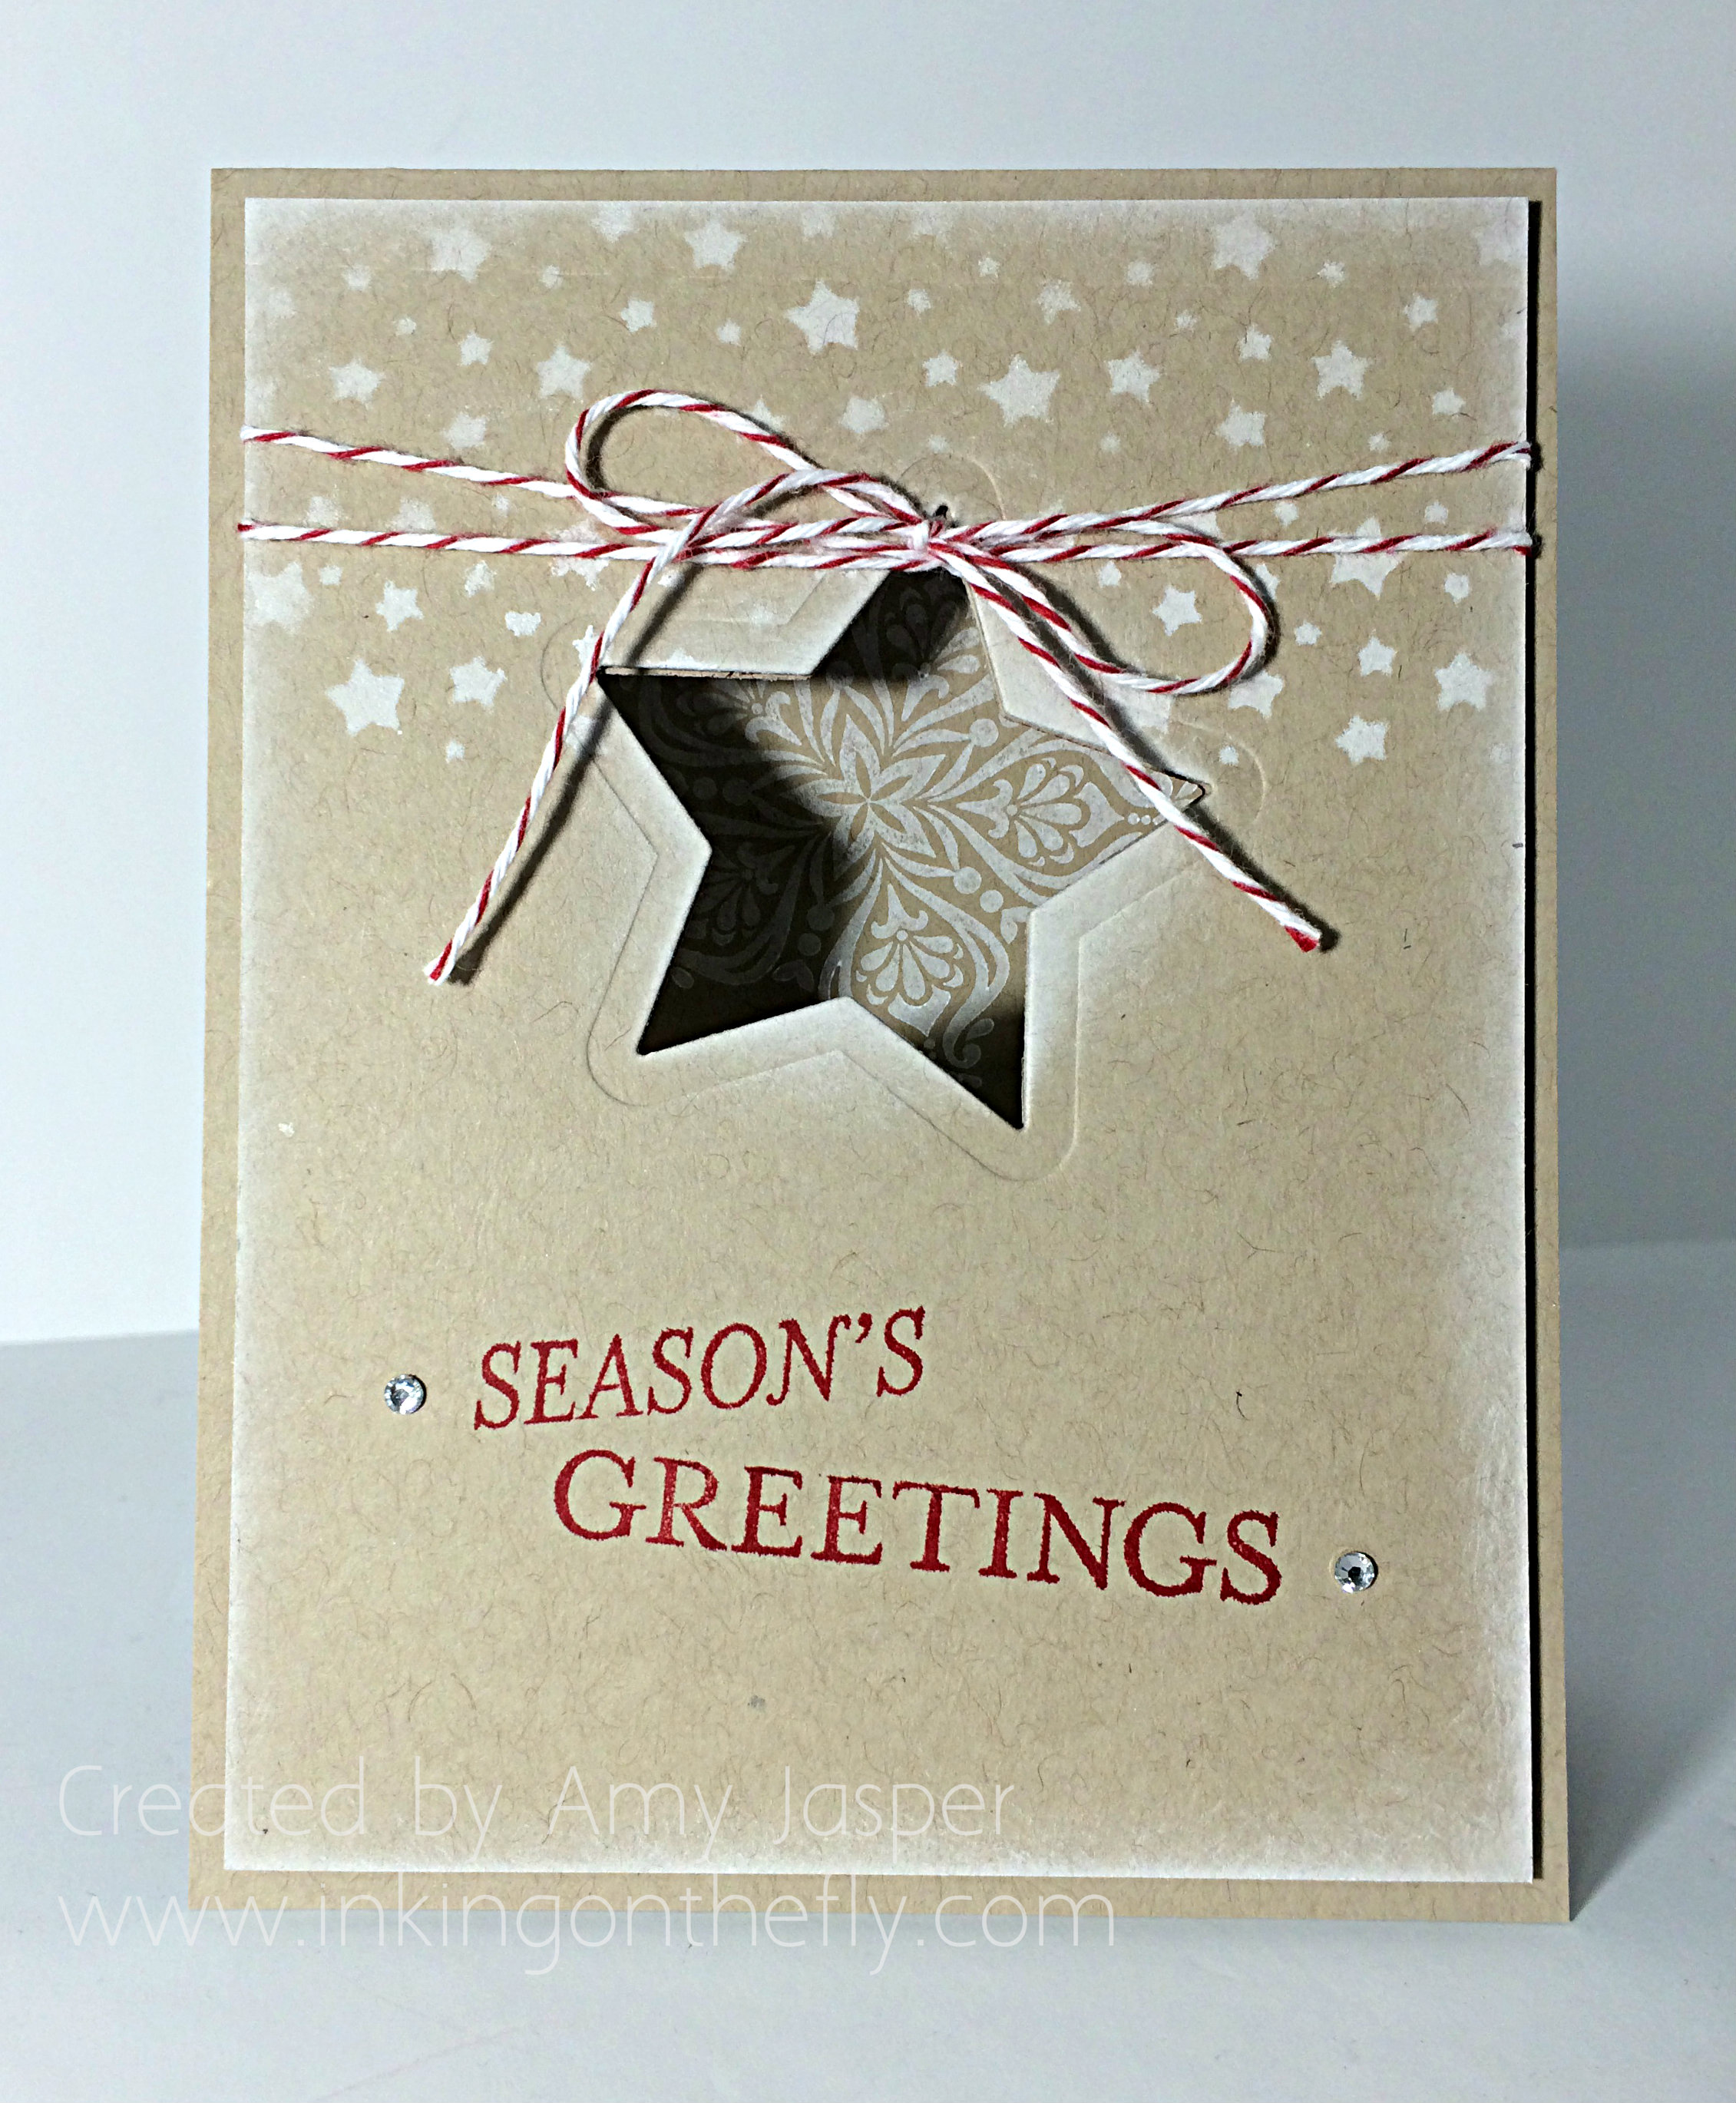
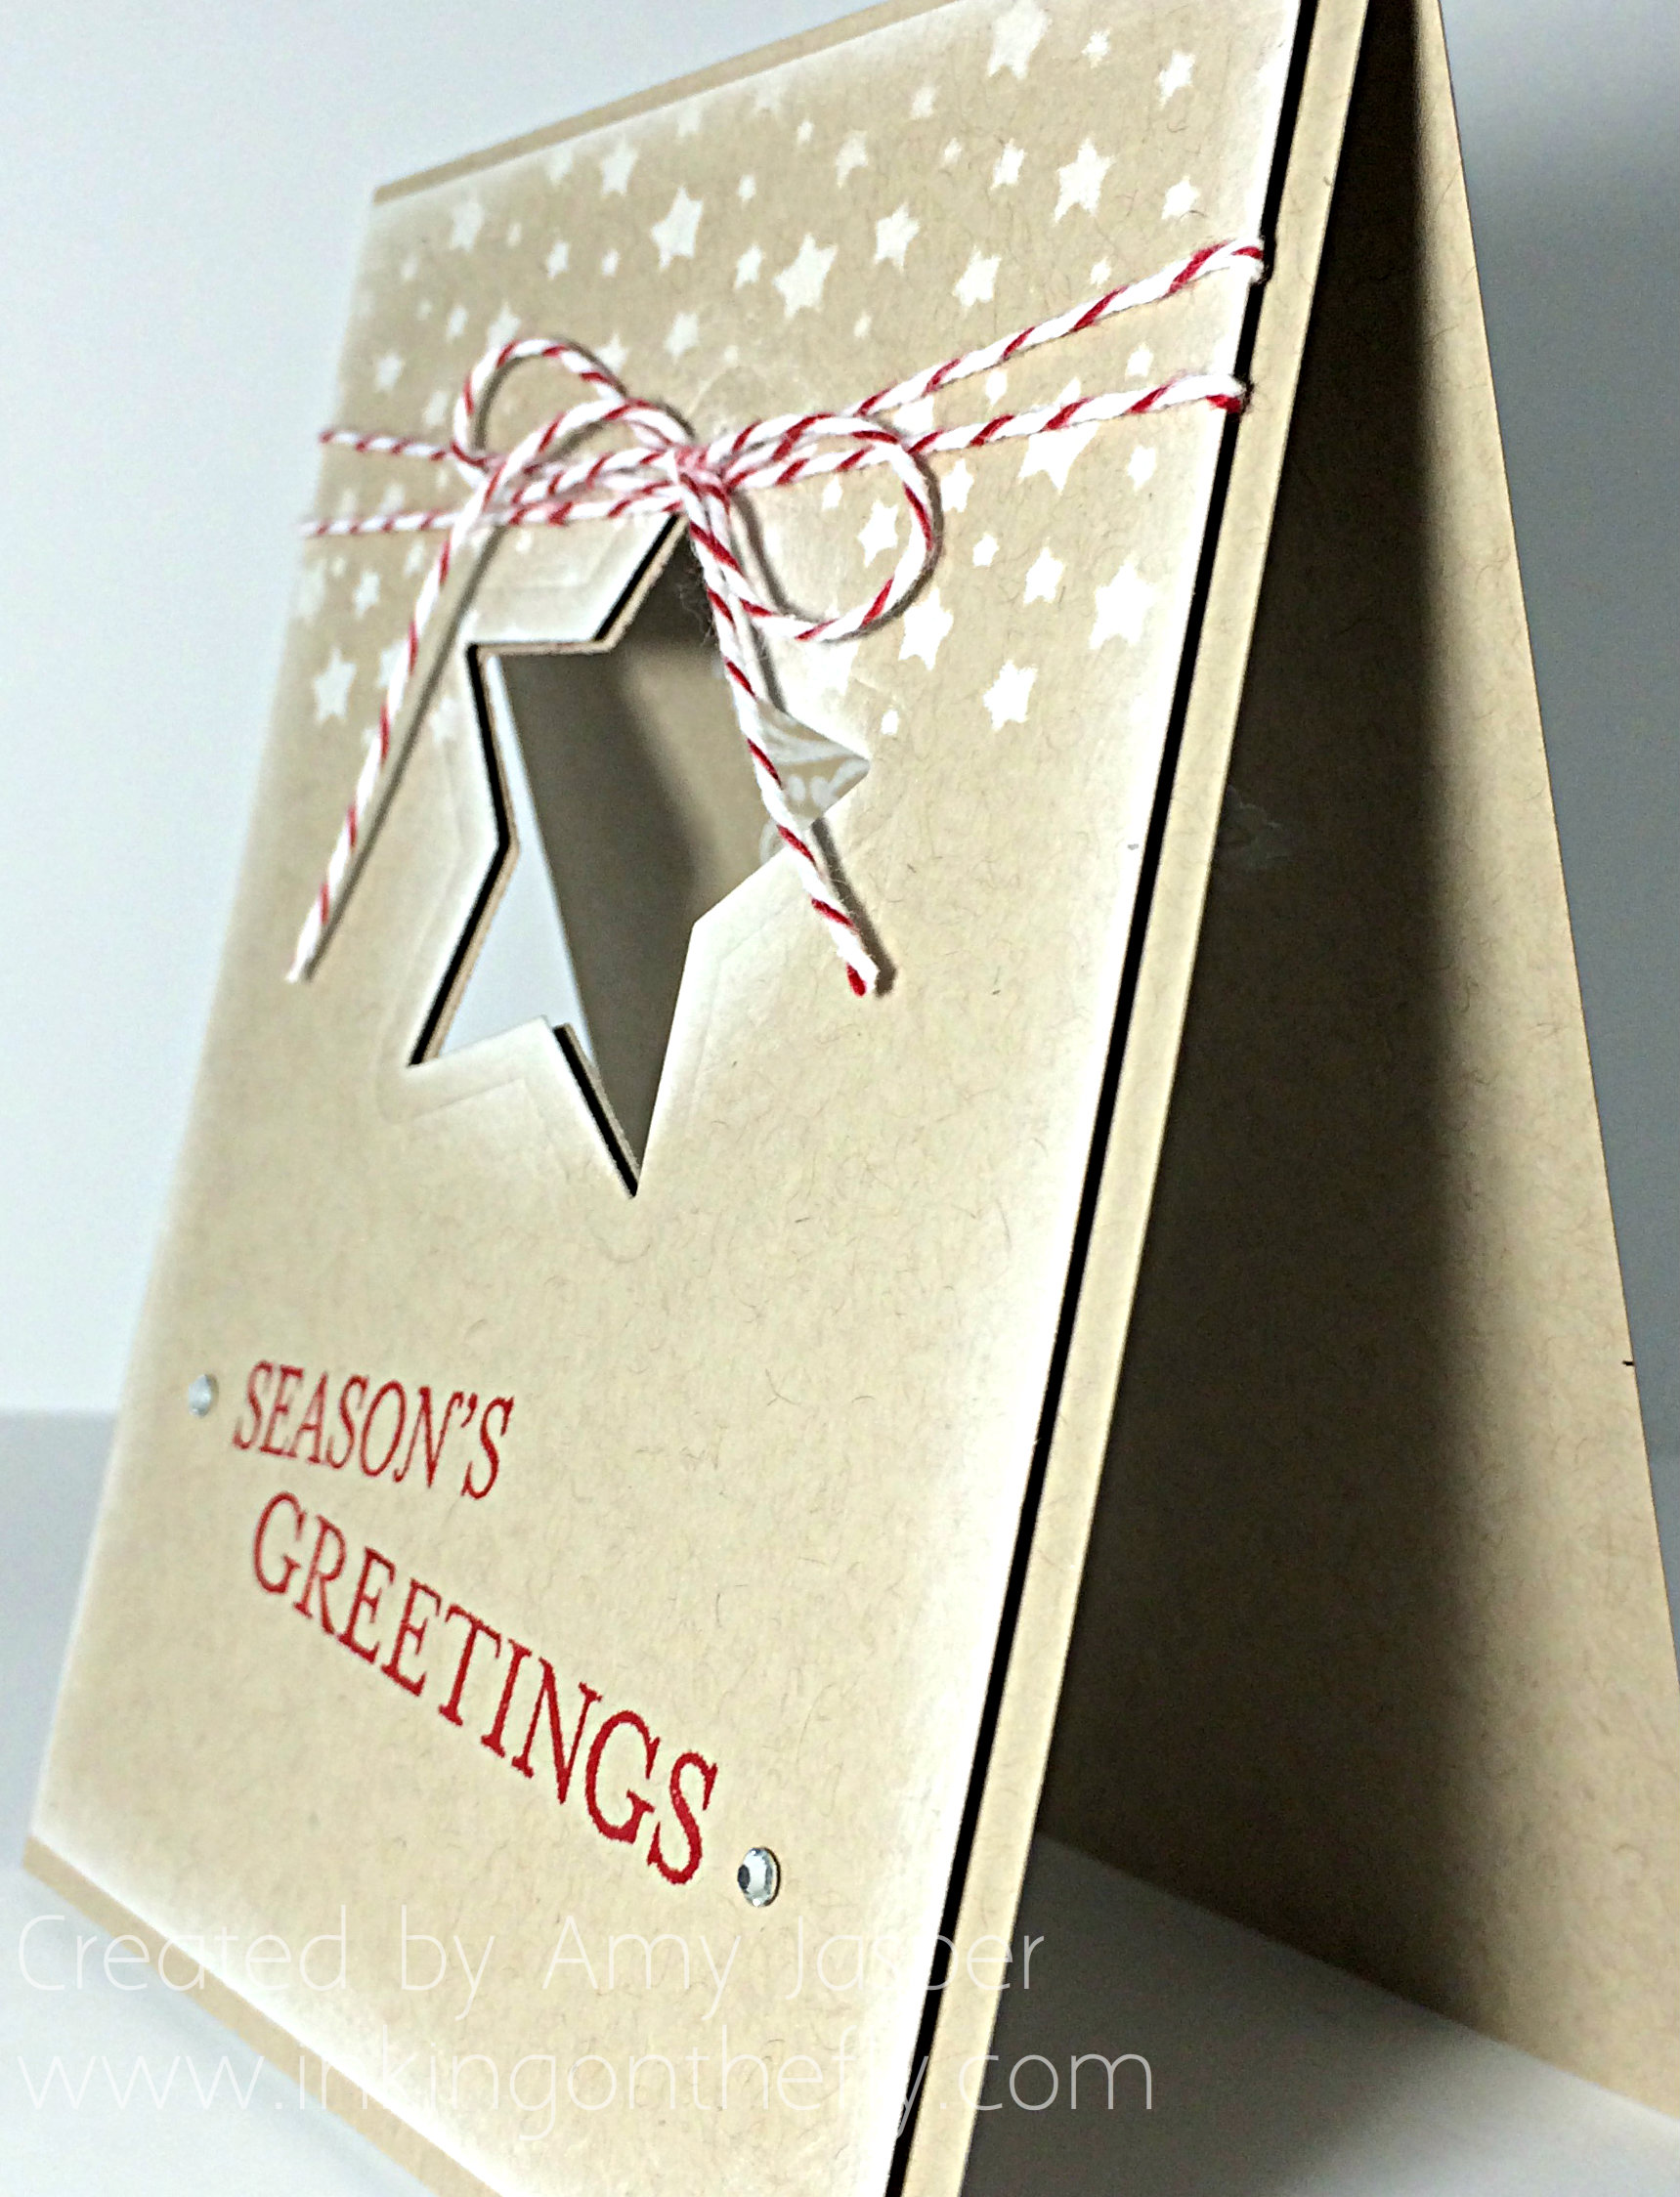
I usually start thinking and planning my Christmas projects in September, so I have another Christmas card for you this week. I love that Stampin’ Up has lots of stars in their Holiday catalogue this season: Star framelits, a star punch, a star embossing folder, star masks, confetti stars border punch, star stamp sets, and star boxes (oooh, not available until October 20th)! I still haven’t used my star embossing folder, but you might see that next week.
I used Crumb Cake cardstock for my card base and layered another piece of Crumb Cake over that. Before doing anything, I used a star framelit to cut out the star from BOTH layers for the front of the card. That way, when I completed my stamping and embellishments, I could have that peak-a-boo hole line up with the card base. I did that by leaving the card base layer open (not folded as I don’t want to cut through the back of the card, too!).
I stamped the medium-sized star from the Bright and Beautiful stamp set on the inside of the card using Whisper White craft ink so that it would line up with my star cut out on the front of the card. I made a few pencil marks through the star opening as a guide for where I wanted my stamp to be placed.
I sponged Whisper White Craft ink all around the edge of my front layer and around the star opening. Then I used my Confetti Stars Punch on a separate piece of cardstock to use as a mask and sponged through the mask on my Crumb Cake cardstock to place the adorable little stars on my card. I love them!
Next step, I added my Cherry Cobbler baker’s twine by wrapping it around the Crumb Cake layer two times so that the ends were at the BACK side of the star opening. I then pulled the ends through the star to the front so that when I tied the first knot, it tied around the twine with the bow holding it all together at the top of the star. I hope that makes sense, lol! I did it that way so that the twine would stay right at the top point of my star.
Finally, I used the Season’s Greeting stamp twice on the card front to toggle each word and fit the sketch a bit more. I used masking tape to cover one word while I inked up the other, then removed the tape before I stamped, so that I could place each word separately with the Real Red ink.
The Rhinestones add a finishing touch to the toggled greetings. I also used Stampin’ Up Dimensionals to pop up the top layer of the card to add further interest. Have I ever told you how I love using Dimensionals, lol!
I hope you’ll try the sketch this week and put your own creative spin on it! Don’t forget to link it up at the challenge blog and play along!
 Welcome! It’s time for another As You See It Challenge sketch! I have a simple Christmas card for you today. I was so rushed and pulled this together in about 15 minutes! Eek!