Blueberry Watercolour Blossoms
My husband has been trying to convince me to go to Las Vegas for a few years now, but it was never a city that interested me. I’m not one who enjoys crowds of people, flashy lights, or casinos. So, when I found out that Stampin’ Up! was hosting one of their OnStage Local conventions in Las Vegas, I thought that was a great opportunity to get there with my husband for a weekend adventure. Alas, my husband teaches at the university and wasn’t able to take the time off work. So … I went without him!
Las Vegas was pretty much exactly as I expected. Lots and lots and lots AND LOTS of people, lots of flashy lights, lots of smoky casinos. As an introvert, I found it overwhelming, over-stimulating, and just exhausting.
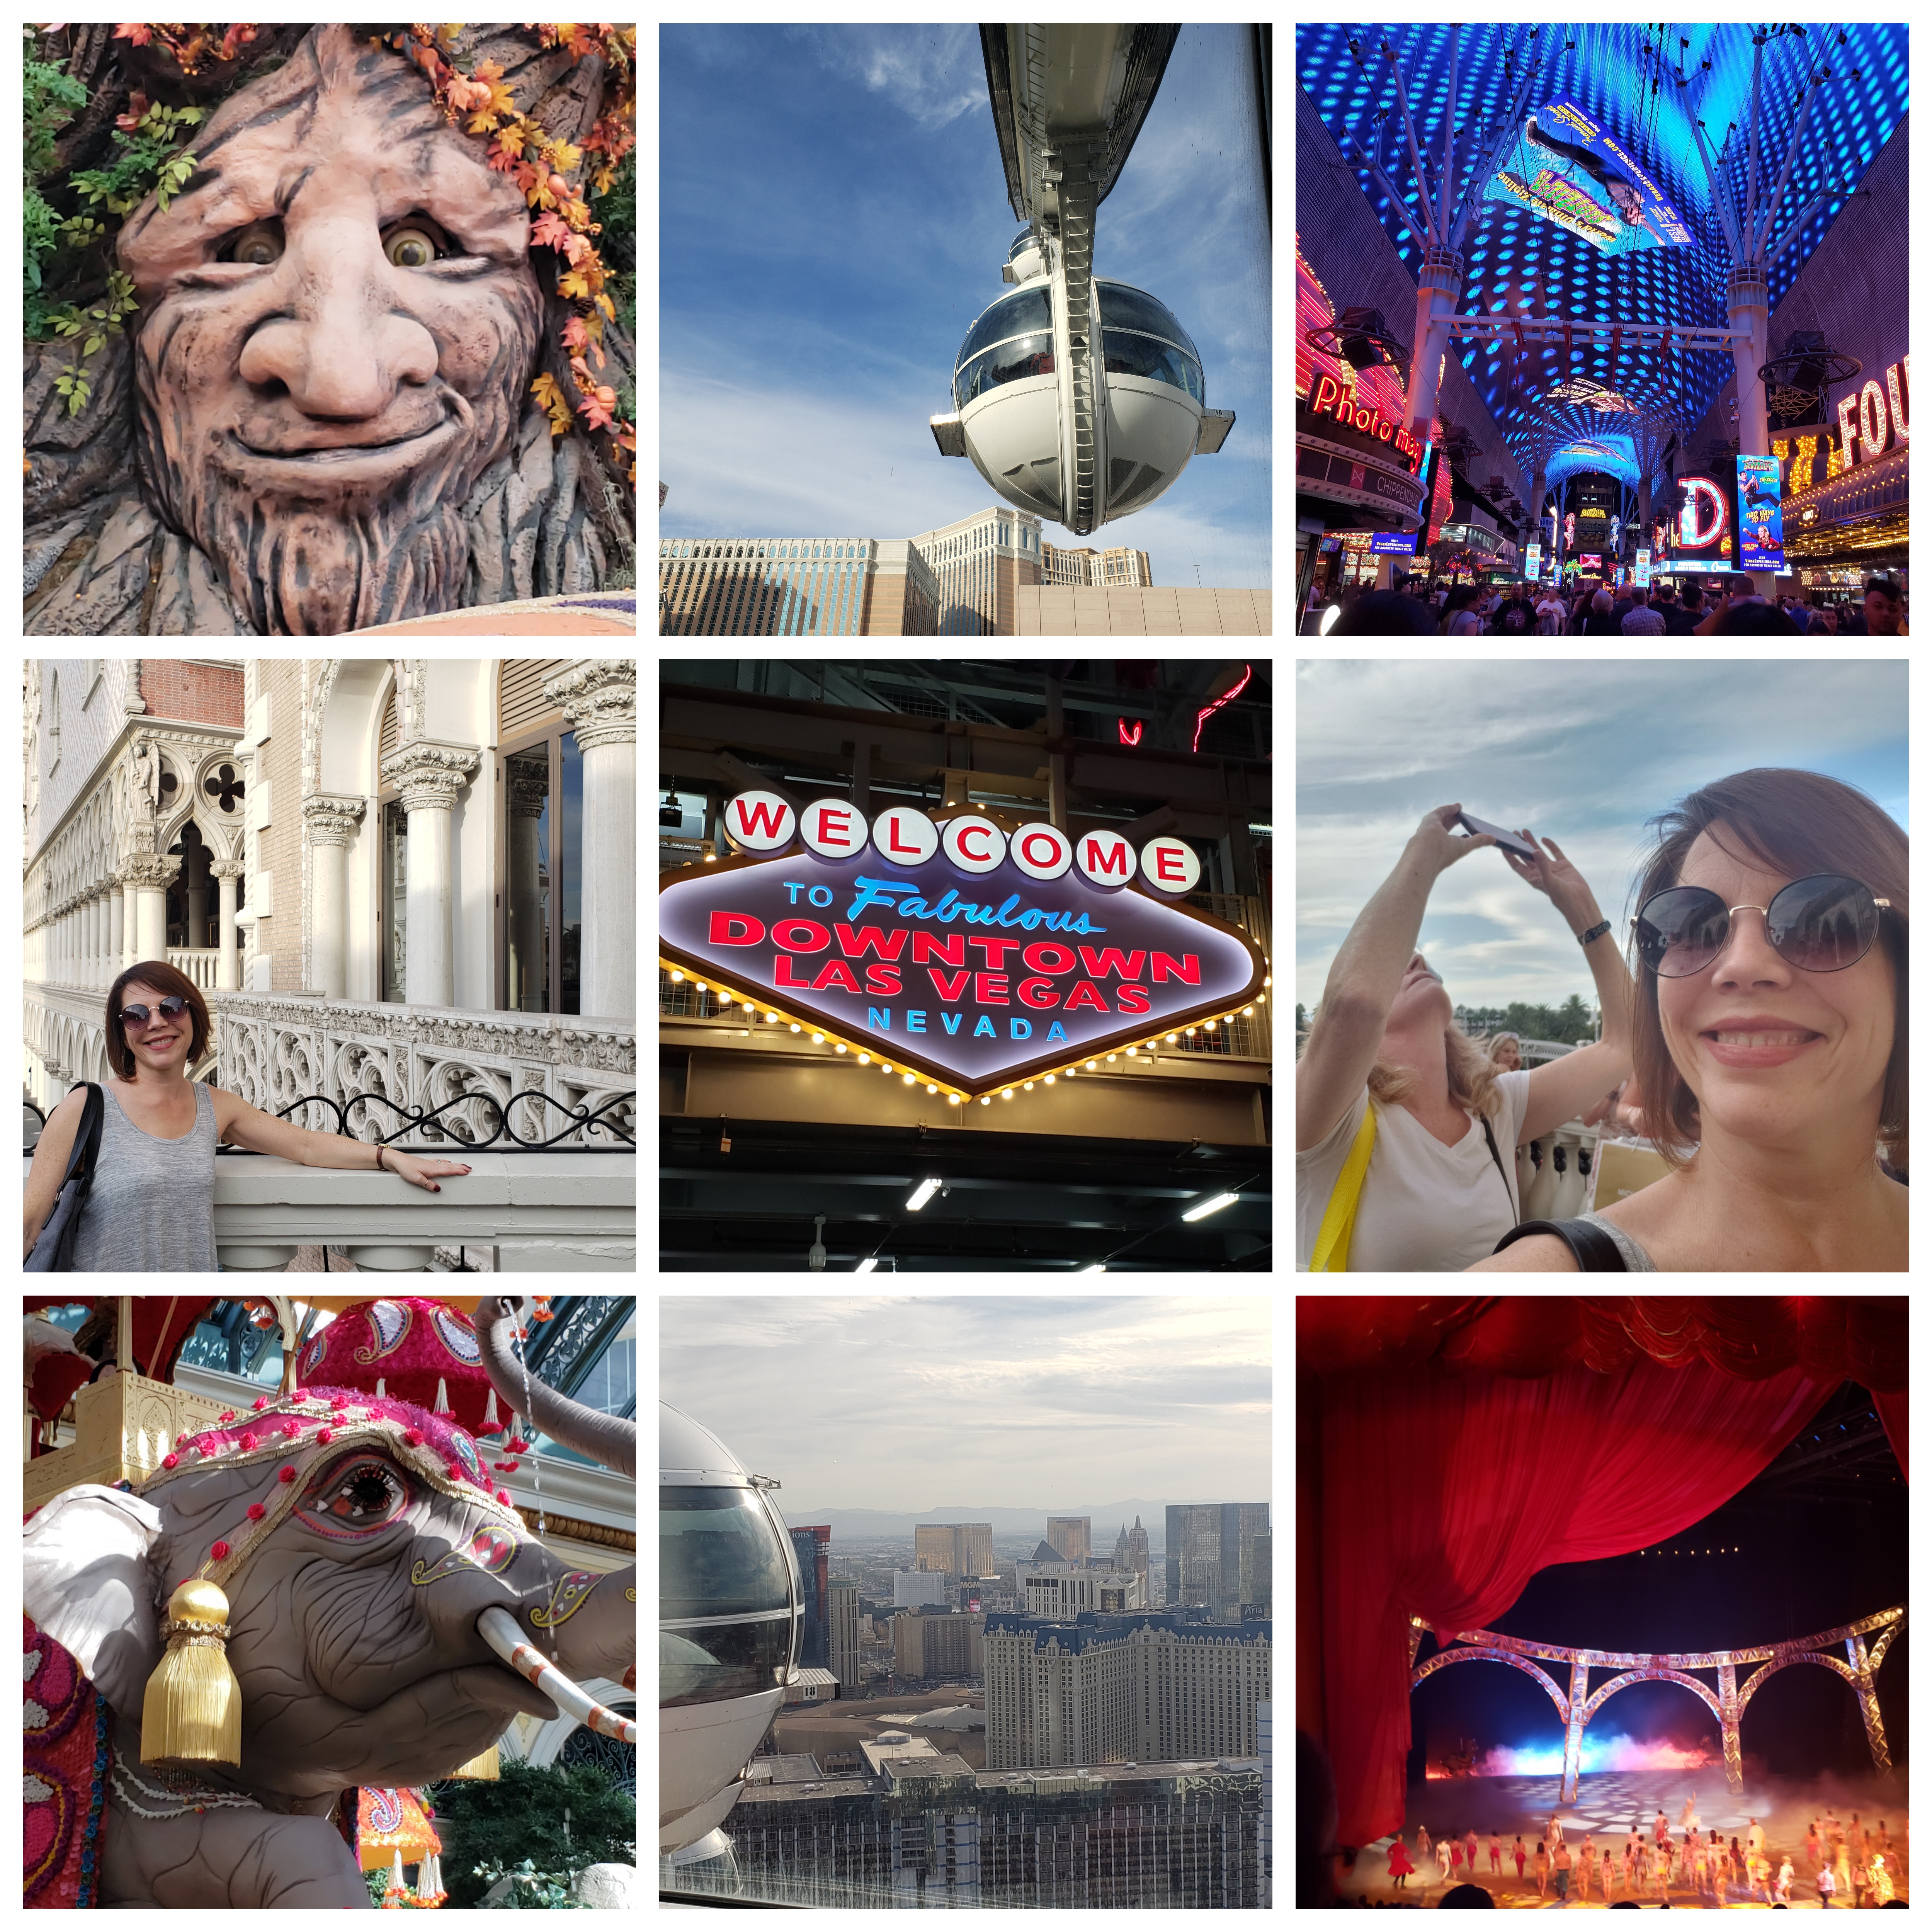
But you know what I DID like? I loved being with other Stampin’ Up! demonstrators. They are my friends and travel companions. I loved watching them get excited about the fountain at the Bellagio, the Bellagio buffet, and the boats in the indoor canal at the Venetian. I loved watching them, with their different way of handling our surroundings, as they chatted up the bartender when we stopped to rest our feet and have a slushy cocktail at the Hard Rock Cafe. I loved how they went out of their way to find a coffee shop that could make me a great latte. I loved how they sat with me while I ate gelato, even though they decided they didn’t want any after all. I loved seeing them turn in their seat in the airplane to wave and make funny faces at me when I was sitting with strangers a few rows back because I refused to pay extra to be able to choose my seat. I loved exchanging roomie gifts, business tips, and sharing ideas. I love how different we are and yet, we still can get excited about the beauty that we each bring to the world. I also love the Cirque de Soleil show, “O”. It was absolutely spectacular!
I’ve been home for 5 days now and I still don’t feel like I’ve recovered and recharged! I felt like I could have slept for three days straight when I got home!
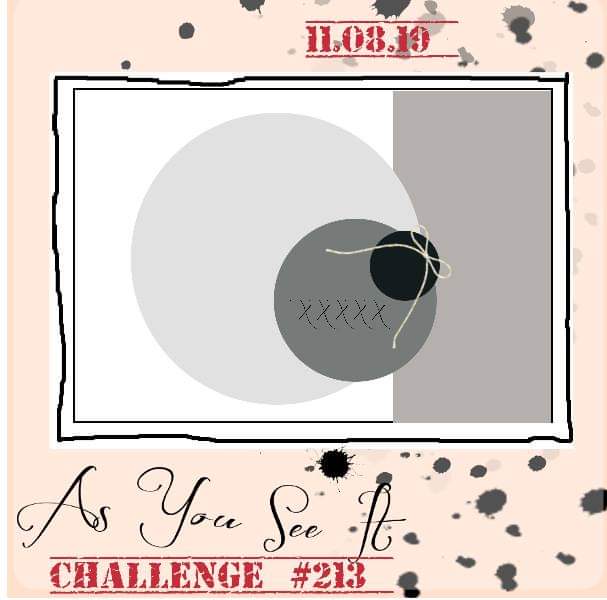
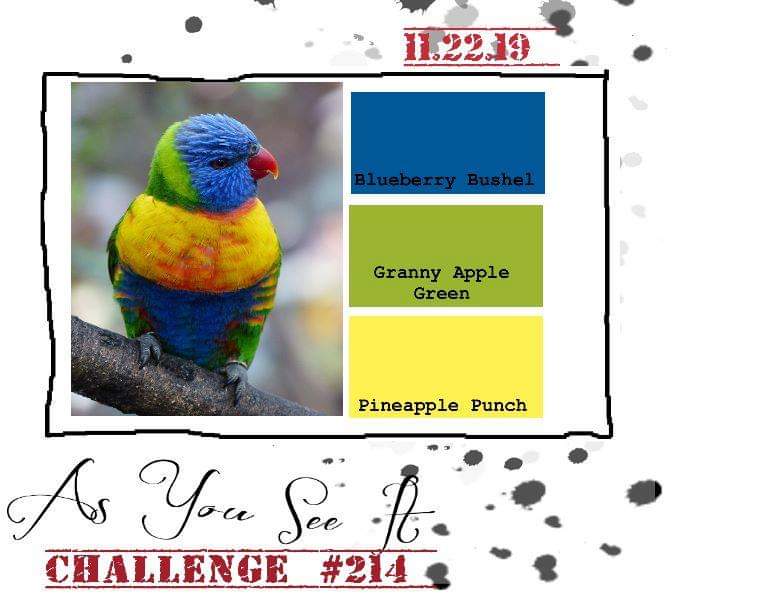
Working on my design for the As You See It Challenge card was actually really helpful for me. It gave me the focus that I needed to take my head out of the fog caused by over-stimulation. This bright and cheerful colour combination was just what I needed to grease my creative gears.
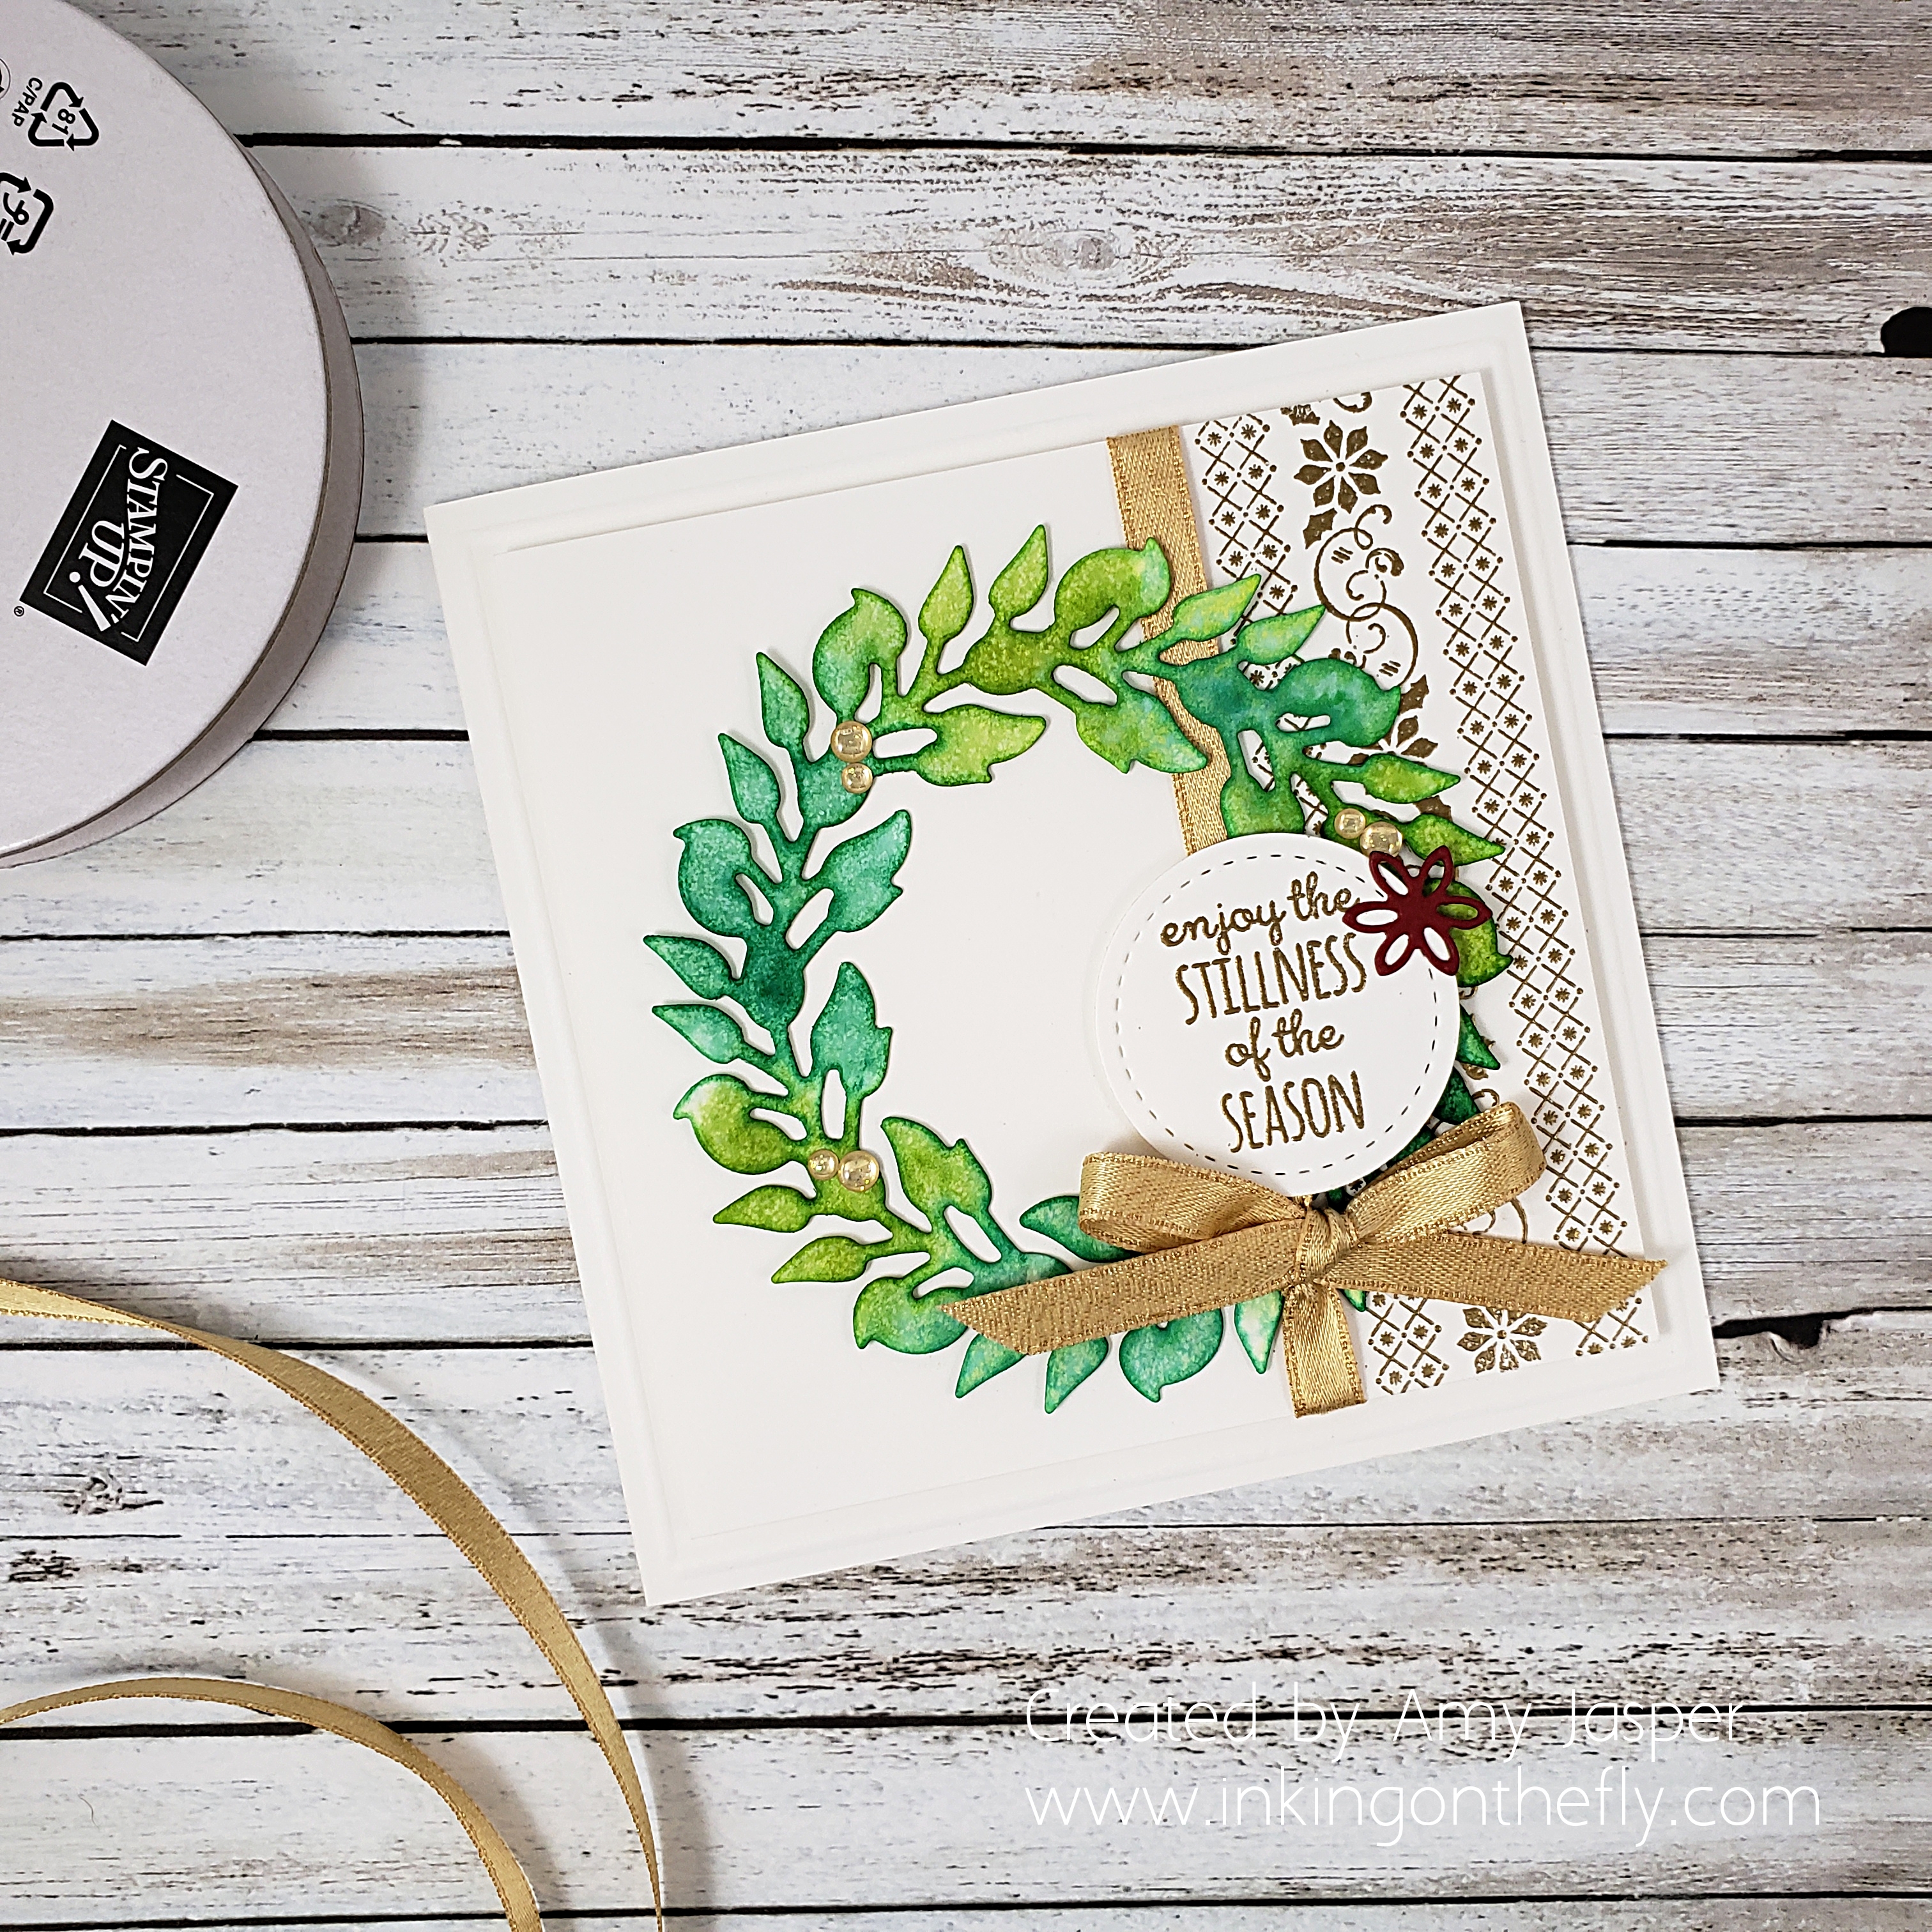
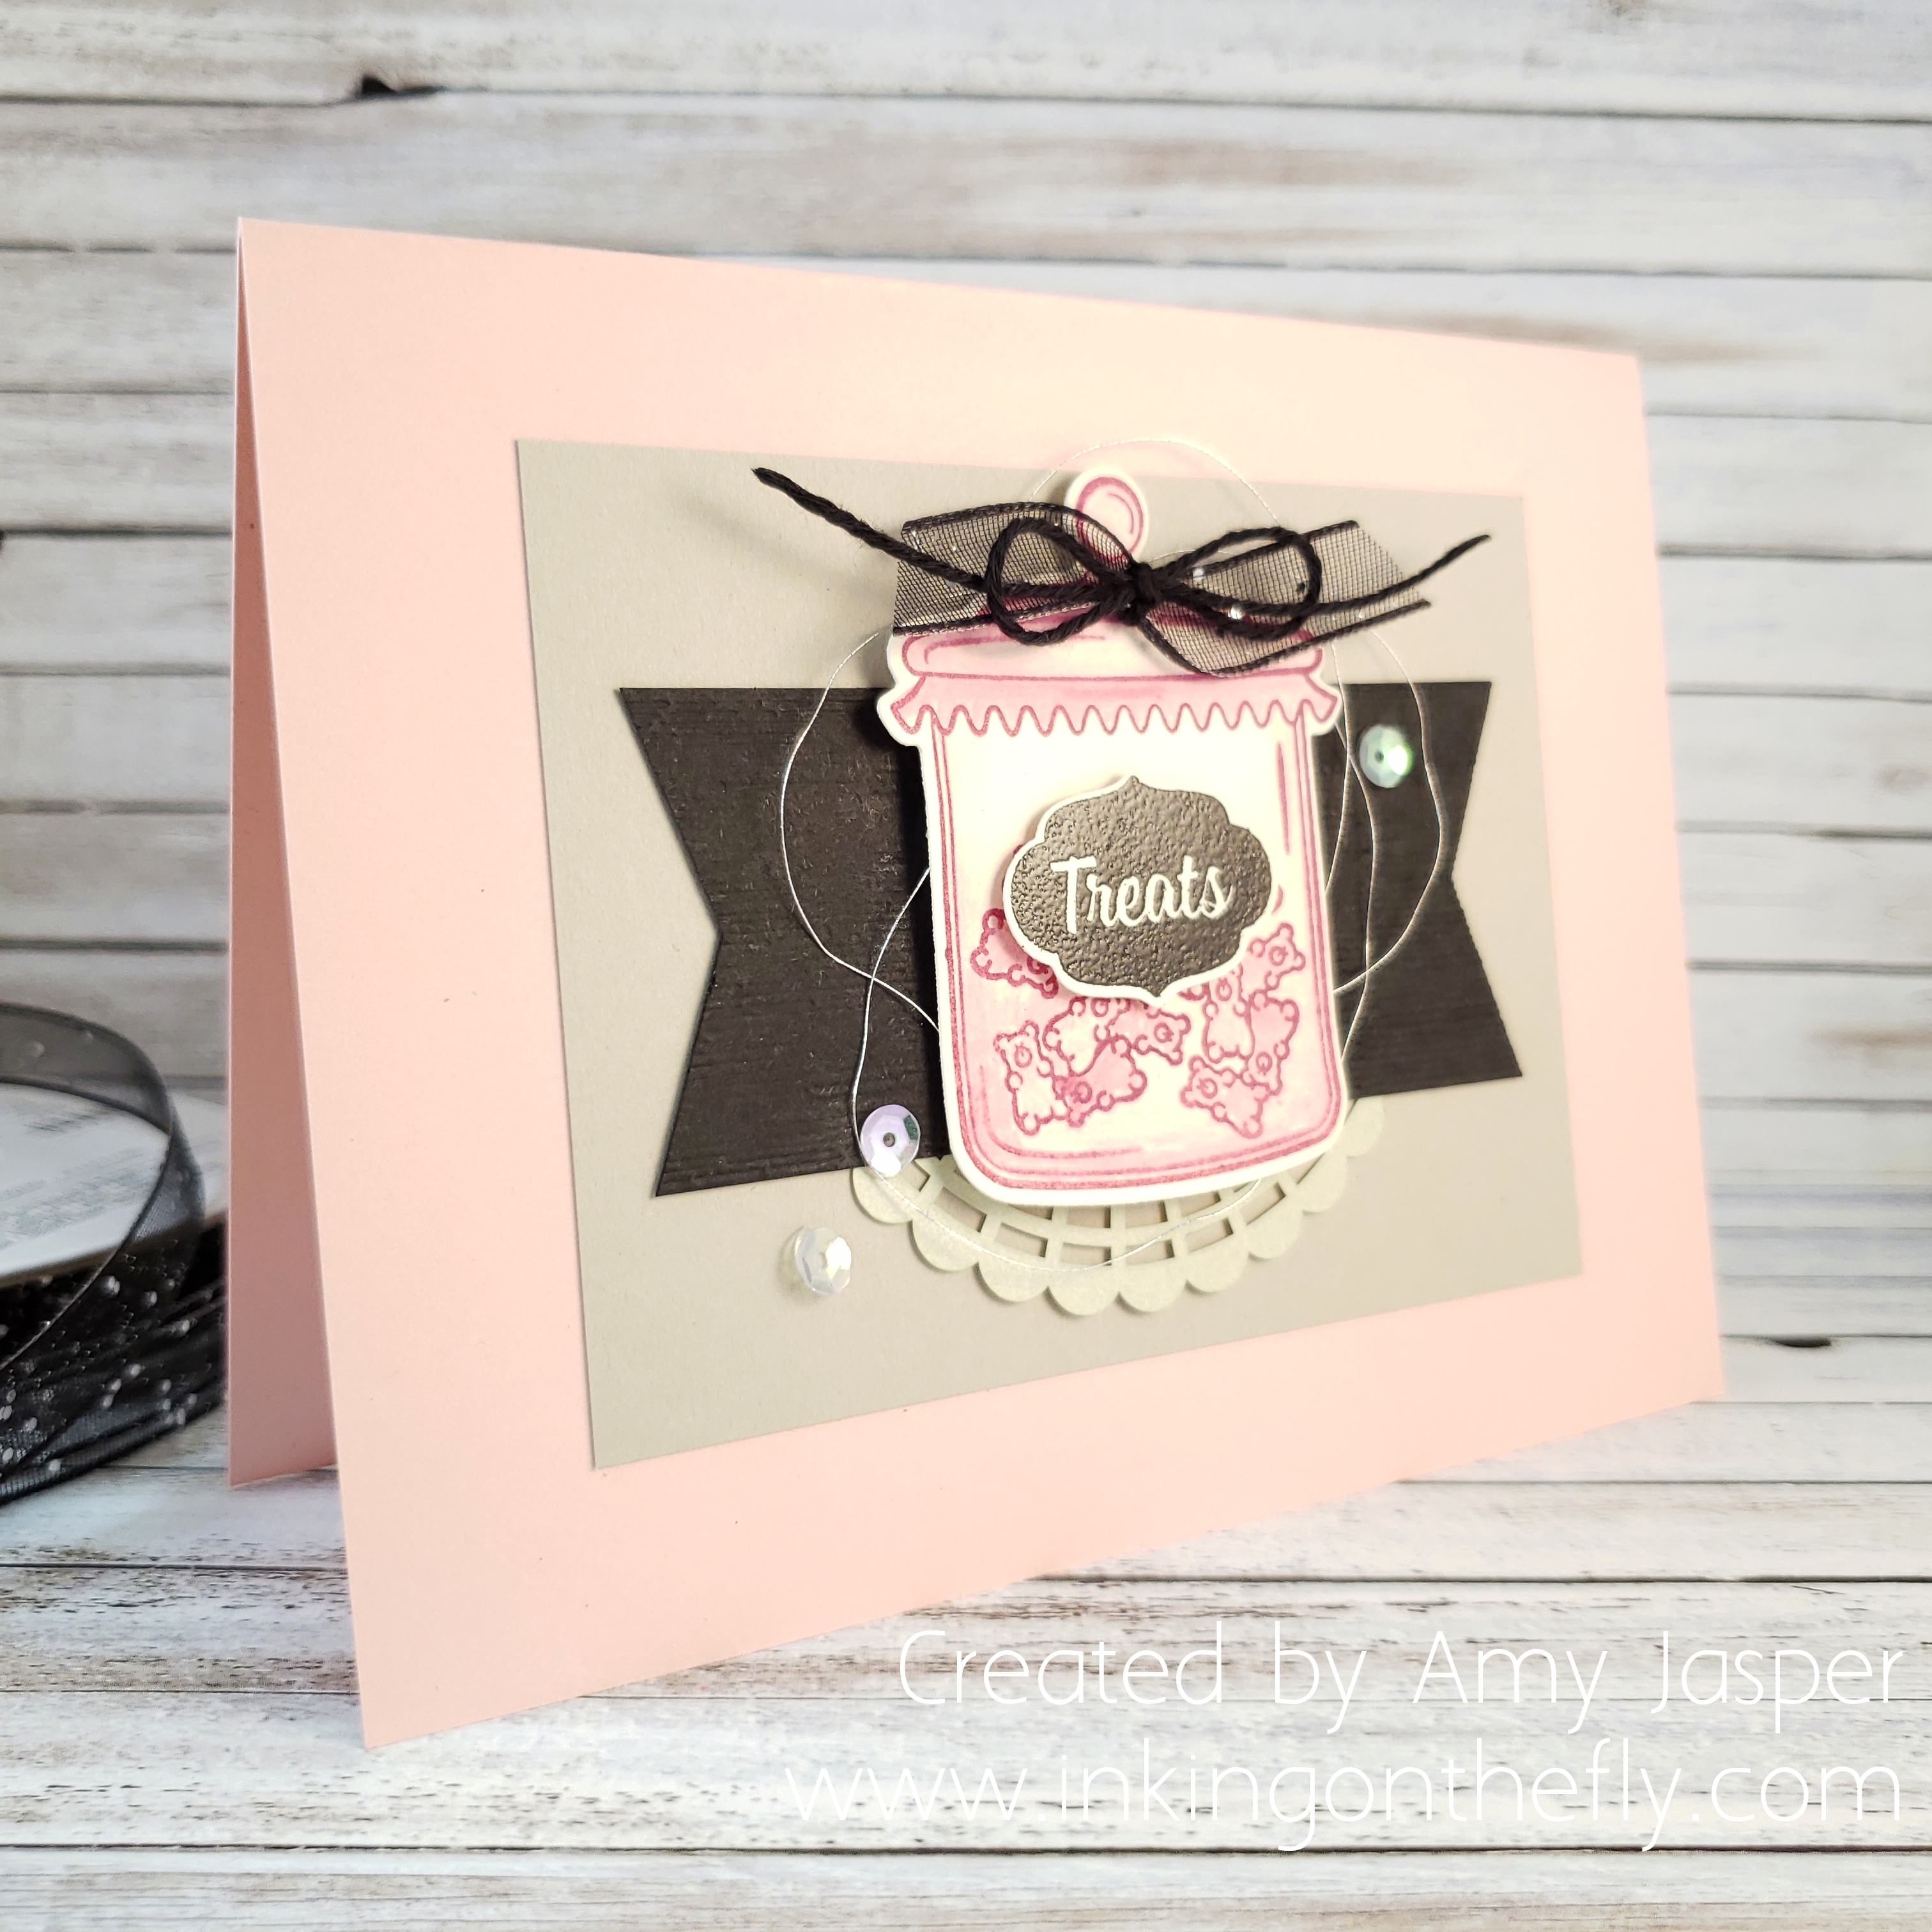
Of course, the fun part about going to a Stampin’ Up! OnStage event, other than the fabulous community of demonstrators, is the free product!! My card today is made using the Forever Blossoms stamp set I received for FREE! This set will be available to purchase in January when the new Occasions Catalogue comes out.
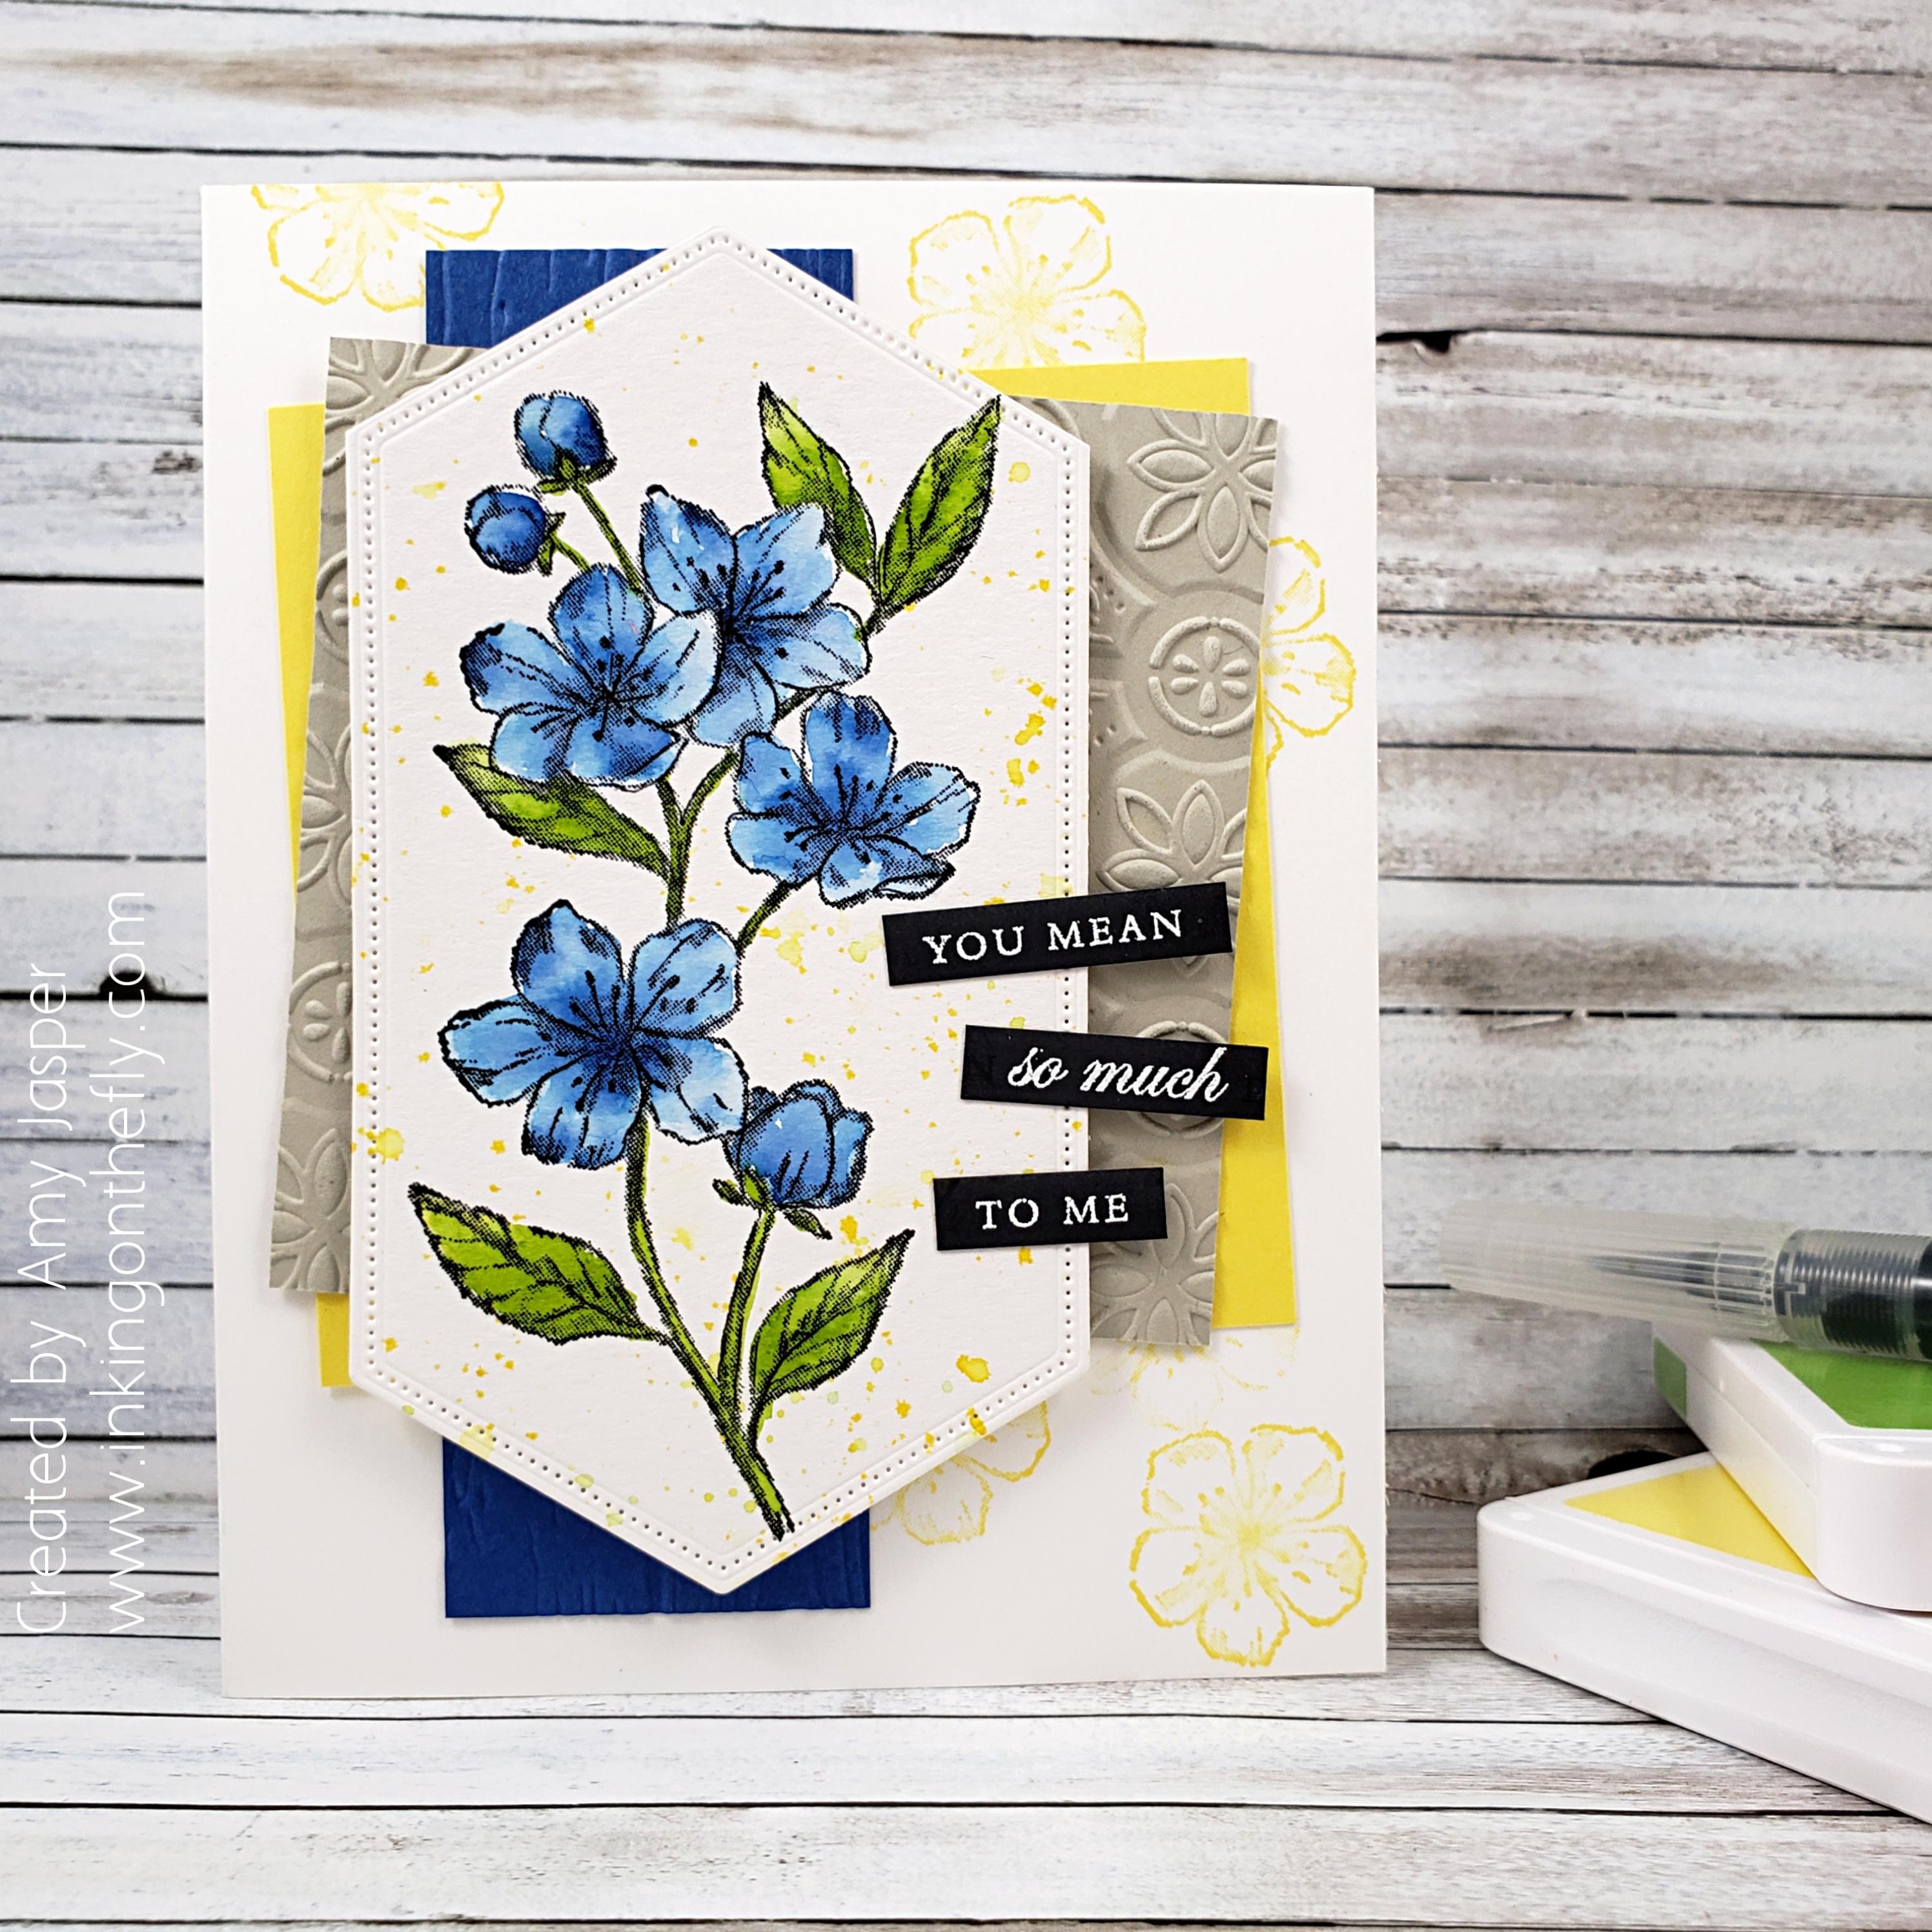
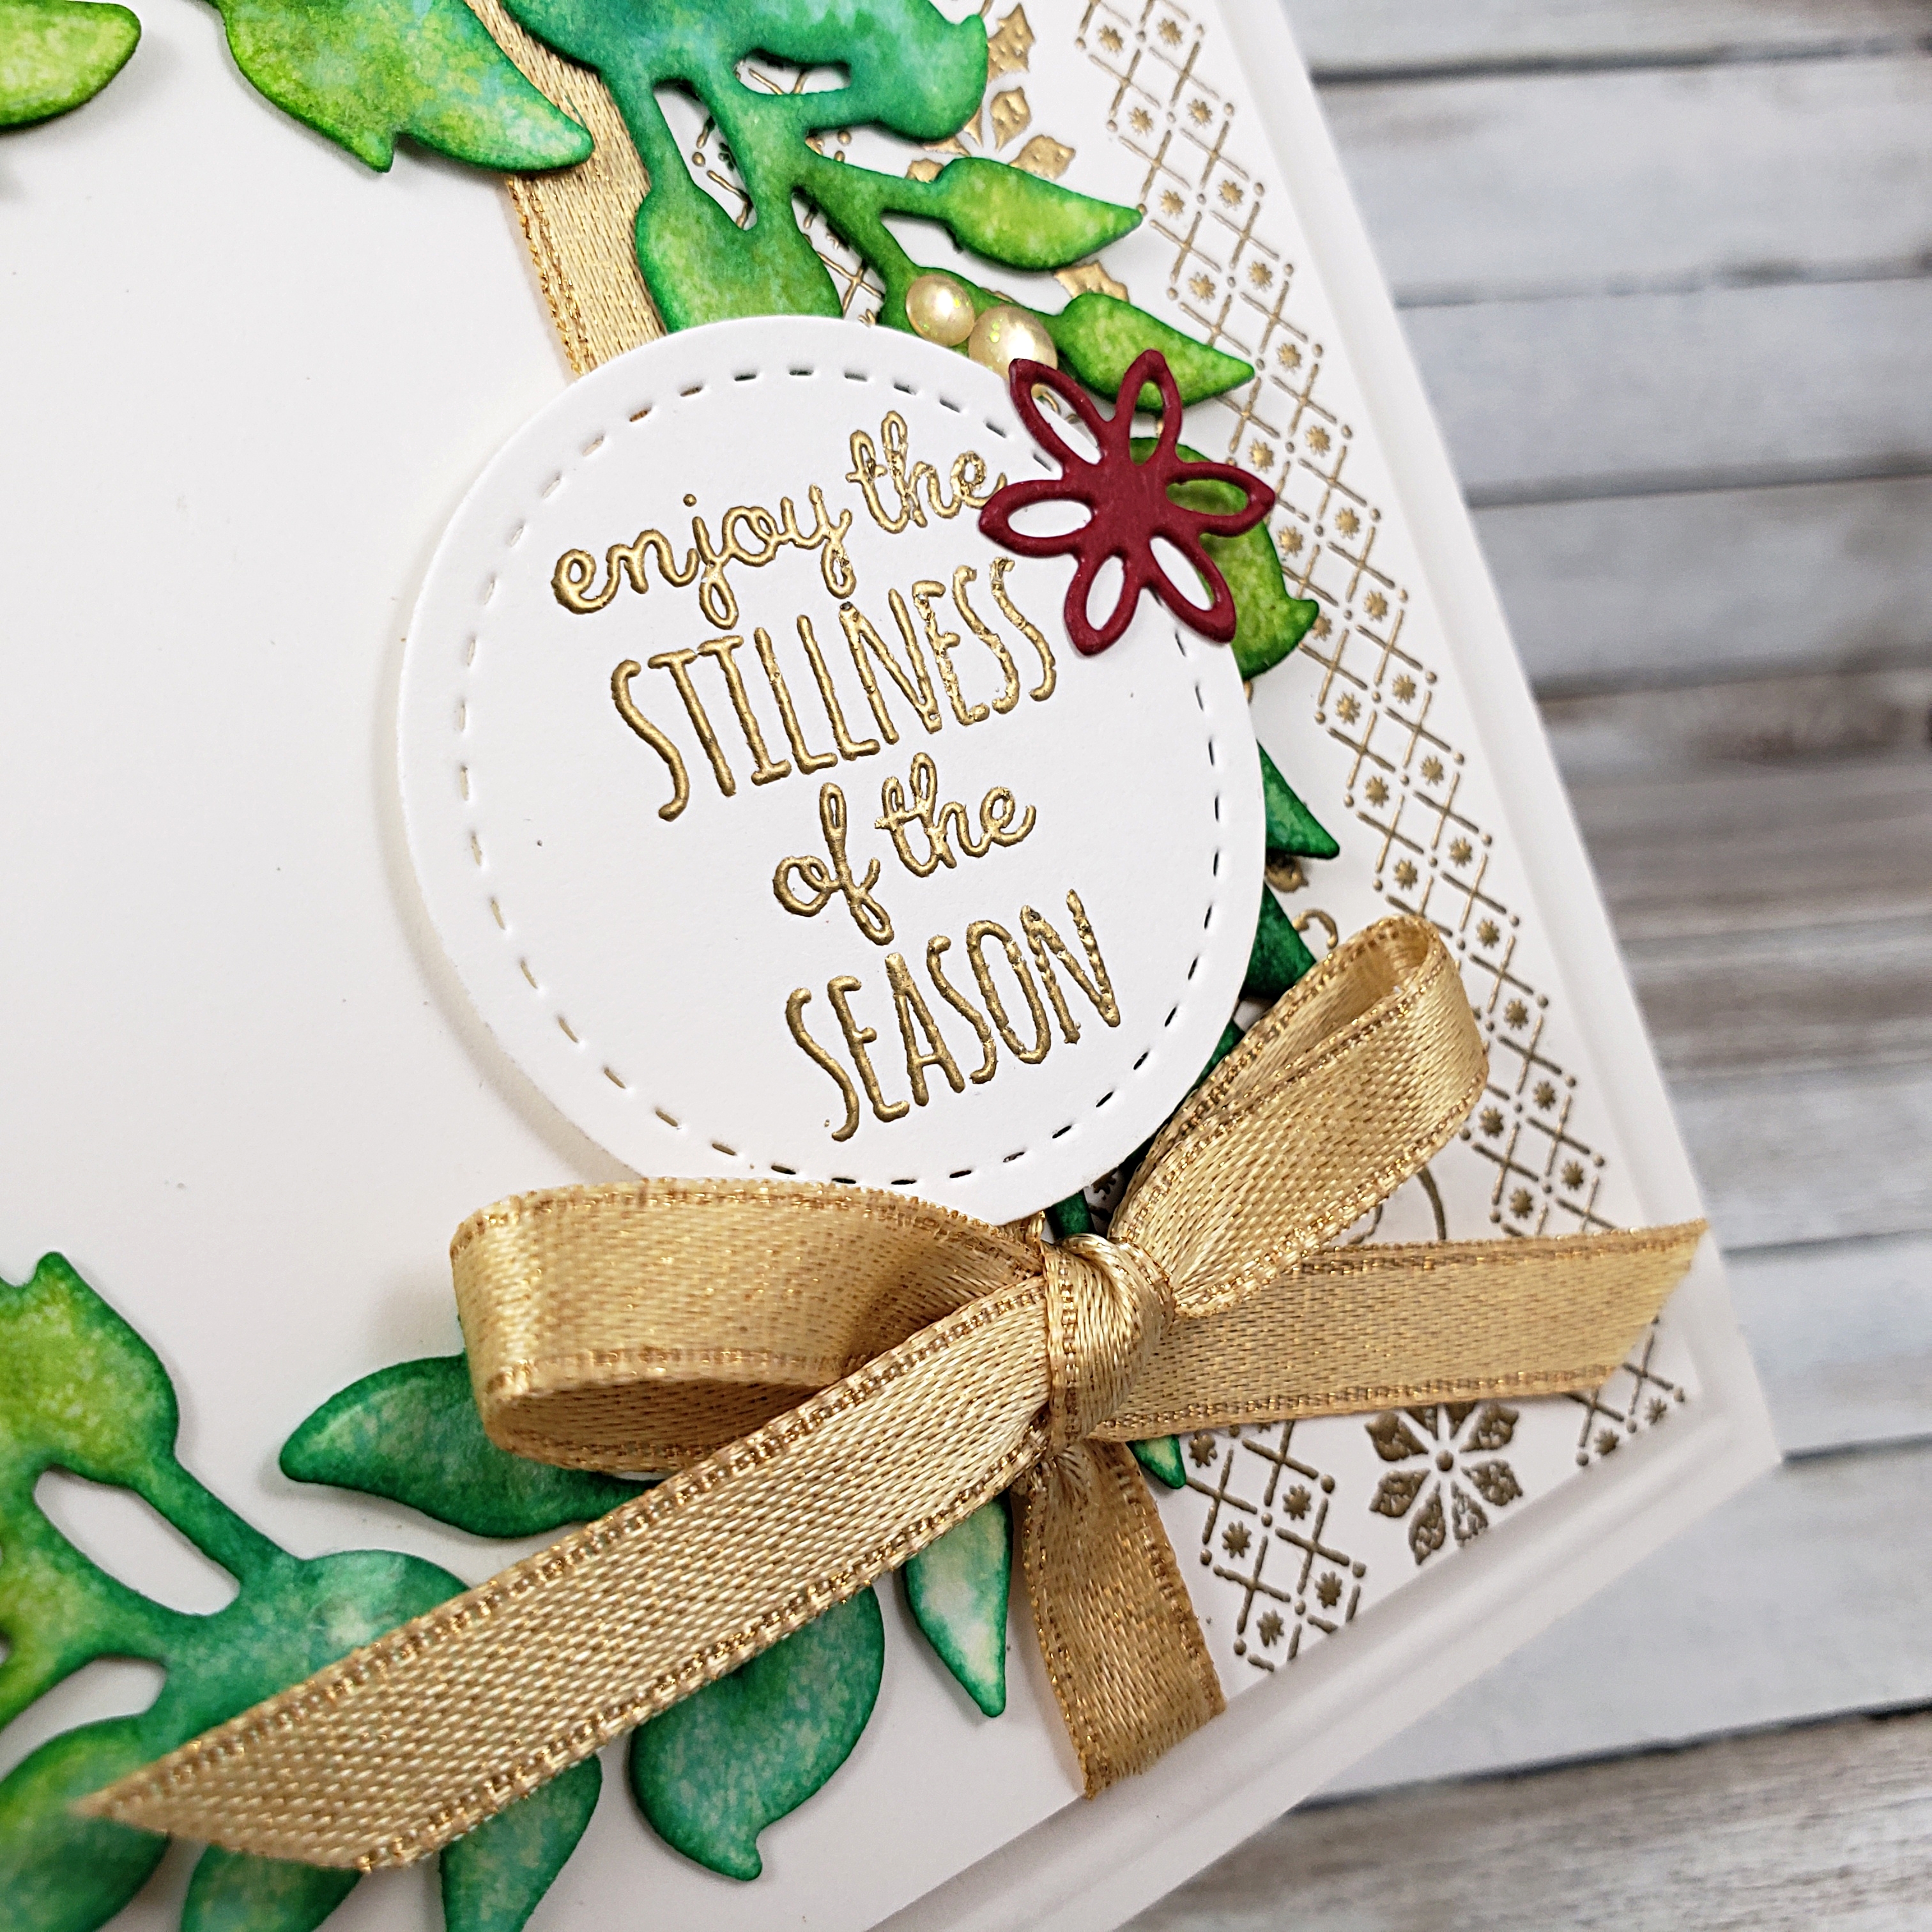
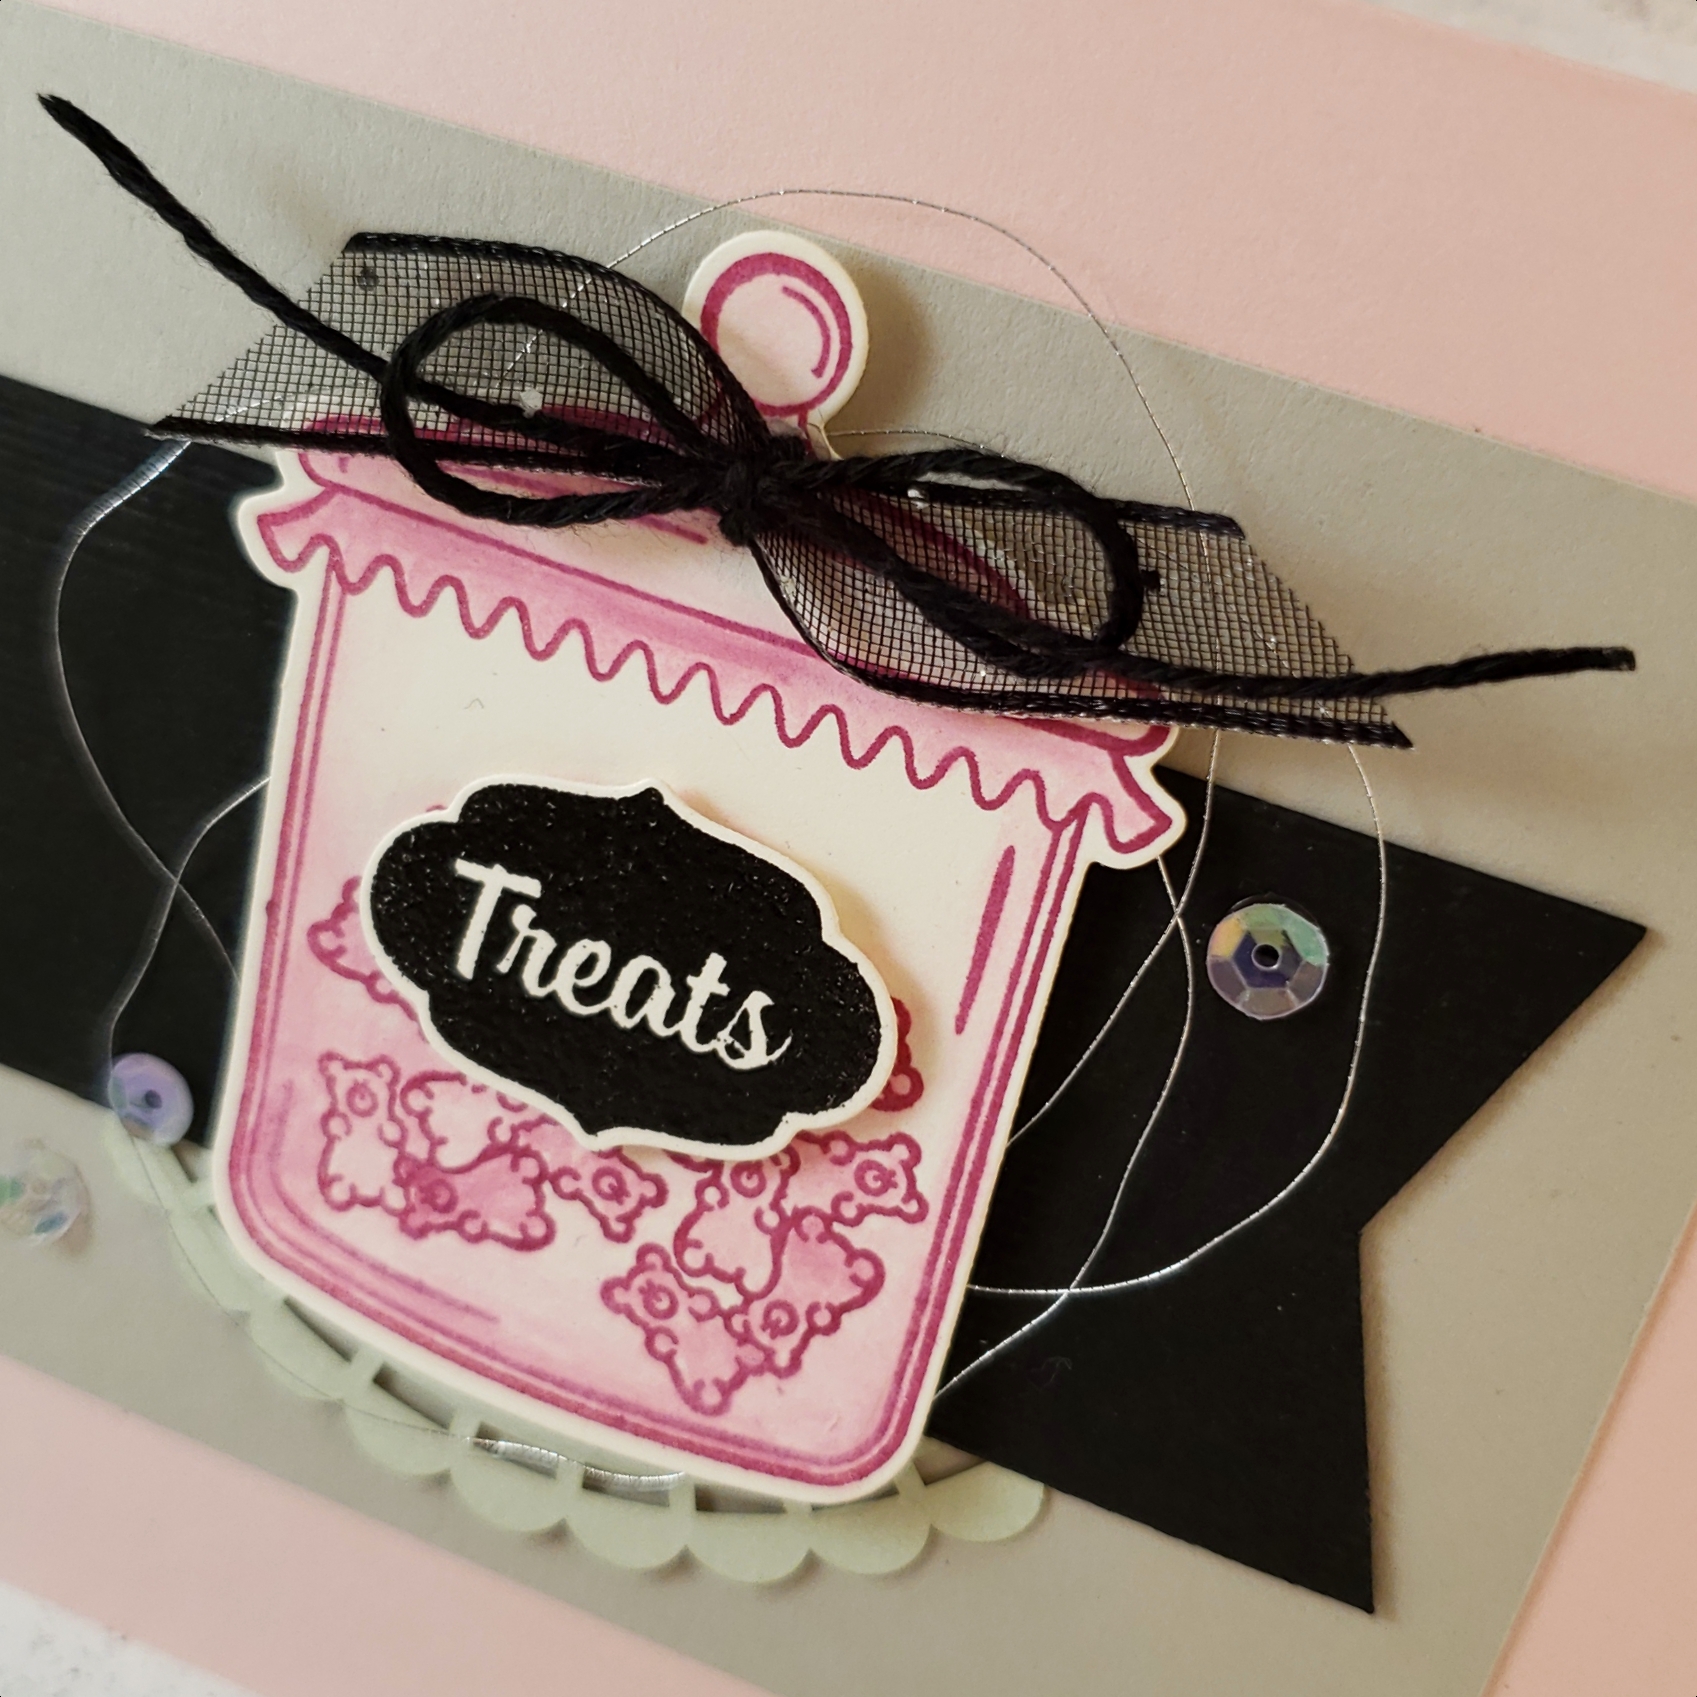
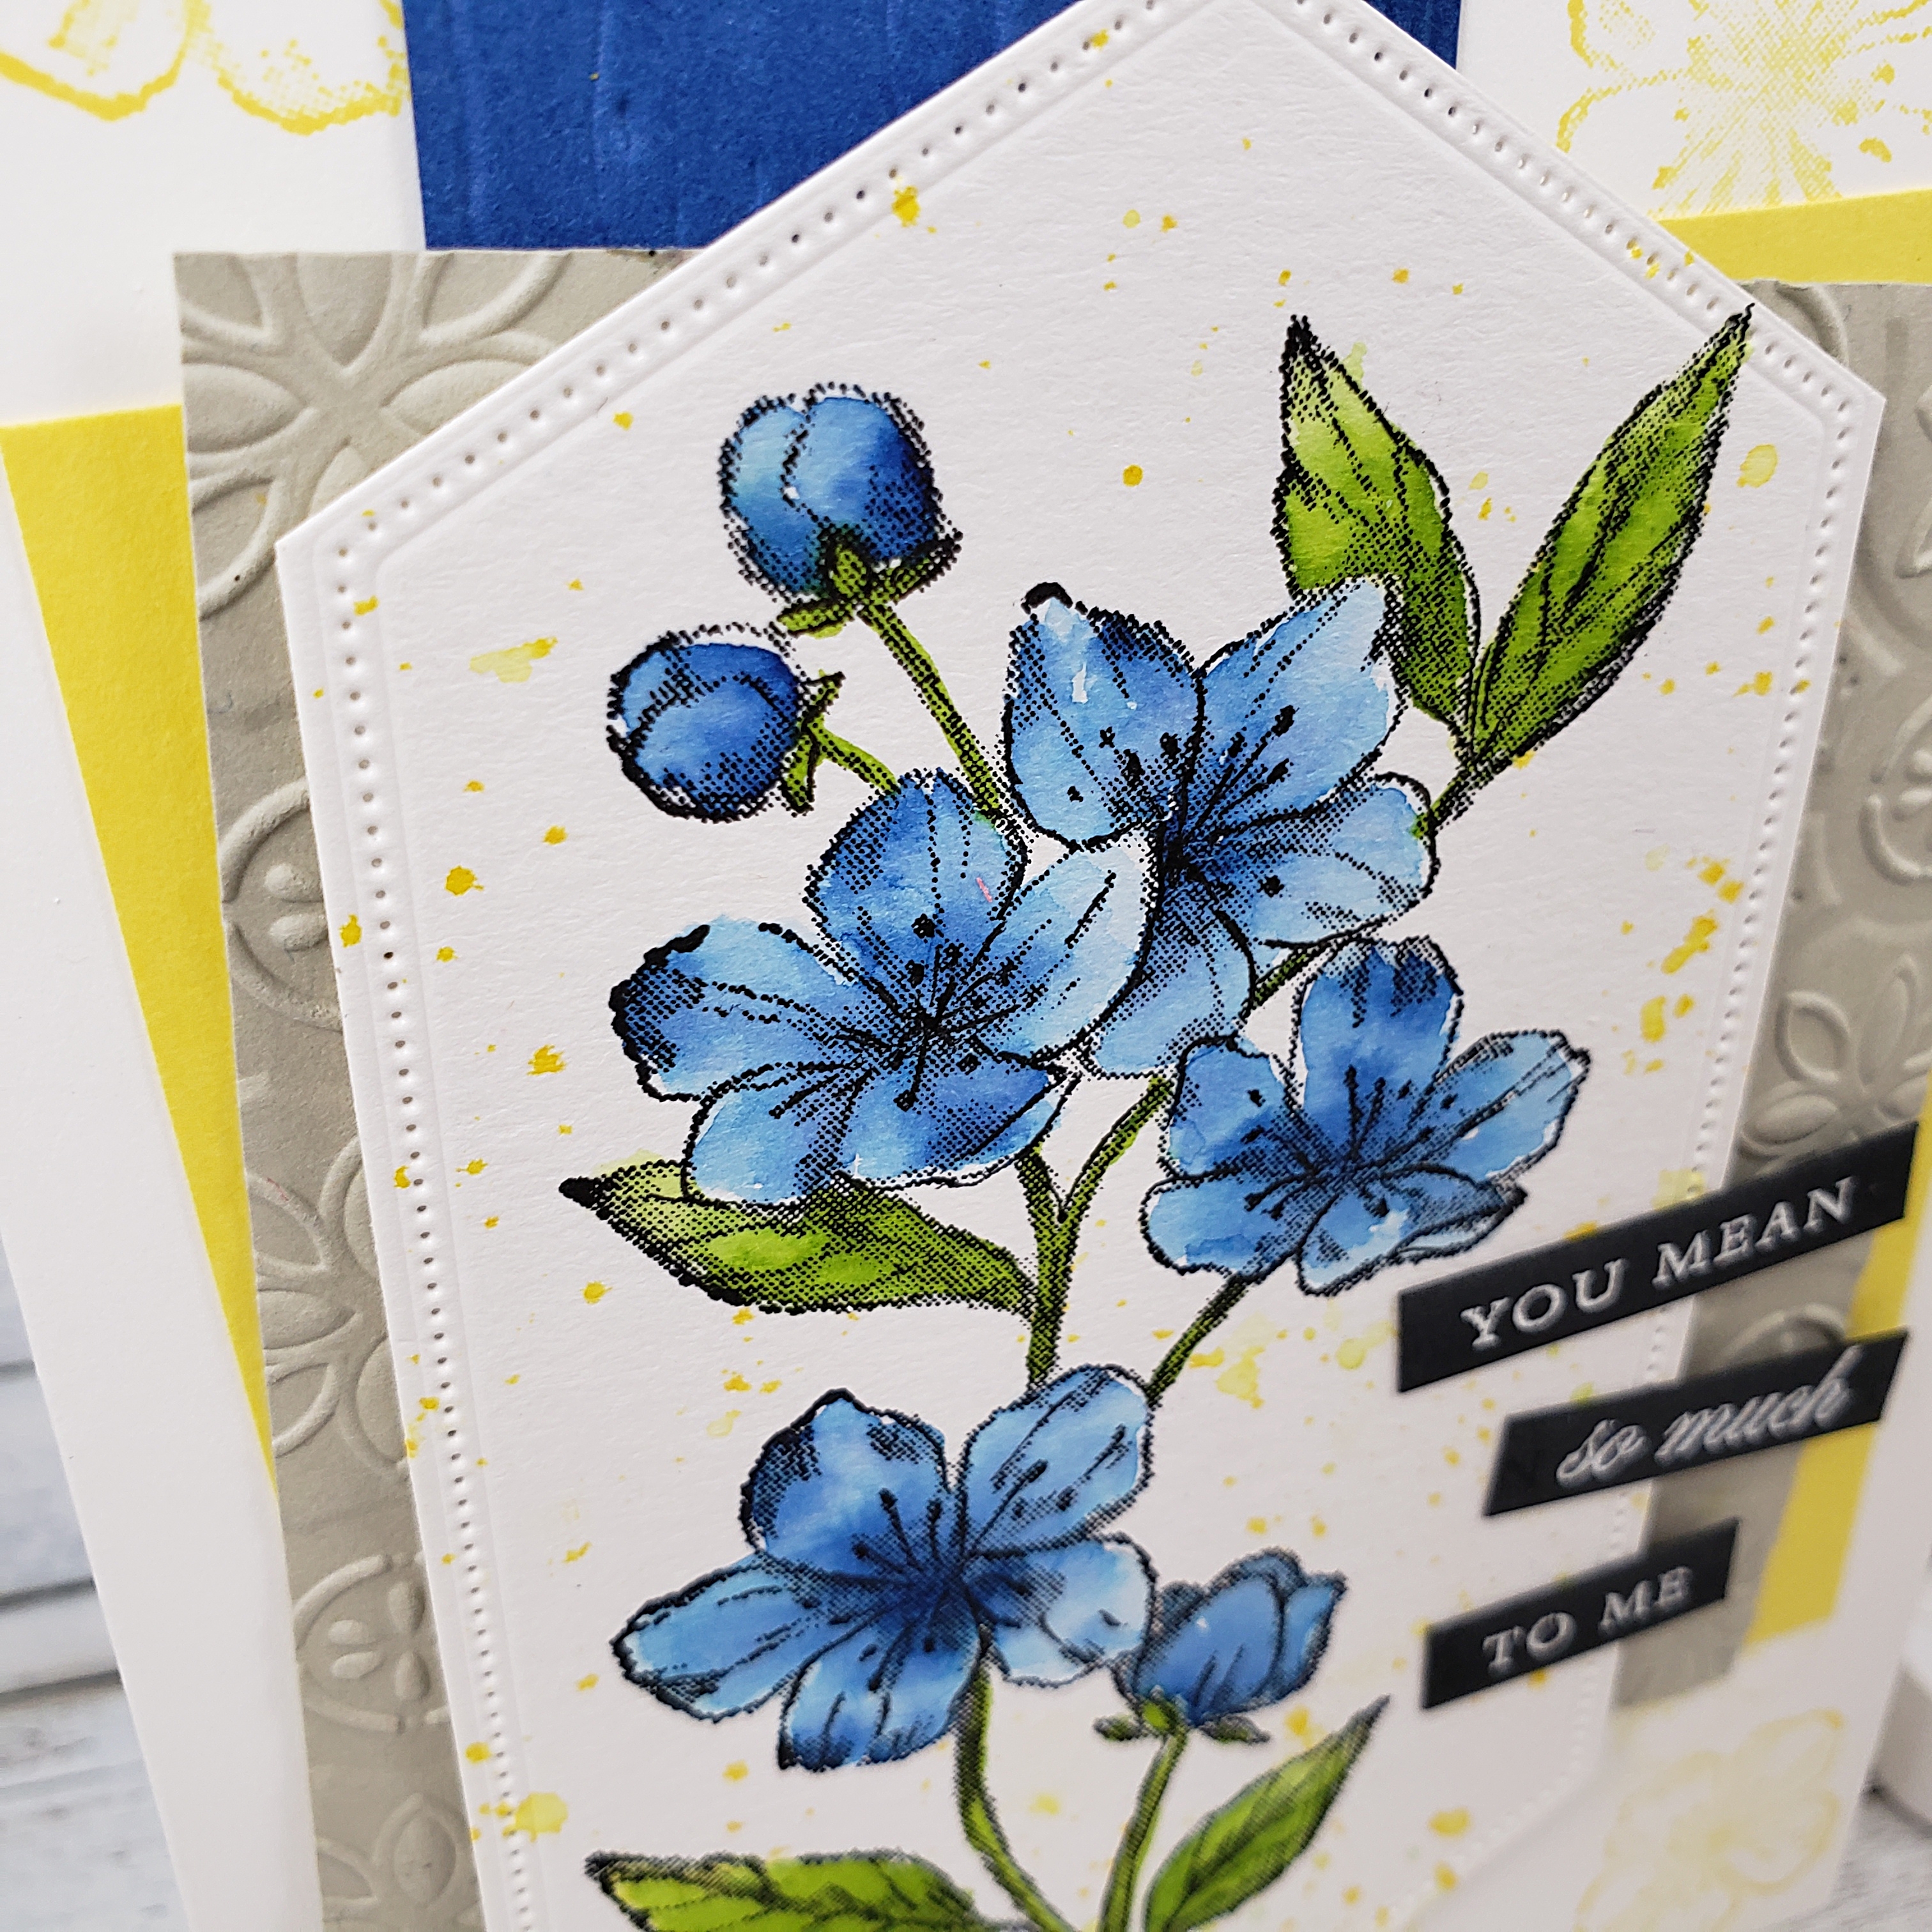
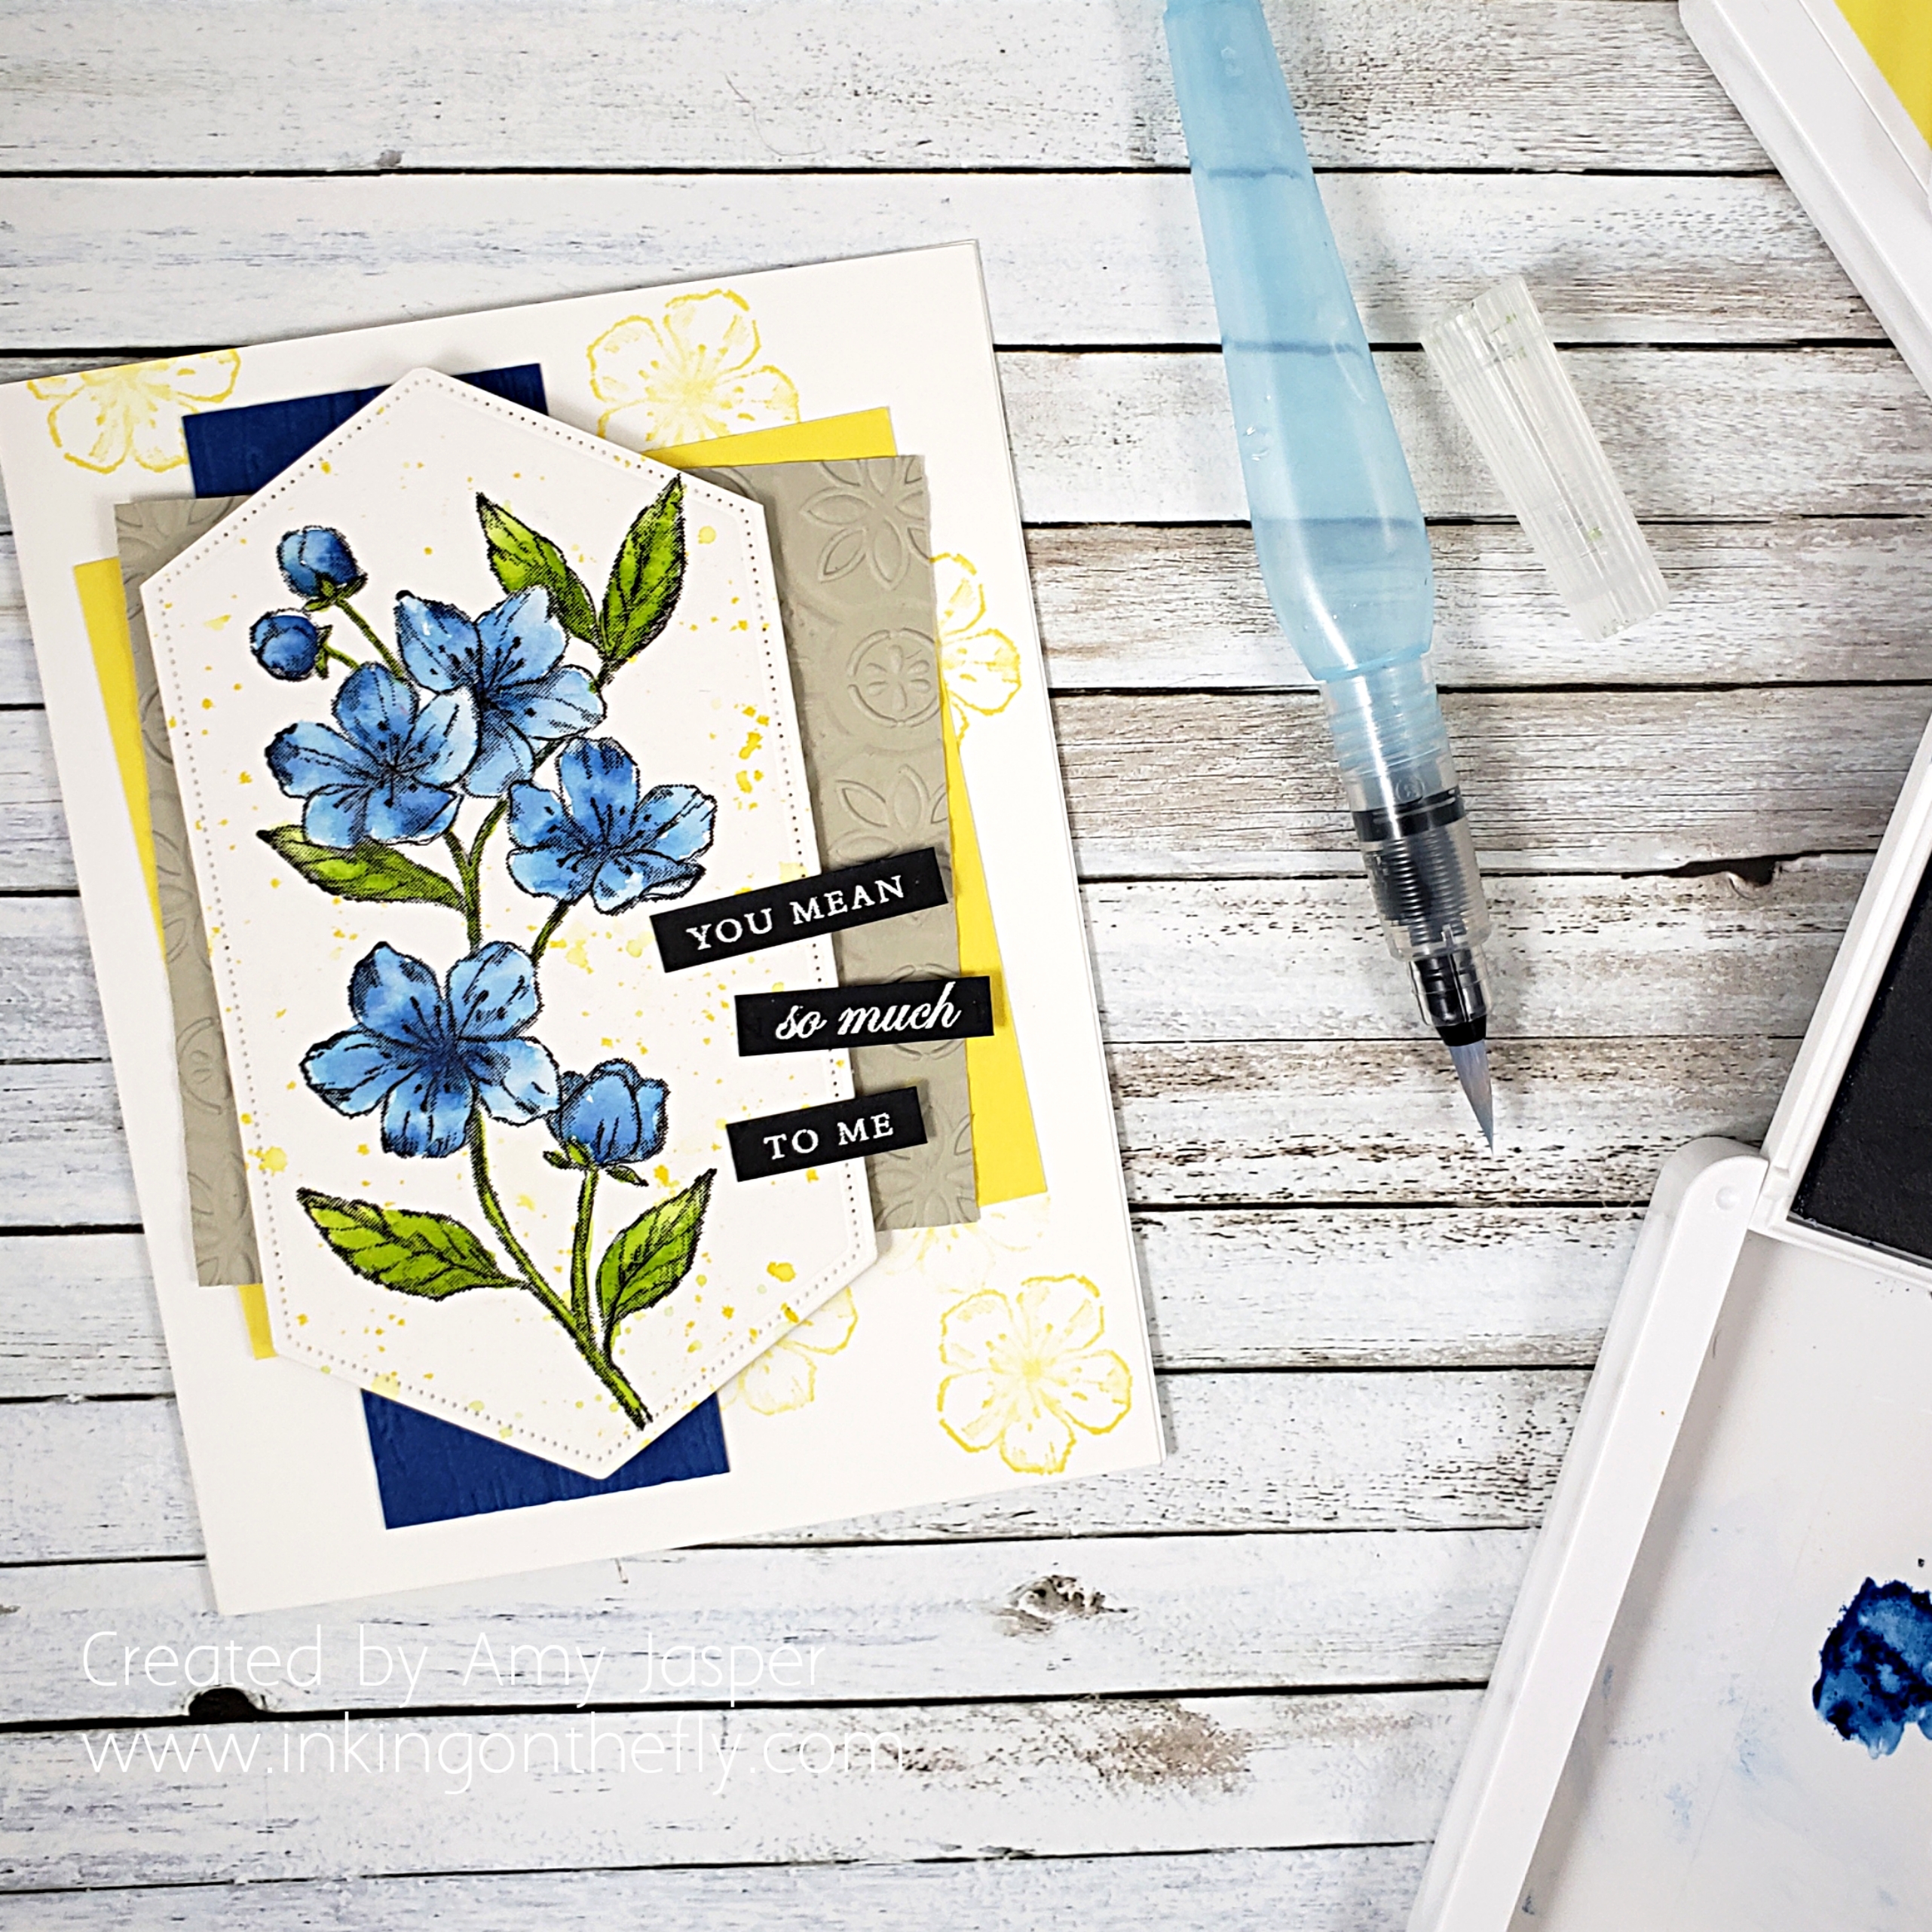
I decided to do some watercolouring with the flower image. I used Blueberry Bushel for the blossoms and Granny Apple Green for the leaves. The yellow spatter is created from loading the brush tip of an Aqua Painter with Pineapple Punch ink, then briskly tapping the Aqua Painter against my finger over the watercolor paper. To protect the blue blossoms from turning green from the wet yellow ink, I first stamped the blossoms on a piece of Post It Note and loosely cut them out so I could use the Post It as a mask over my blue blossoms. See! No green on my flowers!
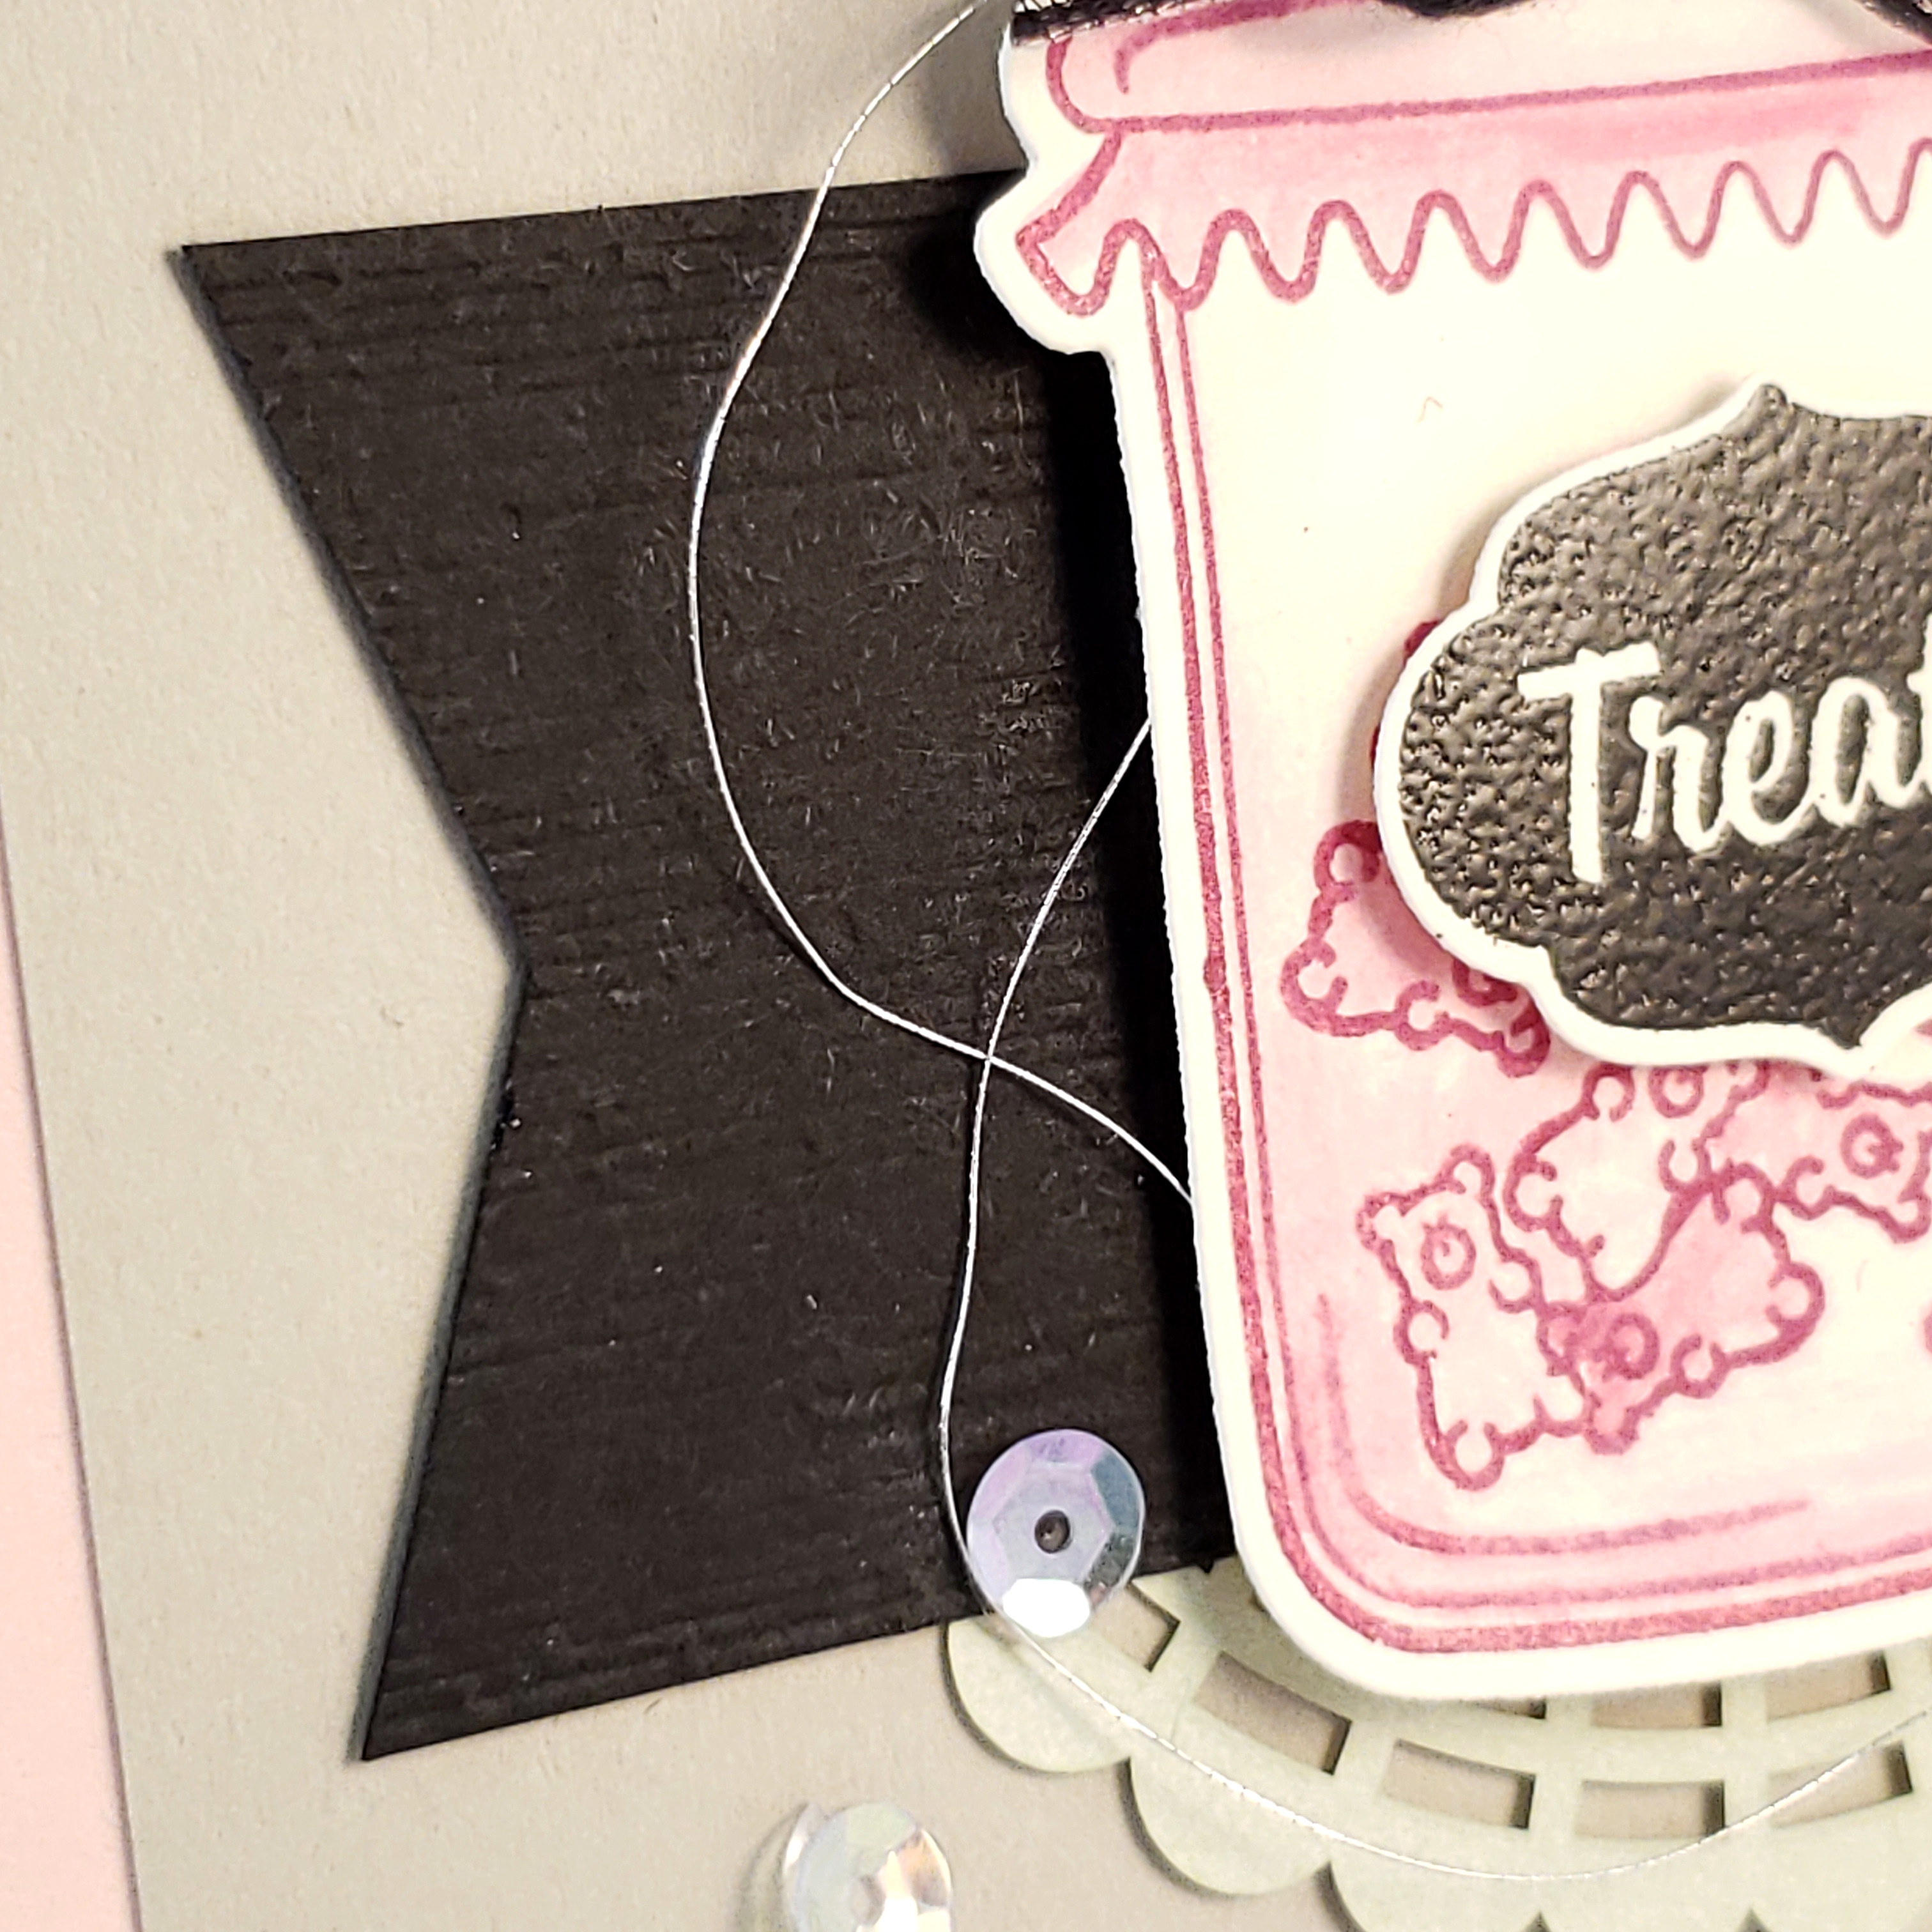
I used the Stitched Nested Labels Dies to cut the stitched shape with my die cutting machine and adhered it to the card with Stampin’ Dimensionals (the black ones, actually! they are great!!). Behind that is the Sahara Sand cardstock that was embossed using the die cutting machine and the Tin Tile 3D embossing folder. I layered a piece of Pineapple Punch cardstock behind that and a strip of Blueberry Bushel cardstock behind that, which was embossed as well, using the die cutting machine and the Pinewood Planks 3D Embossing Folder.
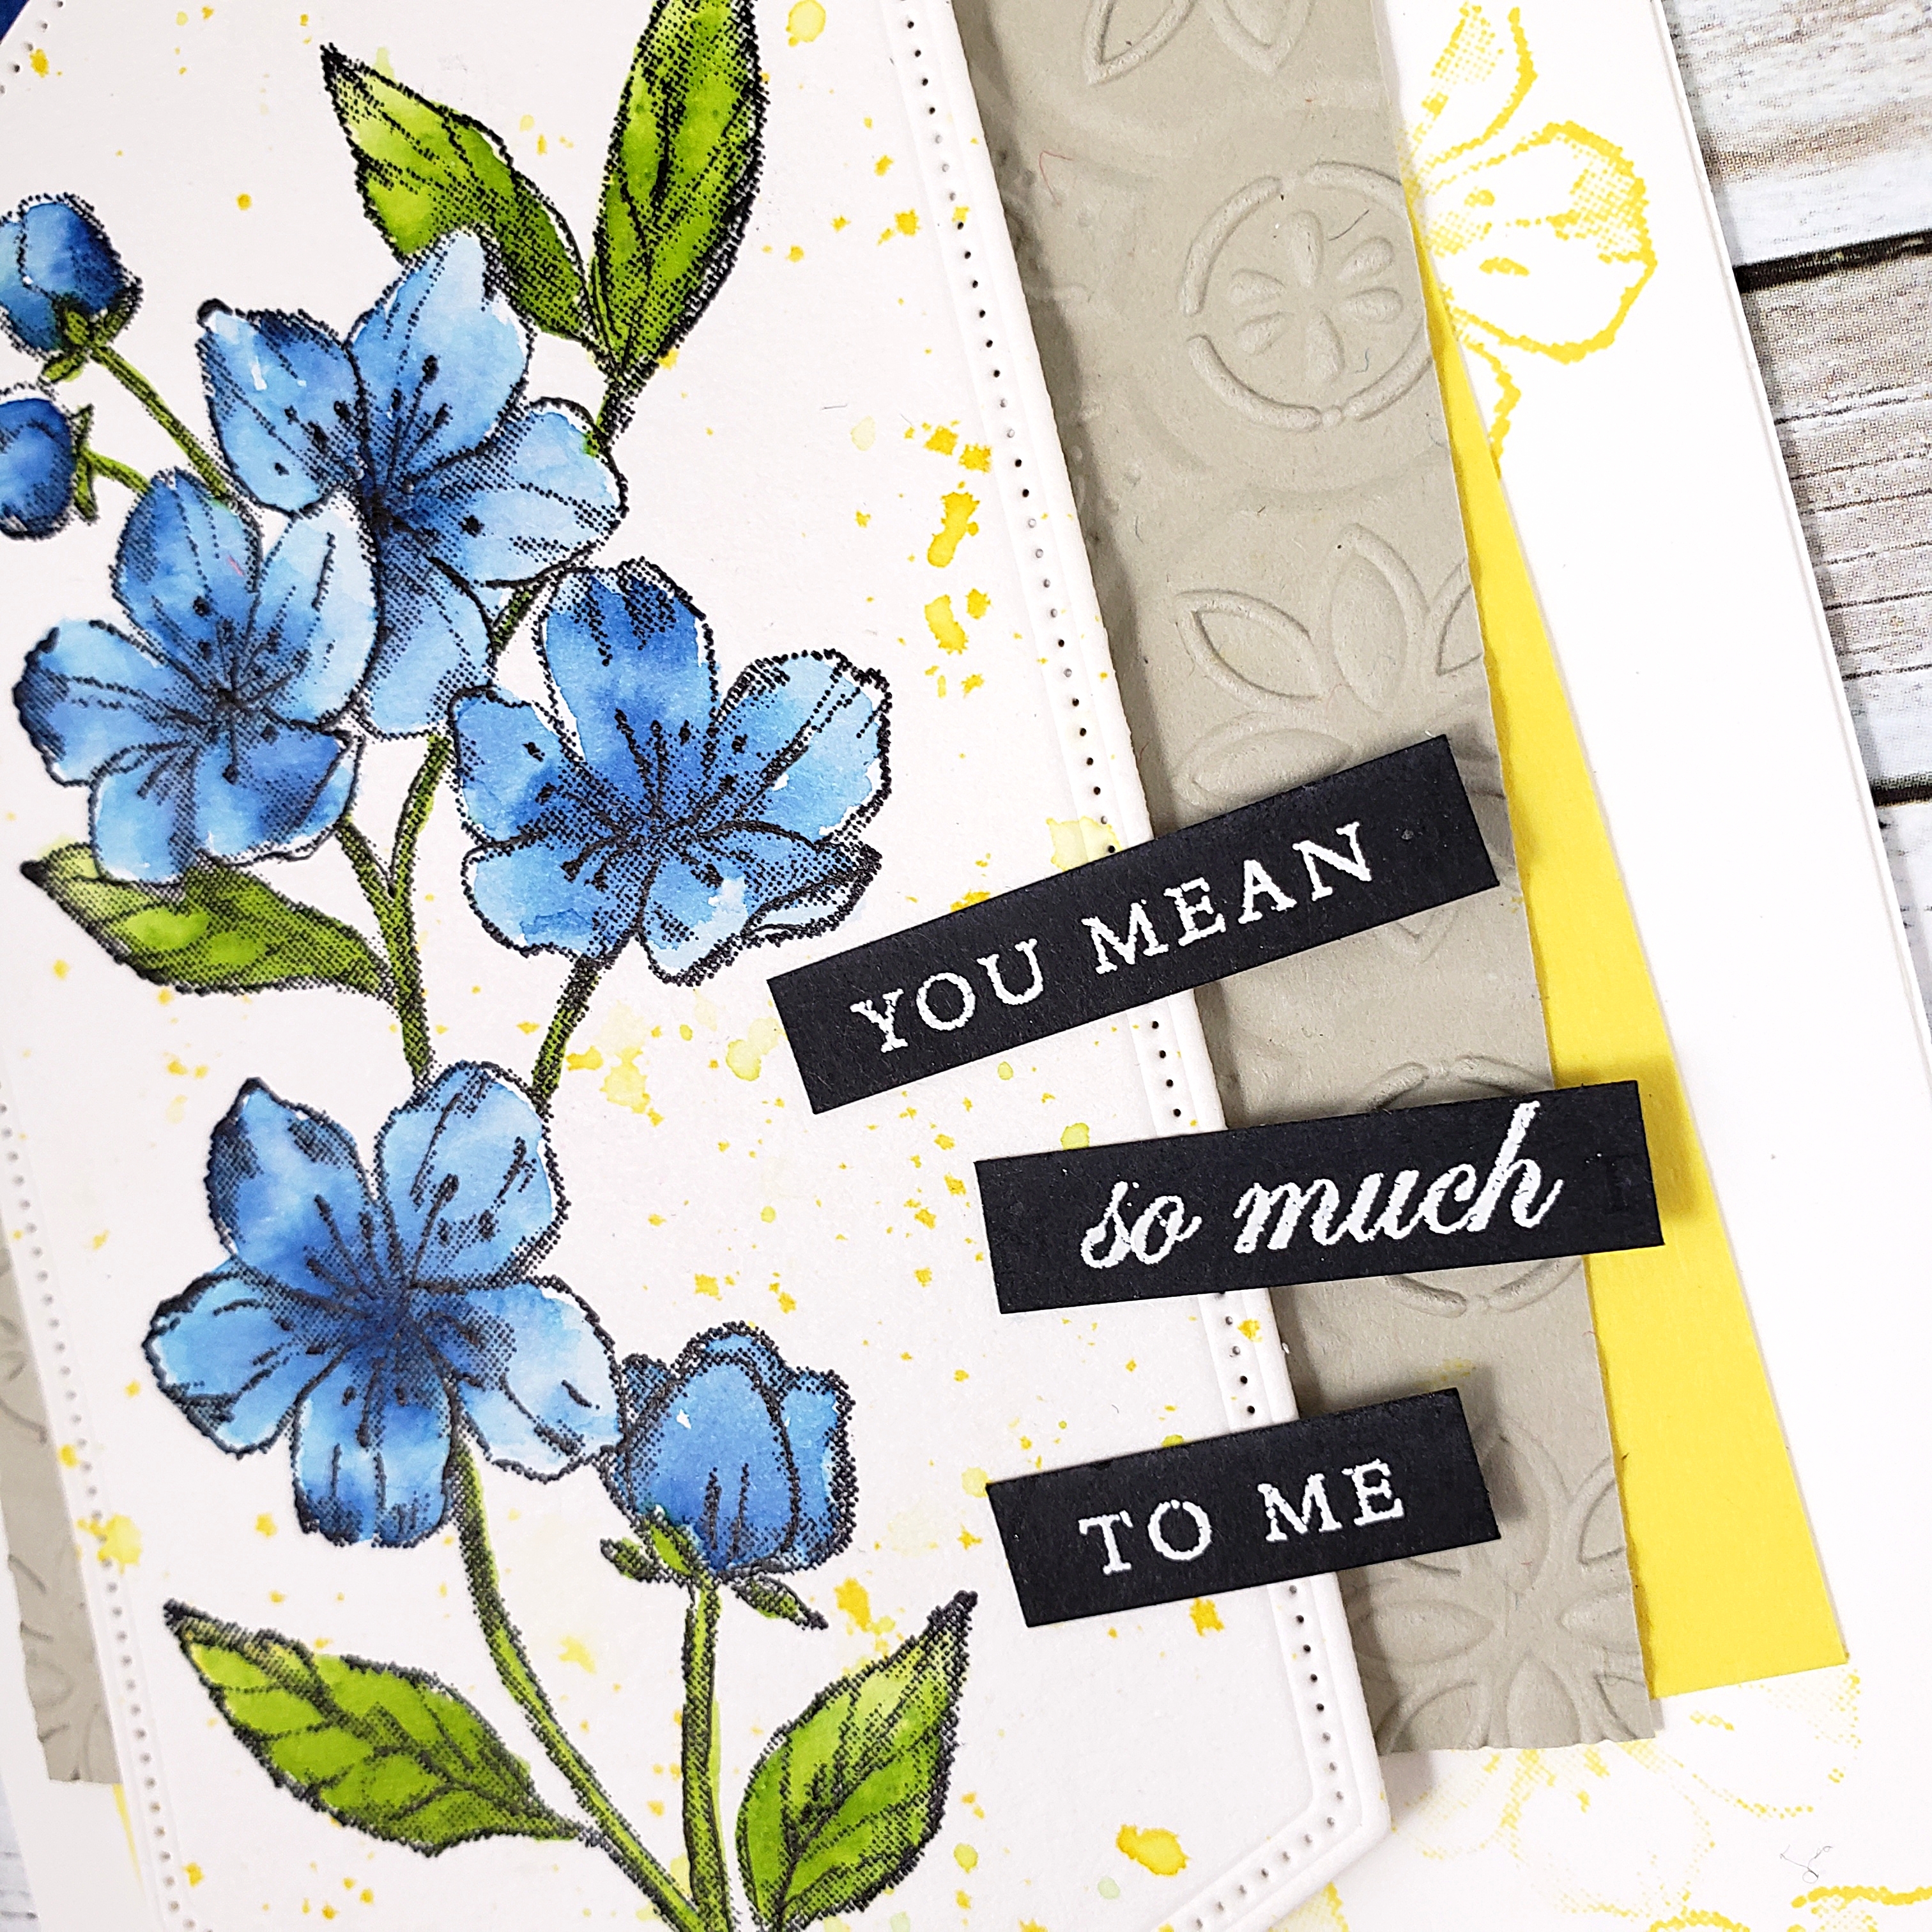
I stamped the sentiment with Versamark ink on Basic Black cardstock (using my Embossing Buddy first, of course), then applied the White Embossing Powder to the stamped words and heat set it with my Heat Tool. I then cut the sentiment into three sections and attached them to the card front using the combination of Stampin’ Dimensionals where it needed to be raised and Tombo Liquid Glue where it attached to the watercolor paper. I stamped the single blossoms from the stamp set on the Thick Whisper White card base with Pineapple Punch ink (before adhering all the things to the card base, of course, LOL!)
AVID STAMPER TIP: the words in the sentiment are actually quite close together, making it awkwardly tight when cutting them into sections. To add a bit of space, I actually stamped the sentiment twice and applied the powder. Before heat setting it, I brushed the powder off of the “so much” part of one of the stamped sentiments and off of the “you mean” and “to me” parts of the second stamped sentiment. After doing that, I heat set the powder with my Heat Tool. That way, when I cut the sentiment into the three sections, I was able to have a bit more space before and after the words on each section that I cut.
After all my talk about how Las Vegas wasn’t my thing, you might assume that I would never go there EVER again! That’s what my husband thought. But, you know what? I would totally go again! I would just do it a little differently. I would go with my husband and enjoy a few shows, maybe a couple of museums, and definitely would go off of the strip for some nature hikes to escape the crowds, the flashy lights, and the cigarette smoke. I would go see performers doing Sinatra, Elvis, Billie Holiday or Big Band music.
Yes, I would go again. I just need to look a little harder to see past the flashy, “adult Disneyland”, to seek out the natural and the historic Vegas. But, I might need to get in a few camping trips here in British Columbia first. I need a bit more nature to make up for all that …. cement.
Have you been to Vegas? Would you go? Let me know what you think by leaving a comment.