woodland folder

Watercolour Birch Trees

Welcome all who are faithful followers and all who wandered over here by chance. I hope you enjoy your stay!

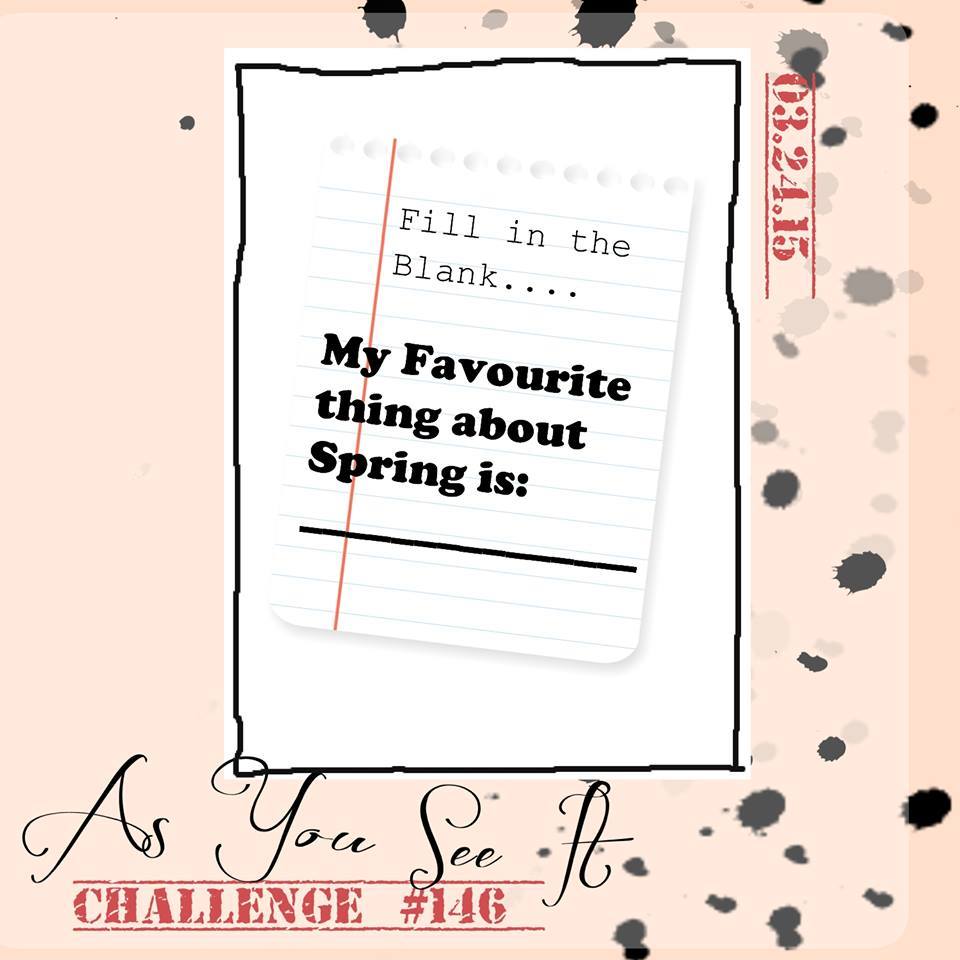
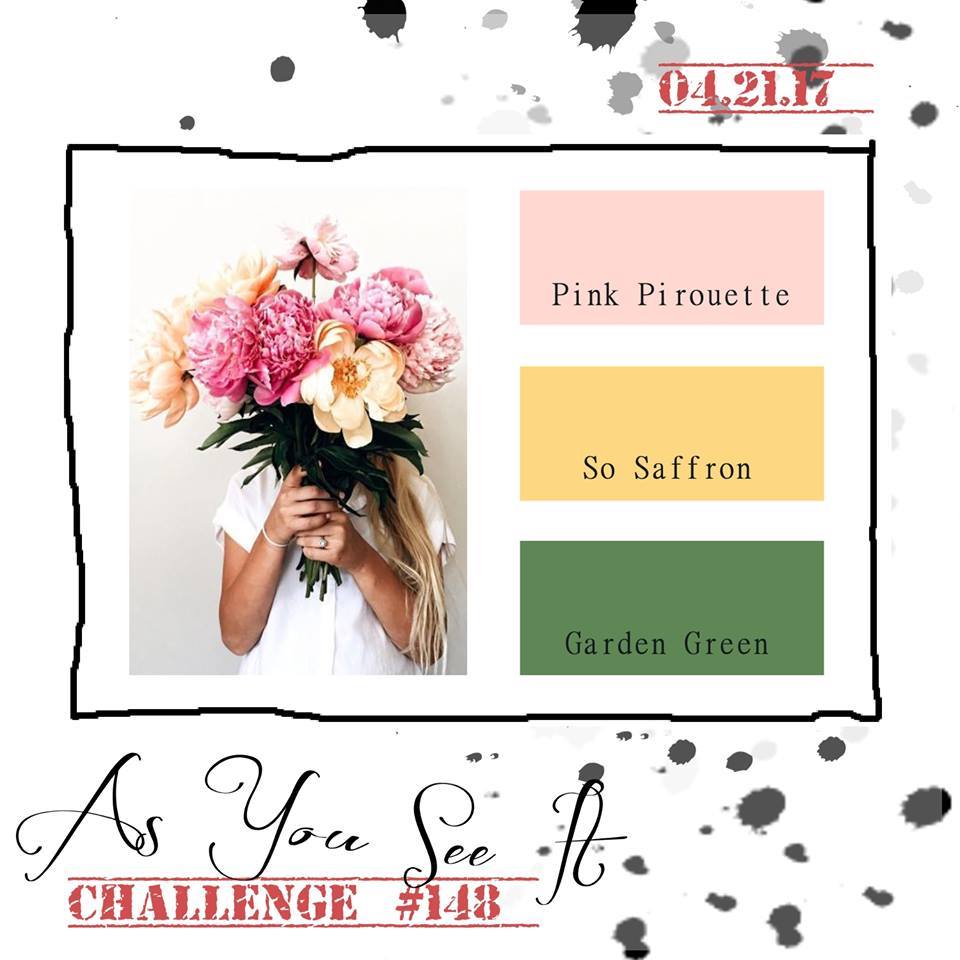
I admit to scrambling for this As You See It Challenge. I missed telling you all about the challenge two weeks ago – card made, but blog neglected. That’s how it goes sometimes when your Stampin’ Up life takes a back seat to your family life. As it should. Family first.

I did not want to disappoint you this time (or let myself down again). My card was created very last minute and I am writing this post at 5:30 am, scrambling to complete it for the 6am deadline. (I’m already 15 minutes late!). I was actually a little bit grateful to my husband last night who started watching Monty Python’s “And Now for Something Completely Different” with my 13 year old son when I had already said I would spend time with my son watching Merlin on Netflix. They got caught up in the hilarity of their show (I even had to pause to watch a bit), so I took advantage of my sudden free time and used scraps from a class to create my card for this colour challenge from the As You See It Challenge Blog.

As You See It Challenge #148

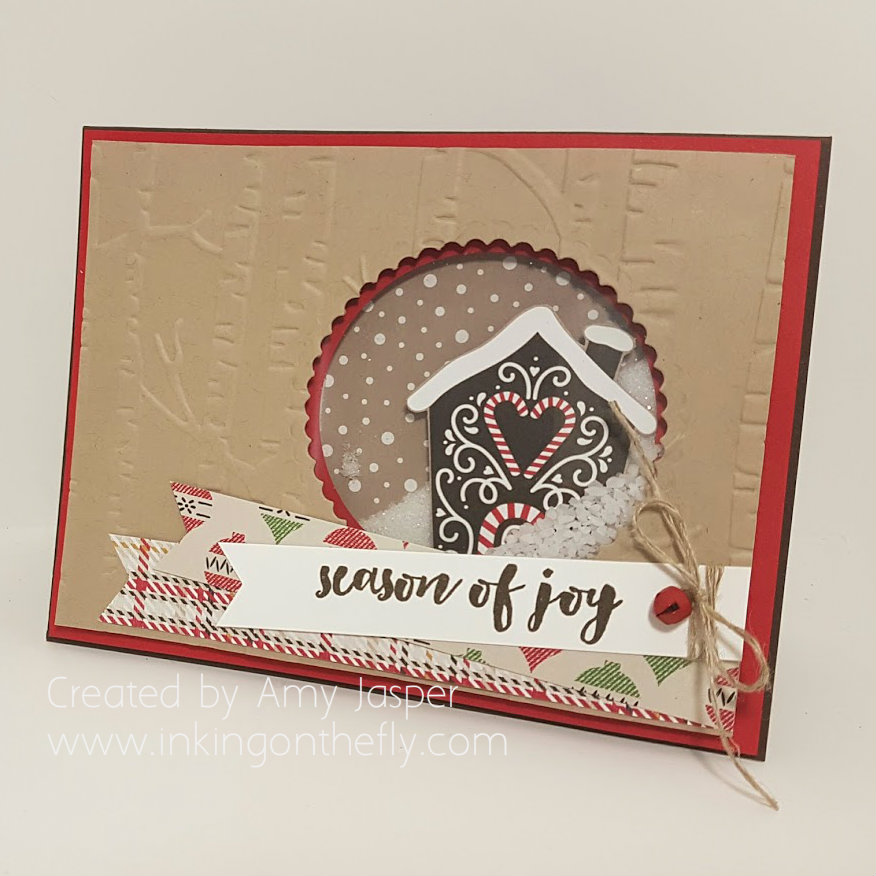
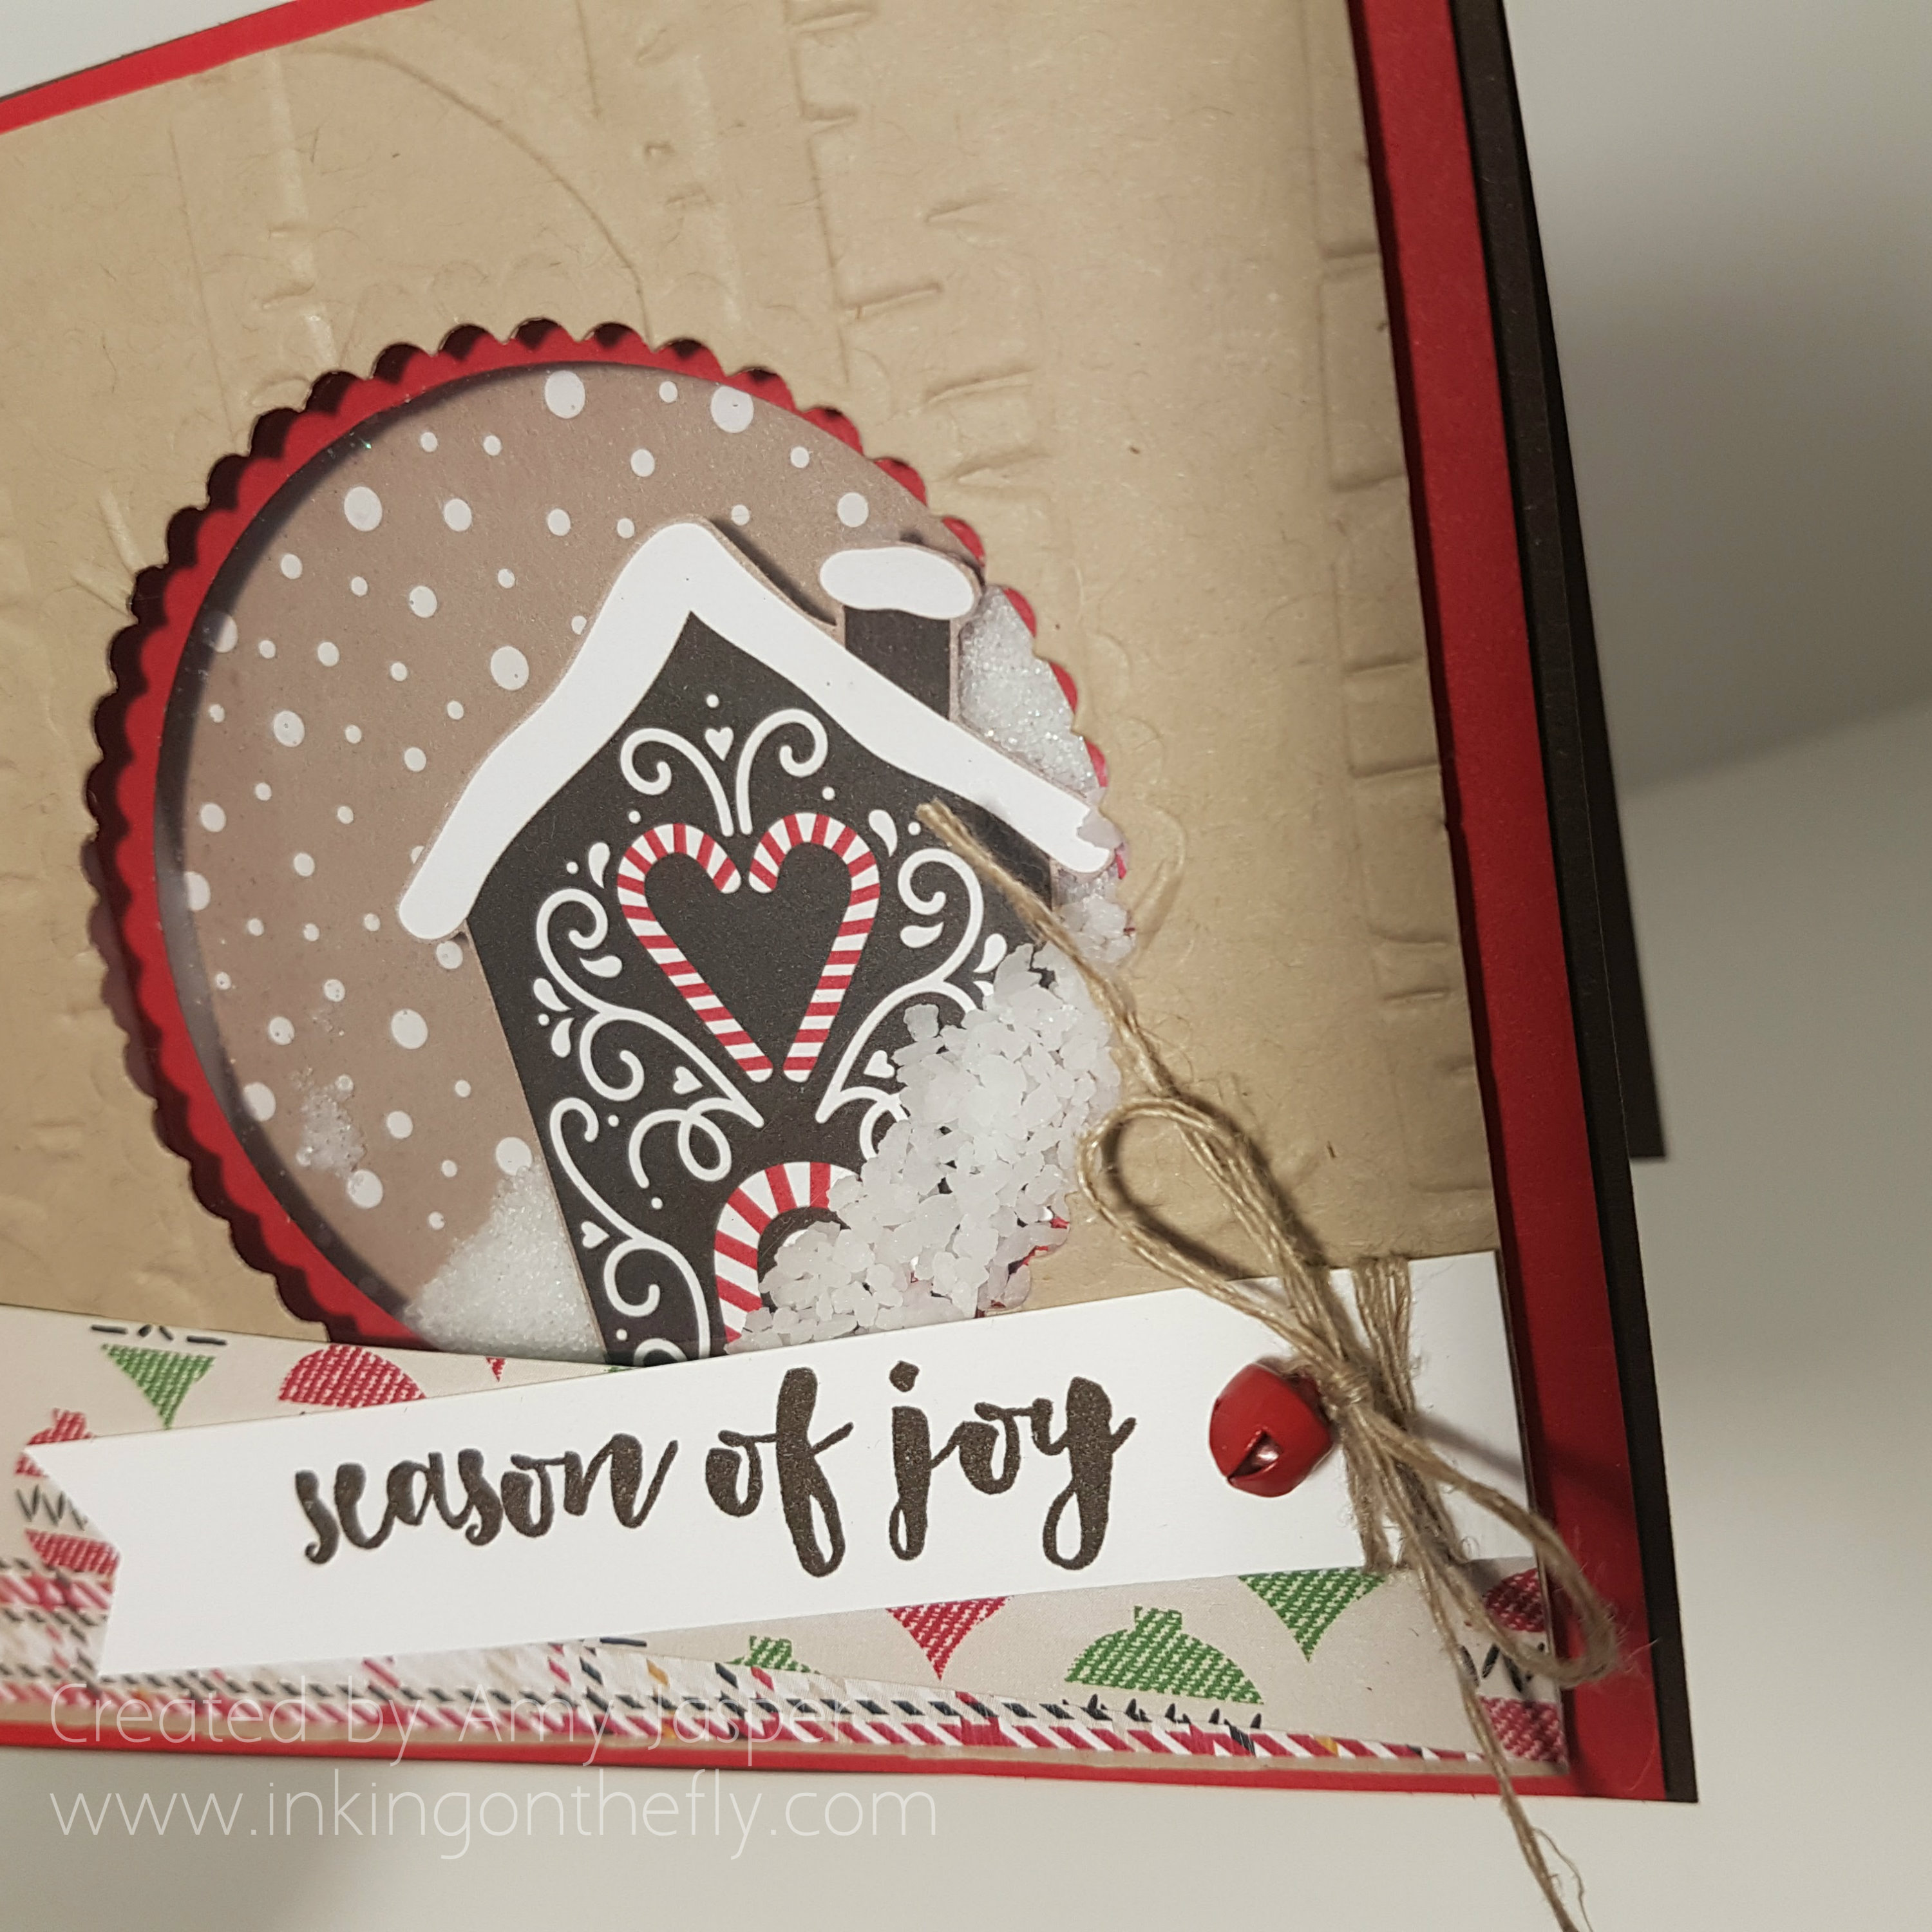
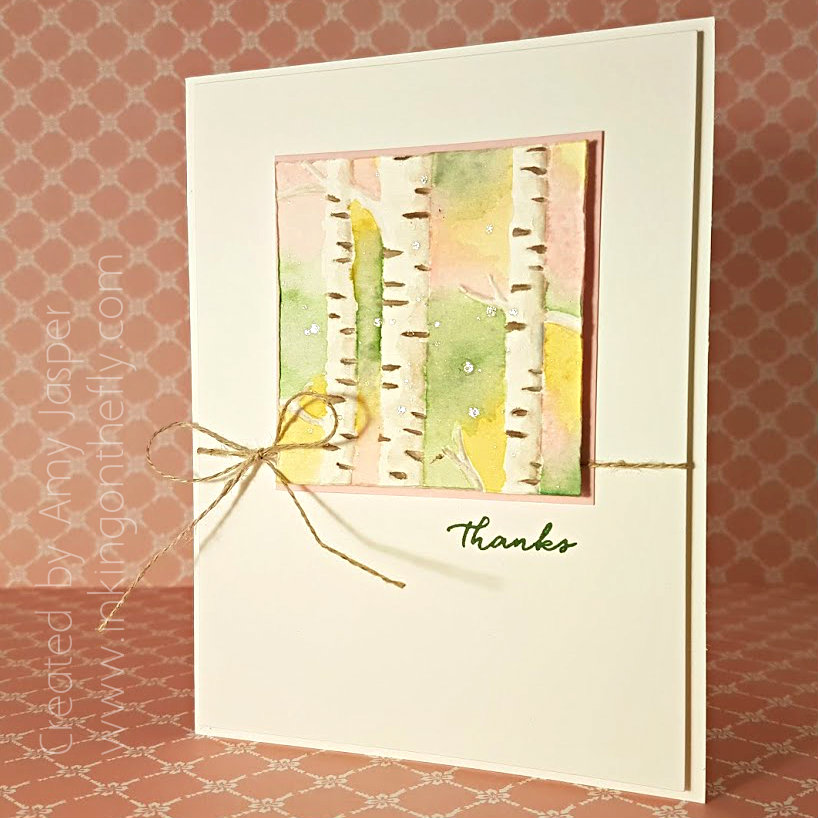
I love the Woodland Embossing Folder from Stampin’ Up! It is one that I use over and over again. I just recently discovered how easy it is to watercolour around the embossed edges of the paper. This is what my scraps from my last class look like combined with this colour challenge:Watercolour Birch Trees by Amy Jasper www.inkingonthefly.com - using the Woodland Embossing Folder from Stampin' Up!

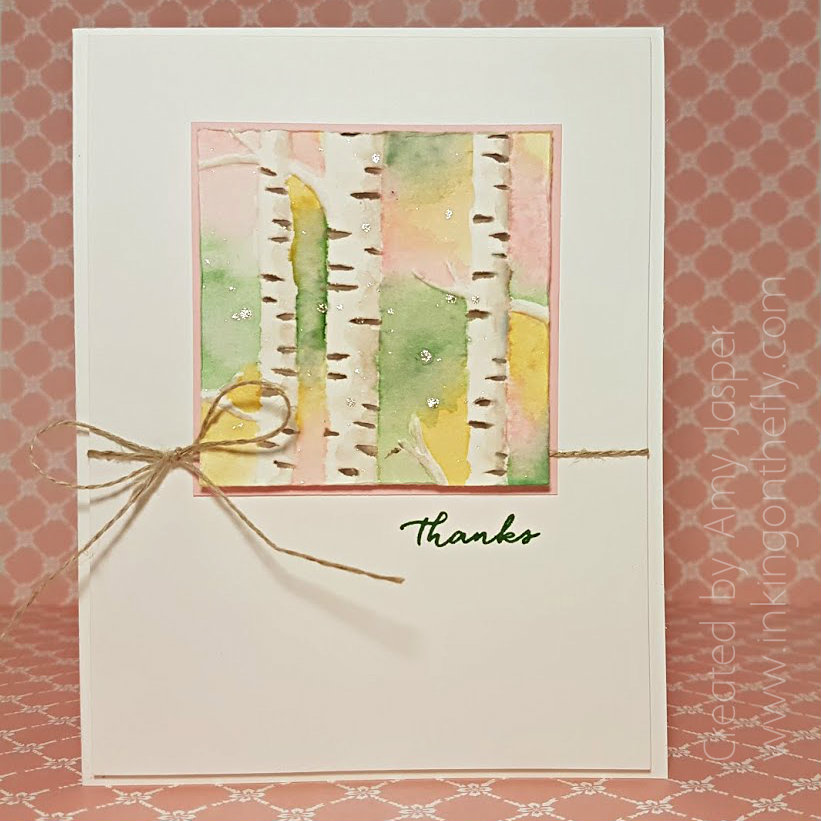
Pretty pretty pretty!! I think I’m in love!

With my Woodland Embossing folder and the Big Shot, I embossed the trees on a 2-1/2″ square piece of Watercolor Paper from Stampin’ Up! Then I used my Aqua Painter and picked up ink from my ink pads (Pink Pirouette, So Saffron, and Garden Green) and coloured between the trees, careful to stay within the guidelines that the embossed edges provided. Once I was happy with my blended background, the trees looked too plain, so I dipped my Stampin’ Up Aqua Painter into some Tip Top Taupe ink and accented the birch bark. With some watered-down Tip Top Taupe ink, I then washed some shading on the right side of the tree trunks to give them some dimension.

watercolour birch trees by Amy Jasper www.inkingonthefly.com using the Woodland Embossing Folder by Stampin' Up!

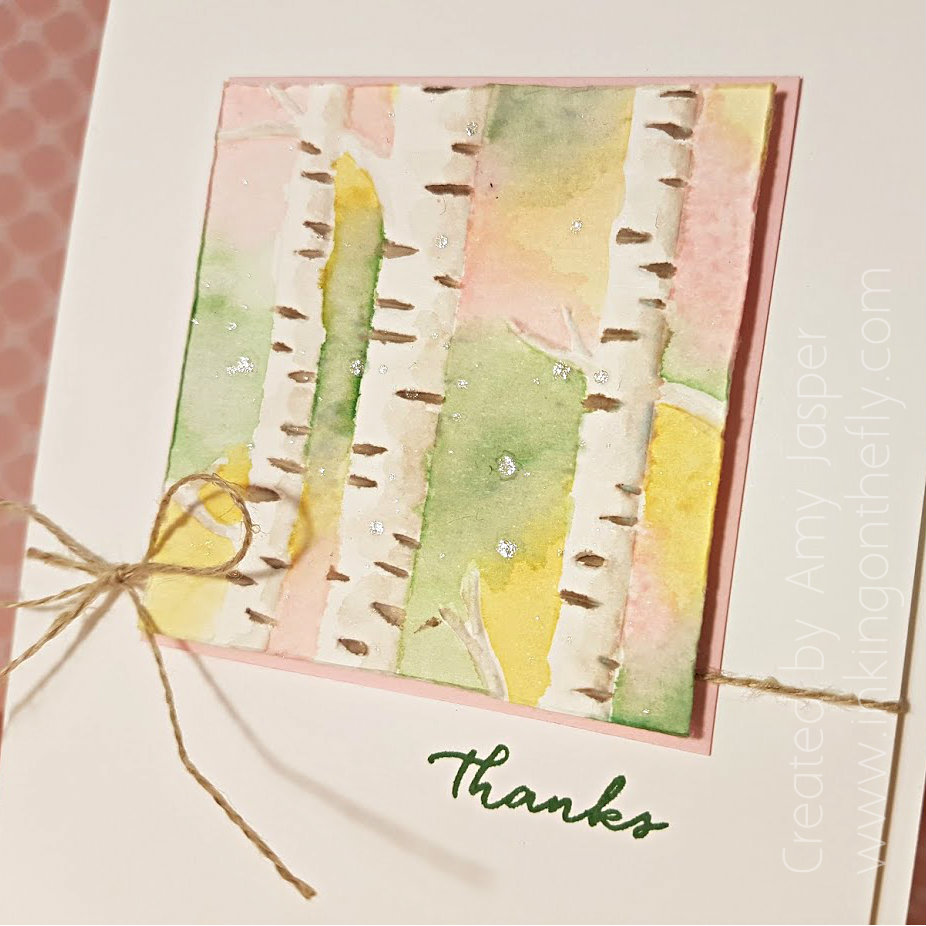
Once I was happy with my final result, I allowed the watercolouring to dry. Then I used the Clear Wink of Stella to create some shimmery splatter among the trees by tapping the brush over my finger above the paper. Glorious!!

The rest was just like we did in my class the night before: I used the blade of my Paper Snips from Stampin’ Up to texture the edges of the Watercolor Paper. This is an old technique that I haven’t used in quite a while. I think it creates a nice contrast to the smooth white background on this card.

Assembly was easy after that.  Adhere the 2-5/8″ square piece of Pink Pirouette cardstock to the top middle of the 4″ x 5-1/4″ piece of Whisper White cardstock. Stamp the sentiment from the Weather Together stamp set below and to the right of the pink square using Garden Green ink. Wrap Linen Thread around the cardstock and tie a bow to the left of the pink square. Adhere the watercoloured piece to the Pink Pirouette square using Stampin’ Up Dimensionals. Finally, use Stampin’ Up Dimensionals again to adhere the entire assembly of layers to the Thick Whisper White card base.

Watercolour Birch Trees by Amy Jasper www.inkingonthefly.com - using the Woodland Embossing Folder by Stampin' Up!VOILA! A lovely card that I will be proud to give to someone to thank them for putting up with my inconsistencies and blunders!

Seriously, thank you for continuing to come back even after I forget to post each week 🙂

Save

Save

April Showers

What do you get when you combine the Woodland Embossing folder, Watercolor Paper and the Watercolor Pencils from Stampin’ Up? Well, scroll on, crafty friends, and find out!!

The As You See It Challenge Blog has a new challenge every two weeks. Sometimes it’s a sketch or a colour combination. Sometimes it’s an assortment challenge or a theme challenge. This one is a fill in the blank challenge! Whoohoo!!

#146Though autumn is my favourite  season, there is something about every season that I love and there is no season that I dislike. Although, of all the months of the year, I dislike February the most. By the time February comes around, I’m very “done” with winter. February is so dreary and dirty as the snow starts to disappear and the dirt and brown grass becomes exposed. Yuck!

But usually, part way through March and moving into April, we start to see more sunshine and the green leaves of spring bulbs show signs of life and renewal. Soon the colours of spring begin to appear. But it’s the spring rain, that I love the most. It’s the rain that helps wash the old winter dirt away and makes the plants grow and become green again. It’s the rain that makes the earth smell so vibrant, so fresh!

So, for this challenge, I focused on the rain and the colours of spring.

April Showers card with Stampin' Up Woodland Embossing folder and Watercolor Pencils by Amy Jasper www.inkingonthefly.comThe beautiful background with the Woodland Embossing folder was inspired by my lovely friend and adopted team leader. She showed me how she used the de-bossed side of the paper (where the trees were indented rather than raised) and coloured the indented tree images with her Watercolor Pencils from Stampin’ Up. Once coloured, she used a Stampin’ Up Aqua Painter to blend the colour with water. It was so pretty, I had to try it! I love the look, don’t you!!?

I added a touch of the Clear Wink of Stella on the right side of each tree trunk to indicate the glimmer of rain in the spring sunshine.  The Clear Wink of Stella spatter over the Watercolor Paper also makes me think of raindrops sparkling in the sun.

The rest of the card is all about layers and paper cutting, really.

April Showers ladybugsThe ladybug duo is from the Lots of Love Hostess set. I stamped them on Watermelon Wonder cardstock with Jet Black Stazon ink and used the Real Red Watercolor Pencil and a Blender Pen to the outer edges of each ladybug. Then I fussy-cut around their bodies (cutting off their arms, legs, and antlers … I mean antennae). I drew in their arms and legs with my Project Life Pen afterward.

The umbrella canopy image was stamped with Momento Tuxedo Black ink on Daffodil Delight cardstock and the handle image on Smoky Slate cardstock. Both were die cut with the coordinating Umbrella Weather Framelits.

The sentiment is from the Love You Lots Hostess stamp set and is stamped with Momento Tuxedo Black ink on the Bermuda Bay cardstock.

As for the rest: Basic Black cardstock for the card base. A layer of Basic Gray cardstock. A few Basic Rhinestones. And a flourish of looped Silver Metallic Thread.

Be sure to try the Watercolor Pencils with this Woodland Embossing folder. So pretty!!

April Showers card with Stampin' Up Woodland Embossing Folder and Watercolor Pencils by Amy Jasper www.inkingonthefly.comHappy Spring!!

Save

Save

Double Shaker Christmas Card

I have been so very absent since the As You see It Challenge site went down. The weekly challenges were what kept me sharing with you and it’s been so difficult to keep up with my blogging without that regular incentive. Life is … life. I catch myself talking about how busy I am all the time, but I’ve realized that we’re ALL busy. ALL the time.

It’s not a new thing. It’s just what life is.

So, time keeps passing me by and I have false starts at sharing my stamping projects with you here on my blog. I’m not sure what my game plan is, but I know that I want to blog. I enjoy sharing with you. More than that, I enjoy hearing from you. Your comments spur me on and make me want to have more to offer.

I’ve been getting a lot of responses for a Christmas card that I shared with you last year. I’m loving the interest and the encouragement! It’s those comments that make me want to get back into sharing cards with you. So keep commenting, my crafty friends! If you like anything that I do on inkingonthefly.com, then take the time to say hi. It’s nice to know that I’m not just talking to myself!!

I have a project to share with you today. It’s a card that I made with my technique class that uses a double shaker design with … wait for it … SALT!! BAH! I’m so crazy sometimes!!

Double shaker Christmas card by Amy Jasper www.inkingonthefly.com

Can you see it? There are two different mediums in the shaker because there are two layers! How fun is THAT!! And, I decided to use salt for the snow. Table salt for the distant snow and course pickling salt for the snow in front of the house. I have no idea how salt will effect the paper over time, but if it’s kept dry (which paper should really be), I imagine it would take a very long time for the salt to degrade the paper, if it even would at all. I’ll take my chances.

Double shaker card by Amy Jasper www.inkingonthefly.com

If you’ve ever made any kind of shaker card before, all you need to do is add a second layer! Because the Foam Adhesive Strips are thicker than Stampin’ Dimensionals, this card with two layers of foam strips will be a tight fit in an envelope. You can either make a larger envelope to give your card more room by using the Envelope Punch Board, or you can use a little finagling to wiggle this card into one of Stampin’ Up’s medium sized envelopes. It can be done!

20161026_144334

Supplies used include:

  • Stampin’ Up Foam Adhesive Strips
  • Crumb Cake cardstock
  • Real Red Cardstock
  • Early Espresso Cardstock
  • Whisper White Cardstock
  • Stampin’ Up Window Sheets
  • Candy Cane Lane Designer Series Paper
  • Layering Circle Framelits
  • Big Shot
  • Woodland Embossing Folder
  • Dazzling Diamonds Glitter (I added just a smidge to the table salt)
  • Table salt and pickling salt
  • Tombo Multipurpose Liquid Glue
  • Christmas Pines Stamp Set
  • Early Espresso Ink
  • Linen Thread
  • Mini Jingle Bells
  • Banner Triple Punch (for those perfect flagged ends on my paper strips)
  • Warmth and Cheer Designer Series Paper Stack

double shaker card by Amy Jasper www.inkingonthefly.com

We also got a dog in May. He’s 8 months old now and likes to chew on our baseboards, door frames, and the underground sprinkler system in the backyard. We love ‘im though!!

Save

Save

Save

Save