Watercolour Tissue Paper Technique
Have you ever used tissue paper on your hand made cards? There are a few fun and creative ways to work with tissue paper, some of which you may remember from elementary school crafts! I wanted to share a technique that I recently found online. It’s a bit messy, but definitely worth the trouble. My method primarily follows the instruction from a crafter named Loll Thompson, though I do a couple things differently.
Here’s one of the cards I made using this technique.
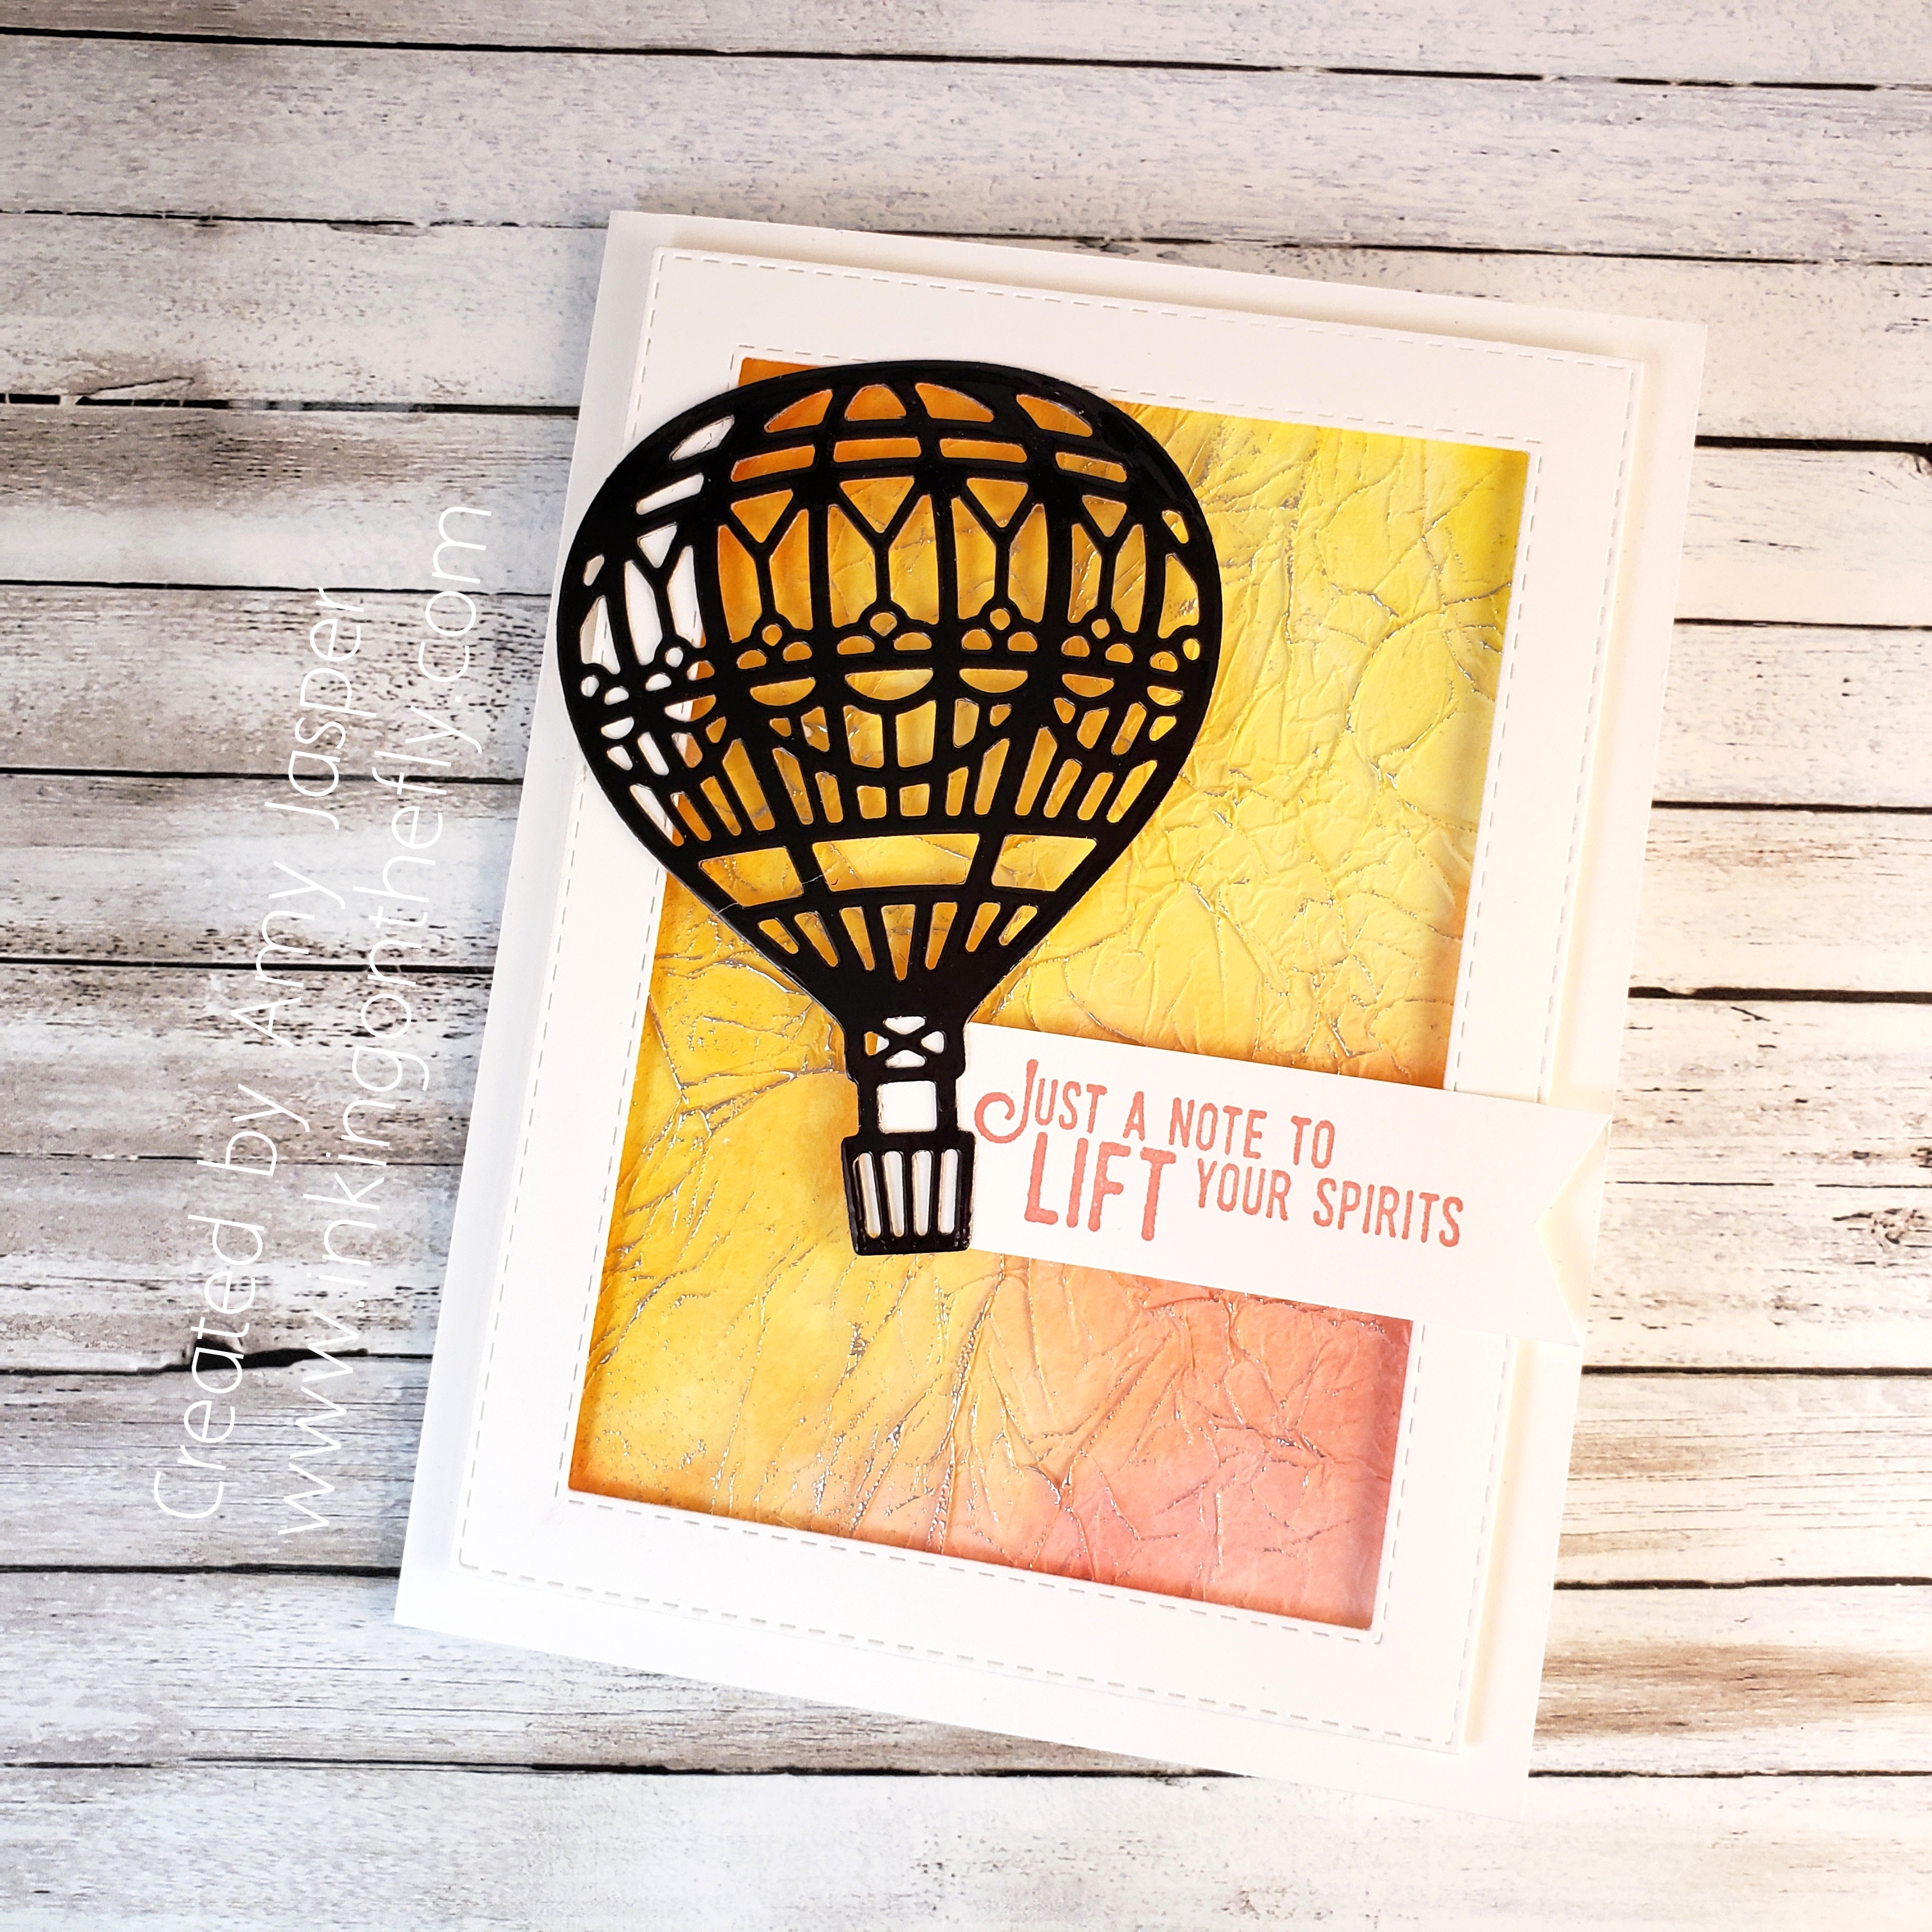
I used Pineapple Punch, Calypso Coral, and Mango Melody with the tissue paper technique. After crumpling and pressing the dry tissue paper onto a piece of Whisper White cardstock, I used my embossing buddy over the surface, then gently tapped the Versamark ink on the wrinkled tissue paper so that it would only touch the tops of the wrinkled bits. Then I used Silver Embossing Powder with my Heat Tool to create this awesome and unique background.
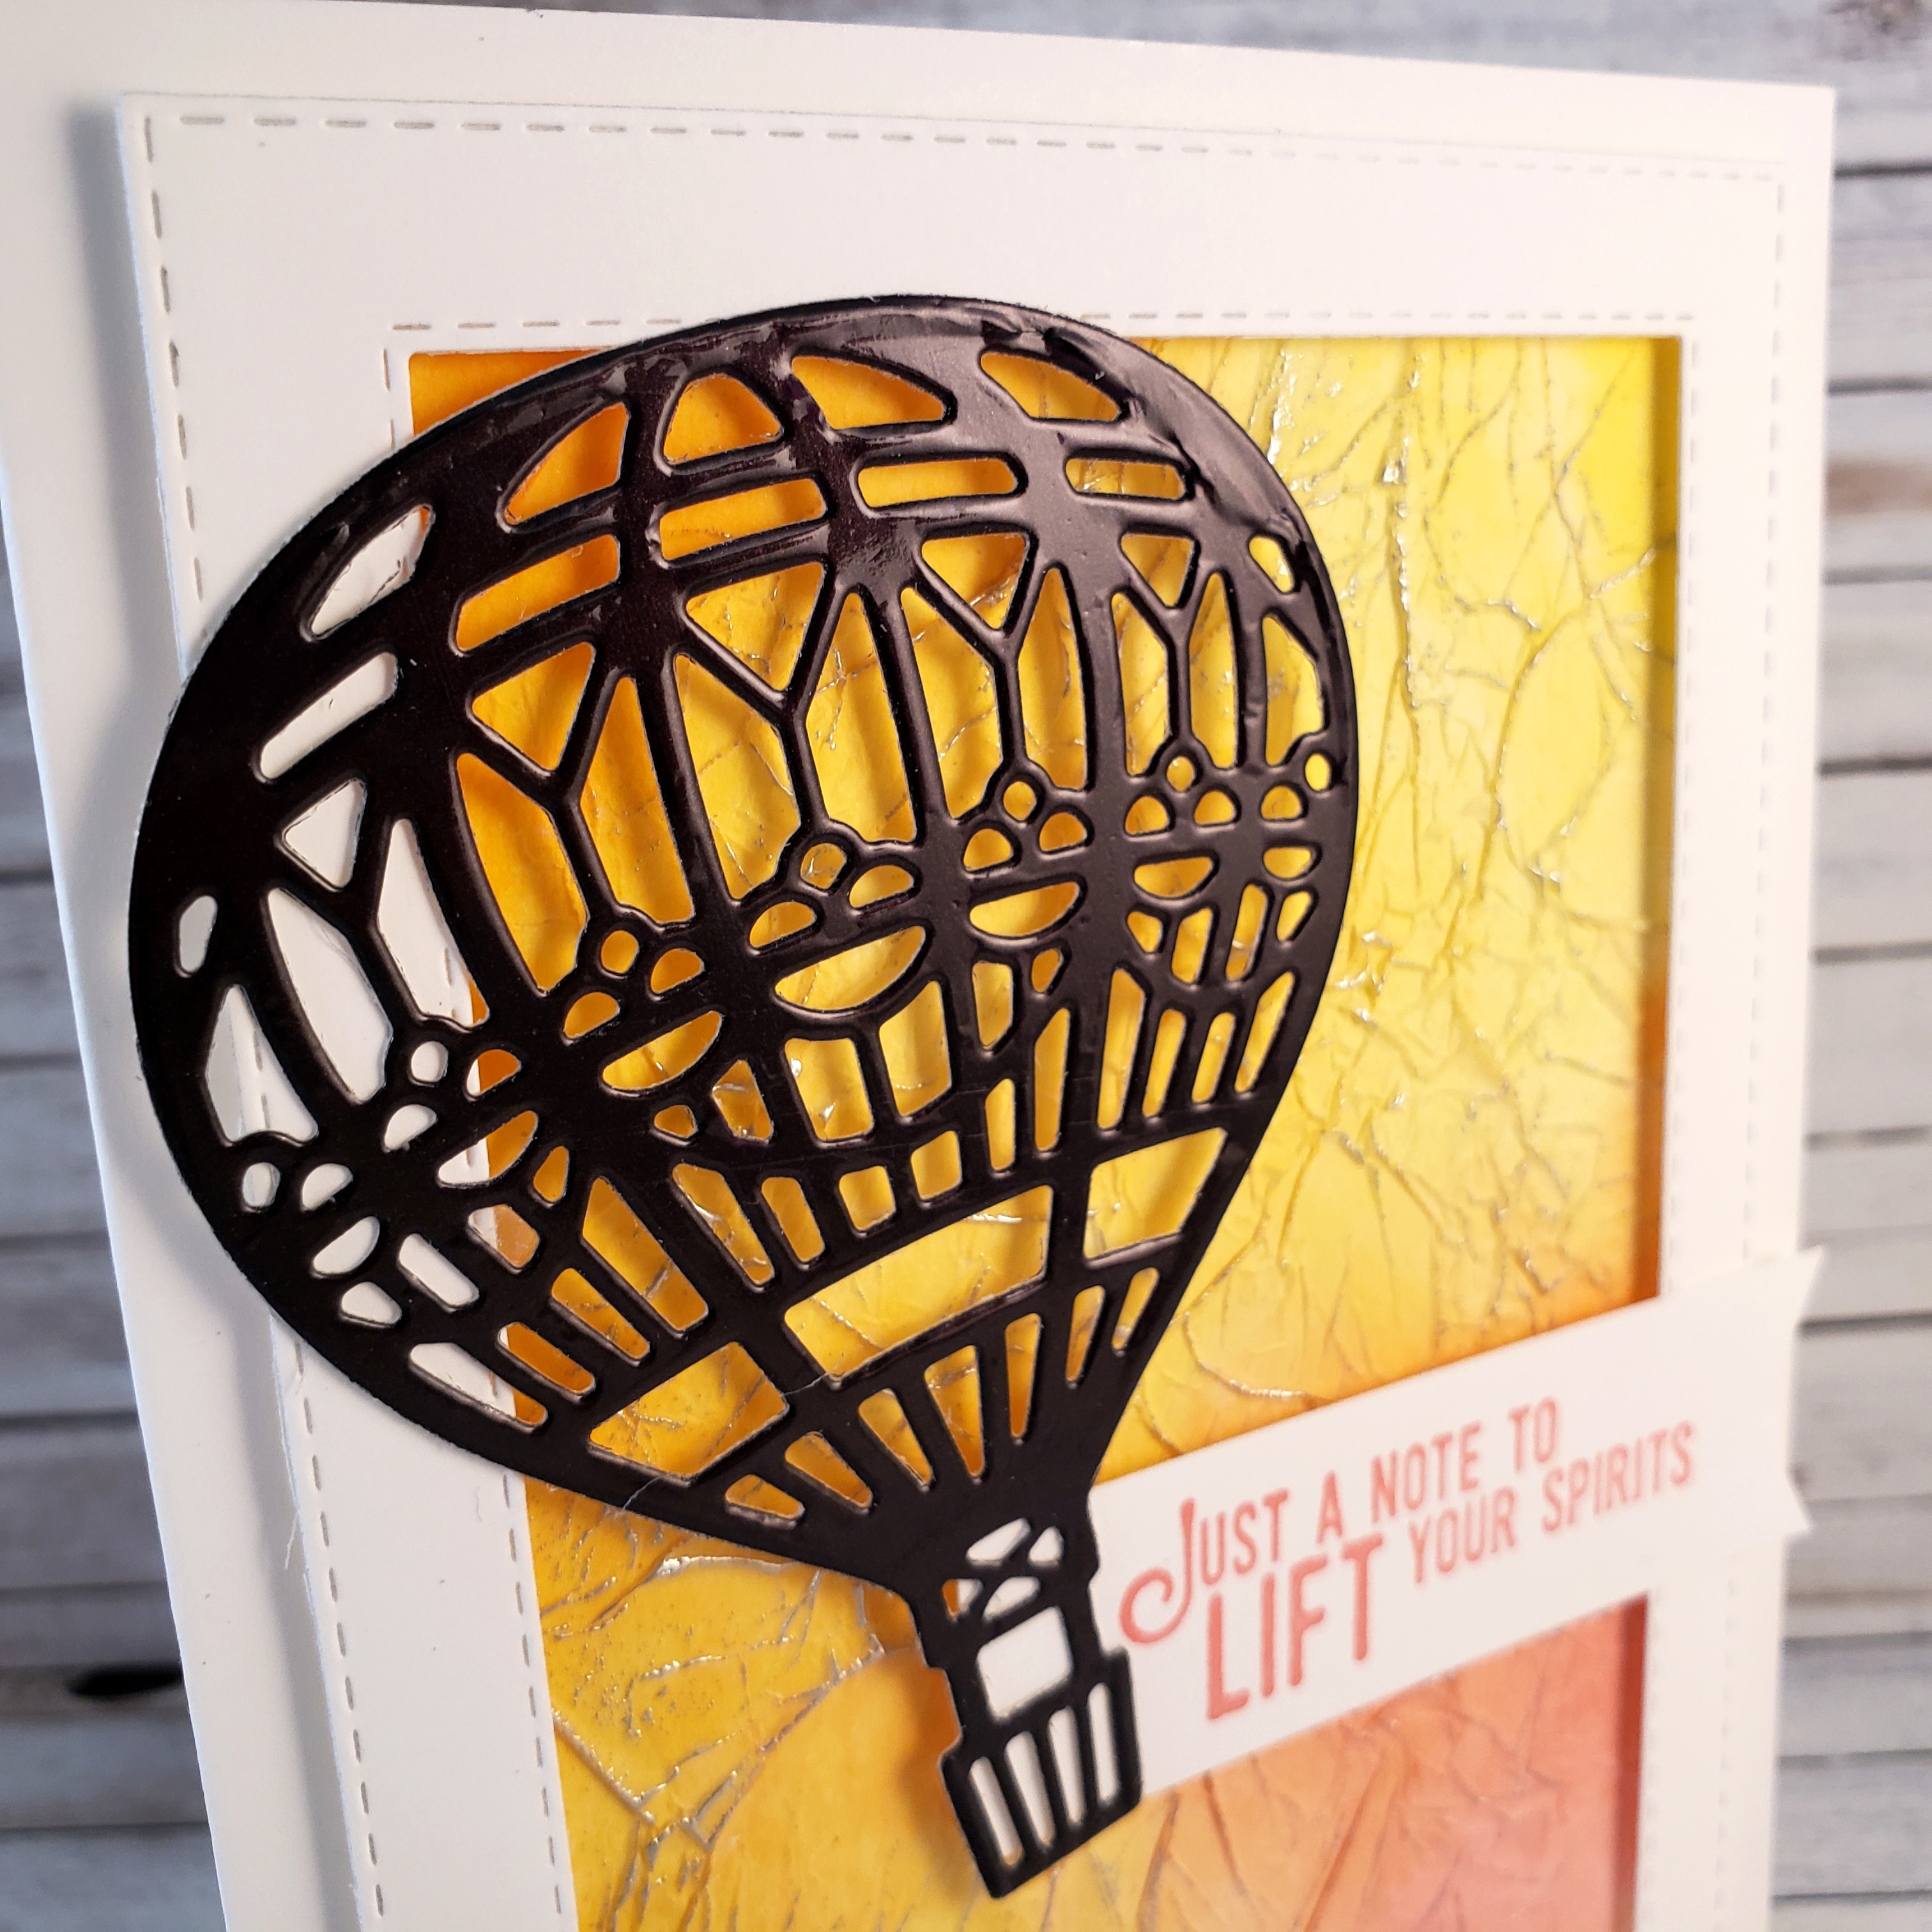
The Stitched Rectangle Framelits Dies were used to create the Whisper White frame. I die cut the hot air balloon from a piece of the Black Foil Sheets from Stampin’ Up! and carefully adhered it to the frame and the banner, which are both attached to the card with Stampin’ Dimensionals.
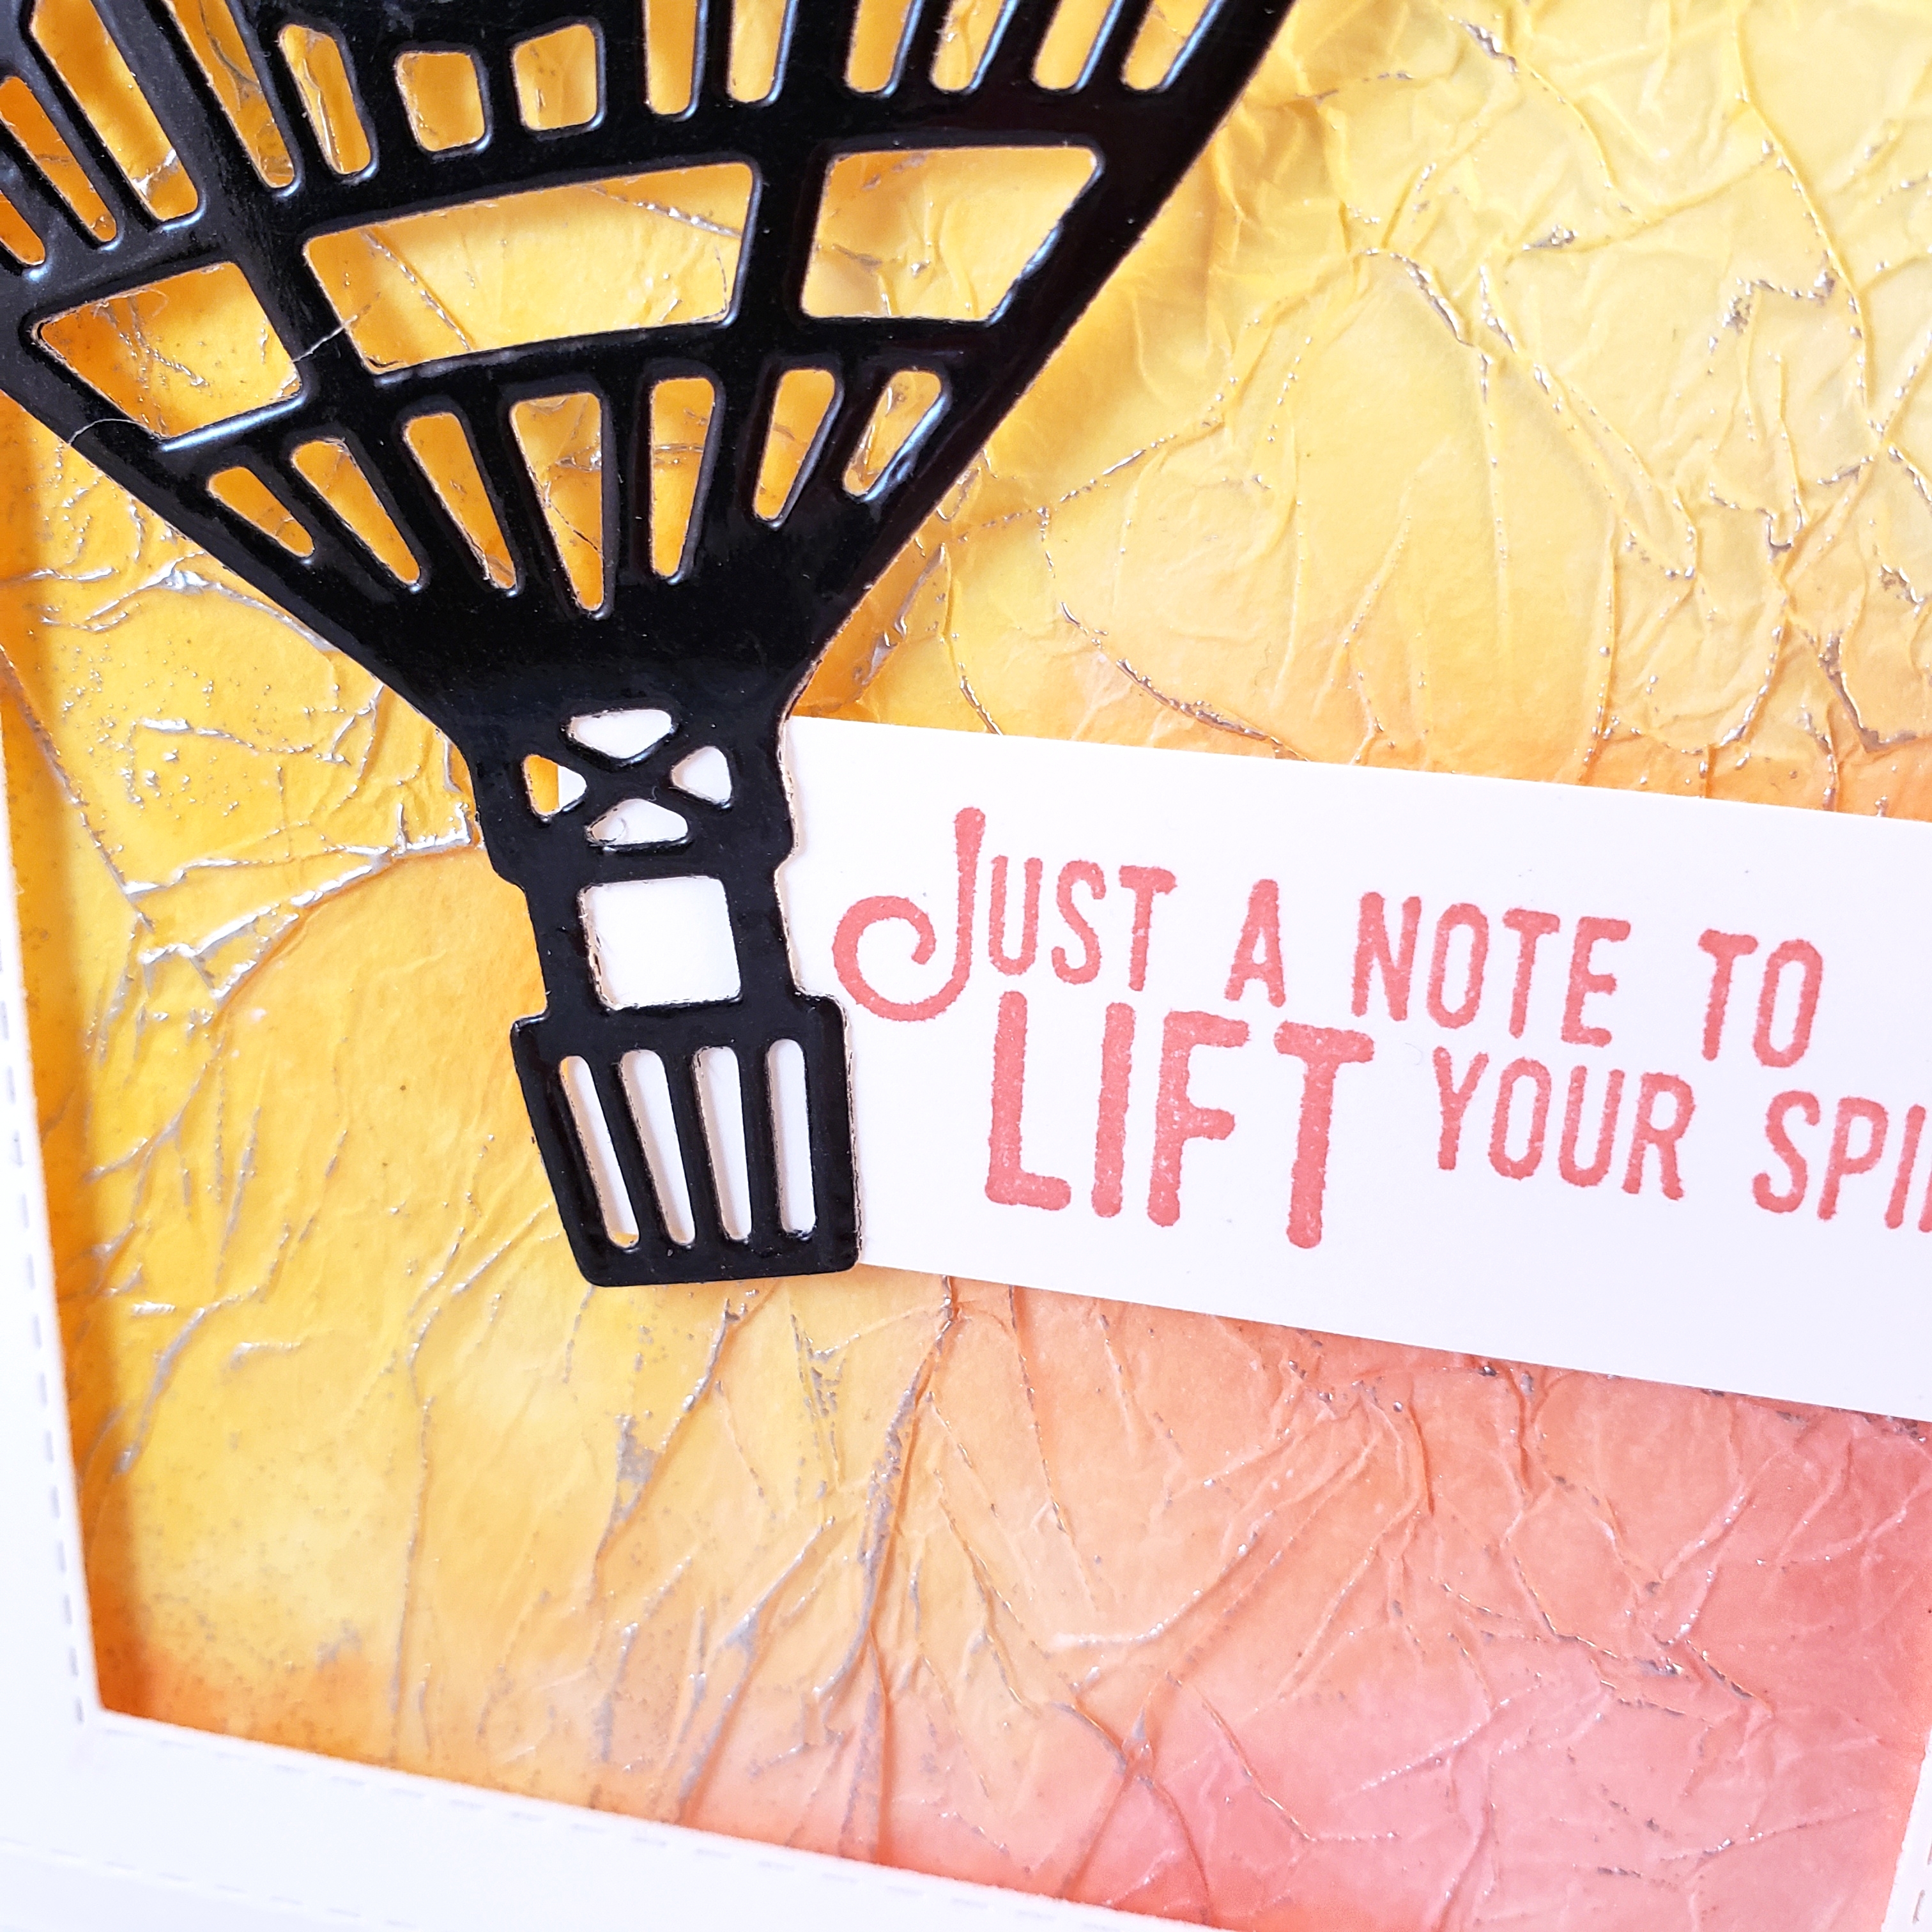
The sentiment from the Lift Me Up stamp set from Stampin’ Up! is stamped on Whisper White cardstock with Flirty Flamingo ink to coordinate with the results of the watercolour effect.
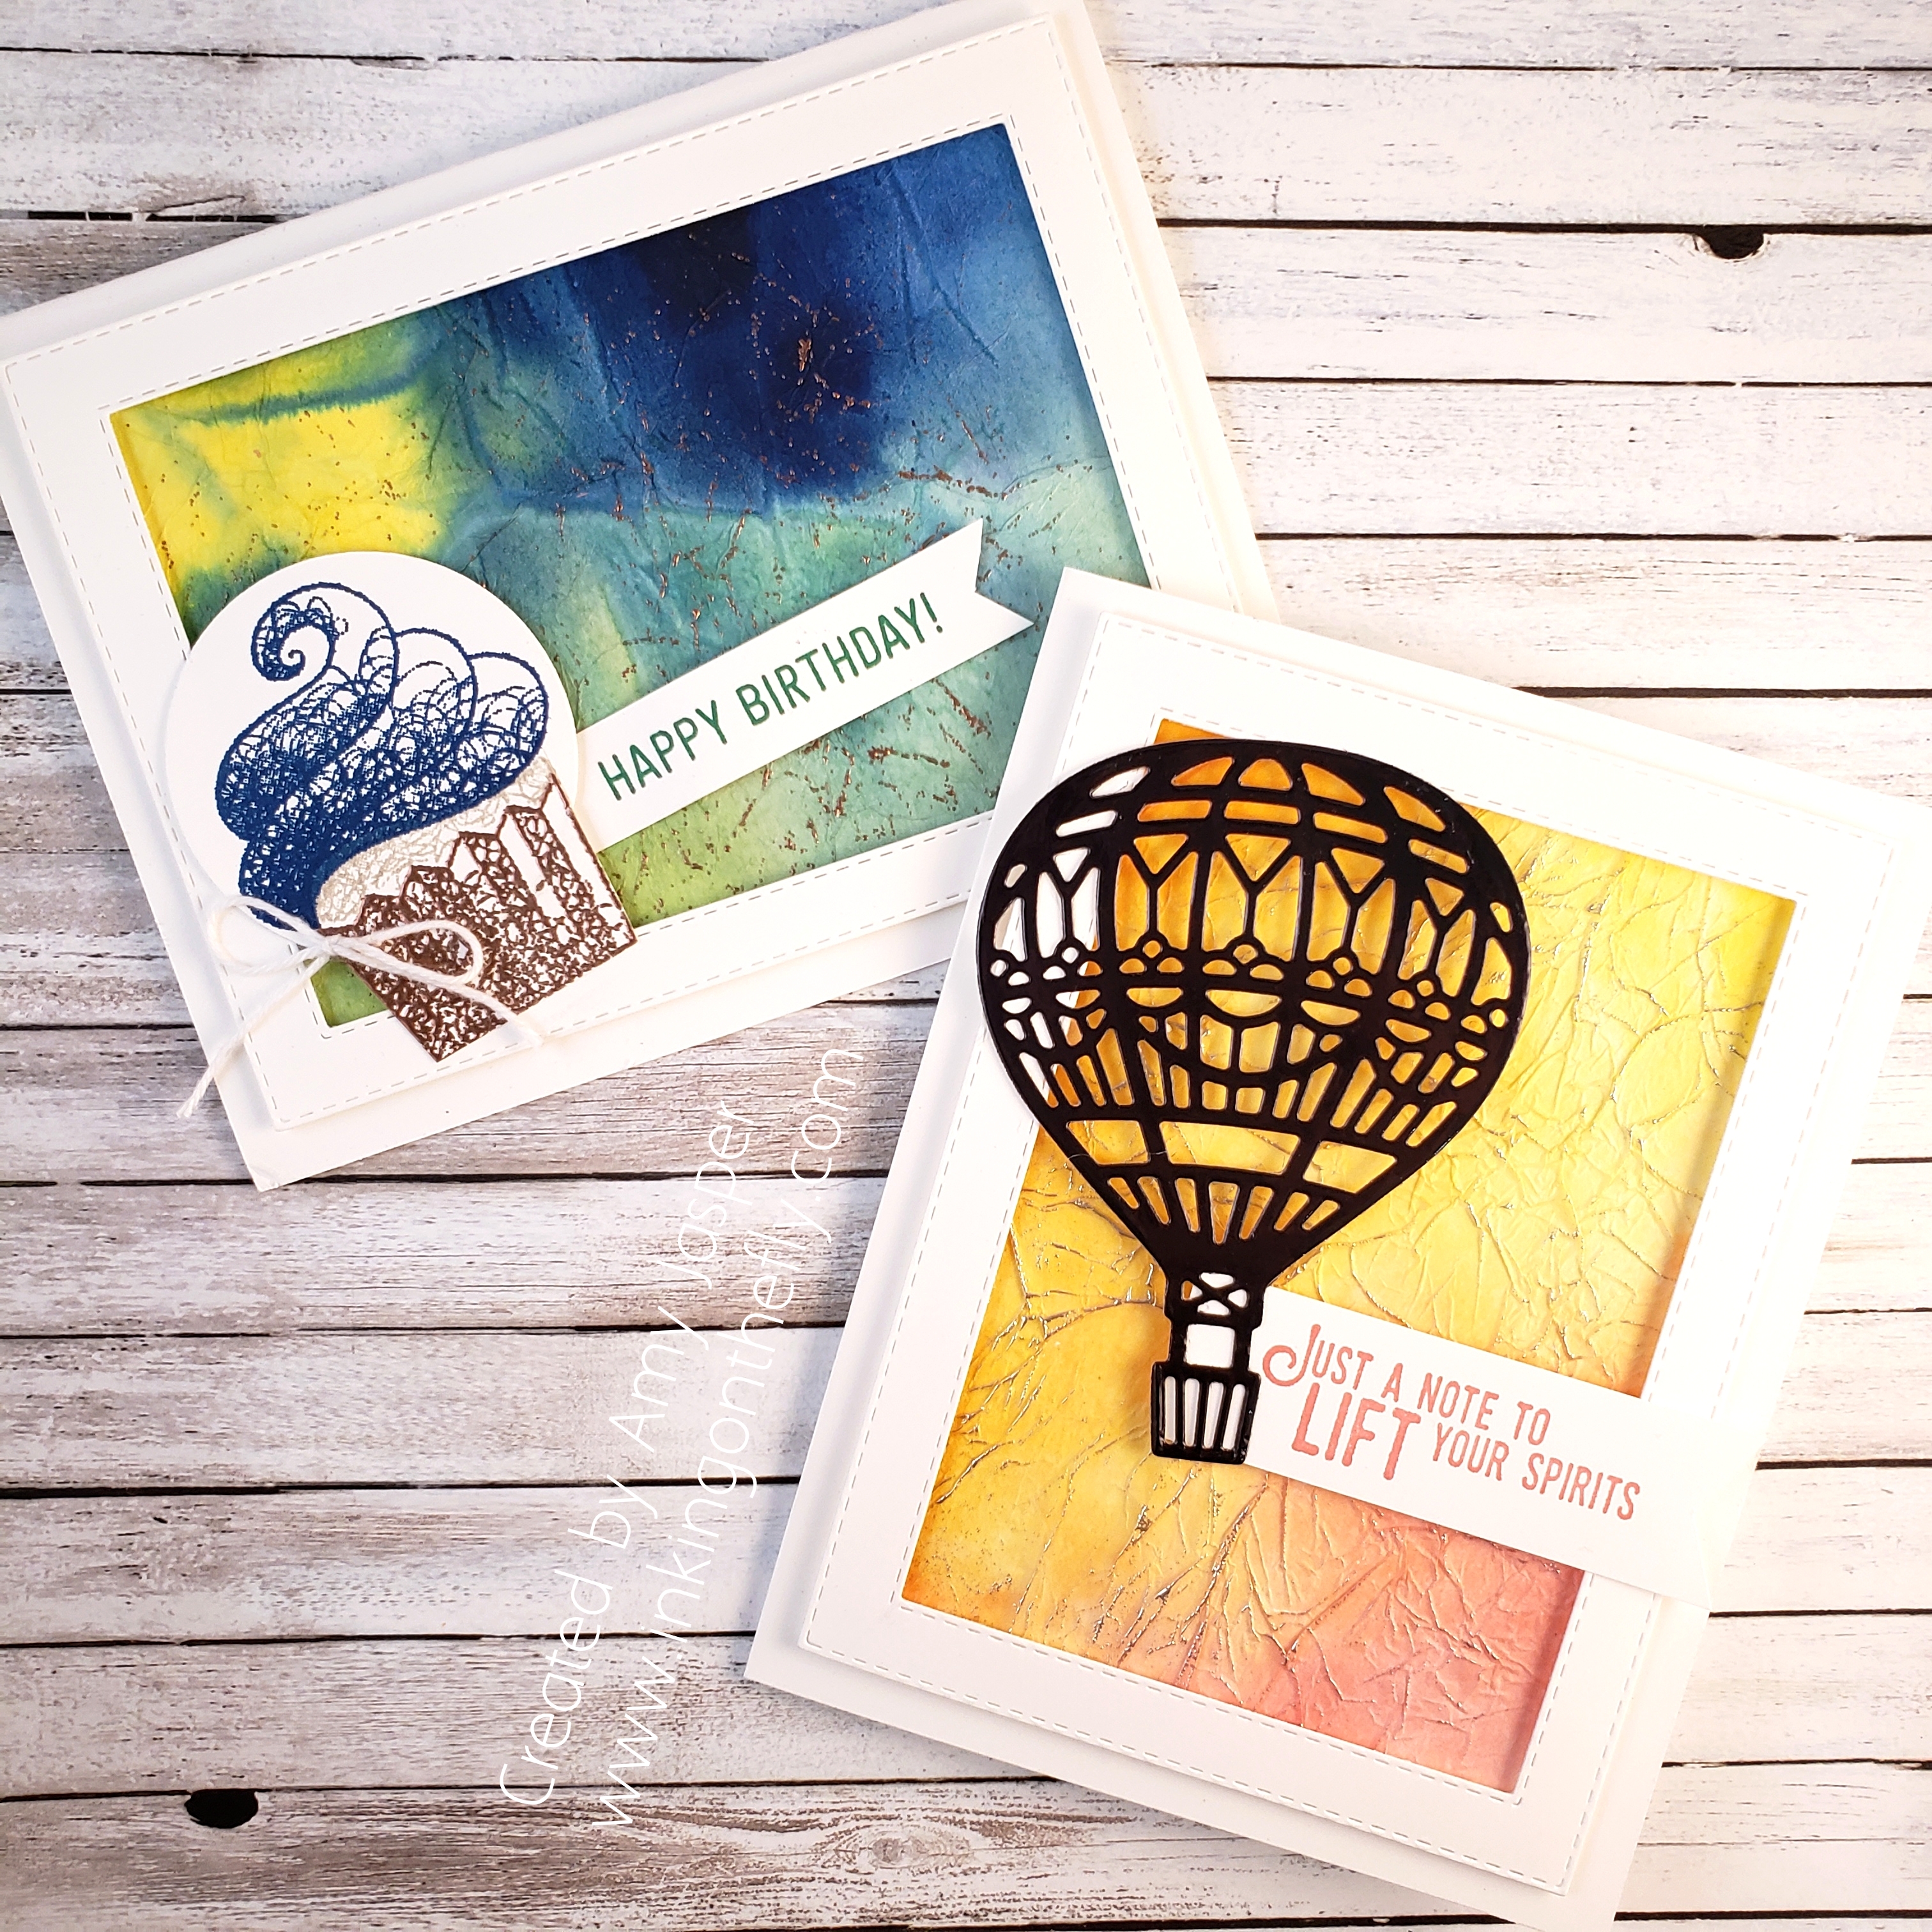
The card with the cupcake from the Hello Cupcake stamp set (no longer available for purchase), shows off the colour combination of Blueberry Bushel, Call Me Clover, and Pineaple Punch ink with Copper Embossing Powder. You will find that this technique gives you different results every time!
Check out the video and find out more about how to do this watercolour tissue paper technique.

July 26, 2019 @ 11:56 am
Well these are completely stunning. I think I just found one of my layouts/ techniques for christmas cards this year. Blown away by your graceful yet simple artistry here Amy!
July 31, 2019 @ 1:08 pm
Thanks Seana! It means a lot that you took the time to leave me a comment 🙂