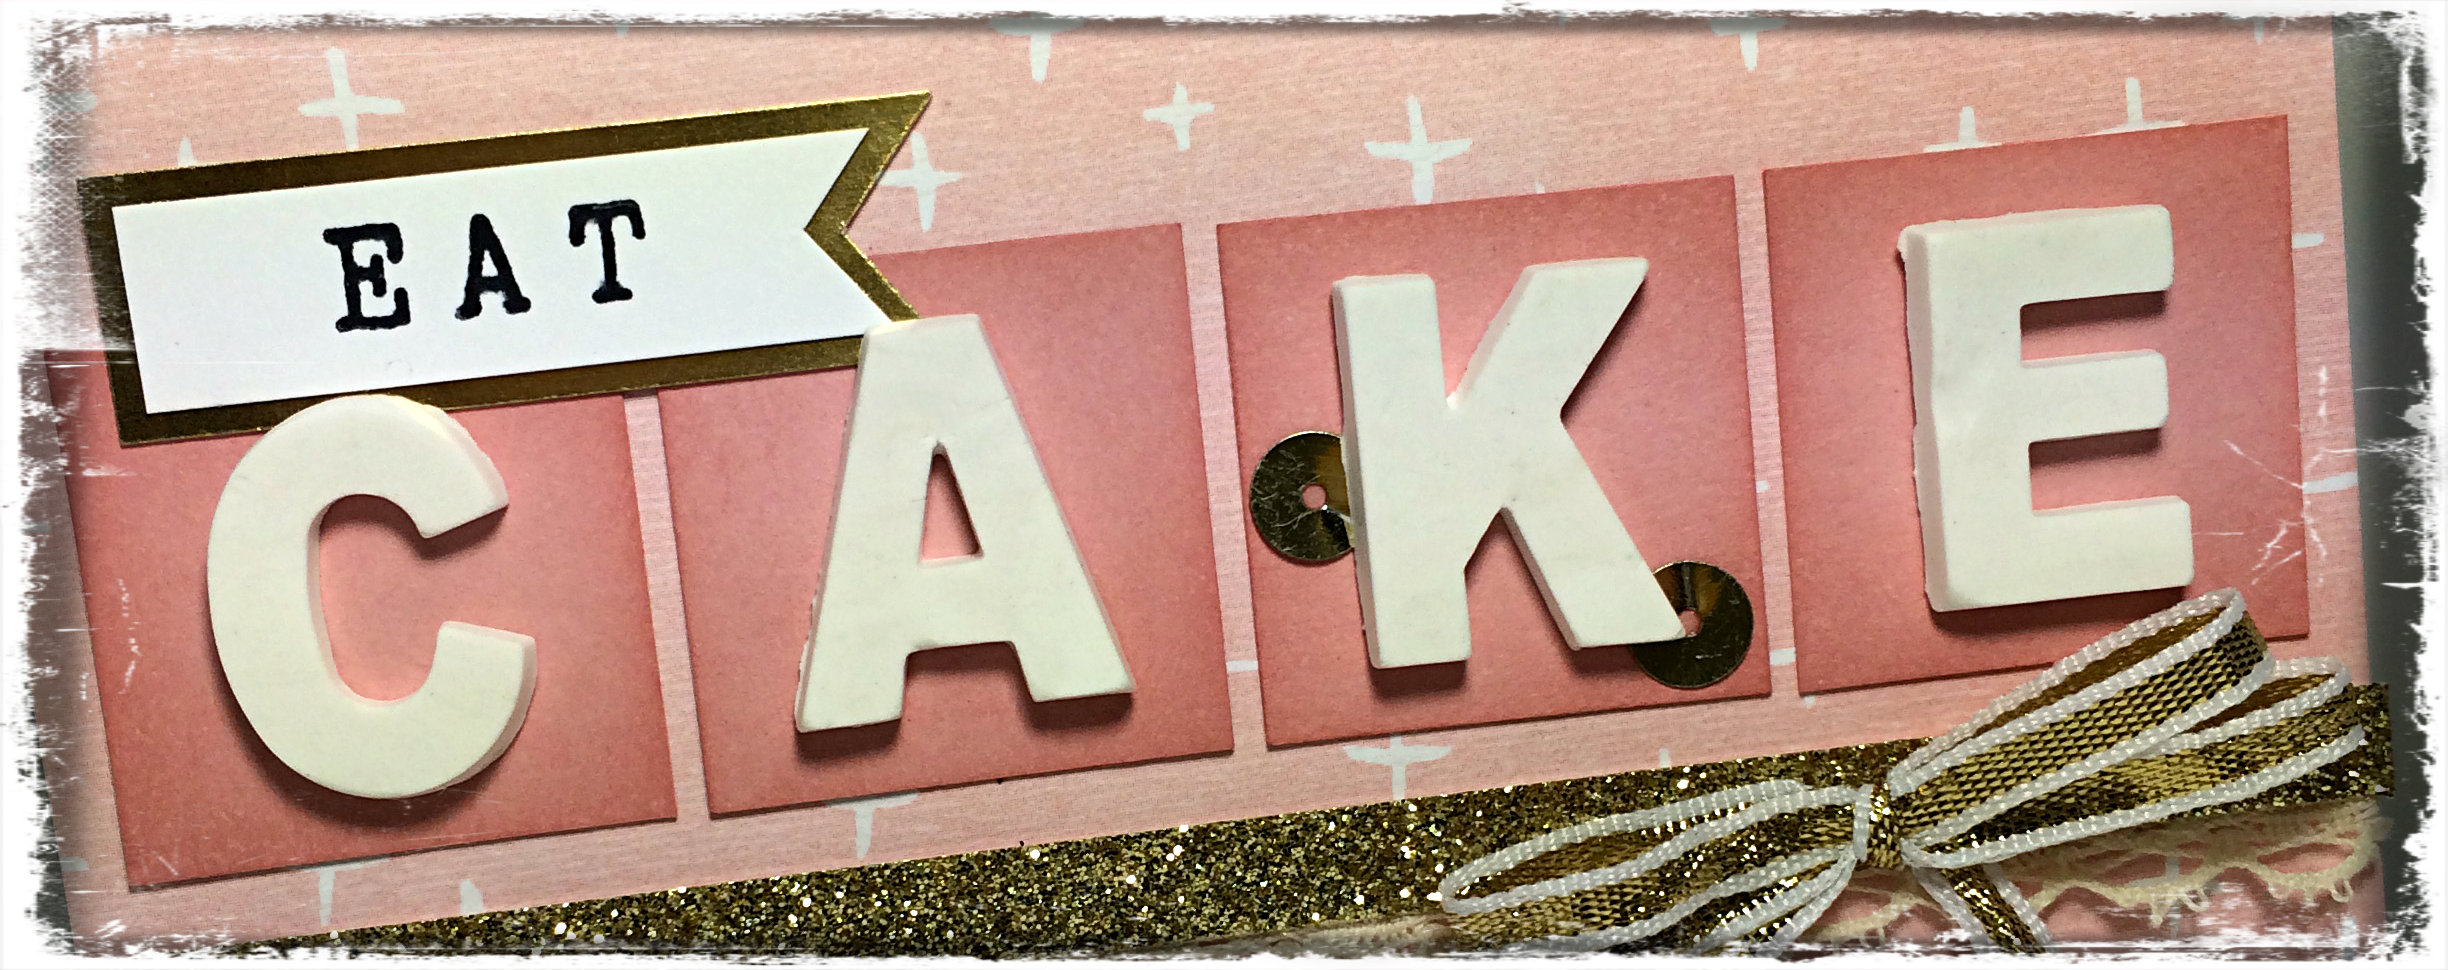
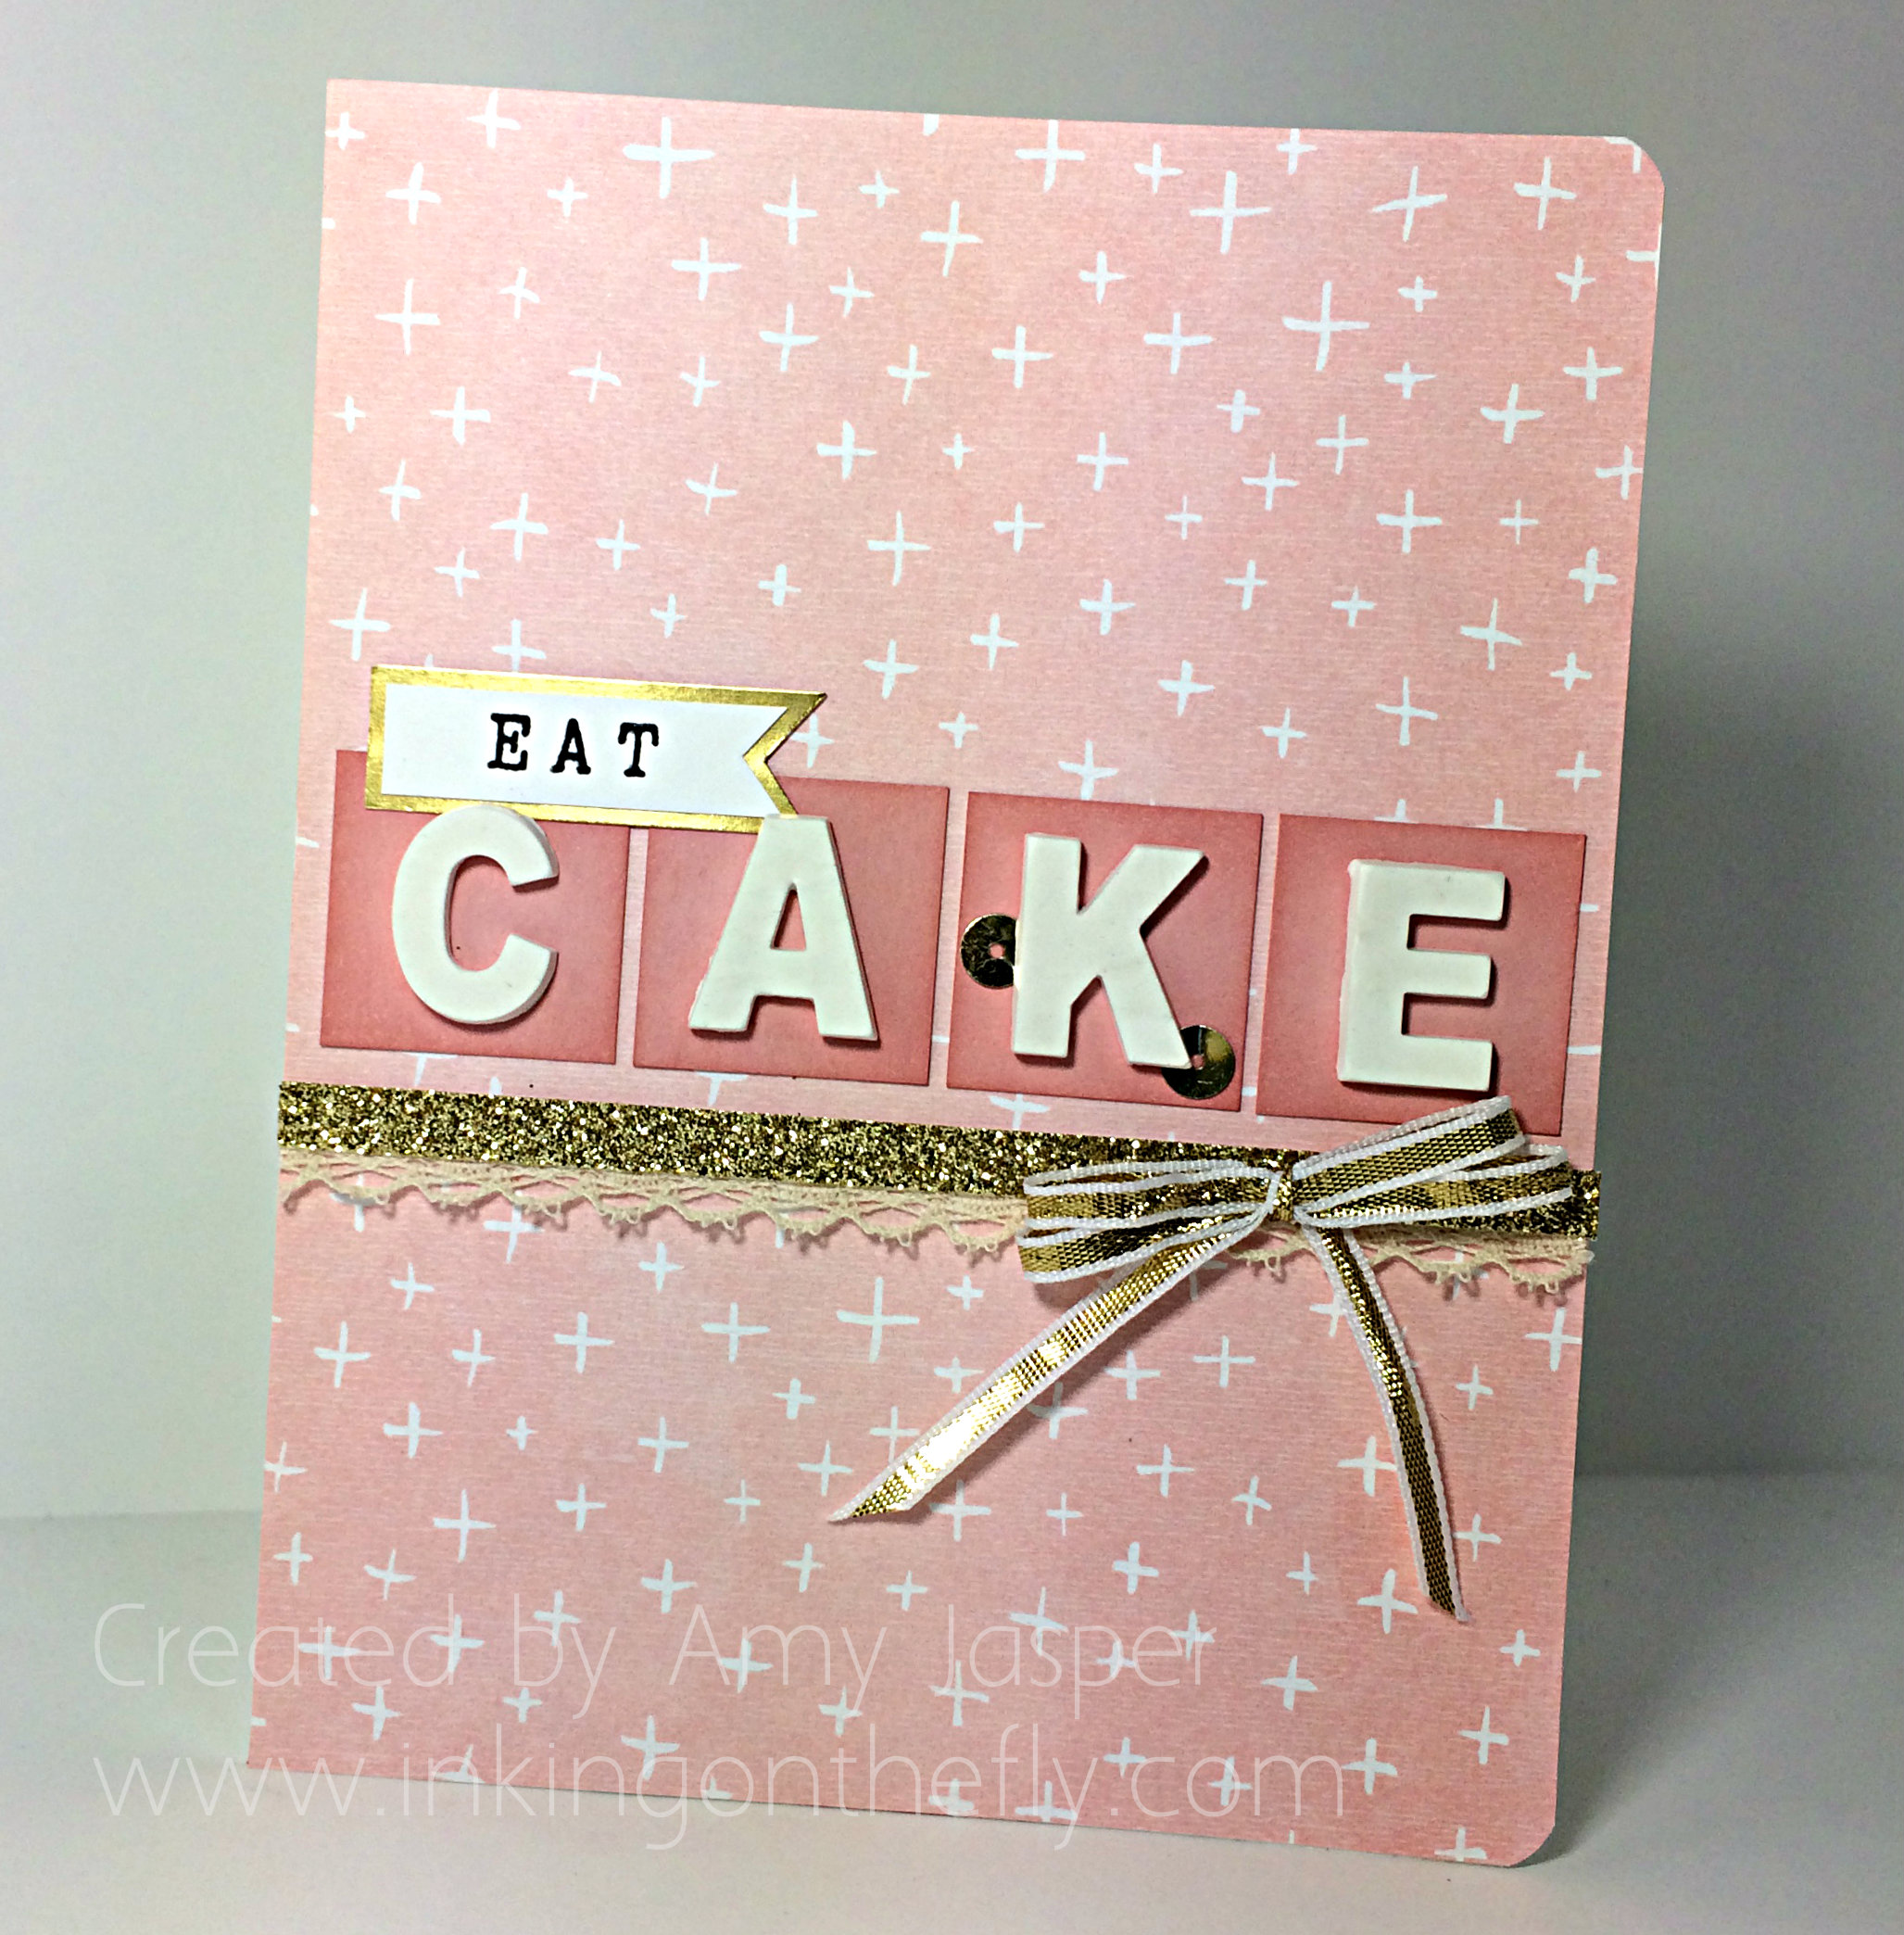
Techniques

Peekaboo Card

080header

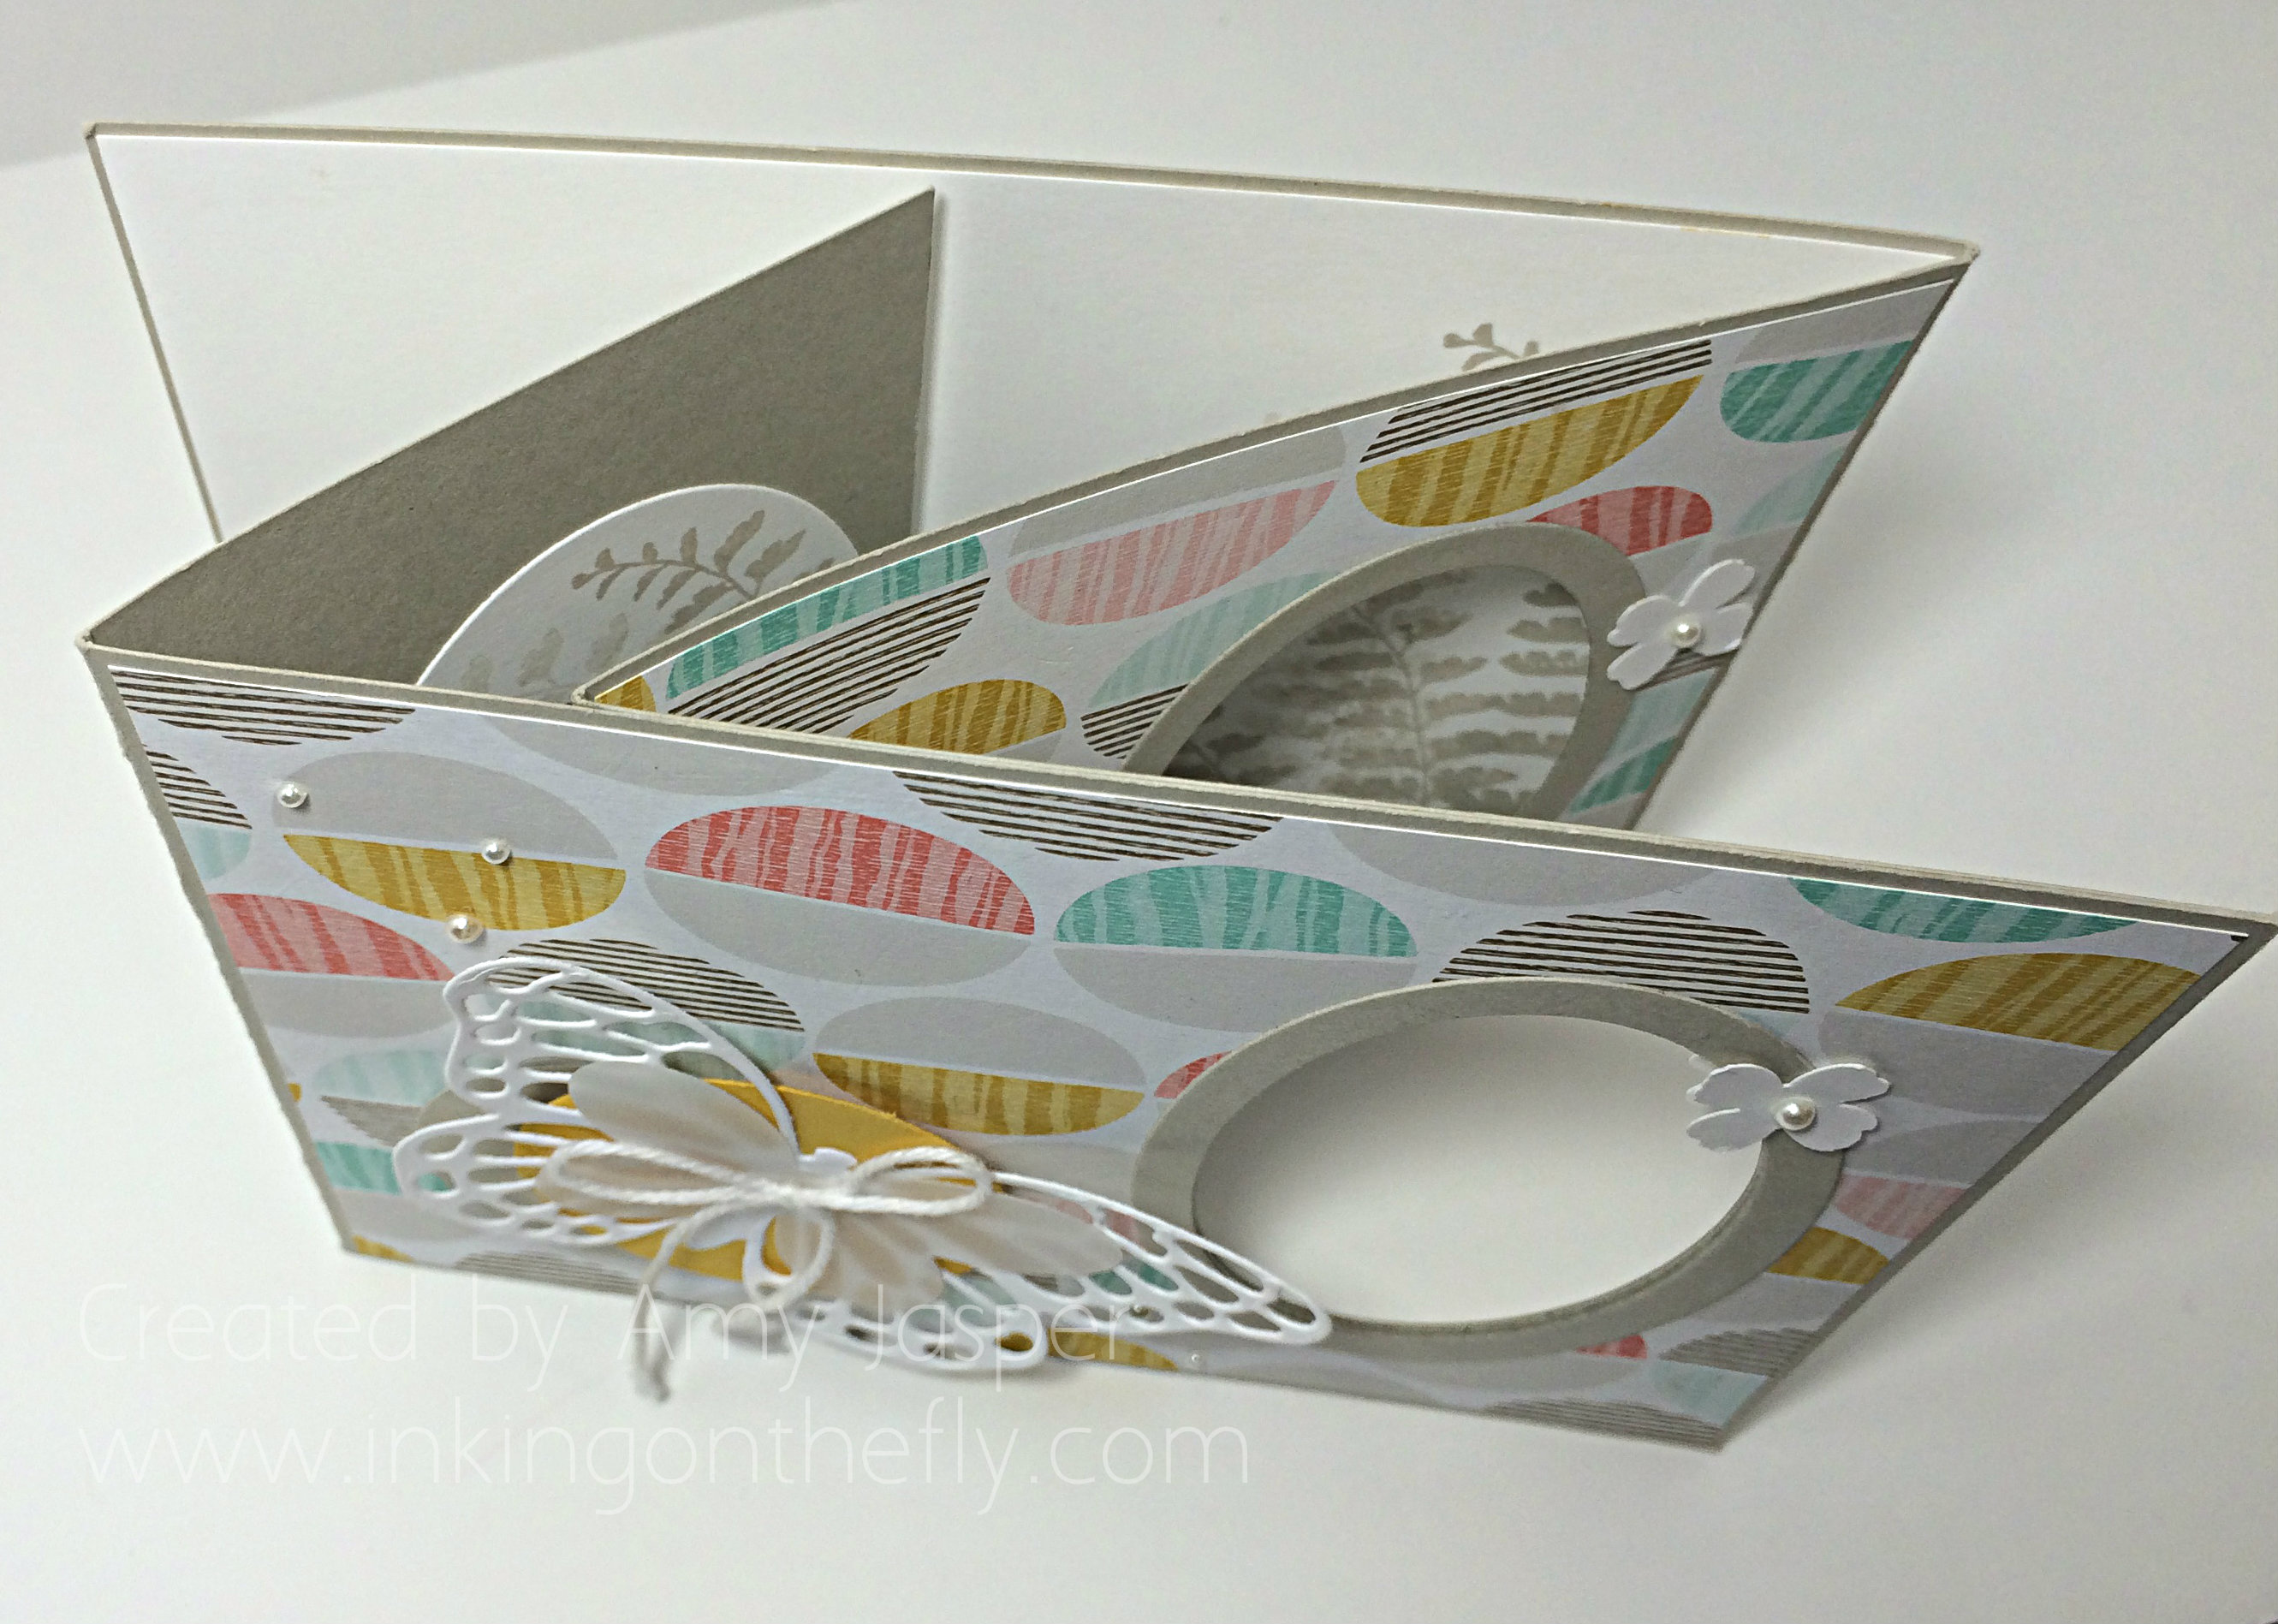
This fancy fold card is sure to surprise and wow it’s recipient! Not only is it cute, but the technique creates a fun interactive experience that you don’t normally get with paper greetings.

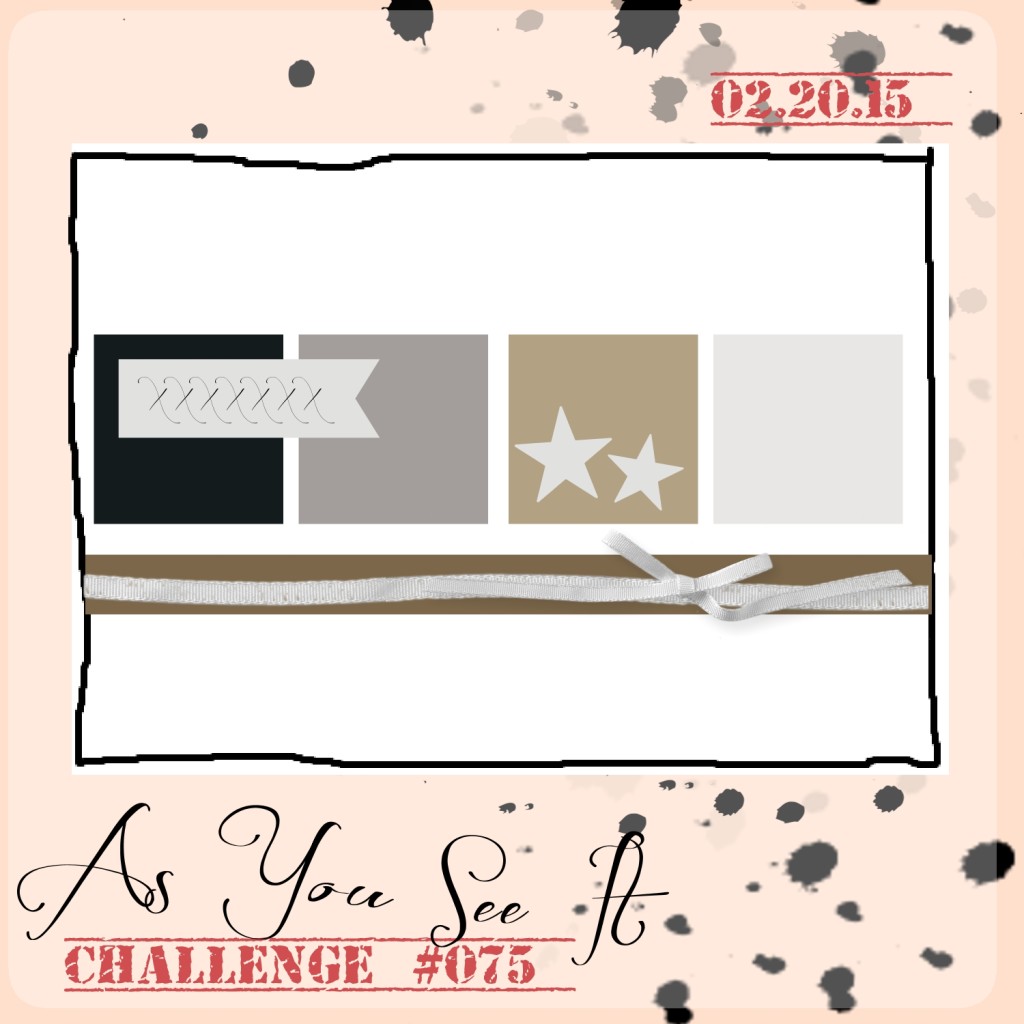
This blog post is inspired by As You See It Challenge #80: try a new technique.

AYSIChallenge080-1024x1024

Lucky for me, I needed to learn a new technique so I could show my monthly stampers group something they hadn’t seen before (they’ve seen A LOT!). As a designer for the AYSI blog, I have the privilege of receiving the challenges in advance, so my stampers group did this card with me a couple weeks ago (and with great success, I might add).

080Amy

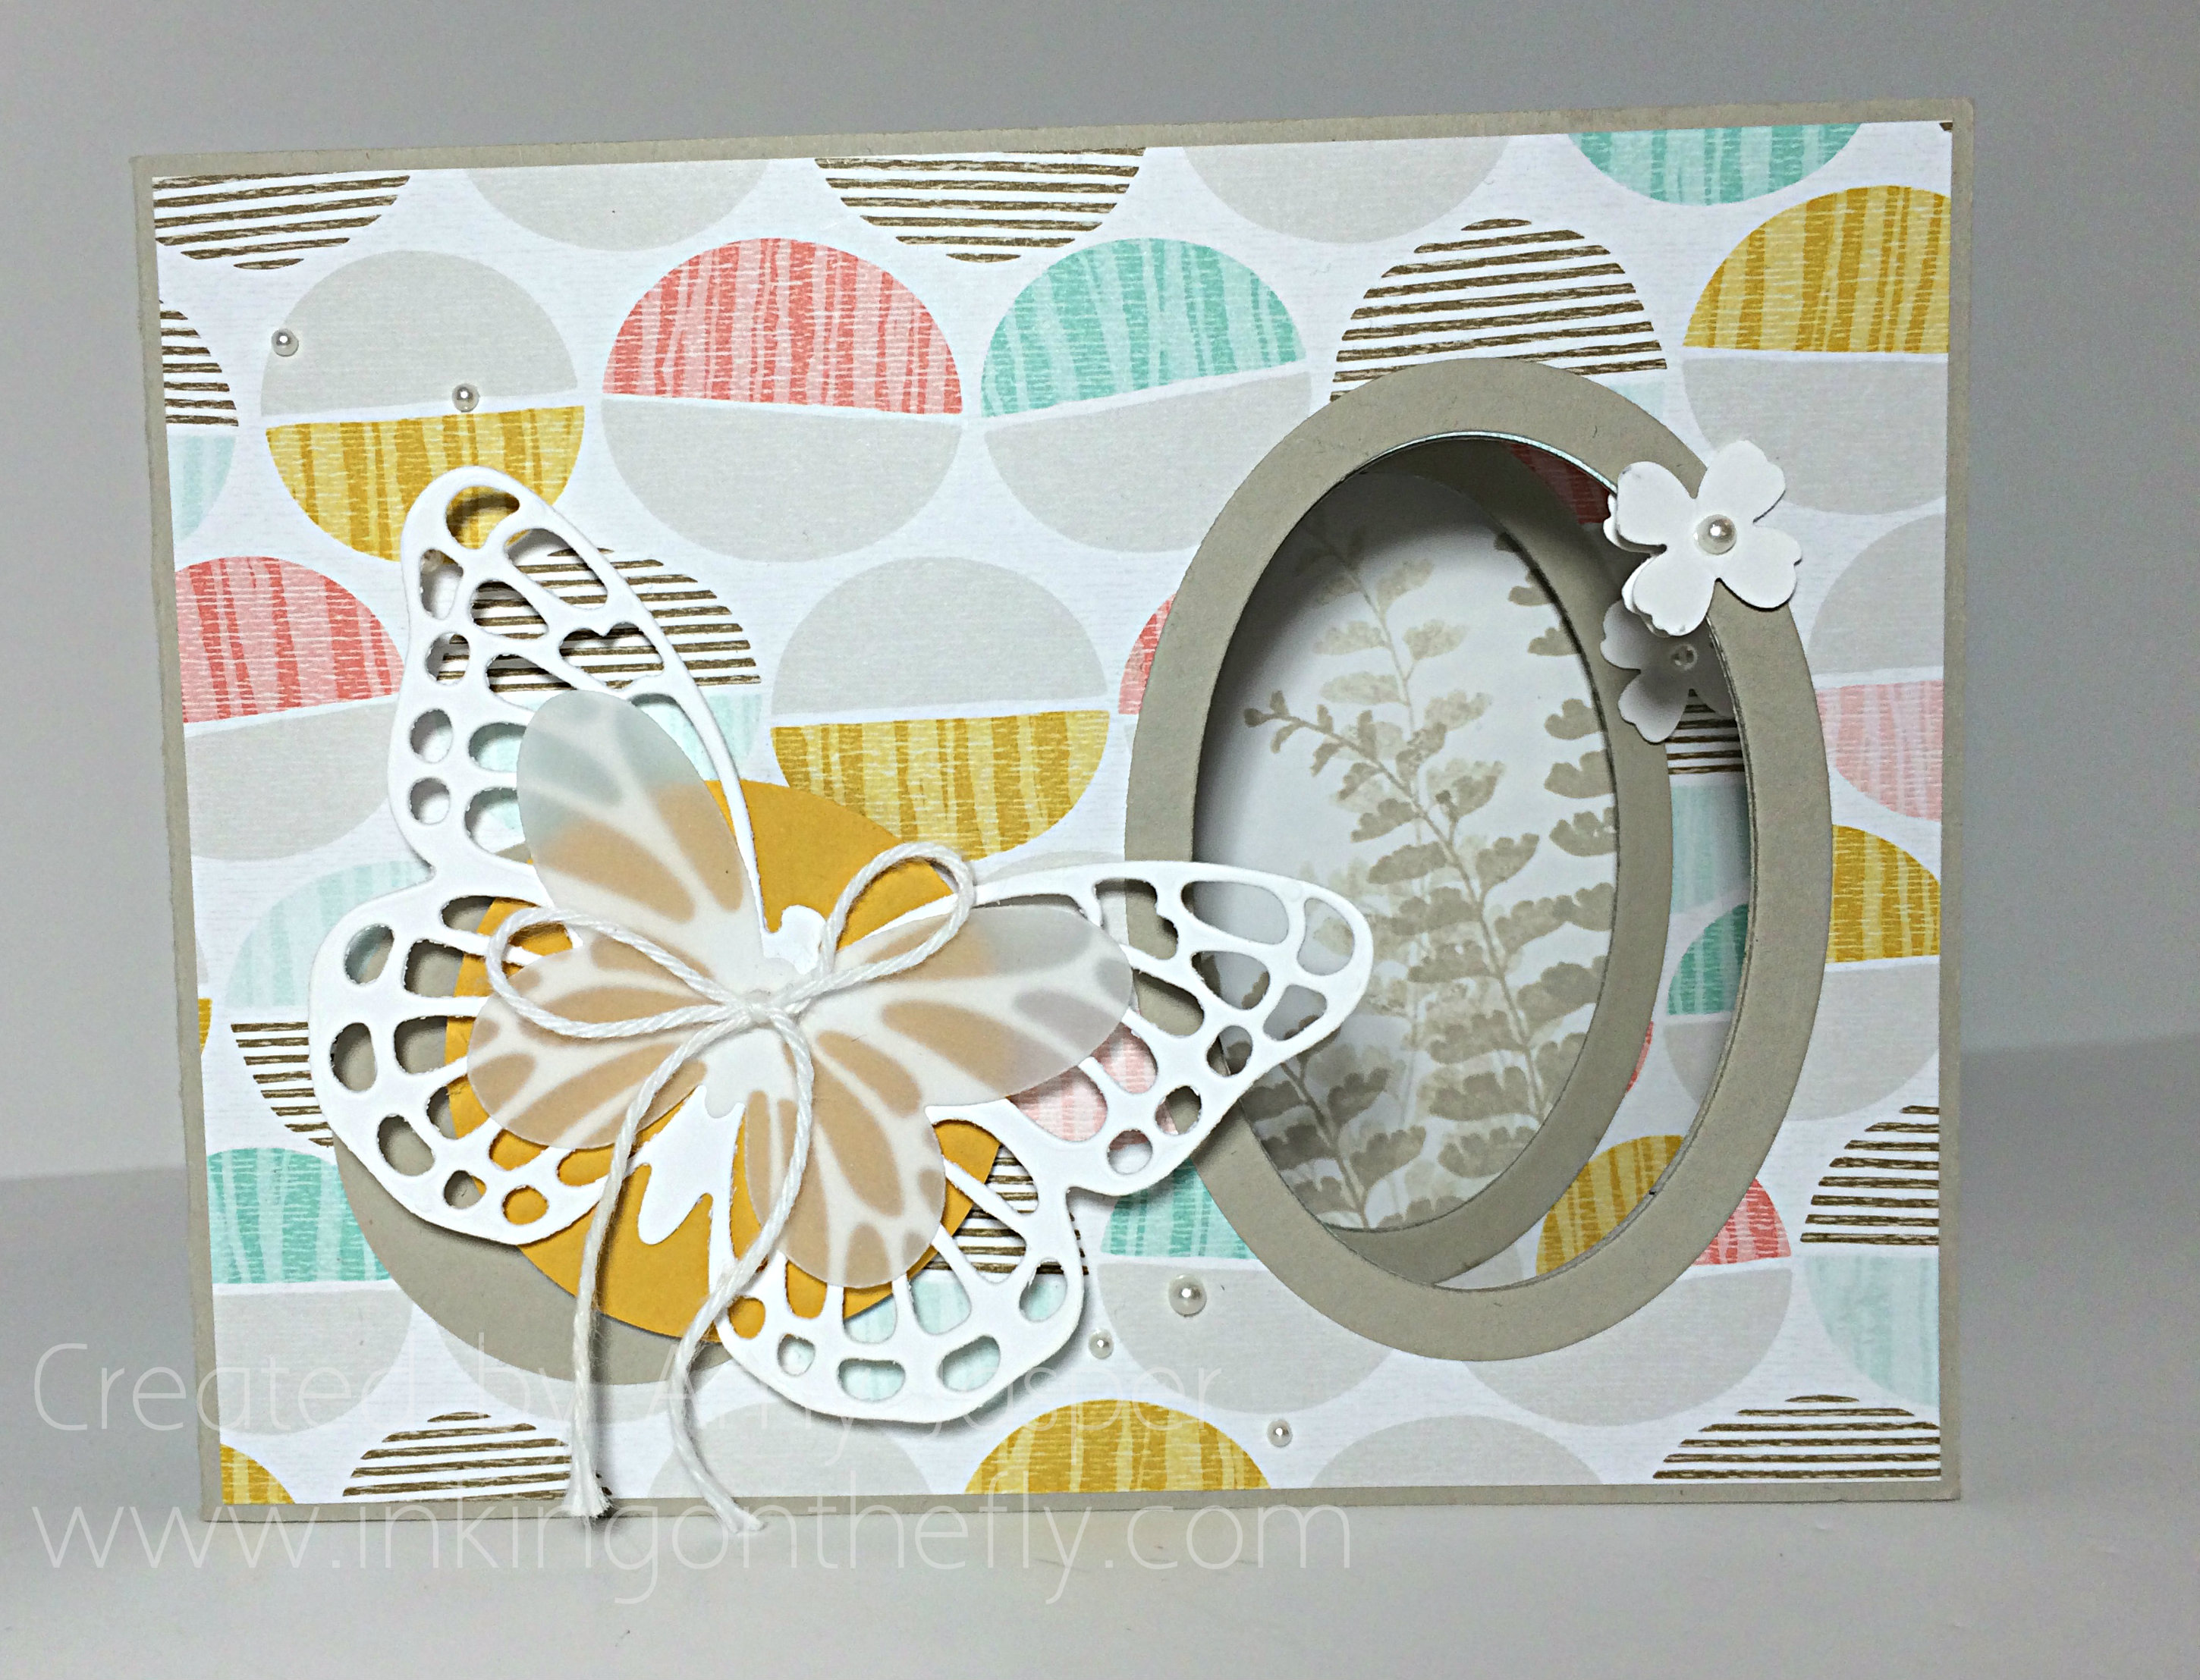
It doesn’t look so fancy just like that, but check out this video to see what happens when you open it!

I used this fabulous tutorial from Splitcoaststampers.com to create this card, but changed the dimensions a bit so that they would fit into Stampin’ Up! envelopes. The paper sizes I used were as follows:

Card base (mines in Sahara Sand):

  • 4 1/4″ x 8 1/2″
  • 4 1/4″ x 8 1/4″
  • 4 1/4″ x 5 3/4″

Patterned Paper layers (I used Best Year Ever Designer Paper):

  • 4″ x 4″ (you need two of these)
  • 4″ x 5 1/4″

I also added a space to write in the back of the card in Whisper White cardstock that is simply 4 1/8″ x 5 3/8″.

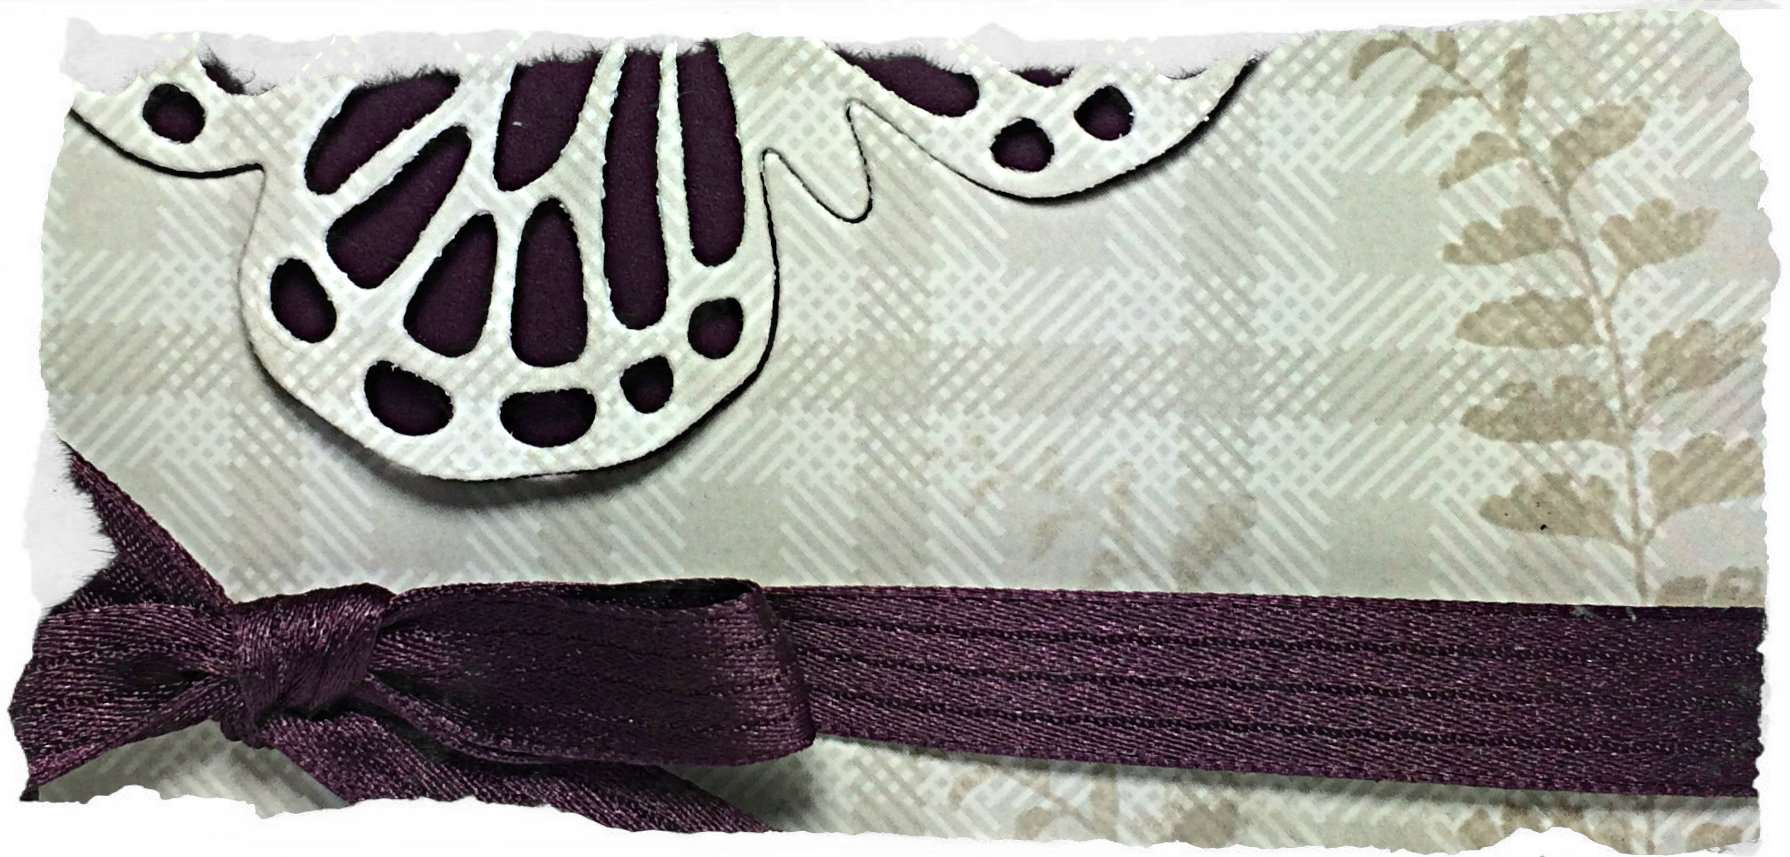
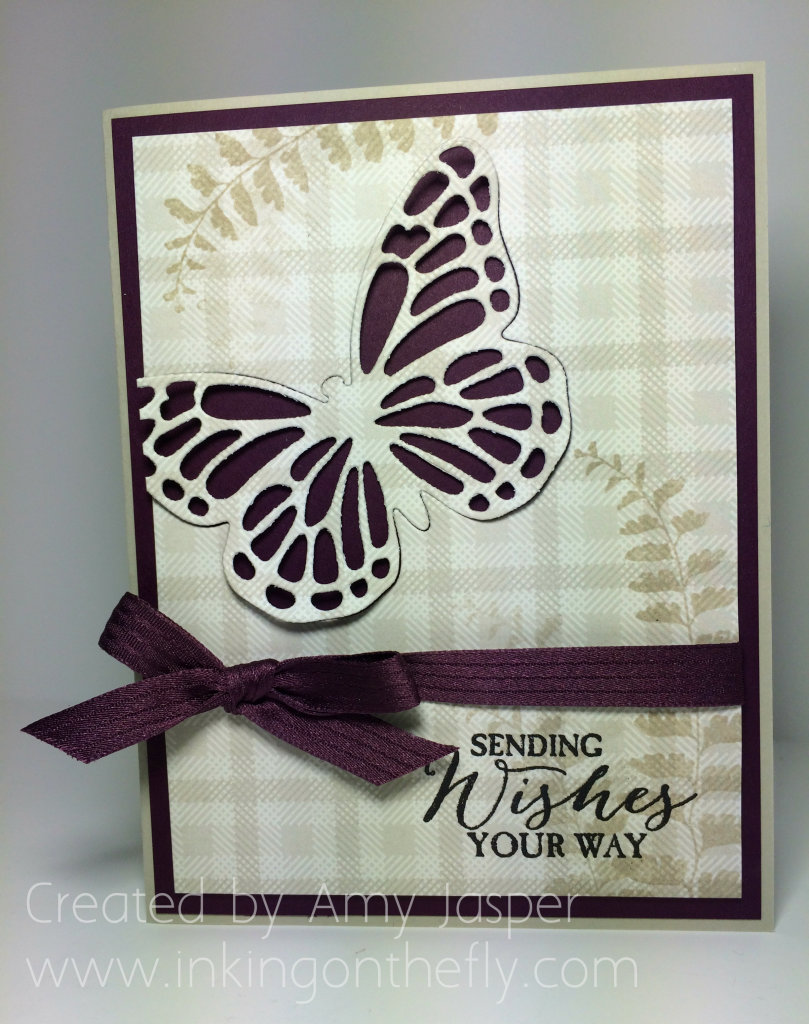
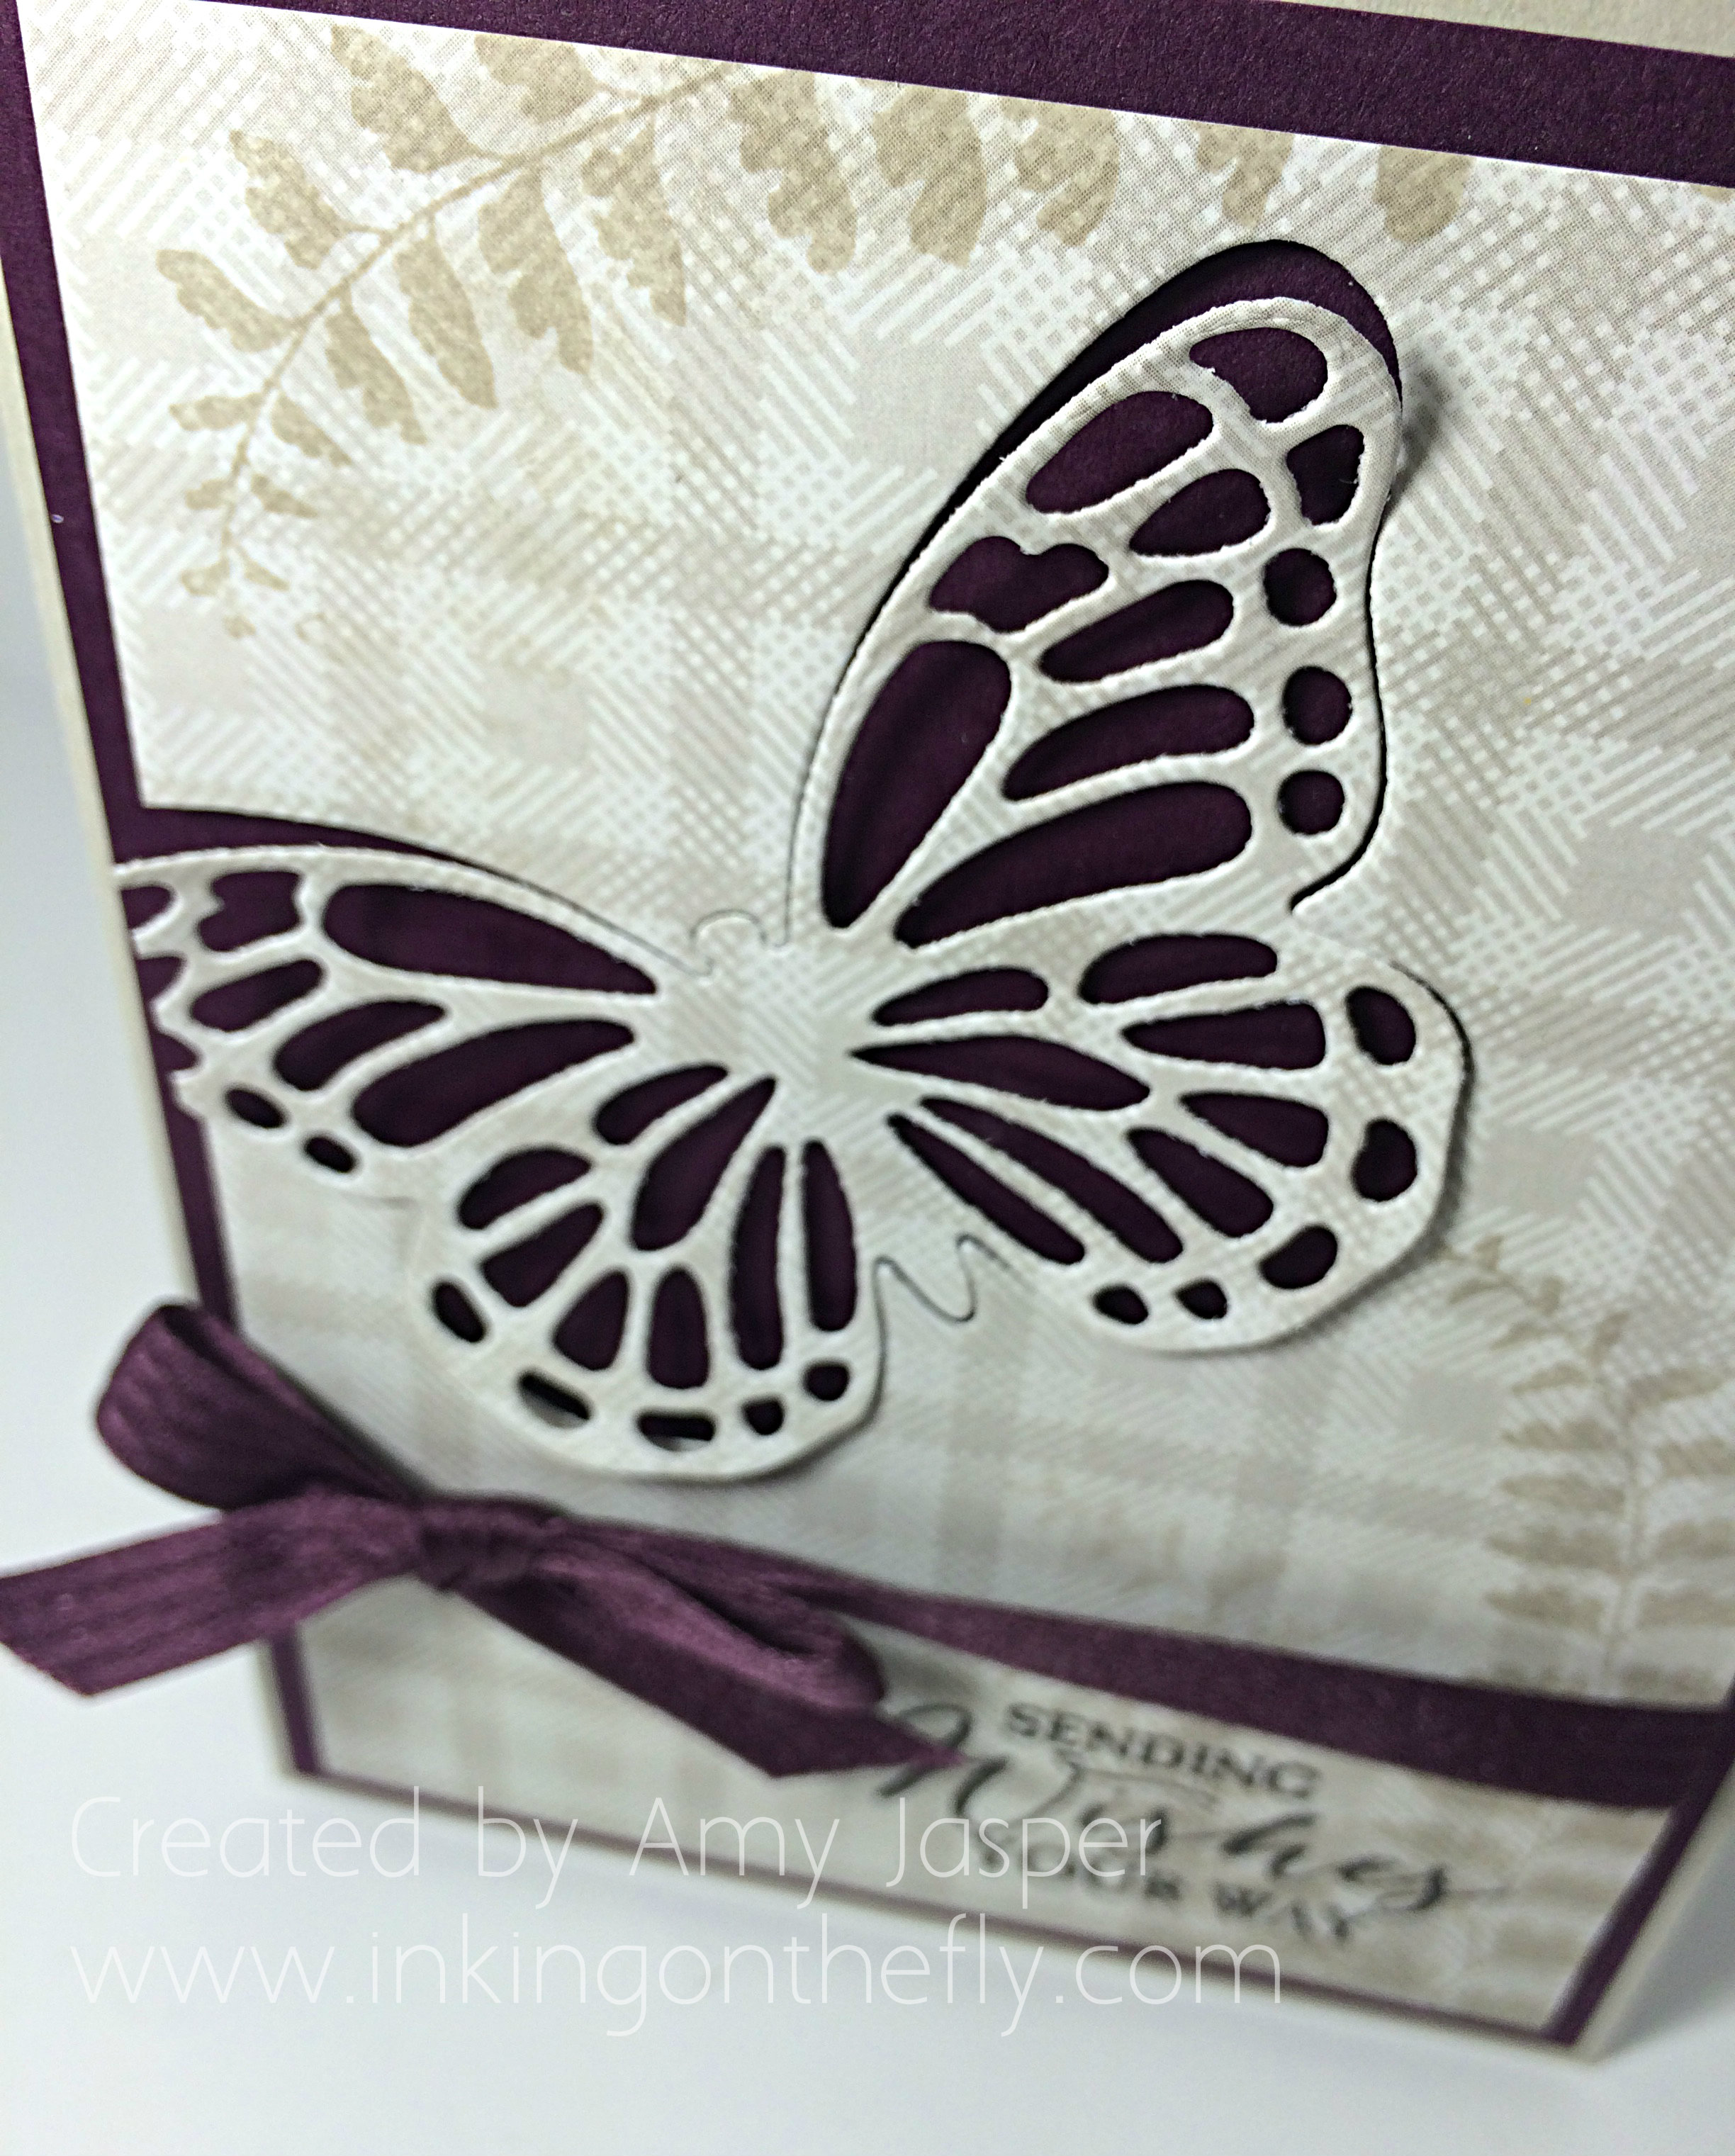
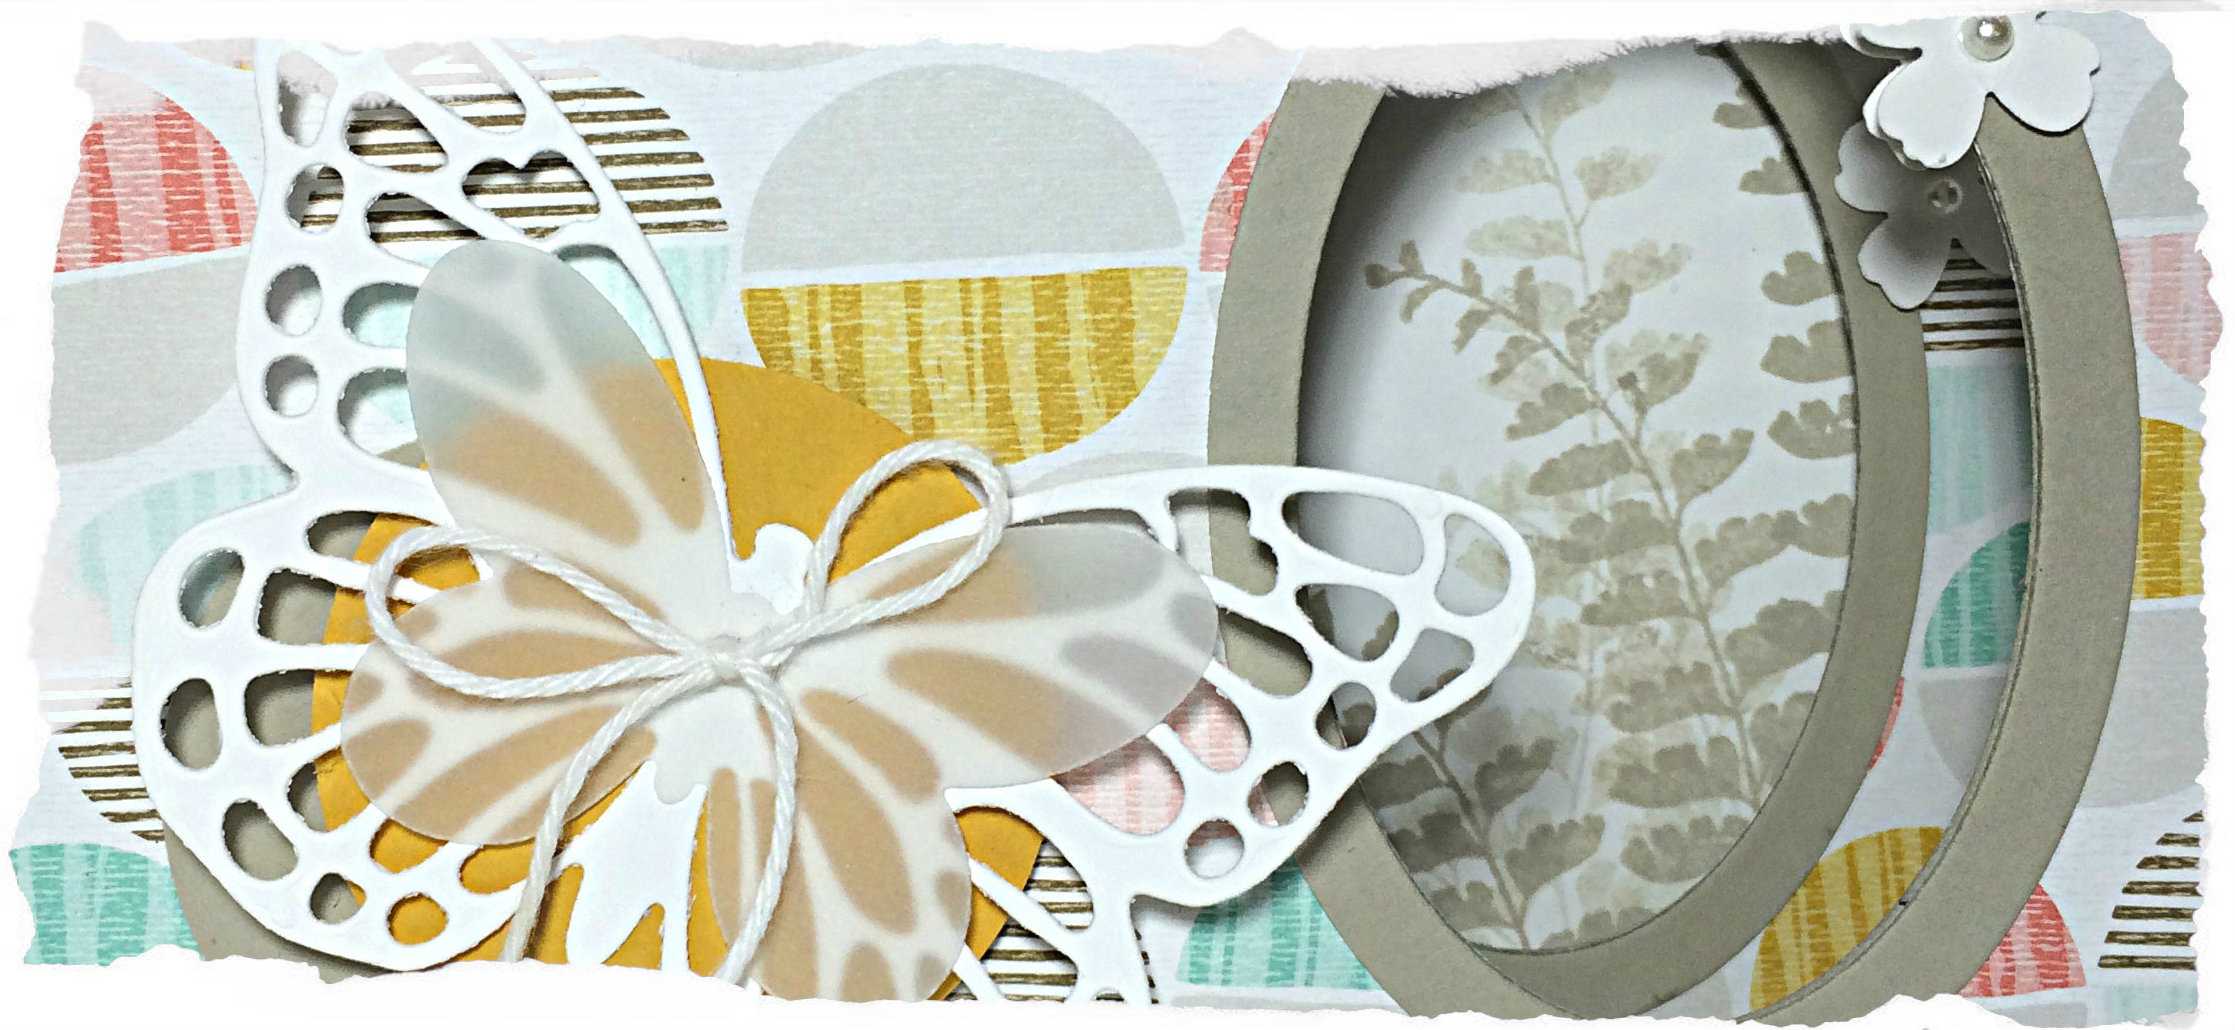
Other product used includes Butterfly Thinlits, Ovals Framelits, White Baker’s Twine, Basic Pearls, Butterfly Basics Stamp Set, 1 3/4″ circle punch, Sahara Sand cardstock, Crushed Curry cardstock, flower punch from the Itty Bitty Accents punch pack, White Vellum, and, of course, Tombow Multipurpose Liquid Glue, Stampin’ Up Dimensionals and Glue Dots.

080topview

You can see how the card looks from the top side with all of its layers. This is a card that you might want to give to someone in person so you can show them how it works. Otherwise, they might find it very strange and confusing, lol!

Amy

Butterfly Bliss

077header

Oh, speed challenges, how I love thee. Let me count the ways: I love you because you are quick; I love you that you push me; I love you that you’re quick; I love that I have time for you; I love that you are simple; I love that you are quick!!

My card today was designed for the As You See It Challenge Blog. The challenge is to create a card from start to finish in 10 minutes or less!! Can you do it? I’m usually just under the wire and find it very challenging. My design style is very … involved. Making a quick card is NOT my usual style at all! But I love that these challenges stretch me and force me to do something simpler. Sometimes I’m very unhappy with my final results, but today, I quite like how it turned out.

Here’s the speed challenge theme:

AYSIChallenge077-1024x1024

I decided to try working with a cute technique I saw using the Butterflies Thinlits. The card I saw was simple white cardstock, that had the butterfly cut out of it, then put back in place so that a colourful patterned paper showed through the detailing of the wings. I thought I would turn it inside out just a little bit and have the patterned paper on the topmost layer, with the solid colour showing through. Of course, if I HAVE to use purple (not my favourite for cards), I choose to use the gorgeous, rich, Blackberry Bliss!

#inkingonthefly

9:47

Blackberry Bliss is very striking along side the soft neutral tone of Sahara Sand, so I chose one of the patterned papers from the Adventure Bound Designer Series Paper Stack that has a nice tone-on-tone plaid pattern. This I stamped with the leaf image in Sahara Sand, then thoroughly rubbed my Embossing Buddy over the paper before stamping the sentiment in Versamark ink and heating the applied Black Embossing Powder with my Heat Tool.

Once all the stamping was taken care of, I grabbed my butterfly die and headed on over to my Big Shot to cut it out from the stamped patterned paper. The Blackberry Bliss Satin Ribbon is wrapped around this paper and tied in a bow, then applied to the Blackberry Bliss cardstock layer with many Stampin’ Dimensionals (thin paper that has been heated for embossing, tends to get a bit curvy and needs support). Next, half of a Stampin’ Dimensional was used to attach the cut out butterfly back into its place in the patterned paper. And, finally, all that is attached to the Sahara Sand card base.

077butterfly

Love it, love it, love it. Simple, pretty, elegant, and QUICK!! I could easily whip up a bunch of these in different colour combinations and package them up to give away as a gift. Hmm. Maybe I’ll do just that!

I hope you’ll give the speed challenge a try and share your finished result on the As You See It Challenge Blog. I’d love to see what you do with purple!

Amy

Designer-Badge

Simply Pressed “Cake”

075header

Stampin’ Up Simply Pressed Clay is something I loved the idea of, but up until now had little interest in using the flower or button molds that were available. I finally tried my clay when my new Stampin’ Up, oh-so-fun, Alphanumerical mold arrived!

I love words – the shapes, the meaning, the linear order of them. They are powerful and beautiful and can be smart, witty, sarcastic, sweet, painful and wise. Words give us so many possibilities.  Though, I am often tongue-tied by the deeper introvert within me and may not be as eloquent as I would like to be in my writing style, I love that words have the power to evoke emotion, philosophical thinking, a search for meaning, and can open up all sorts of doors in our lives.

(literally – i.e. “open sesame” in the tale of Ali Baba and the 40 Thieves, as well as “Speak, friend, and enter” from The Lord of the Rings. lol!)

Check out the sketch for this week’s As You See it Challenge #075:

075

Here’s my Simply Pressed Clay card design:

075Amy

I started with a Whisper White cardstock base. It was one that I had accidentally smudged with ink, so I cut a 4.25″ x 5.5″ piece of the Sale-a-bration paper called Best Year Ever and adhered it to cover the entire front of the card base. I felt so clever, covering up that smudge, lol!

I changed the orientation of my card from landscape to portrait and rounded the corners with the Project Life Corner Rounder Punch. I used Blushing Bride cardstock for the squares and I lightly sponged the edges of those squares with Blushing Bride ink. The EAT banner at the top is stamped using my new Alphabet Rotary stamp (more words! So fun!) with Momento Tuxedo Black ink on Whisper White cardstock, matted with Gold Foil paper. I hand-cut the flag end of the banner.

The Simply Pressed Clay was carefully pressed into the letters in the mold, then I place it in the freezer for a few minutes to allow the letters to set before removing them from the mold so they could continue to dry. The first time I used the mold, I dabbed the Embossing Buddy over the mold so it could act like flour in a cake pan and prevent the clay from sticking. This was not such a good idea as it discoloured my white clay with stained gray powder. (I’ll used those letters when I want to take the time to colour them). Once the letters were completely dry, I used Tombo Multipurpose Liquid Glue to attach them to my card front. Then I tucked in my Gold Sequins under the letter “K” in accordance with the stars on the sketch.

For the gold strip, I cut a thin piece of Gold Glimmer paper and adhered the Venetian Crochet Trim to the back with Tombo liquid glue, the attached both together to my cardfront with more glue. Finally, I tied the double bow, using the Fingertip Double Loop bow technique as seen in this Youtube video, and applied it to the Glimmer paper with a Glue Dot.

A fun and pretty word card, playfully commanding that you “eat cake” on your special day!

On a personal note, my family likes chocolate cake with chocolate frosting. We went cross-country skiing last Saturday (as we often do) and found that the warm weather had melted all the snow in the parking lot, leaving us to maneuver through a muddy mess.

The kids commented that it looked like chocolate frosting! lol!

chocolate frosting parking lot

Thanks for visiting today! Hope you’ll play along at the As You See It Challenge Blog and share your take on this sketch!

Amy.Designer-Badge