Video: Stamping on Linen Paper is Easy

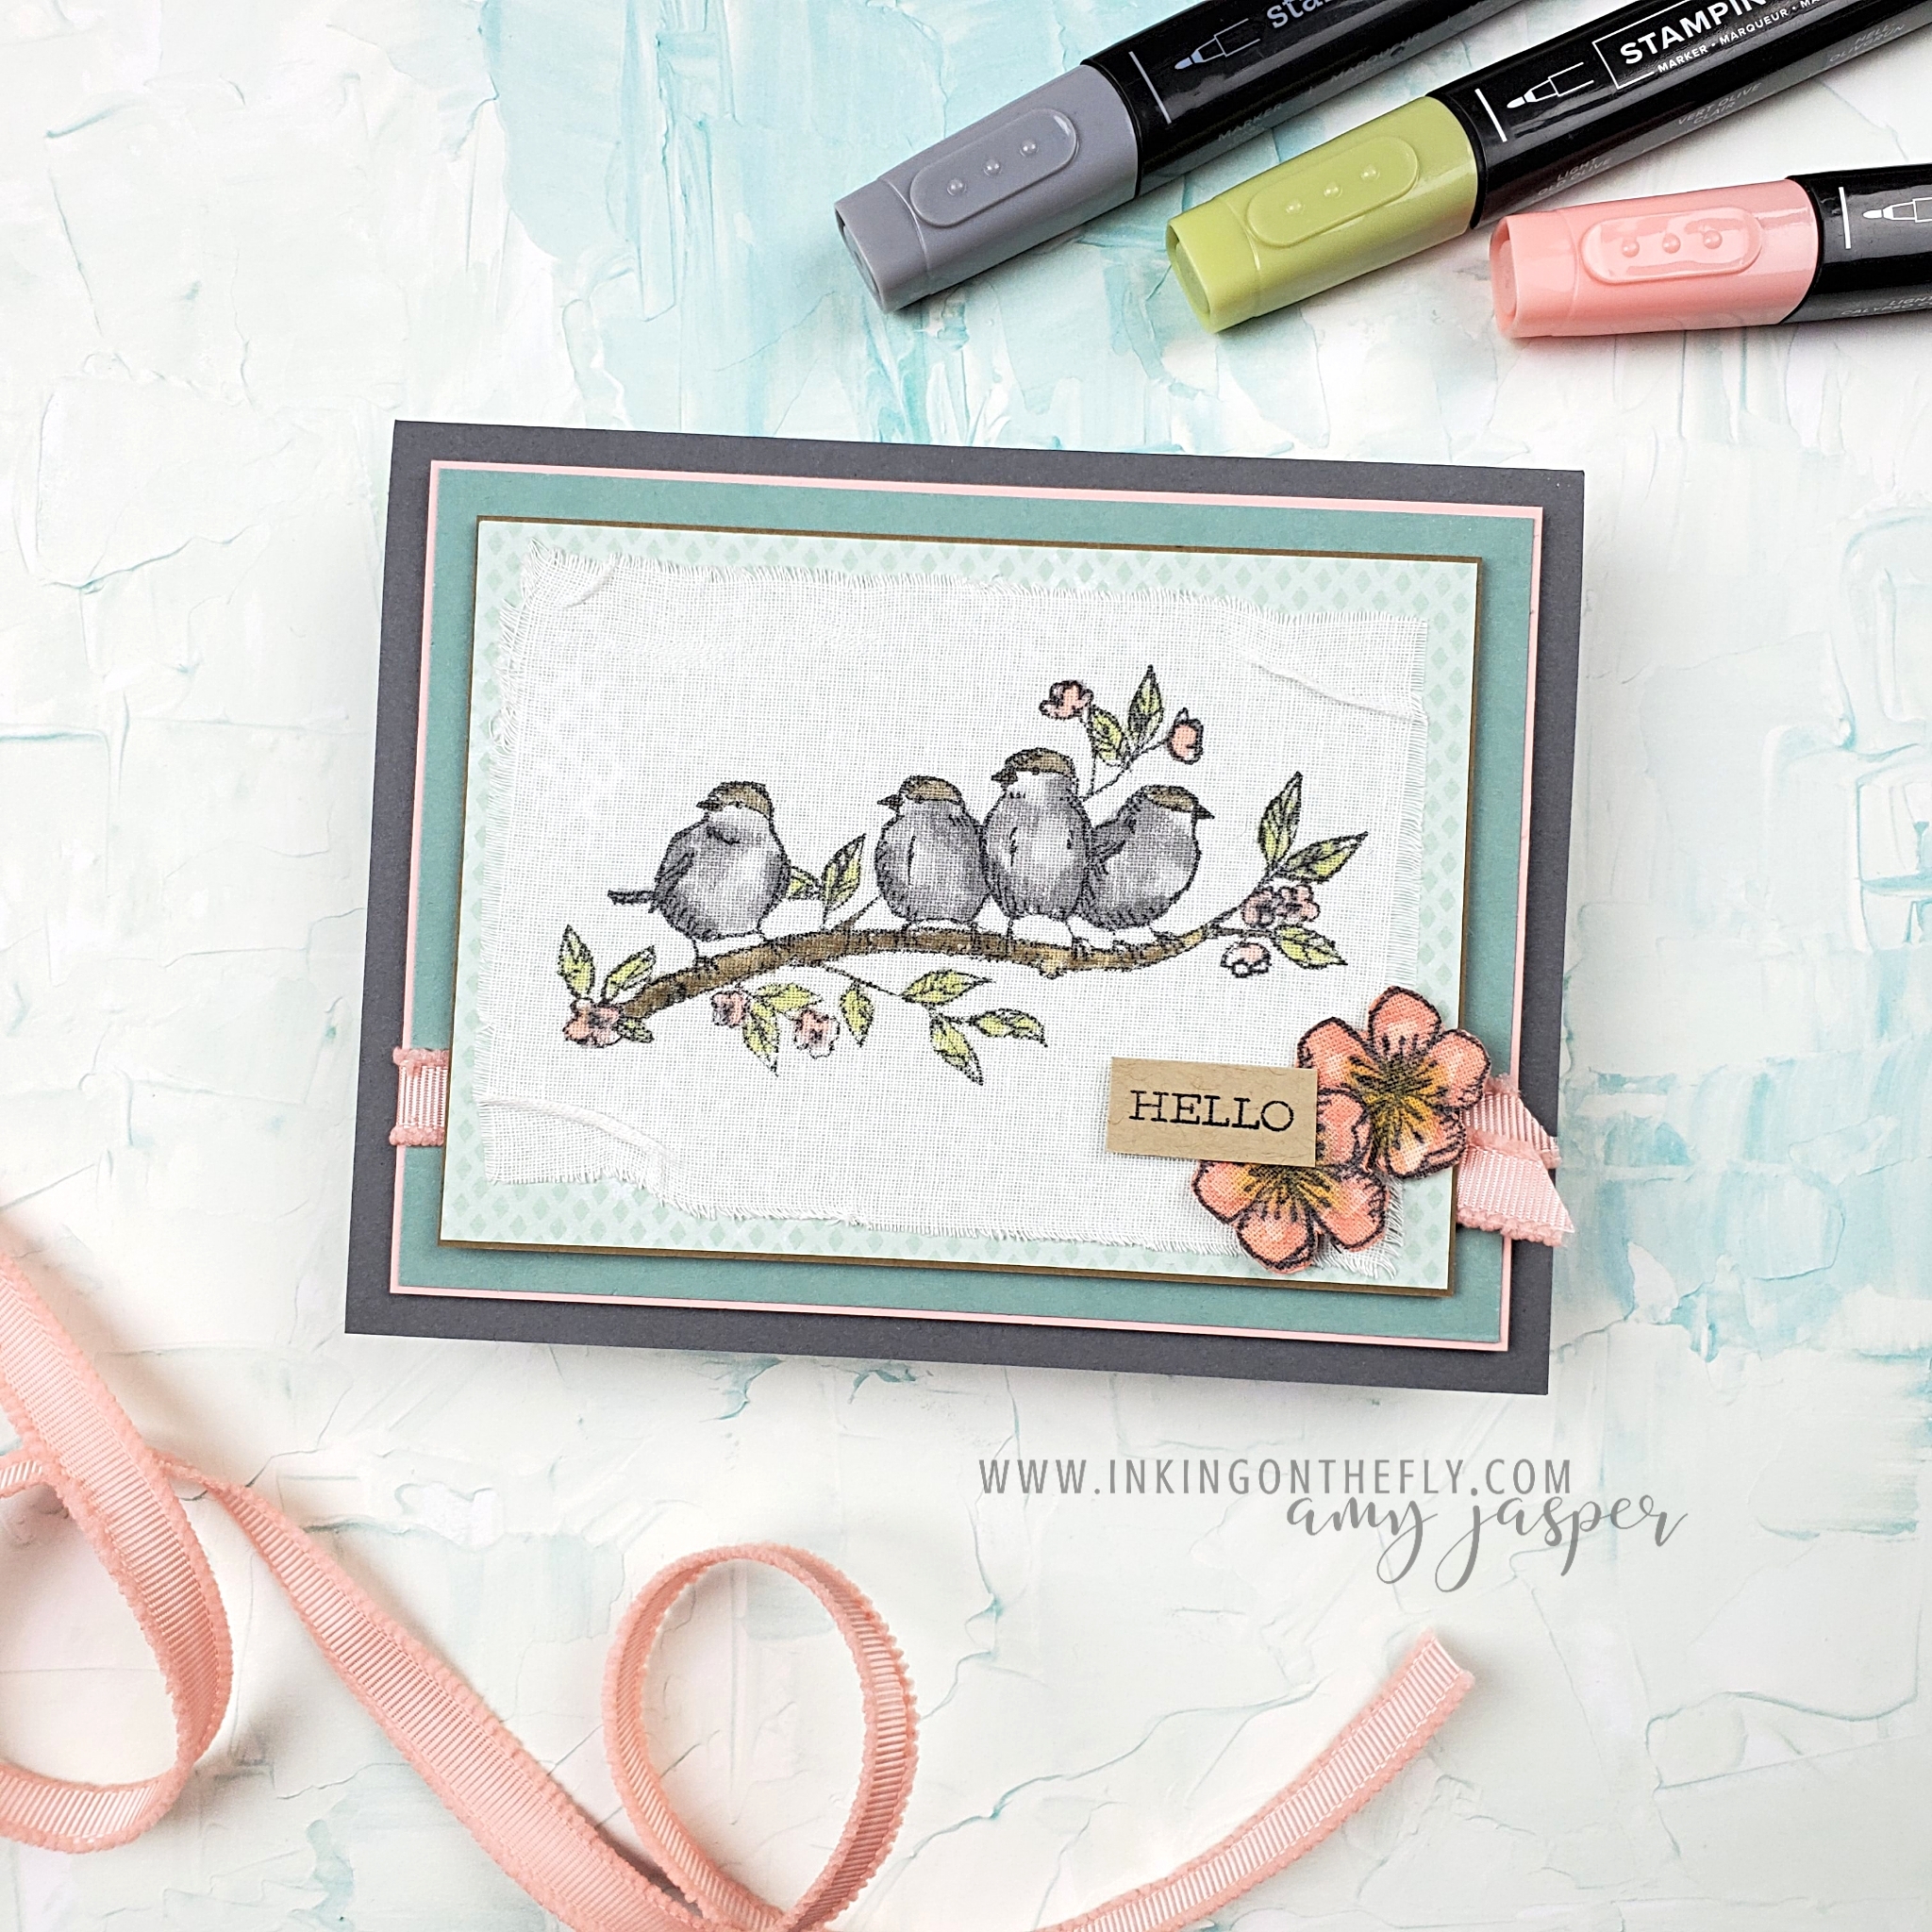
I can’t believe that I haven’t used the Linen Paper from Stampin’ Up!®️ until now! It was so much easier than I expected to use this adhesive-backed fabric. It’s fantastic!

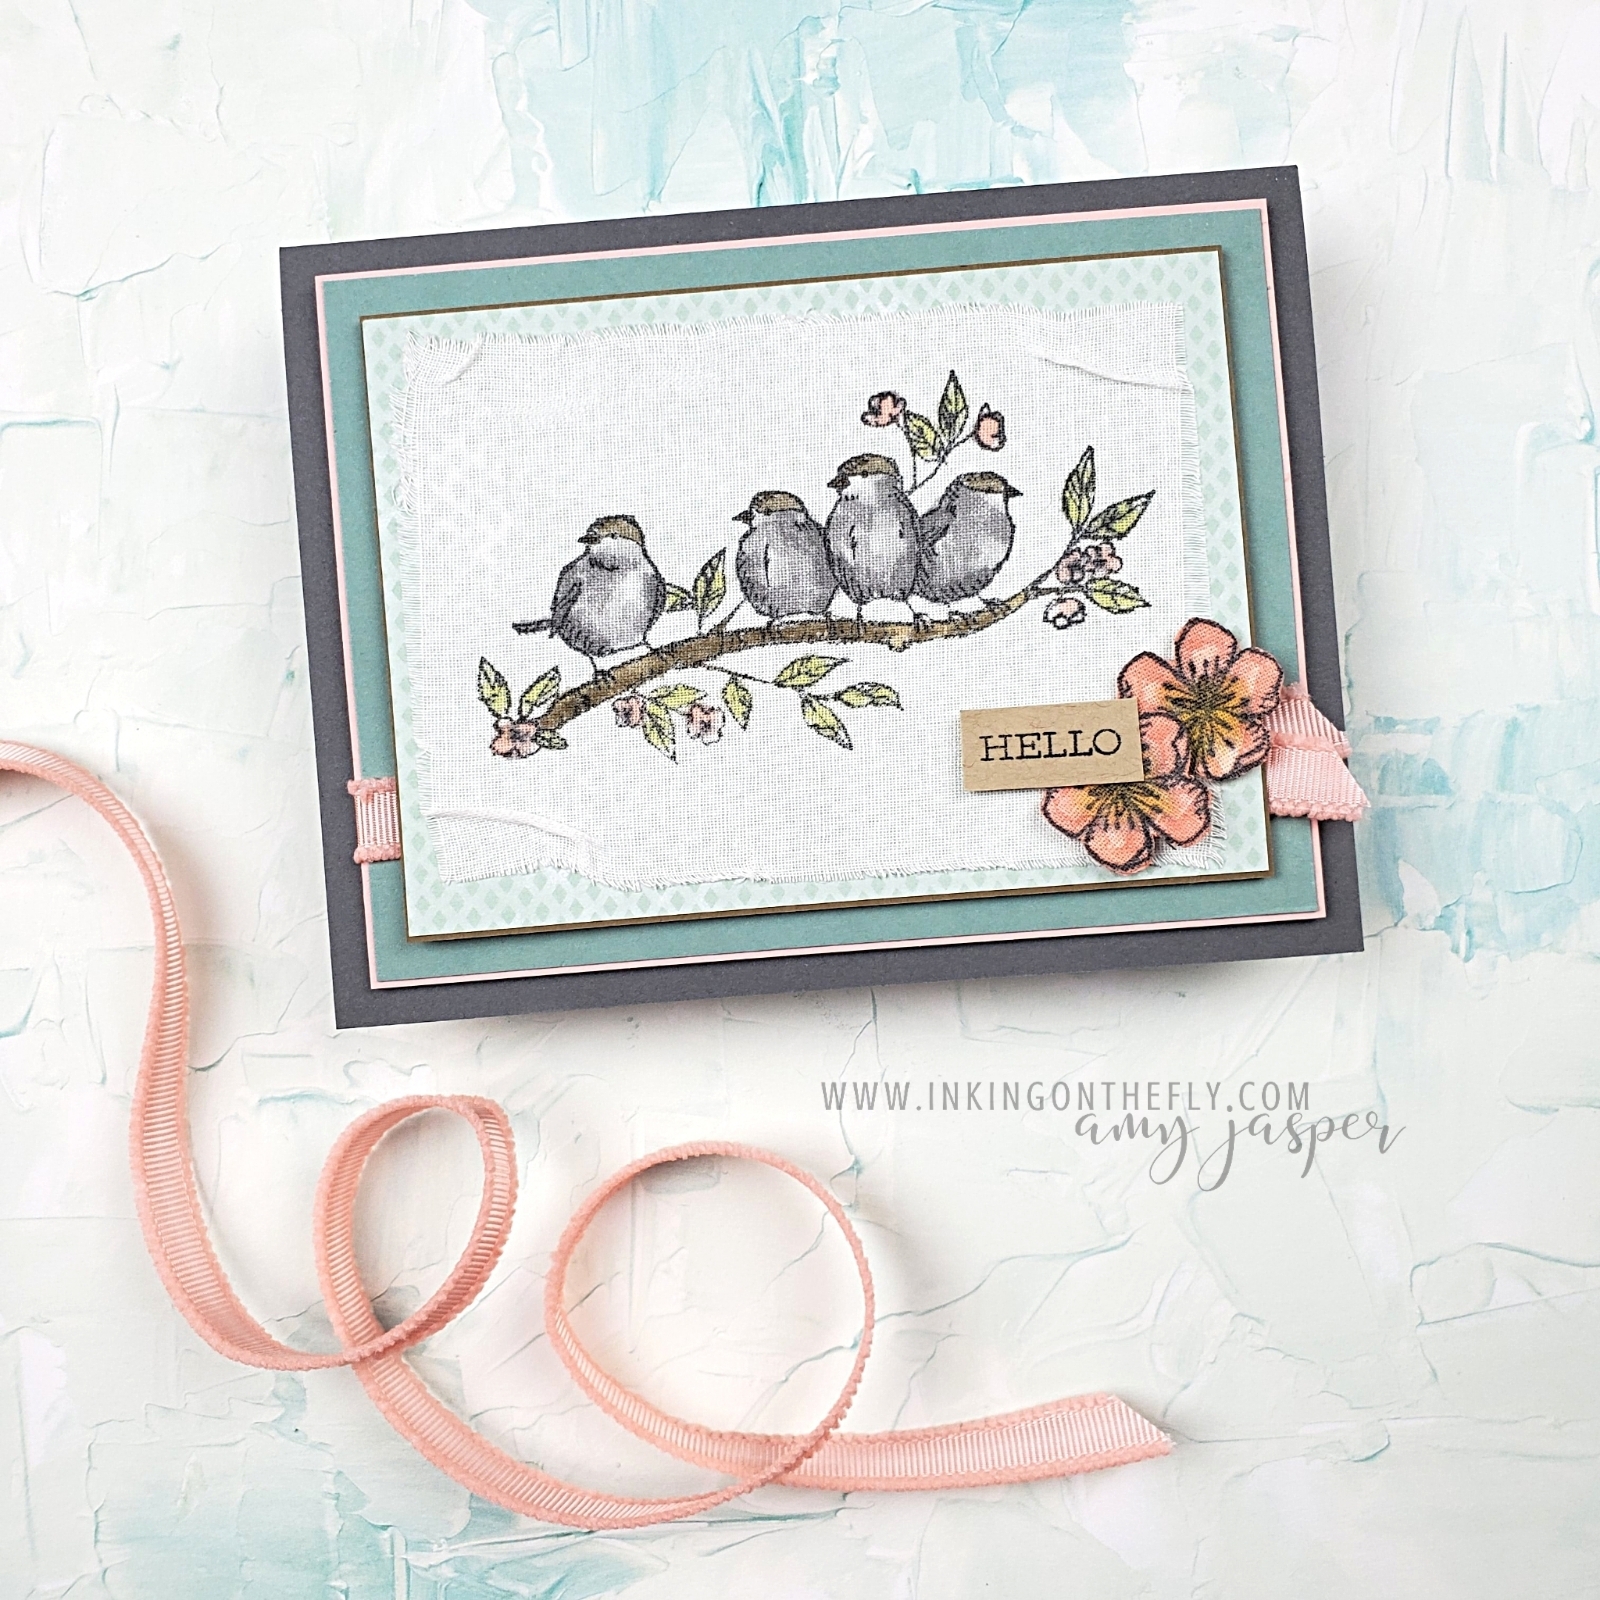
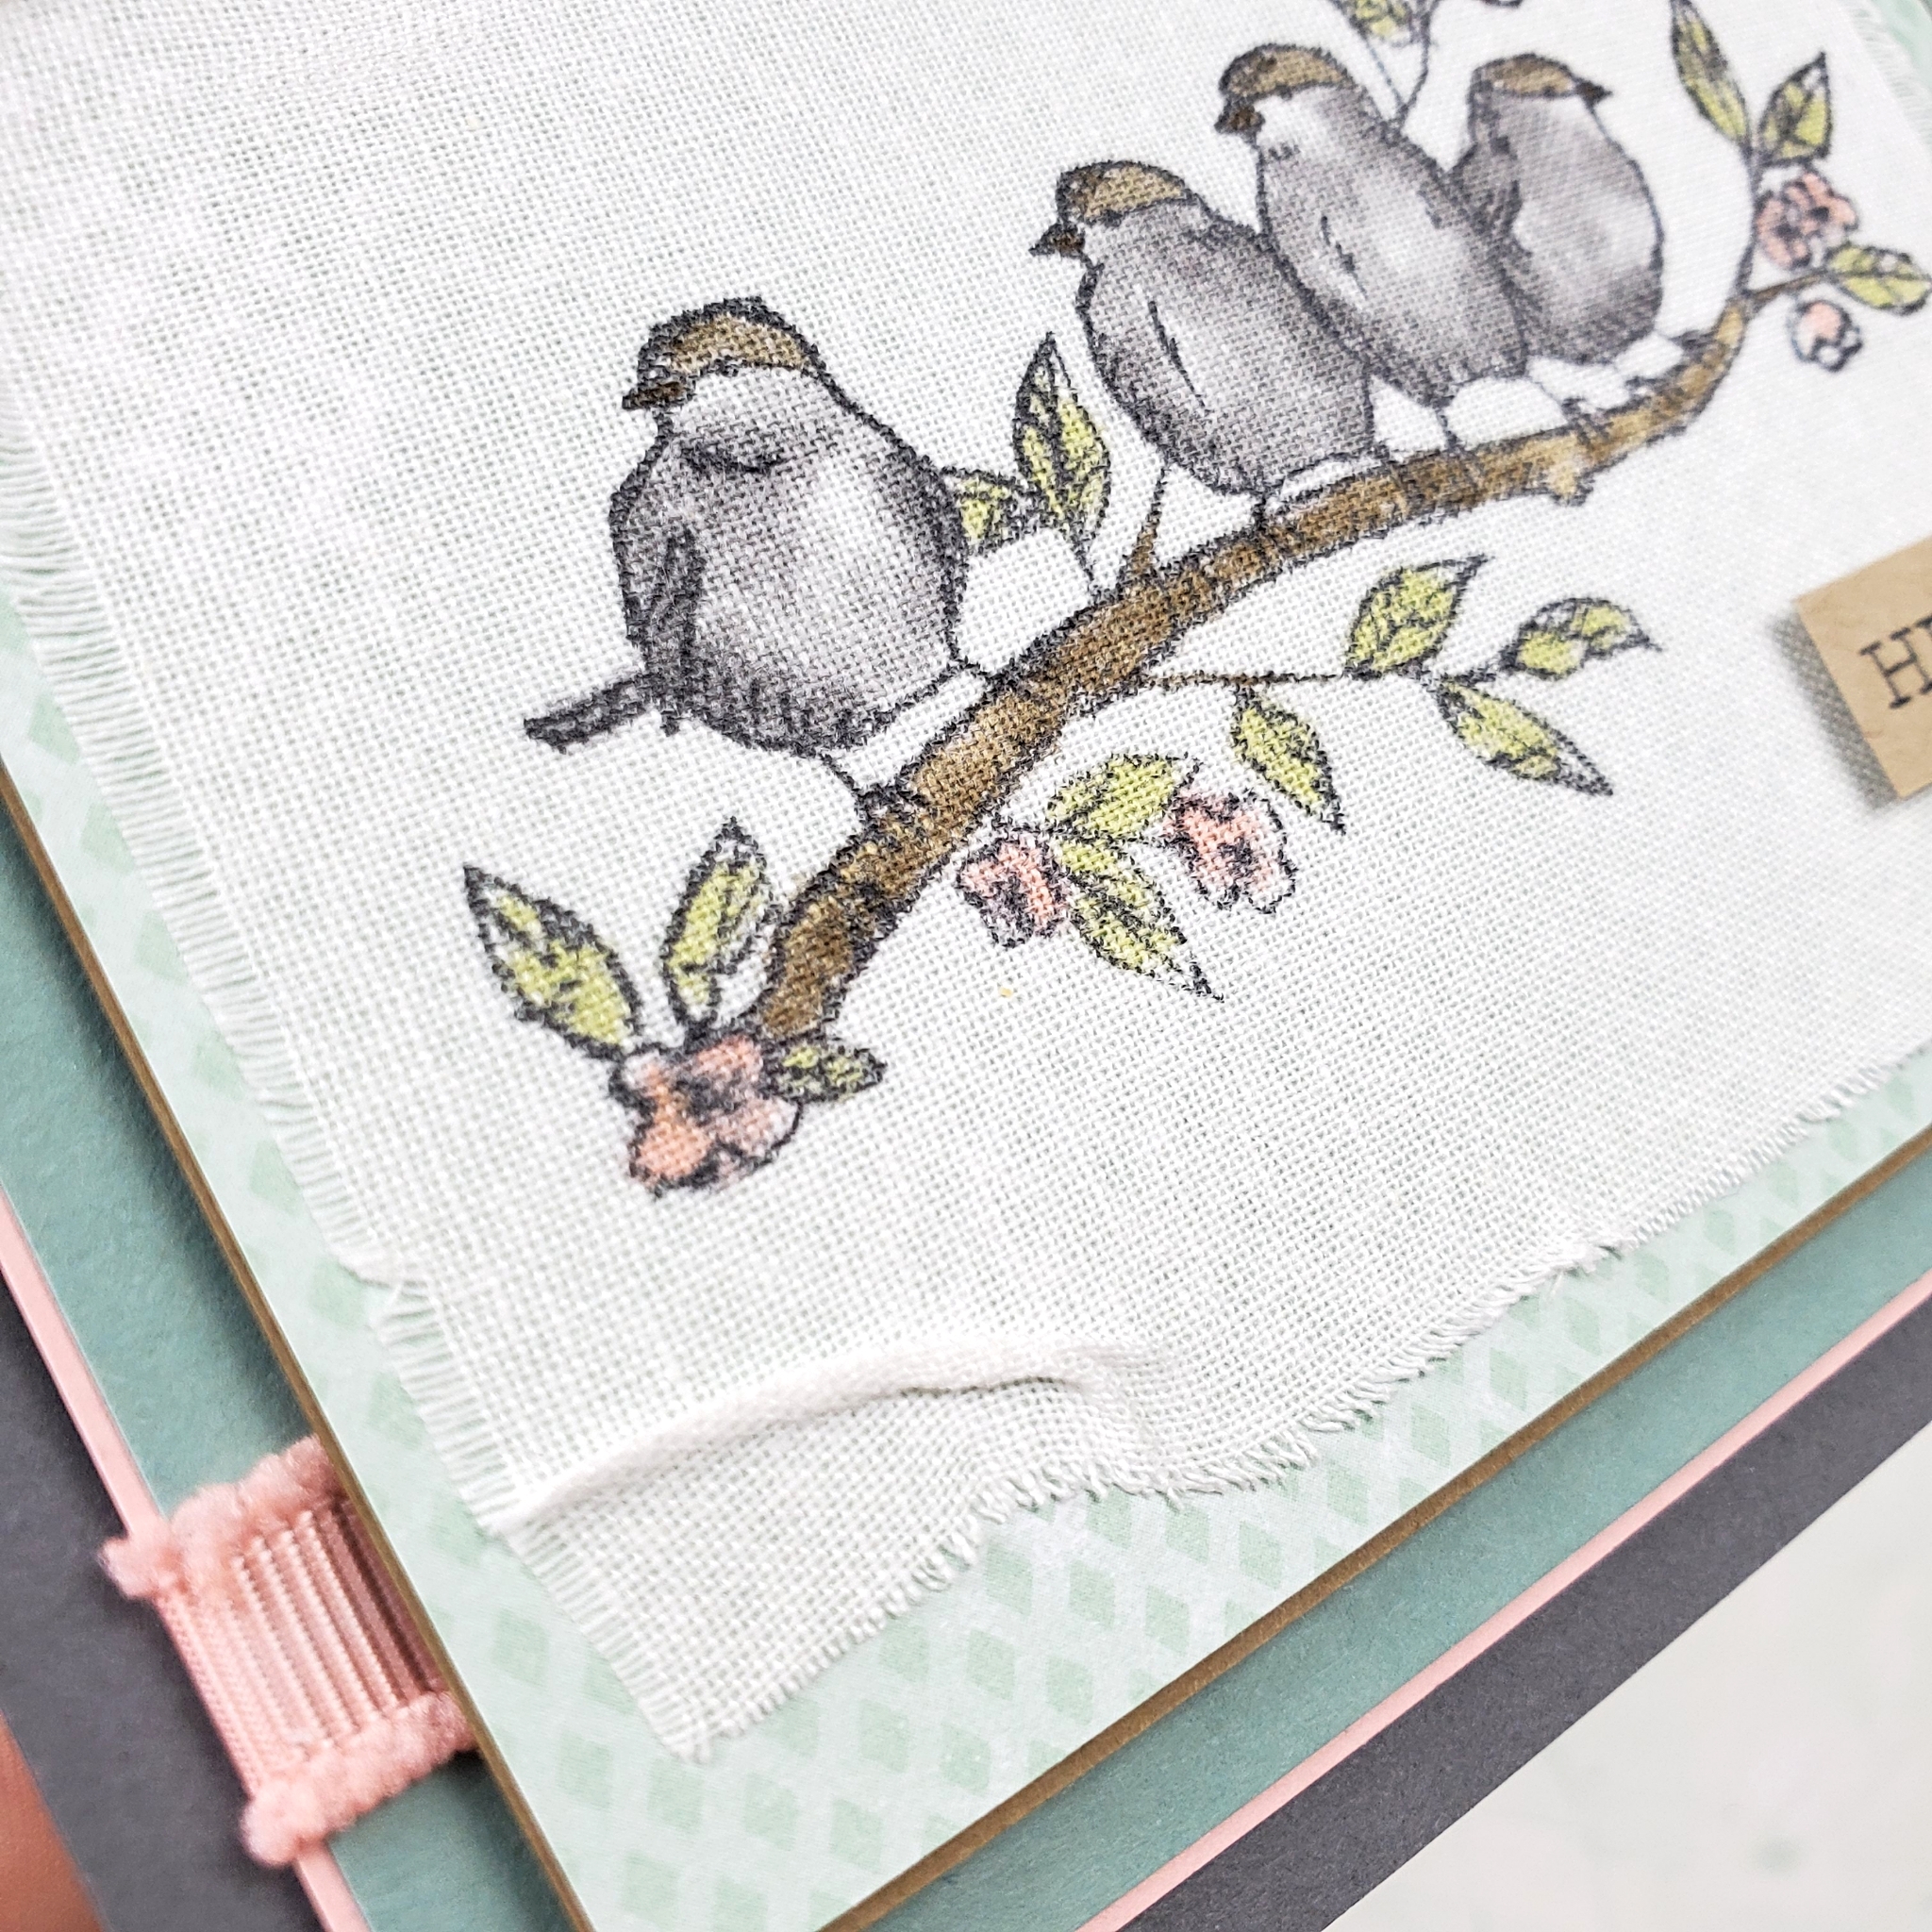
I started by stamping the bird image on the Linen Paper with Jet Black Stazon Ink. Because this is an alcohol-based ink, I felt that it would be less likely to bleed on the fabric. As it turns out, my exploration of this unique paper showed me that the Tuxedo Black Momento ink also works great!

Colouring Tips

Stampin’ Write Markers and Stampin’ Blends Markers were both used to colour my birds. While the Stampin’ Write Markers seemed to place the ink where I wanted it to go, the ink from the Blends Markers would spread. Using a feather-light touch, I was able to control the spread of the Blends Markers ink and have it work for me instead of against me.

After using the Stazon ink and Blends Markers on the birds, I stamped the little blossoms on the Linen Paper. I coloured them with the Blends Markers, but with a heavier hand and discovered that it caused the Stazon ink to bleed and mix with my colour. This isn’t really surprising, considering that Stazon and the Blends Markers are both alcohol-based inks. However, what was surprising was that the markers didn’t cause the Stazon lines on my bird image to bleed. The lesson here is that a light touch while colouring reduced the risk of bleeding the lines, while the heavy hand increases the risk.

In the end, if you use Momento Tuxedo Black ink when colouring with the Blends, you won’t have to be concerned with this happening.

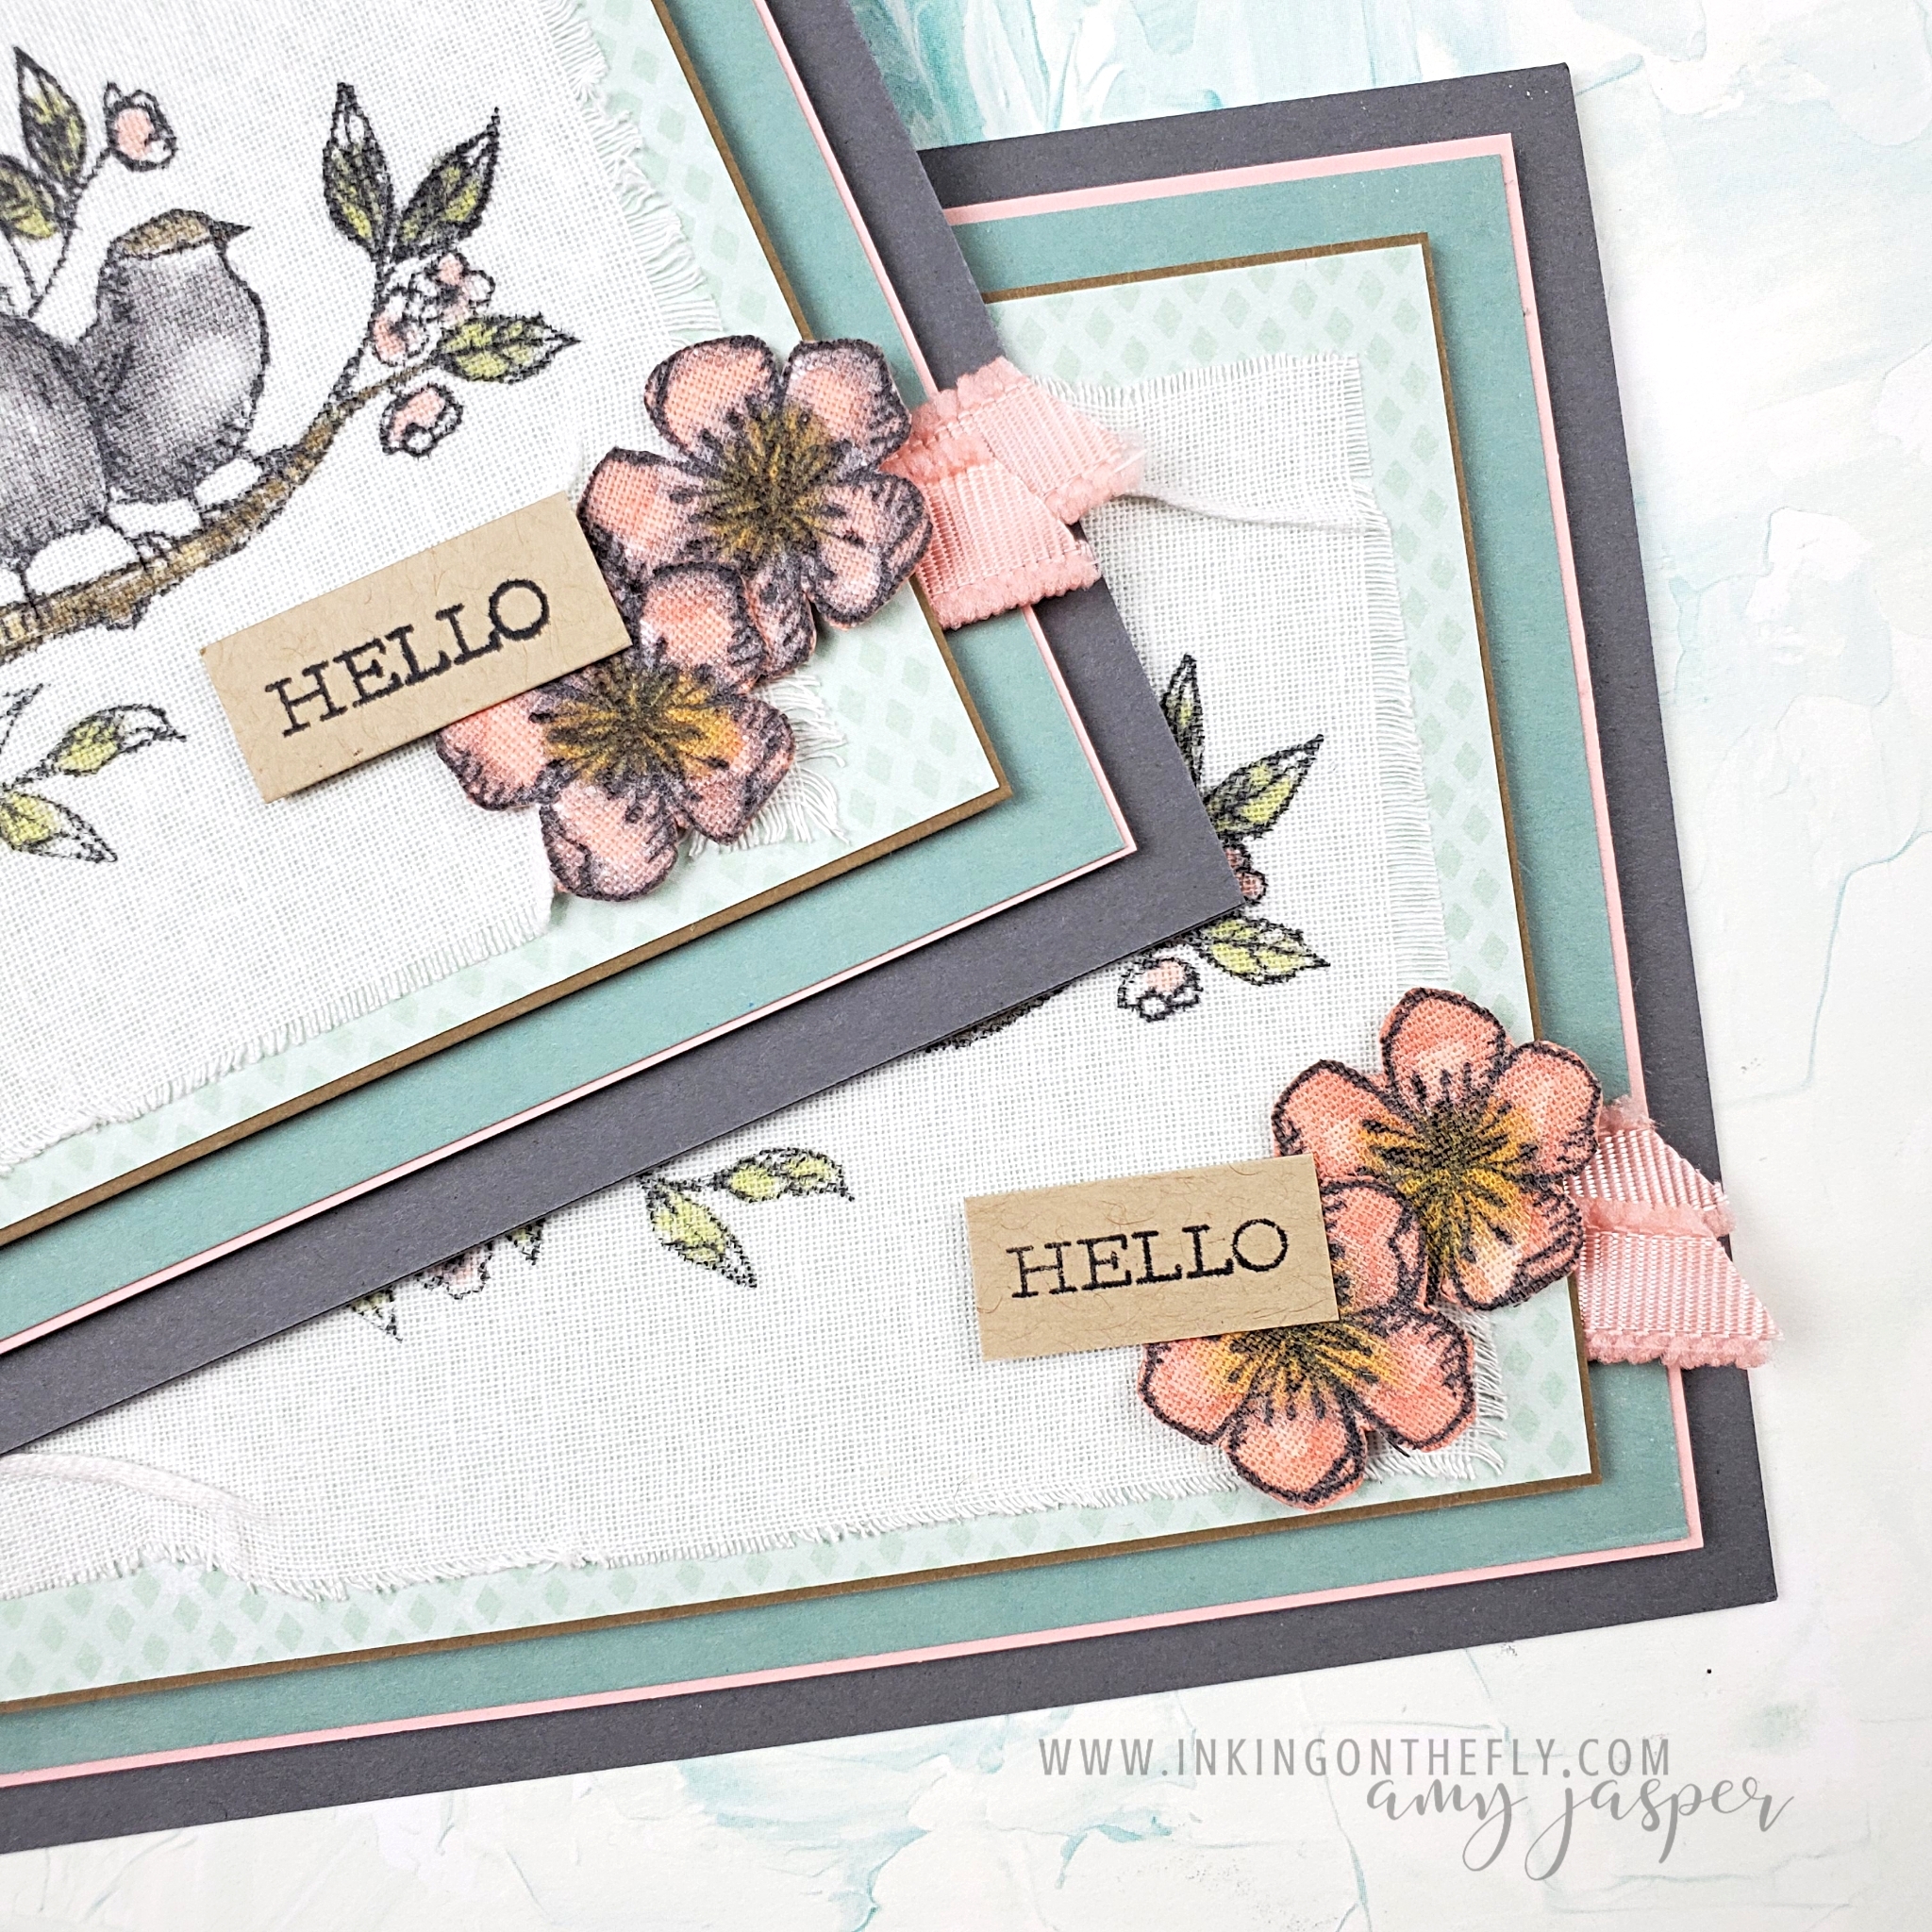
You can see in the image above, the difference in my flowers. The flowers on the left were stamped using Stazon ink and coloured with the Blends Markers. Comparatively, the flowers on the right were stamped using Momento ink (water-based ink) and coloured with the Blends markers. Voila! Crisp lines and clean colours!

New products available today!

When I made this card, the Whimsy & Wonder Designer Series Paper and the Blushing Bride Frayed Grosgrain Ribbon were not yet available. Today, they ARE!! New products and the summer Sale-a-bration are both launching today. Go to my online store to see the new products. You will also be able to order the Free As A Bird stamp set, the Linen Paper and all the inks and papers used to create this card.

Every $60 of product that you order allows you to get a FREE Sale-a-bration item. This is a great time to stock up on your favourite products and get free stuff.

Watch the video

Follow along or skip to the good parts to observe my colouring technique and how I frayed the edges of the Linen Paper. You’ll see a few more colouring tips and tricks.

I Love Happy Mail!

I haven’t been crafting all week as I’ve been away on a little family trip. This is the perfect opportunity to share a project made by someone else!

This gorgeous card was given to me by my friend and fellow Stampin’ Up! Demonstrator, Terry Hamilton. She’s much better at sending cards than I am and I was lucky enough to receive this beauty!

I love happy mail!

Evening Evergreen and Soft Succulent cardstock are a great colour combination. Terry used some gold embossing with the flourish image from the Elegantly Said stamp set. It looks like delicate gold embroidery, adding to the clean elegance of this design.

The sentiment from the Peaceful Moments stamp set works perfectly with the gap in the diagonal cut paper.

I’m so grateful for Terry and the friendship we have because of our connection through the passion for papercrafting.

You will definitely want to check out Terry’s blog to see more of her designs.

Video: Learn how to make this locking gate fold

I love the look of paper strips and pieces on a card.

This locking gate fold design has multiple pieces of patterned paper for a sweet patchwork look. My original card was created for my technique class back in May. Since then, we’ve had some products retire and we have some new products coming available in August.

A fresh take with the Whimsy & Wonder DSP

You will see that the video tutorial at the bottom of this post explains how to make the original card. Of course, that design features the retired Art Gallery Designer paper. It would be easy to adapt this design with other patterned papers, as you can see on my new design above.

The original design for my May technique class

Imagine the possibilities! Go over to my online store and have a look at some of the patterned paper options currently on sale. Be sure to check back on August 3rd to see the new fall products!

I decided to try this design using the Wonderful Snowflakes that will be available to purchase in August. Because the snowflakes are so detailed and delicate, I chose to use a rectangle stitched piece of paper as my centre locking mechanism. Only the top layer is die-cut with the Rectangle Stitched die. The two layers underneath are just cut to size, thereby saving me some time and effort.

My new design features the gorgeous Whimsy & Wonder Specialty paper in the August – December Mini Stampin’ Up! Catalogue. I also used the STUNNING Be Dazzling 6″ x 6″ paper for the narrow paper strips. These are so so so sparkly and have almost a mirror finish.

The inside of the card is just as pretty as the outside!

This card called for a sentiment on the front. The Whimsical Trees stamp set was created to coordinate with the paper, so I used Shaded Spruce ink on Basic White cardstock.

Watch the video to see how to make this cool locking card!

The video provides step by step instructions so you can make this at home. I share two different methods for the centre locking mechanism, so be sure to see the difference. If you watch the video on YouTube, you’ll also see that there are measurements and a supply list in the video description. While you’re there, don’t forget to subscribe to my channel!