Christmas

Buffalo Check Christmas

Oh my, oh my!! I haven’t done a speed challenge for a while and I forgot what a rush it it!! Whoohoo! Making a card in less than 10 minutes isn’t easy and I don’t always like how it turns out, but it ALWAYS gets my creative mojo flowing!!

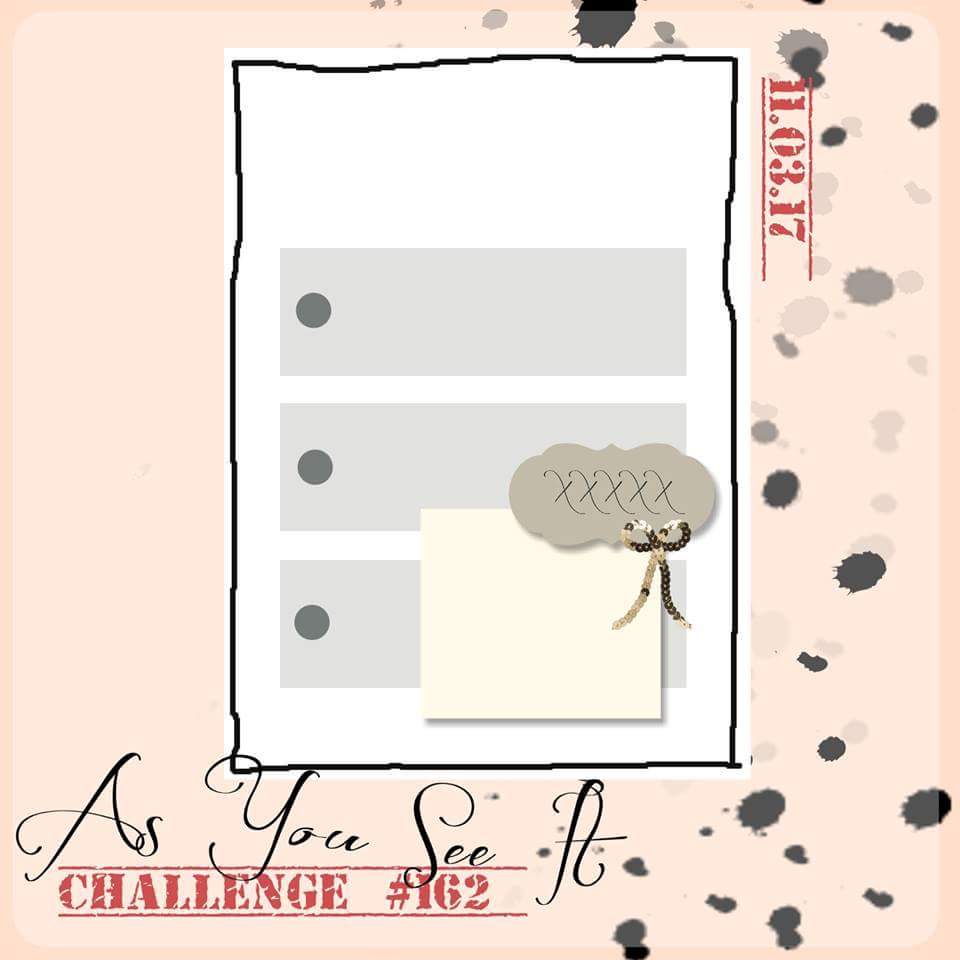
Here’s the inspiration for Shades of Red from the As You See It Challenge Blog:

After considering what I wanted to do and gathering all my supplies (no cutting ahead of time!), I started my card design. Why I insist on adding bows to speed challenge cards, I’ll never know. I probably would have been done under eight minutes if I avoided the Linen Thread all together!

My completed time: 9 minutes 52 seconds

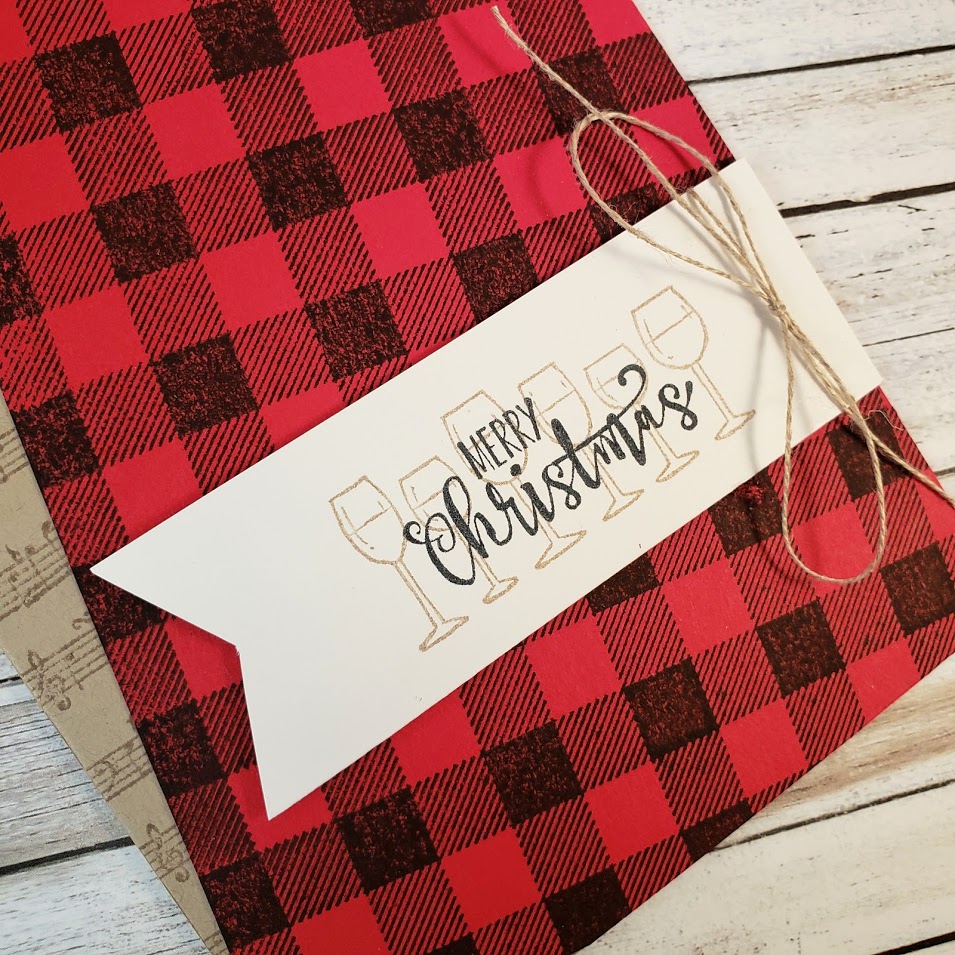
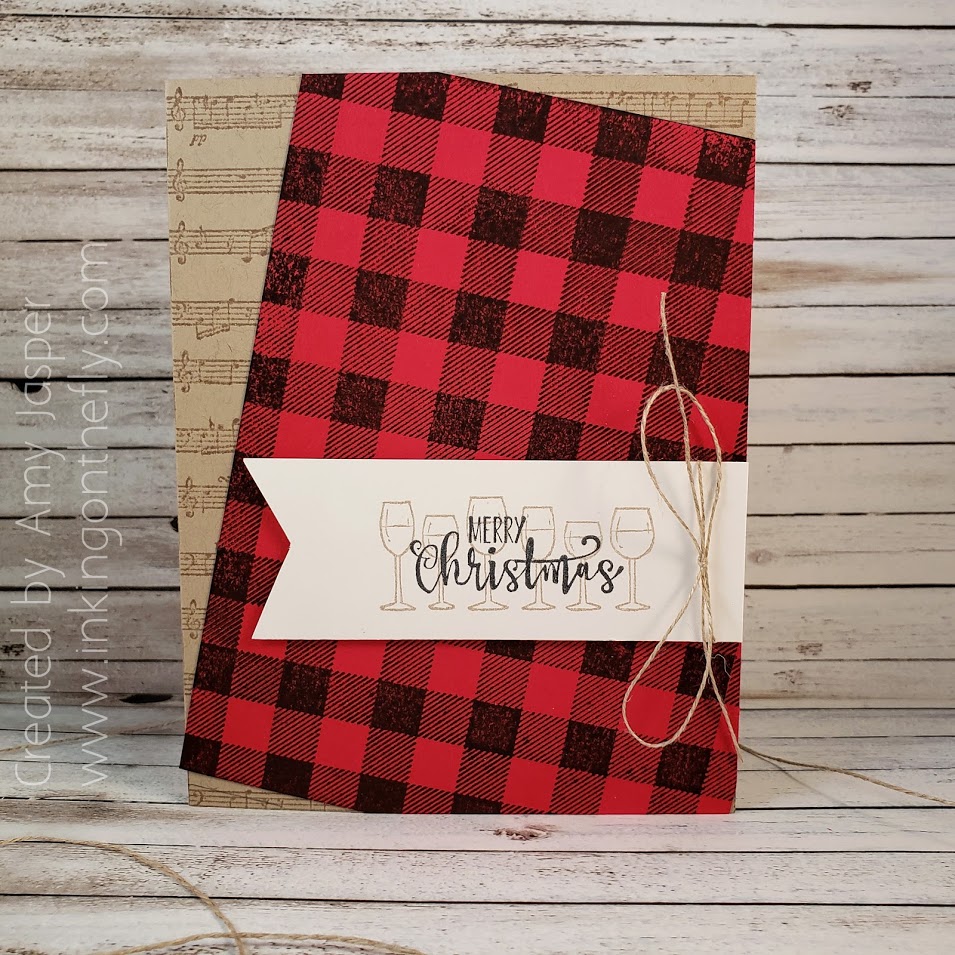
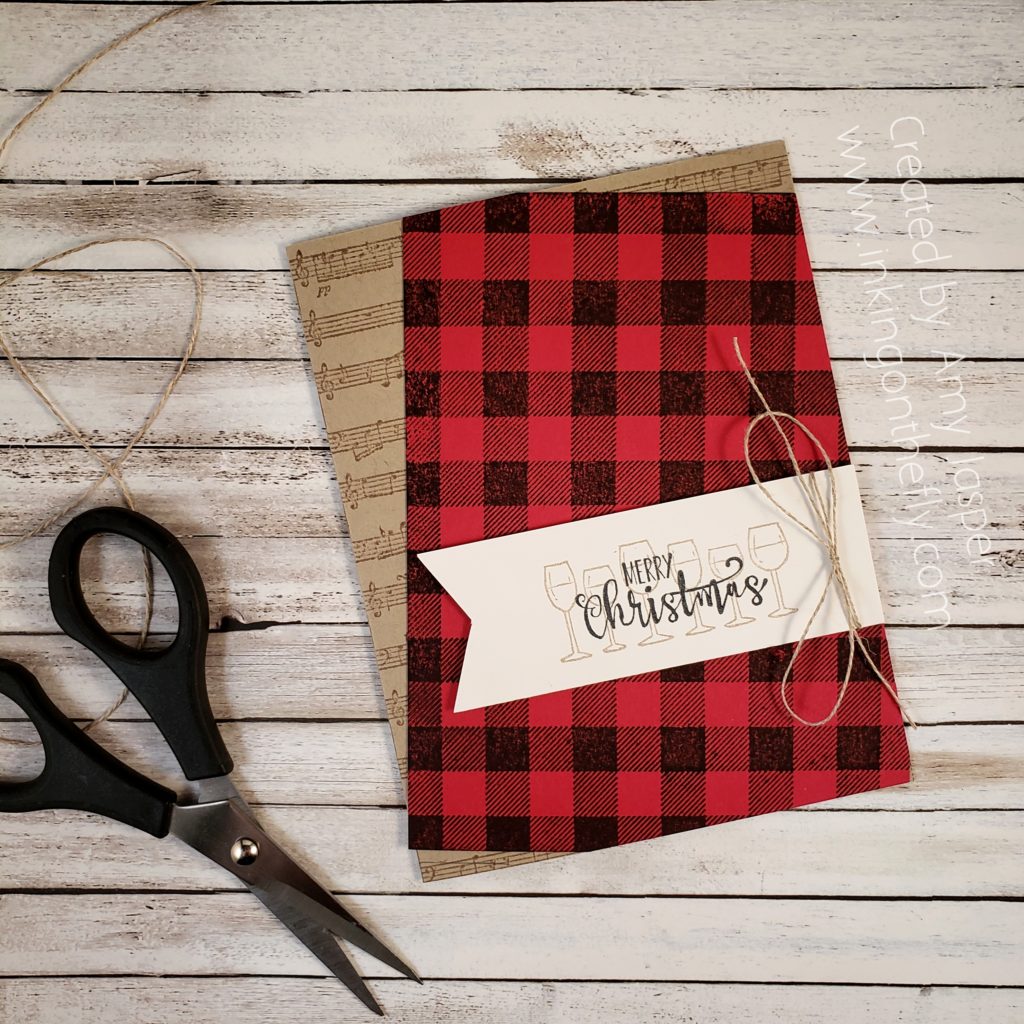
I used Crumb Cake ink with the Sheet Music background stamp on the Crumb Cake card base. I cut a piece of Real Red cardstock the same size as my card front and used the Buffalo Check background stamp with Tuxedo Black Momento Ink. I find it easier to use these background stamps so that the rubber faces up on the table. That way, I can place my cardstock on top of the stamp and have more control to make sure the image is stamped straight – particularly with any stamp image that needs to be parallel with the edge of my paper. I adhered my checked cardsock at an angle on my card, then trimmed the excess from the edges with my paper trimmer.

I still love the Half Full stamp set because it has images of one of my favourite things: wine! I love wine, particularly red wine. Sadly, wine isn’t very kind to my stomach these days, so I have started reserving it for Sunday dinners with my family.

I stamped the wine glass image on Whisper White cardstock with Crumb Cake ink, stamping off once on a scrap piece of paper so I could have a slightly lighter image. The Merry Christmas sentiment from the same stamp set was stamped with Tuxedo Black Momento ink over top of the wine glasses image. I then trimmed my Whisper White cardstock to the size I wanted and flagged the end with my Paper Snips. The Linen Thread is tied around the end of the Whisper White cardstock into a bow and the completed banner was attached to the card front with Stampin’ Dimensionals.

Voila! This is what a 10 minute speed challenge card looks like! Sweet and Simple, don’t you think!?

Your turn! Give the challenge a try. Set your timer for ten minutes and see if you can beat the time. If you get it under, be sure to share your finished work with us at the As You See It Challenge blog so we can ooh and ahh at your creative genius! (we always do!)

If you like these products and are in Canada, you can order them from me by clicking on the Shop Now circle button on this blog. If you are on a phone or tablet, just keep scrolling down until you find the shopping button. If you are on a computer, you will see it in the side bar. Be sure to use the Hostess Code just above the shopping circle so I can award you with Loyalty Points for any order over $50 (before shipping and taxes).

Happy stamping!!
Sequin and Burlap

It’s time for another As You See It Challenge design!

Here’s the challenge sketch:

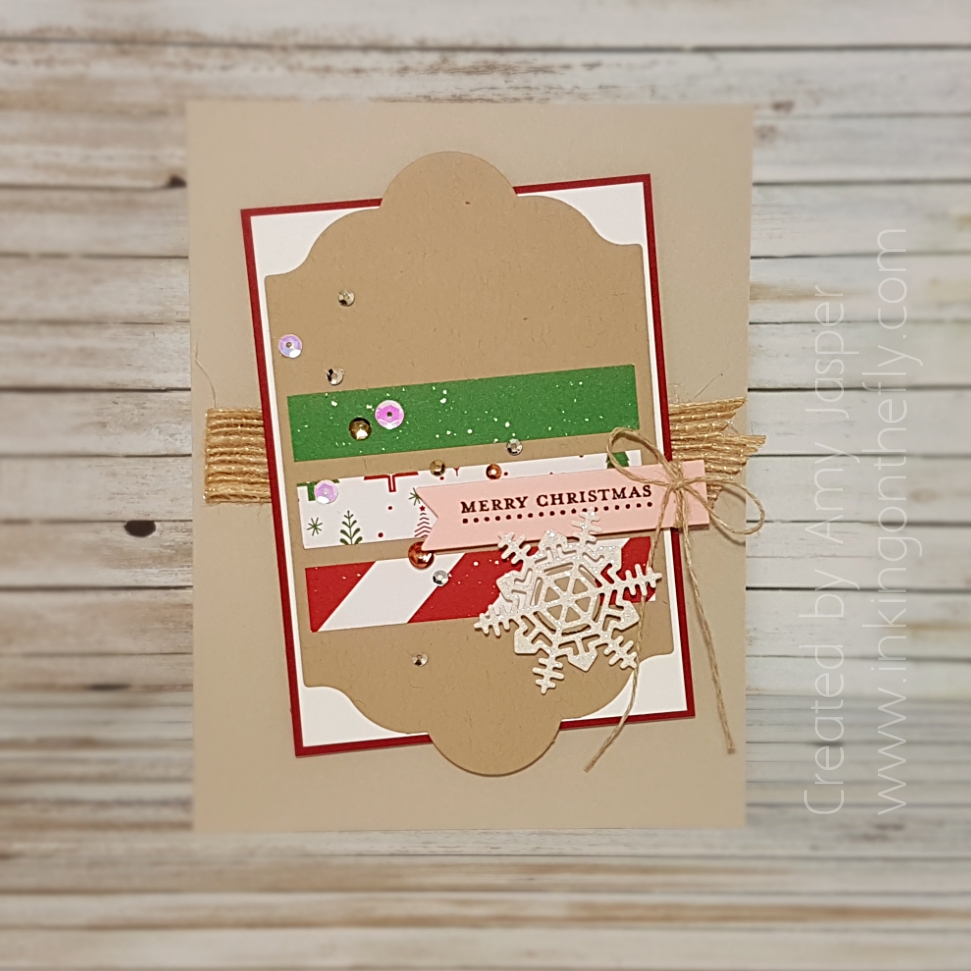
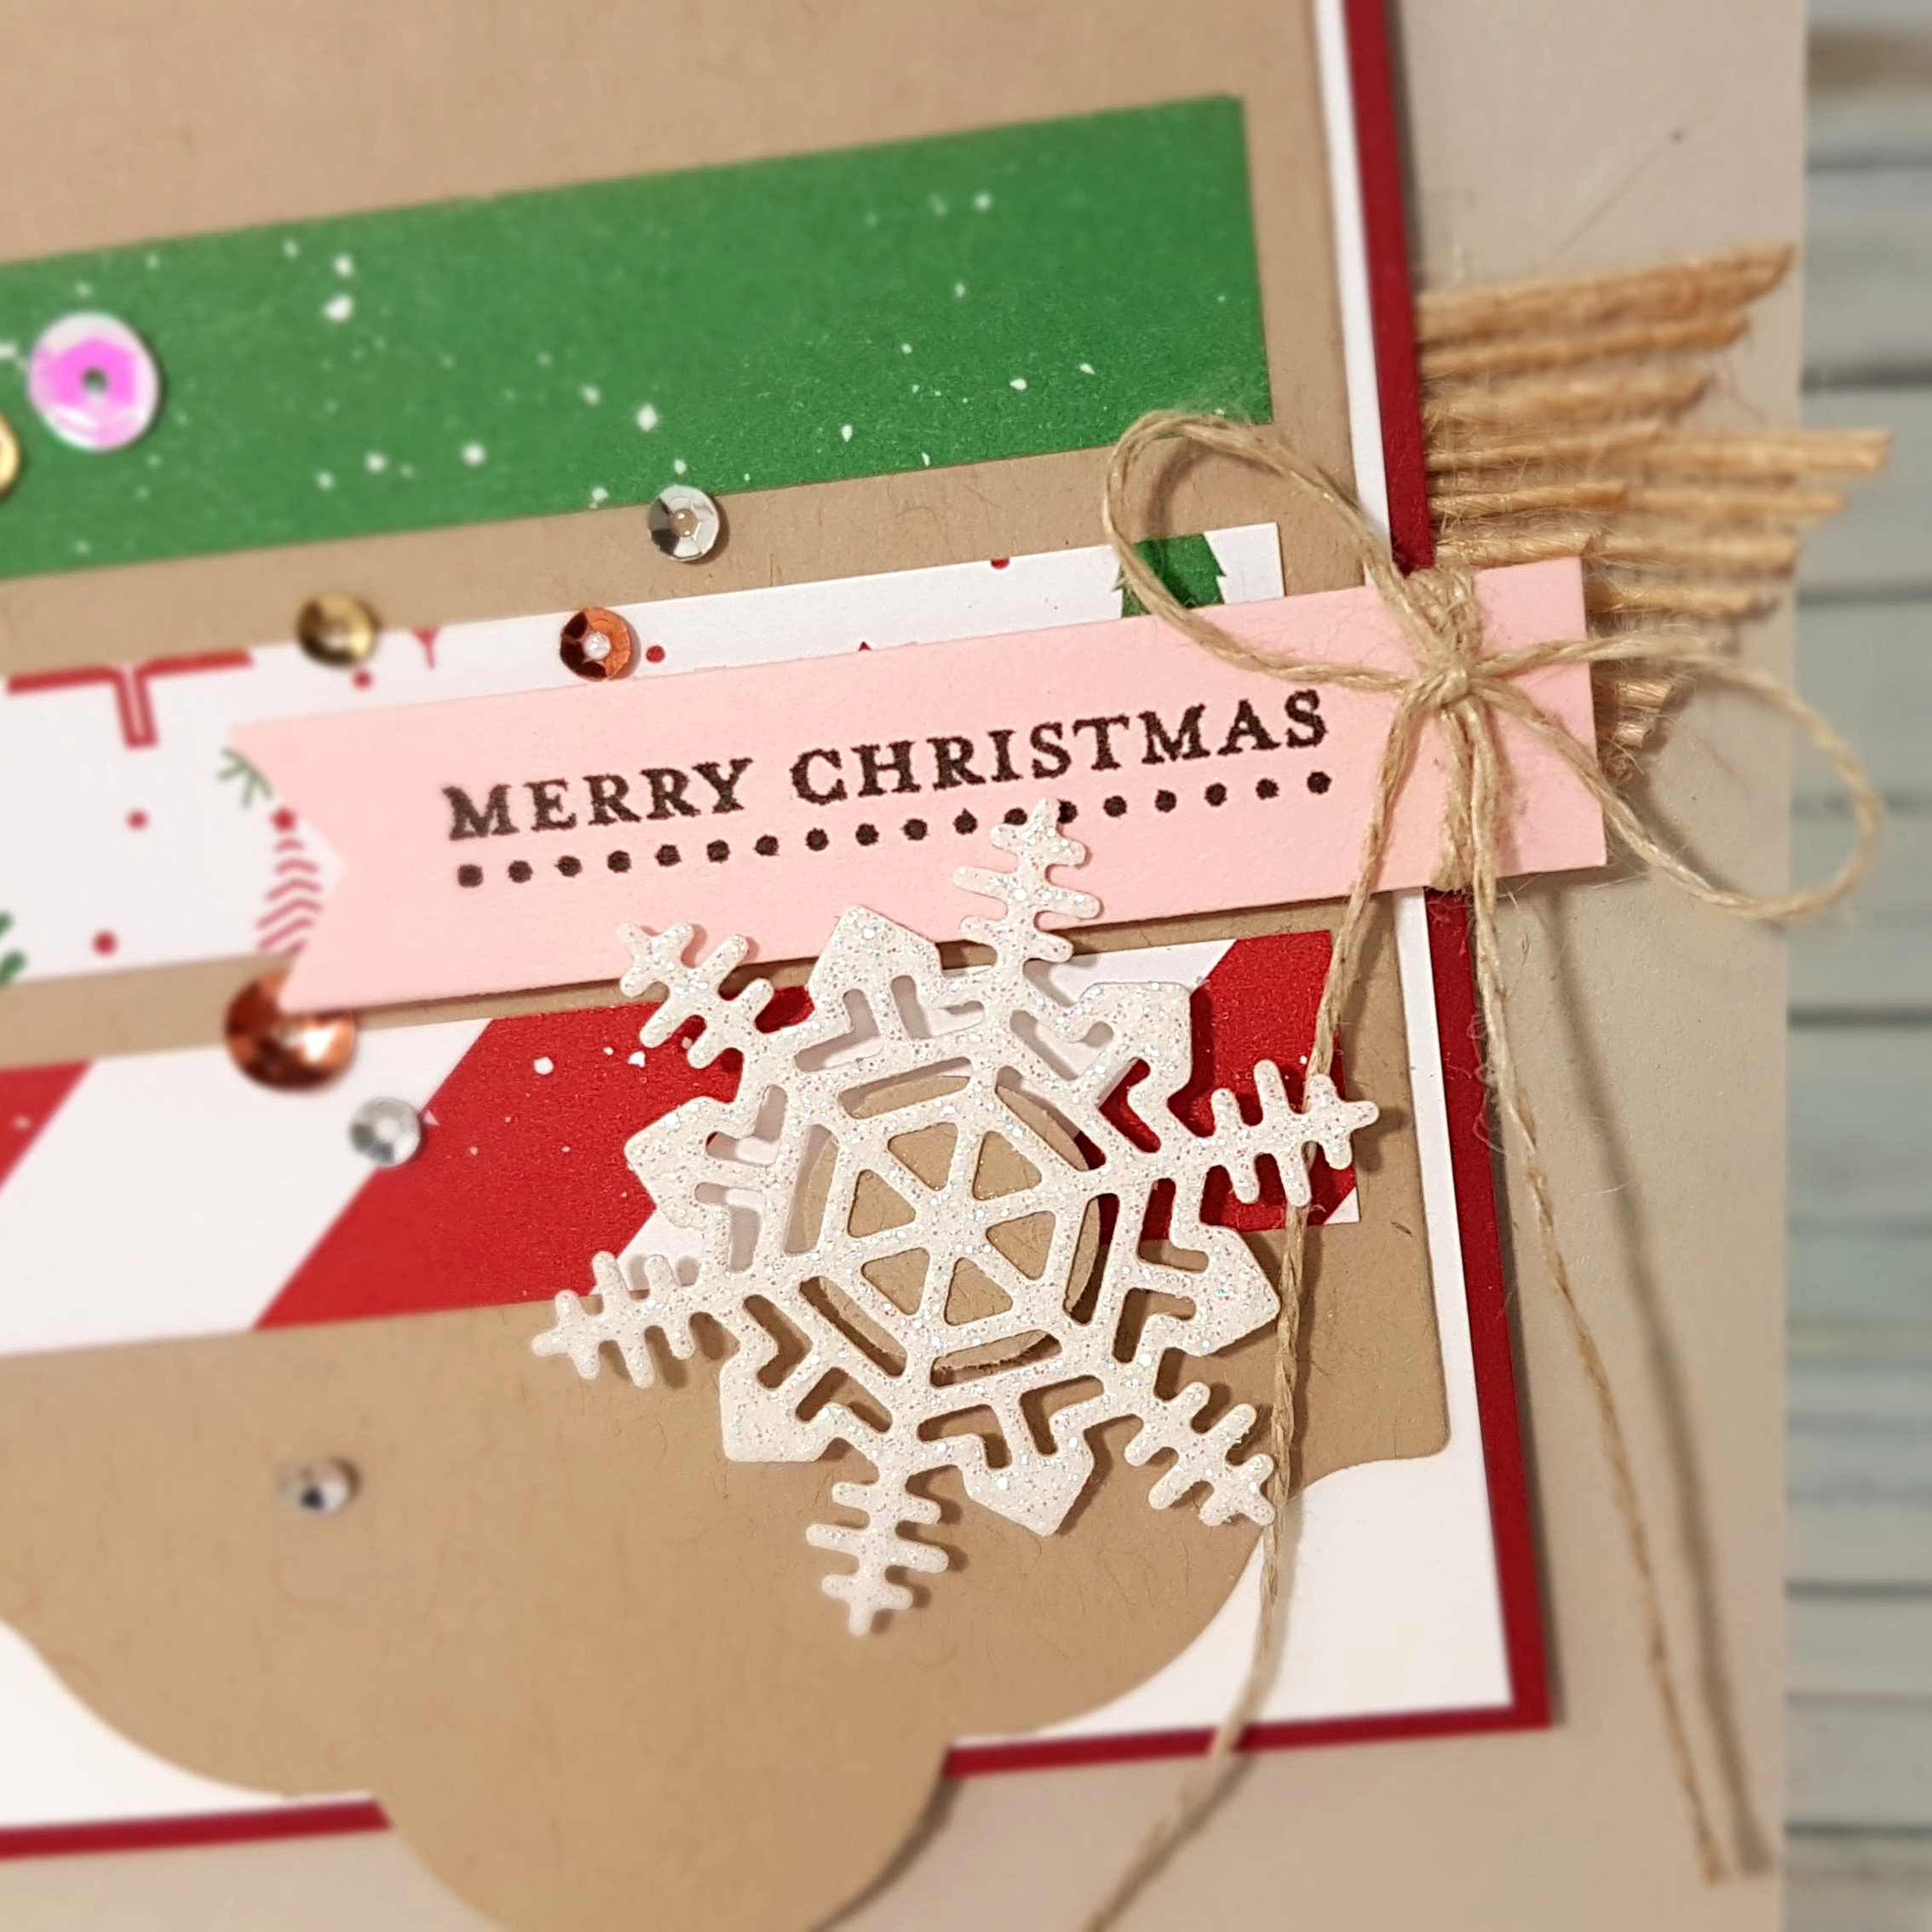
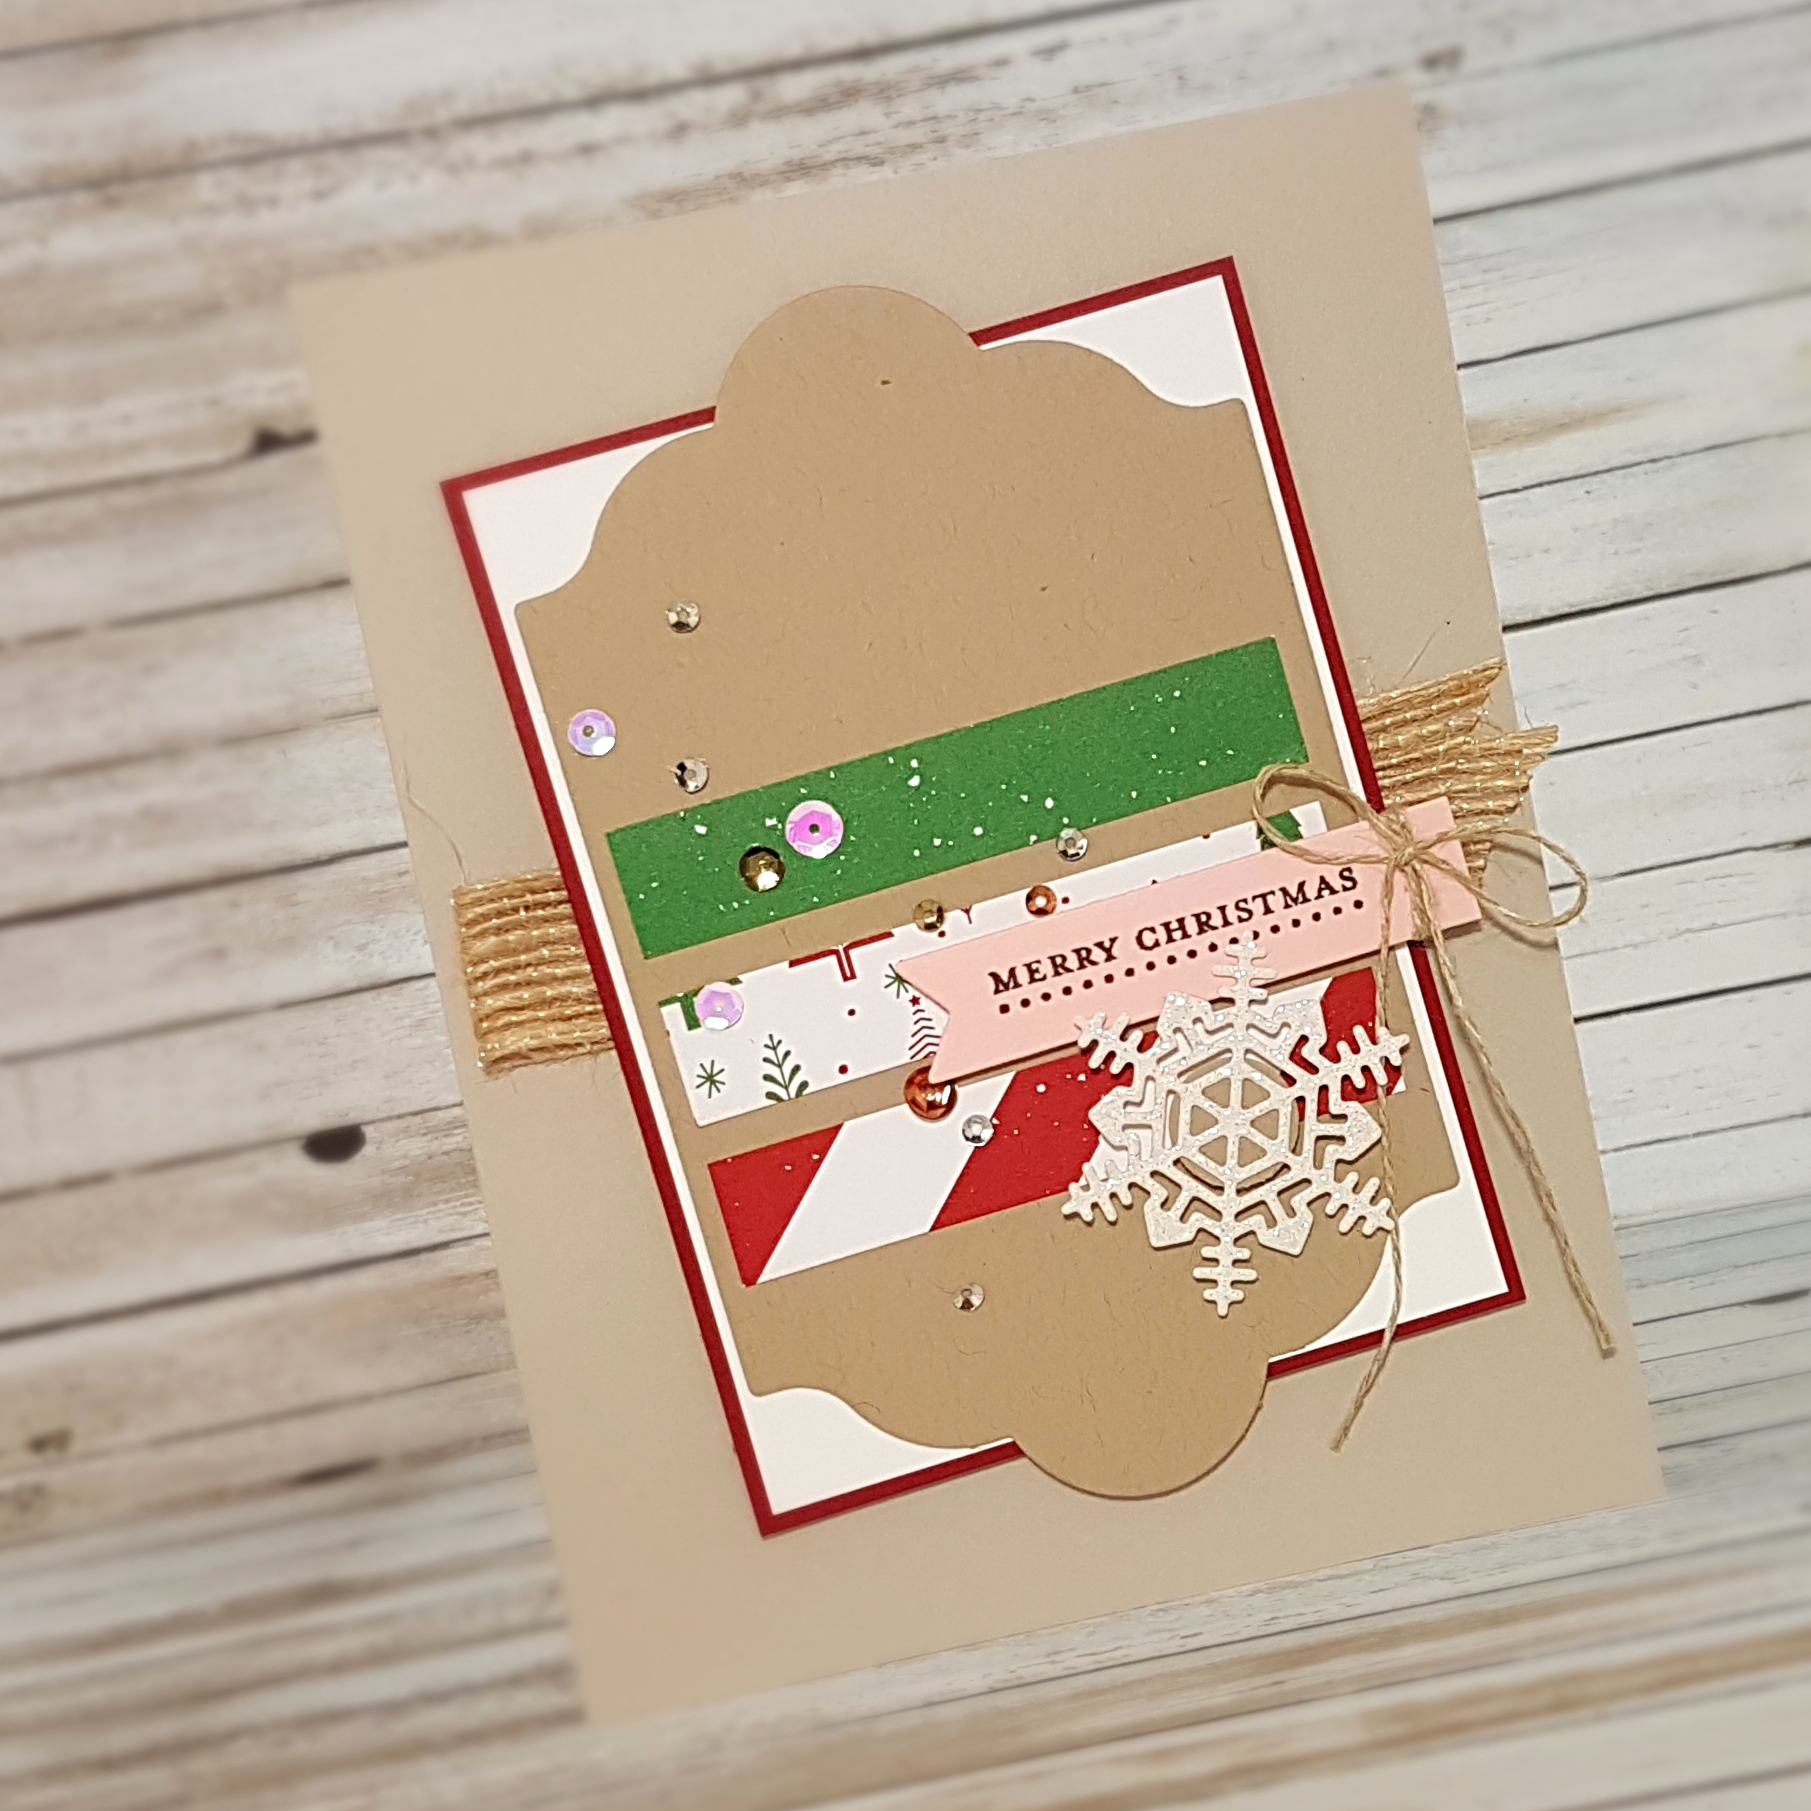
I decided to use the Lots of Labels Framelits for this one. Here’s my take on the challenge:

I wanted to use some of the Be Merry Designer Series Paper, but I find the Garden Green/Cherry Cobbler/Whisper White colour combo a bit dull on its own. That’s when I decided to add the Powder Pink, Crumb Cake and Sahara Sand into the mix. I think the iridescent pinky colouring of some of the Metallic Sequin Assortments is what makes the Powder Pink cardstock work quite well.

I don’t know if you can really see it in the photos, but the snowflake die from the Seasonal Layers Thinlits is cut from the Dazzling Diamonds Glimmer Paper and is so pretty and sparkly! I wanted it to be popped up off the page, but it’s too delicate to hide a Stampin’ Dimensional behind it, so I first adhered a 1/2″ Crumb Cake circle to the back of the snowflake with the Multipurpose Liquid Glue. After that, I could hide a Dimensional behind that circle without losing the delicate design of the snowflake.

The sentiment from the Teeny Tiny Wishes stamp set, was stamped on the Powder Pink cardstock using Early Espresso ink. Then, it was die cut with a banner die from the Bunch of Banners Framelits for that perfect flagged end (I cut the other end off – two perfectly flagged ends would have been more than this card could handle. lol!

Double Shaker Christmas Card

I have been so very absent since the As You see It Challenge site went down. The weekly challenges were what kept me sharing with you and it’s been so difficult to keep up with my blogging without that regular incentive. Life is … life. I catch myself talking about how busy I am all the time, but I’ve realized that we’re ALL busy. ALL the time.

It’s not a new thing. It’s just what life is.

So, time keeps passing me by and I have false starts at sharing my stamping projects with you here on my blog. I’m not sure what my game plan is, but I know that I want to blog. I enjoy sharing with you. More than that, I enjoy hearing from you. Your comments spur me on and make me want to have more to offer.

I’ve been getting a lot of responses for a Christmas card that I shared with you last year. I’m loving the interest and the encouragement! It’s those comments that make me want to get back into sharing cards with you. So keep commenting, my crafty friends! If you like anything that I do on inkingonthefly.com, then take the time to say hi. It’s nice to know that I’m not just talking to myself!!

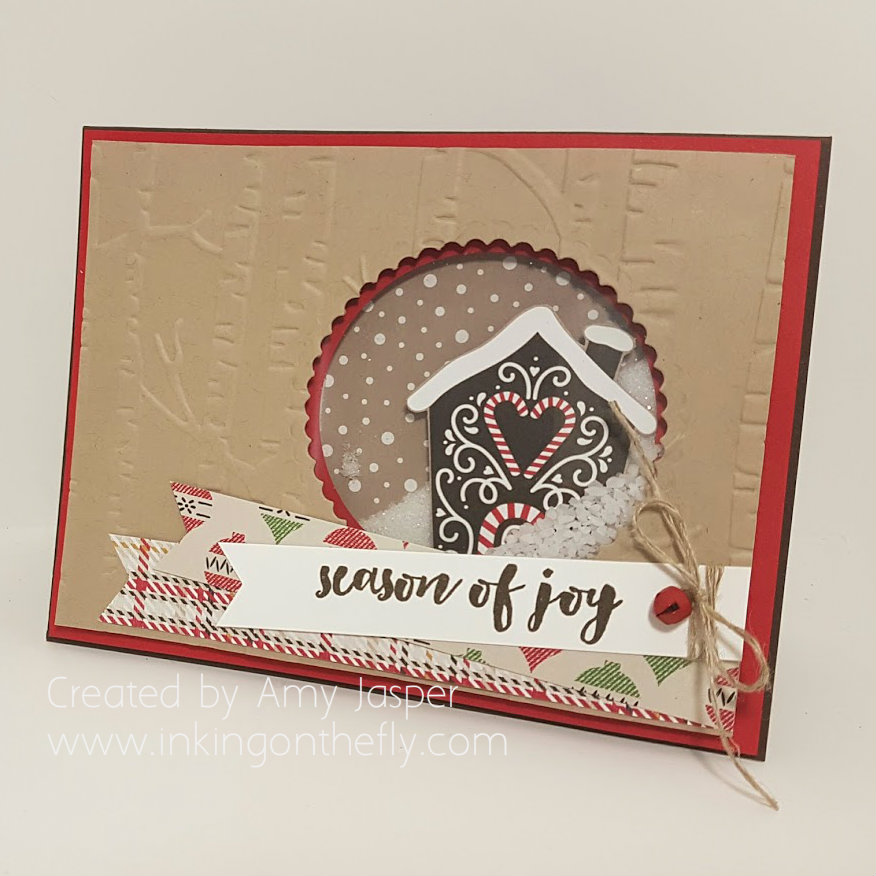
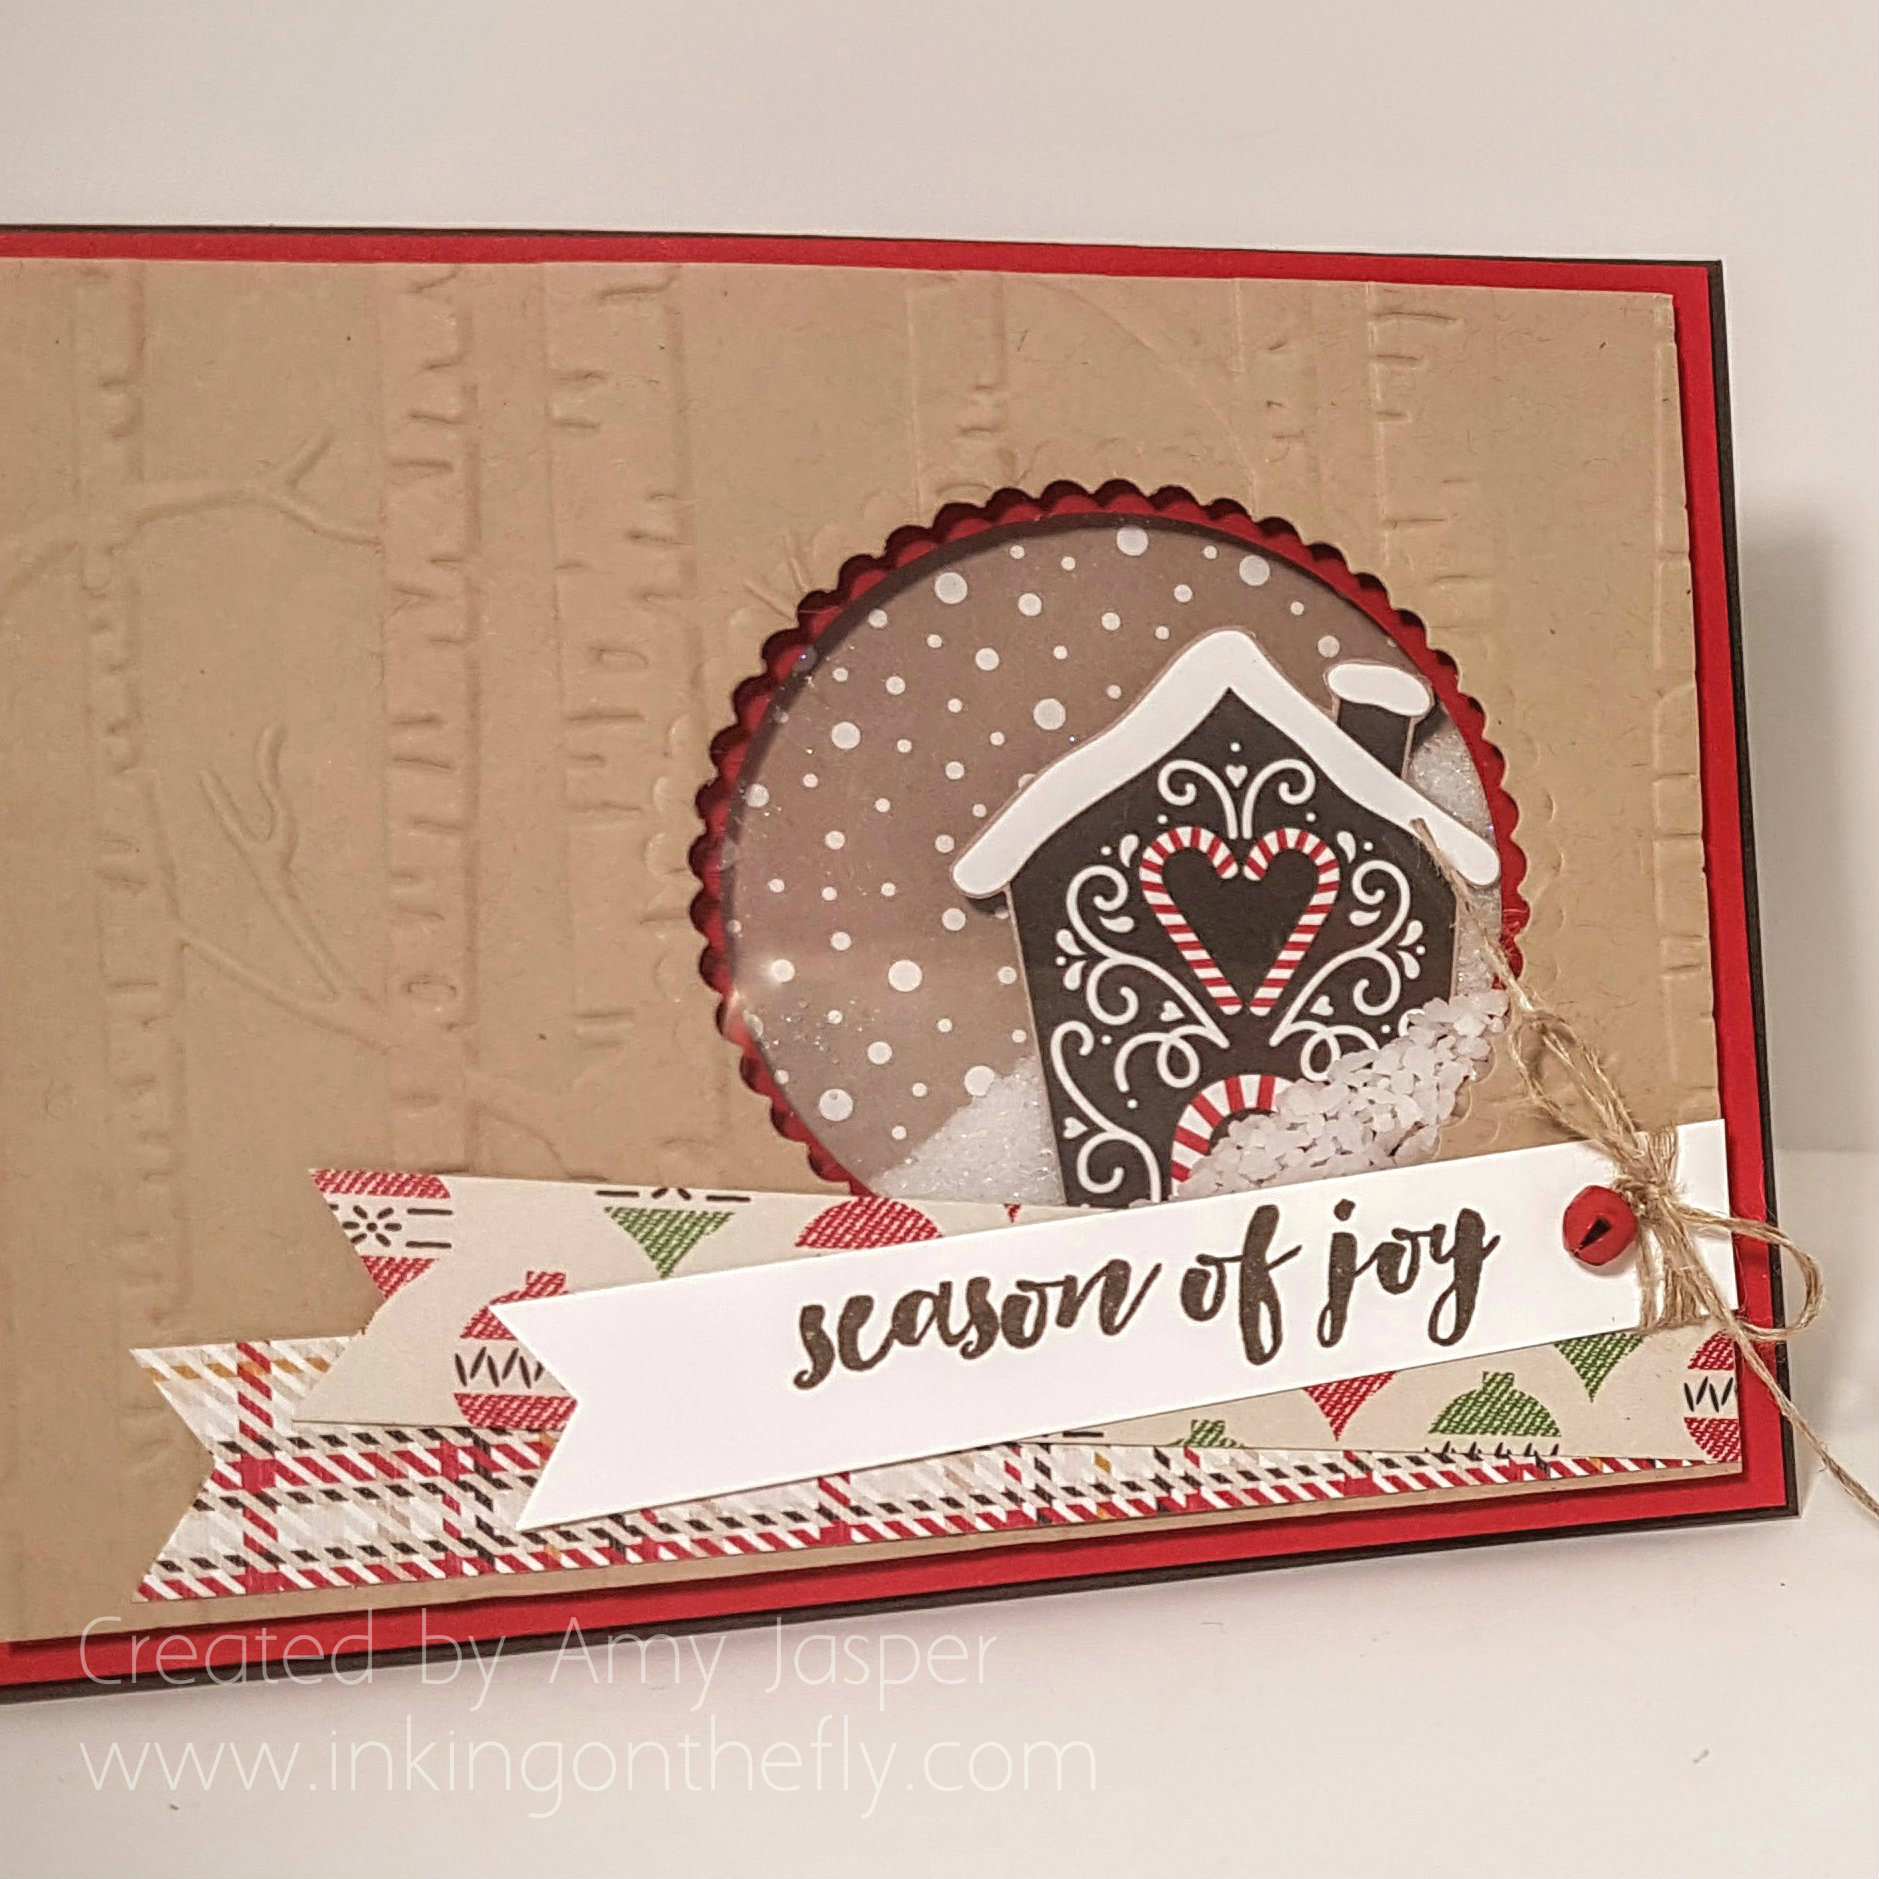
I have a project to share with you today. It’s a card that I made with my technique class that uses a double shaker design with … wait for it … SALT!! BAH! I’m so crazy sometimes!!

Double shaker Christmas card by Amy Jasper www.inkingonthefly.com

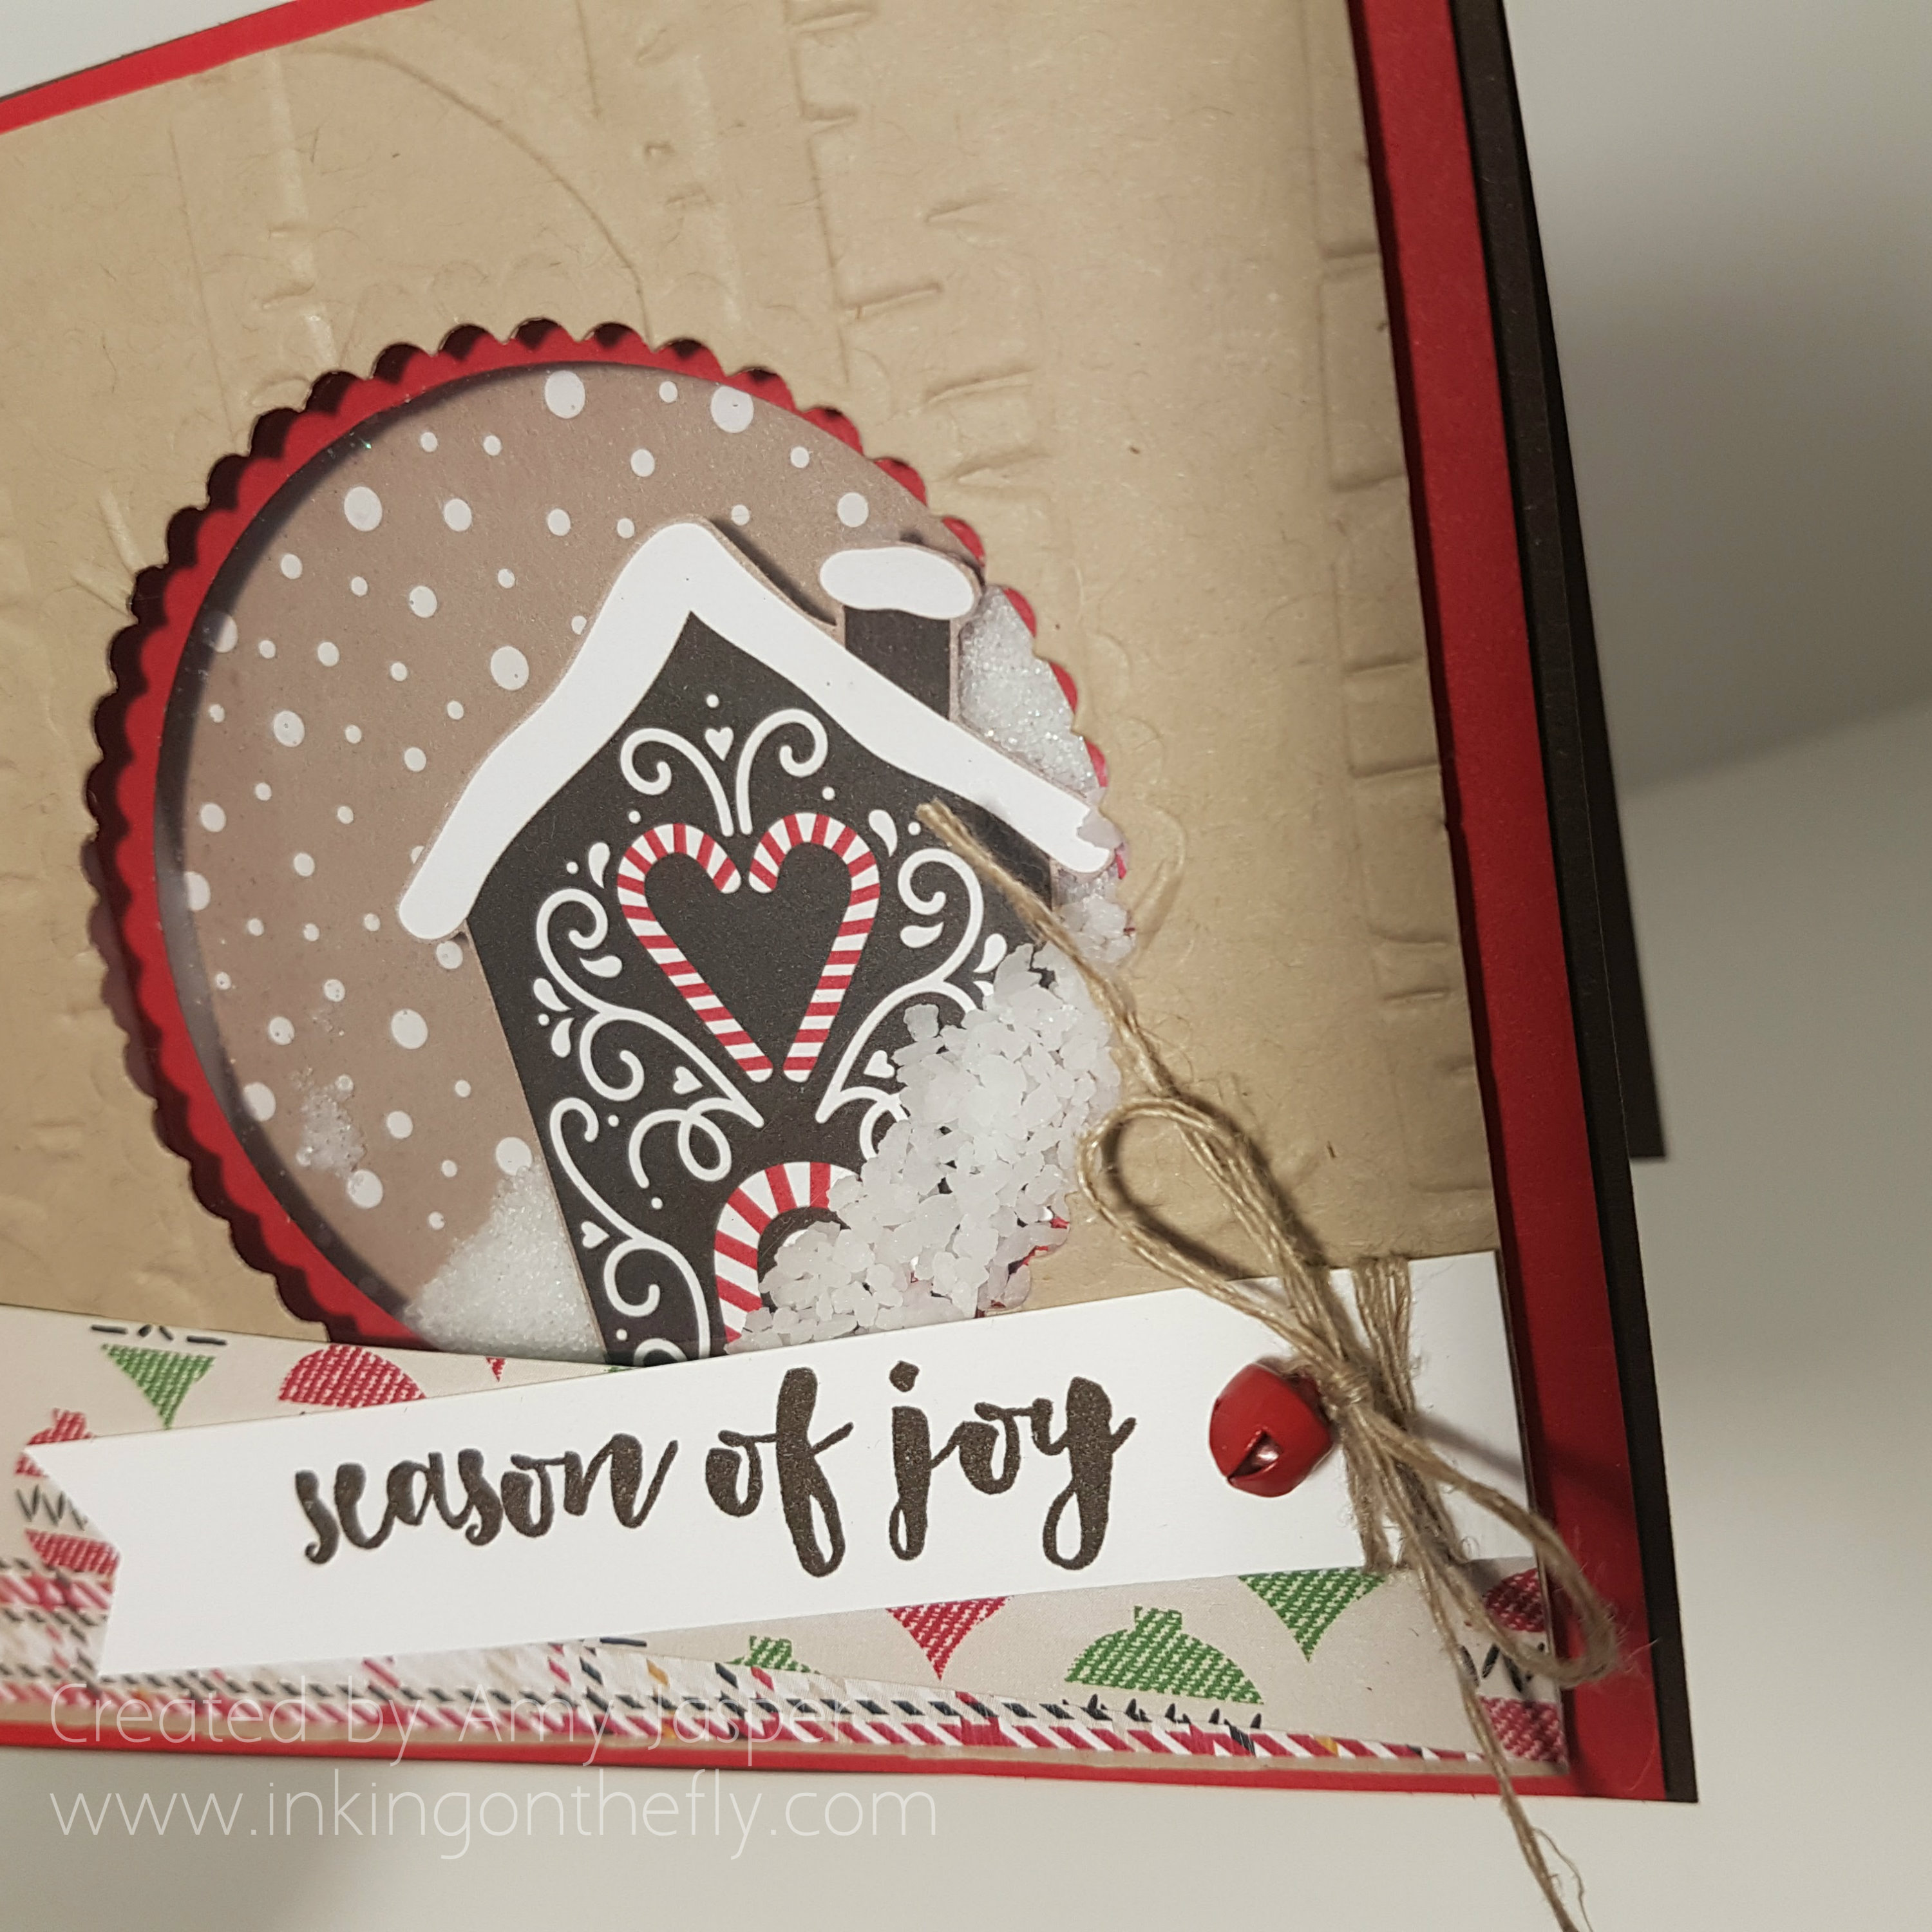
Can you see it? There are two different mediums in the shaker because there are two layers! How fun is THAT!! And, I decided to use salt for the snow. Table salt for the distant snow and course pickling salt for the snow in front of the house. I have no idea how salt will effect the paper over time, but if it’s kept dry (which paper should really be), I imagine it would take a very long time for the salt to degrade the paper, if it even would at all. I’ll take my chances.

Double shaker card by Amy Jasper www.inkingonthefly.com

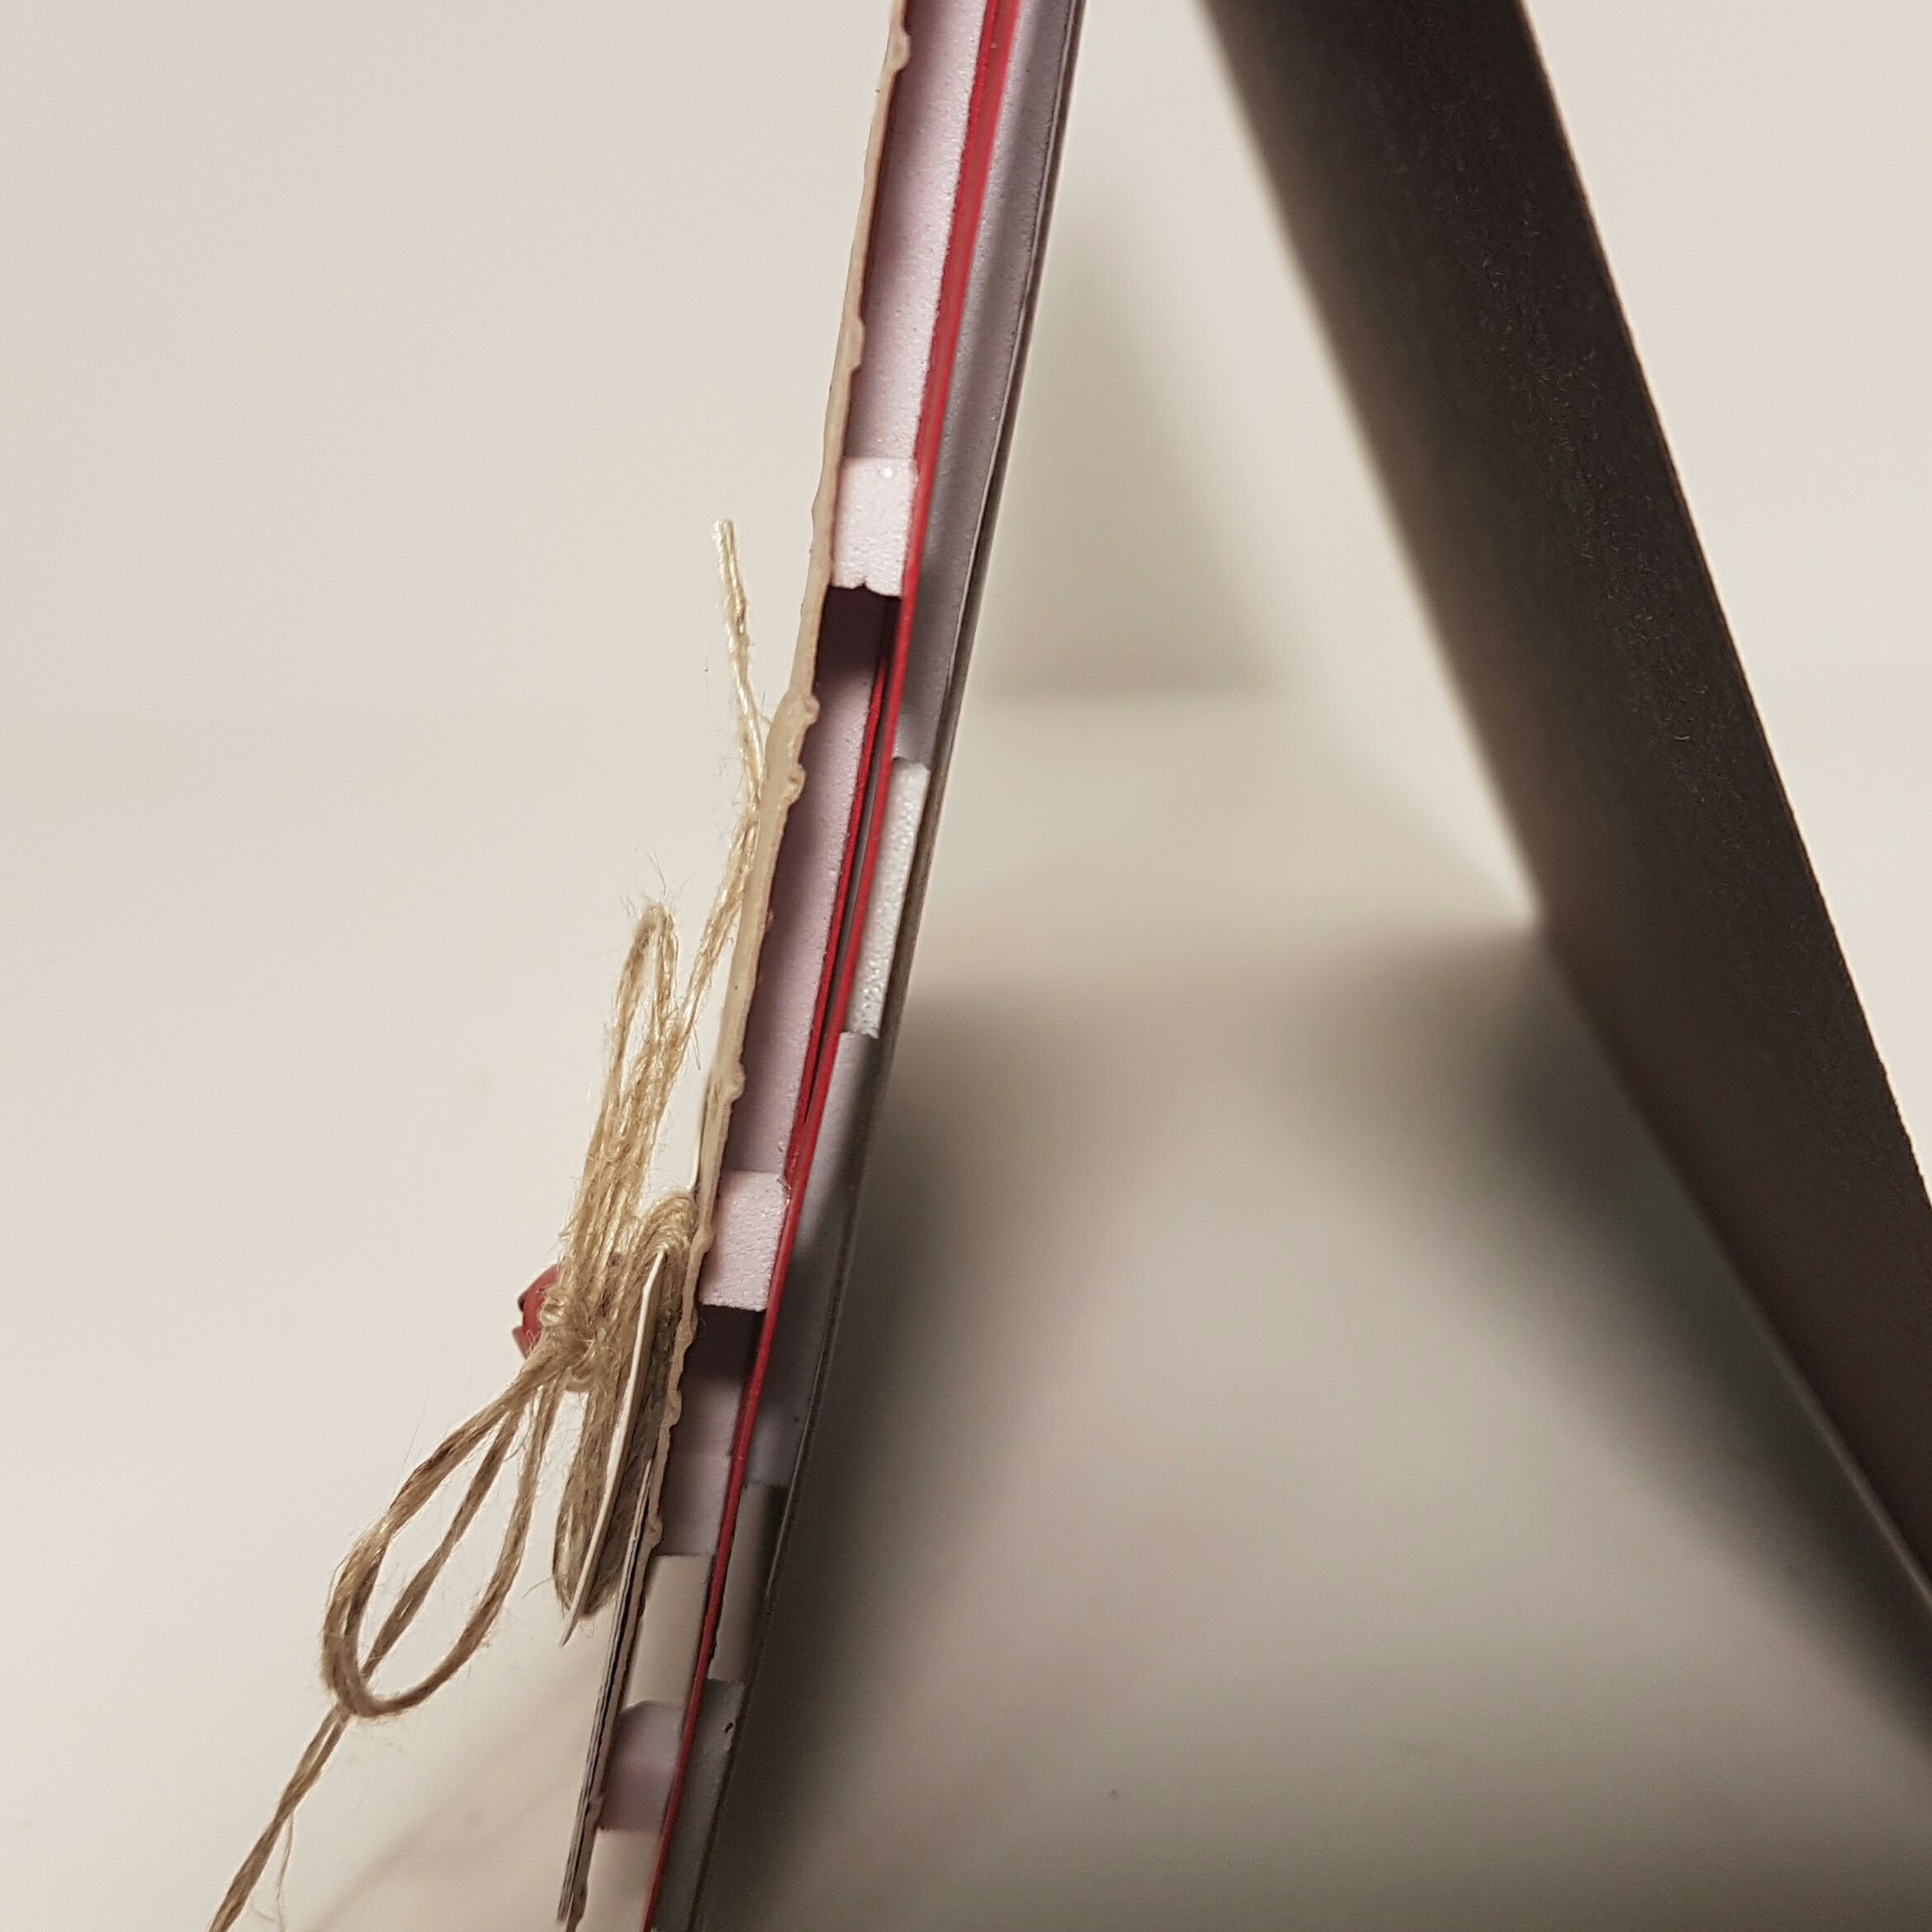
If you’ve ever made any kind of shaker card before, all you need to do is add a second layer! Because the Foam Adhesive Strips are thicker than Stampin’ Dimensionals, this card with two layers of foam strips will be a tight fit in an envelope. You can either make a larger envelope to give your card more room by using the Envelope Punch Board, or you can use a little finagling to wiggle this card into one of Stampin’ Up’s medium sized envelopes. It can be done!

20161026_144334

Supplies used include:

  • Stampin’ Up Foam Adhesive Strips
  • Crumb Cake cardstock
  • Real Red Cardstock
  • Early Espresso Cardstock
  • Whisper White Cardstock
  • Stampin’ Up Window Sheets
  • Candy Cane Lane Designer Series Paper
  • Layering Circle Framelits
  • Big Shot
  • Woodland Embossing Folder
  • Dazzling Diamonds Glitter (I added just a smidge to the table salt)
  • Table salt and pickling salt
  • Tombo Multipurpose Liquid Glue
  • Christmas Pines Stamp Set
  • Early Espresso Ink
  • Linen Thread
  • Mini Jingle Bells
  • Banner Triple Punch (for those perfect flagged ends on my paper strips)
  • Warmth and Cheer Designer Series Paper Stack

double shaker card by Amy Jasper www.inkingonthefly.com

We also got a dog in May. He’s 8 months old now and likes to chew on our baseboards, door frames, and the underground sprinkler system in the backyard. We love ‘im though!!

Save

Save

Save

Save