quick and cute

Easy and So Beautiful with Expressions in Ink

The Expressions in Ink Designer Series Paper is so beautiful that it can practically pull off a solo performance! In other words, it allows you to make a stunning card with hardly any effort!

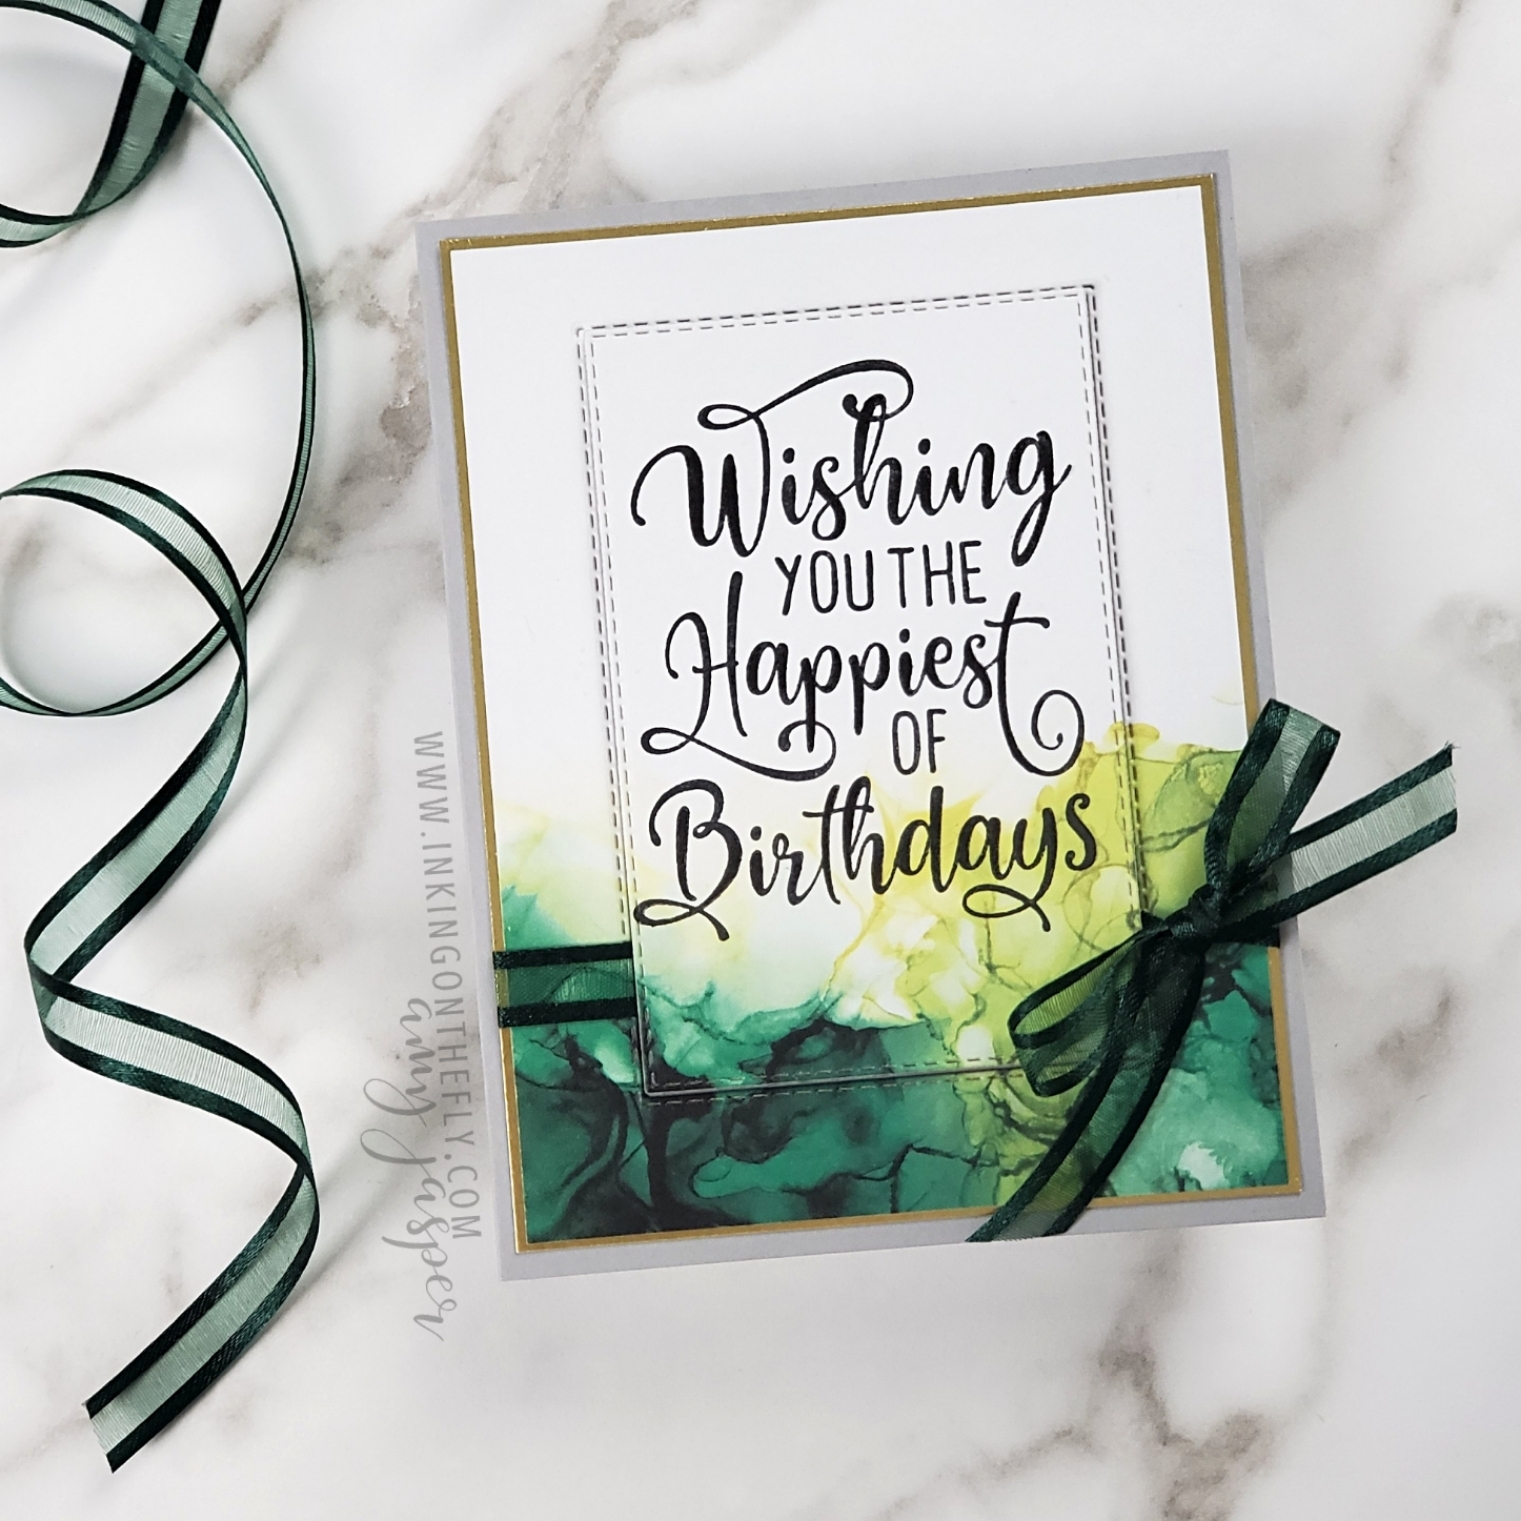
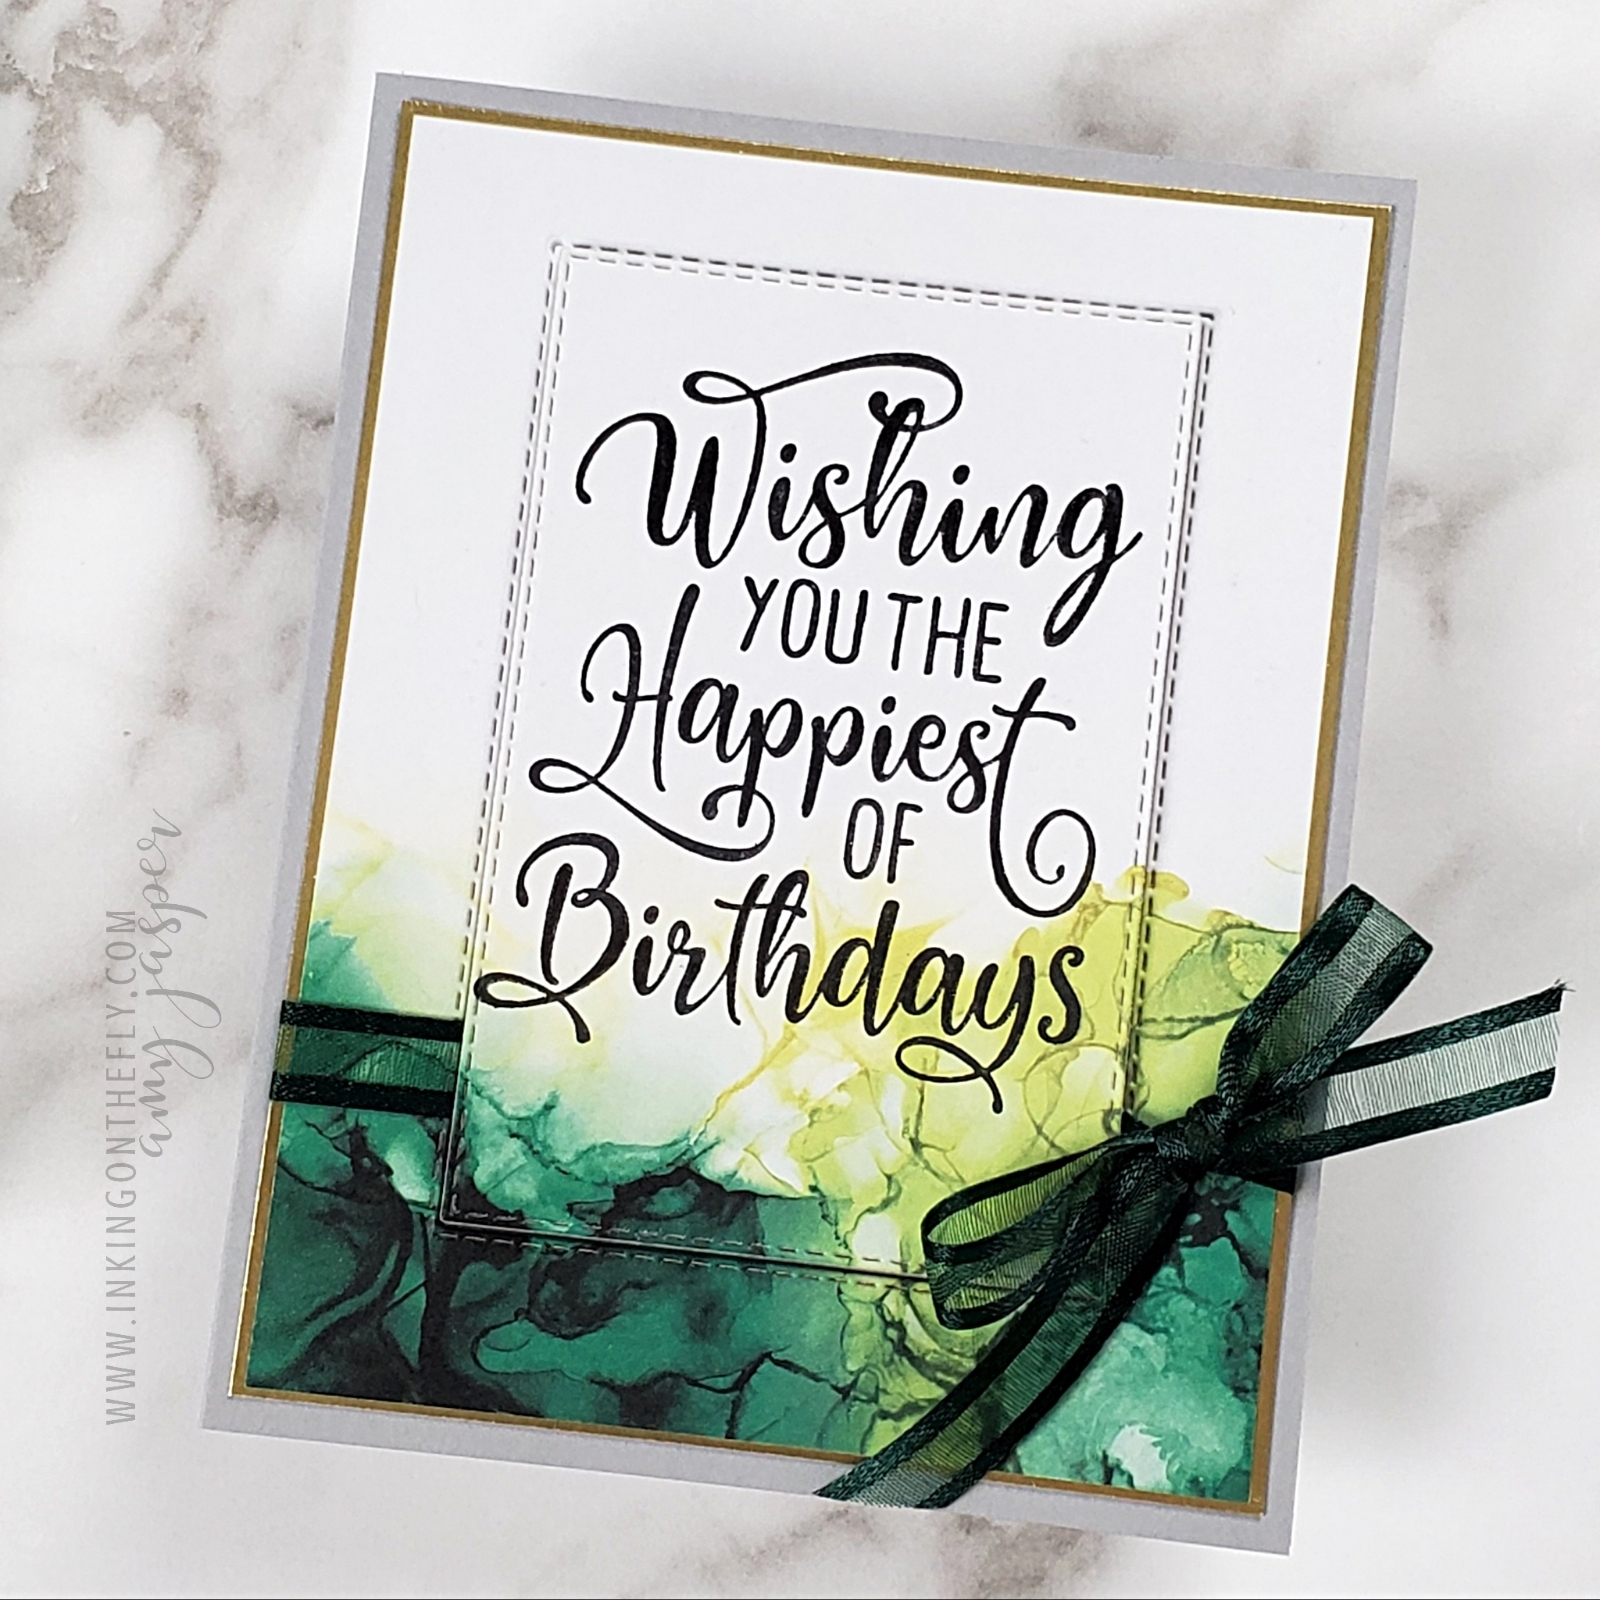
The card I have to share with you today looks fancy, but is actually very easy. It all began with a piece of the Expressions in Ink Designer Series Paper from Stampin’ Up! ®️.

Making the card

I stamped the sentiment on the patterned paper, then used a die to cut around the sentiment. Setting the centre cut piece to the side, I layered the outside frame over the Gold Foil.

Considering that the open weave ribbon is so pretty and ties very cleanly, you can probably guess that I have all the colours! How could I not!? I wrapped it around the two layers and tied a tidy little bow.

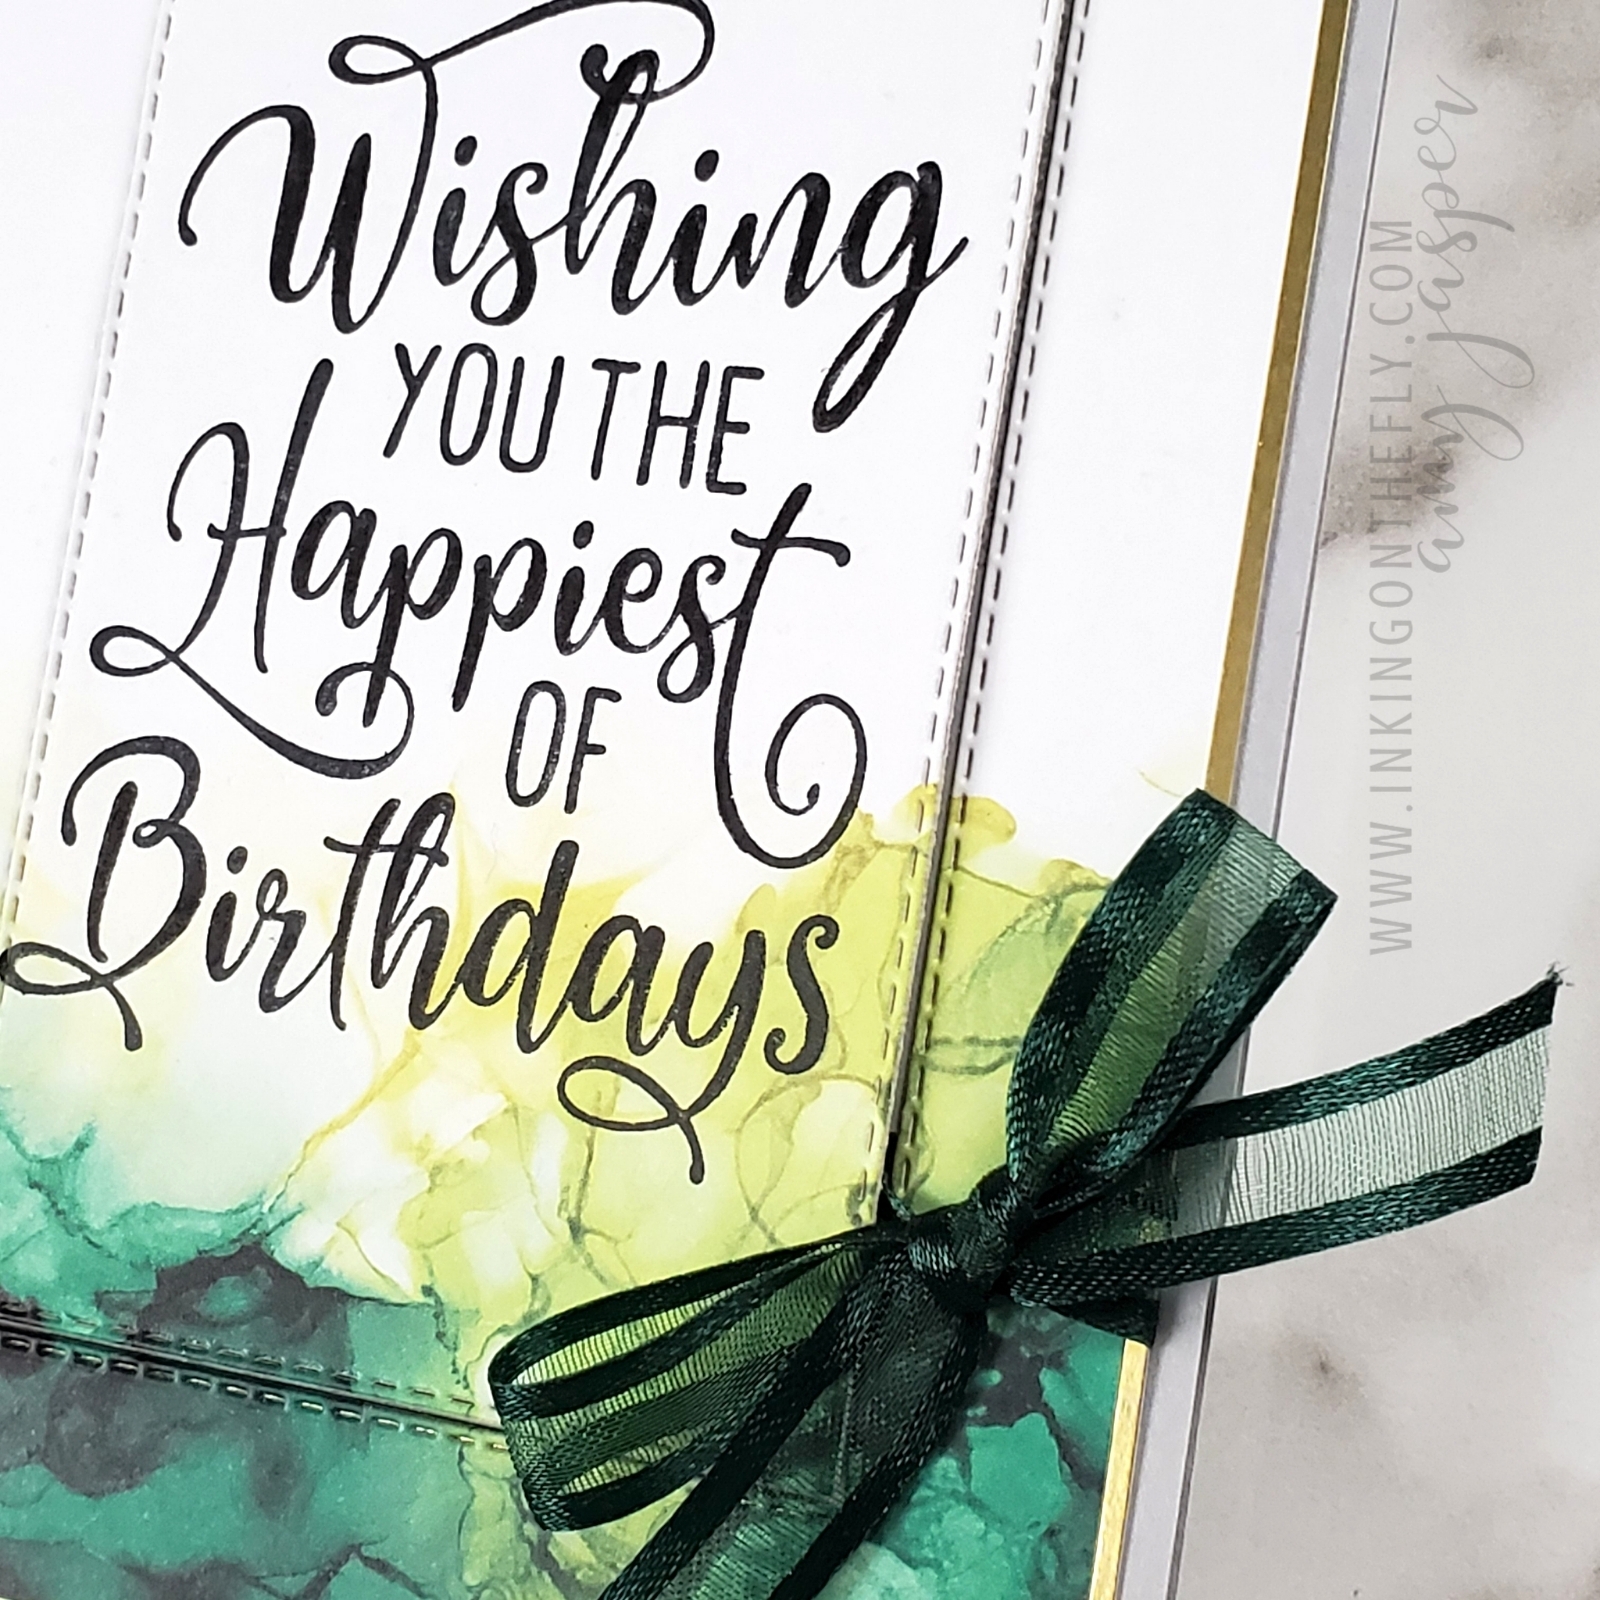
Once the ribbon was in place, I could then adhere these elements to the card base. Finally, the die-cut piece with the sentiment could be adhered to the card front with Stampin’ Dimensionals. I love how the lifted cut-out provides interest and texture, yet still allows the paper to be the main feature of the design.

This card was quick and simple. I feel like I cheated somehow by letting the patterned paper do all the work for me!

A few supplies

In the event that you might want to make this card (or assist it to make itself, as the case may be, LOL!), you will certainly want to get your hands on this gorgeous specialty paper. Unfortunately, (or fortunately, depending on how you look at it), this paper is so popular that it keeps going on backorder! Stampin’ Up! just can’t keep up with the demand.

If you find that’s its on backorder and can’t be ordered, keep checking back. The supply will be restocked. Alternatively, you can contact me and I can notify you when it comes available again.

Click on the links below to find each item easily on my online store.

When you use this paper, don’t let it make you feel like you cheated. Instead, be proud at the discovery of a more efficient way to make something beautiful!

It’s not cheating, it’s a life hack!

So Cool Alternatives

The sun is shining here in the beautiful Okanagan Valley in my little piece of Canada. I could almost imagine that it’s summer. My son mowed the lawn for the first time this year and it’s amazing how much better my yard looks when the grass is freshly cut. It’s the big thing that makes the yard look so much tidier – similar to how making your bed can make the whole bedroom look cleaner!

The April 2021 Paper Pumpkin kit definitely has that summery feel with images of watermelons and popsicles. I have a couple of alternative projects to share with you today using some of the supplies in the kit.

I used the Stitched So Sweetly dies to cut a scallop stitched rectangle from Basic Black cardstock for this card. The watermelon was coloured with Flirty Flamingo and Granny Apple Green Stampin’ Blends Markers.

The second design is a slimline card in Granny Apple Green cardstock. I did some fancy ink blending with my Blending Brush for the background along with the added texture of an embossed outline using my Simply Scored Tool. See the little Clear Epoxy embellishments? They’re hiding an unsightly smudge and are not even available to customers until the new catalogue goes live on May 4th.

If you’re in Canada, you can sign up with me to receive your monthly Paper Pumpkin kit and have your own personal creative escape to enjoy each month.


Watch the video to see more on the making of these two Paper Pumpkin alternative designs.


Birdies for You

This sweet Sunday design has a little bit extra with fancy score lines, some ink blending, and coloured ribbon.

I started with a Gray Granite cardbase and layered a strip of Rococo Rose cardstock. I created the grid pattern on the square piece of Very Vanilla cardstock with my Simply Scoring Tool, then used a Blending Brush with Rococo Rose Ink to emphasize those score lines with a bit of colour. The little birdies from the Quite Curvy stamp set were stamped with Tuxedo Black Momento ink to look like they’re standing on the grid lines.

After adhering the Pearlescent Paper behind the vanilla piece, I coloured a section of the Pool Party Sheer Ribbon using the Dark Blackberry Bliss Blends Marker and wrapped it around the two layers, adding a Heart Charm into the knot before tying a bow.

The final touch was to stamp the sentiment on the strip of Crumb Cake cardstock, flag the end with my Paper Snips and adhere it to the card with Stampin’ Dimensionals.

This was one of the 10 cards offered as part of the Stamp Camp event in January. Registration for the next stamp camp (only available in Canada) ends April 30th and features the Hand-Penned stamp set from the upcoming 2021 – 2022 Annual Stampin’ Up! Catalogue. Click on Events and Classes in the menu on the top of the page to find out more.