I made an alternative project for this stellar Paper Pumpkin kit after already loving the design of the original cards.
If you saw my earlier post about the kit, you would know how much I love it! I didn’t think it would be possible to make an alternative project that I loved as much.
My 17 year old son tells me that this pop-up card is definitely a step up. (This, from the amazing kid who got the highest possible mark on his Advanced Placement Physics exam! So proud of him!)
I’m very happy with this design, but I have to admit that you just can’t beat the simplicity of the original tri-fold cards in the kit. For how simple they are, they look fantastic!
My design is certainly not as simple.
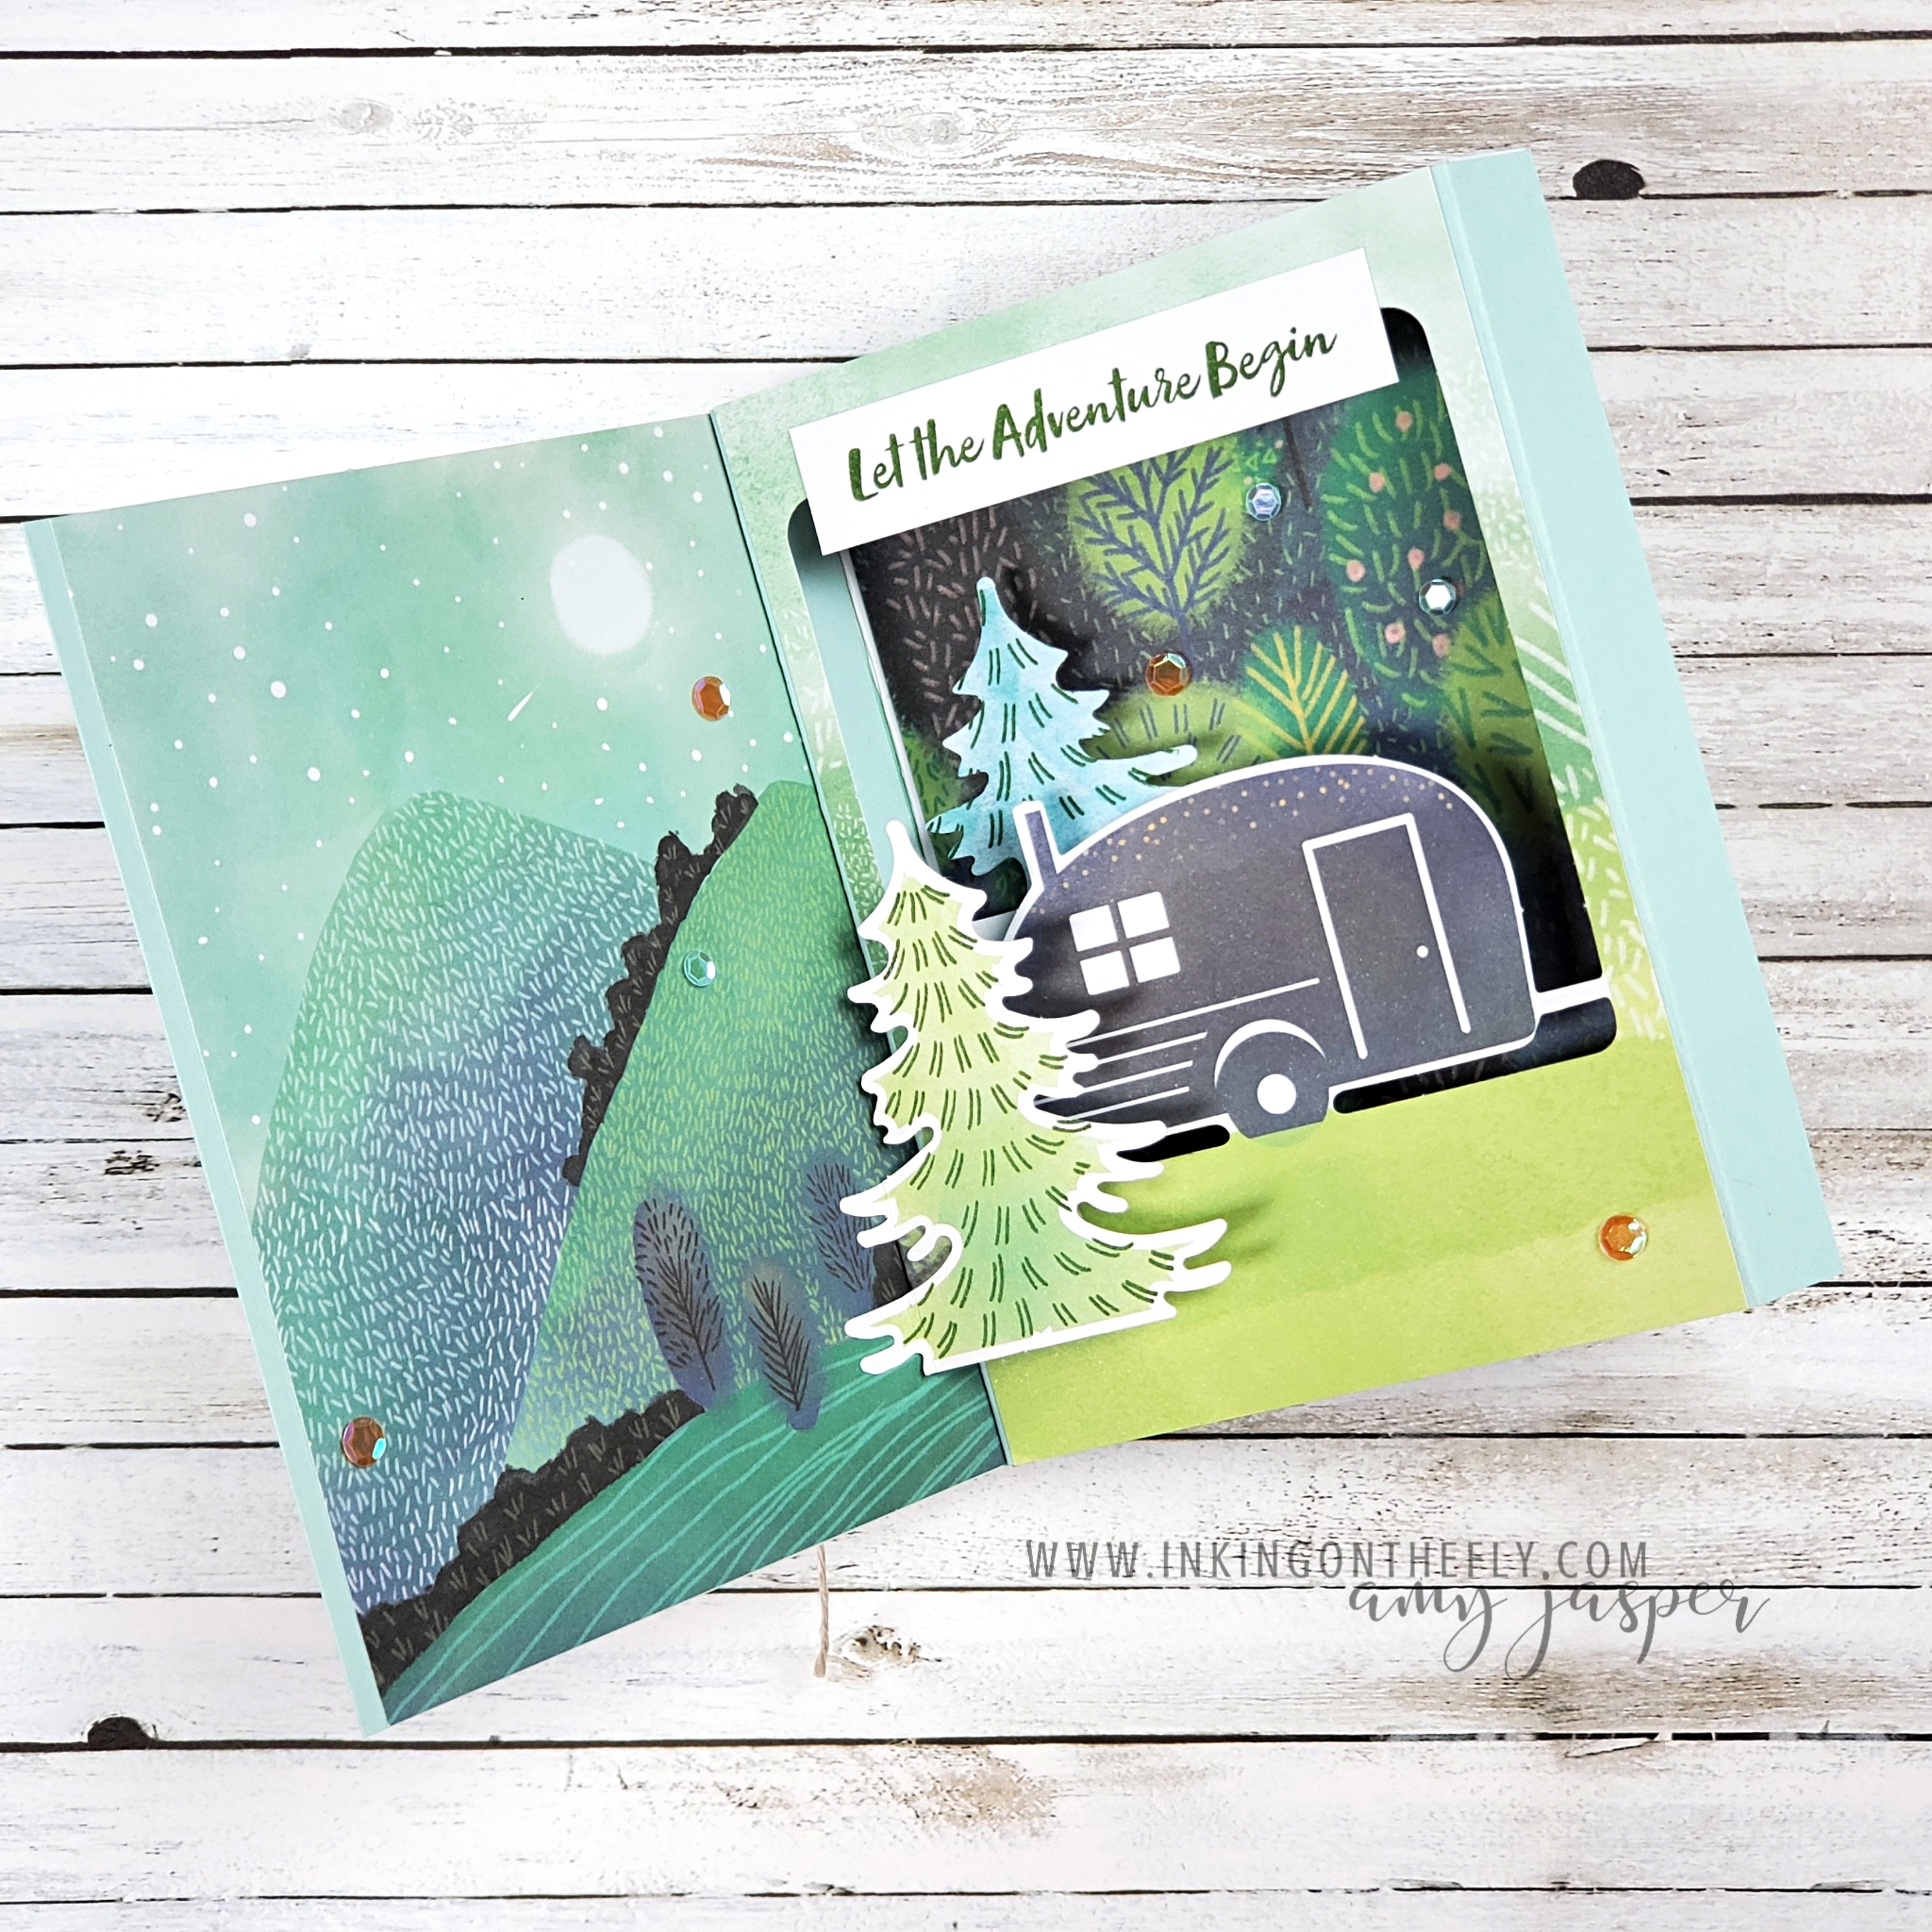
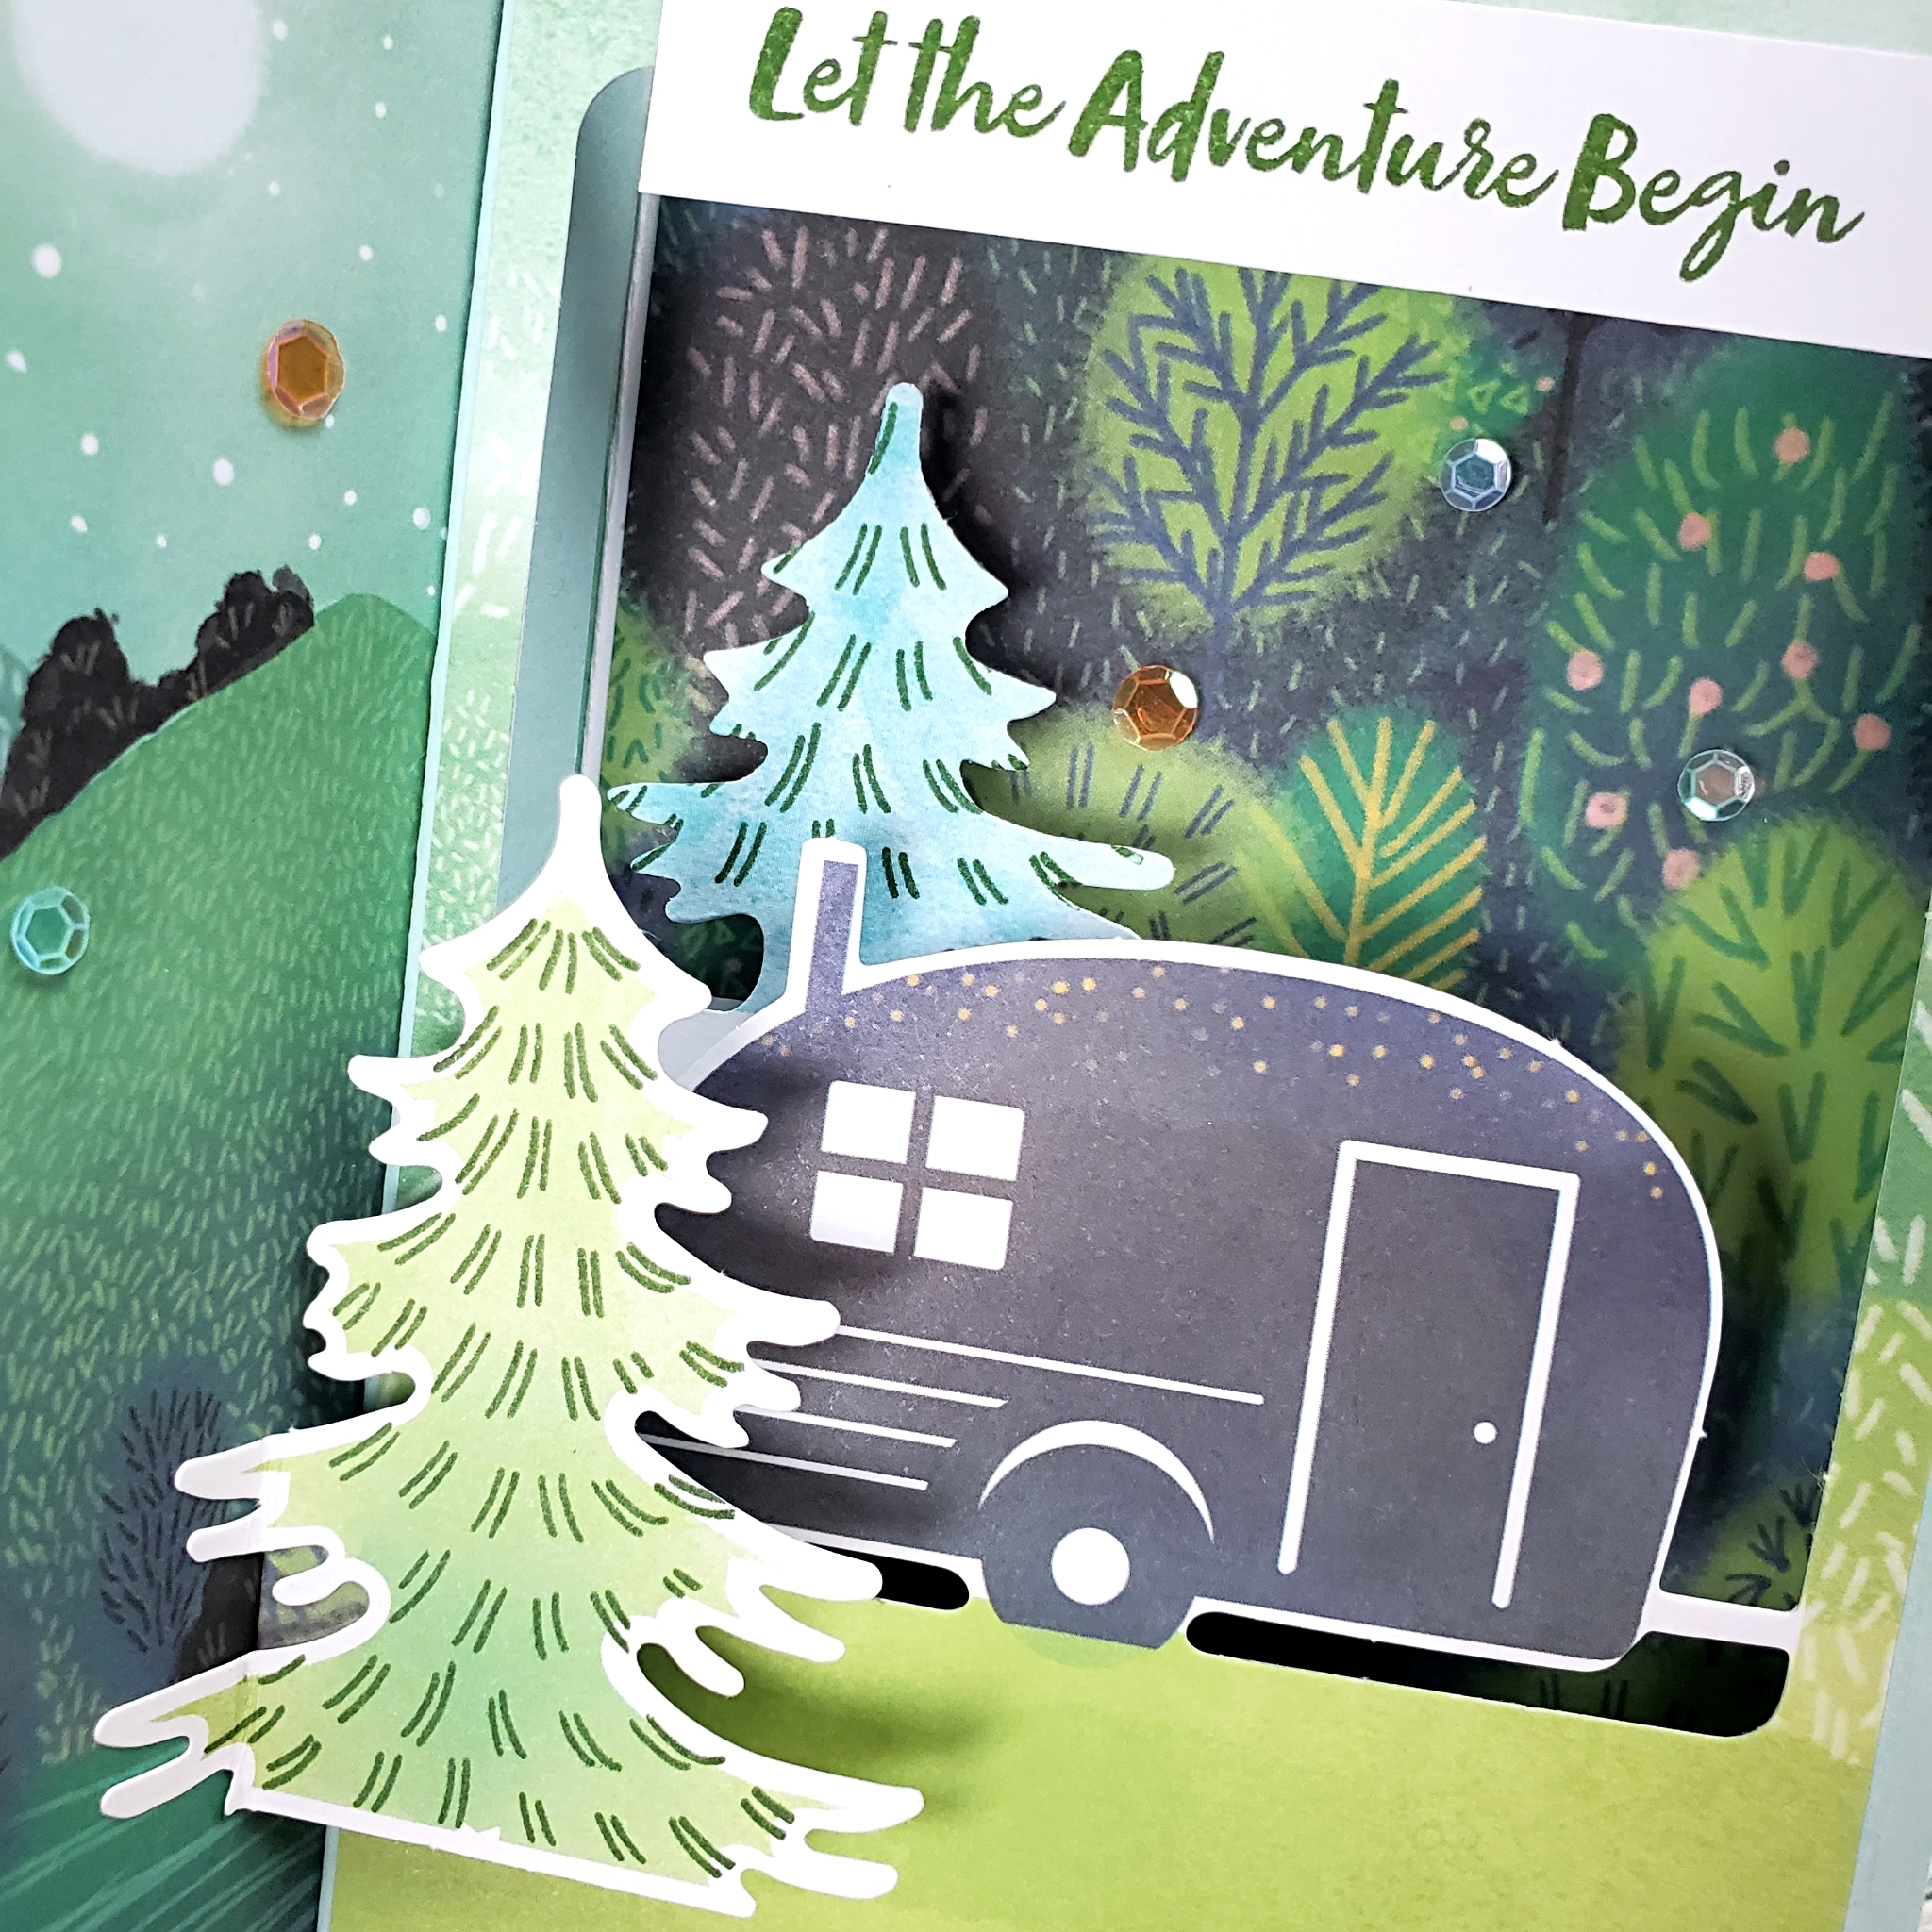
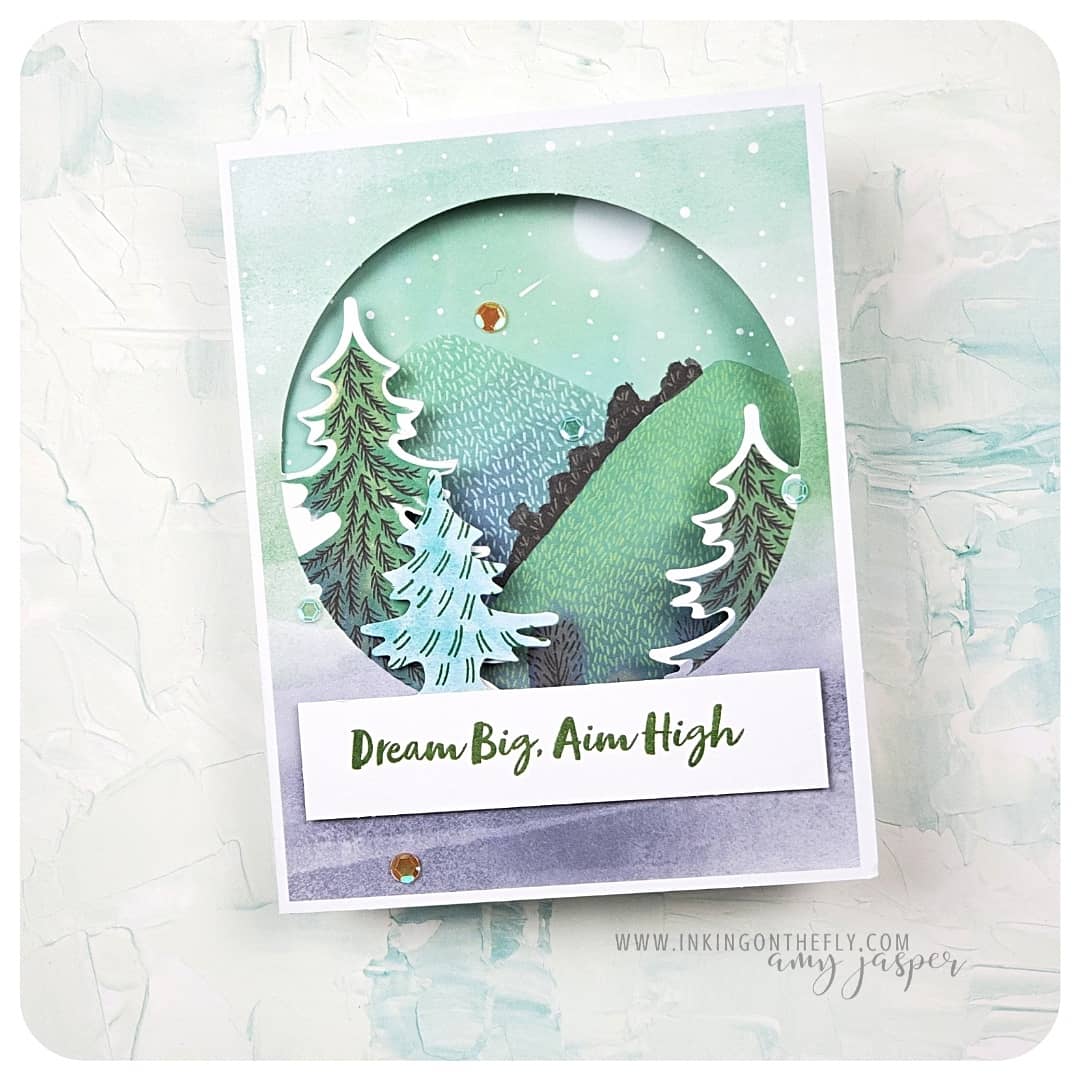
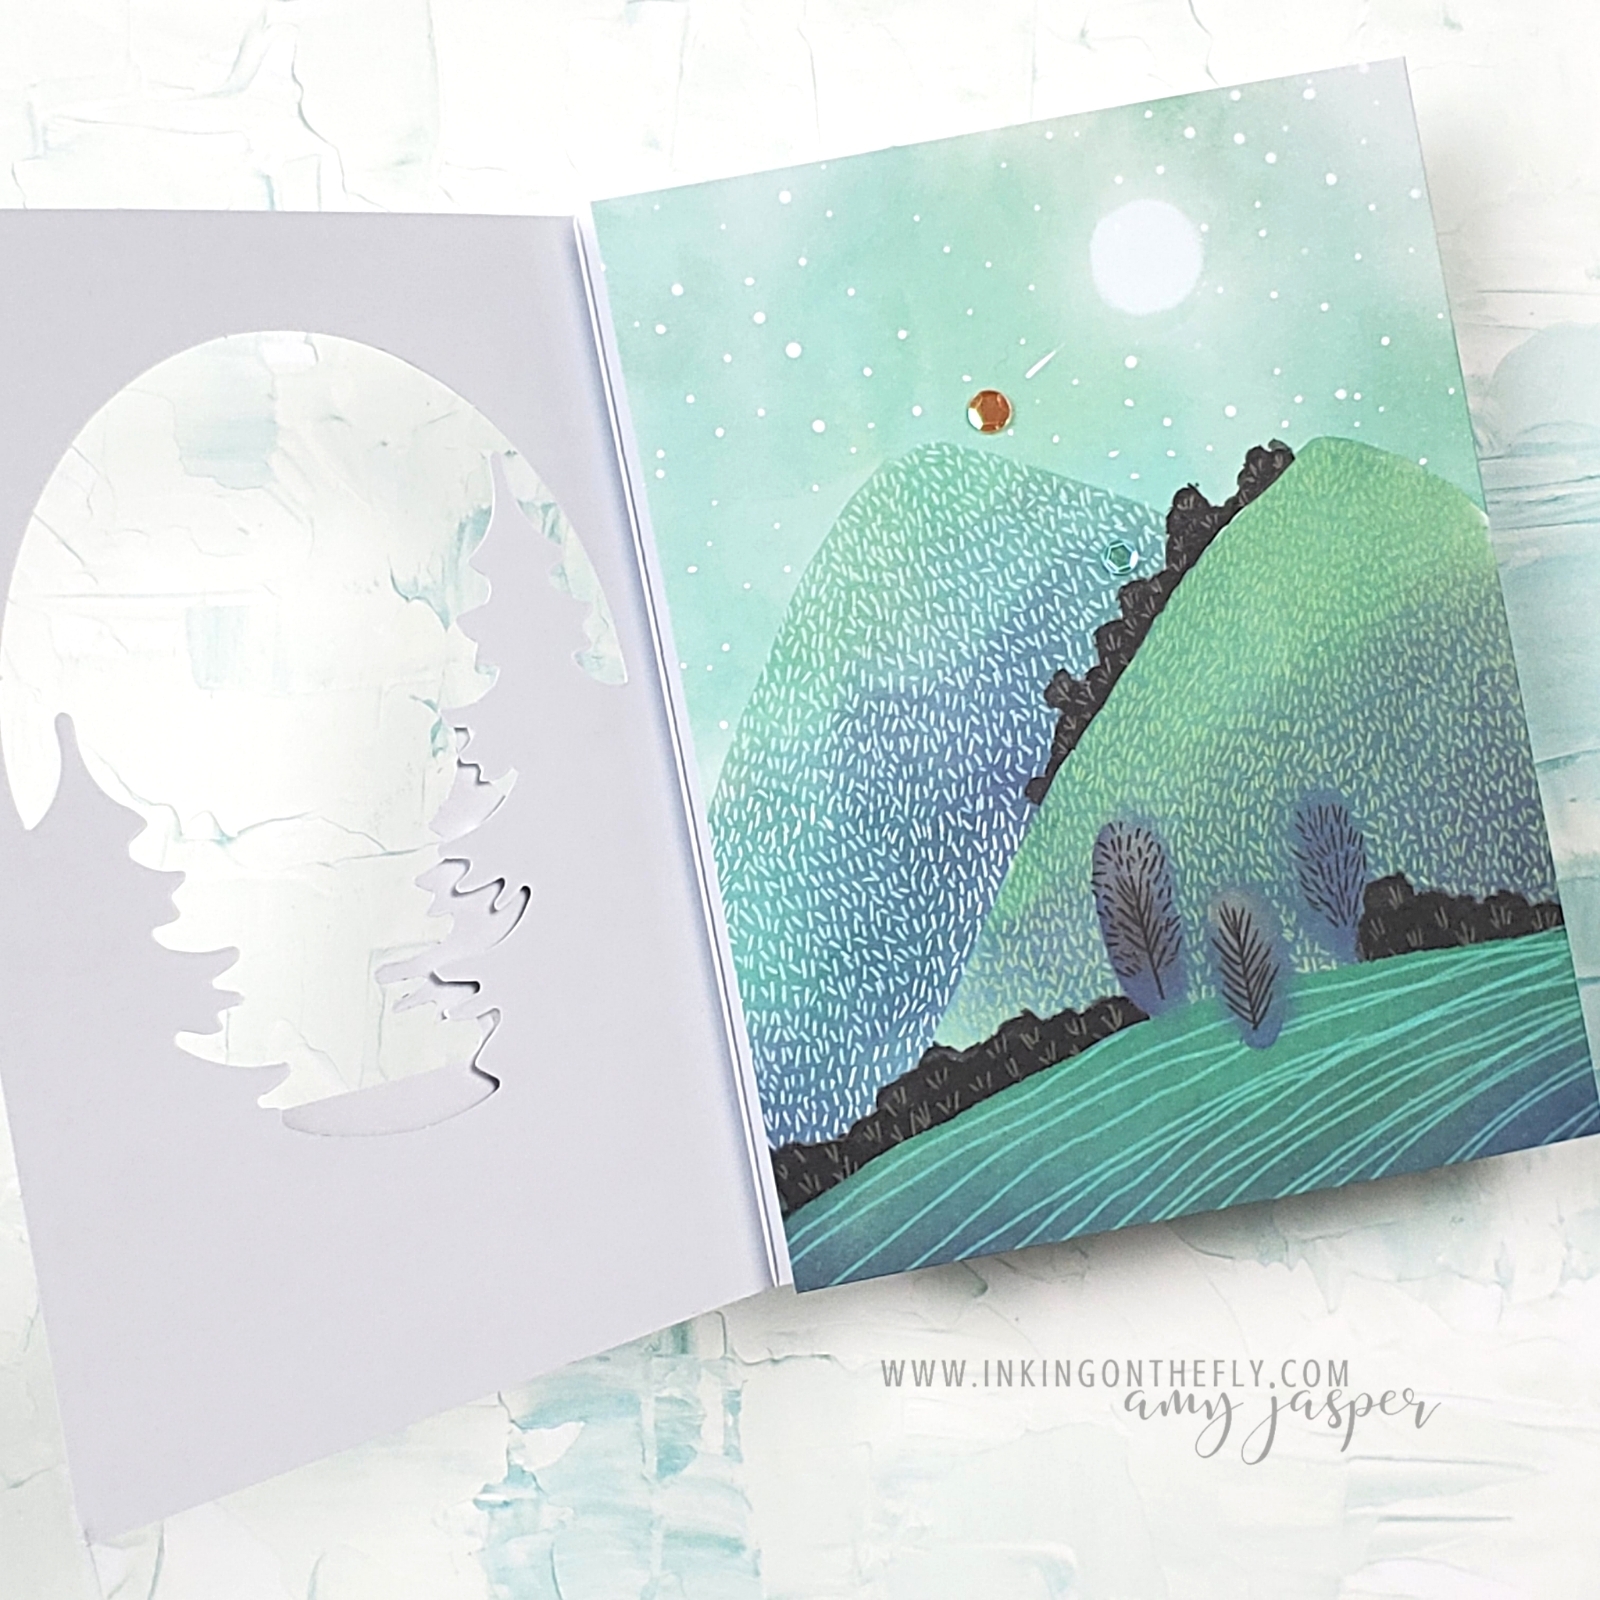
Two of the designs in the July Paper Pumpkin kit were used to create this diorama card. When you open the card, you can see that the inside is the best part with the printed scene on the left and the pop-up scene on the right. This shows off the printed parts of the cards.
How-to Video
Usually, I share my Paper Pumpkin projects in a live stream on Facebook. However, this week I’m taking a vacation, so I pre-recorded the video and scheduled it to post. (tech skills, don’t fail me now!)
Watch the video below to see how to make this fancy pop-up diorama card using the July 2021 Paper Pumpkin Kit – The Adventure Begins.
Start your Paper Pumpkin subscription today. You can choose to make the cards just as they are intended or you can stretch your creativity and make some alternatives. Either way, Paper Pumpkin is a fun escape!
First, can I even say that? Is it fair for me to say that this is the best Paper Pumpkin kit of all time? Show me one that you liked better and prove me wrong!
I love everything about this kit. I love the colours, the theme, the tri-fold design, not to mention how quick and easy these are to make! With all that in mind, it will be hard to make alternative projects that I like more than the original!
Oh, but I’ll certainly try!!
This is the July Paper Pumpkin Kit. It’s perfect for folks who appreciate the beauty of nature. Especially those who love camping. Indeed, my friends, that is likely why I love this kit so much!
If Paper Pumpkin isn’t yet coming to your door each month, you can subscribe now to receive the August kit.
The co-founder of Stampin’ Up! helped design the August projects. That alone tells me that the August kit will be gorgeous! You won’t want to miss it!
Did you know that Paper Pumpkin subscribers have special perks? It’s true! They have the opportunity to purchase any available past kits, as well as refill supplies for past kits. So, if you like this kit, then you might be lucky enough that it will become available for purchase..
Just another reason to subscribe to Paper Pumpkin!
Watch the video
Step into my crafting process and see how easy these cards are to put together. Click to watch the video below.
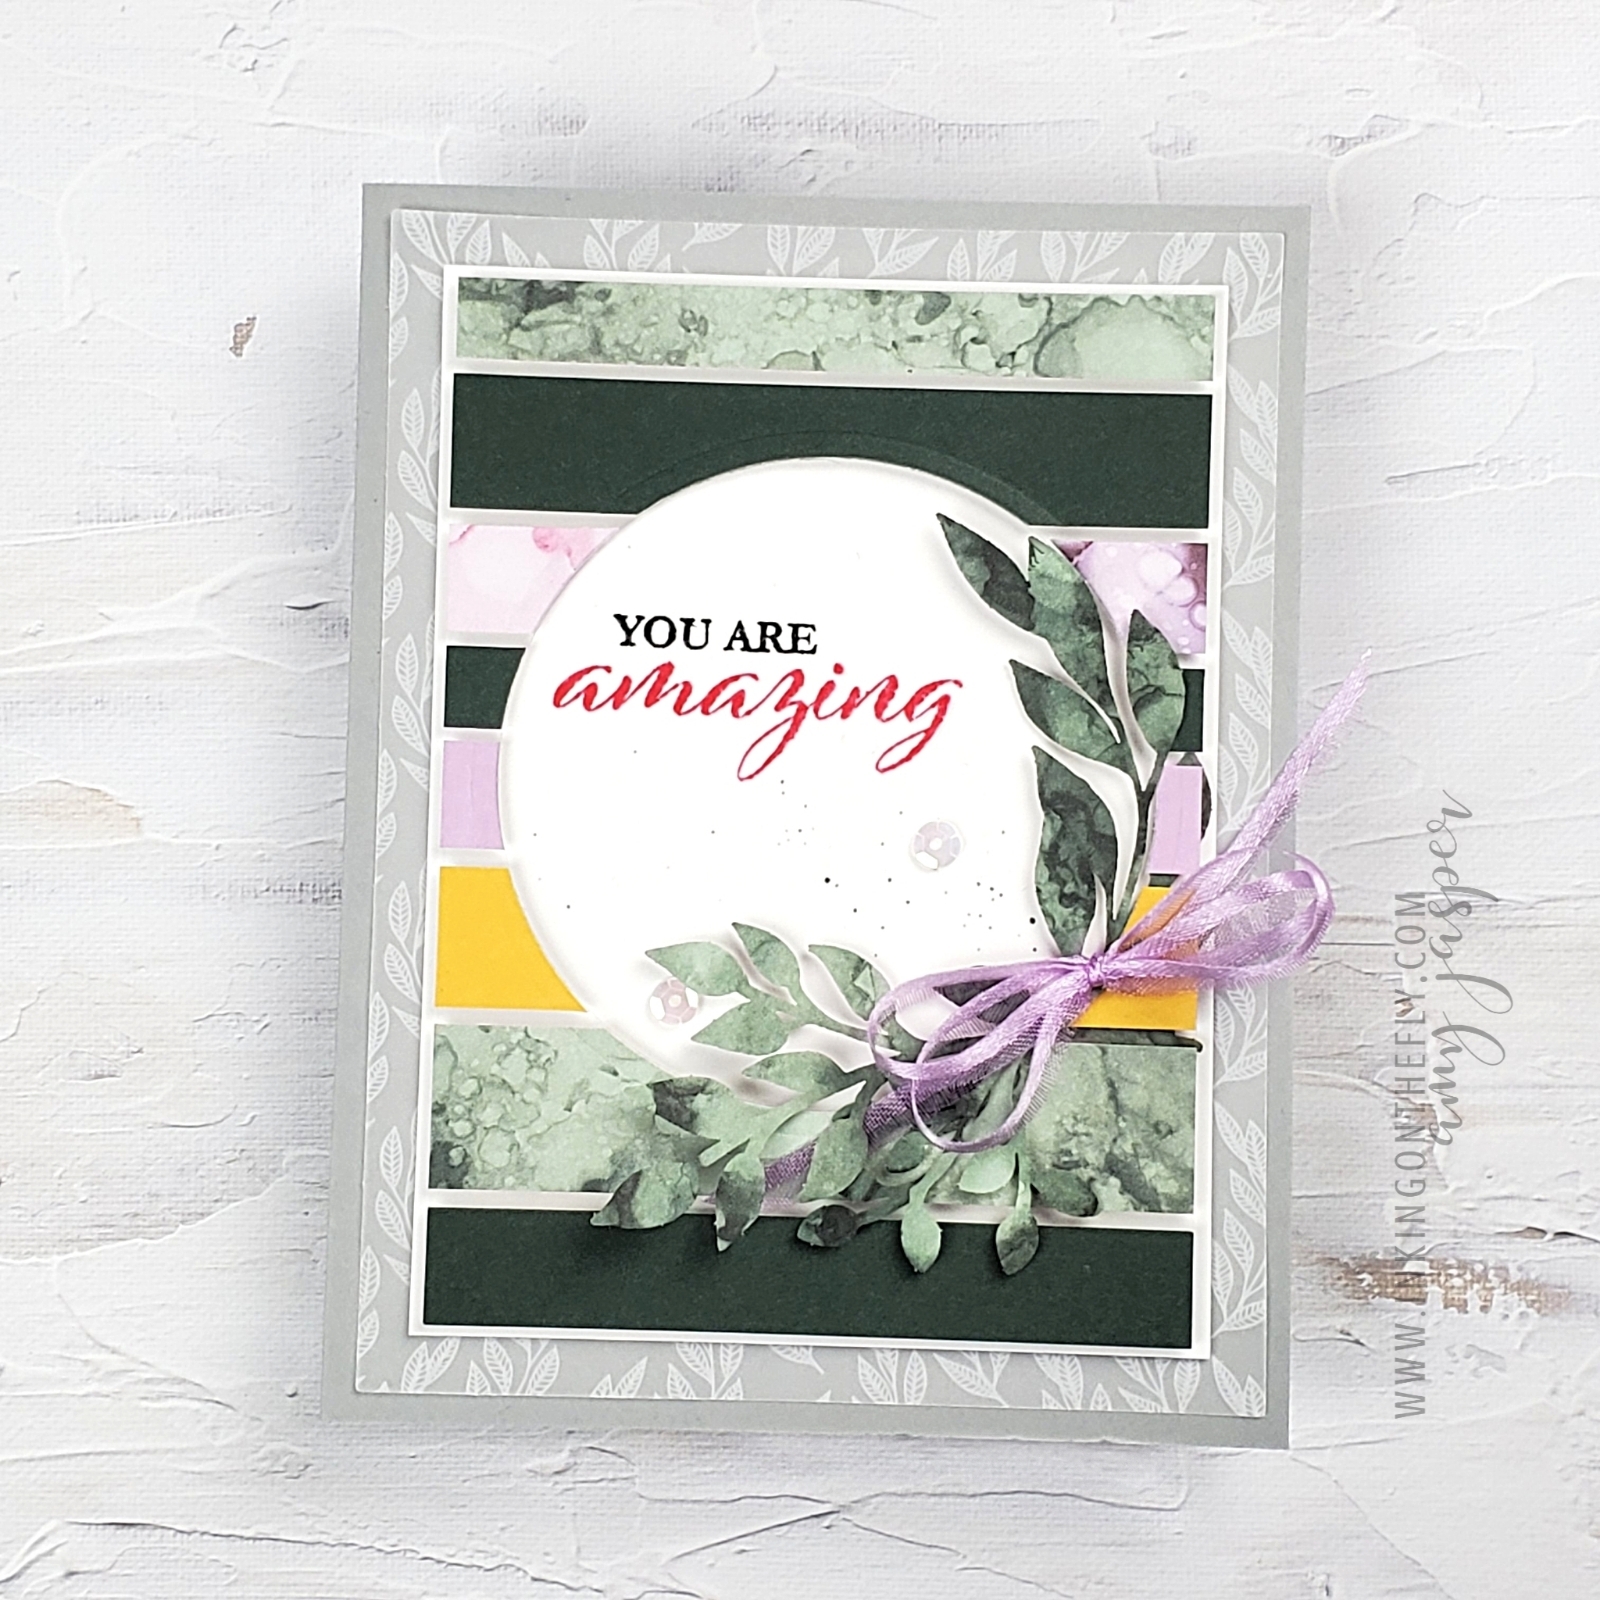
Remember my alternative projects for the June Paper Pumpkin Kit? One of those alternatives was made using strips of the various patterned and coloured paper that came in the kit. After making that card, I thought I’d create a third project, using the left-over paper-strip piece.
It so happens that every once in a while I create a project using left-overs or scraps. Whenever this is the case, I feel so good about myself, as though I conquered some big bad evil in the world! LOL! It feels like I should get to wear a little crown for the rest of the day!
Sadly, that’s probably a strong indicator that this is a rare occurrence and, in fact, leads me to realize that I should seek out more opportunities to be thrifty.
Making the card
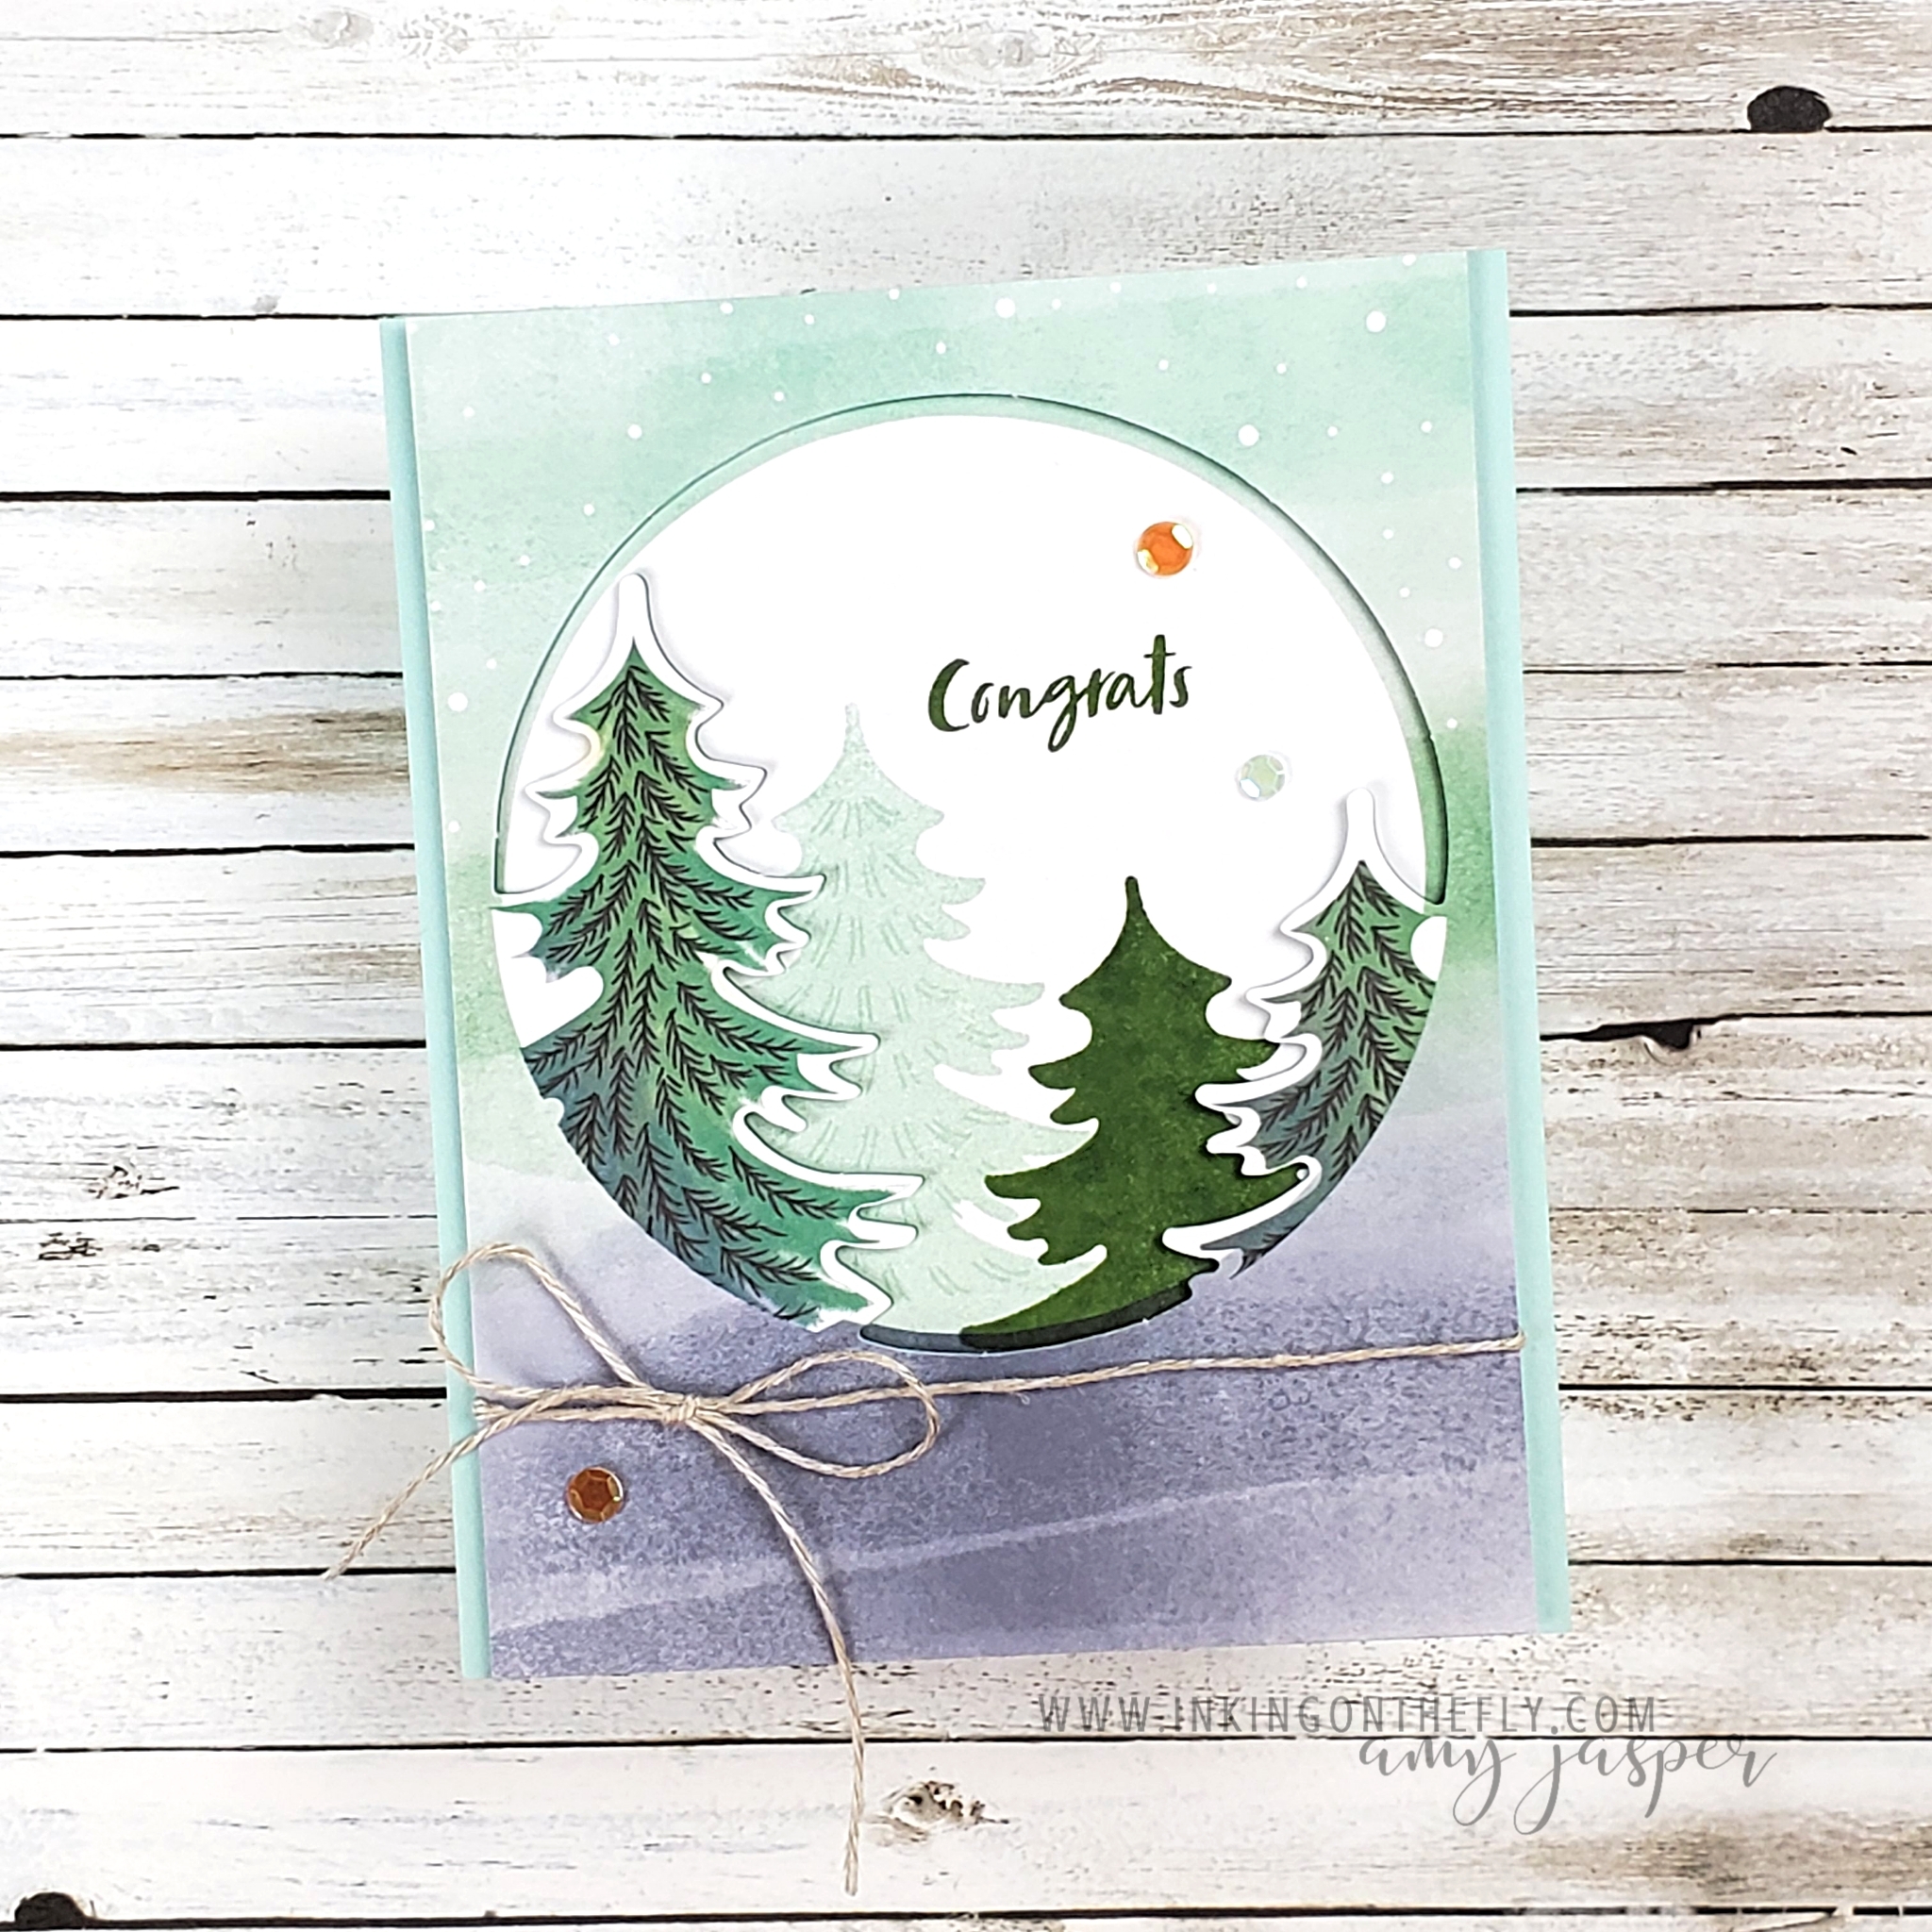
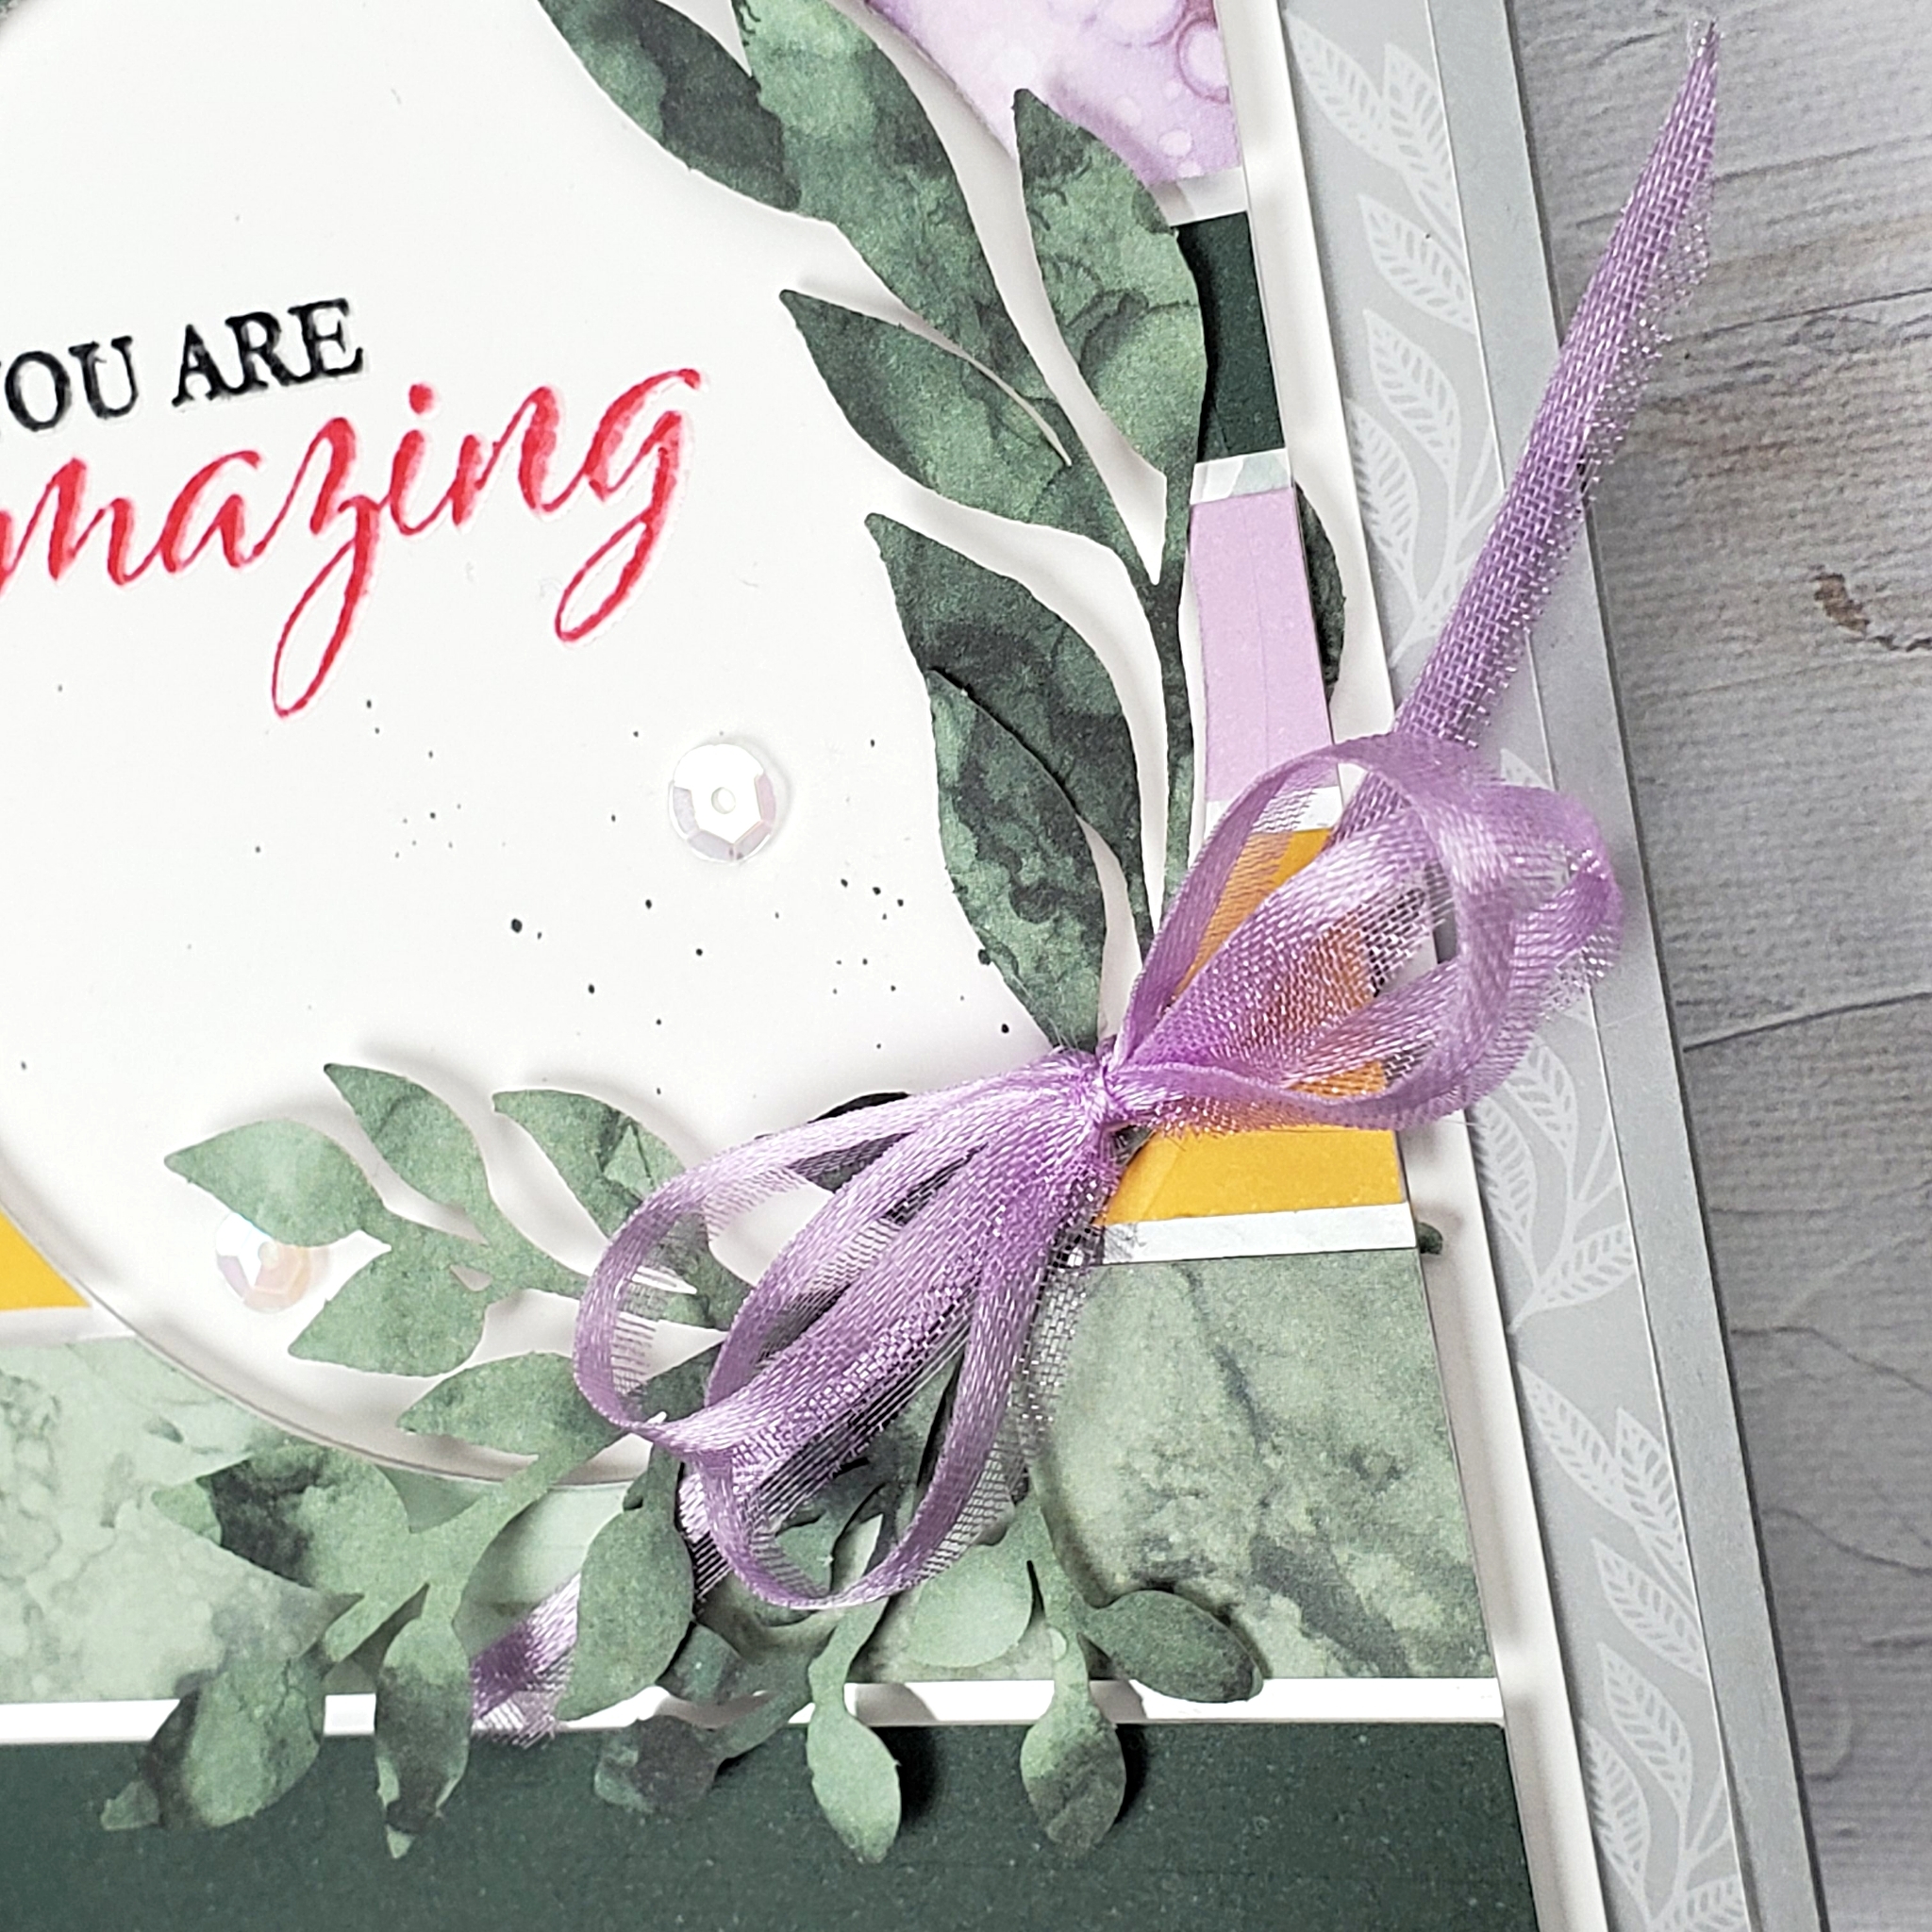
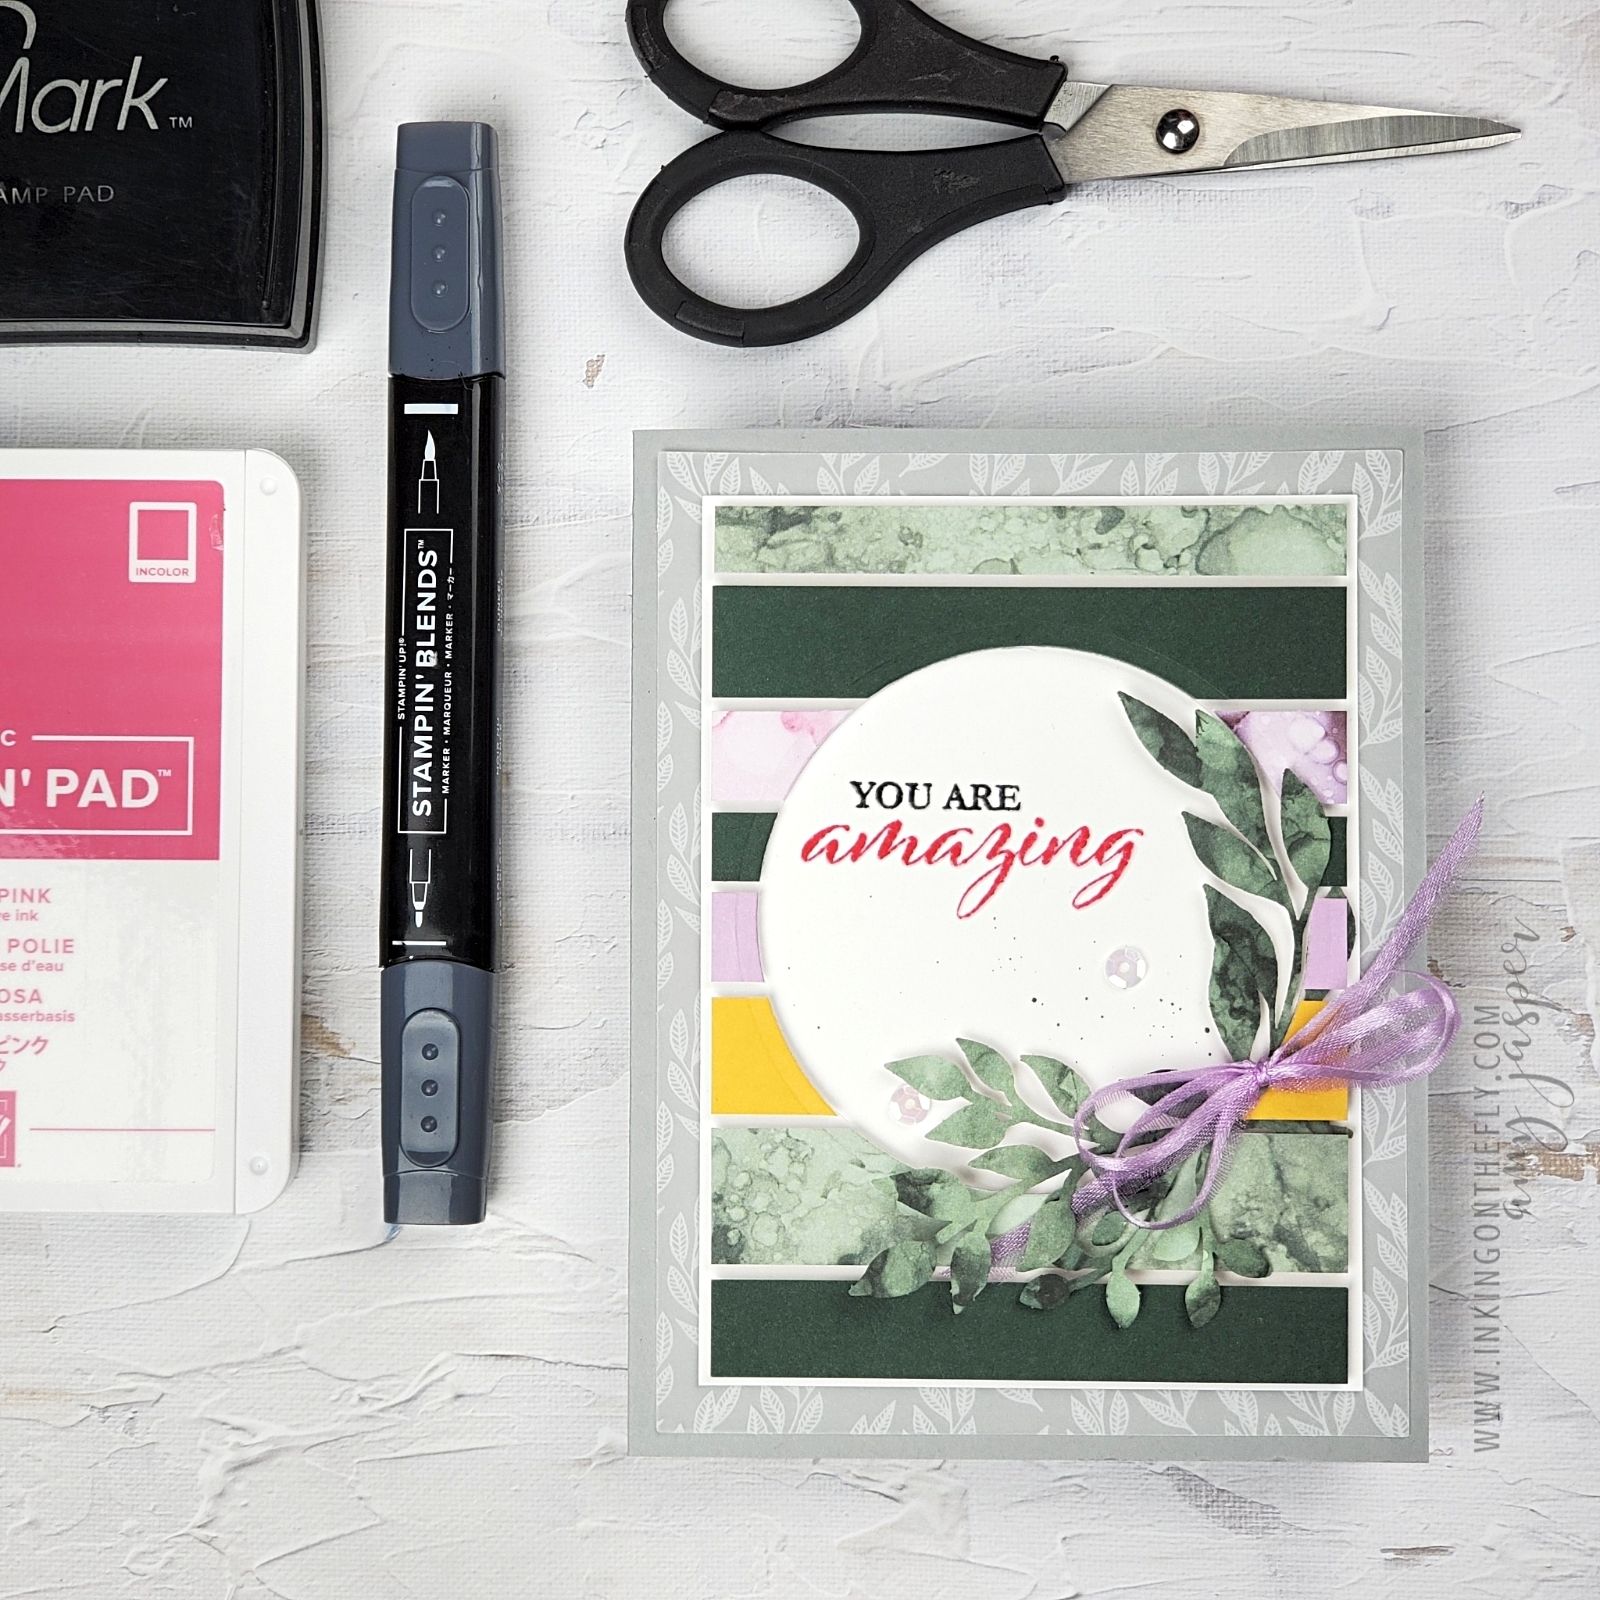
This Paper Pumpkin alternative project has multiple strips of paper adhered to a piece of Window Sheet (acetate). The stripey acetate was run through the Cut & Emboss Machine with one of the Layered Circle Dies to cut out the centre. I made my first card using the circle piece. You can see the information on that card by clicking HERE.
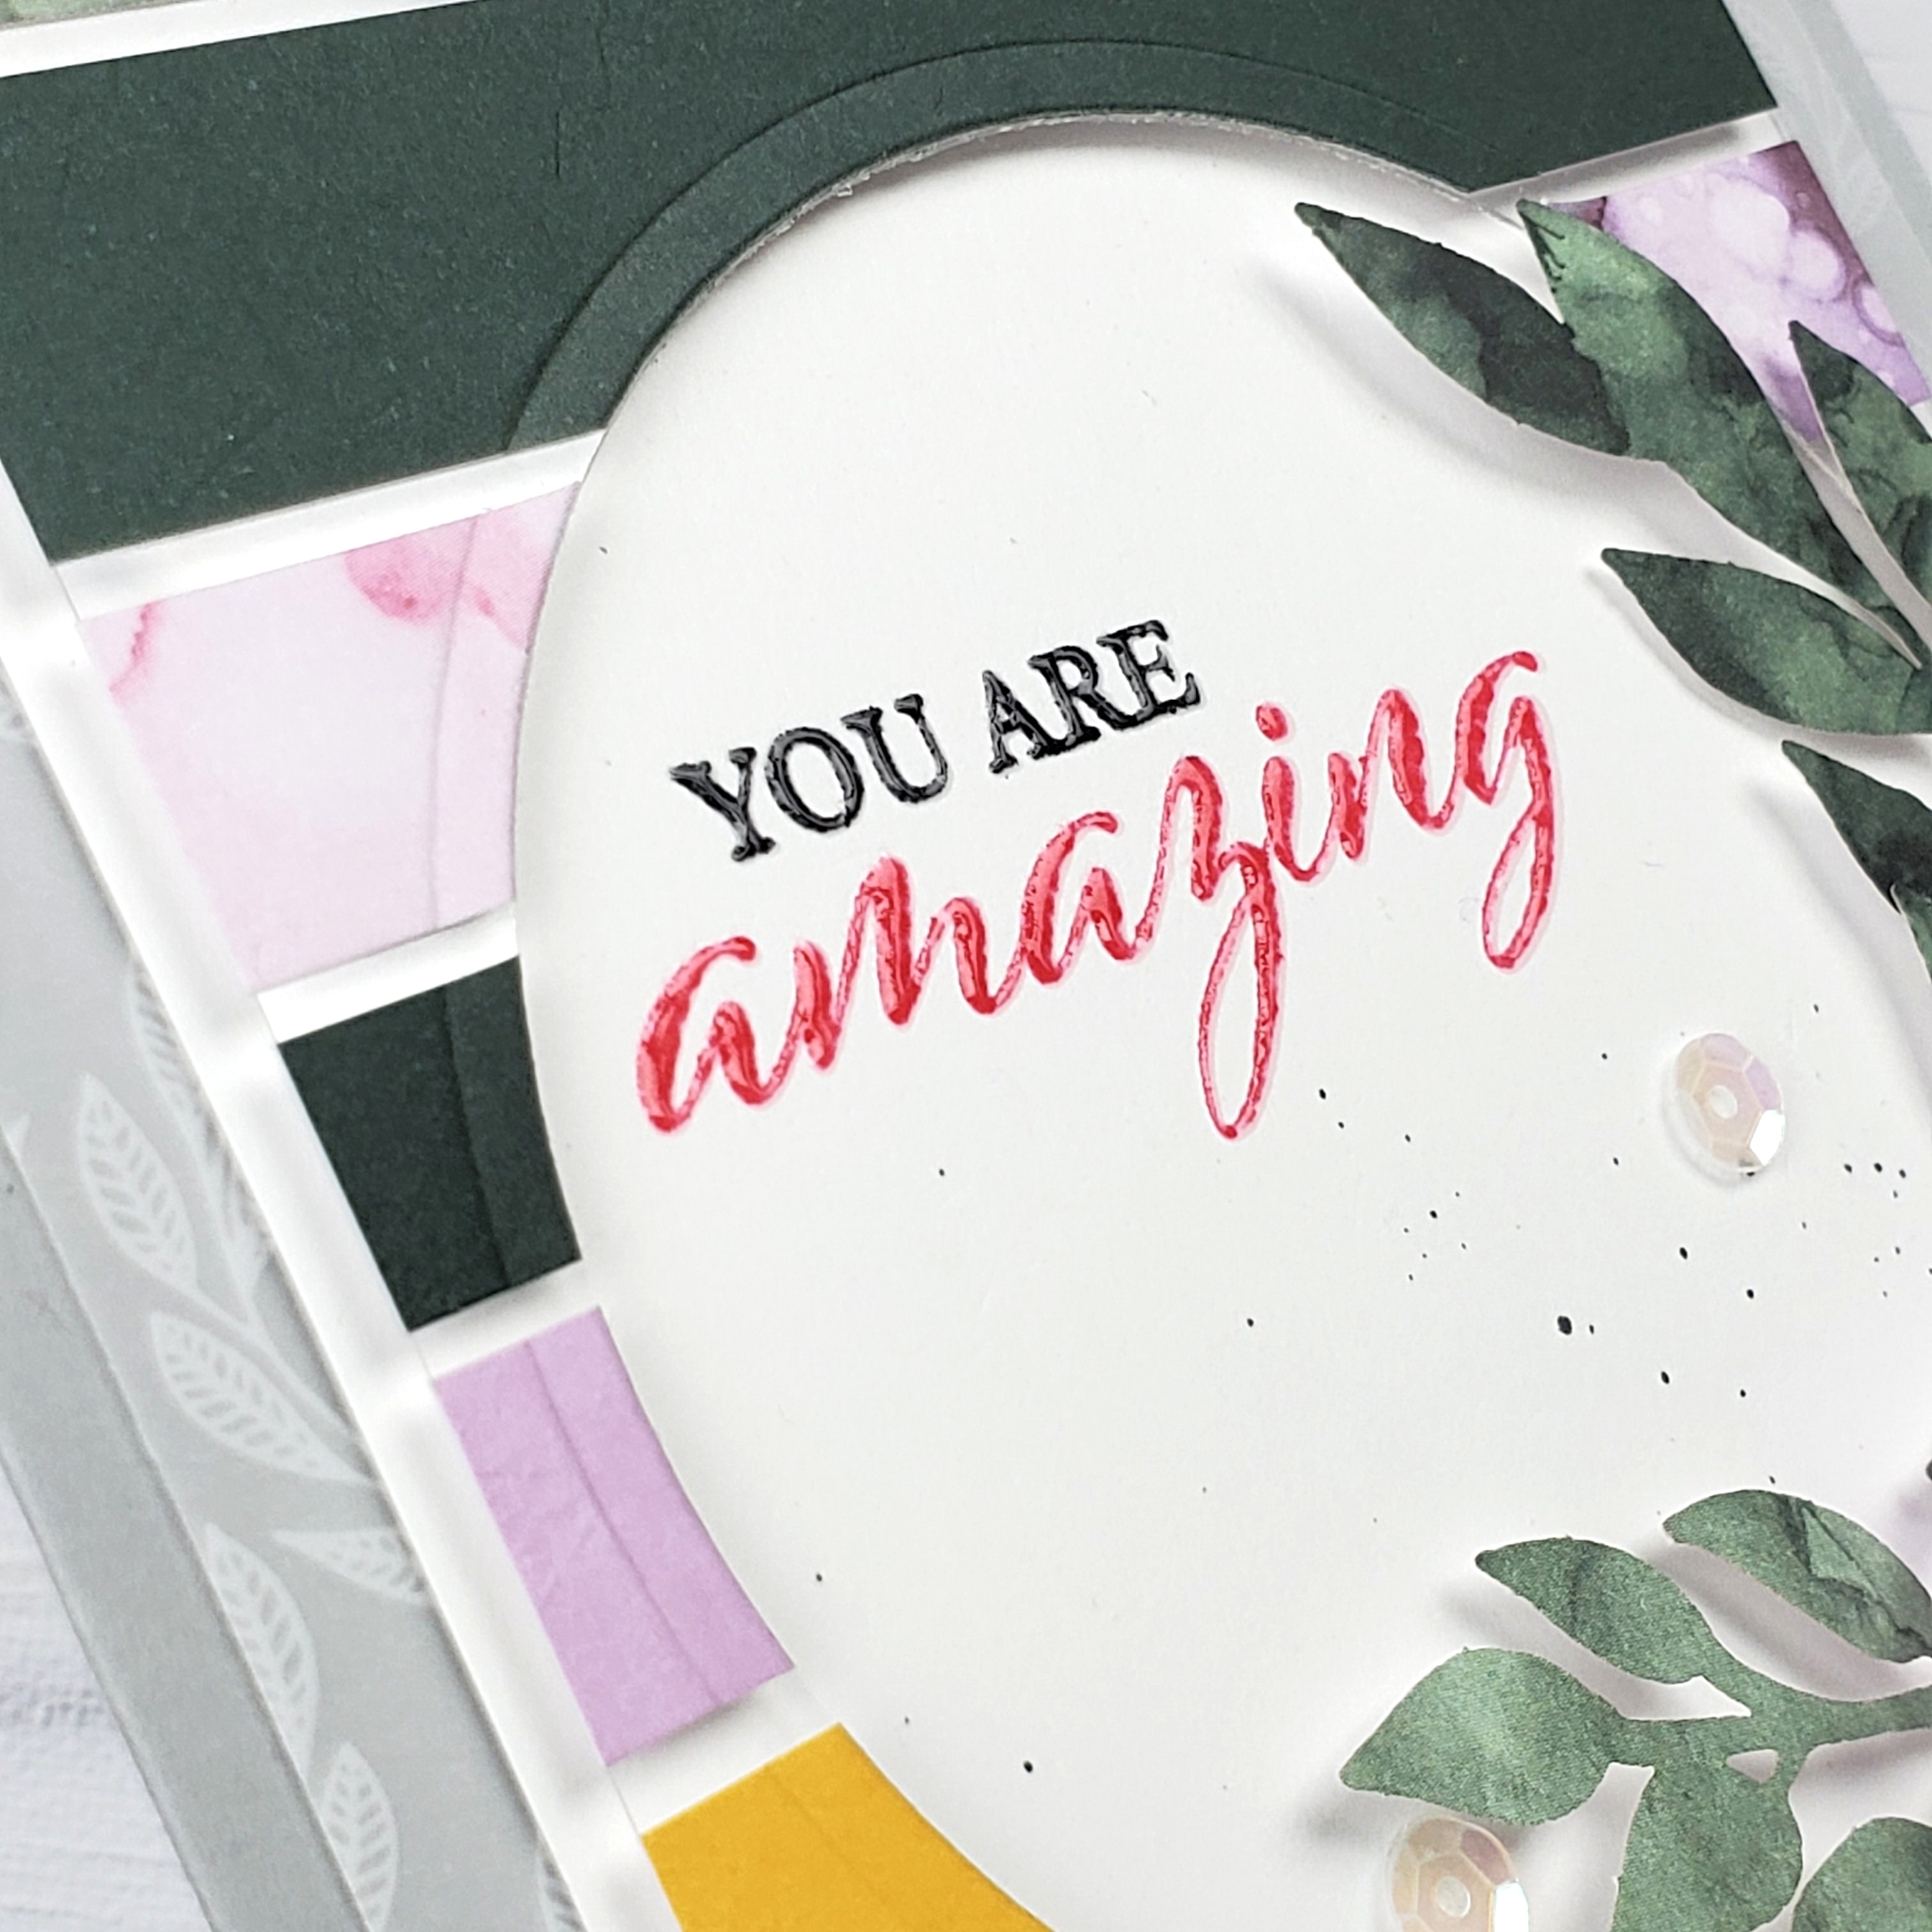
The sentiment from the Expressions in Color kit is stamped on Basic White cardstock. I used my Stamparatus so I could stamp the sentiment more than once.
Clear Embossing over stamped sentiment
Why do I want to stamp it more than once, you ask? Well, my crafty friends, there are a couple reasons: First, if it doesn’t stamp evenly, I can easily re-ink my stamp and go for it again. Second, I can clean my stamp with my Simply Shammy and use Versamark ink to stamp it again in the same spot, so I can use Clear Embossing Powder. This gives me a beautiful, glossy, coloured sentiment!
Using your Stamparatus also allows you to do a second layer of embossing powder to get an even better finish. After heat-setting your powder, place your paper back into position in the Stamparatus and ink it a second time with Versamark ink. Stamp again over your previous image (in exactly the same place, because of this amazing stamp position tool!). At this point, you’re ready to add your Clear Embossing Powder again and heat-set it for a super glossy finish! No pitting or vacant areas. Just amazing!
Basic Black Blends Marker was used to create a bit of spatter on the Basic White
The rest of the design is pretty simple.
I layered the leaf patterned vellum from the kit over a Smoky Slate card base, following that with the Basic White stamped and spattered piece. The stripey acetate is adhered with Stampin’ Dimensionals to give it that cool floating paper-strips look.
Tucked in the lower right section of the circle, is a die-cut element (also from the June Paper Pumpkin kit) adorned with a delicate bow. This is a segment of Fresh Freesia Open Weave Ribbon that had been cut in half along its length before tying it into a double bow and adhering to the card with a Glue Dot.
Two adhesive-backed sequins give the final touch to this project.
How do you manage your paper scraps?
I don’t always use left-over pieces from cards that I’ve made. However, I do recycle the smaller scraps and I cut larger scraps to sizes so that I can use them more readily. Often, the remains of a card could be used with more intention, rather than being tossed aside and ending up in the recycle bin because of lack of imagination. Perhaps I could challenge myself to make a card with the scraps from the previous project every time? Then I could wear my do-good crown almost everyday! LOL!
(I guess I need to make myself a crown!)
If you have any good tips or tricks for managing your paper scraps and left-over card bits, please share your wisdom! I’m sure I’m not the only person who struggles with being frugal.