Christmas

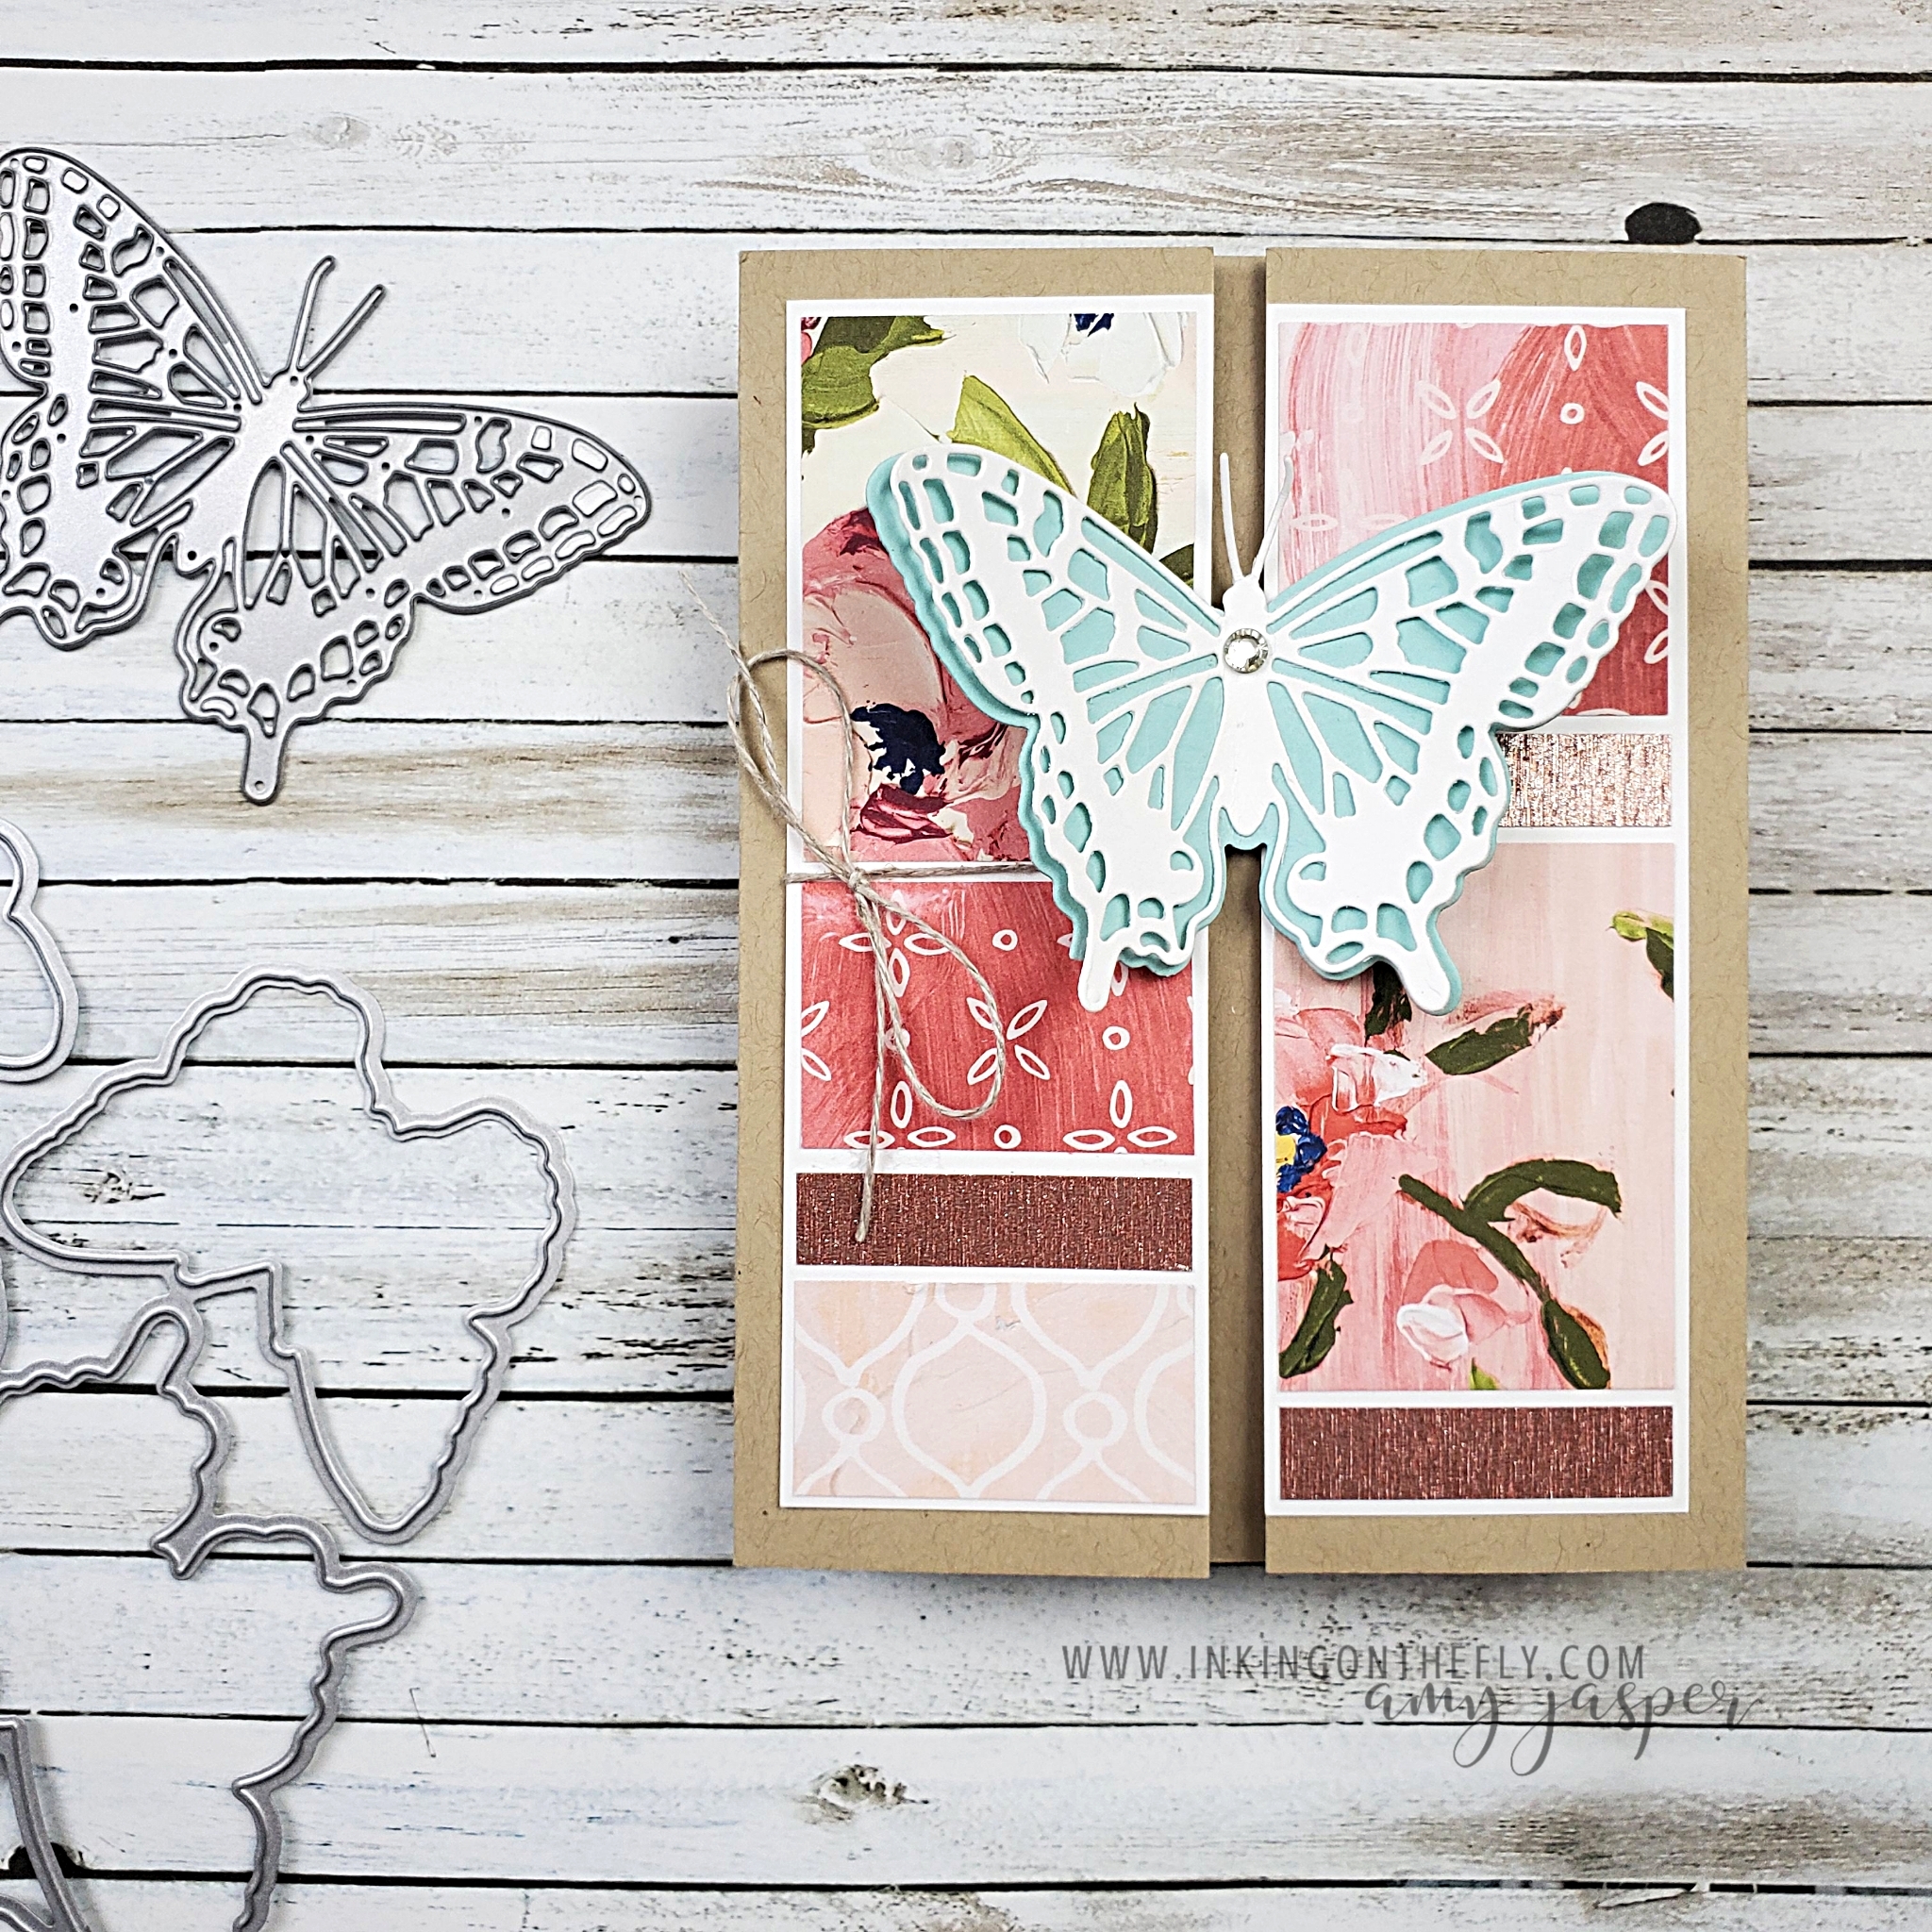
How to Make this Easy Front Flip Fold

Seriously! This fun fold card is so easy! When I find an easy card design that I like, I end up making a lot of them!

I think it’s the kind of card that is also fun to receive because of the unique opening. I shared this design at my October virtual gathering with my team of demonstrators because it’s a great card to make together with friends.

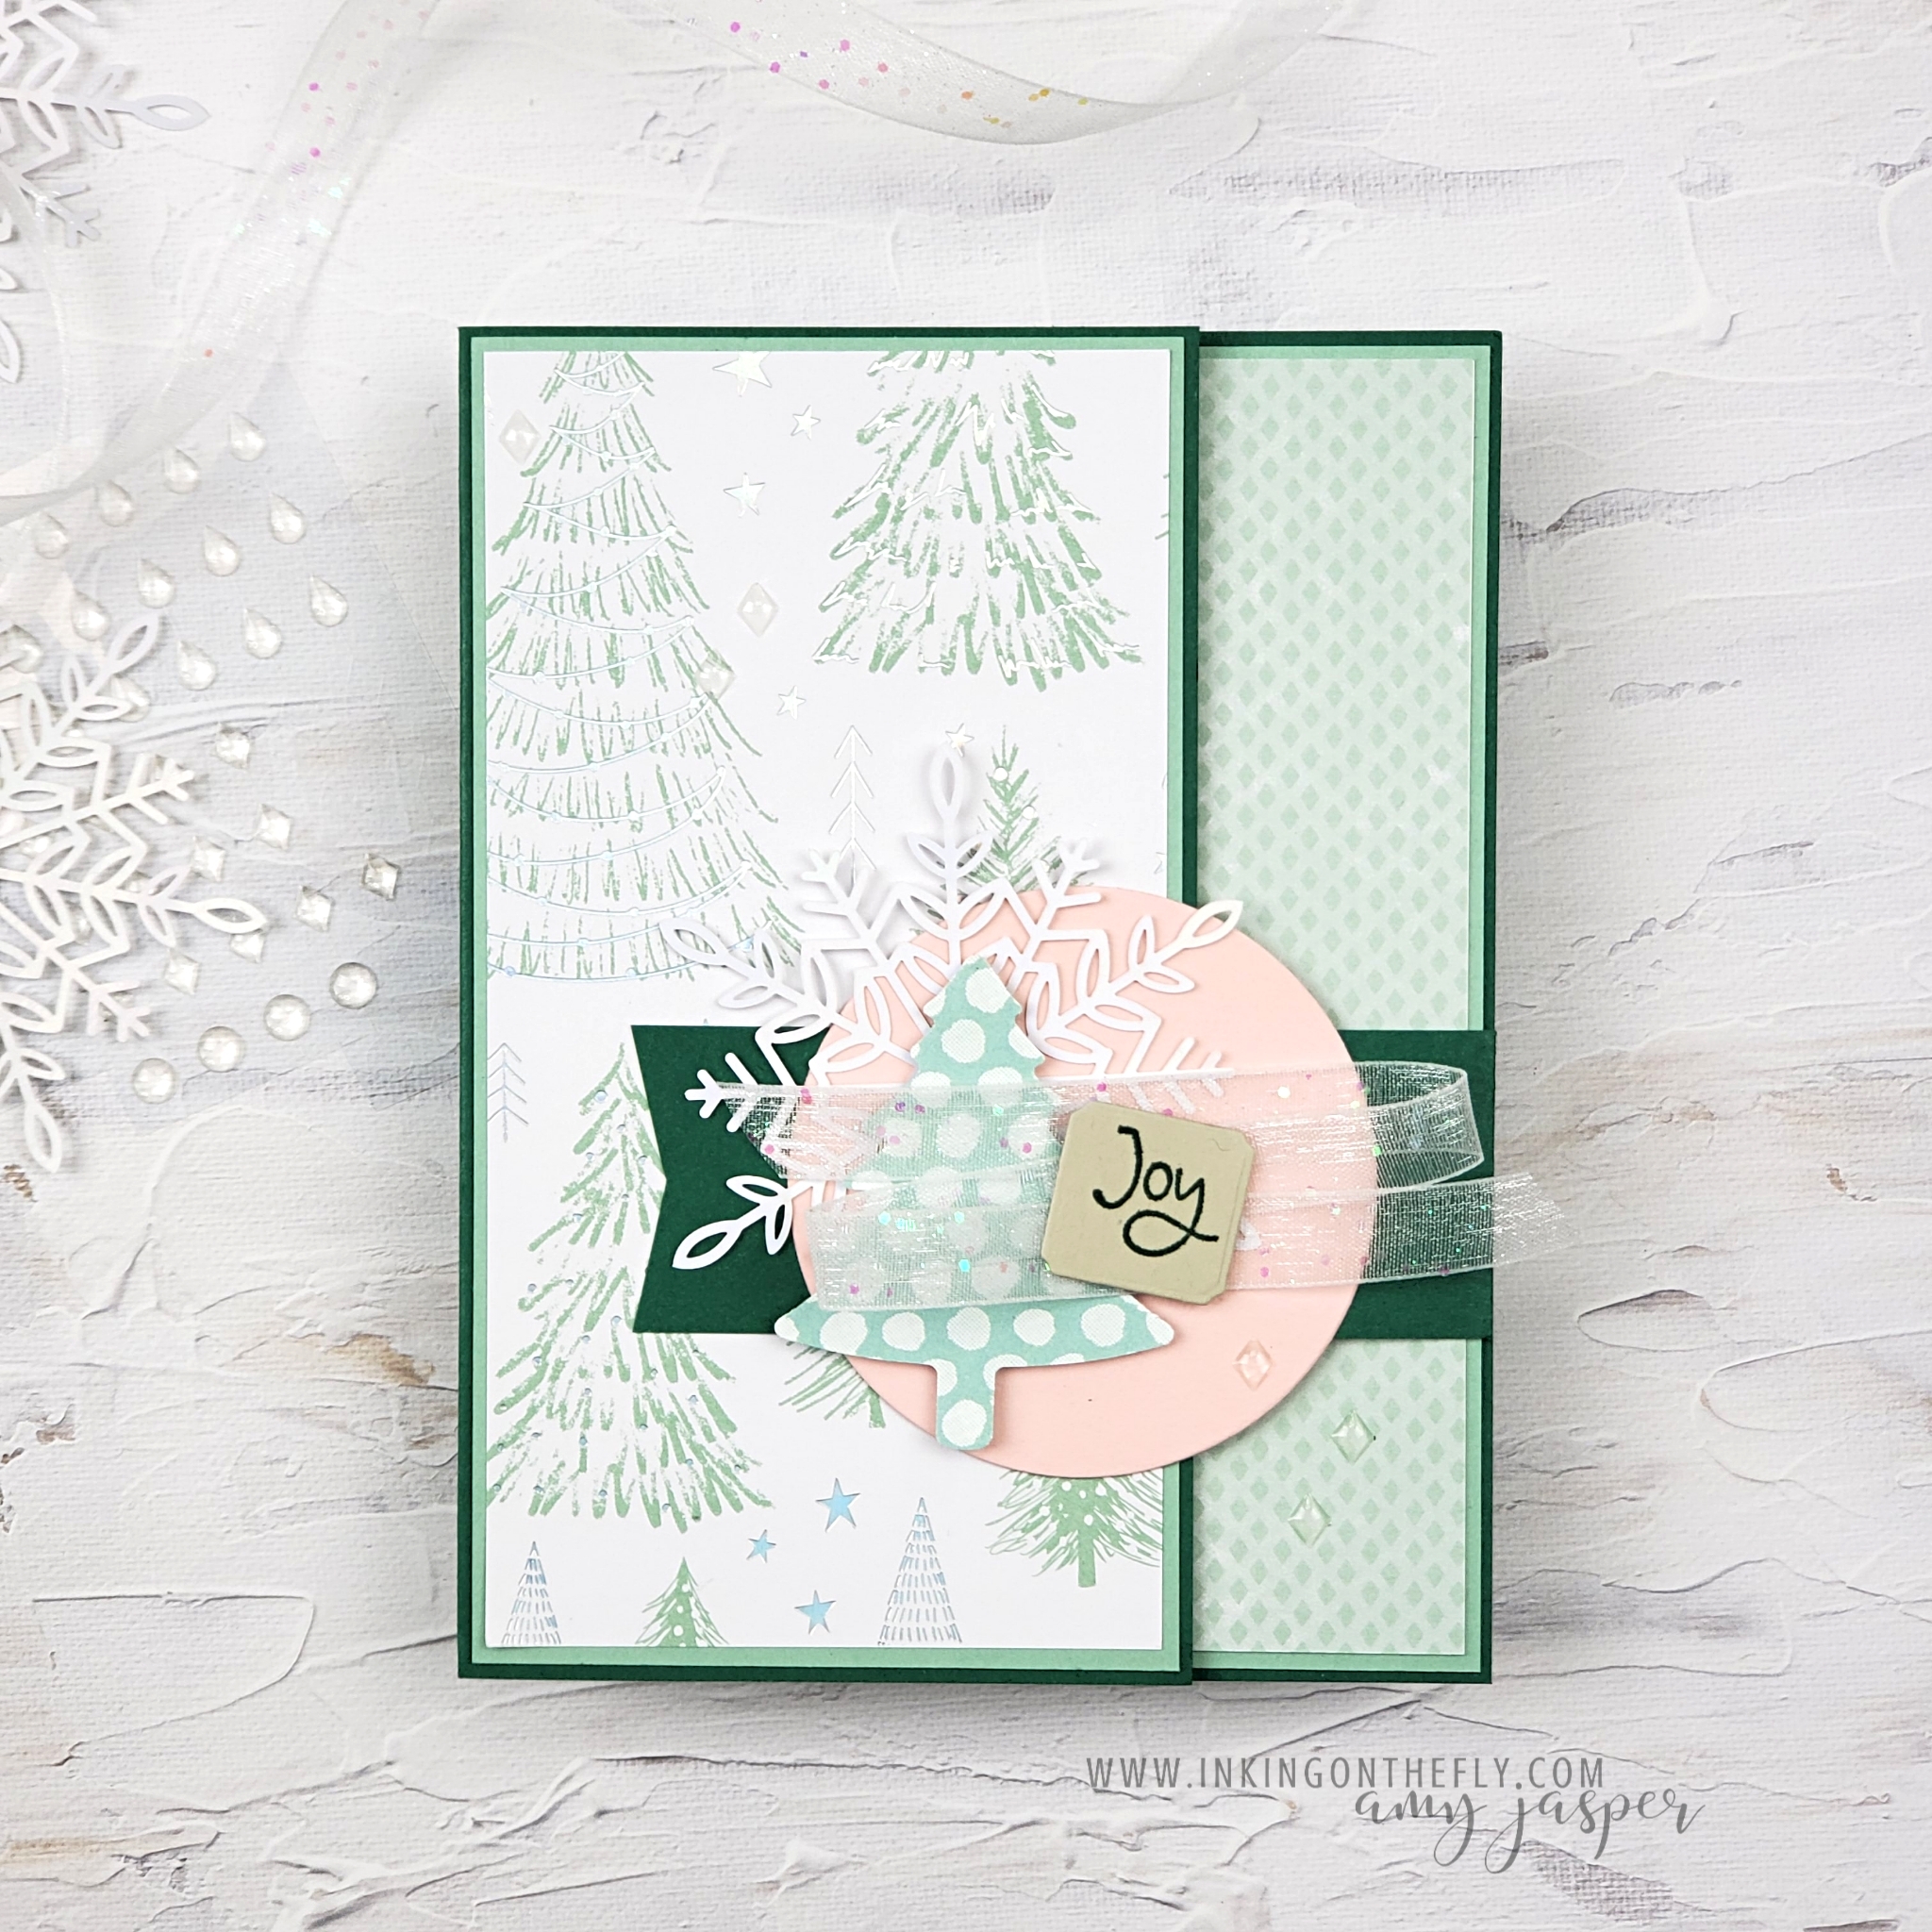
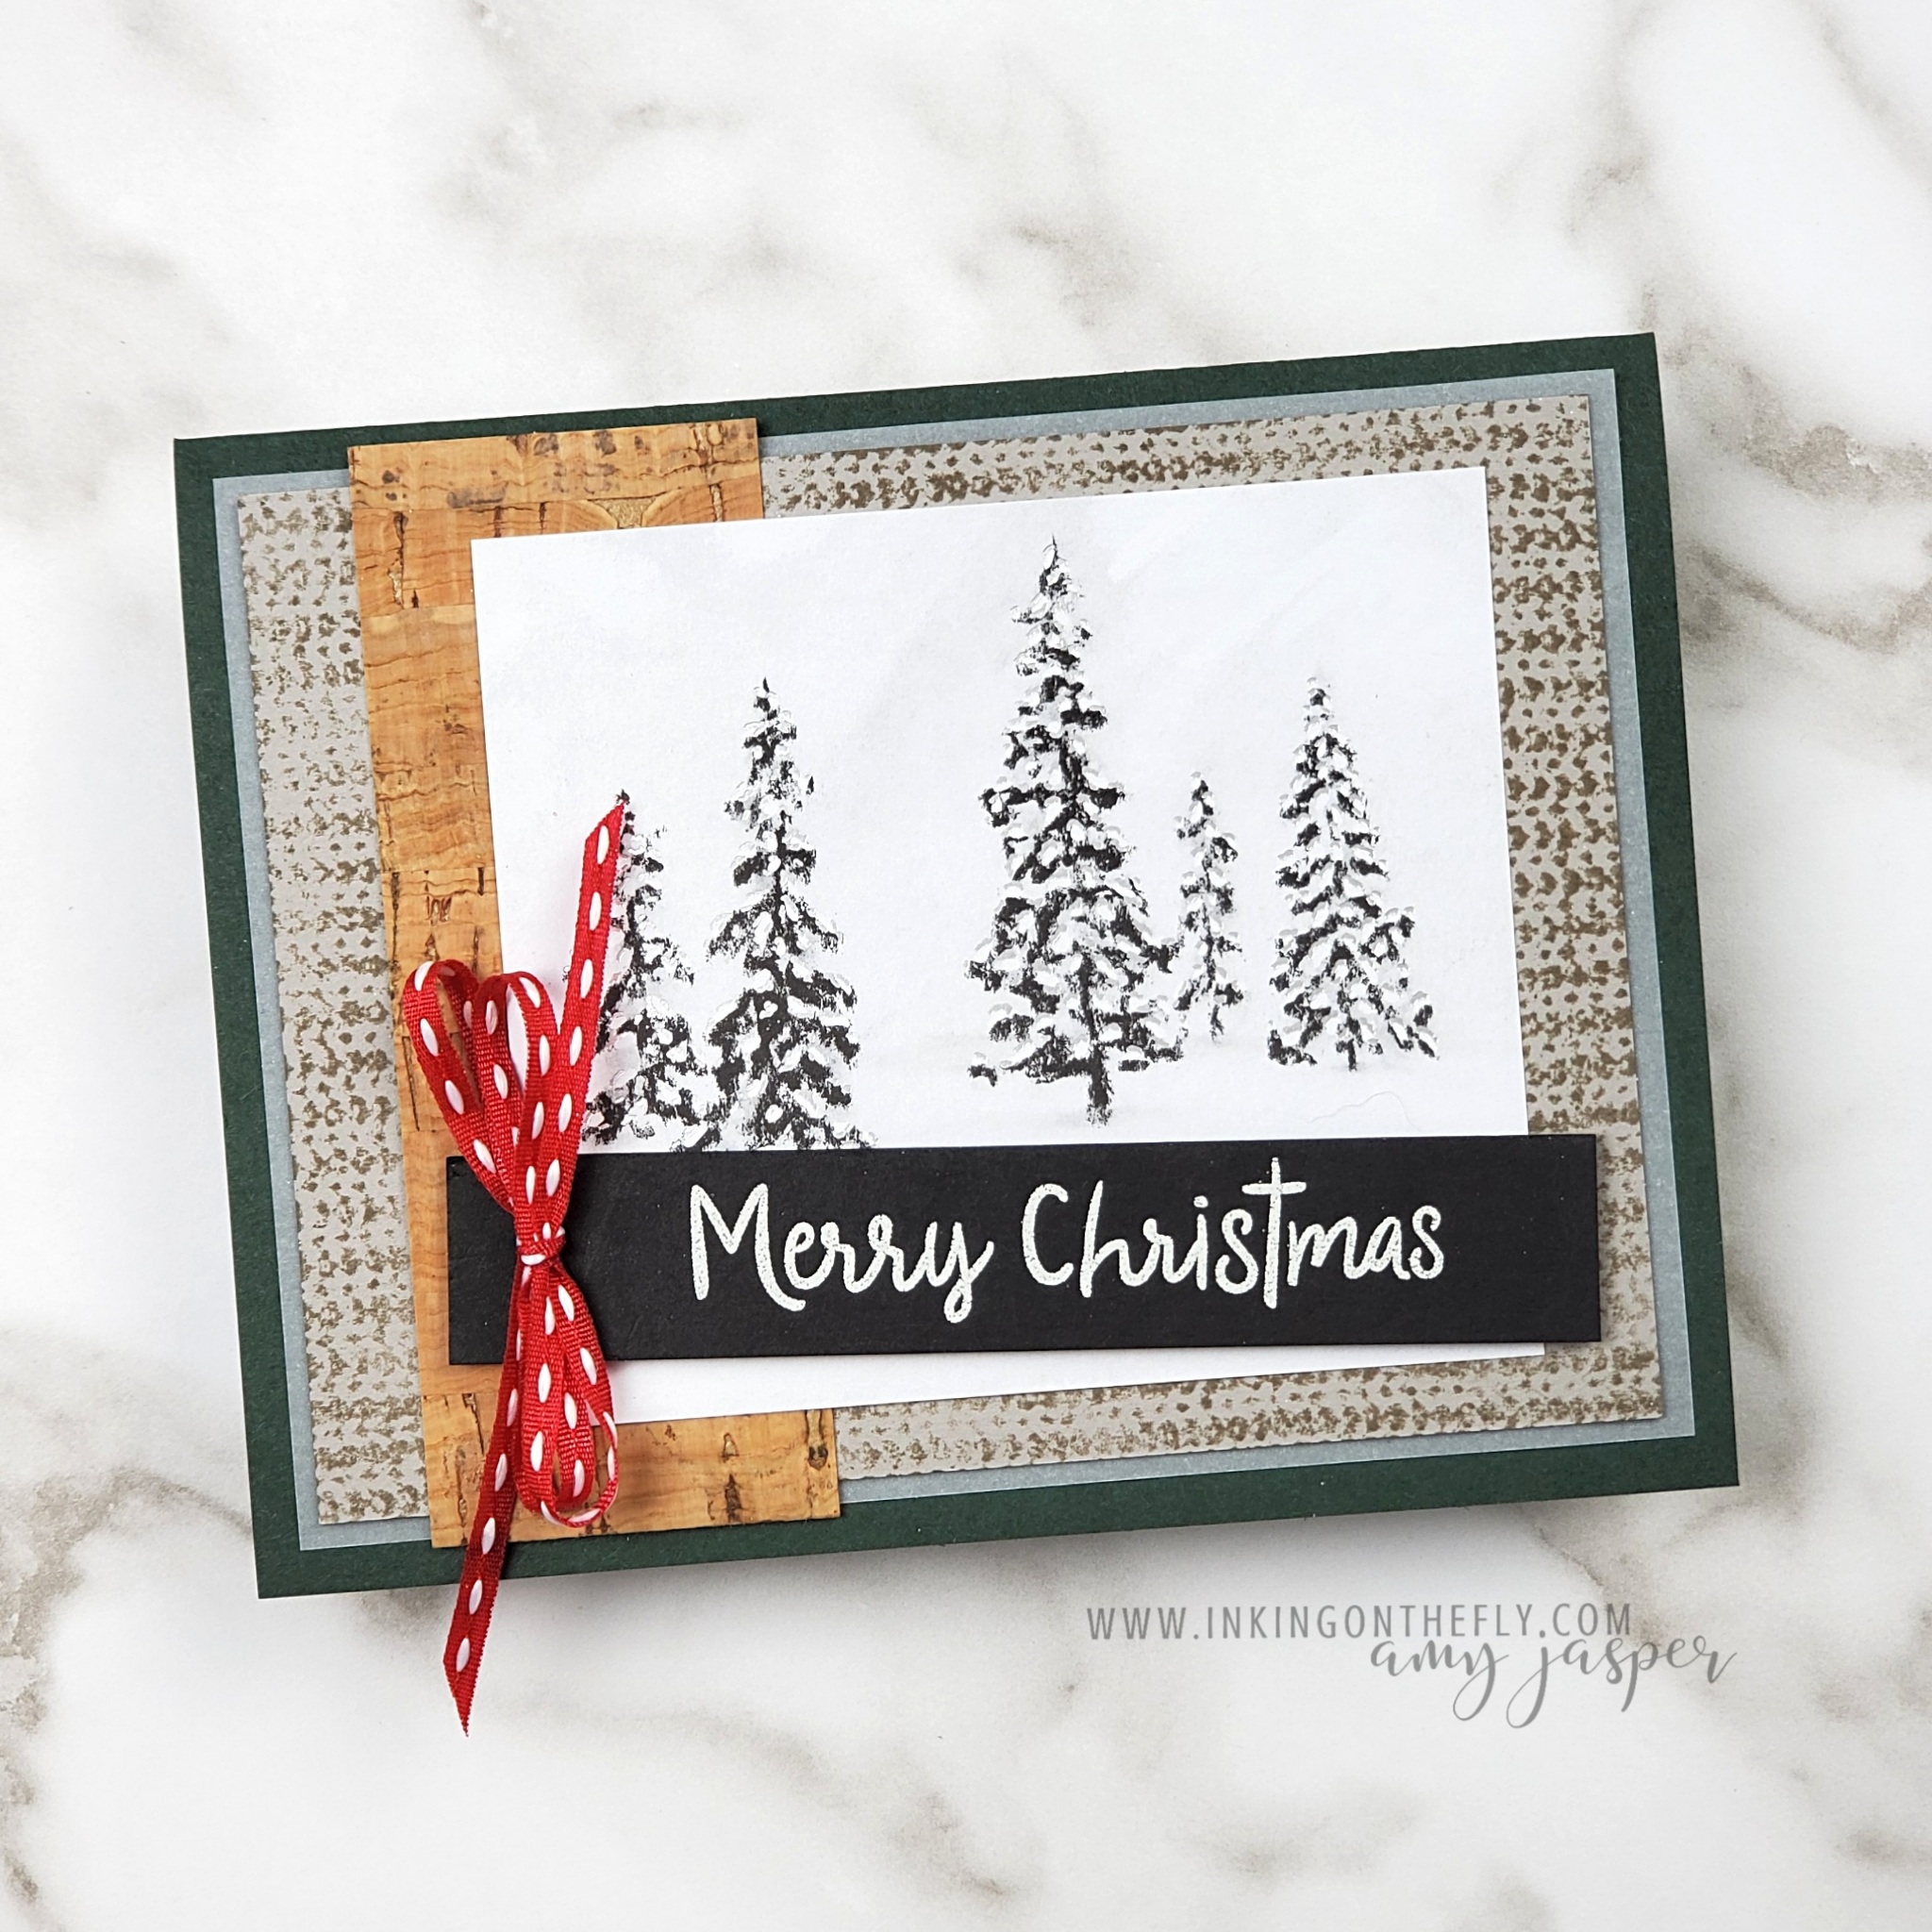
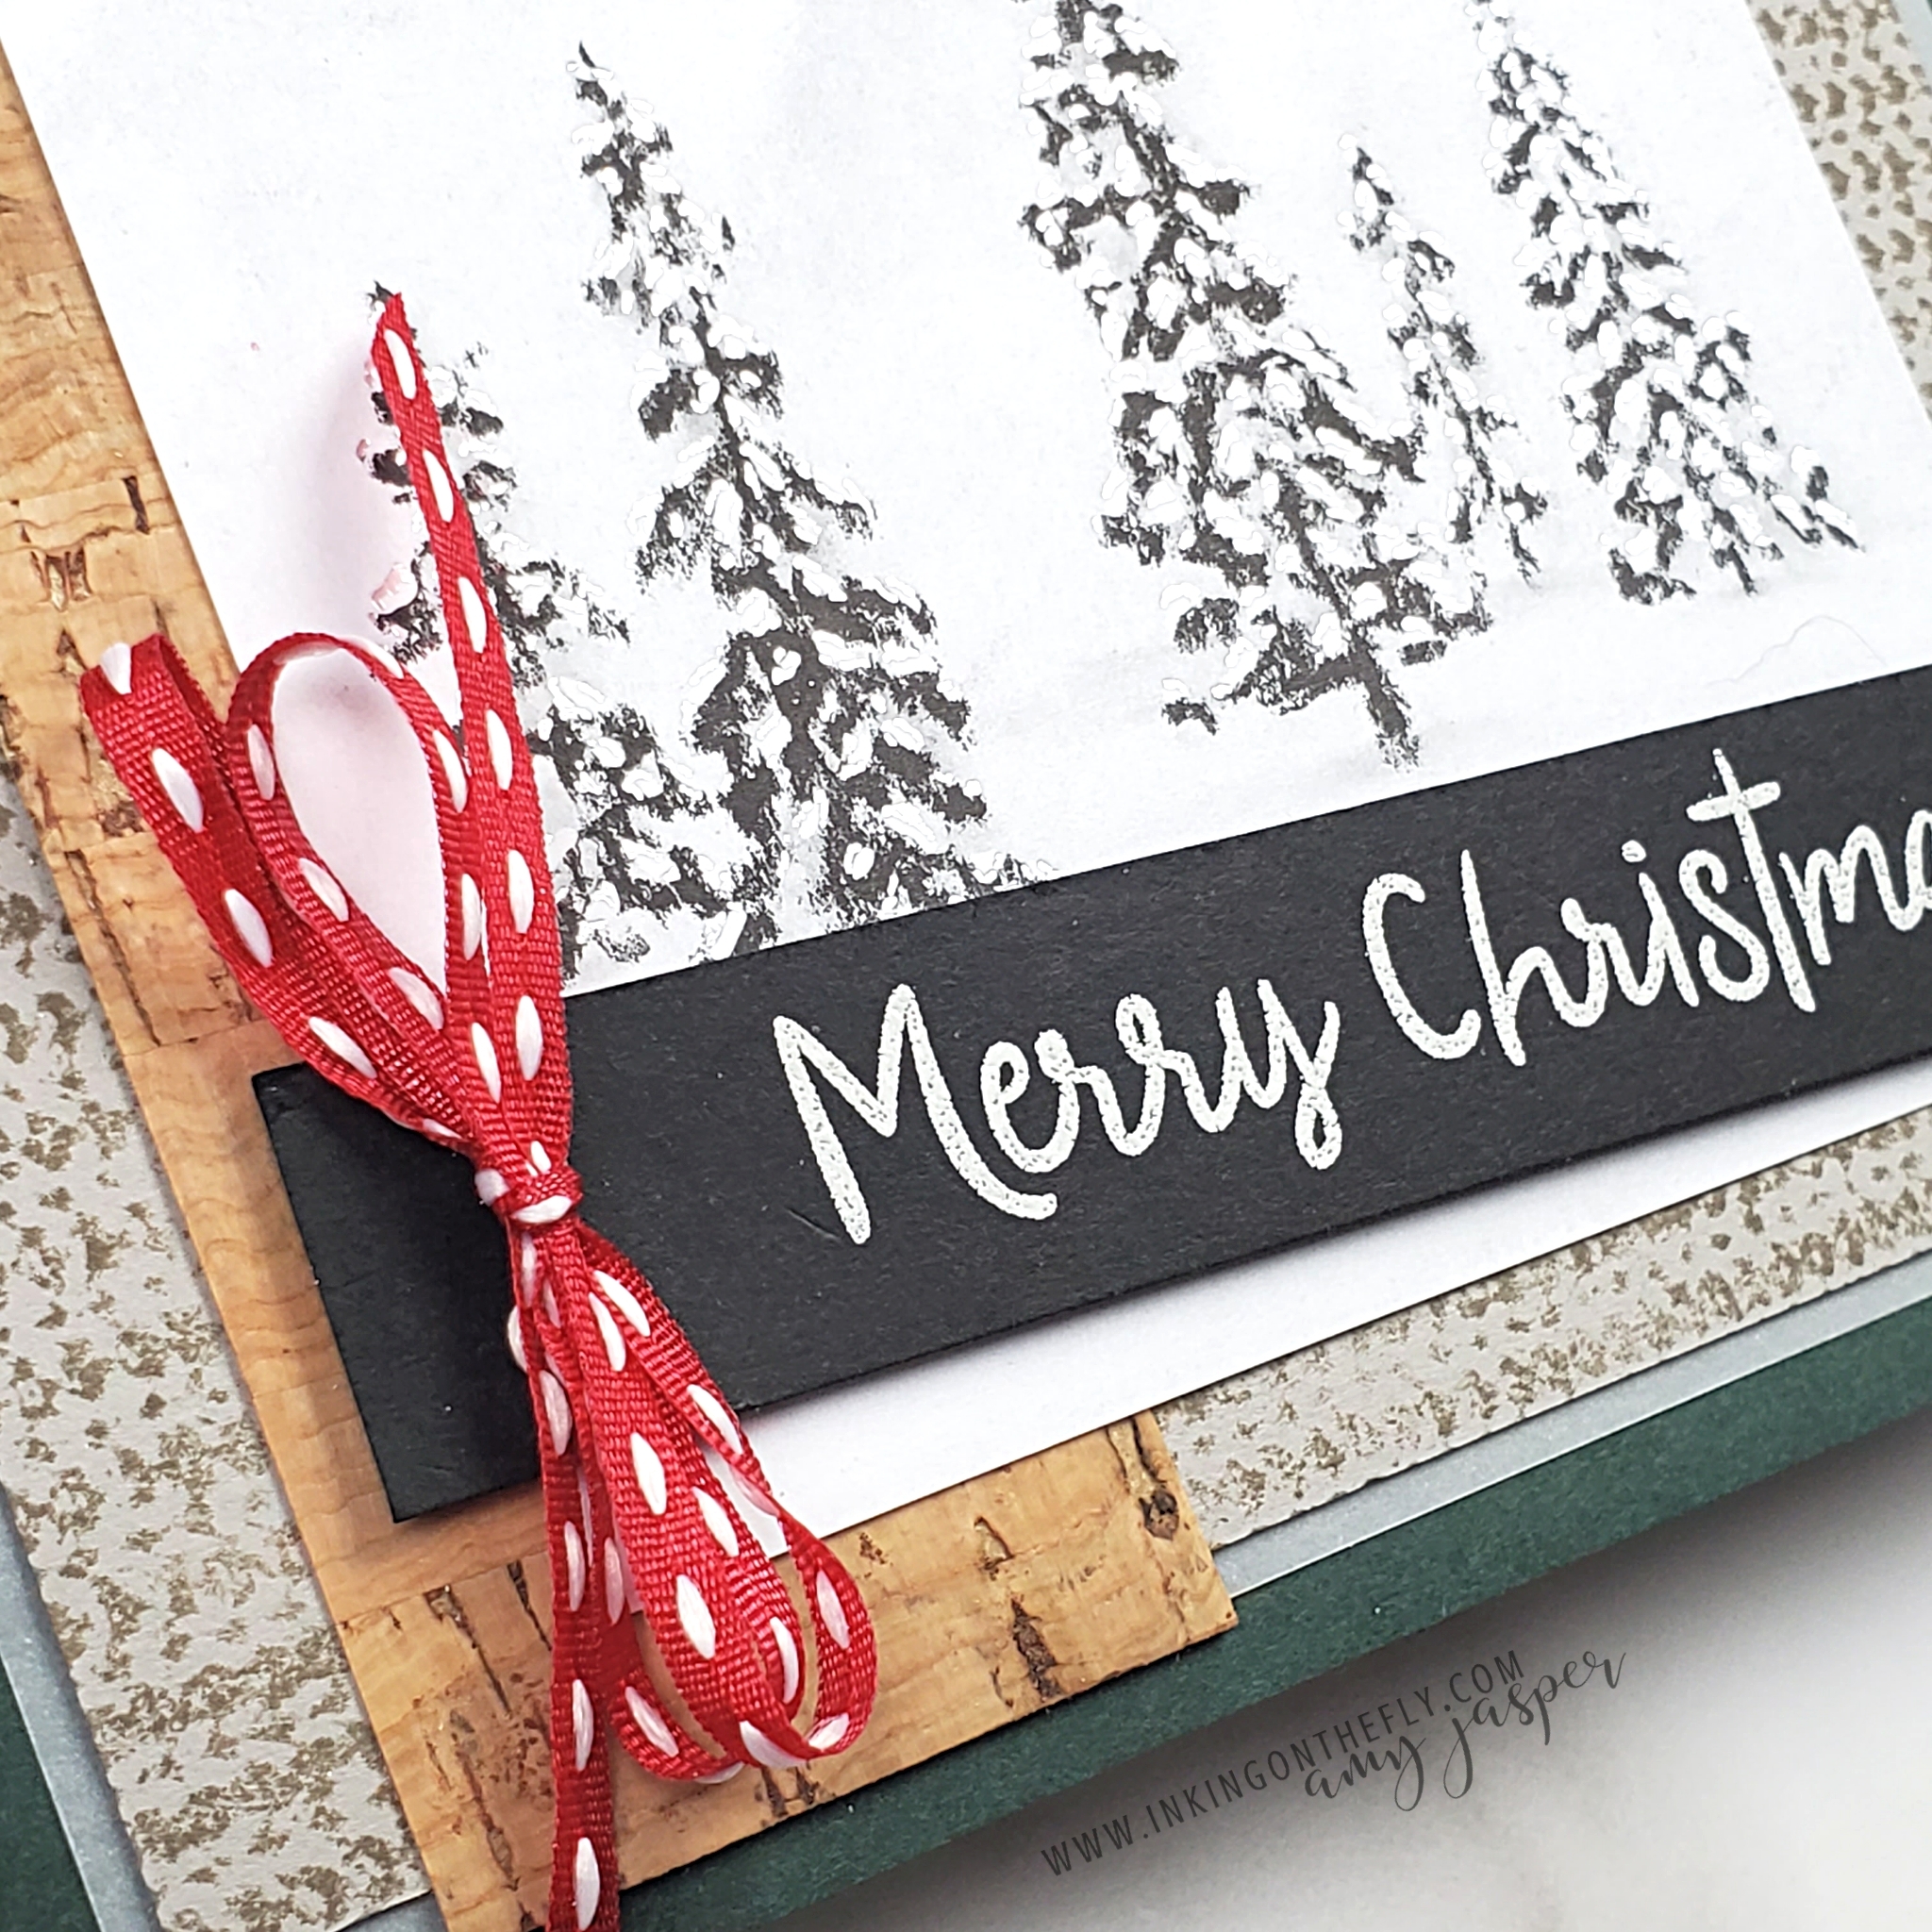
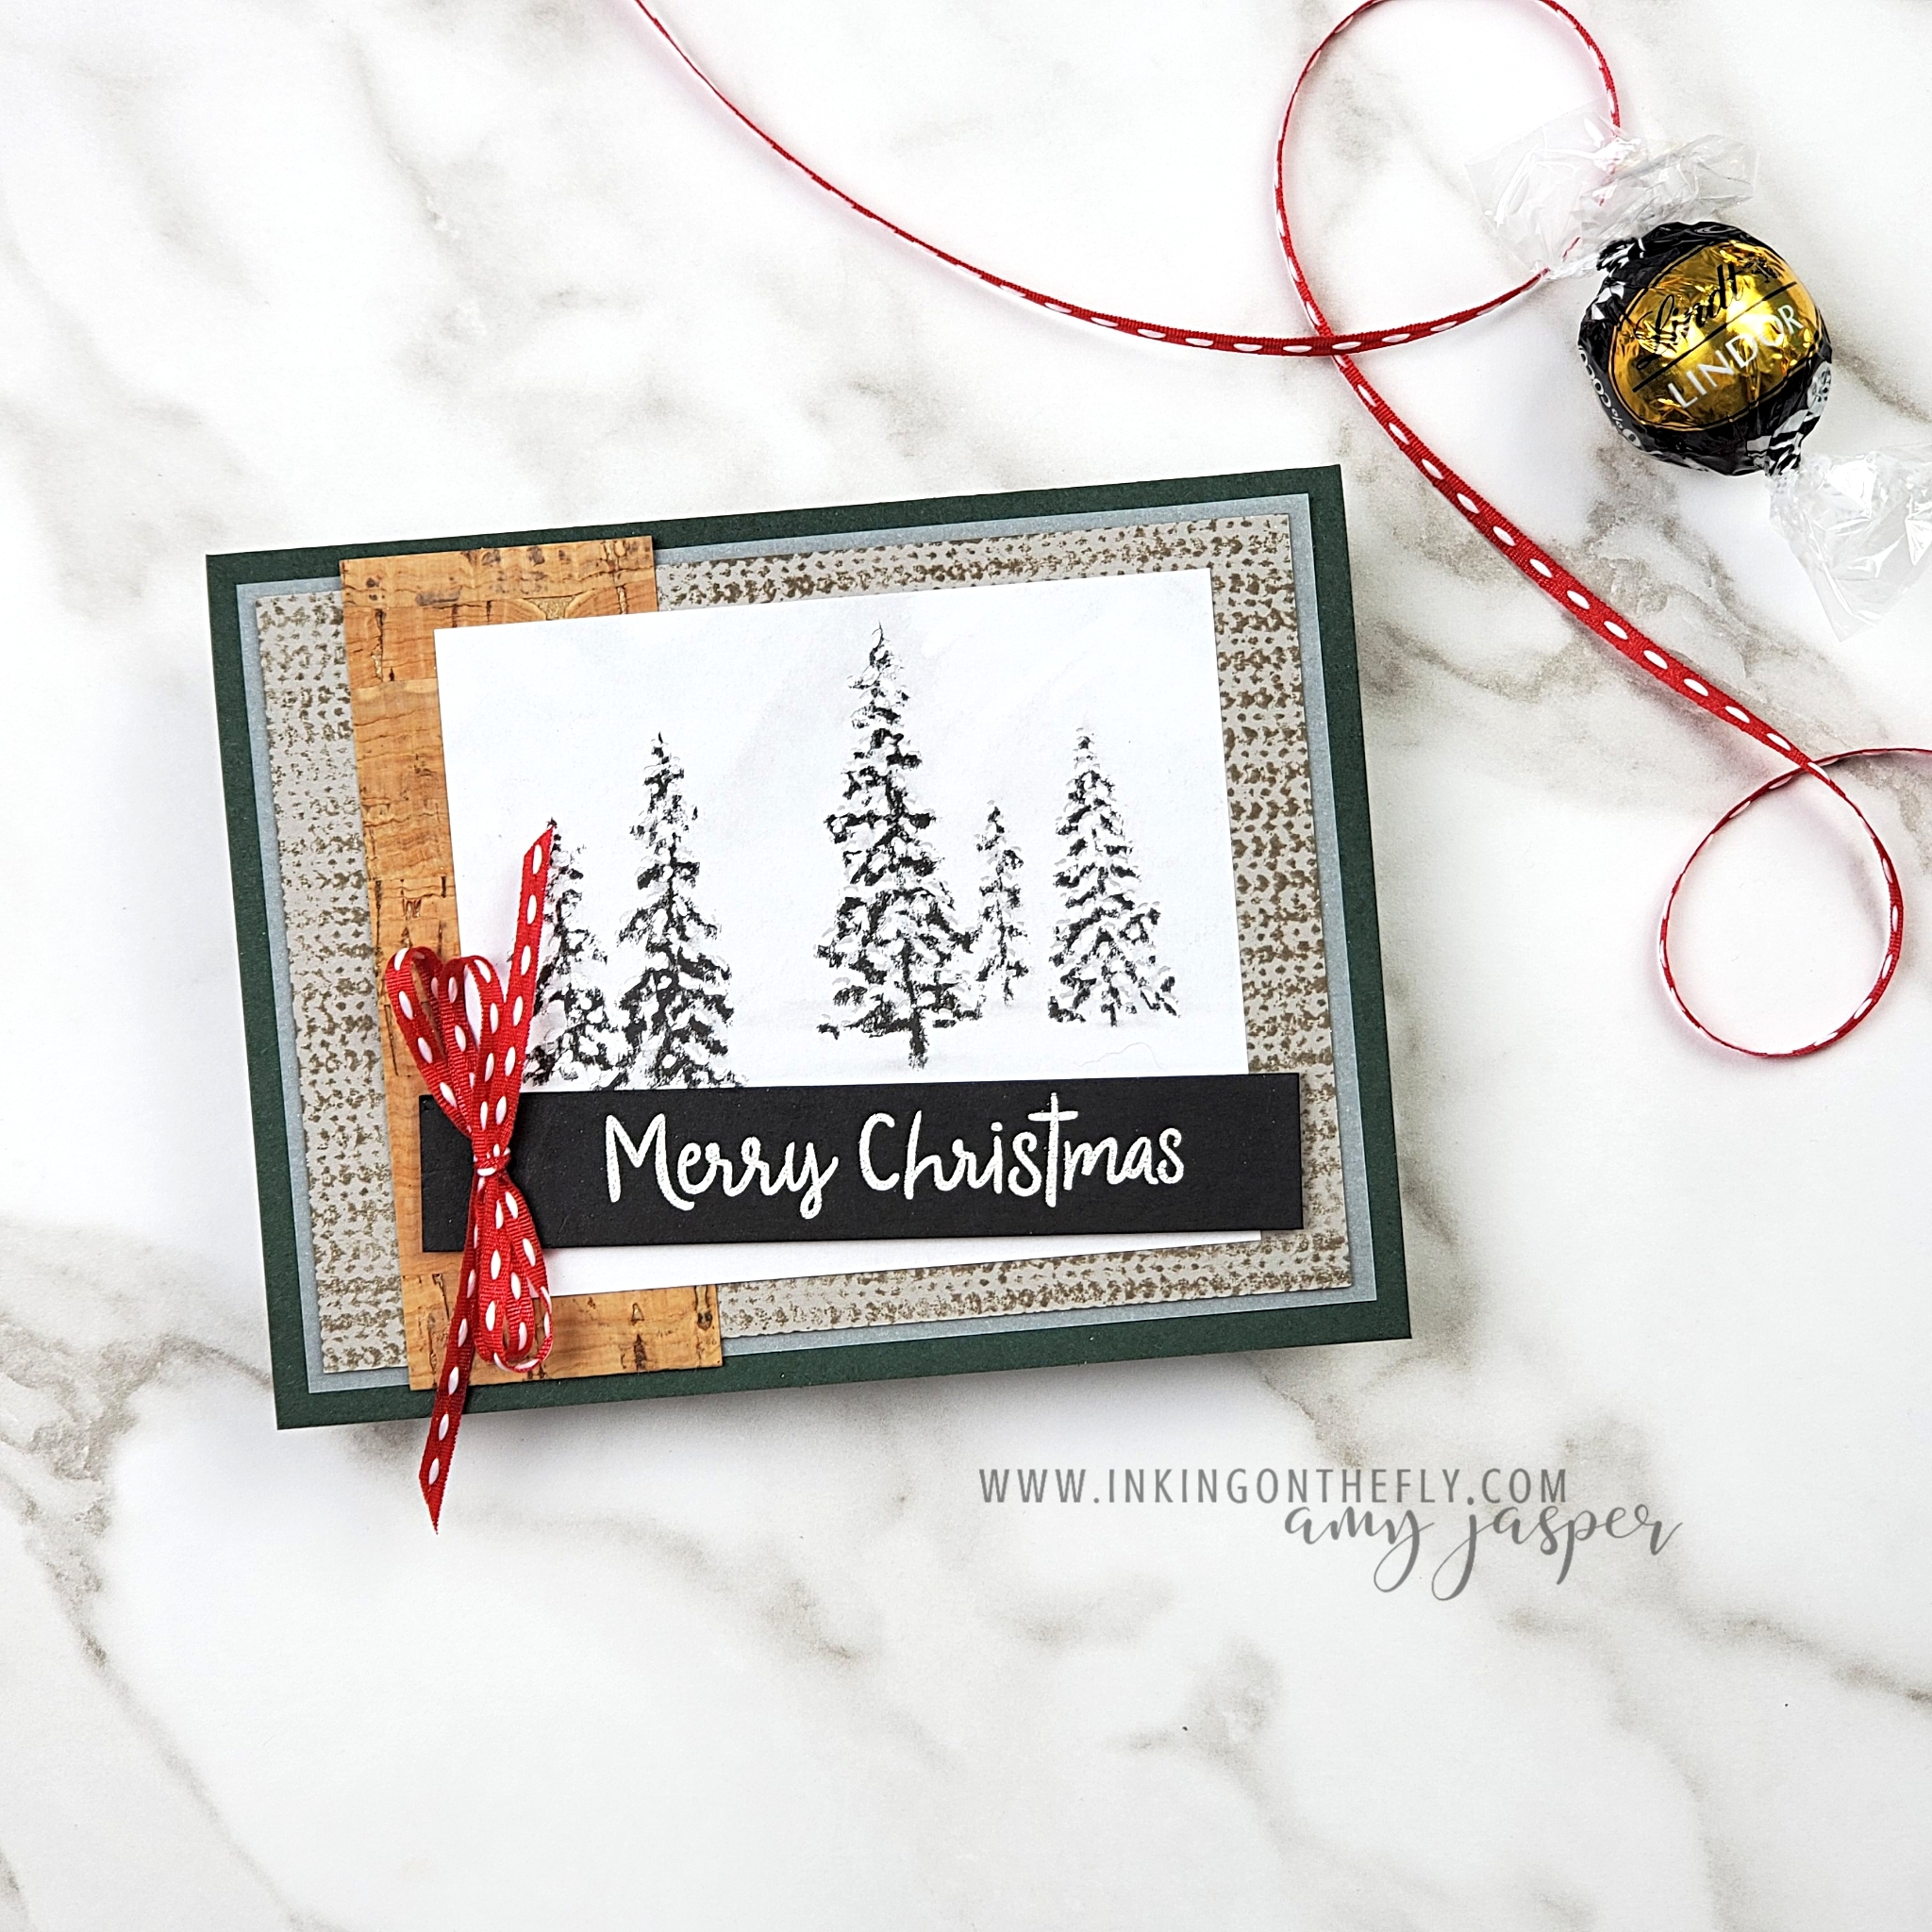
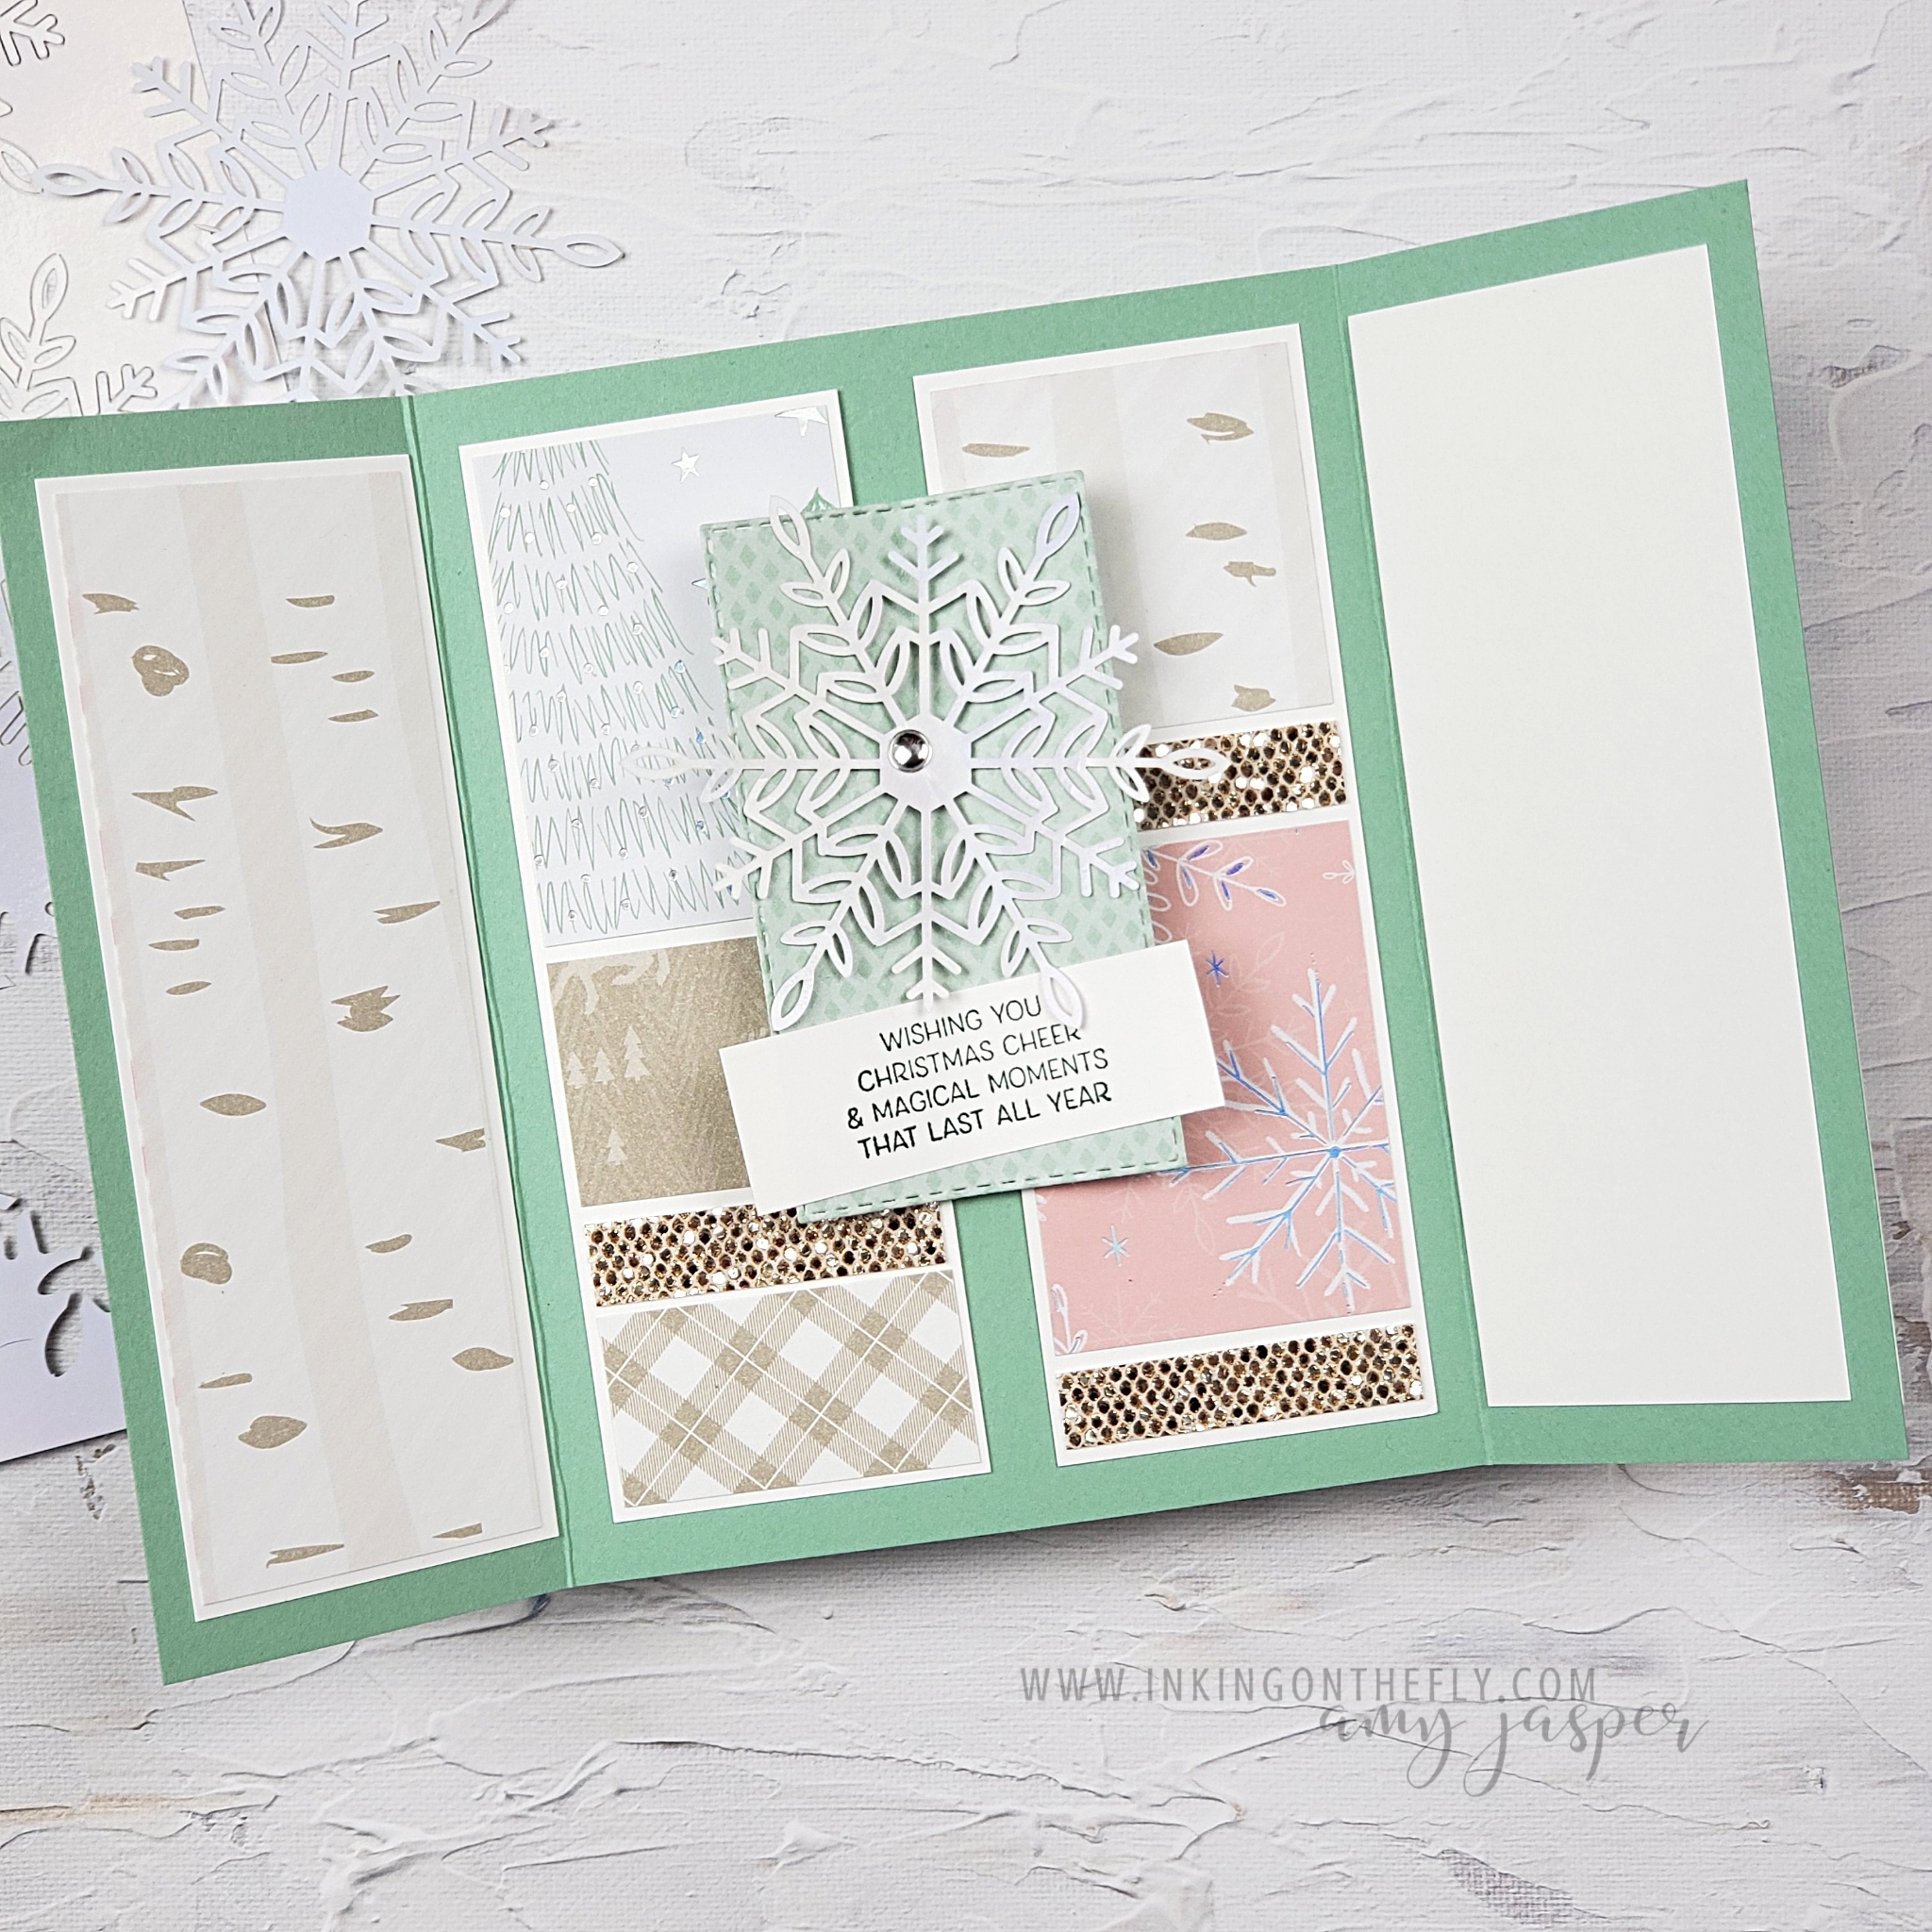
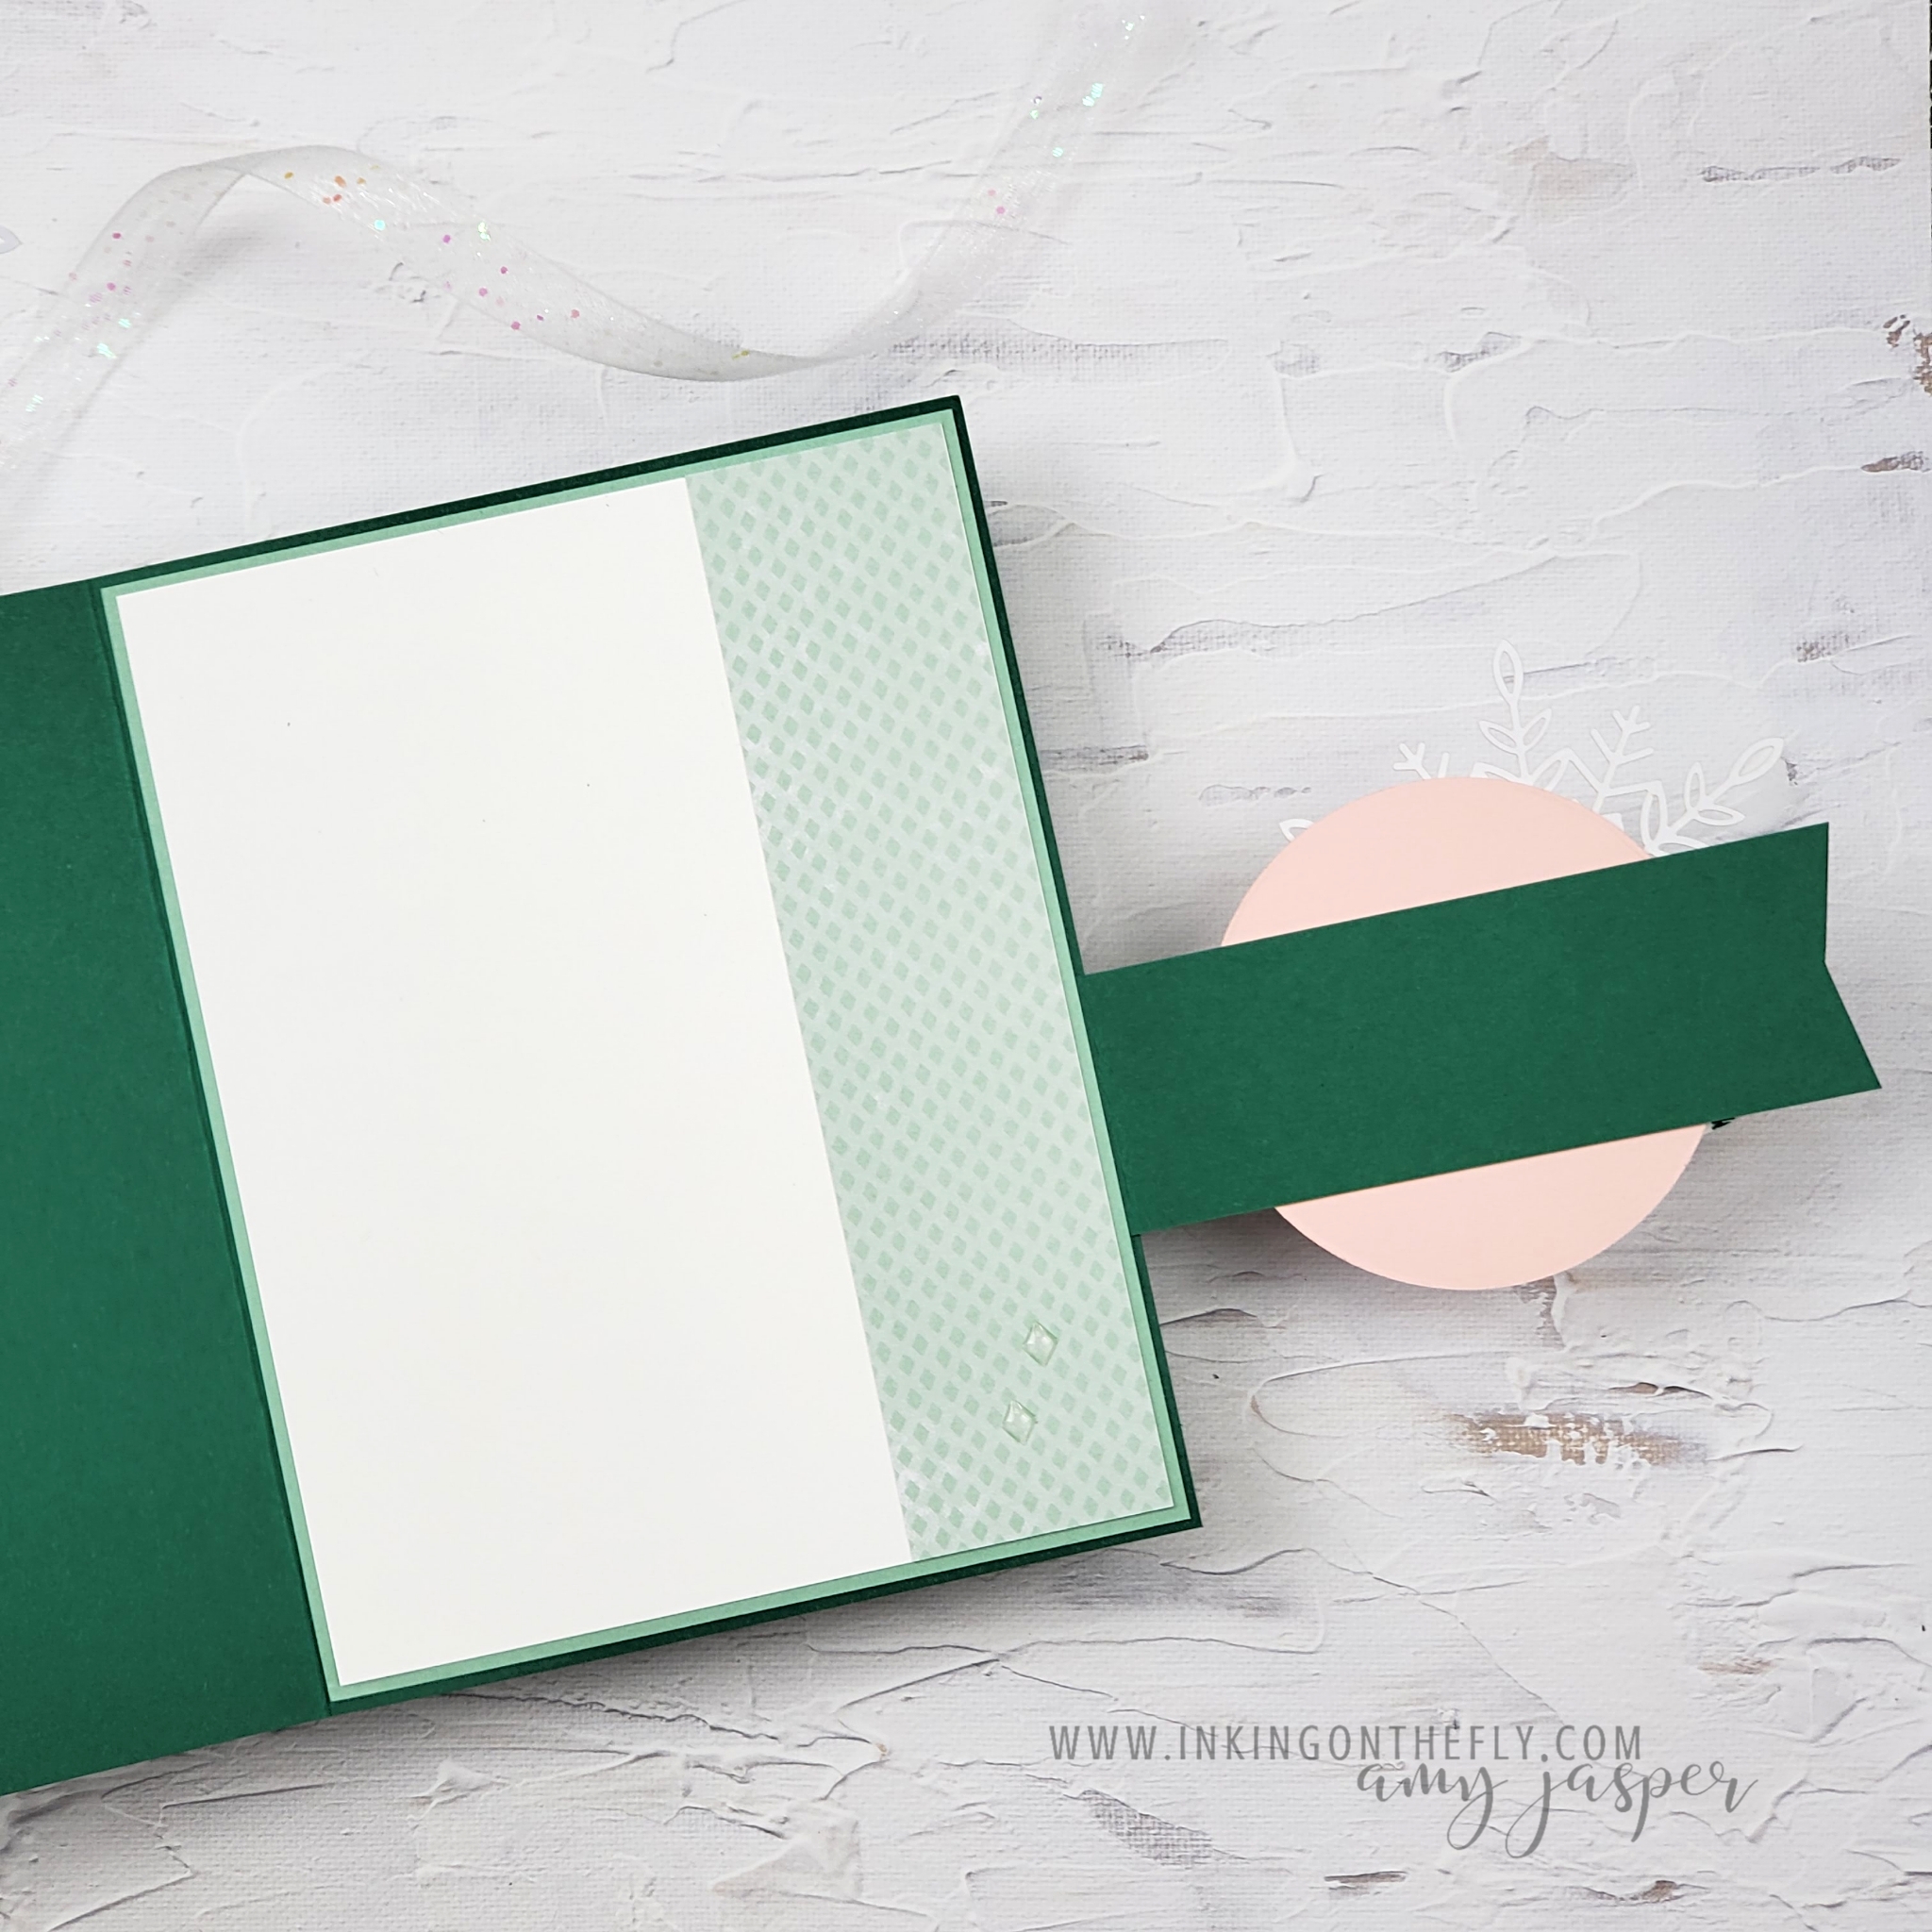
The card base is a piece of cardstock, measuring 5 1/2″ x 8 1/2″, scored at 4 1/4″. However, you will cut off a 1 1/4″ section from the front of the card and use it to attach the front flap.

With those two pieces for your base, you can create multiple versions of this style of card. After that, it’s a simple matter of what patterned paper to use.

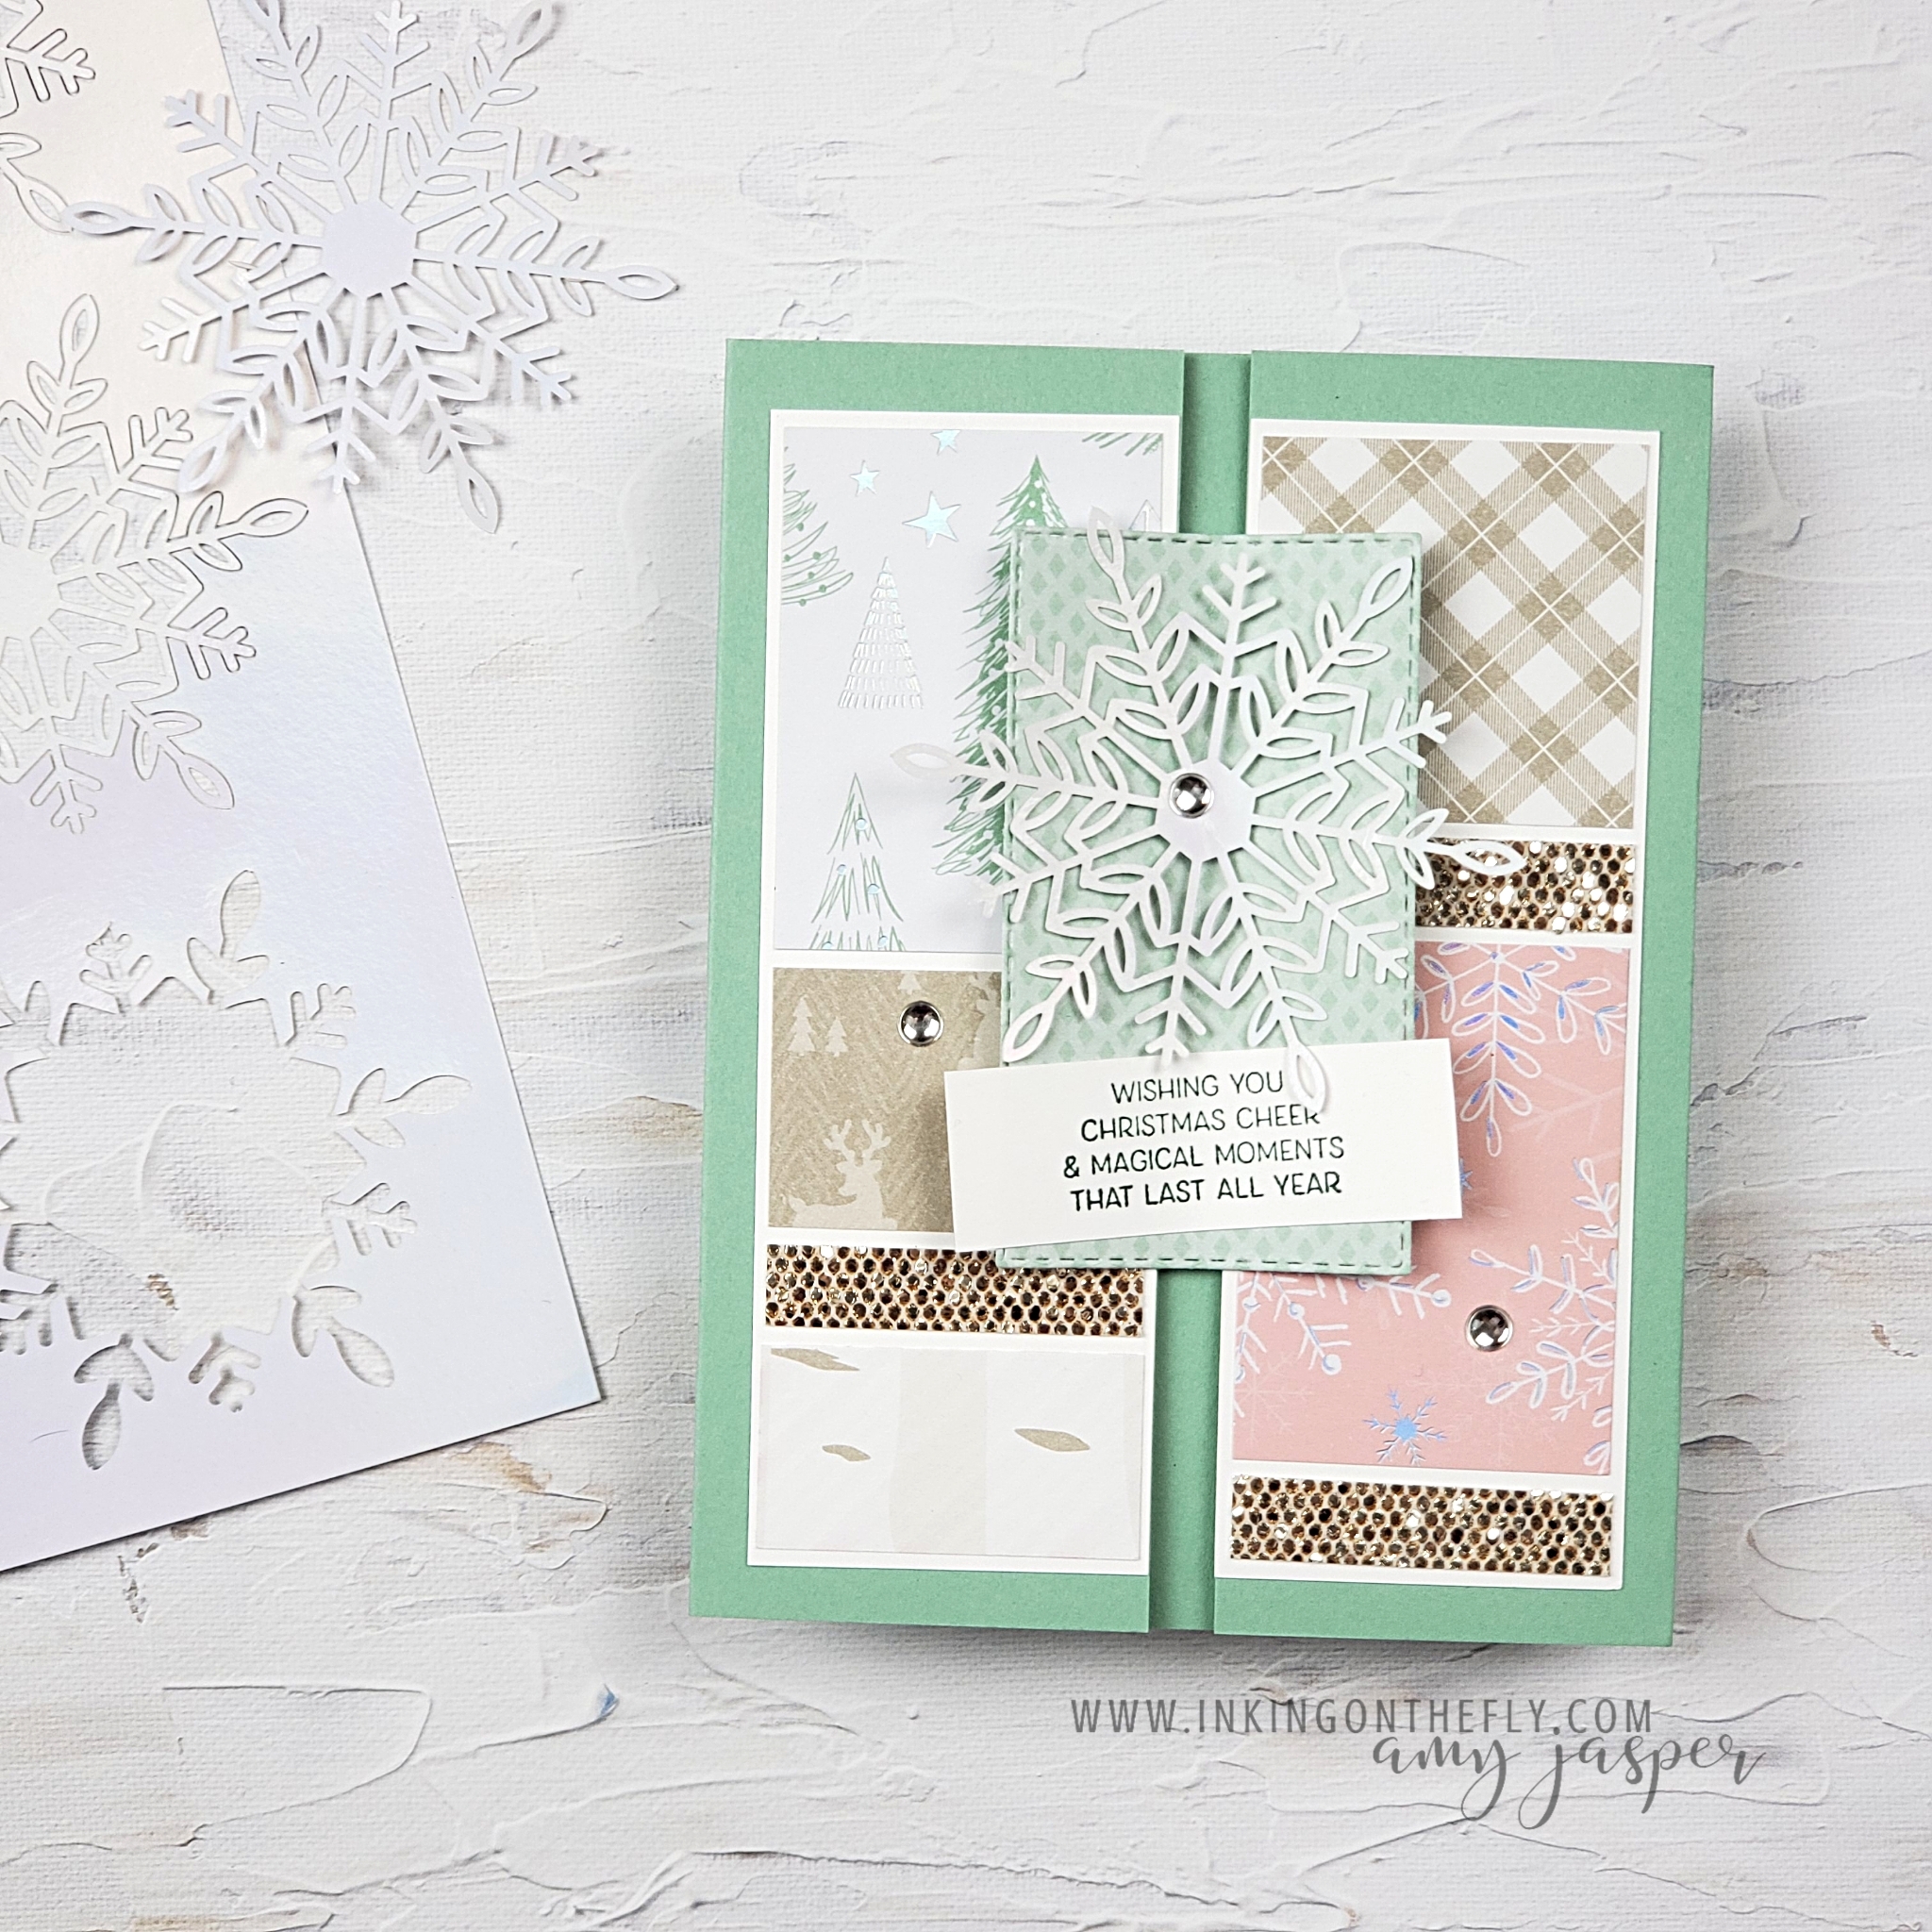
I have Christmas on the brain!

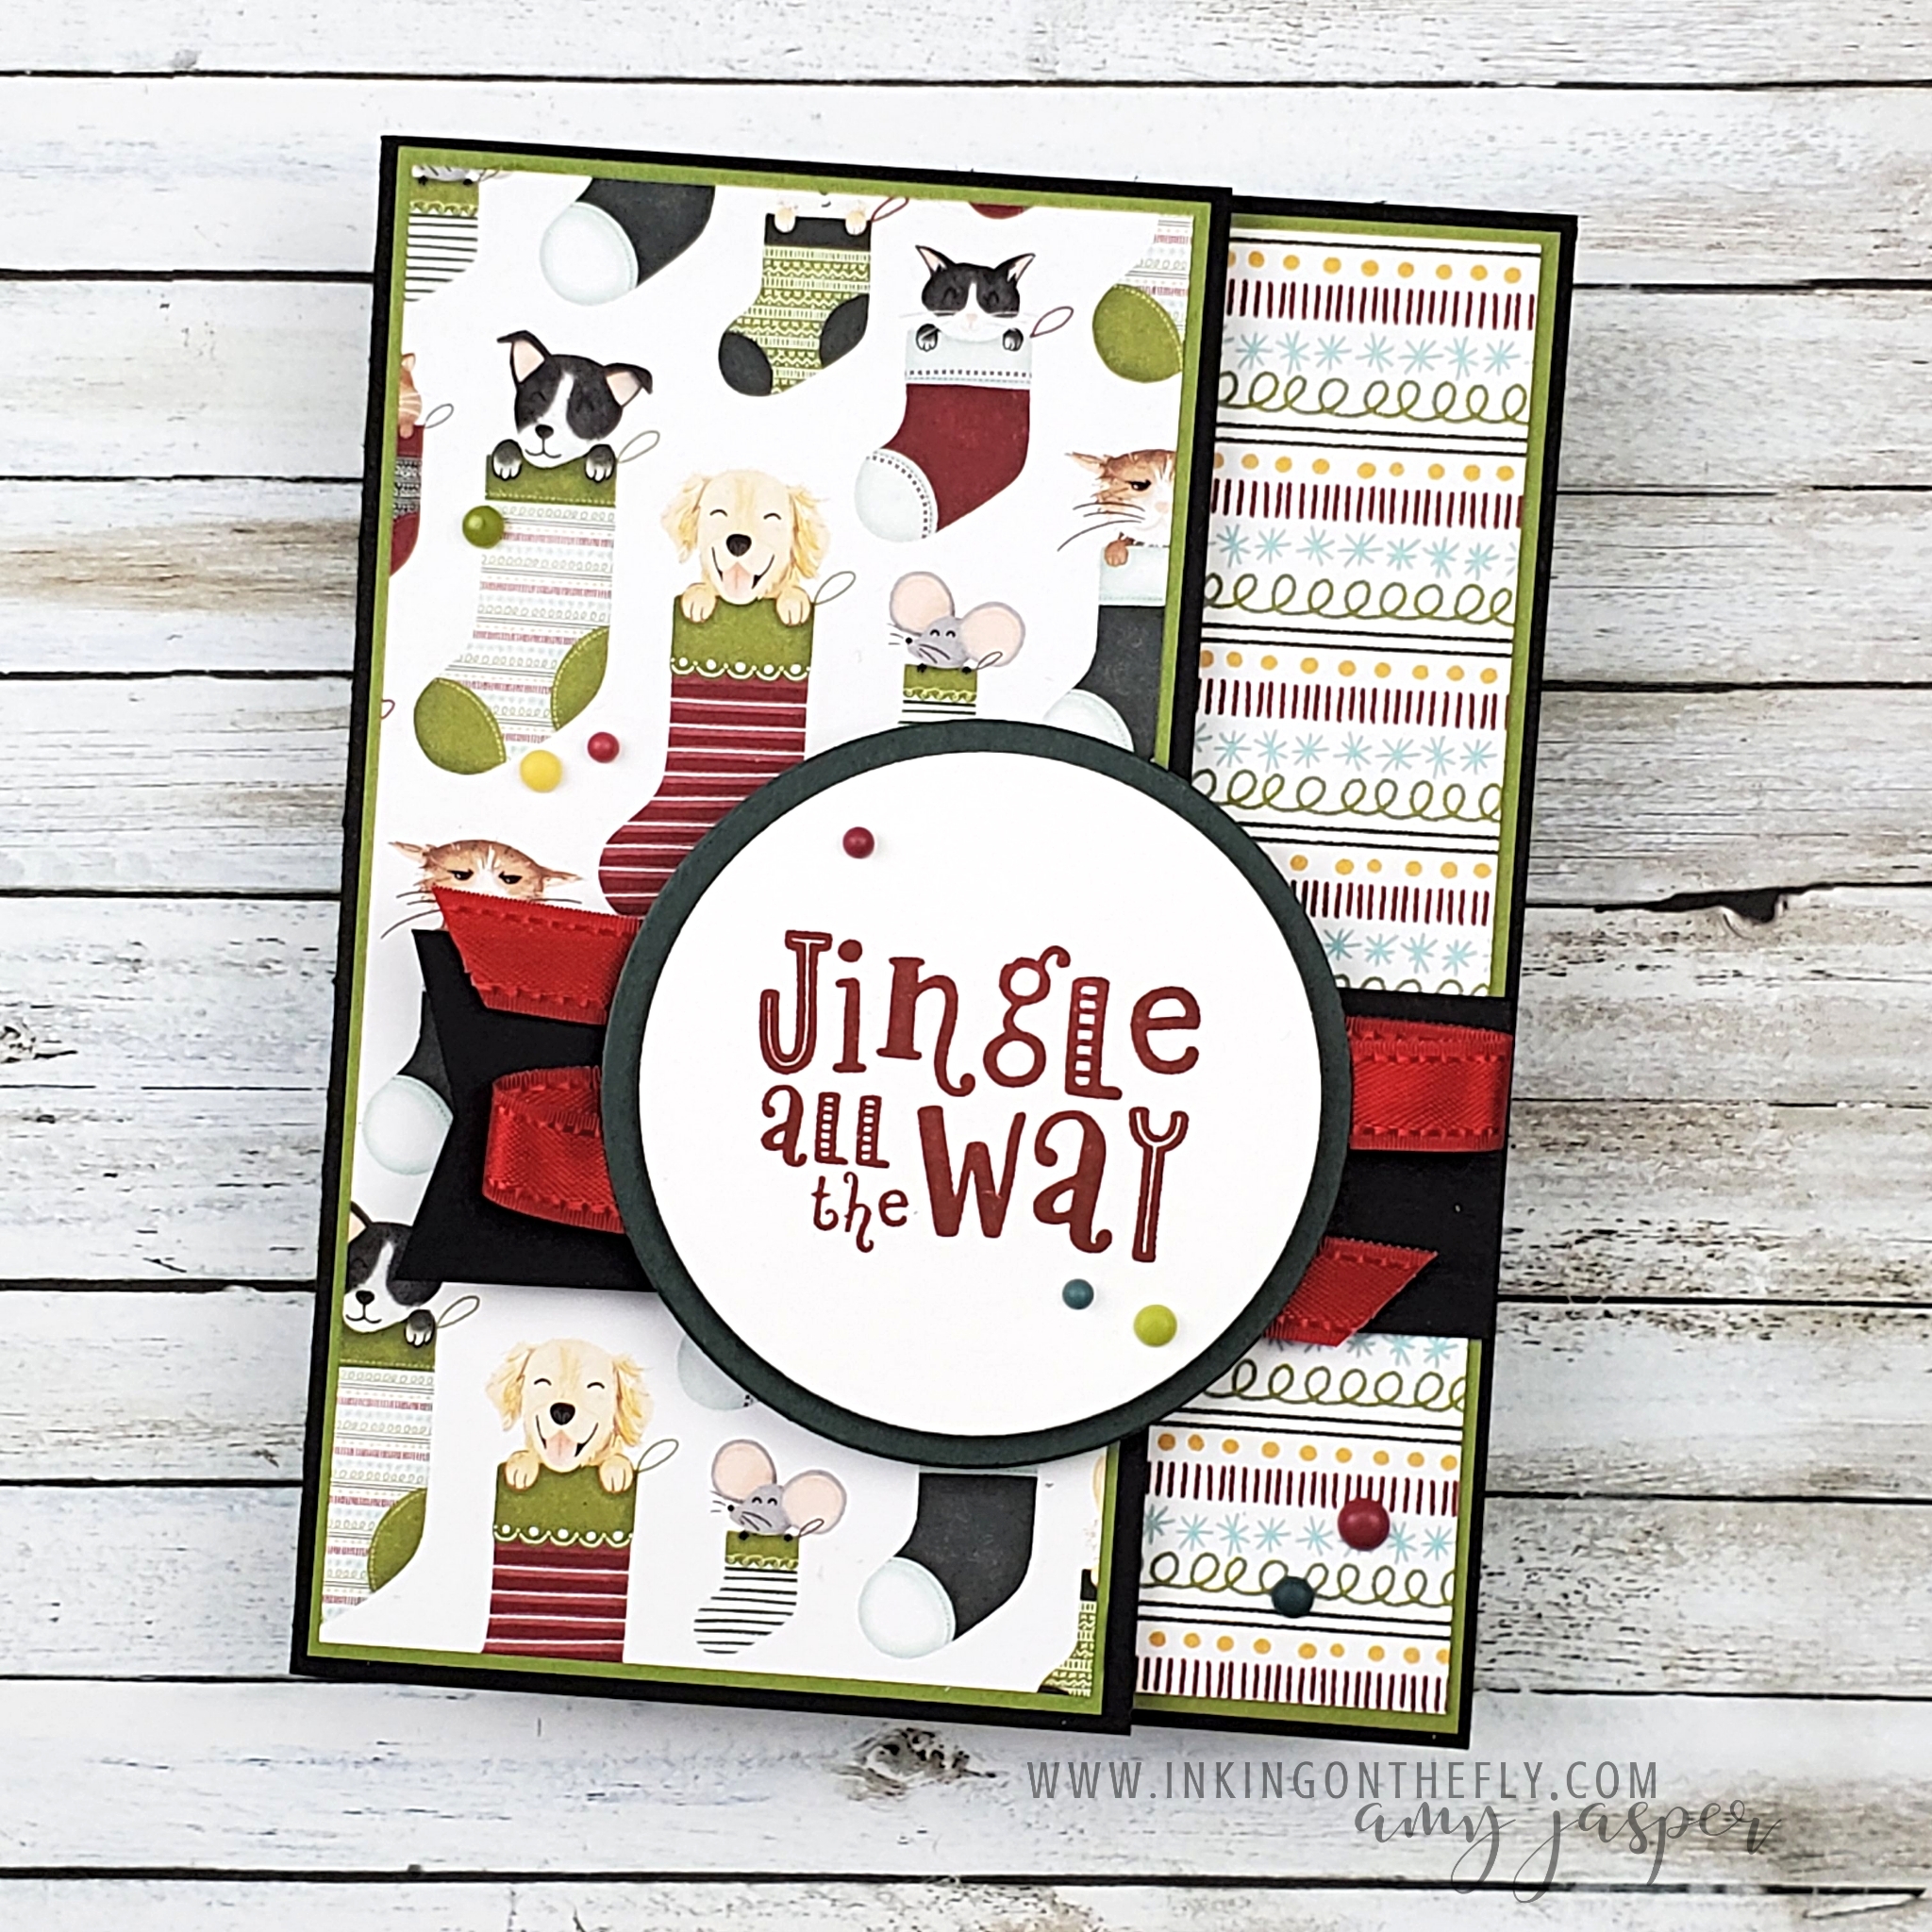
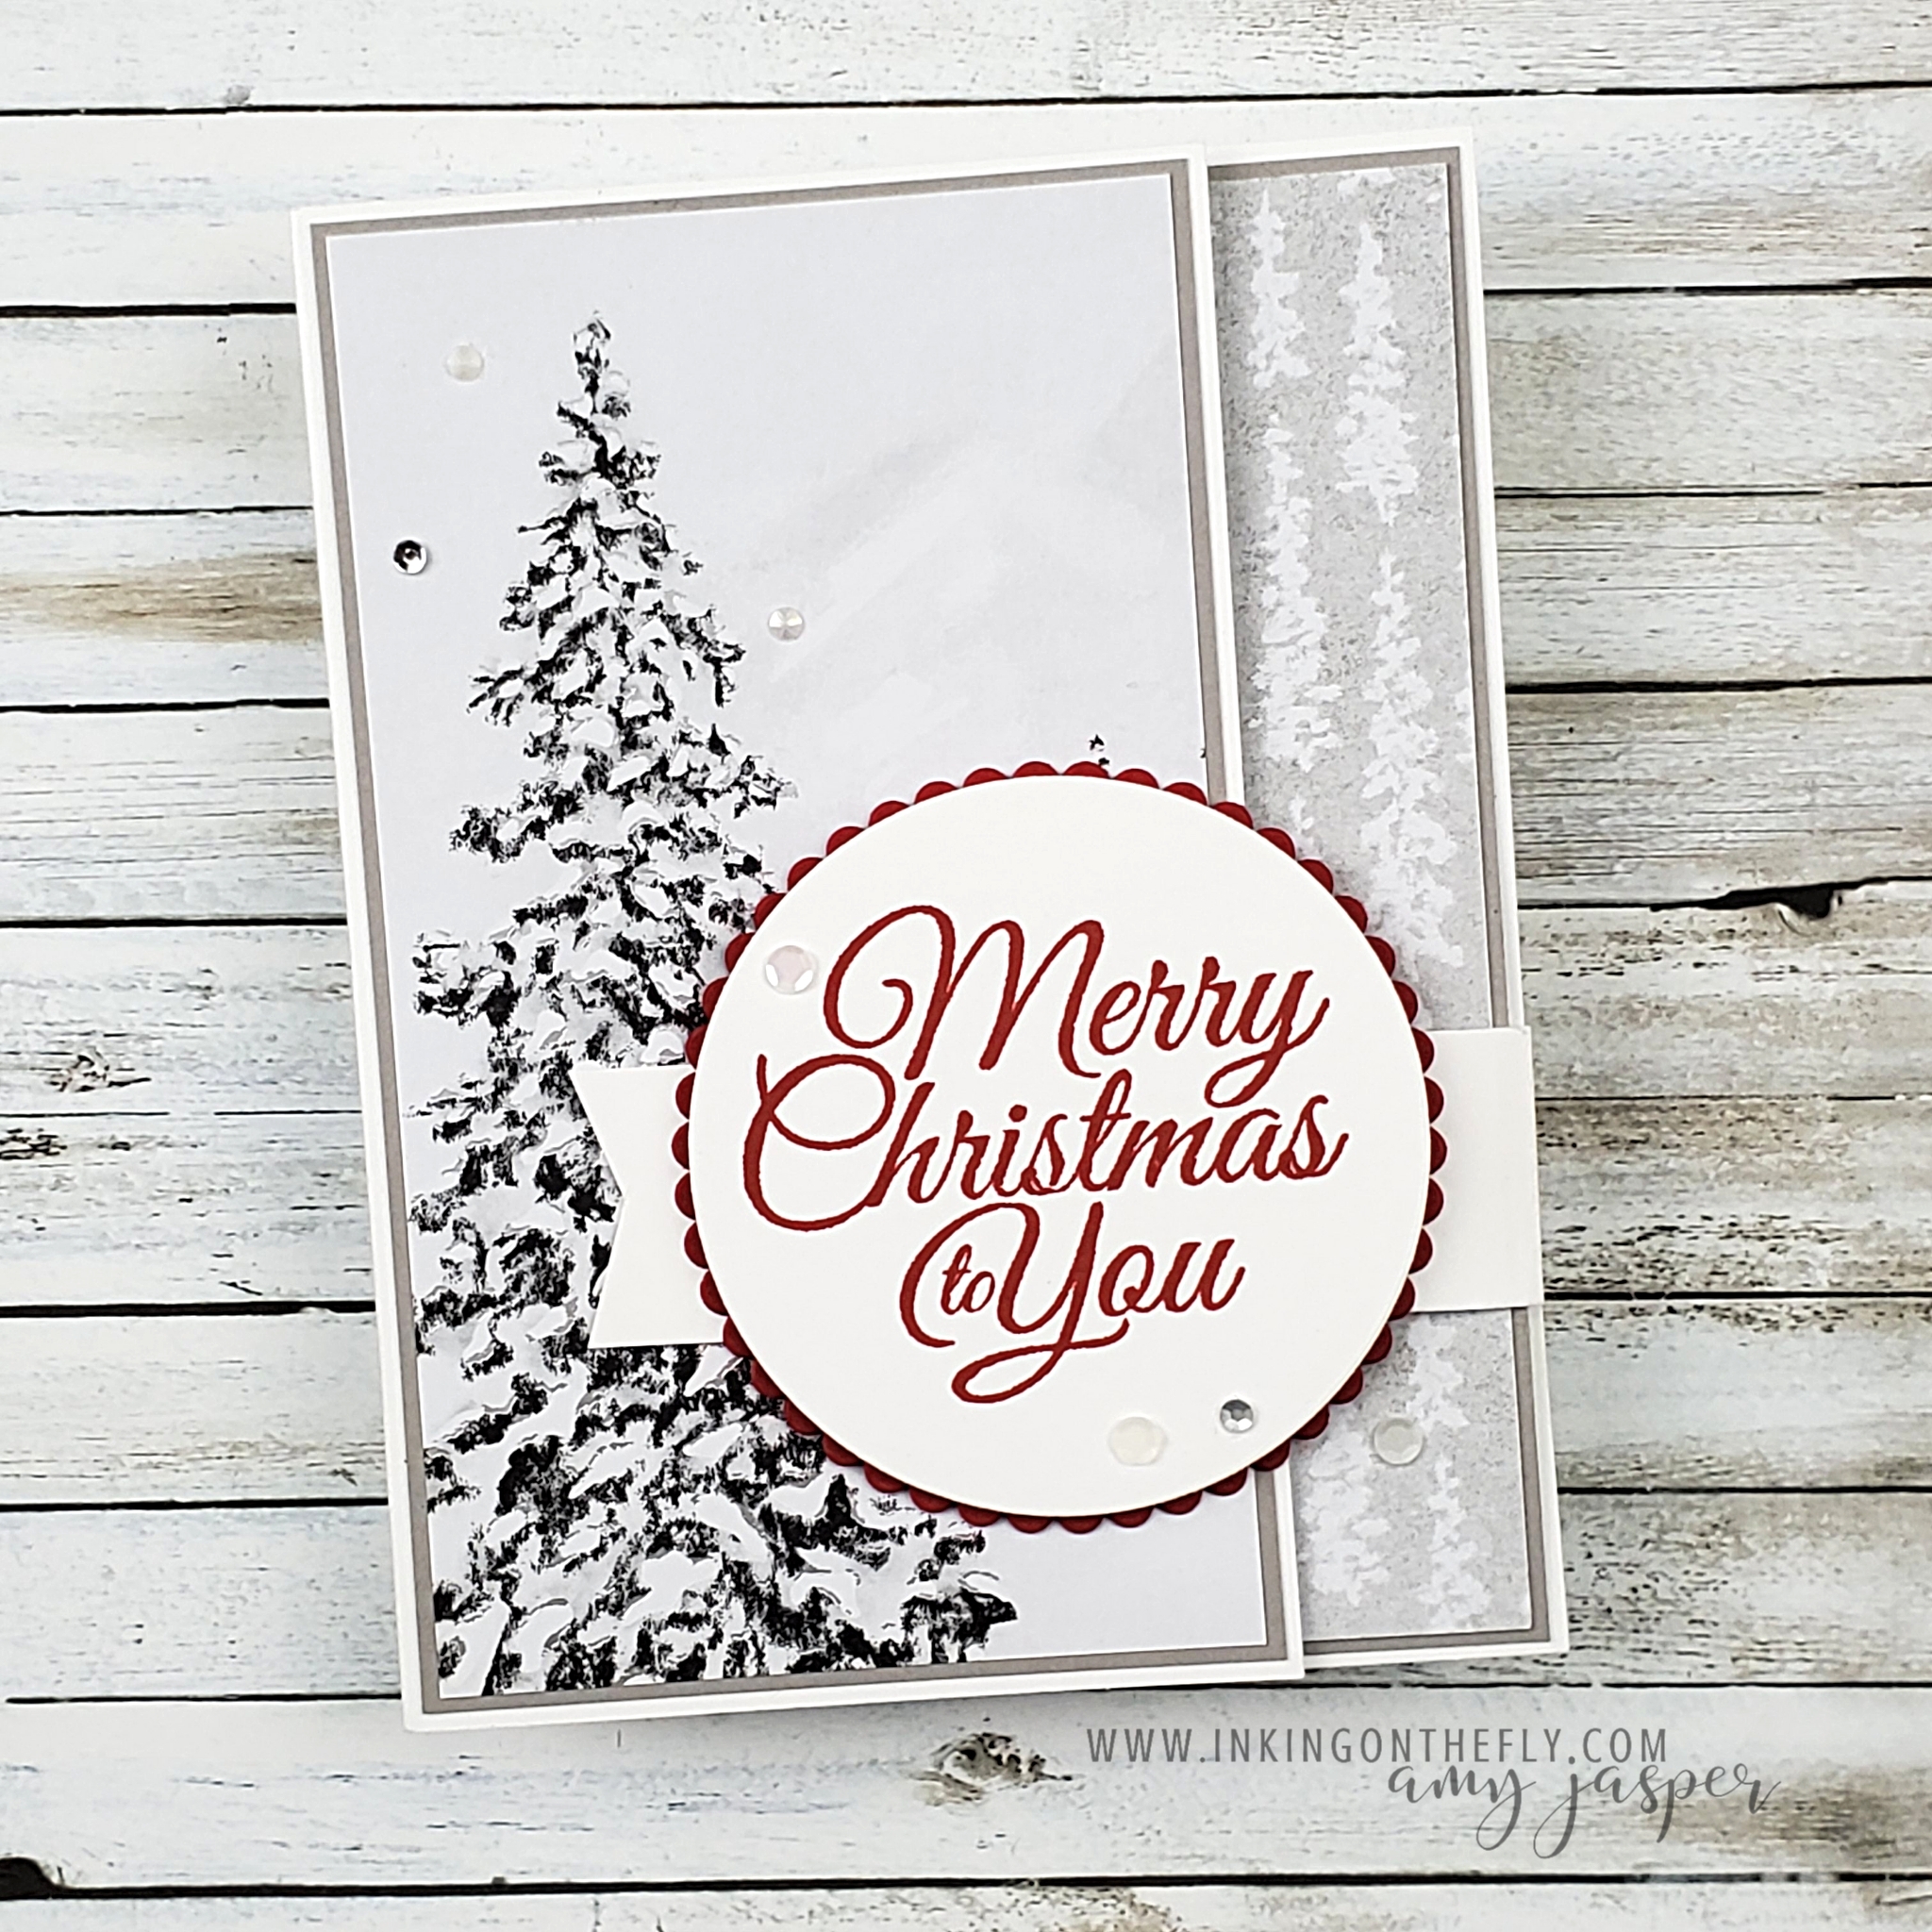
Since this fun fold is so easy to make, I was able to make a few different versions.

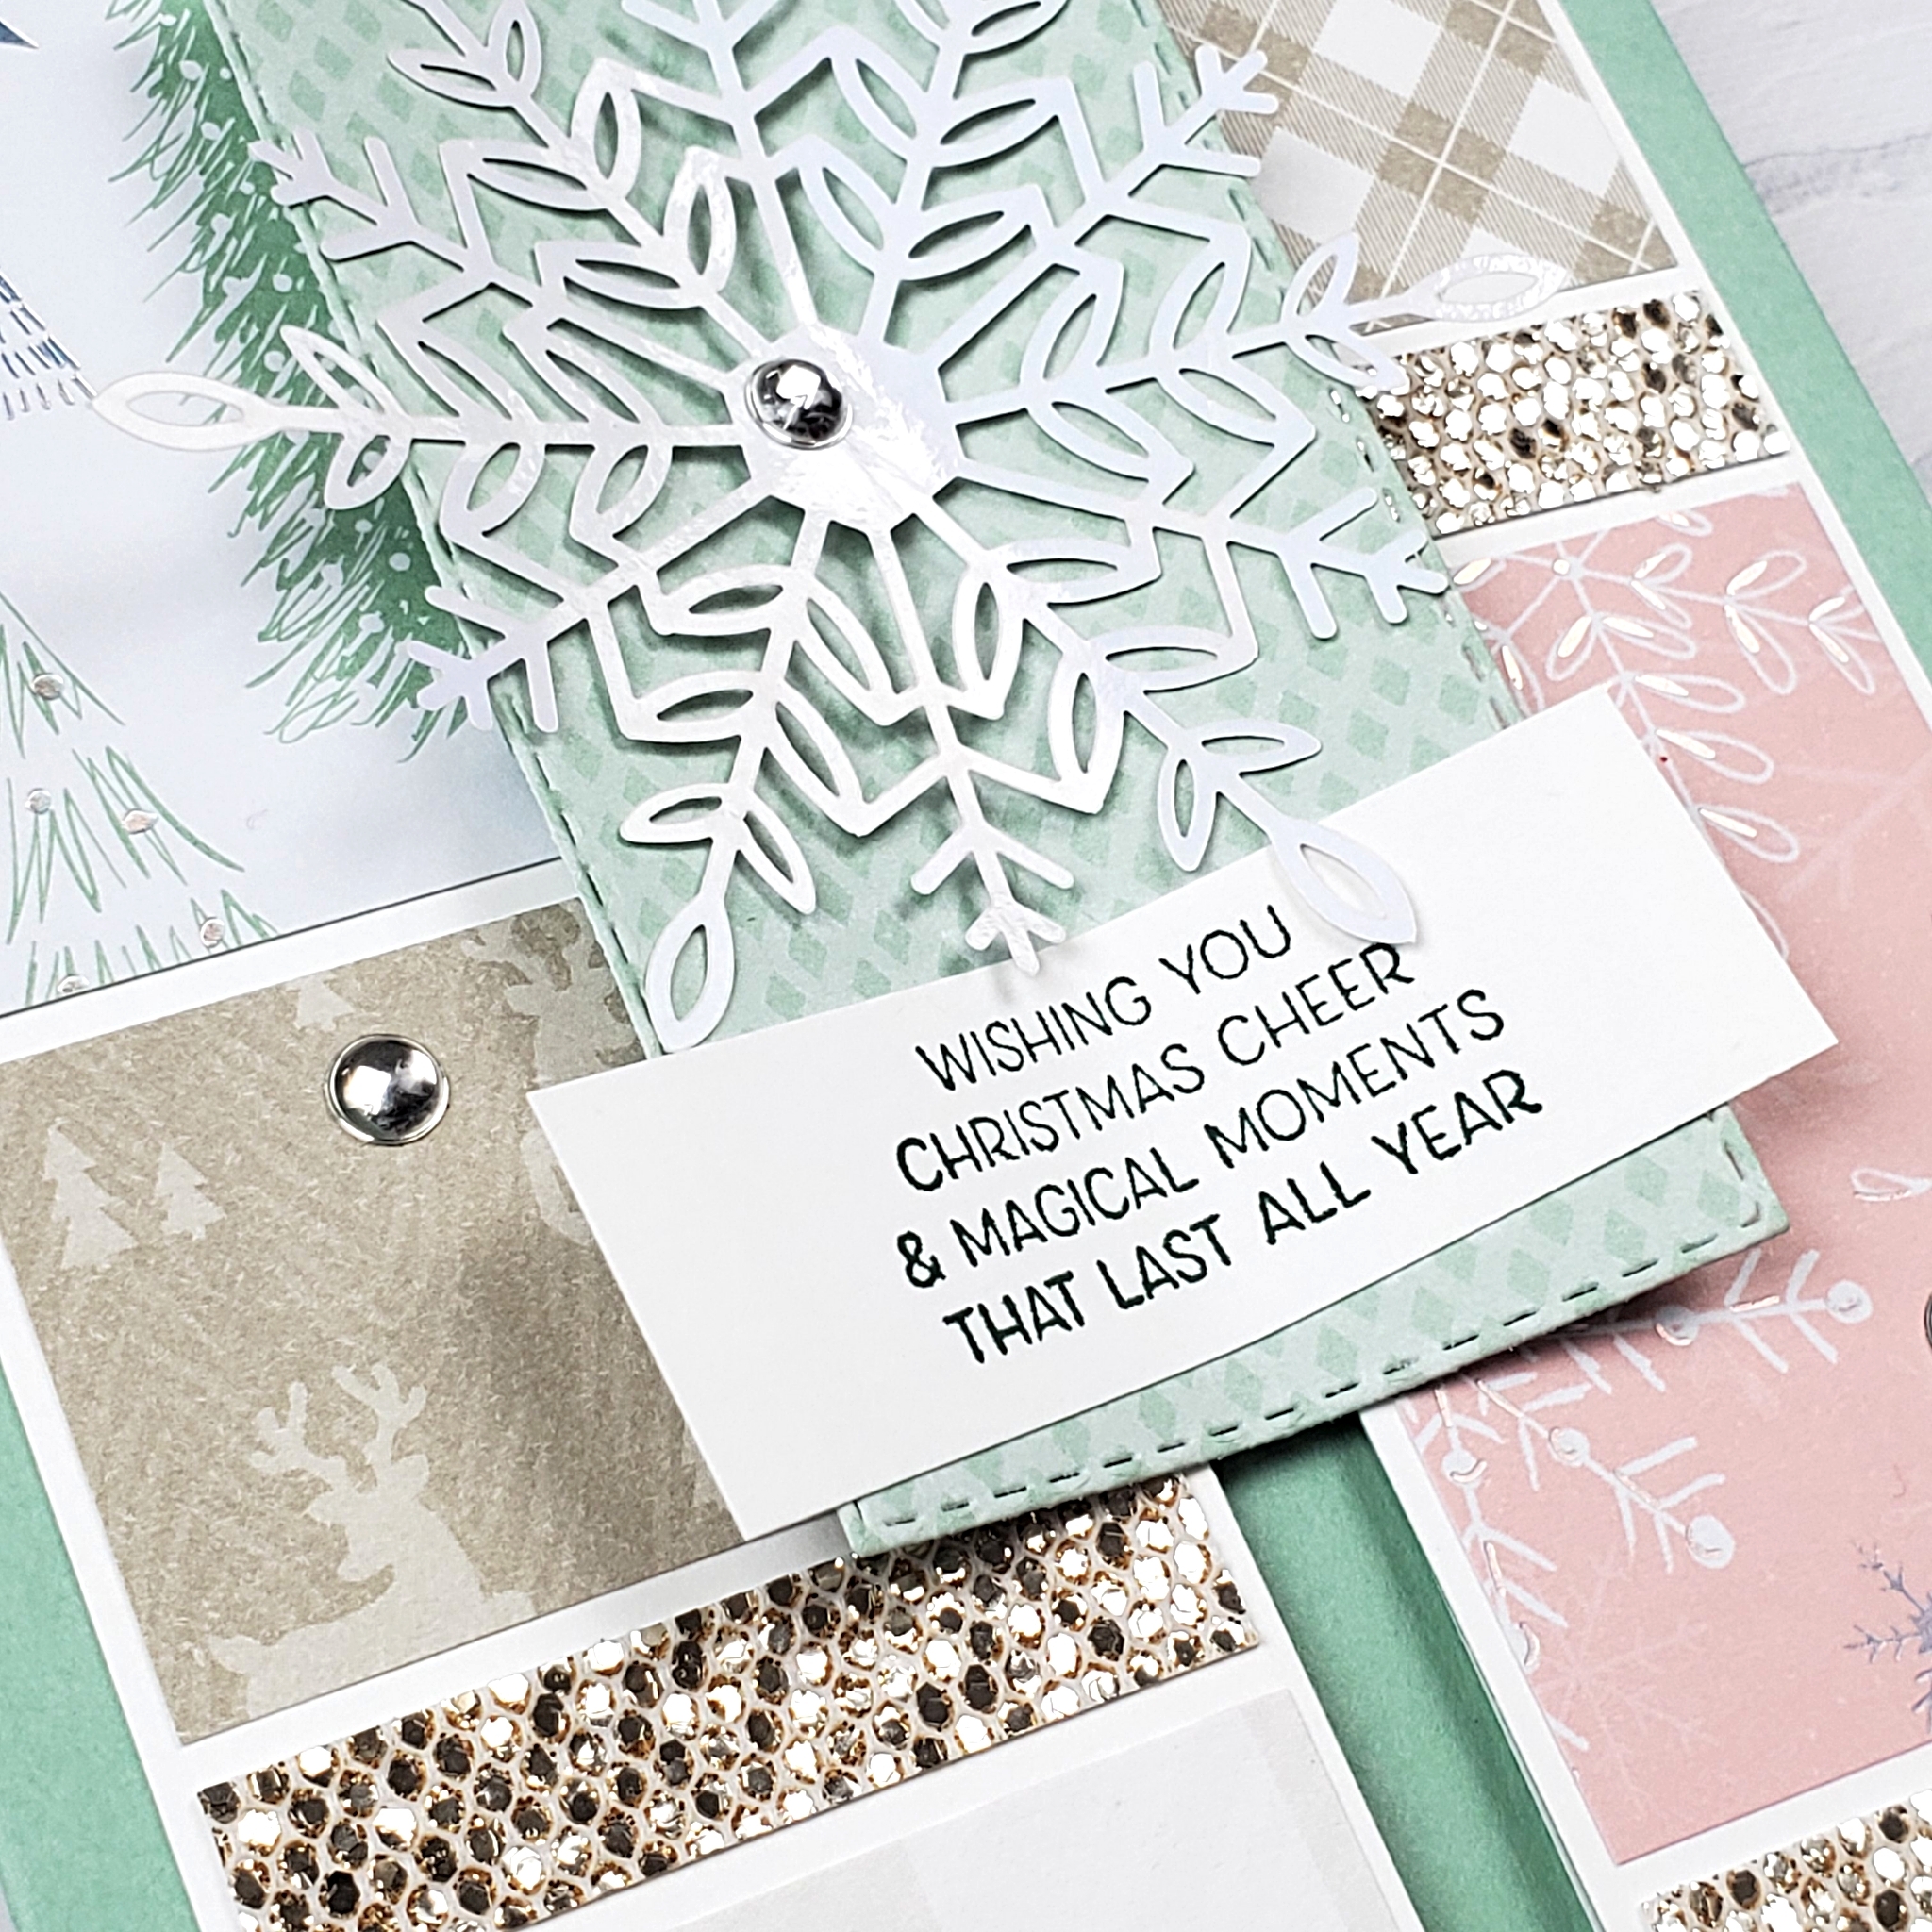
Both of the cards below feature the Holly Jolly Wishes Stamp Set for the sentiments. Though they are the same layout, they have a very different feel. The Sweet Stockings patterned paper gives a playful design, while the Peaceful Place patterned paper has a more serene presentation.

As you can see, the card in my video tutorial uses Shaded Spruce, Mint Macaron, Blushing Bride and Sahara Sand cardstock. Those colours coordinate nicely with the Whimsy & Wonder Designer Series Paper as well as the Pattern Party Designer Series Paper. I also used the Pine Tree Punch and one of the iridescent Wonderful Snowflakes with the Messages Die and White Glittered Organdy Ribbon.

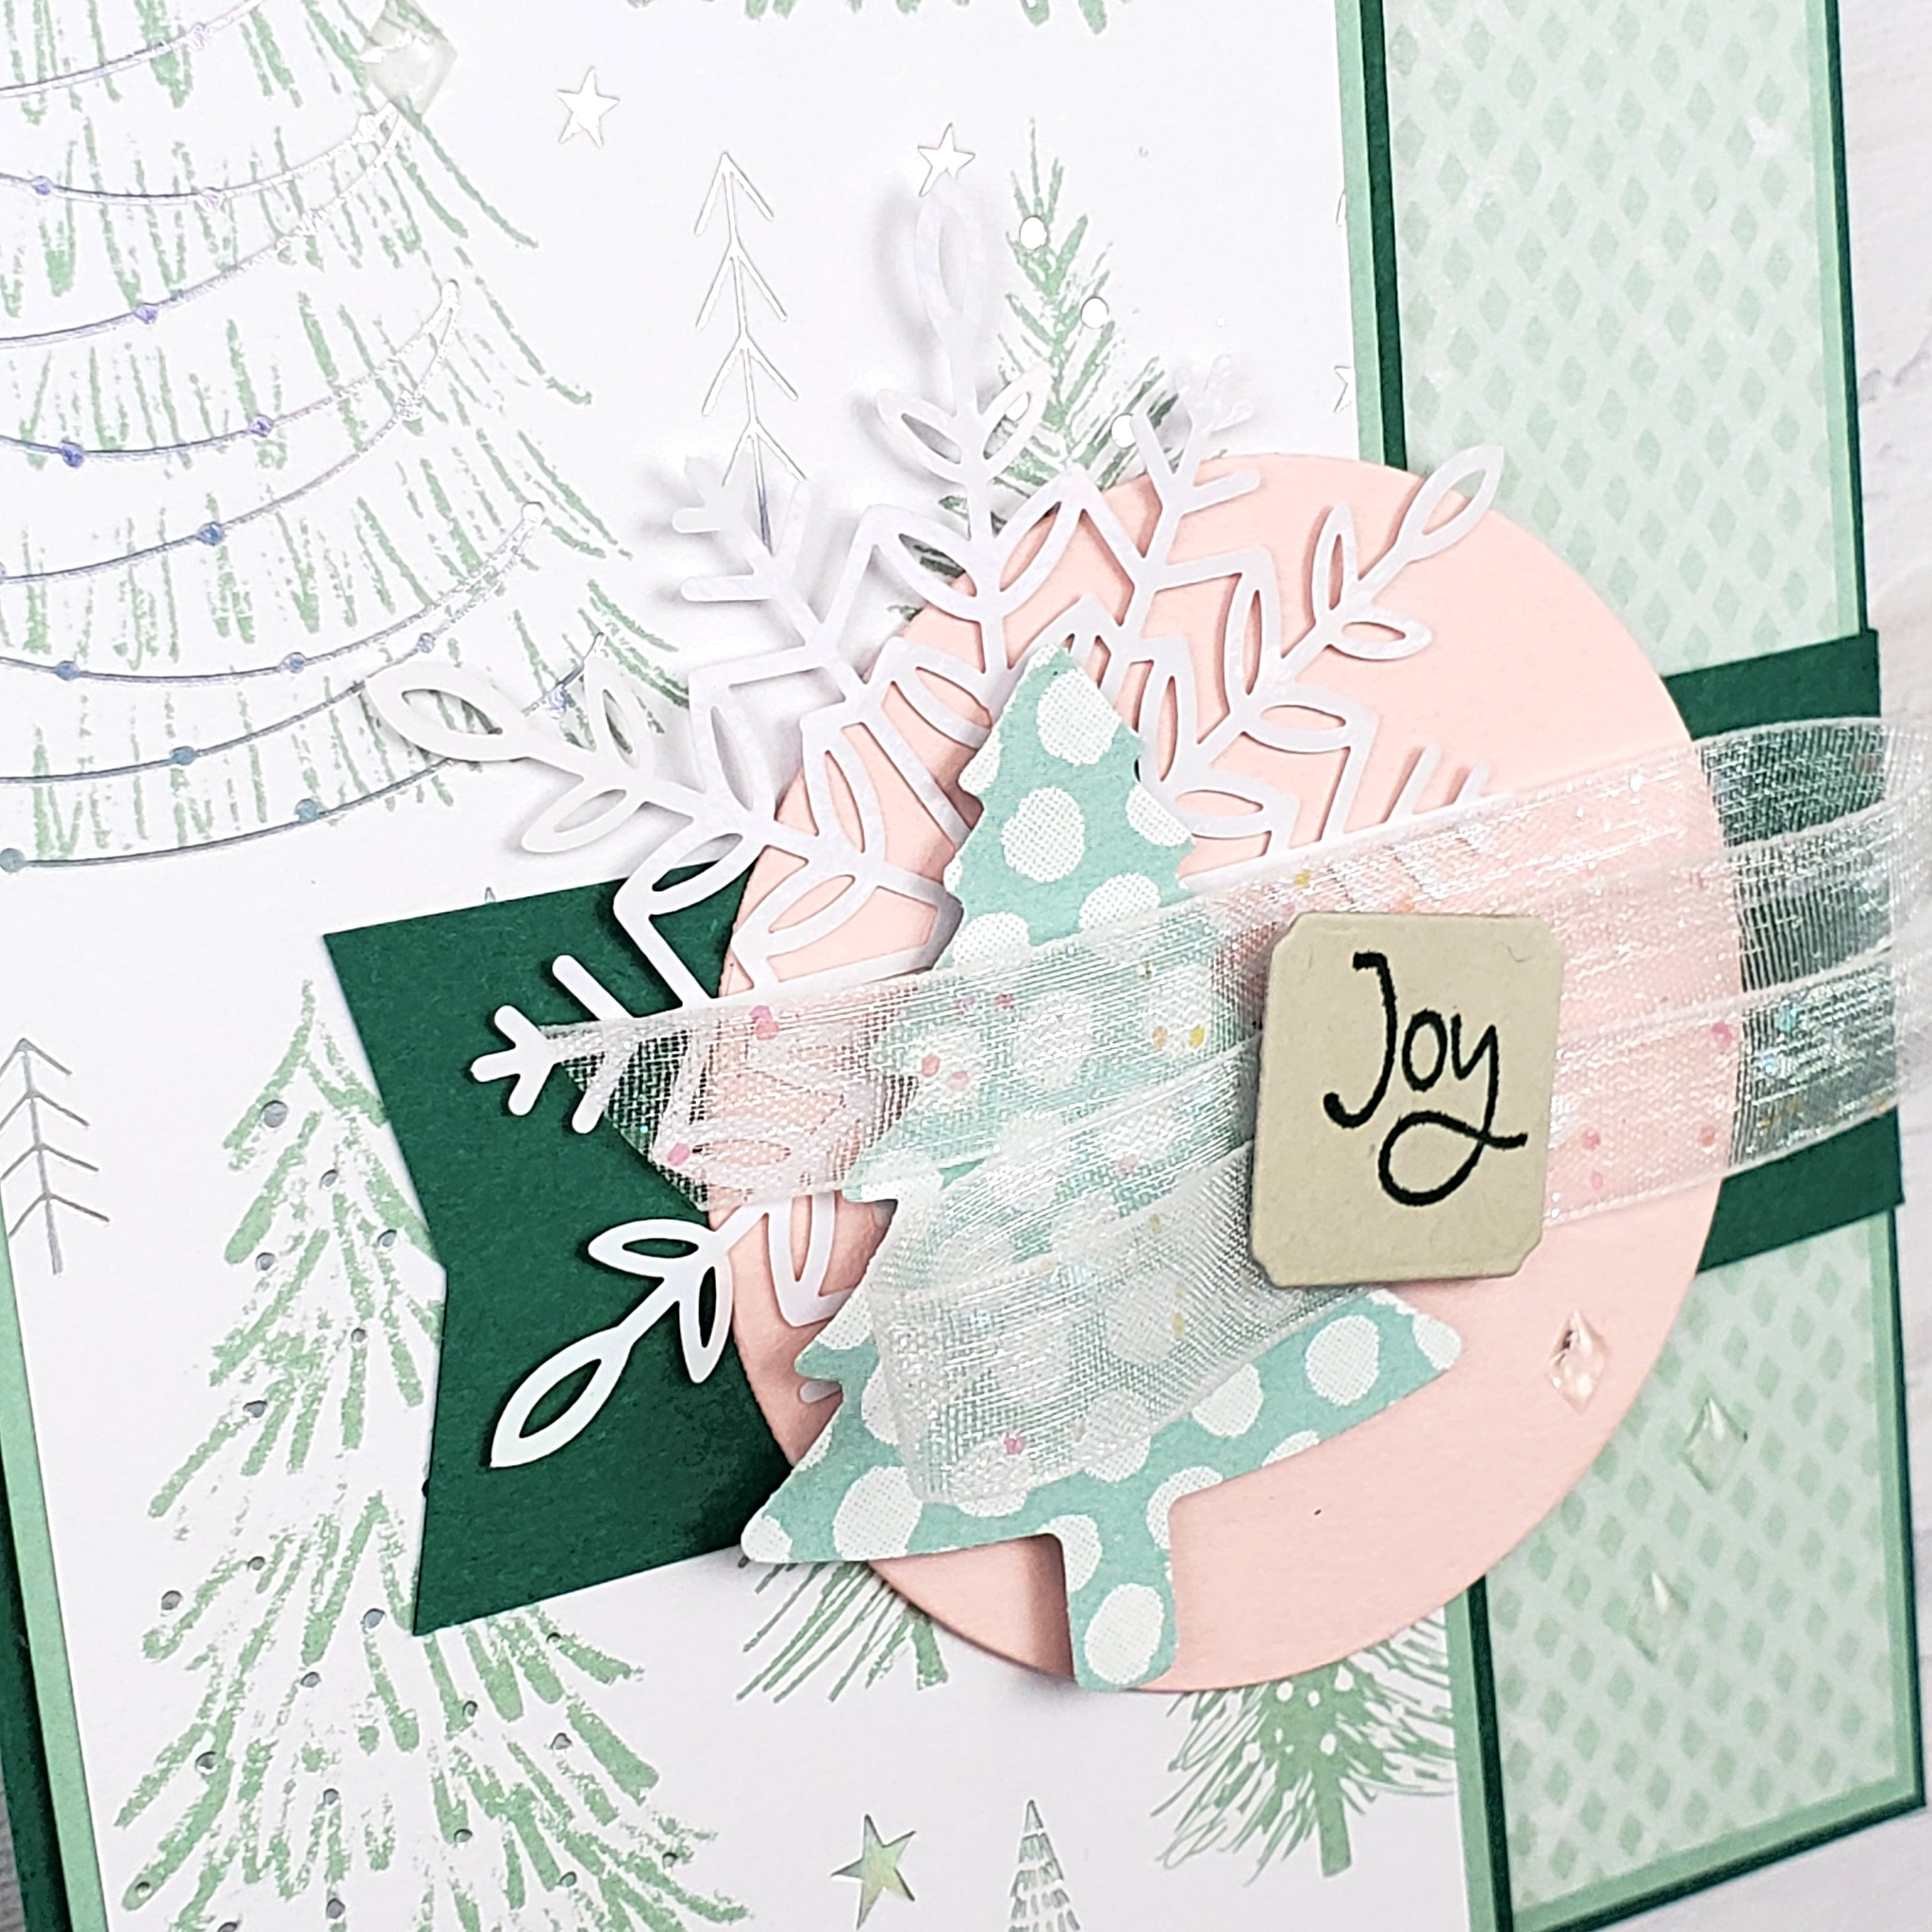
The clear Epoxy Essentials are such a cute and simple addition to a card design. I like how the diamond-shaped ones coordinate with the pattern of the paper.

Check out the video to see how to make this easy fun fold card.

Let me know in the comments if you have any questions. I’m always happy to help when I can!

Send Holiday Love with this Peaceful Christmas Card

The weather is getting cooler and the leaves are changing colour. For me, that means it’s time to cozy up and prepare for winter. This is the season to wrap yourself in your most comfy knitted sweater, make a cup of tea, slip your feet into those slippers and do some holiday crafting.

The only thing that would make my holiday crafting even better is a gas fireplace in my craft room! That would be glorious! It’s not a realistic goal, by any means, but I do wonder if I could make room for a small electric fireplace. My crafting studio is in the basement, so it gets chilly. The ambience and warmth of a fireplace would be so delightful, don’t you think!

As You See It Challenge

As a part of the As You See It Design Team, I get to share another card inspired by today’s As You See It Challenge blog.

It begins with a sketch!

Events & Classes

For the past couple weeks, I’ve been having fun creating with the Peaceful Place Specialty paper. I showed my September technique class how to make a very special fancy fold card using this patterned paper along with the coordinating Cabin Dies. My technique cards and tutorials are exclusively available to those who purchased the class. That means they get VIP Access to the tutorials for two months. After that, I get to share the projects with you! So keep watch for that fancy fold card to show up here on my blog in November!

To find out more about my virtual classes (only available in Canada) or about purchasing VIP Early Access to the technique class tutorials, go to my Events & Classes page.

You can also find lots of tutorials on my YouTube Channel.

Peaceful Christmas Card

Since I’ve had the Peaceful Place patterned paper on my mind AND on my desk, it made its way into this design.

I LOVE this paper!

The Cork Specialty Paper and the Knit Together cling stamp have been waiting so patiently for me to bring them into a project. They both offer such a warm and cozy texture. Stamping tone-on-tone with Gray Granite ink on the Gray Granite cardstock works beautifully with that stamp.

I wasn’t sure what colour of cardstock to use for this design. Many of the neutral colours that I considered were too drab, while some colour options seemed too loud. Finally, I tried the Evening Evergreen.

It was perfect! Neutral enough to feel calm, but rich enough to feel cozy and inviting.

Also on this design, you can see the soft layer of Vellum, the white embossed sentiment from the Snowman Season stamp set, and the red stitched ribbon from the Playful Pets Trim Combo Pack.

Give this sketch a try and share your final take on the As You See It Challenge blog. We love to see what you design with that creative brain of yours!

Video: Learn how to make this locking gate fold

I love the look of paper strips and pieces on a card.

This locking gate fold design has multiple pieces of patterned paper for a sweet patchwork look. My original card was created for my technique class back in May. Since then, we’ve had some products retire and we have some new products coming available in August.

A fresh take with the Whimsy & Wonder DSP

You will see that the video tutorial at the bottom of this post explains how to make the original card. Of course, that design features the retired Art Gallery Designer paper. It would be easy to adapt this design with other patterned papers, as you can see on my new design above.

The original design for my May technique class

Imagine the possibilities! Go over to my online store and have a look at some of the patterned paper options currently on sale. Be sure to check back on August 3rd to see the new fall products!

I decided to try this design using the Wonderful Snowflakes that will be available to purchase in August. Because the snowflakes are so detailed and delicate, I chose to use a rectangle stitched piece of paper as my centre locking mechanism. Only the top layer is die-cut with the Rectangle Stitched die. The two layers underneath are just cut to size, thereby saving me some time and effort.

My new design features the gorgeous Whimsy & Wonder Specialty paper in the August – December Mini Stampin’ Up! Catalogue. I also used the STUNNING Be Dazzling 6″ x 6″ paper for the narrow paper strips. These are so so so sparkly and have almost a mirror finish.

The inside of the card is just as pretty as the outside!

This card called for a sentiment on the front. The Whimsical Trees stamp set was created to coordinate with the paper, so I used Shaded Spruce ink on Basic White cardstock.

Watch the video to see how to make this cool locking card!

The video provides step by step instructions so you can make this at home. I share two different methods for the centre locking mechanism, so be sure to see the difference. If you watch the video on YouTube, you’ll also see that there are measurements and a supply list in the video description. While you’re there, don’t forget to subscribe to my channel!