I love how this type of challenge is so open to your imagination. As long as your design includes all of the elements listed on the challenge, you are good to go! I knew that the Botanical Tags Dies would be part of this one because the die I used covers 3 of the elements required right away! It’s a tag. It’s a die cut. It has leaves! Whaaa!
I cut the tag out of Whisper White Cardstock and coloured it using the Stampin’ Blends. I ended up colouring the entire lower portion with my Black Stampin’ Blends! A bit colour happy, perhaps? LOL!
The Triple Banner Punch was used to cut the bottom of both the botanical tag die and the Pool Party banner. The branch/vine was cut using another of the dies from the Botanical Tags Dies and was also coloured with my Blends Markers.
The sentiment is from the stamp set in the Darling Label Punch Box by Stampin’ Up!. The Darling Label Punch was also used on this card as part of the layers on the tag. The sentiment was stamped on Sahara Sand cardstock using Pretty Peacock ink, then punched out with a circle punch to layer over the punched out Pool Party Scallop circle. I used yet another punch, the Leaf Punch, to cut the leaves that are tucked under the left side of the tag. The little Rhinestone Basic Jewel and the Whisper White Solid Baker’s Twine were just the right embellishments to complete the look I wanted for my tags.
All this is layered over the Woven Threads Designer Series Paper, matted with Whisper White cardstock. Stampin’ Dimensionals hold that onto the Pretty Peacock coloured Woven Threads Designer Series Paper layer on the Pretty Peacock cardstock base of the card.
Did you know that the Woven Threads Designer Series Paper is part of the BUY 3 GET 1 FREE DESIGNER SERIES PAPER SALE!?! Click on the link to go to my online store to see all the papers that are included in this deal!
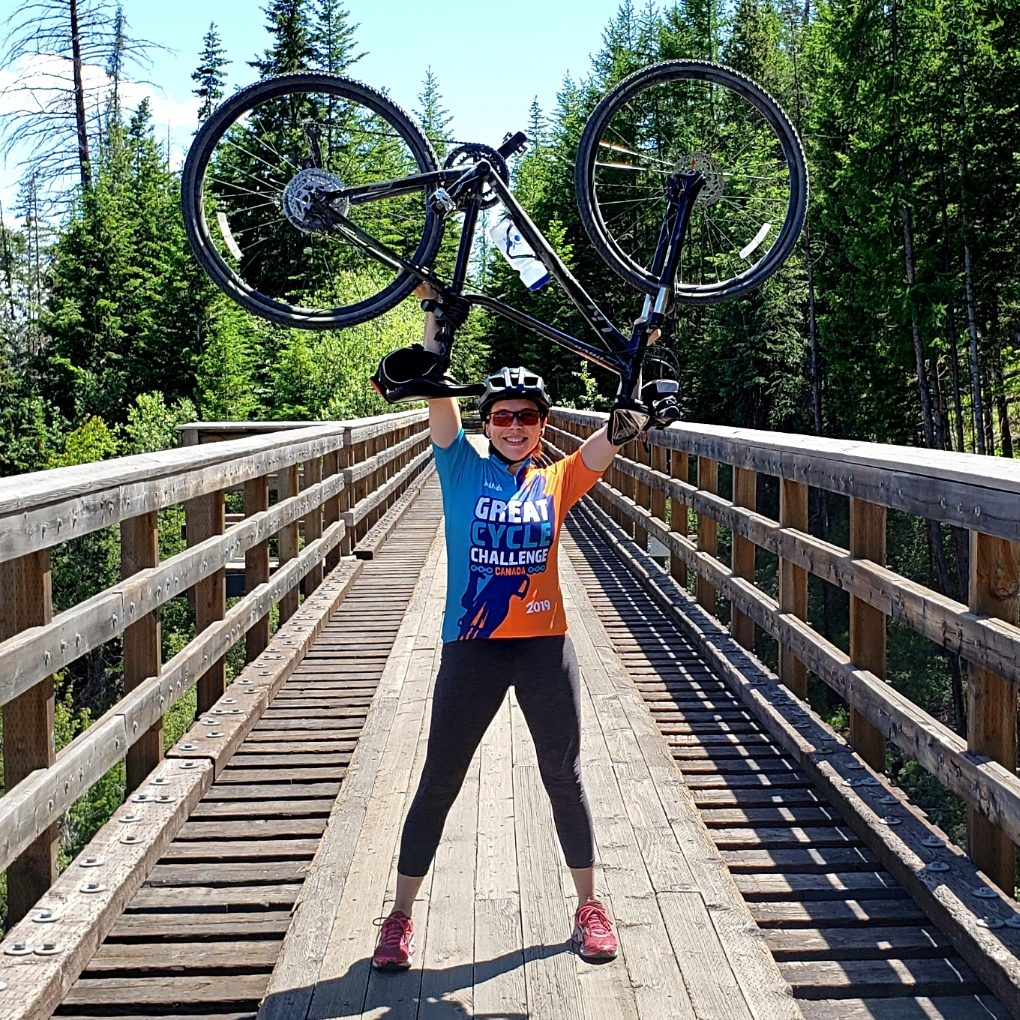
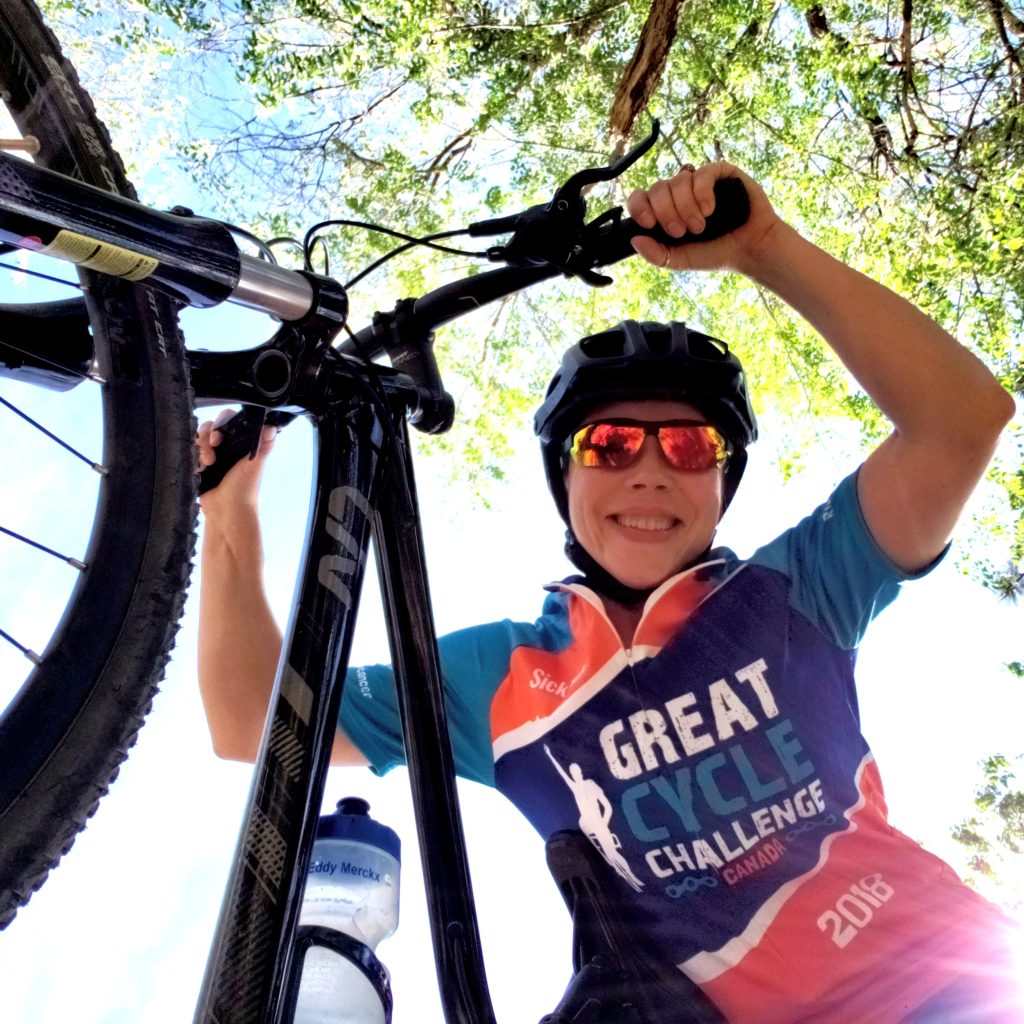
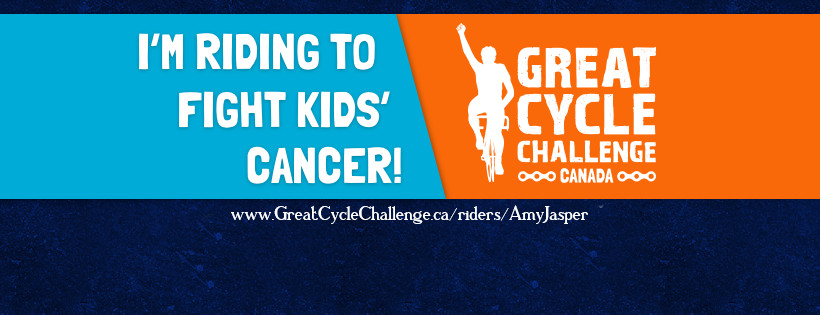
I have been riding my bike this month for the Great Cycle Challenge, raising money to fight childhood cancer. The money will help fund research to find better cancer treatments, provide care for sick kids, and work toward finding a cure for kids’ cancer! I have pledged to ride 750km throughout the month and am aiming to raise $1500 for the cause.
I have pedaled over 590km since June 1st and have practically met my fundraising goal, pulling in $1499 so far! My deeper wish is to actually go way over that and hit $2500 in donations, but I think that might be a bit of a stretch. You see, with that amount raised, riders in the Great Cycle Challenge earn a very special jersey of honour – the Hero Jersey! How I would LOVE to ride around with my “Batman” symbol and utility belt! LOL! With the struggle to find time for my long rides and with the pain and fatigue I’ve been experiencing in my legs, I kind of feel like it would all be even more worthwhile with that very special jersey as physical evidence of my effort. However, that is a very big leap (a superhero sized leap!) to go from $1499 to $2500 with only 10 more days left to go!
At the end of the month, every dollar raised is a huge win in the battle against childhood cancer with or without the Hero Jersey. I believe, that with enough funding, we can truly make a difference in the lives of children and their families who are fighting cancer. I am very pleased with the support of my friends and family who have donated and encouraged me along the way. My stamping community has been a significant part of my support and I am so grateful that you’ve got my back!!
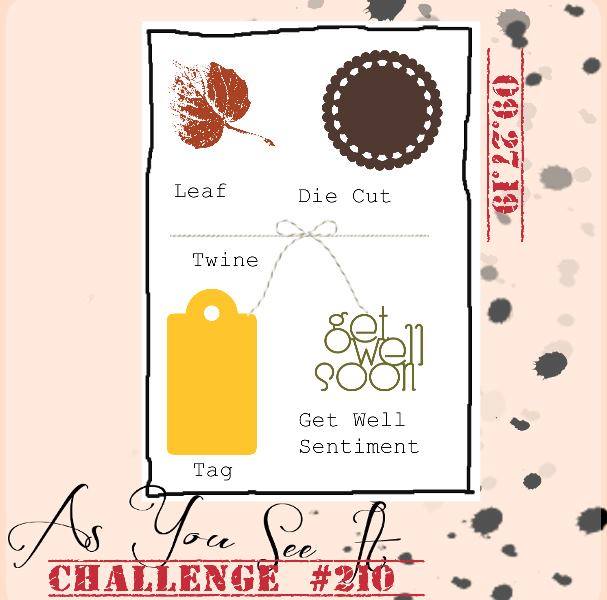
Here’s the As You See It Challenge that has inspired the card design for this blog post:
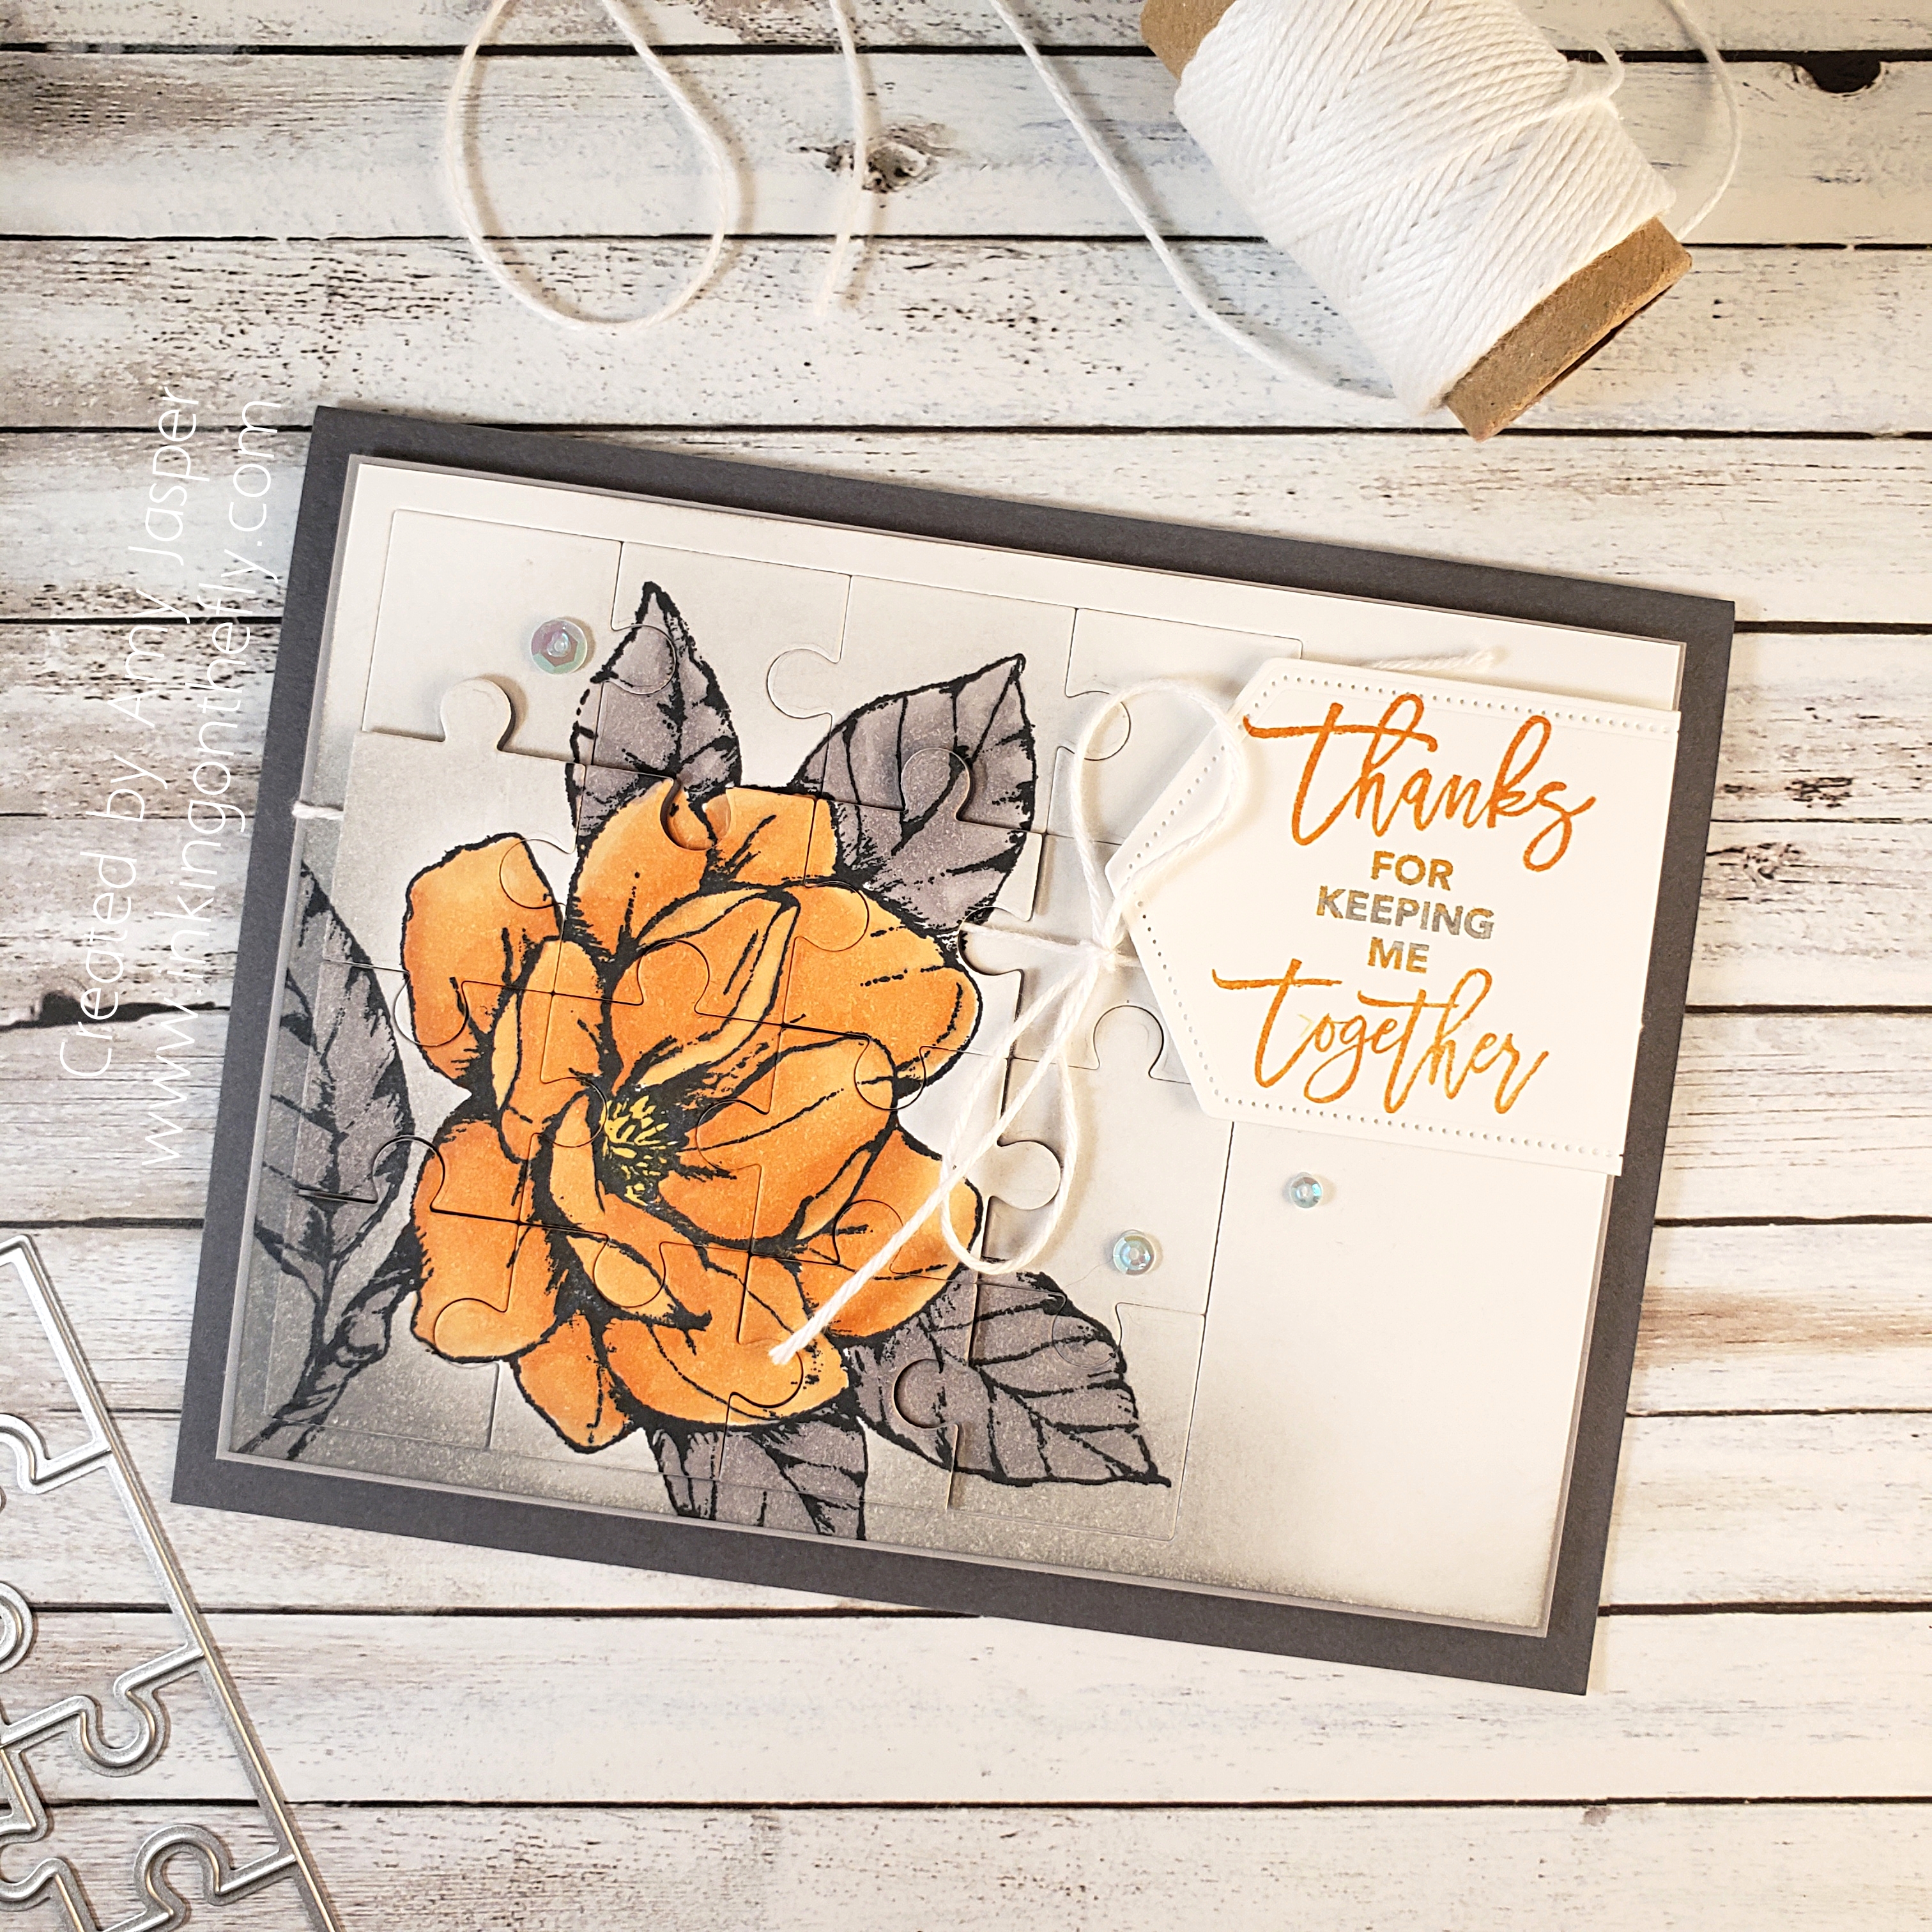
My card today is a bit of a tribute to my supporters. I have been very busy with my bike riding and fundraising, but I have also been managing some untimely life stresses as well. The family van transmission has finally kicked the bucket and we are in a bit of a pickle trying to find a new family vehicle before we leave on a road trip in less than a week. It’s time-consuming to drive to neighboring towns to try out vehicles, talk to sales people, research options and manage the family’s needs with only one working vehicle. Then there’s the normal busyness of June with end of school activities and celebrations for our three kids and the usual day to day things that we still need to keep up with.
It has been overwhelming and I feel like I am falling apart, but with the support of my family, friends, and customers (who are also friends), somehow I’m able to keep it together. They (you) have been keeping me together! I am so grateful for my community!
So, like I said, this card is for my supporters this month.
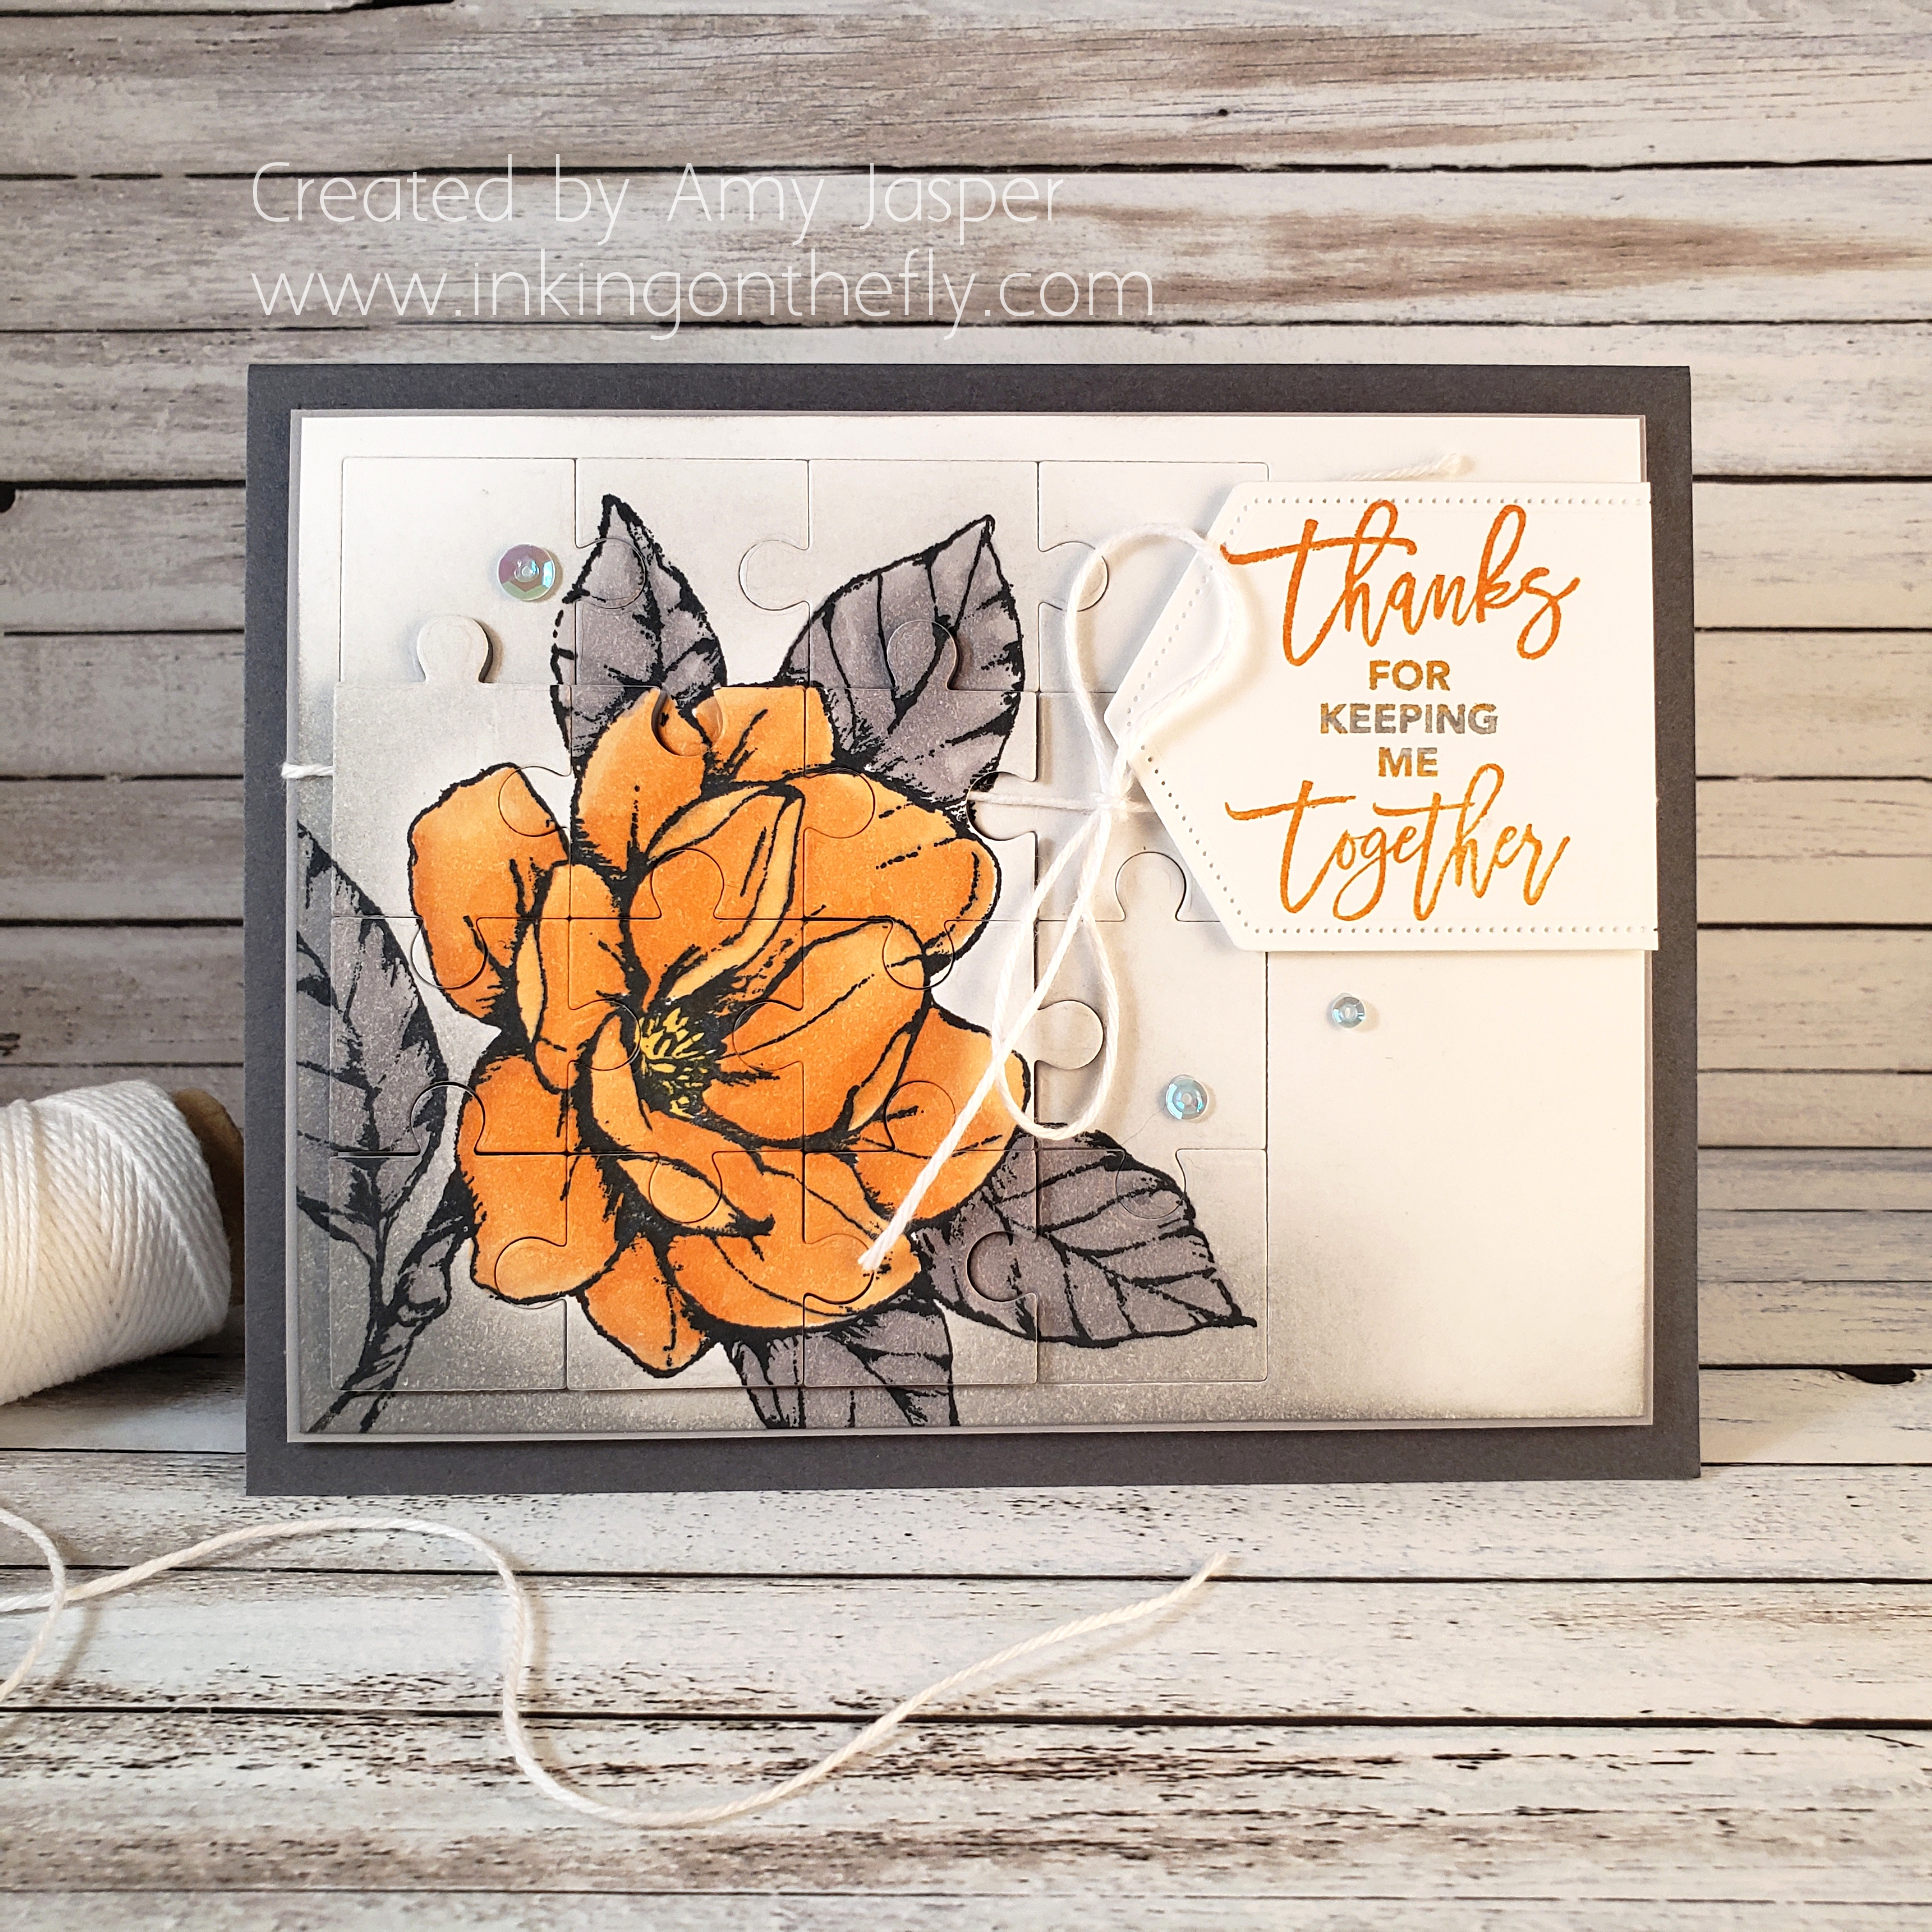
My favourite colour to wear is orange. Orange is my happy colour. I also wear a lot of grey (it’s my comfort colour), so I figured why not just get them both in there! I used the gorgeous Good Morning Magnolia stamp set and my Stampin’ Blends (Pumpkin Pie and Smoky Slate) for the main image and I added some sponging around the flower with Smoky Slate classic ink.
Then I used the Puzzle Pieces Dies with my Big Shot die cutting machine to cut the coloured image into the puzzle shapes. This I adhered to a Smoky Slate cardstock matte with Multipurpose Liquid Glue for some of the pieces and Mini Dimensionals for all the pieces with flower petals on them.
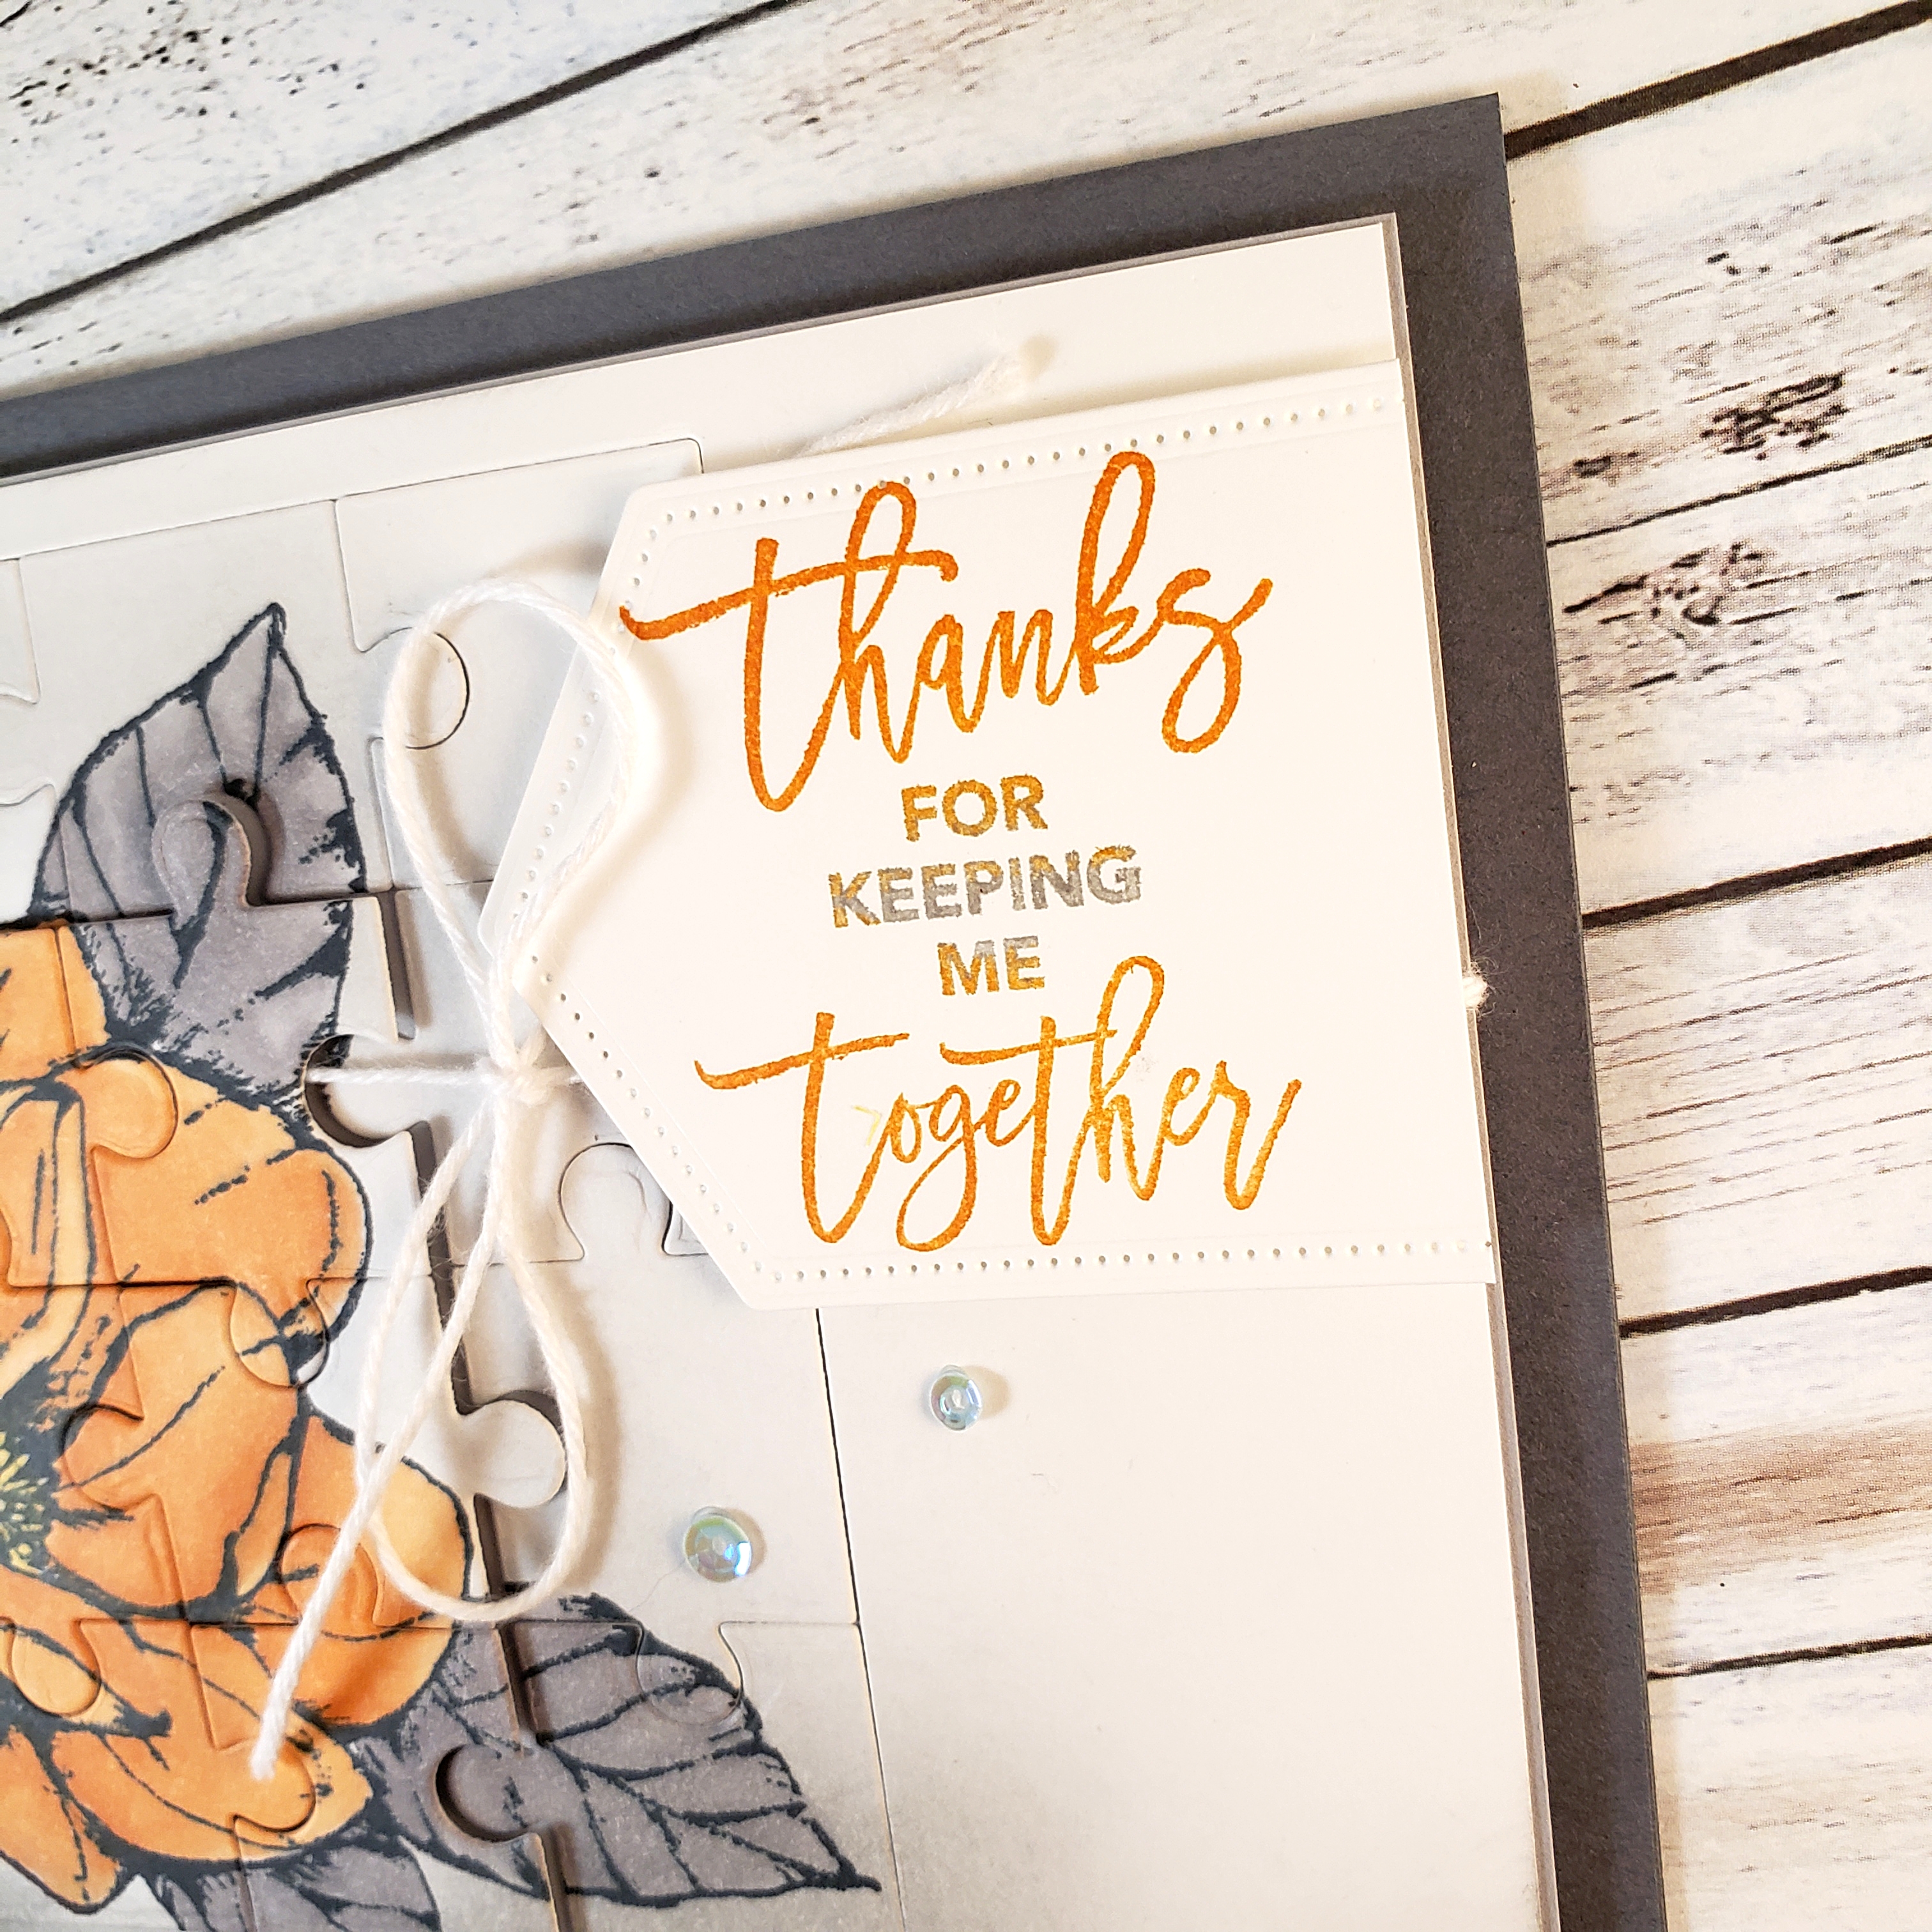
I inked the sentiment from the Love You to Pieces Stamp Set so that the middle was Smoky Slate (inked with my Smoky Slate Stampin’ Write Marker) and the top and bottom were Pumpkin Pie (inked carefully with my Pumpkin Pie ink pad). This was die cut using the Stitched Nested Labels Dies, which I trimmed to fit.
I added the Whisper White Solid Baker’s Twine, attached the label with Mini Dimensionals and adhered the whole card front to the Basic Gray cardstock card base with more Stampin’ Dimensionals. The final touch was to add the Seaside Spray coloured sequin from the Woven Threads Sequin Assortment pack. The Fine-Tip Glue pen and the Take Your Pick Tool are the perfect combination to get those little guys to stay where I want them..
Thank you all for your amazing support!
If you’d like to cheer me on by donating to this great cause, you can click on THIS LINK and help fight childhood cancer with me!
I found my new favourite pop-up card! Once you know how to build this one, it’s super easy and doesn’t take very much time at all! I had a look at a few tutorials for this particular card and found this to be the easiest way with the least amount of measuring and fuss.
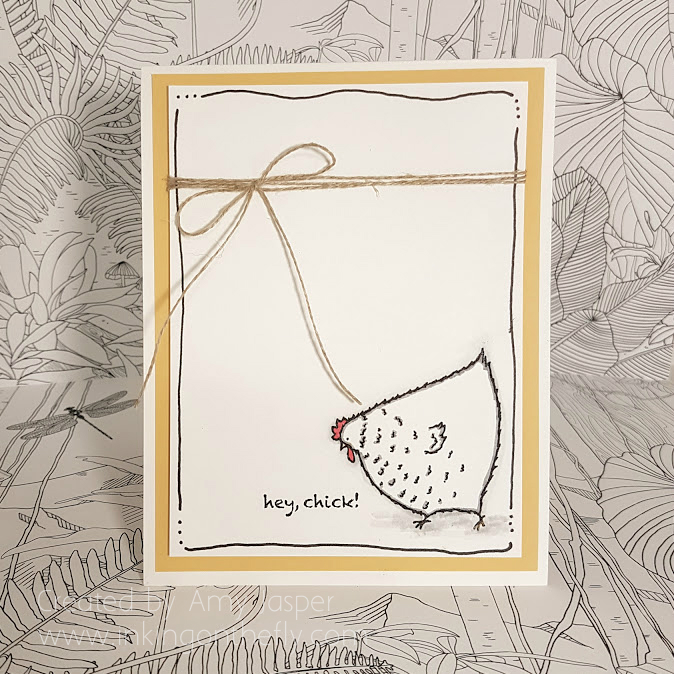
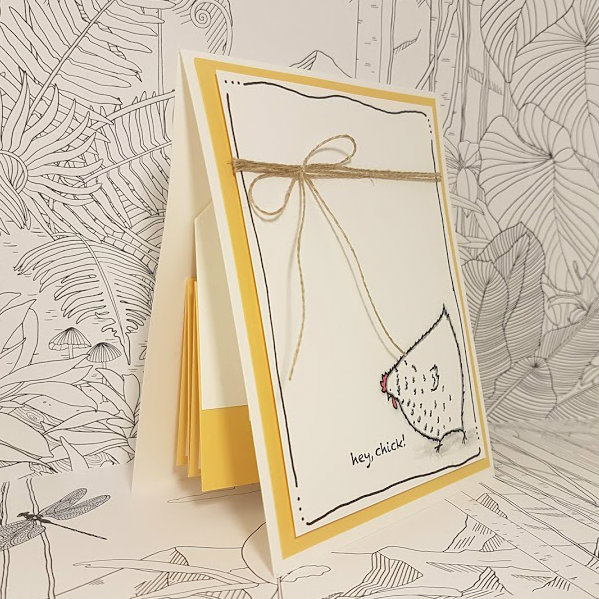
When I first had a look at the Stampin’ Up Sale-a-bration brouchure for 2017, I squealed with delight when I saw the funny little chickens in the Hey Chick stamp set! I think they are so fun and silly and I fell in love with them immediately. Believe it or not, this card is the first time for me to use this stamp set.
Here’s the simple card front:
I love the simplicity of this card. The hand-drawn lines around the Whisper White layer add a simple light frame. The chicken image is stamped with Jet Black Stazon ink and coloured with Blender Pens using Smoky Slate ink, Crushed Curry ink and Watermelon Wonder.
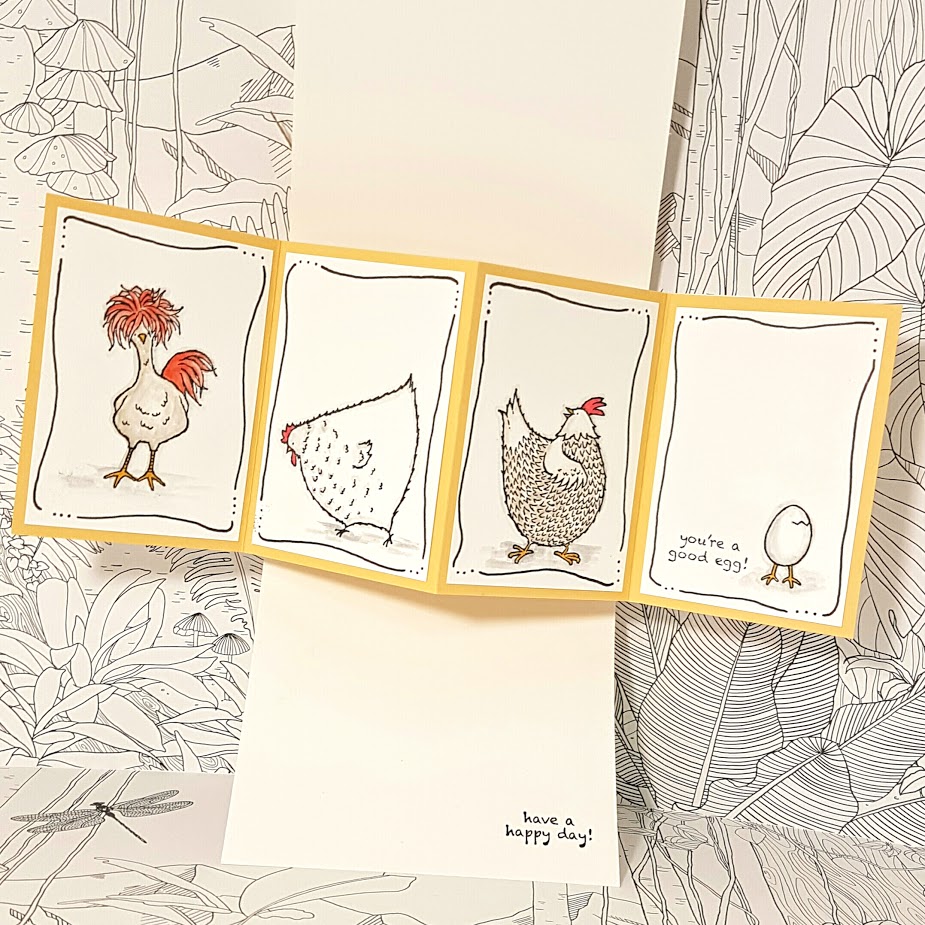
Here’s what happens when you open it:
Save
You can see that I did more of those hand-drawn lines with my Project Life pen on each of the inside panels of this card. I used some Tangerine Tango ink with my Blender Pen for the crazy chicken’s “hair” and tail feathers, some Crumb Cake ink for the body of the crazy chicken and the body of the looking back chicken. Smoky Slate ink accents the pecking chicken and the cracking egg images.
The best part about this pop-up card is that it is super easy to make. I started with preparing the piece for my inner mechanics, Thick Whisper White cardstock measuring 3-1/2″ x 8″. This piece was scored lengthwise at 1-3/4″, then I used my Simply Scored tool to make a notch marking at 2-1/4″ on the long edge of the cardstock. I did four of these marks, then used them as guidelines to score the X needed for these magical inner workings of this pop-up card. The So Saffron panel piece measures 3-1/2″ x 10″ and is scored at 2-1/2″, 5″, and 7-1/2″, then folded in an accordian fold style.
It’s not easy to explain this fun card in writing. Are you confused, yet? LOL! I thought you might be, so I made a video! Check it out on my youtube channel by clicking here.
I hope you give this super fun card a try. It’s guaranteed to delight anyone who opens it to find that it’s much bigger on the inside!