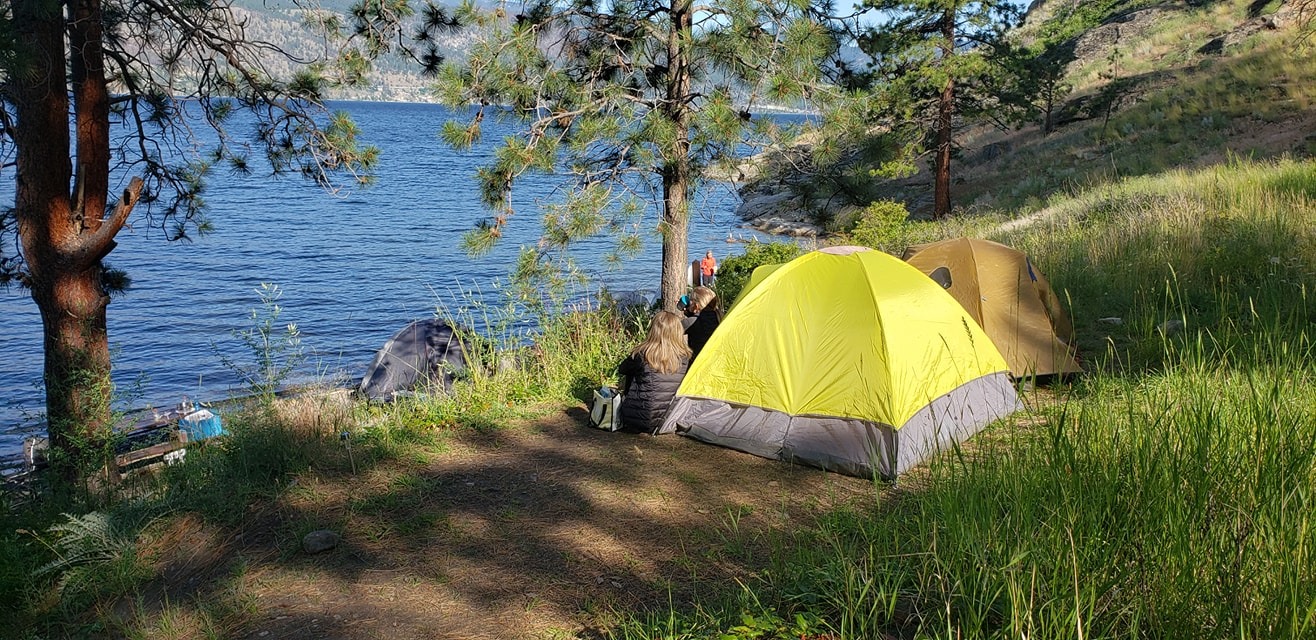
Camping is in Tents
I have a lot of great memories of camping with my family. We never had a trailer or RV – always a tent.
When I was 12, we hiked the 78km West Coast trail. I complained a LOT, but what an amazing adventure! We would hike about 10km each day (my oldest brother carried my backpack for me for some of the trek), then pitch our tents and eat our meal by the open fire and dry out our clothes. In the morning, we’d pack everything up again and carry it to the next tenting spot.
The best camping ever is backpacking. No vehicles. Very few people. A minimalist experience where you can fully appreciate nature and all of its scary and beautiful glory!

I love camping, but I have to admit, I’m a bit of a snob. I get very annoyed at campers who play their music without any consideration of the other people in the area. Many campers prefer the sounds of the wind in the trees and soft buzzing of the busy insects as they maintain the balance of the ecosystem.
I’m also not a fan of big RV’s and their loud generators that are strategically placed far away from themselves because of the noise. Which, of course, means that the noise is closer to my tent. My tent! With its thin fabric walls that provide shelter from the wind and rain, but absolutely no protection from the noise pollution of a generator or music.
If you are someone who camps in an RV, offer me some of the ice cream from your freezer and I just might forgive you for stealing my peace and quiet. 🙂 Better yet, consider powering-up with solar panels, if you can. This is better for the environment, your camping neighbours, and your bank account.
But, enough about my camping snobbery. Let’s get to the card I want to show you!
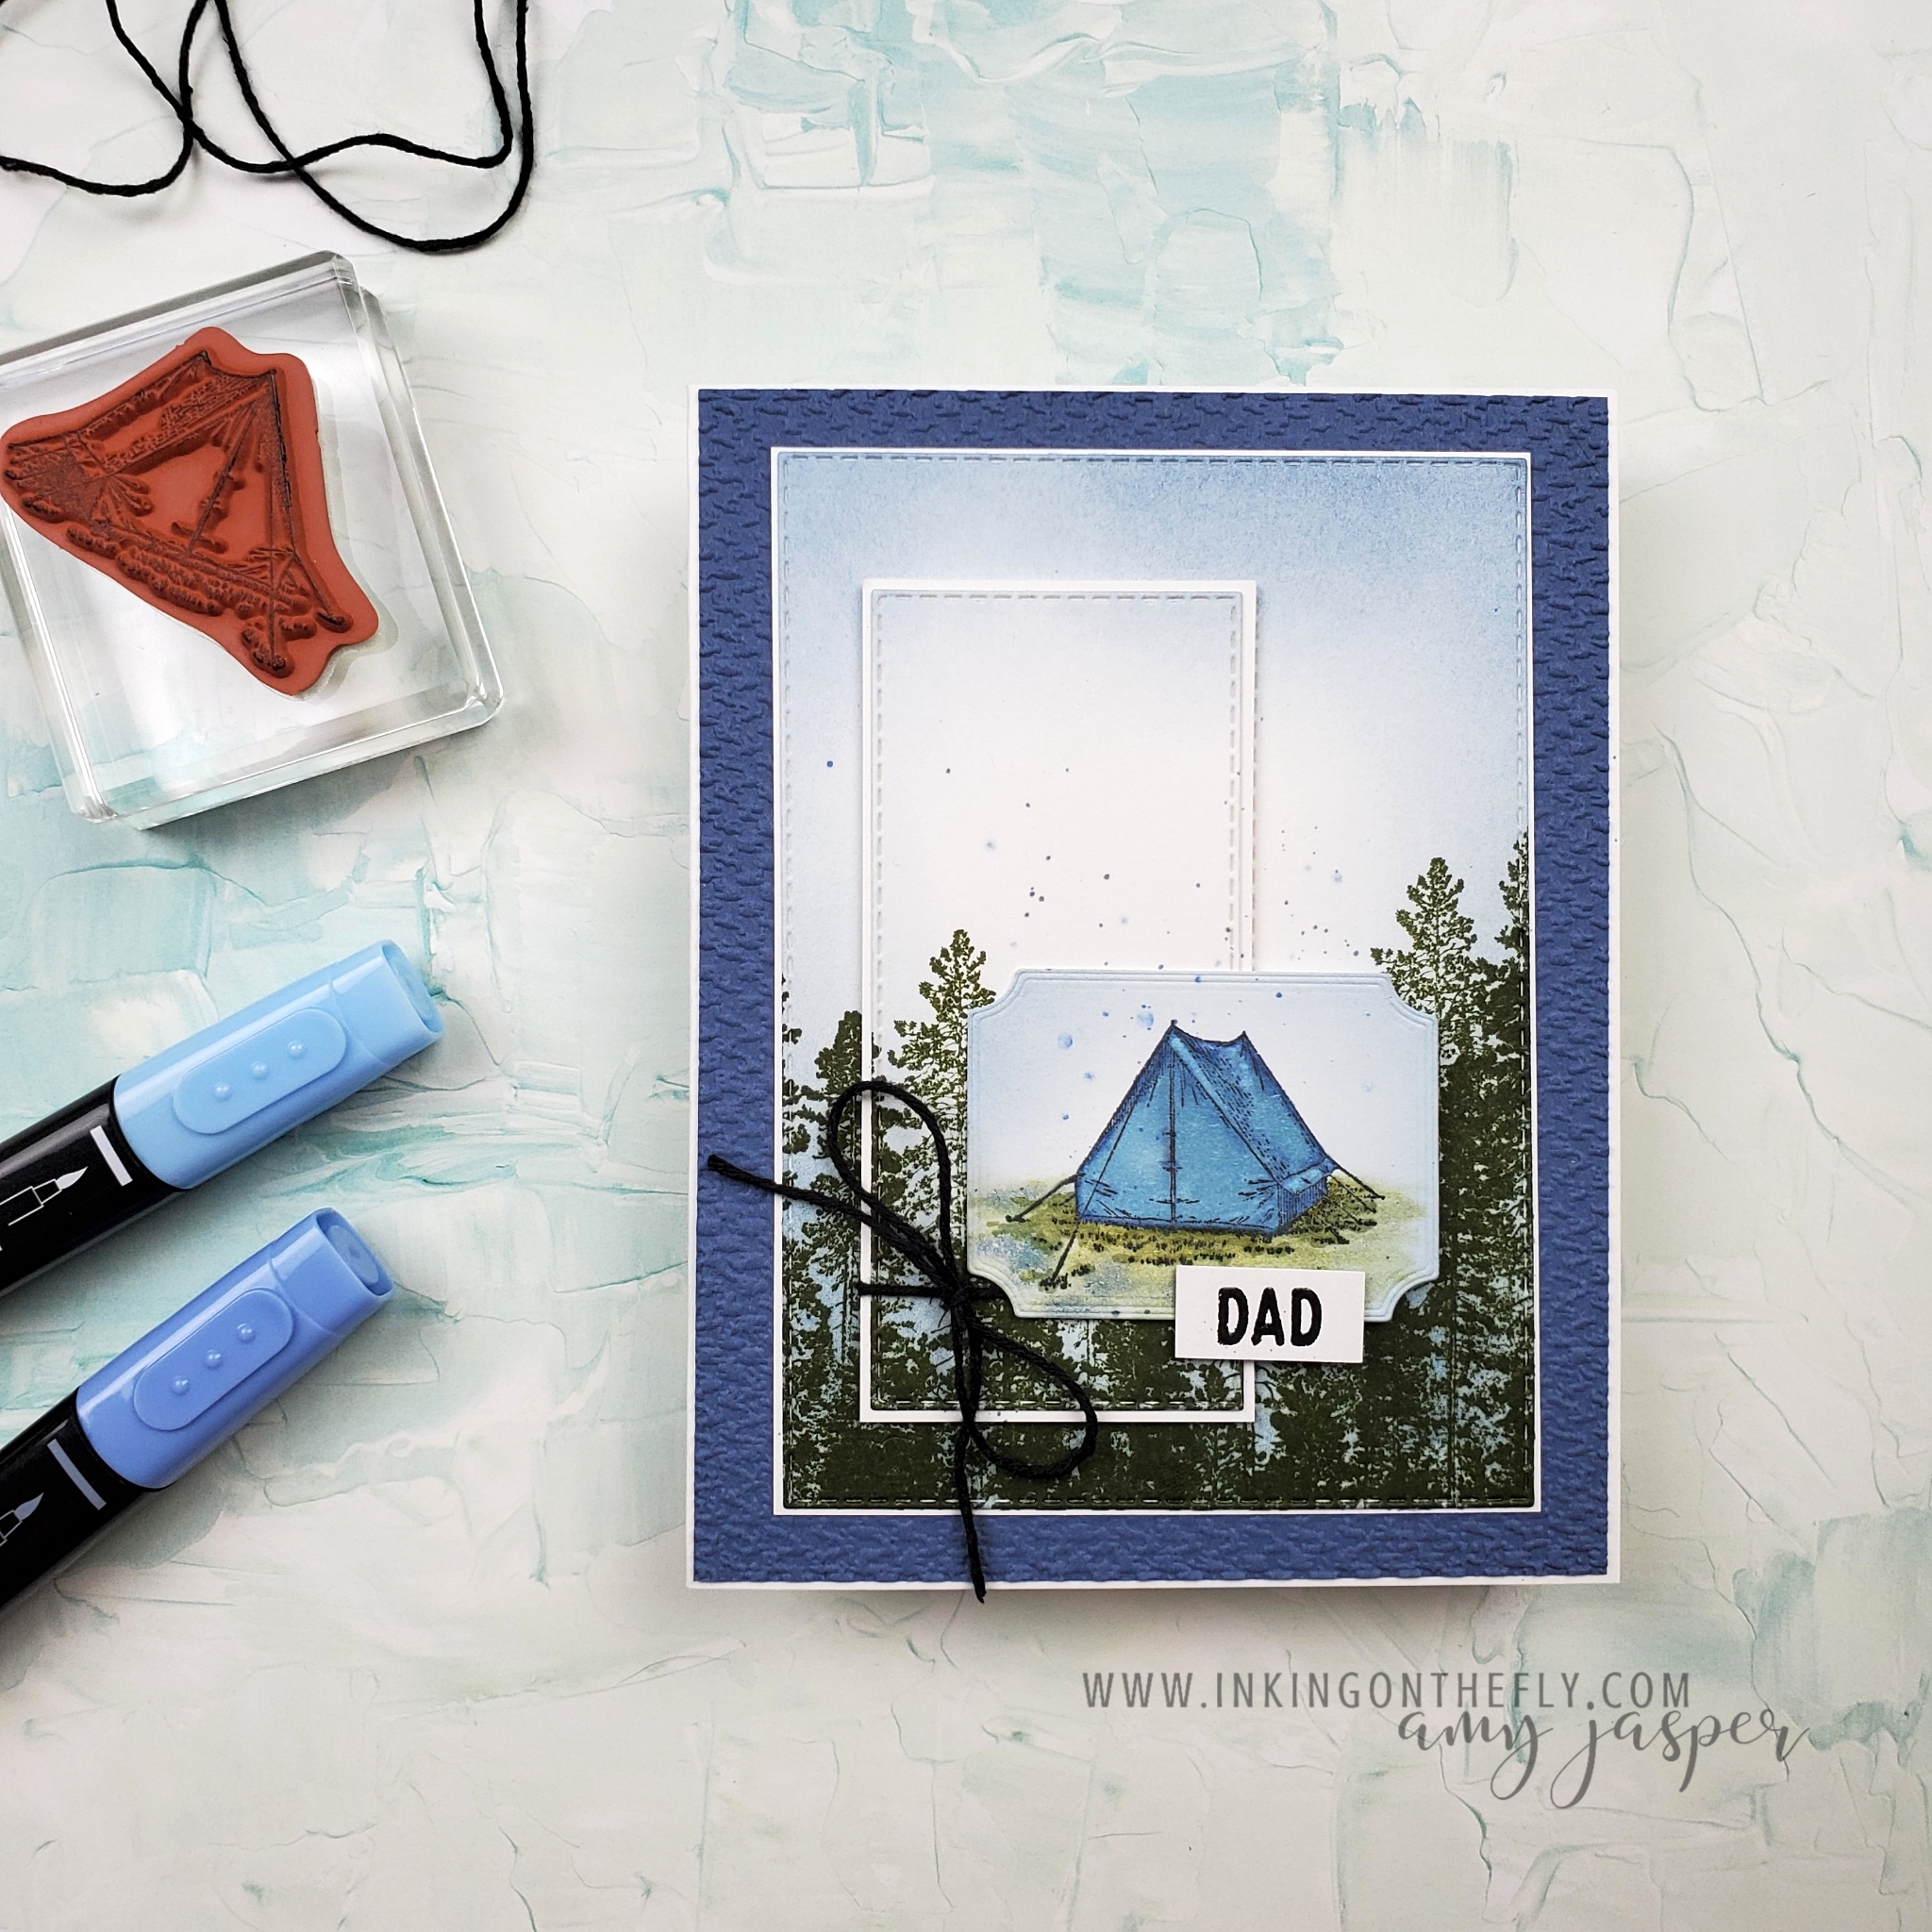
I created this one with the Campology stamp set from Stampin’ Up! and it will be the card that I give to my Dad this Father’s Day. He’s the one who passed on his love of nature and the outdoors to me. I feel incredibly blessed and privileged to have the positive experiences that I did.
Here are some of the products used:
- Thick Basic White, Basic White, and Misty Moonlight cardstock
- Tasteful Textile Embossing Folder, Stitched Rectangle Dies, and Tasteful Labels Dies
- Campology Stamp Set
- Mossy Meadow Ink for the trees, Misty Moonlight Ink with a Blending Brush
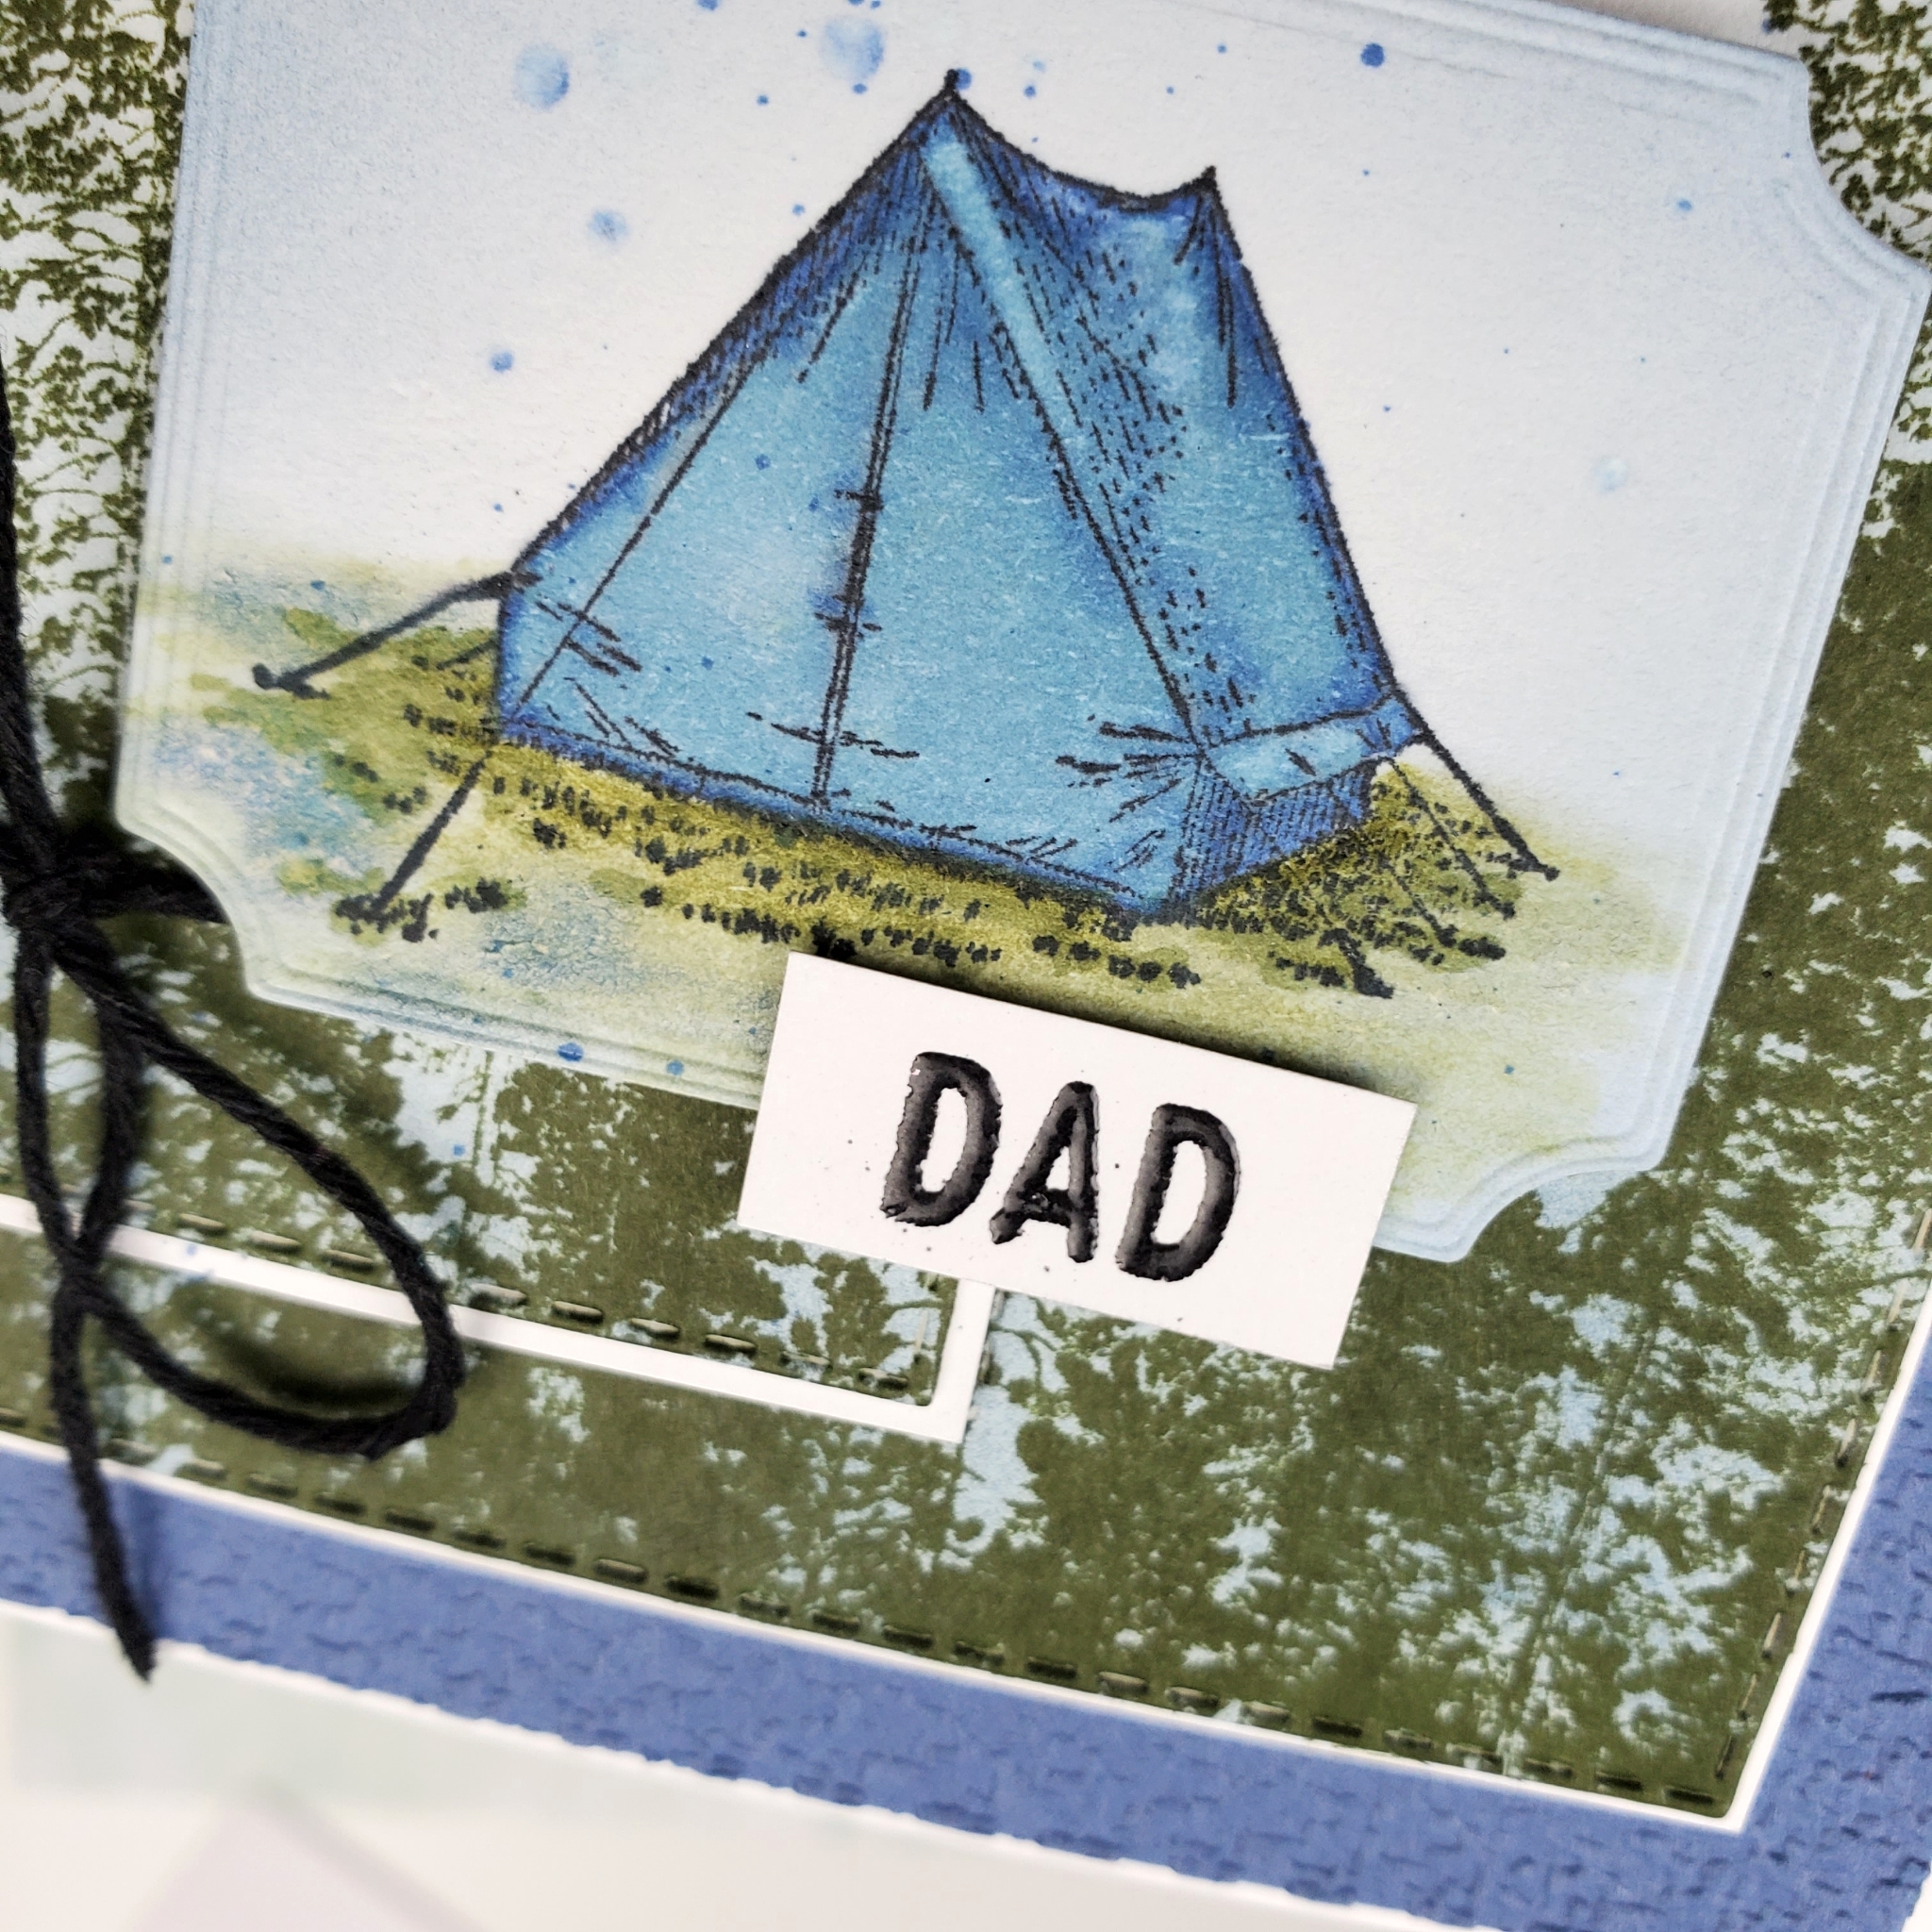
- Tuxedo Black Momento Ink to stamp the tent image
- Light Night of Navy, Dark Balmy Blue Blends Markers and the Color Lifter to colour the tent
- Old Olive Watercolor Pencil and Blender Pen for the grass
- Versamark Ink, Black Embossing Powder and the Heat Tool
- Dad stamp is from the Batter Up Paper Pumpkin stamp set
- Black Baker’s Twine
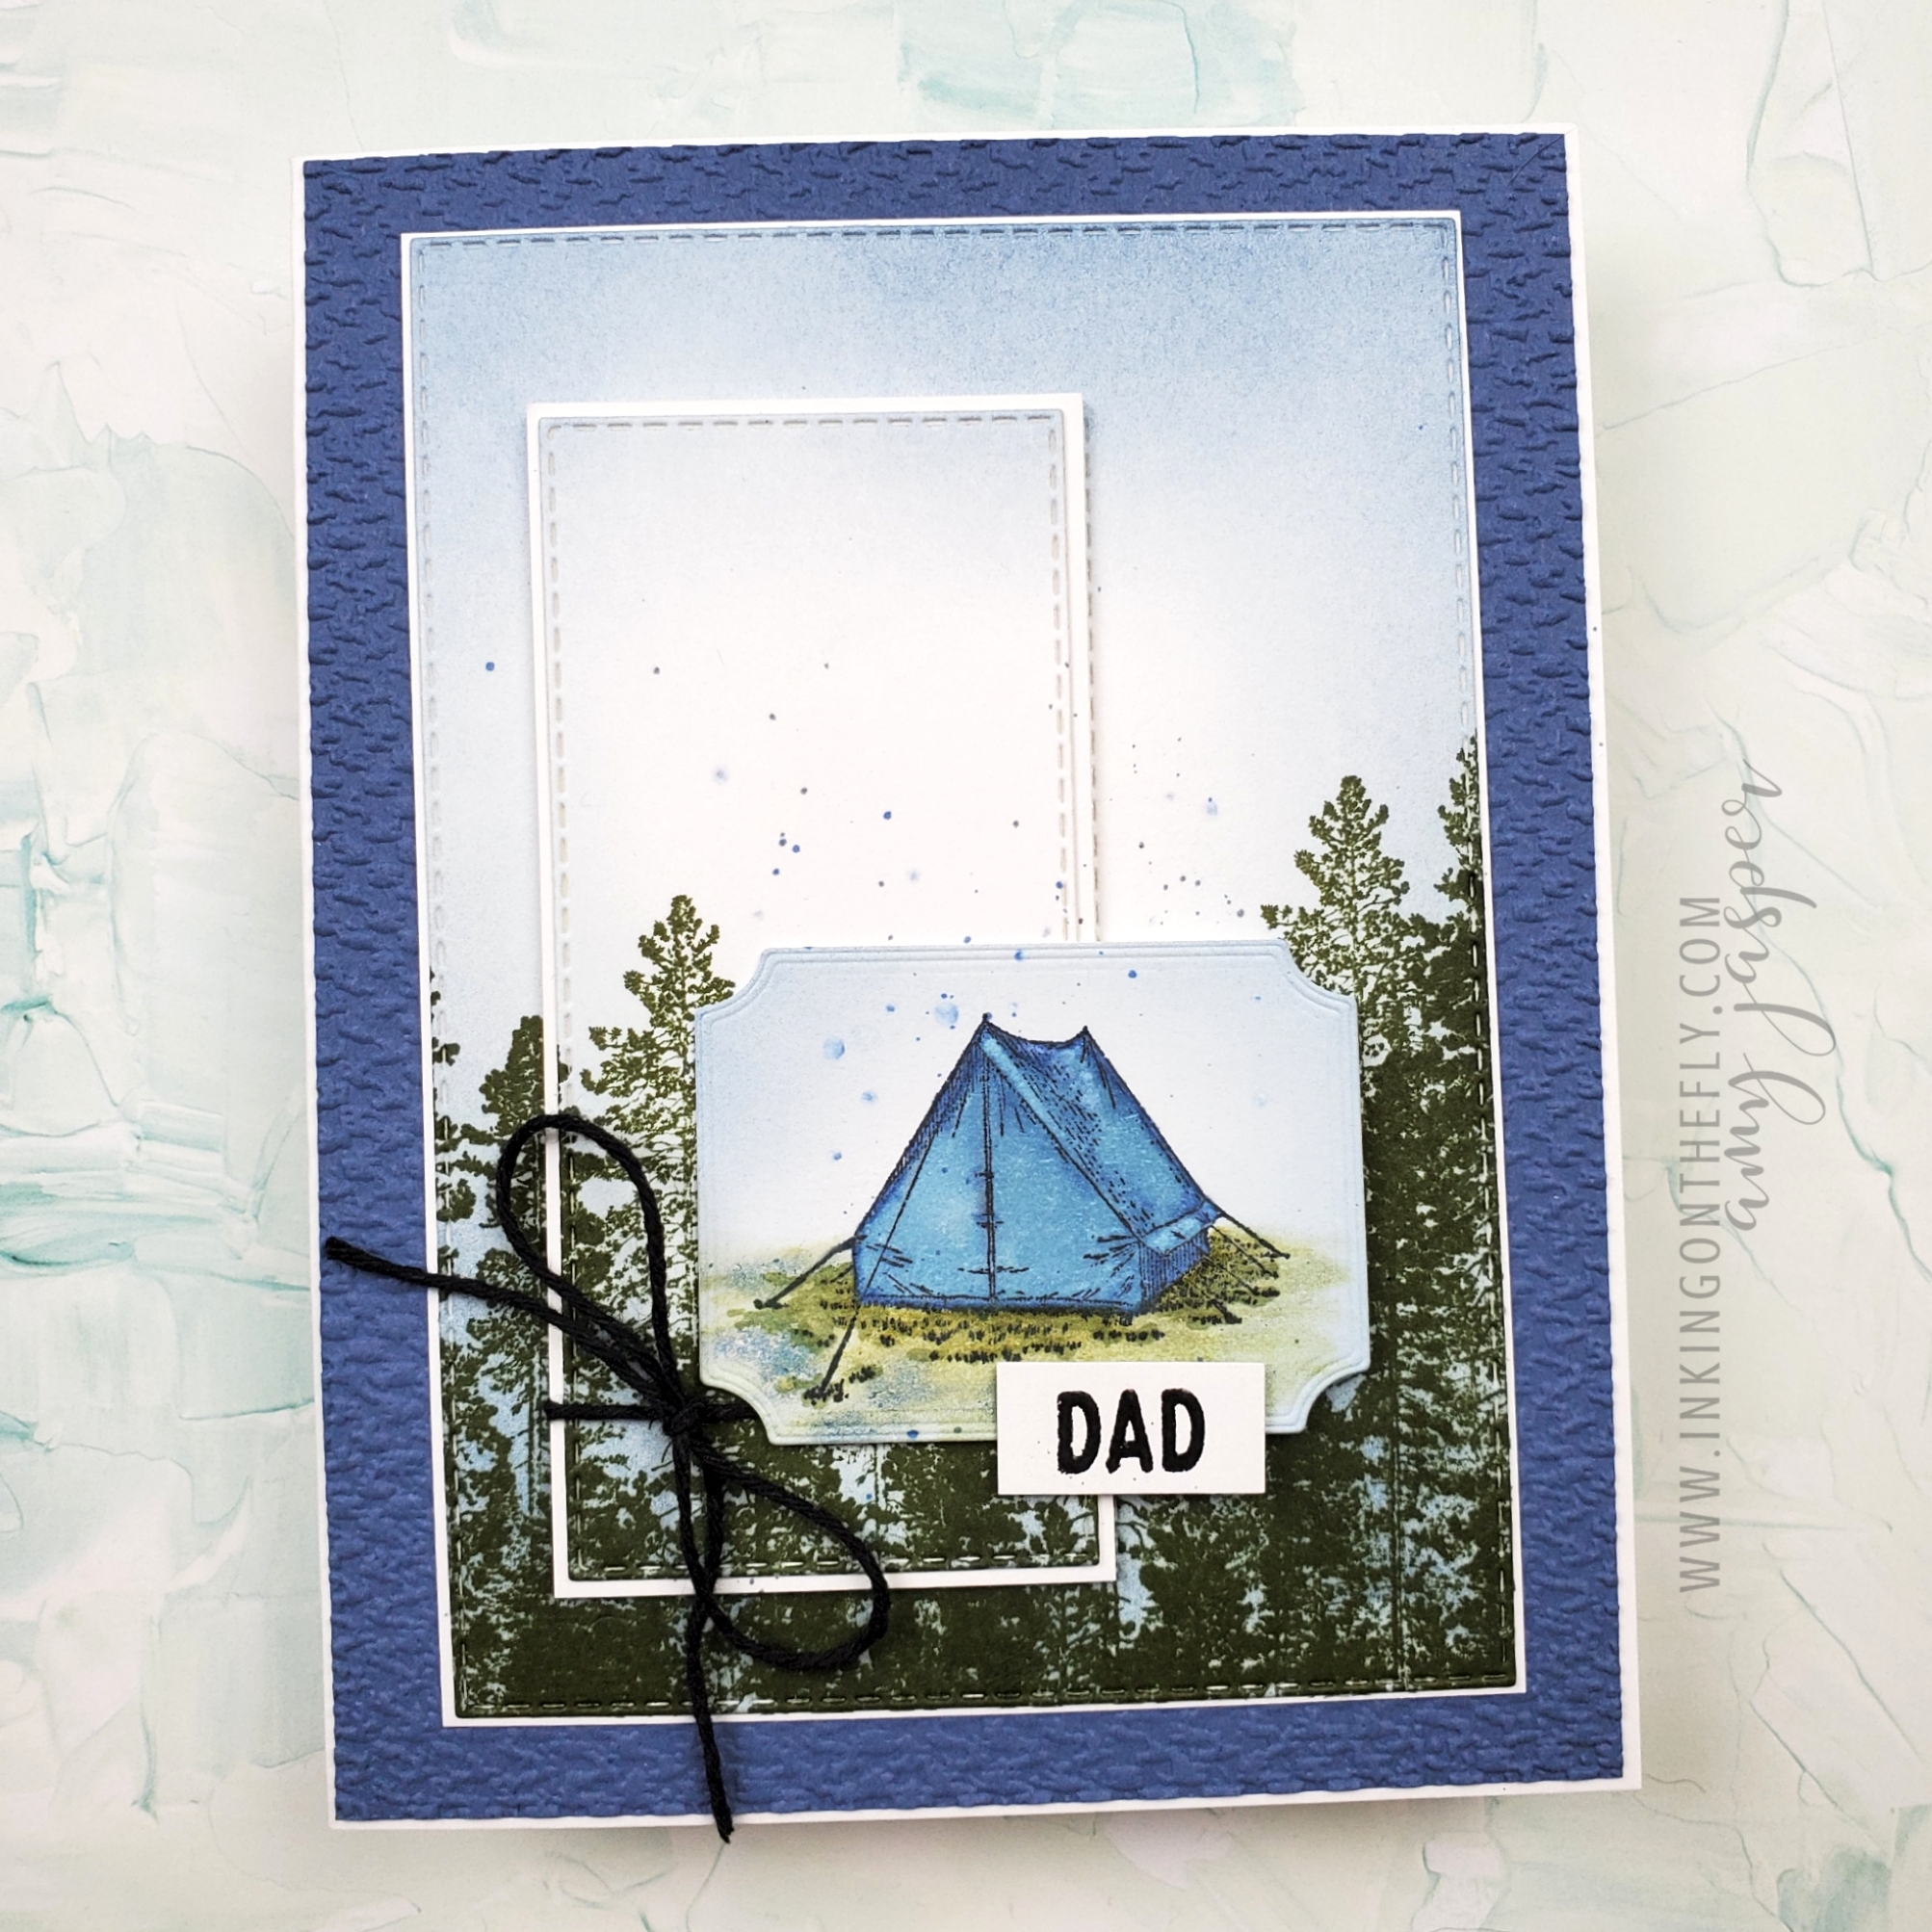
After the card was completed, but before the DAD sentiment was attached, I used the Light Night of Navy Blends Marker to flick the spatter of colour over the card. Some of these I tapped with the Colour Lifter Blends Marker to soften them so they would appear out of focus.
Are you a tent camper or an RV camper? Maybe you’re in the middle somewhere and have a tent trailer or a camper van. What matters in the end, is that you’re getting out to enjoy nature and have a little break from the world!
Oh, and don’t forget, if you camp with an RV, offer some ice cream or freezies to your tenting neighbours on those hot summer days. They will love you for it!