Video: Love the Hand-Penned Suite? Frame It!
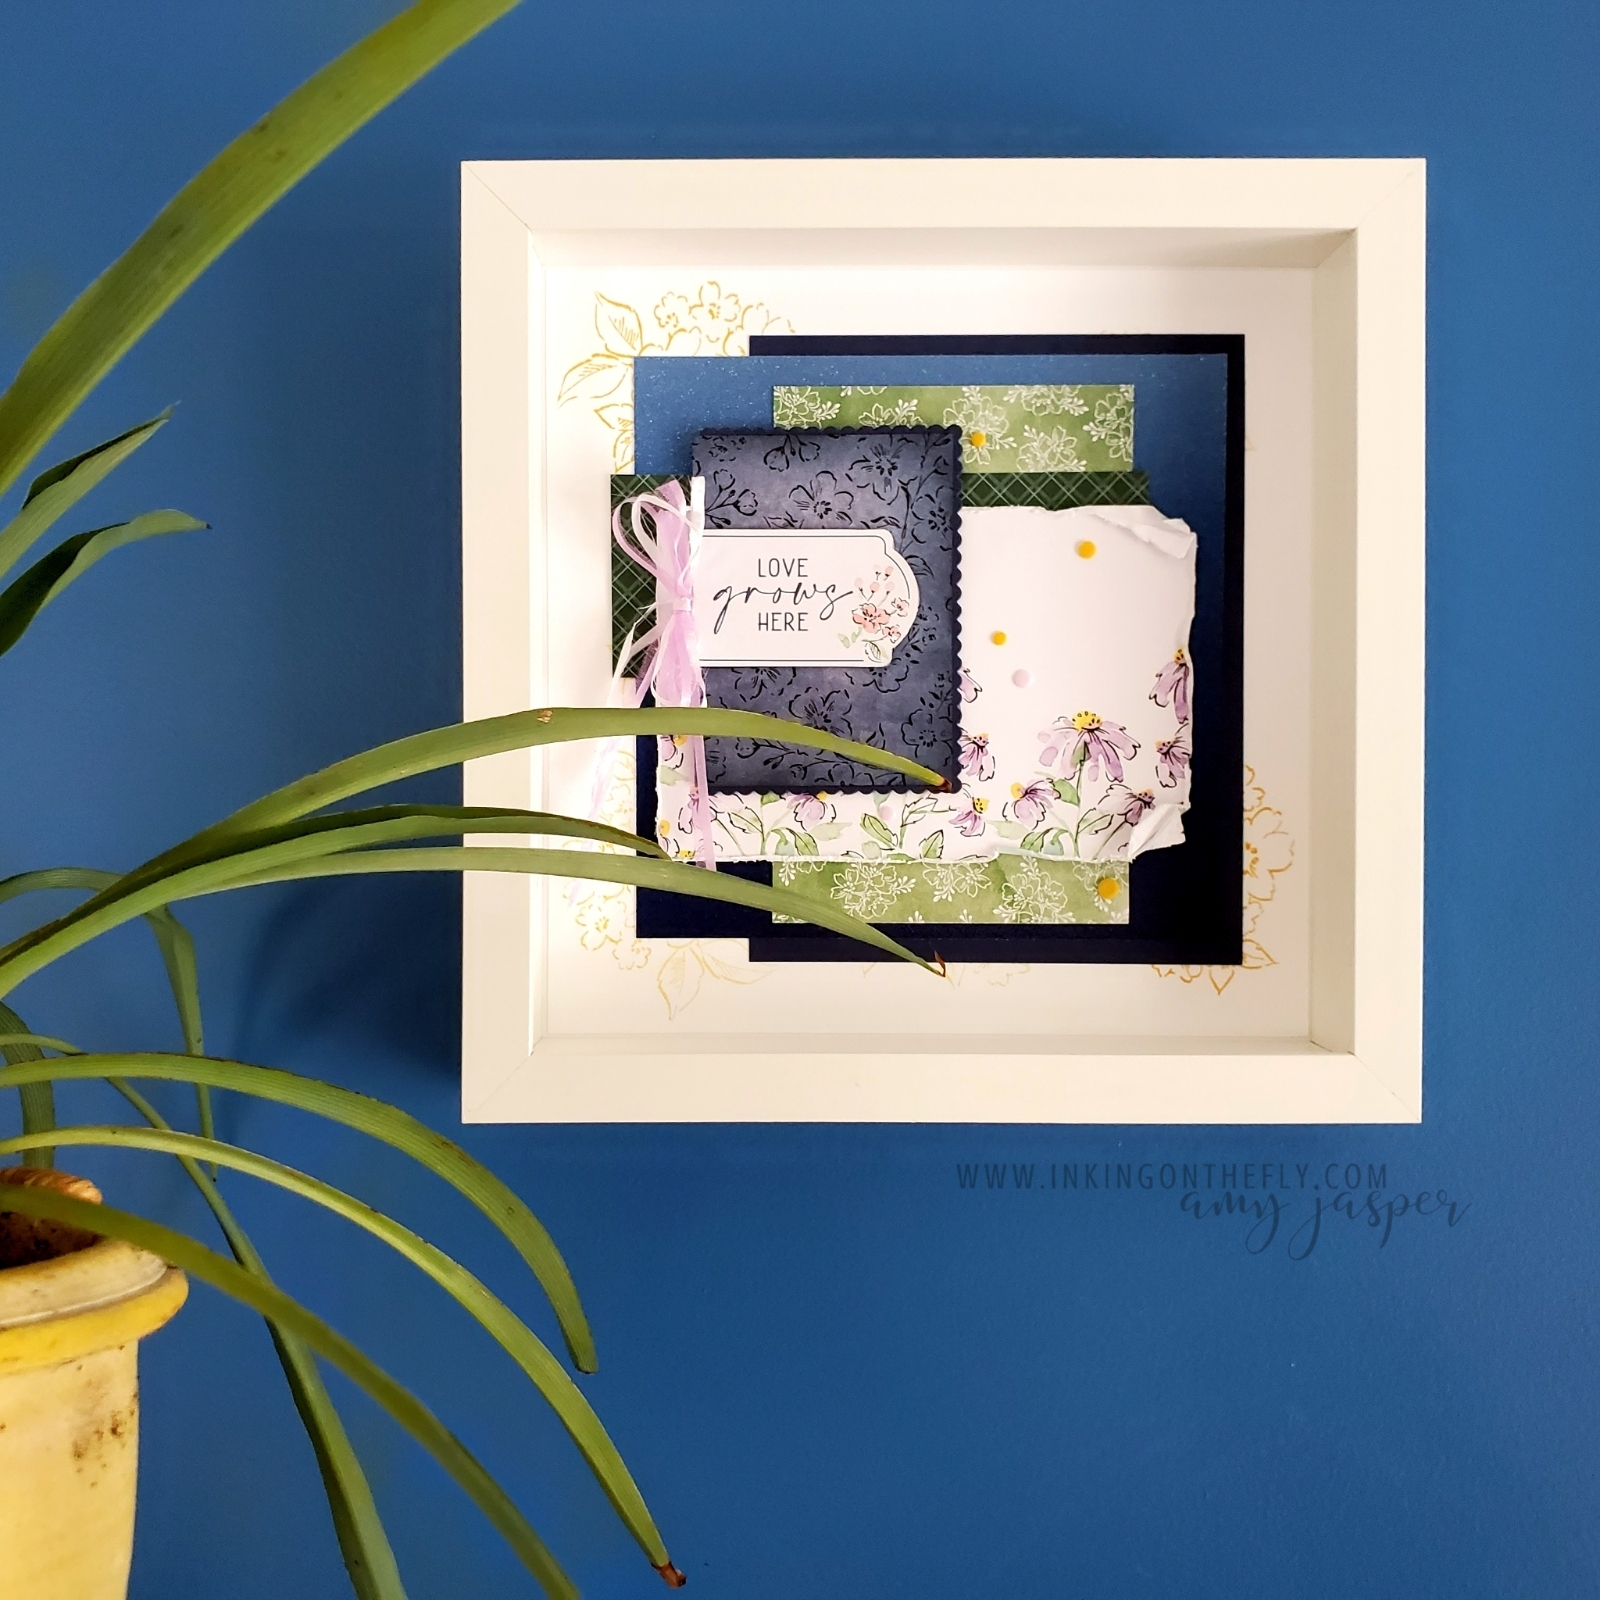
My goal was to create a home decor project using the Hand-Penned Memories & More Card Pack from Stampin’ Up!®. It did NOT disappoint! I absolutely love this art piece!
The card pack is part of the Hand-Penned Suite, which is collection of products intended to work well together. For my frameable art, I used only two of the elements in the suite: the Memories & More Pack and the Hand-Penned Petals stamp set.
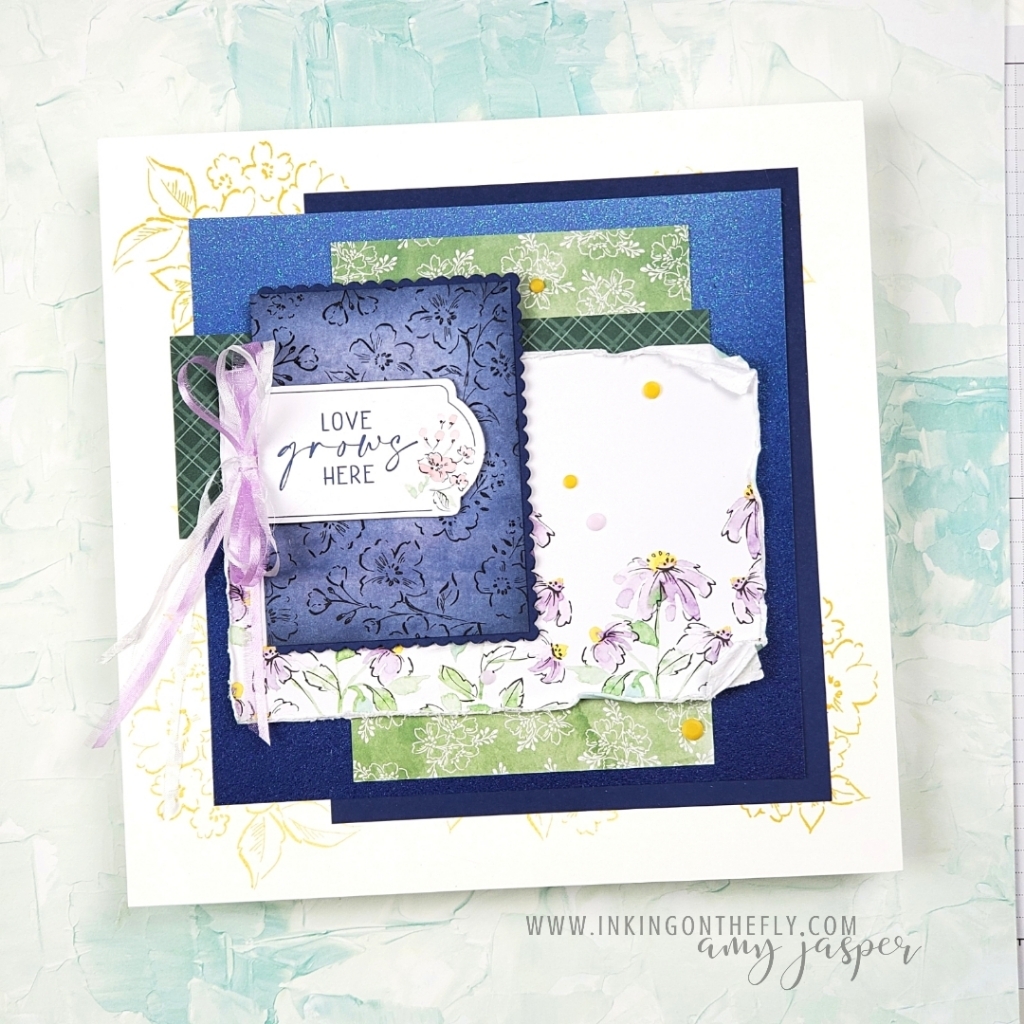
This is basically a scrapbook page designed to be framed for display. You probably could even add a small photo on there somewhere.
I don’t do a lot of scrapbooking as I struggle with the extra planning and steps. When I make cards, I can sit down and make a card using the supplies in my craft room. With scrapbooking, I have to choose my photos and print them in the size I want. That’s two extra steps in my process! My brain just doesn’t work well with that. Kind of crazy, right?
I also find scrapbooking takes sooo much more time. It feels like forever to finish a book and I end up loosing focus and moving onto something else. I’m the kind of gal that is often moving on the the next “shiny” thing that grabs my interest.
In my 15 years as a demonstrator with Stampin’ Up!, I’ve probably completed two scrapbooks. One was digital and one was an 8″ x 8″ book with only about 10 pages. I love looking at the gorgeous ideas on Pinterest, so perhaps I will try again someday. Some of you preserve your memories so beautifully. Maybe you can share some of your tips to help me give it another go?
Making this project
I used a variety of patterned papers for this design and used my Paper Snips to add a bit of a distressed look. The Ombré Specialty Paper adds a nice glimmer in the background for interest and texture.
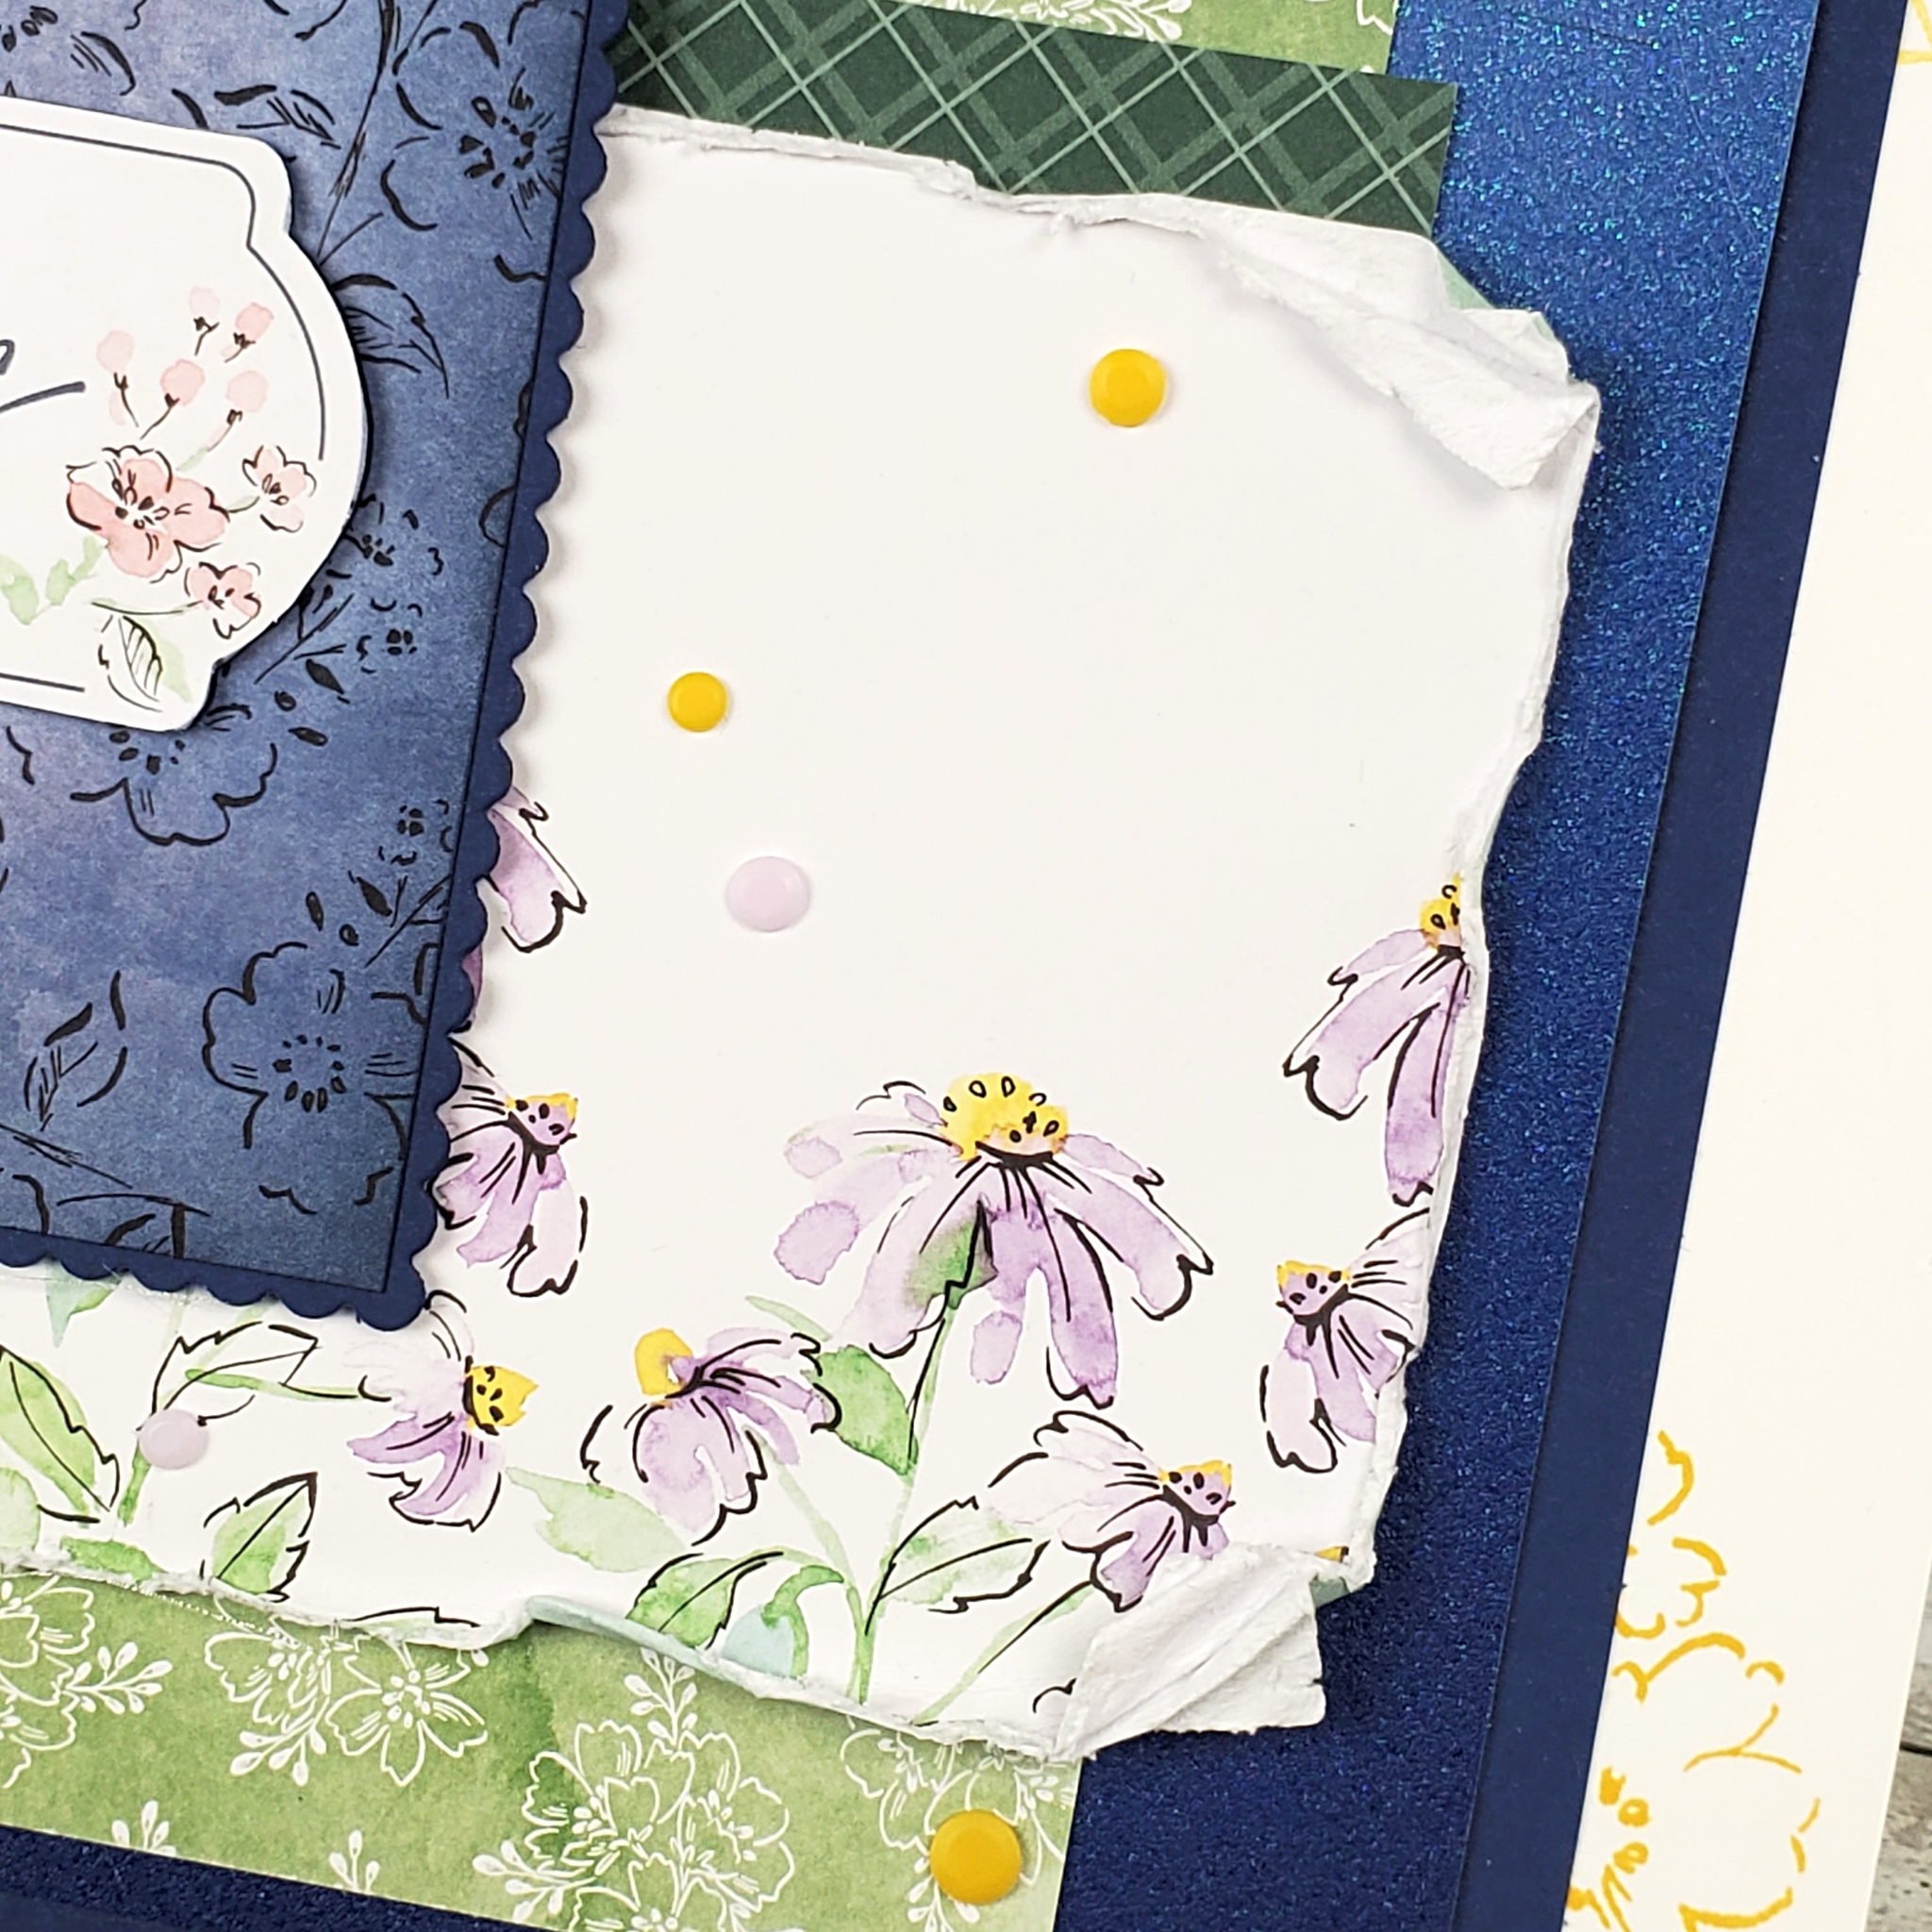
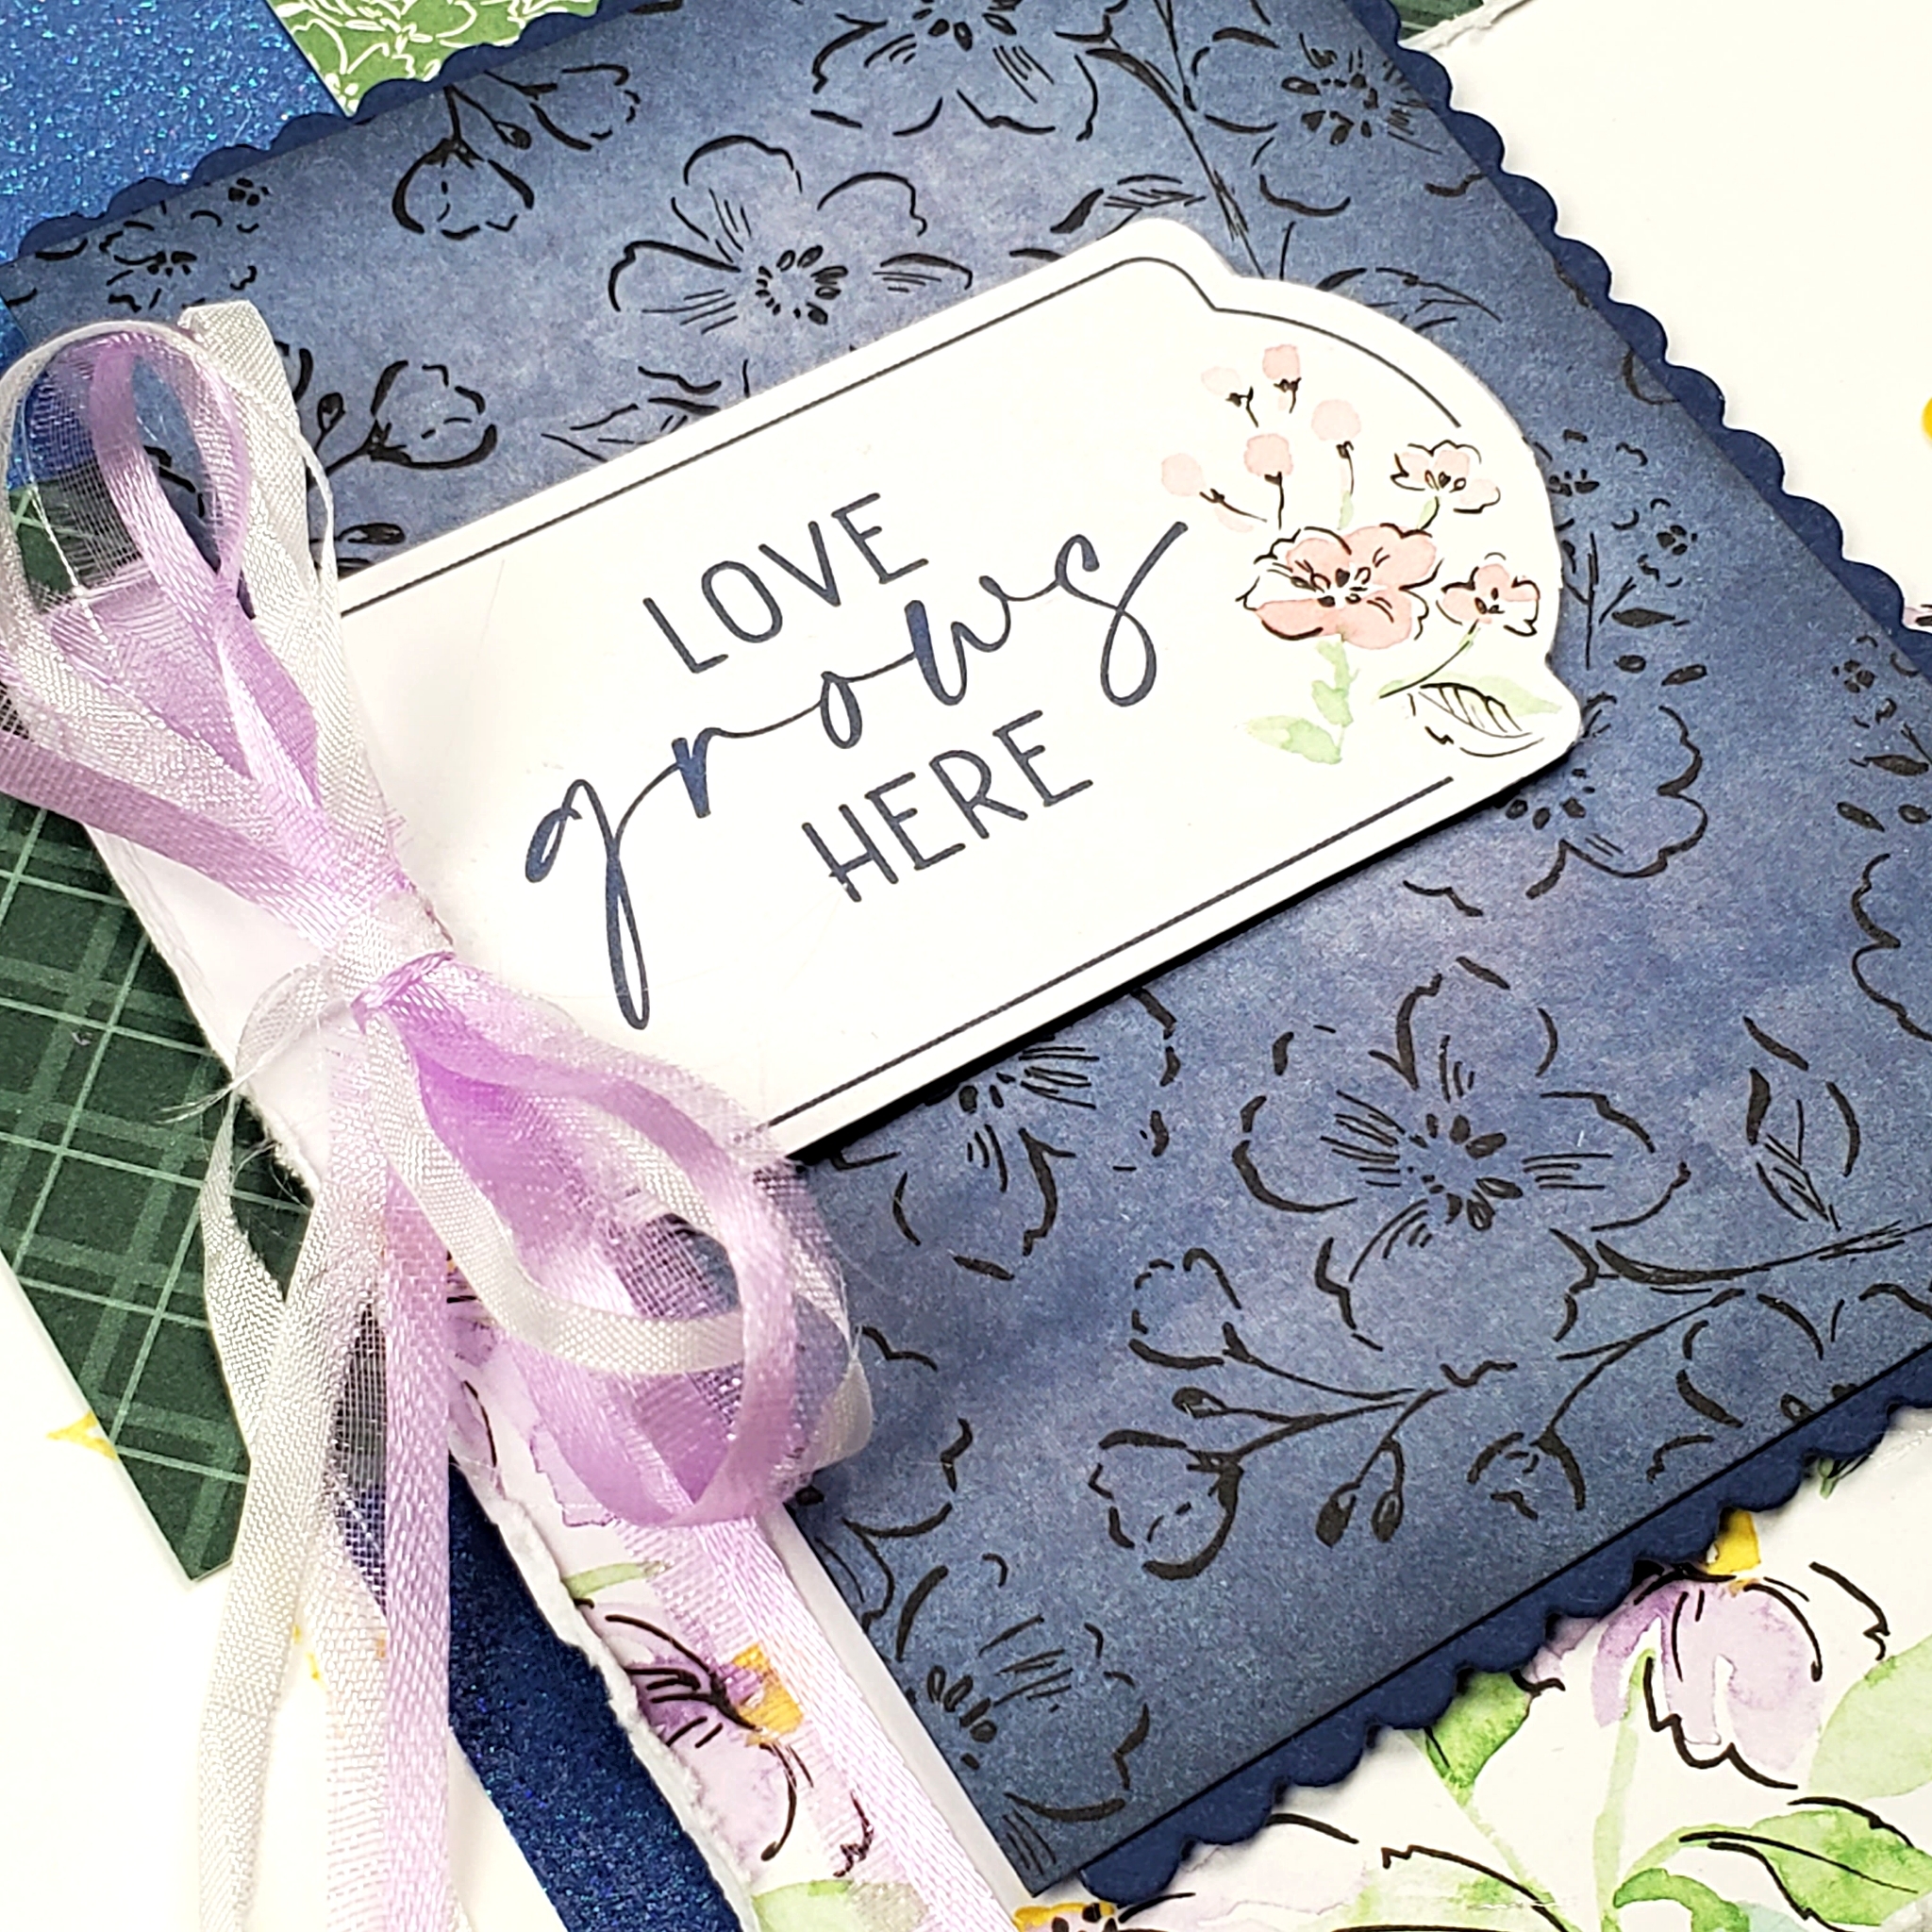
The label in the 3″ x 4″ card in the photo below was carefully cut with my Paper Snips to separate it from the blue patterned background. Cutting it out allowed me to put the label on Stampin’ Dimensionals. My Blending Brush with Misty Moonlight ink added some extra colour on the edges, deepening the colour and drawing the eye to the white label.
You can see that I stamped on the Basic White layer with Daffodil Delight ink using the coordinating Hand-Penned Petals Stamp Set. The yellow ink balances well with the yellow accents in the patterned design on the Memories & More cards.
Other supplies used
- Night of Navy cardstock
- 6″ x 6″ In Color Designer Series paper
- Fresh Freesia Open Weave Ribbon
- White Crinkled Ribbon
- Stitched So Sweetly Dies
- Cut & Emboss Machine
- Playing with Patterns Resin Dots
- Multipurpose Liquid Glue
- IKEA frame
Oh, Stampin’ Up!, how I love that you make it so easy for us to coordinate the colours and patterns in our artwork! Ribbon, accents, paper, and ink! They are designed to work together so beautifully!
Watch the video for more!
If you’re interested in learning more about the elements and techniques used to make this project, watch the video below. Don’t forget to support my YouTube Channel by clicking that subscribe button!